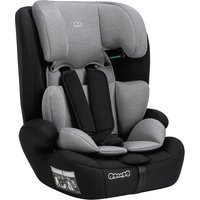
Safety Berlin - Child car seat Osann - Free user manual and instructions
Find the device manual for free Safety Berlin Osann in PDF.


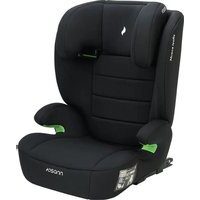
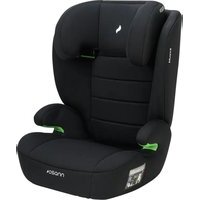
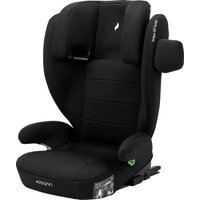
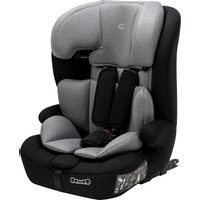
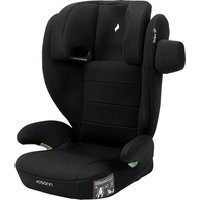
| Product type | Child car seat |
| Brand | Osann |
| Model | Safety Berlin |
| Size categories | 76-105 cm (max 18 kg) and 100-150 cm |
| Minimum age | 15 months |
| Mounting direction | Forward-facing |
| Child restraint system (76-105 cm) | Integrated 5-point harness |
| Child restraint system (100-150 cm) | Vehicle 3-point seat belt with guides |
| Installation in vehicle | Vehicle 3-point seat belt |
| Approval | UN Regulation No. 129 (i-Size enhanced and universal) |
| Adjustable headrest | Yes, height adjustable |
| Removable and washable cover | Yes |
| Cover care | Wash at 30°C delicate cycle, low temperature drying, do not bleach, iron or dry clean |
| Assembly required | Yes (delivered unassembled) |
| Maximum child weight (category 76-105 cm) | 18 kg |
Frequently Asked Questions - Safety Berlin Osann
User questions about Safety Berlin Osann
0 question about this device. Answer the ones you know or ask your own.
Ask a new question about this device
Download the instructions for your Child car seat in PDF format for free! Find your manual Safety Berlin - Osann and take your electronic device back in hand. On this page are published all the documents necessary for the use of your device. Safety Berlin by Osann.
USER MANUAL Safety Berlin Osann
- & 2.:
natural_image
Top-down line drawing of a vehicle's rear view showing engine, wheels, and structural components (no text or symbols)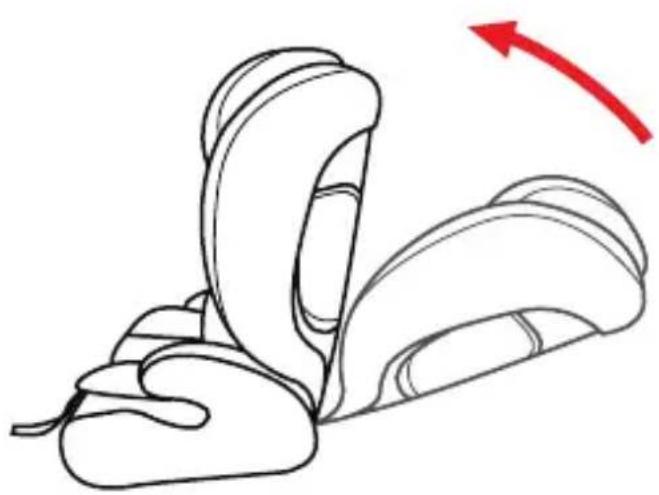
natural_image
Line drawing of a car seatbelt with a red arrow indicating direction (no text or symbols)Komforteinlage
natural_image
Simple line drawing of a symmetrical abstract shape resembling a stylized animal head or mask (no text or symbols)natural_image
Illustration of a child in a car seatbelt being lifted, showing two different states of the seatbelting technique (no text or symbols present)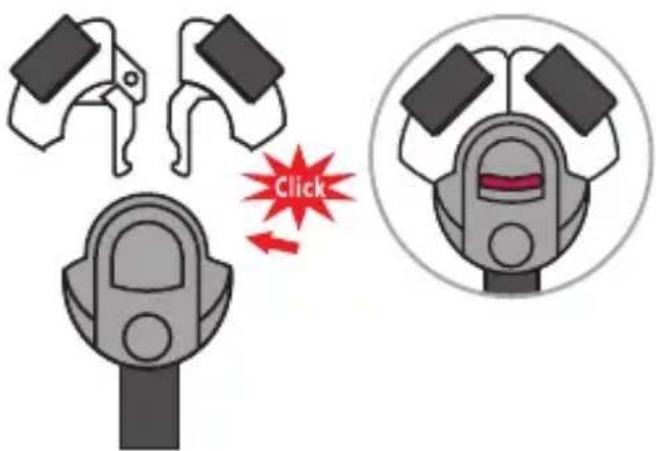
natural_image
Illustration of a hand pressing a red button on a device, with two red arrows indicating downward motion (no text or symbols)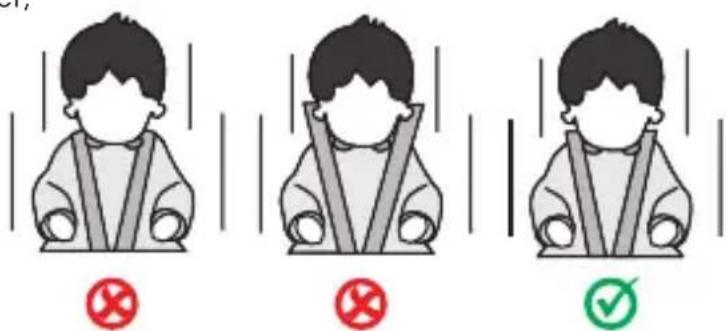
natural_image
Illustration of a yellow baby car seat with a red arrow indicating the seat structure (no text or symbols)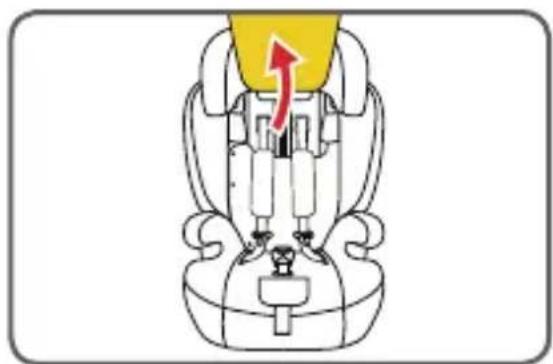
natural_image
Diagram of a car seat assembly with a yellow top and red arrow indicating direction (no text or labels)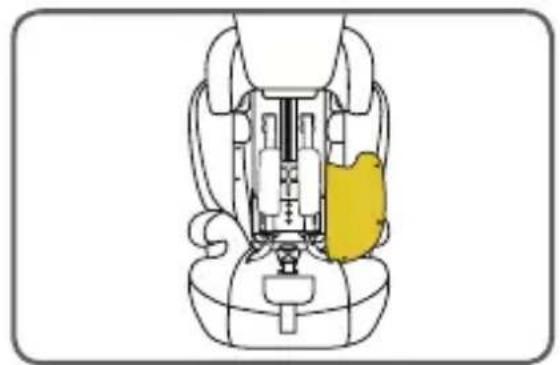
natural_image
Diagram of a car seat assembly with highlighted yellow component (no text or labels)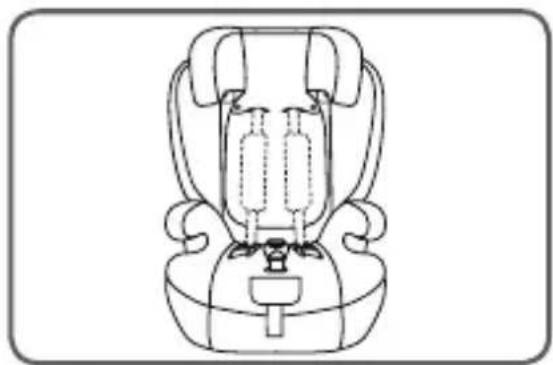
natural_image
Line drawing of a car seat with two seats and a double bass (no text or symbols)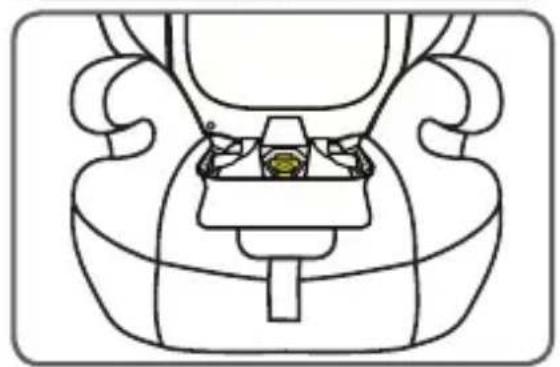
natural_image
Line drawing of a mechanical component with no visible text or symbols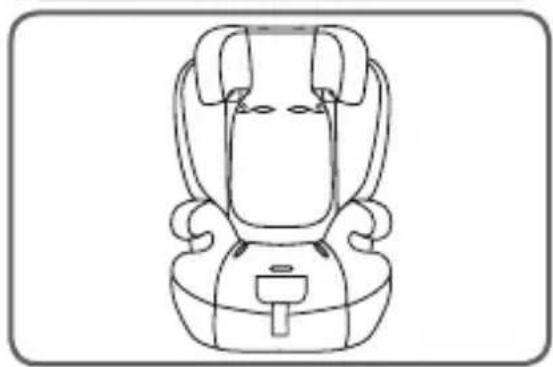
natural_image
Line drawing of a car seat with neck and frontrest (no text or symbols)REINIGUNG
Thank you for choosing our child car seat. If you need help with this product, please contact our customer service.
USE
- This product is suitable for children of a height of 76 to 150 cm.
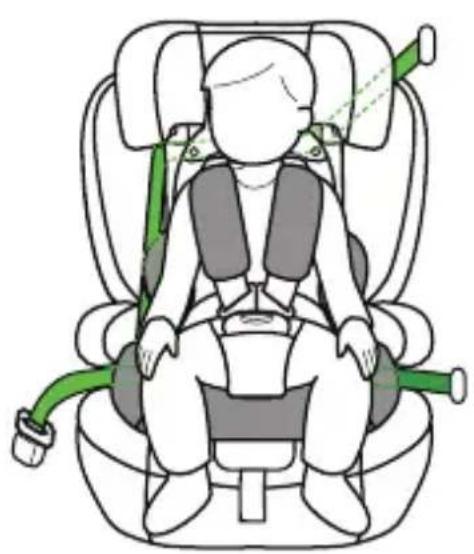
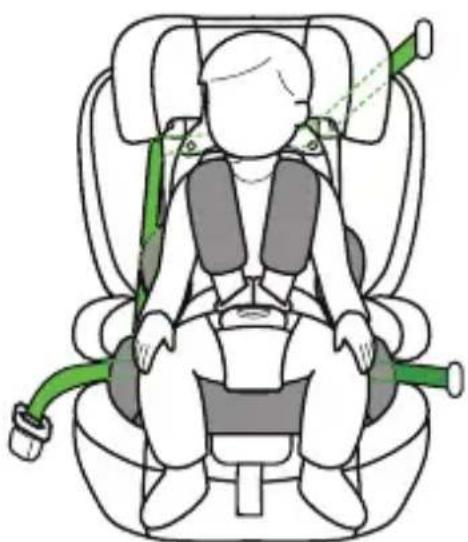
- Forward-facing installation for children between 76 and 105cm in height and a minimum age of 15 months takes place with the aid of the car's 3-point seat belt. The child is strapped in with the 5-point belt on the child car seat.
- When installing forward-facing from 100 to 150~cm height the child is strapped in with the child car seat using the car's 3-point belt.
ATTENTION
USE ONLY FROM THE AGE OF 15 MONTHS.
PLEASE NOTE
NOTE (76-105 cm):
This is an improved belt child restraint system of the "universal" category. It has been approved in accordance with UN Regulation No 129 for use primarily with vehicle seats which are suitable for improved restraint systems in the "universal" categories as specified by the vehicle manufacturer in the vehicle manual. If in doubt, the manufacturer of the enhanced child restraint system or the retailer should be consulted.
NOTE (100 - 150 cm):
This is an optimised i-Size children's booster seat. It is approved under Regulation No. 129 for use primarily on "i-Size vehicle seats" as specified by vehicle manufacturers in the vehicle manual. If in doubt, contact either the manufacturer of the extended child restraint system or the dealer.
The optimised i-Size booster seat can also be used on all seats in the "universal" category, as long as this does not conflict with the vehicle interior.
If you have any doubts, please contact the car seat manufacturer or the dealer.
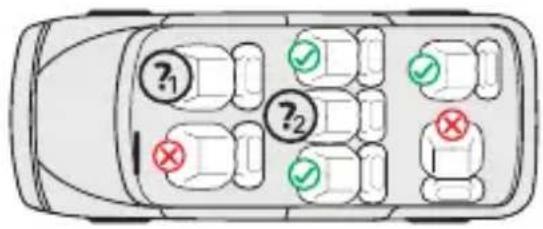
1. & 2.:
Only if a 3-point belt that complies with ECE R16 is available.
Note:
Installation of the child car seat or securing the child with only a 2-point belt is not approved.
The following table provides information about the fastening devices and methods:
| Height range | Installation direction | Installation Type Child safety device | ||
| 76–105 cm | Forward-facing | 3-point car seat belt | Universal belted | 5-point seatbelt on the child seat |
| 100–150 cm | Forward-facing | 3-point car seat belt | i-Size booster seat | 3-point car seat belt |
WARNING
- Please read through these instructions carefully before use in order to guarantee the safety of your child. Retain the instructions. Non-compliance with the instructions in this manual may result in serious injuries to your child.
- The child seat can only be used with its own 5-point belt system for children who weigh under 18 kg and are less than 105 cm in height.
- The child seat CANNOT be used with its own 5-point belt system for children who weigh over 18 kg or are taller than 105 cm.
- Do not use the child seat until the child is at least 15 months old.
- Do not use load-bearing contact points other than those described in the instructions and indicated on the child restraint system.
• We recommend installing the child car seat on the rear seat of the vehicle. - Do not use this child car seat at home. It has been designed exclusively for use in a car.
- Do not leave your child unsupervised in the seat at any time.
- The child seat must be replaced if it has been subject to severe mechanical stress in an accident.
- For safety reasons, the child car seat must be secured in the vehicle even when there is no child sitting in the child car seat.
- Always make sure that all belts that attach the child car seat to the vehicle are secure and that all belts that restrain the child are adjusted to fit the child's body. Ensure that the belts are not twisted.
- Items of luggage and other objects that could cause injury in the event of a collision must be properly secured.
- The rigid elements and plastic parts of a child restraint system must be positioned and installed so that they cannot become jammed by a movable seat or a vehicle door.
- It is important that belts that sit low hold the child's pelvis firmly in place. Your child should always be fastened in to stop them falling out.
- It is dangerous to make changes or additions to the product without approval from the responsible authority. Non-compliance with the installation instructions provided by the manufacturer of the child restraint system may also present risks to the safety of your child.
- This child seat is designed for children with a maximum height of 150 cm. Never overload the child seat by transporting more than one child or additional loads in it.
- The child restraint system must not be used without the seat cover.
- The seat cover must not be replaced by a cover other than that recommended by the manufacturer, as this seat cover is an important component of the restraint system.
SEAT PARTS
Front view
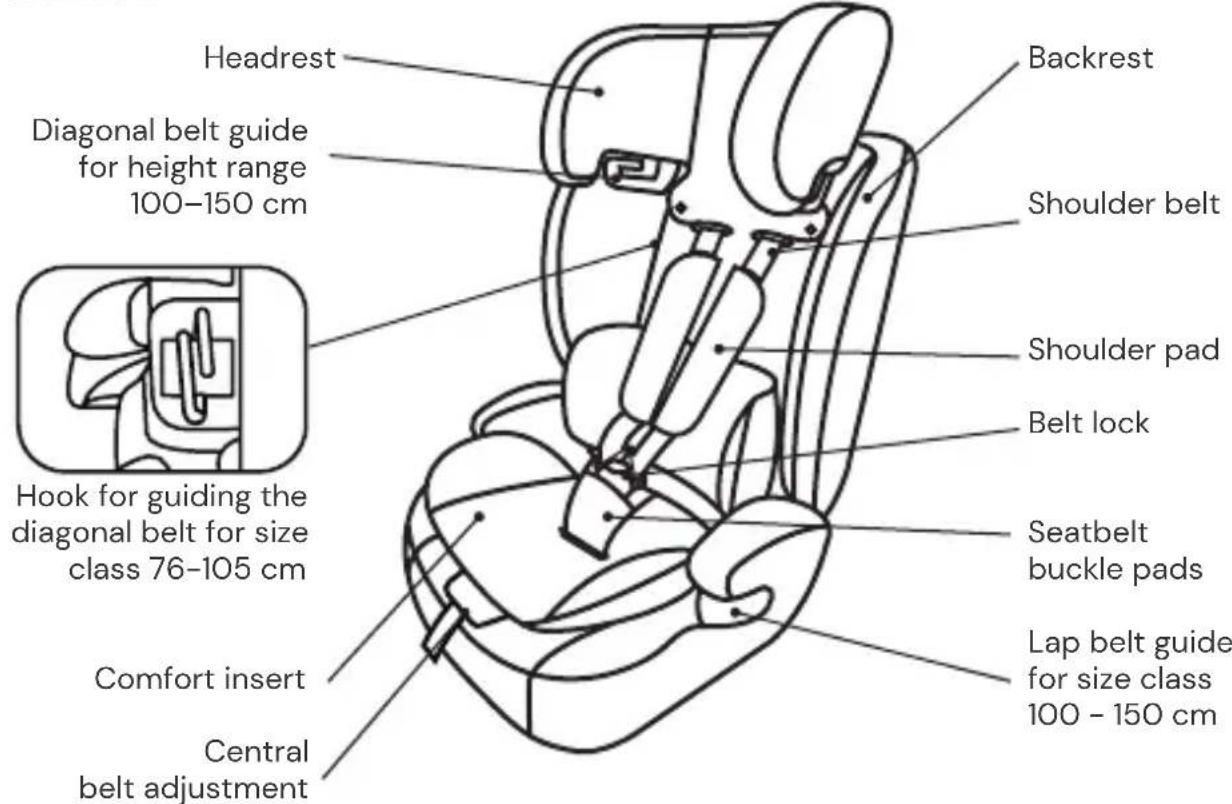
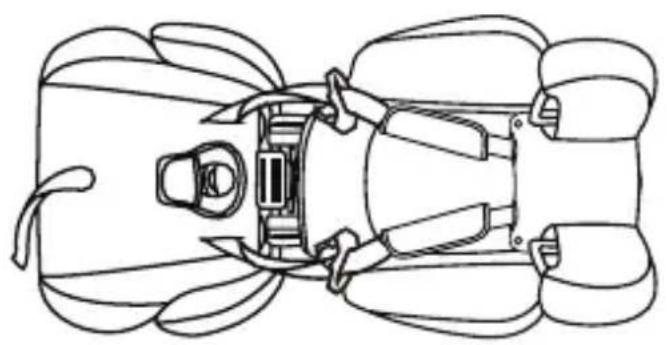
Rear view

Assembling the backrest & seat shell (variant-dependent)
• The child car seat is delivered unassembled.
- First remove the comfort insert from the child car seat.
- Two elastic bands are sewn onto the cover of the seat area. Please hang them around the hooks of the backrest.
- Please take the backrest and hook it into the seat shell at a shallow angle.
- Hold the seat shell firmly and push the back-rest upwards until it is fully engaged.
- Use of the child car seat without a backrest is not permitted.
natural_image
Top-down line drawing of a vehicle's rear view showing engine, wheels, and structural components (no text or symbols)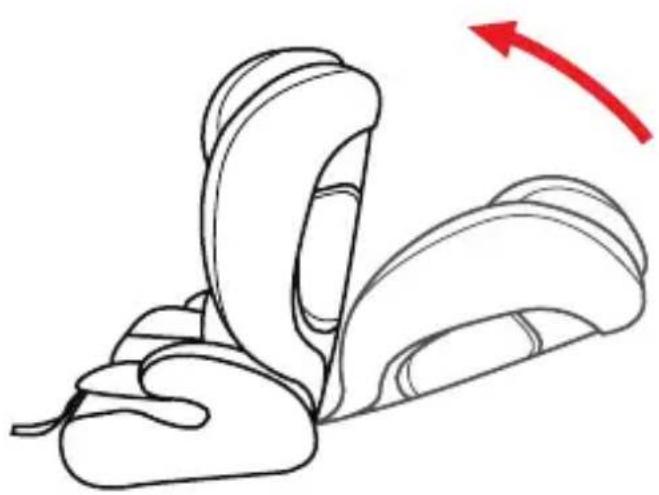
natural_image
Line drawing of a car seatbelt with a red arrow indicating direction (no text or symbols)Comfort insert
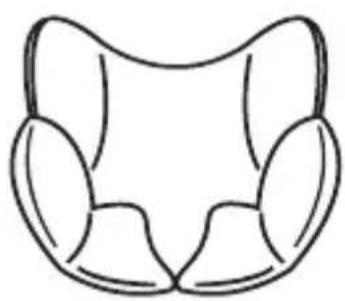
- The comfort insert is intended for children with a body height of 76-105 cm.
- Please remove the insert as soon as your child exceeds the specified height.
natural_image
Simple line drawing of a symmetrical abstract shape resembling a stylized animal head or mask (no text or symbols)USING THE CHILD CAR SEAT
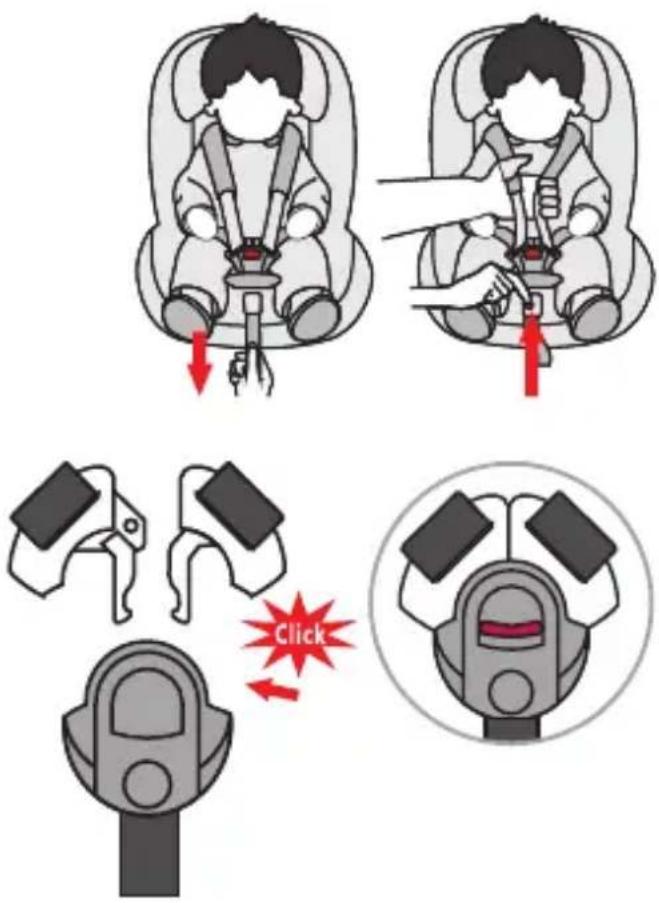
Adjusting the belt
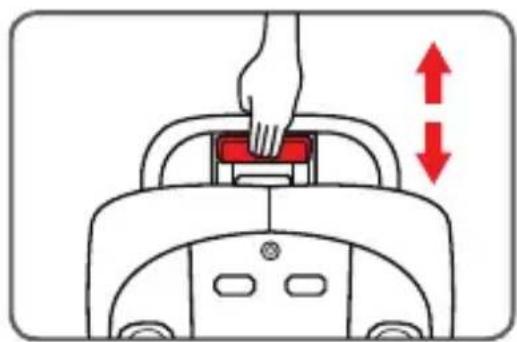
- To loosen the belt, press the belt adjustment button in the seat area with one hand. Hold the belt buckle with the other hand and carefully loosen the attached straps.
- Pull the front adjustment strap to tighten the belts. Ensure that the straps are not twisted.
Opening/closing the belt
- To unlock the belt, press the button on the belt buckle, pull out the buckle tongues and separate them.
- To lock the belt, first connect both tongues of the buckle and then insert them together into the belt buckle.
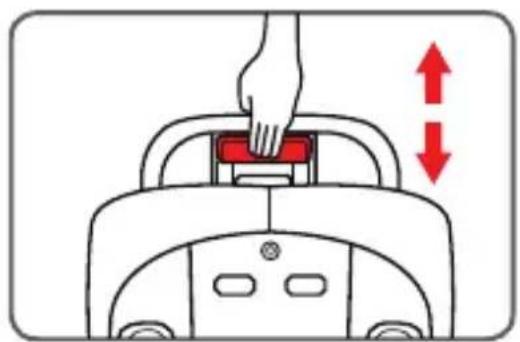
Adjusting the head support
- Release the belt and pull the lever to adjust the headrest on the back of the child car seat. Move the headrest until it engages at the correct height.
- Make sure the shoulder belts are positioned just above your child's shoulders when they come out of the child car seat.
- Release the lever and ensure that the headrest is engaged.
natural_image
Illustration of a hand pressing a red button on a device (no text or symbols)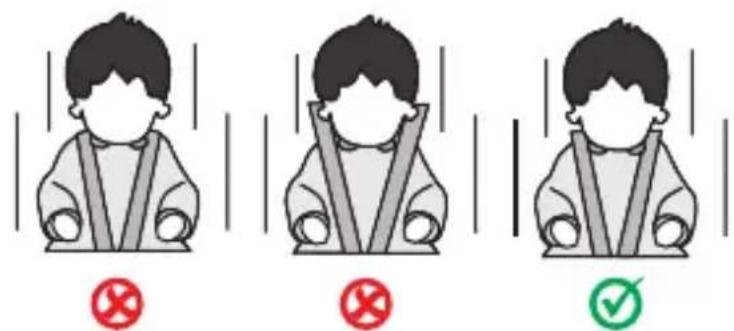
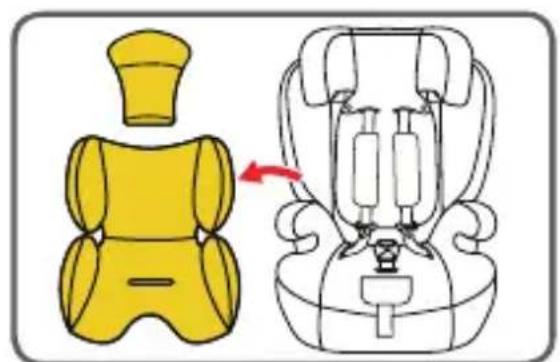
Stowage of the 5-point belt for size class 100-150 cm
- Loosen the belt system to the maximum length.
- Open the belt system and remove the comfort insert and the belt buckle pad.
- Open the press buttons on the lower part of the headrest cover and fold the cover away upwards.
- Open the press studs on the backrest cover and fold the cover to the side.
- Stow the shoulder straps together with the shoulder padding in the backrest area and close the backrest cover again at the press studs. Now fold down the lower part of the headrest cover and close the press studs here too.
- Carefully pull off the cover in the seat area so that you can insert the seat belt buckle through the opening in the seat cover.
- Stow the seat belt buckle in the recess in the seat area below the foam padding.
- Stow the seat belt buckle tongues in the two smaller hollows at the side of the seat.
- Now put the cover back over the seat area.
- Keep all the removed parts in a safe place.
natural_image
Illustration of a yellow baby car seat with a red arrow indicating the seat structure (no text or symbols)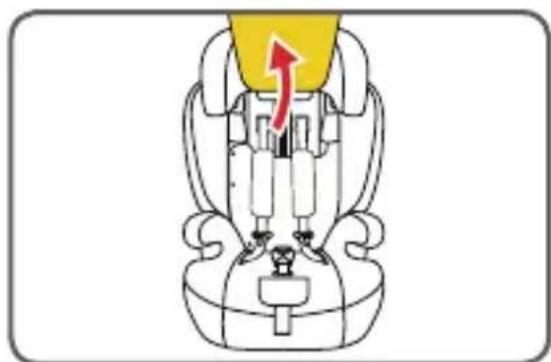
natural_image
Line drawing of a car seat assembly with a yellow top component and red arrow indicating direction (no text or symbols)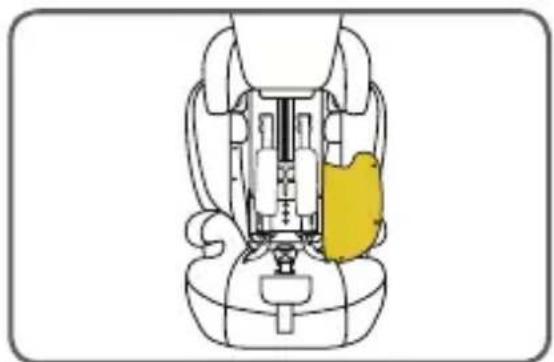
natural_image
Diagram of a car seat assembly with highlighted yellow component (no text or labels)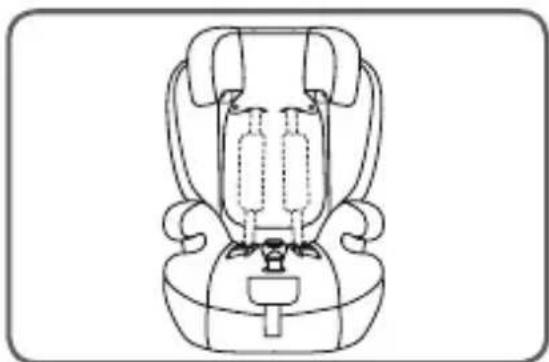
natural_image
Line drawing of a car seat with two side seats and a double bass (no text or symbols)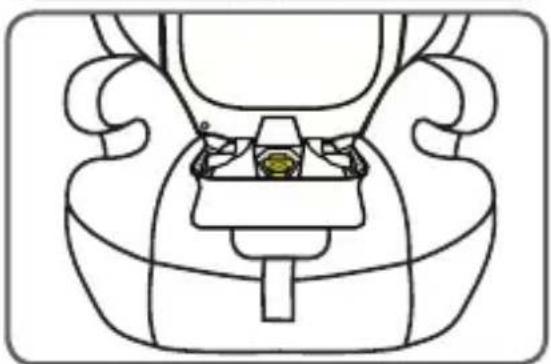
natural_image
Line drawing of a mechanical component with symmetrical arms and central housing (no text or symbols)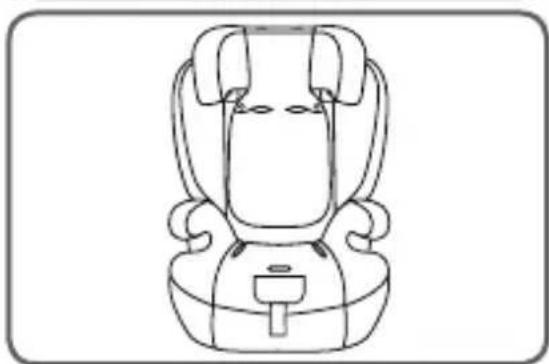
natural_image
Line drawing of a car seat with neck and seatbelt (no text or symbols)CLEANING
To guarantee long-term use of your child car seat, do not use any solvents, abrasive cleaners or aggressive cleaning agents to clean the car seat. Check the stability of the fabric and the seams after each wash. When washing the fabric, carefully follow the instructions on the label (see below).

Wash at 30^ C, gentle wash cycle
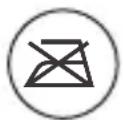
Do NOT iron

Do NOT bleach

Do NOT dry clean
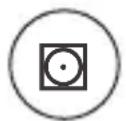
Tumble dry at low temperature
MAINTENANCE
Check the condition of the product for possible damage at regular intervals. In the event of damage, the child car seat must no longer be used and must be stored out of the reach of children.
In case of any issues, please contact
Osann customer service on +49 (0)7731 970077.
INSTALLING THE CHILD CAR SEAT
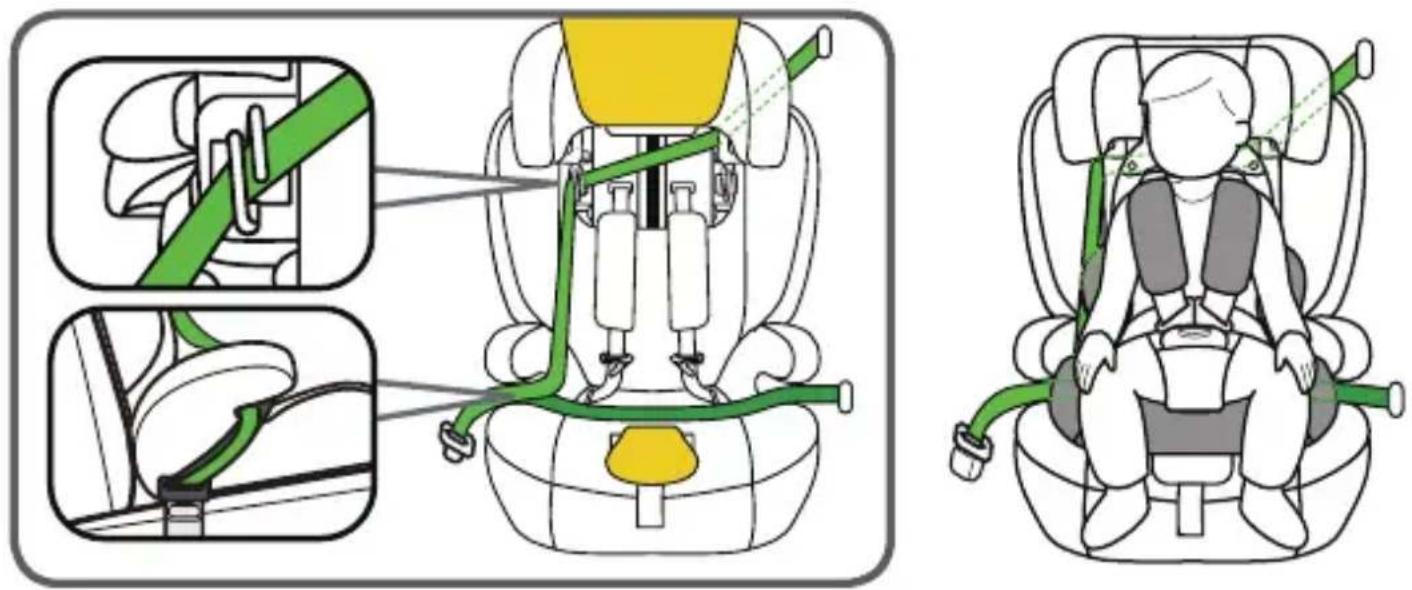
1) Height range 76–105 cm, min. 15 months, max. 18 kg, forward-facing
ATTENTION: USE ONLY FROM THE AGE OF 15 MONTHS.
-
Place the child car seat forward facing on your car seat.
-
Open the belt system and remove the comfort insert.
-
Open the press buttons on the lower part of the headrest cover and fold the cover away upwards.
-
Move the headrest to a higher position so that you can easily reach the metal hook for guiding the diagonal belt.
-
Take the car's 3-point belt and extend it to its full length.
-
First guide the diagonal belt between the headrest and the backrest and close the buckle of the car's 3-point belt until you hear it click into place.
-
Then guide the lap belt along the seat surface between the shoulder belts and the belt buckle of the child car seat.
-
Now make sure that the lap belt and the diagonal belt of the car's 3-point belt run underneath the armrest of the child car seat.
-
Now take the diagonal belt of the 3-point belt and thread it into the metal hook for guiding the diagonal belt in the backrest. Make sure that it is fully inserted.
-
Pull firmly on the diagonal belt until the entire 3-point belt is tightened and the child car seat is stable. Make sure that the straps are not twisted.
-
Put the comfort insert back into the child car seat so that it covers the lap belt of the 3-point belt.
-
Place your child in the child car seat.
-
Adjust the height of the headrest as previously described.
-
Close the belt buckle again until you hear a click.
-
Pull the front adjustment tab to tighten the straps. Make sure that the straps are not twisted.
2) Size class 100-150 cm, forward-facing
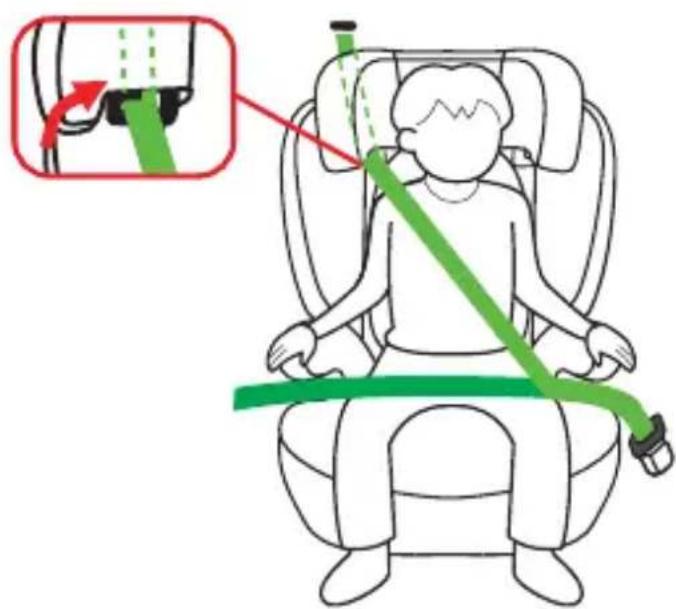
- The 5-point belt of the child car seat must be stowed as previously described. This is not needed in this size class.
- Push the child car seat in until it rests securely against the backrest of the vehicle seat.
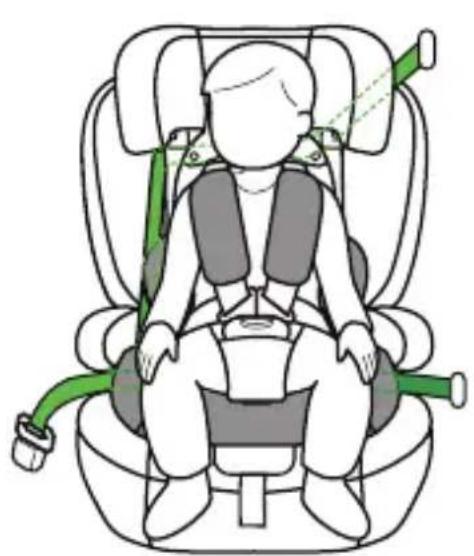
- Thread the diagonal belt of the 3-point seat belt in the car through the diagonal belt guide on the headrest of the child car seat.
- Put your child in the child car seat.
- Adjust the height of the headrest so that the child's head is fully in the headrest and the diagonal belt comes out through the belt guide at the level of the child's shoulders.
6.Fasten the belt buckle of the 3-point seat belt until you hear a click. - Make sure that both the diagonal belt and the lap belt run along the second lap belt guide (below the armrest) on the child car seat, which faces the car's seat belt buckle.
8.Pull on the diagonal strap to tighten it. Make sure that the straps are not twisted.
1 & 2 :
natural_image
Top-down line drawing of a vehicle's rear view showing engine, wheels, and structural components (no text or symbols)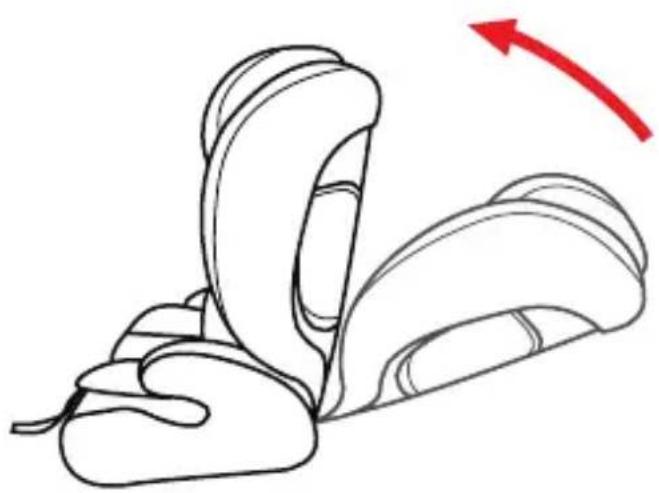
natural_image
Line drawing of a car seatbelt with a red arrow indicating direction (no text or symbols)Insert de confort
natural_image
Simple line drawing of a stylized animal head (no text or symbols)UTILISATION DU SIÈGE AUTO POUR ENFANT
natural_image
Illustration of a child in a car seatbelt being lifted, showing two different states of the seatbelting technique (no text or symbols present)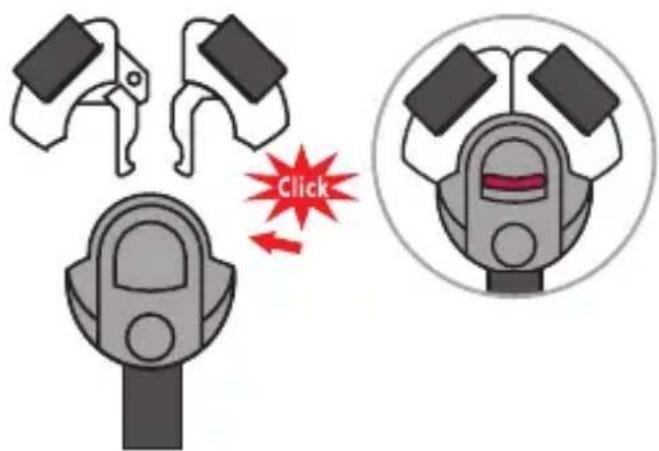
natural_image
Illustration of a hand pressing a red button on a device, with two red arrows indicating downward motion (no text or symbols)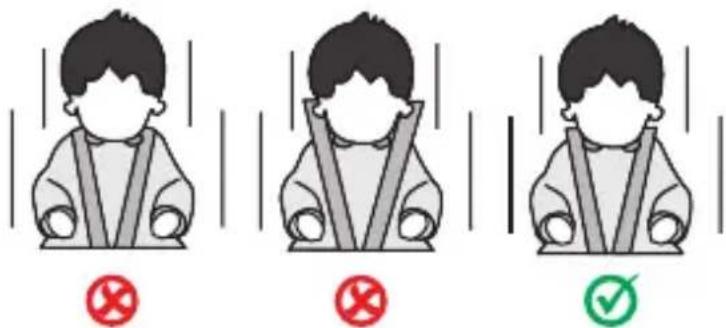
natural_image
Illustration of a yellow baby car seat with a red arrow indicating the seat structure (no text or symbols)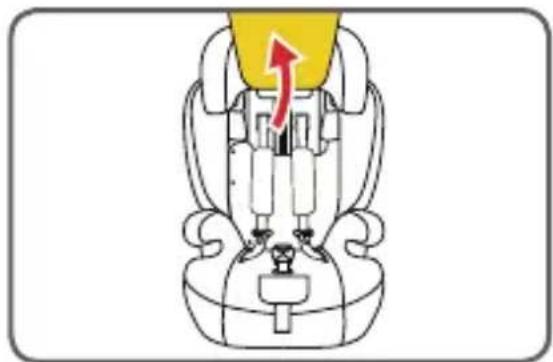
natural_image
Diagram of a car seat assembly with a yellow top component and red arrow indicating direction (no text or symbols)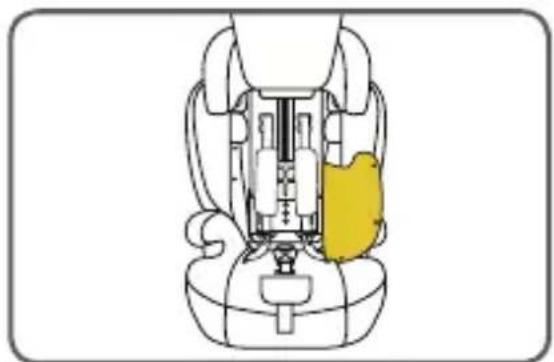
natural_image
Diagram of a car seat assembly with highlighted yellow component (no text or labels)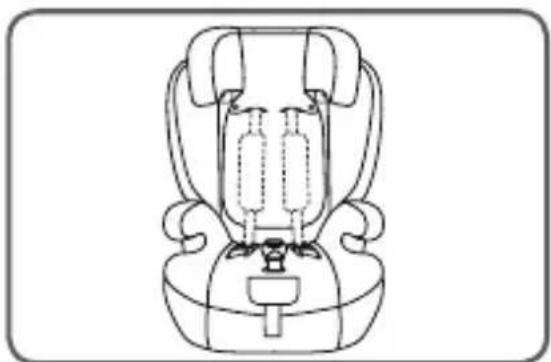
natural_image
Line drawing of a car seat with two side seats and a double bass (no text or symbols)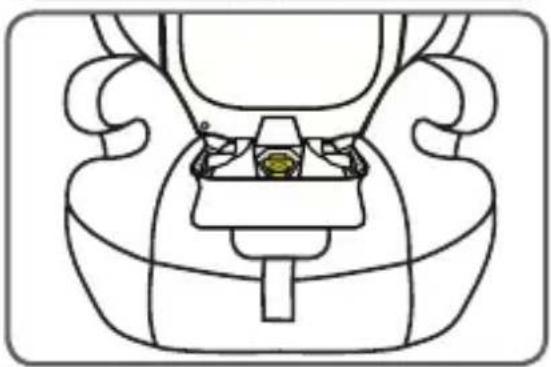
natural_image
Line drawing of a mechanical component with no visible text or symbols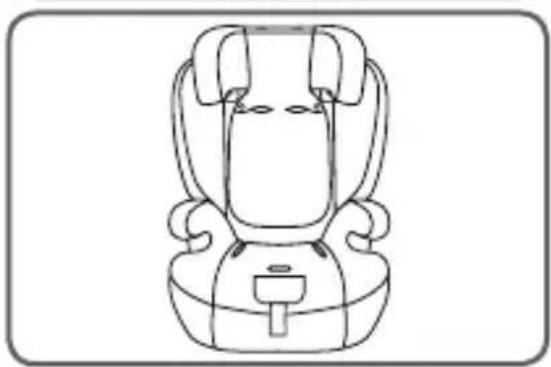
natural_image
Line drawing of a car seat with neck and seatbelt (no text or symbols)NETTOYAGE
natural_image
Illustration of a child in a car seat with green safety belt and orange straps (no text or symbols)ATTENTION : UTILISER UNIQUEMENT À PARTIR DE 15 MOIS.
1. & 2.:
natural_image
Top-down line drawing of a car's front view showing engine, wheels, and structural components (no text or symbols)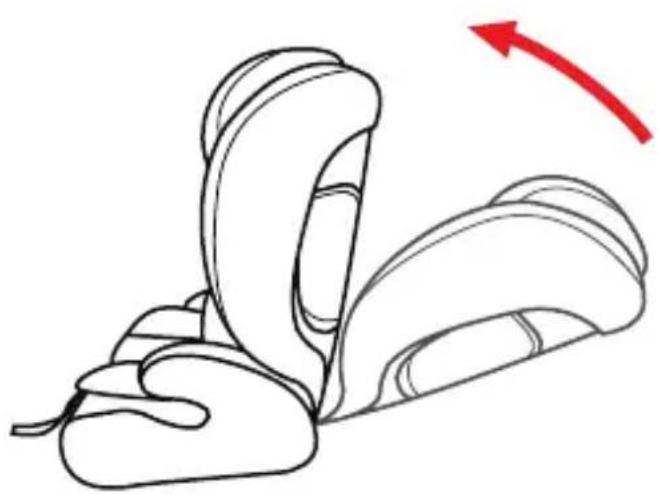
natural_image
Line drawing of a car seatbelt with a red arrow indicating direction (no text or symbols)Inserto comfort
natural_image
Simple line drawing of a symmetrical abstract shape resembling a stylized animal head or mask (no text or symbols)UTILIZZO DEL SEGGIOLINO AUTO
natural_image
Illustration of a child in a car seat being lifted, showing two different positions (no text or symbols present)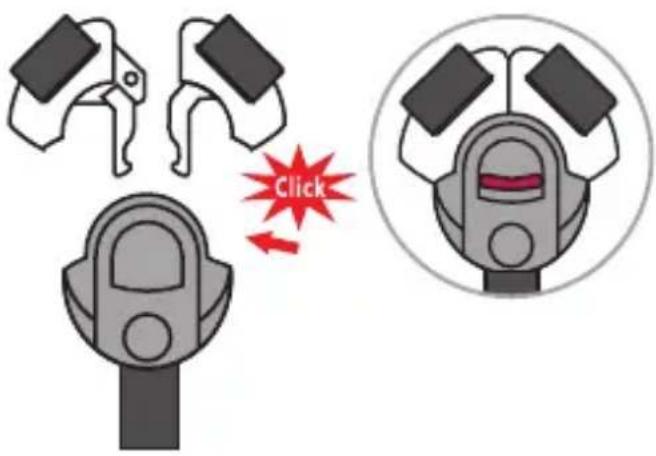
natural_image
Illustration of a hand pressing a red button on a device, with two red arrows indicating downward motion (no text or symbols)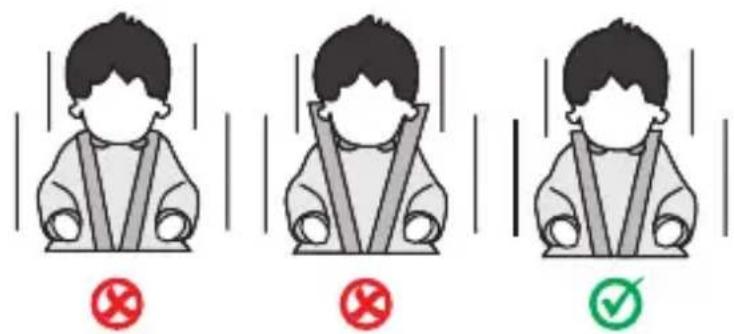
natural_image
Illustration of a yellow baby car seat with a red arrow indicating the seat structure (no text or symbols)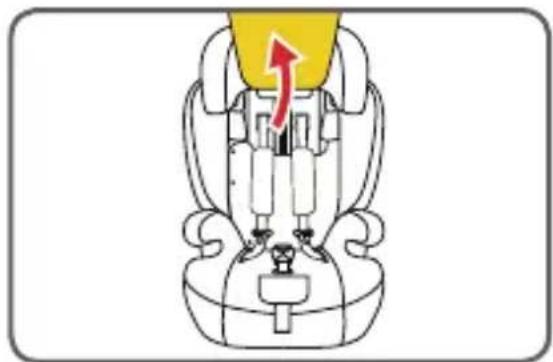
natural_image
Diagram of a car seat assembly with a yellow top component and red arrow indicating direction (no text or symbols)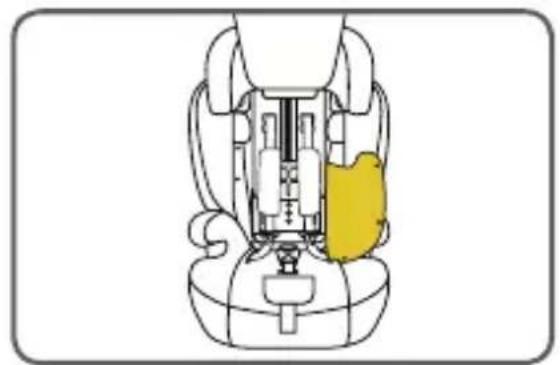
natural_image
Diagram of a car seat assembly with highlighted yellow component (no text or labels)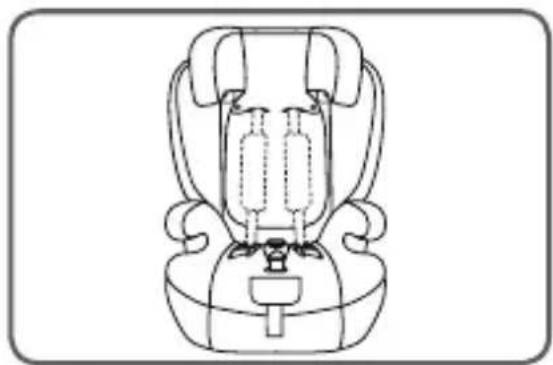
natural_image
Line drawing of a car seat with two seats and a double bass (no text or symbols)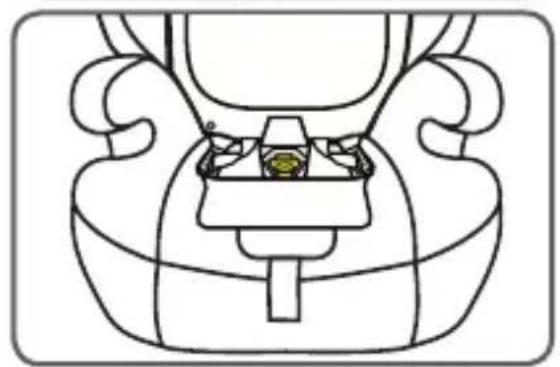
natural_image
Line drawing of a mechanical component with no visible text or symbols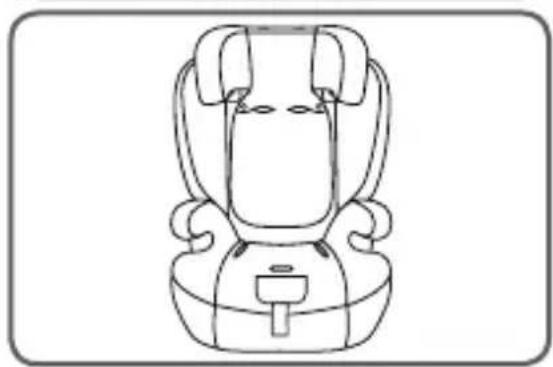
natural_image
Line drawing of a car seat with neck and frontrest (no text or symbols)PULIZIA
natural_image
Illustration of a child in a car seat with green safety belt and orange headband (no text or symbols)ATTENZIONE: UTILIZZARE SOLO A PARTIRE DAI 15 MESI DI ETÀ.
1 en 2:
natural_image
Top-down line drawing of a vehicle's rear view showing engine, wheels, and structural components (no text or symbols)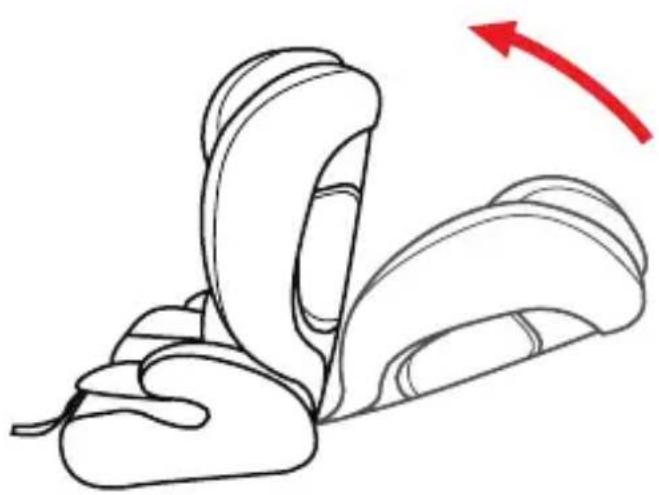
natural_image
Line drawing of a car seatbelt with a red arrow indicating direction (no text or symbols)Comfort-inlegstuk
natural_image
Simple line drawing of a symmetrical abstract shape resembling a stylized animal head or mask (no text or symbols)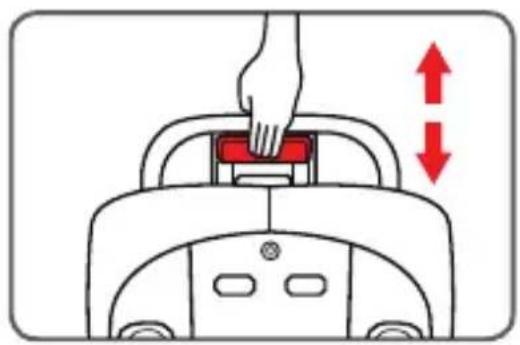
natural_image
Illustration of a hand pressing a red button on a device, with two red arrows indicating downward motion (no text or symbols)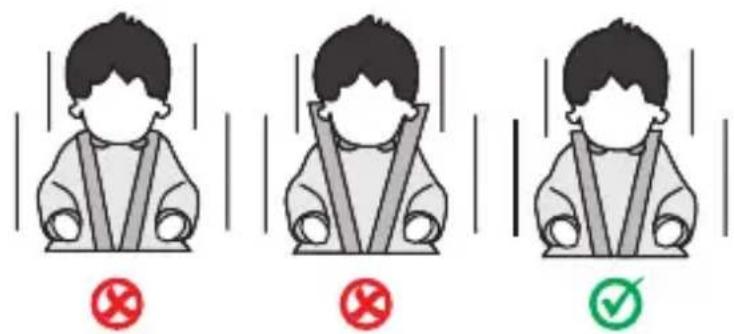
natural_image
Illustration of a yellow baby car seat with a red arrow indicating the seat structure (no text or symbols)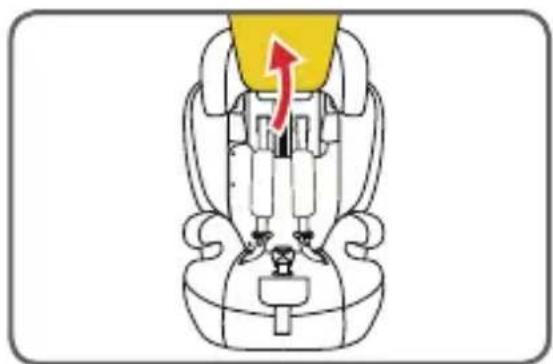
natural_image
Diagram of a car seat assembly with a yellow top and red arrow indicating direction (no text or labels)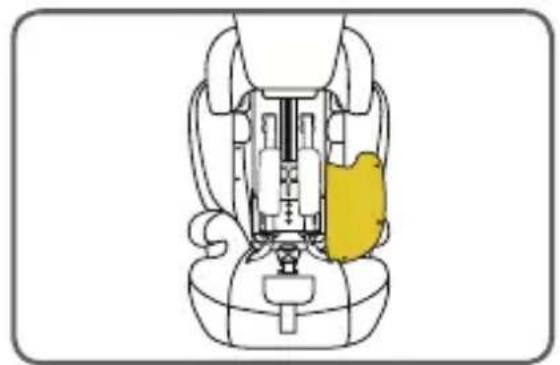
natural_image
Diagram of a car seat assembly with highlighted yellow component (no text or labels)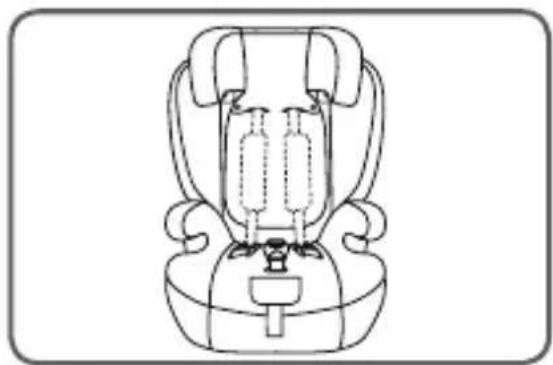
natural_image
Line drawing of a car seat with two seats and a double bass (no text or symbols)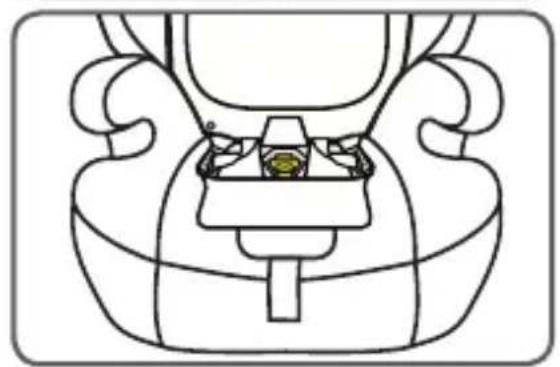
natural_image
Line drawing of a mechanical component with no visible text or symbols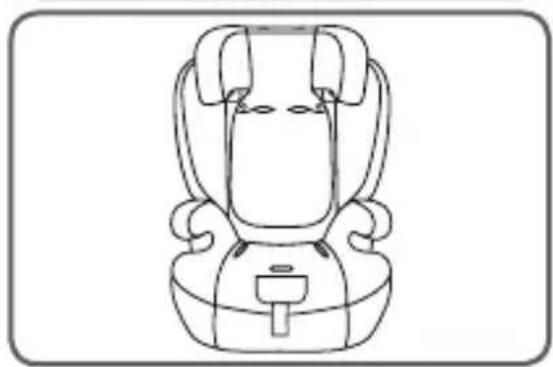
natural_image
Line drawing of a car seat with neck and frontrest (no text or symbols)REINIGING
LET OP: PAS TE GEBRUIKEN VANAF EEN LEEFTIJD VAN 15 MAANDEN.
- y 2.:
natural_image
Top-down line drawing of a vehicle's rear view showing engine, wheels, and structural components (no text or symbols)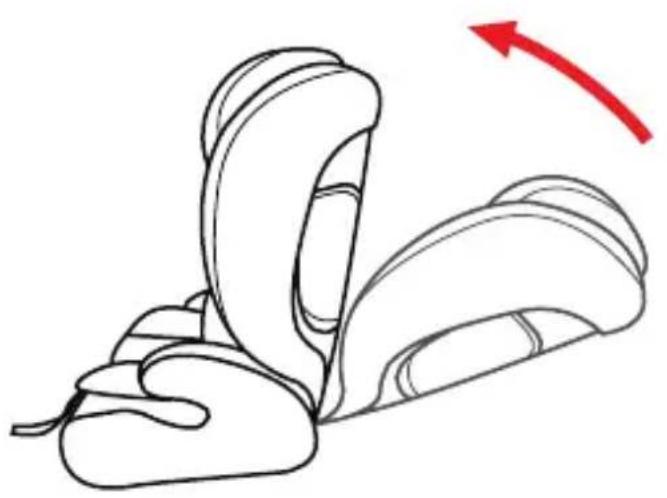
natural_image
Line drawing of a car seatbelt with a red arrow indicating direction (no text or symbols)Inserto de confort
natural_image
Simple line drawing of a symmetrical abstract shape resembling a stylized animal head or mask (no text or symbols)USO DEL ASIENTO INFANTIL PARA AUTOMÓVIL
Ajustar el cinturón
natural_image
Illustration of a child in a car seatbelt being lifted, showing two different states of the same seatbelt (no text or symbols present)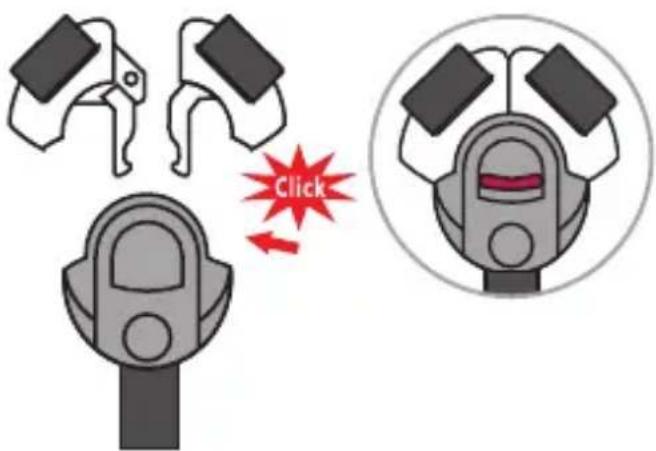
natural_image
Illustration of a hand pressing a red button on a device, with two red arrows indicating downward motion (no text or symbols)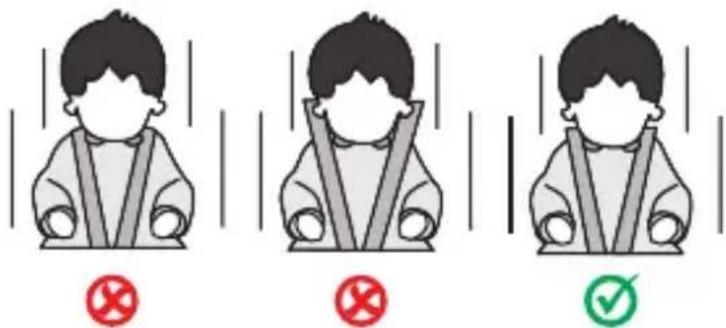
natural_image
Illustration of a yellow baby car seat with a red arrow indicating the seat structure (no text or symbols)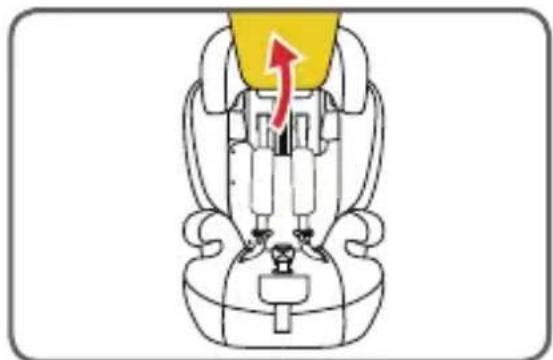
natural_image
Diagram of a car seat assembly with a yellow top and red arrow indicating direction (no text or labels)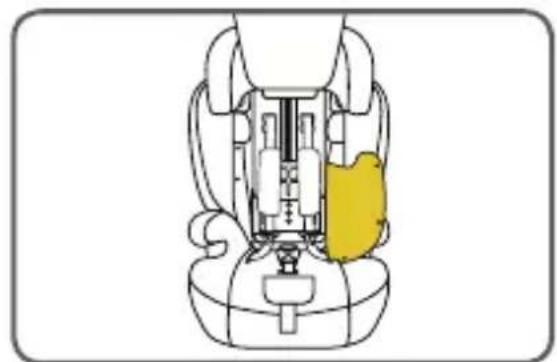
natural_image
Diagram of a car seat assembly with highlighted yellow component (no text or labels)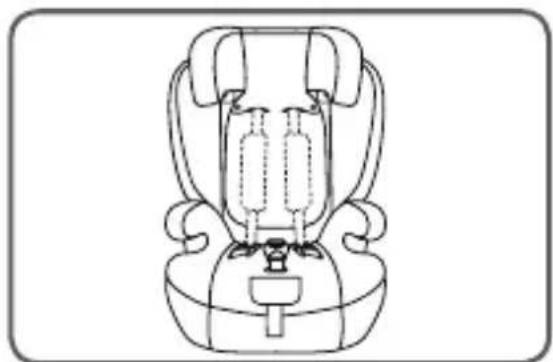
natural_image
Line drawing of a car seat with two seats and a double bass (no text or symbols)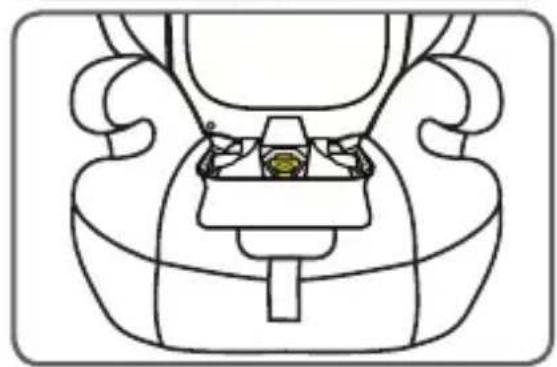
natural_image
Line drawing of a mechanical component with no visible text or symbols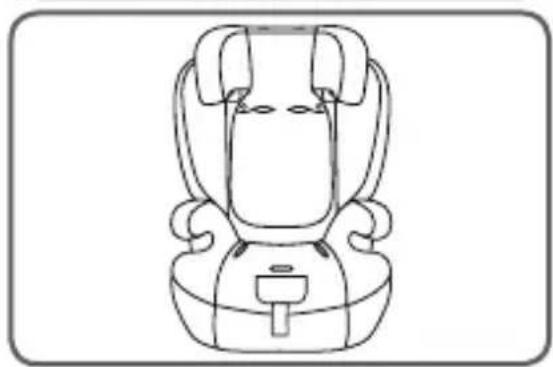
natural_image
Line drawing of a car seat with neck and frontrest (no text or symbols)LIMPIEZA
natural_image
Illustration of a child in a car seat with green safety belt (no text or symbols)natural_image
Simple black-and-white cartoon illustration of two overlapping circles (no text or symbols)
- Komforteinlage
- REINIGUNG
- USE
- ATTENTION
- PLEASE NOTE
- NOTE (76-105 cm):
- NOTE (100 - 150 cm):
- & 2.:
- Note:
- WARNING
- SEAT PARTS
- Assembling the backrest & seat shell (variant-dependent)
- Comfort insert
- USING THE CHILD CAR SEAT
- Adjusting the belt
- Opening/closing the belt
- Adjusting the head support
- Stowage of the 5-point belt for size class 100-150 cm
- CLEANING
- MAINTENANCE
- INSTALLING THE CHILD CAR SEAT
- ATTENTION: USE ONLY FROM THE AGE OF 15 MONTHS.
- & 2 :
- Insert de confort
- UTILISATION DU SIÈGE AUTO POUR ENFANT
- NETTOYAGE
- ATTENTION : UTILISER UNIQUEMENT À PARTIR DE 15 MOIS.
- Inserto comfort
- UTILIZZO DEL SEGGIOLINO AUTO
- PULIZIA
- ATTENZIONE: UTILIZZARE SOLO A PARTIRE DAI 15 MESI DI ETÀ.
- Comfort-inlegstuk
- REINIGING
- Inserto de confort
- USO DEL ASIENTO INFANTIL PARA AUTOMÓVIL
- Ajustar el cinturón
- LIMPIEZA
Brand : Osann
Model : Safety Berlin
Category : Child car seat