
Halime Air 3in1 - Stroller BabyGO - Free user manual and instructions
Find the device manual for free Halime Air 3in1 BabyGO in PDF.

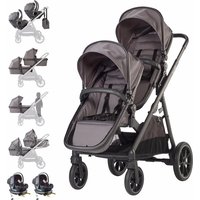
| Product type | 3-in-1 stroller (seat, carrycot, car seat) |
| Brand | BabyGO |
| Model | Halime Air 3in1 |
| Recommended age | From birth to 36 months |
| Maximum child weight | 15 kg |
| Stroller weight | Approximately 10.5 kg (reasonable estimate) |
| Folded dimensions | Approx. 80 x 60 x 30 cm (estimate) |
| Materials | Metal frame, fabric and plastic |
| Restraint system | Adjustable 5-point harness |
| Wheel direction | Swivel and lockable front wheels |
| Brake | Rear foot brake |
| Seat position | Reversible (world-facing or parent-facing) and reclineable |
| Footrest | Adjustable recline |
| Handle | Height adjustable |
| Canopy | Extendable with zipper |
| Storage basket | Maximum capacity 5 kg |
| Carrycot | Included, mattress thickness max 15 mm |
| Compatible car seat | With ISO-FIX base (not included) |
| Usage | Dry, firm, and horizontal surface |
| Maintenance | Cover not machine washable, clean with brush; plastic parts washable with mild soap |
| Warranty | 1 year |
Frequently Asked Questions - Halime Air 3in1 BabyGO
User questions about Halime Air 3in1 BabyGO
0 question about this device. Answer the ones you know or ask your own.
Ask a new question about this device
Download the instructions for your Stroller in PDF format for free! Find your manual Halime Air 3in1 - BabyGO and take your electronic device back in hand. On this page are published all the documents necessary for the use of your device. Halime Air 3in1 by BabyGO.
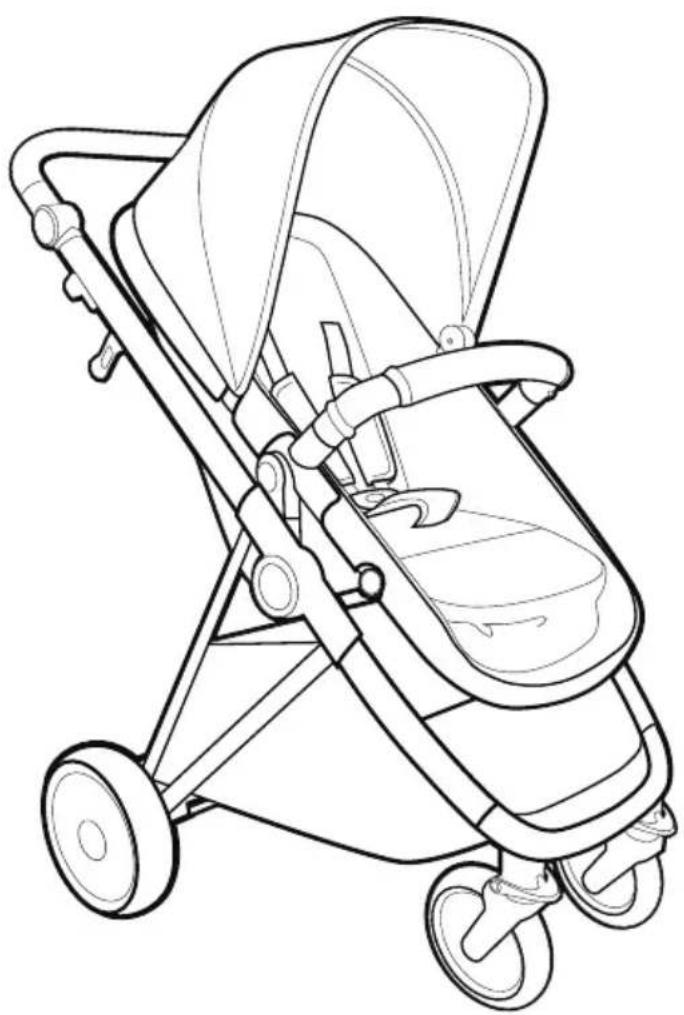
USER MANUAL Halime Air 3in1 BabyGO
Carry Cot Assembly Instructions

Stroller Assembly Instructions
EN Carry Cot Assembly Instructions
ASSEMBLY INSTRUCTIONS
Dear Parents:
Thank you for purchasing the Stroller System.
Please read and follow all instructions before using this Stroller System.
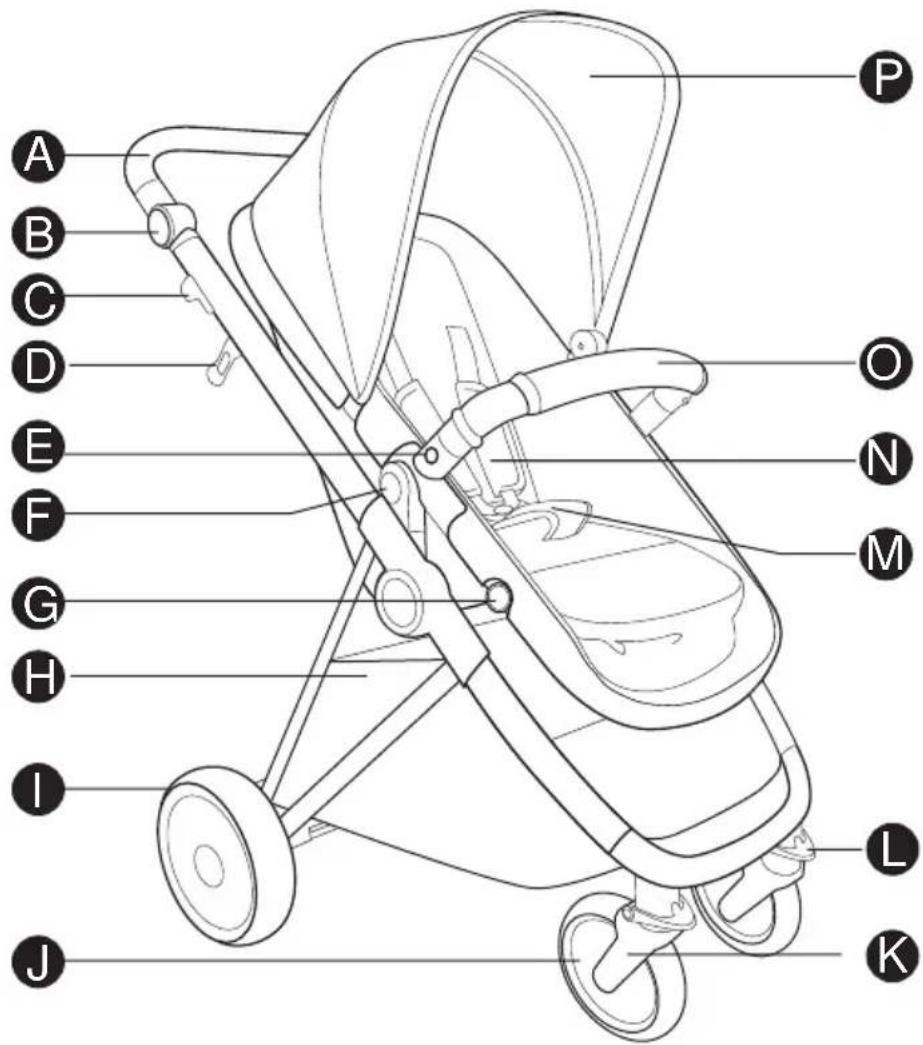
A handle
B handle adjustment knob
C folding knob
D hook safety lock
E release knob bumper
F release knob seat
G footrest adjustment knob
H basket
rear wheel
J front wheel
K front fork
pivot Funktion
M safety harness
N shoulder pad
bumper bar
P canopy
Function operation:
Assembly:
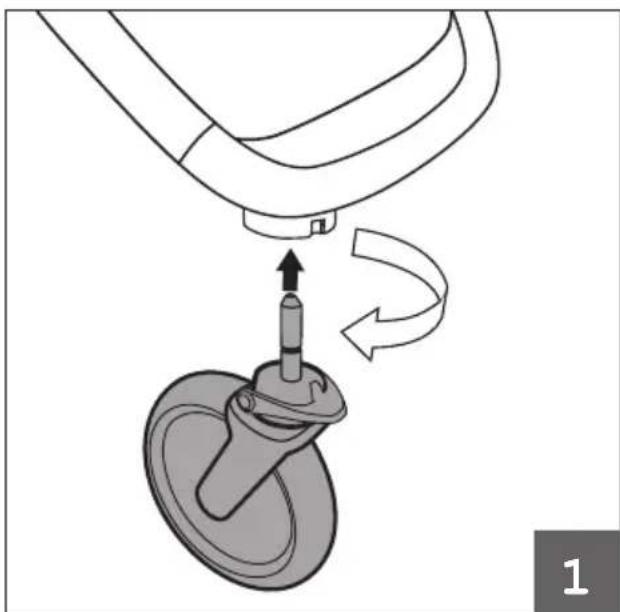
insert the wheel with the pin into the holder.
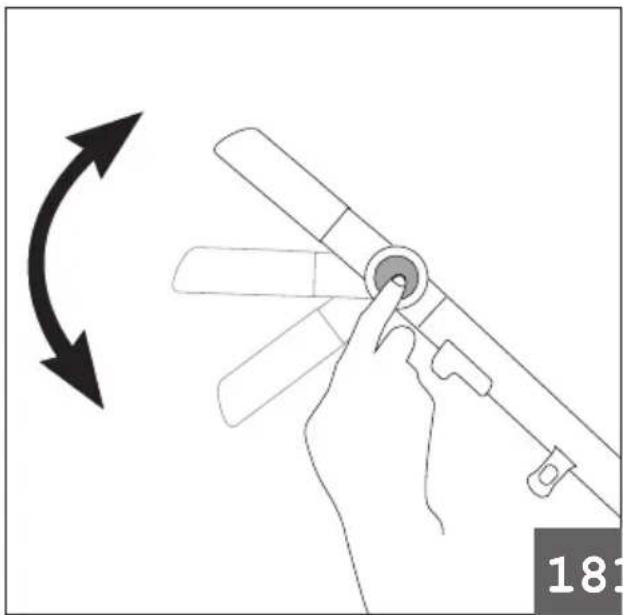
Push down the plastic pin to lock the pivot functionality. Push up the plastic pin to unlock the rotation.

Disassembling the front wheel: push in the metal pin on the side of the holder and pull out the wheel.
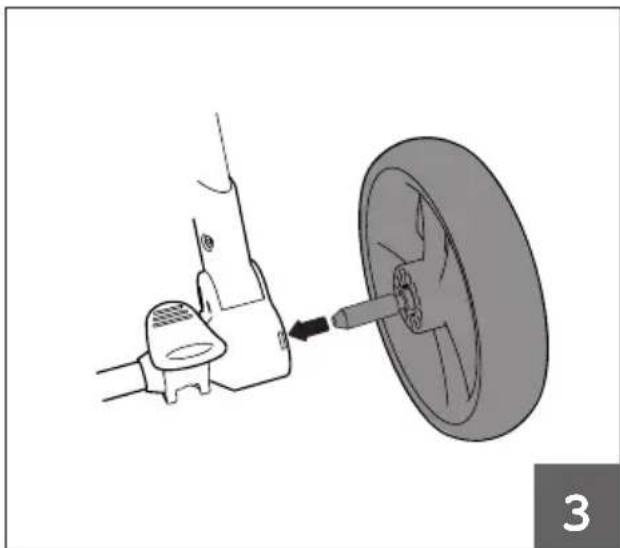
Rear wheel assembly:
insert the wheel like the arrow shows to assemble it.
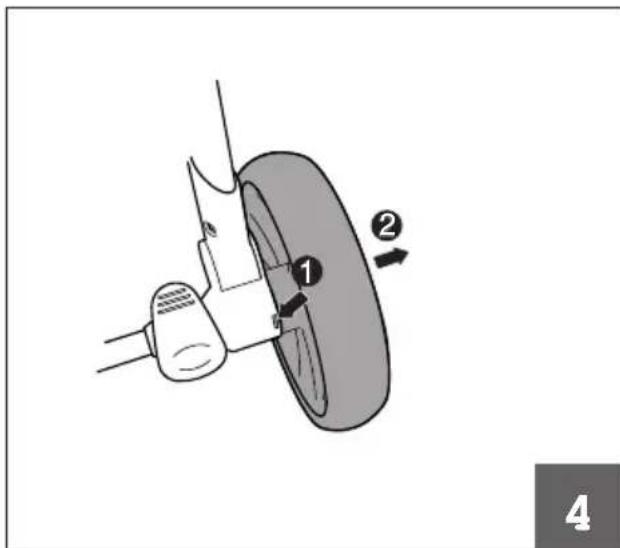
Disassembling the rear wheel: press the metal pin like the arrow 1 shows. Pull out the wheel like arrow 2 shows.
Carry Cot
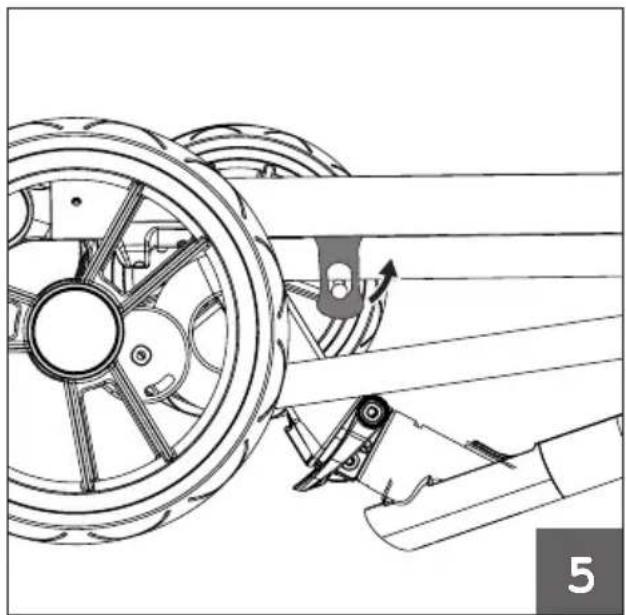
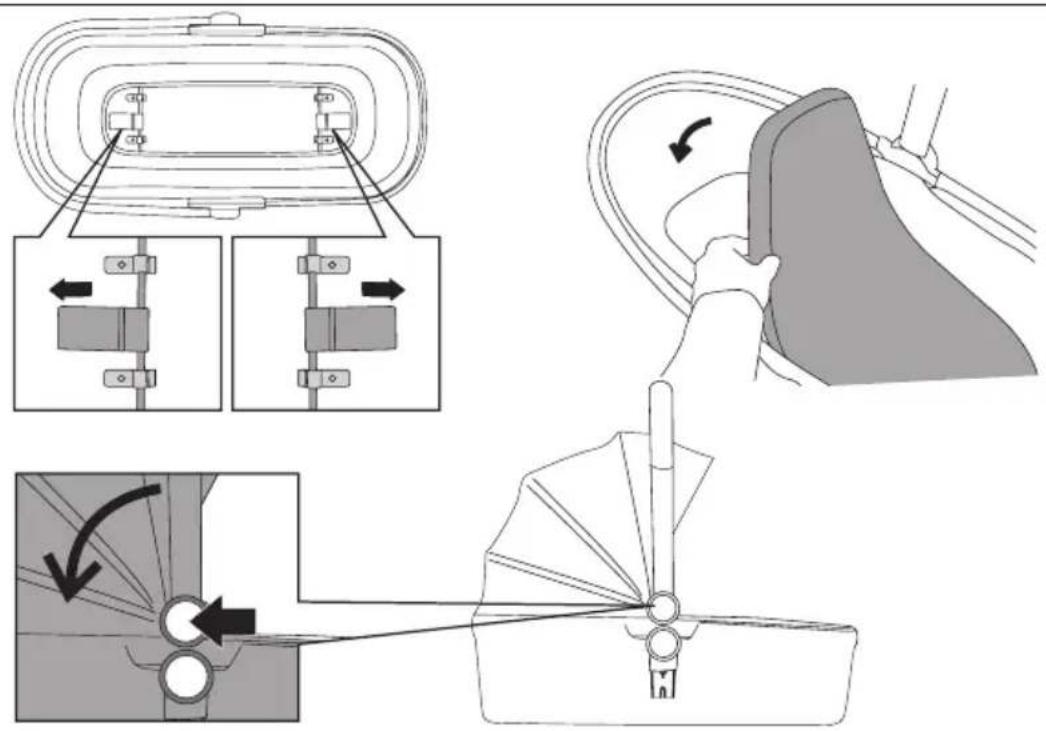
Unfold frame:
first pull the hook like the arrow shows.
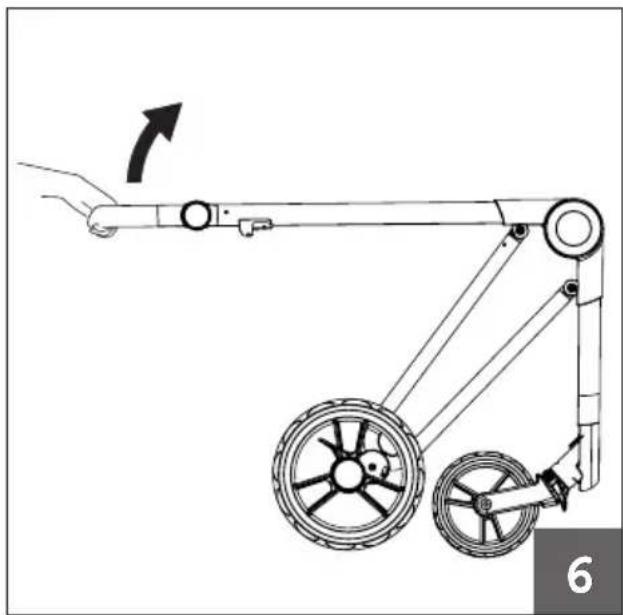
Unfold frame:
pull the handle like the arrow shows. When you hear a „click“, the frame is opened.
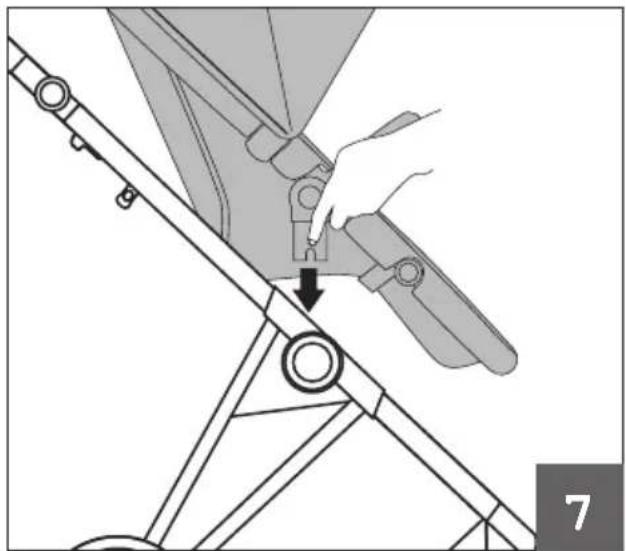
Seat assembly:
insert the seat like the arrow shows.
Disassembling the seat:
press the release buttons like the arrow shows and lift the seat out.
Carry Cot
Seat adjustment: pull the plastic lever like the arrow shows in figers 10, 11, 12 and 13, to adjust angle.
Carry Cot
The seat is reversible as figures 14 and 15 show.
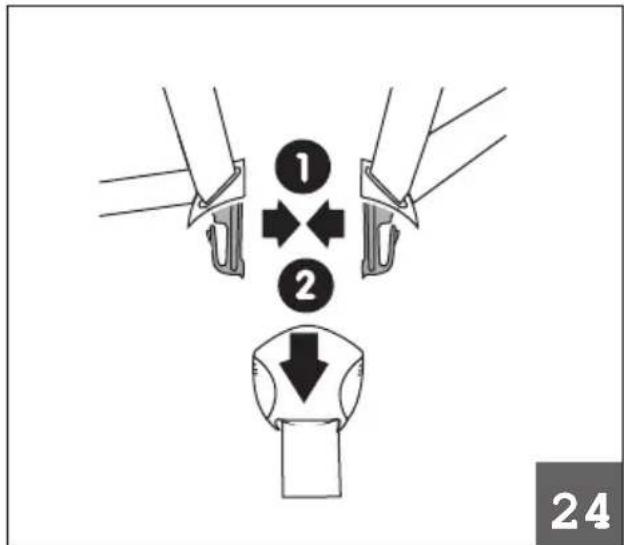
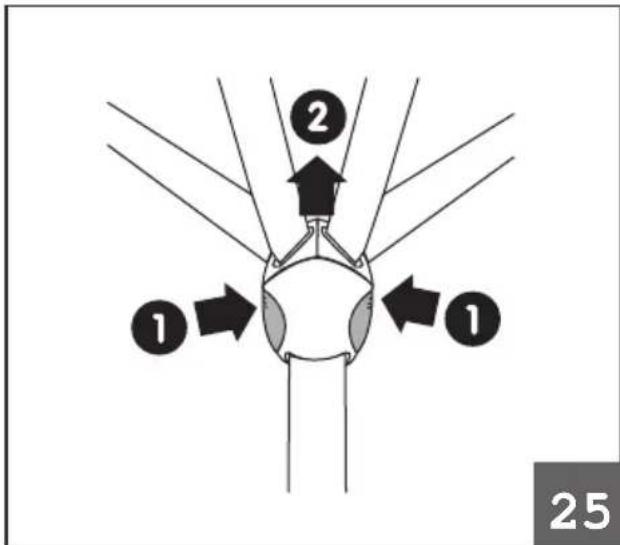
Bumper assembly: insert the bumperernds into the holder simultaneously. Bumper disassembly: press the buttons like the arrow shows to pull off the bumper.
Footrest adjustment: press the buttons like the figure shows to adjust the footrest angle.
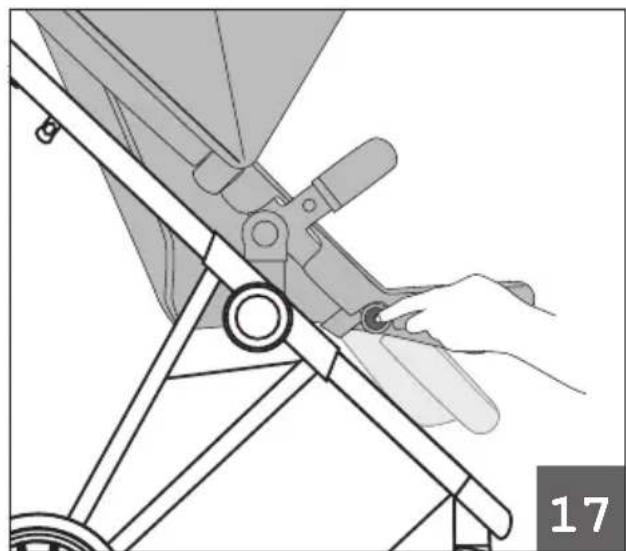
Handle adjustment: press the buttons to adjust angle.
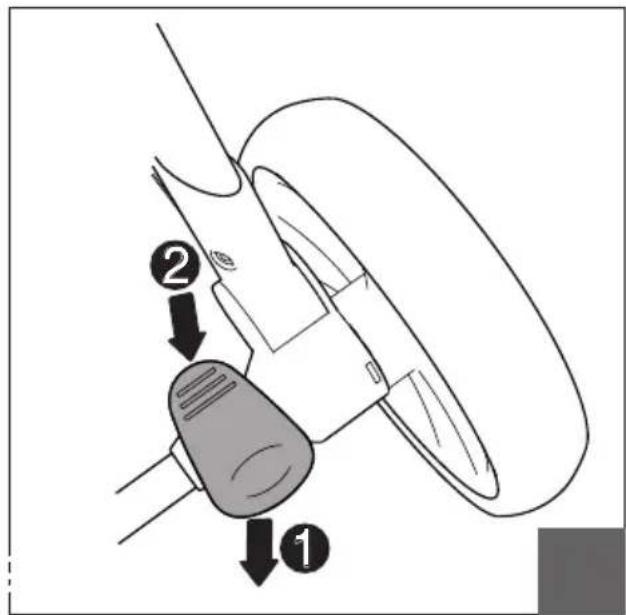
Step on the pedal like arrow 1 shows, to activate the brake. Step on the pedal like arrow 2 shows, to release the brake.
Attention:
always activate the brake if you do not use the stroller.
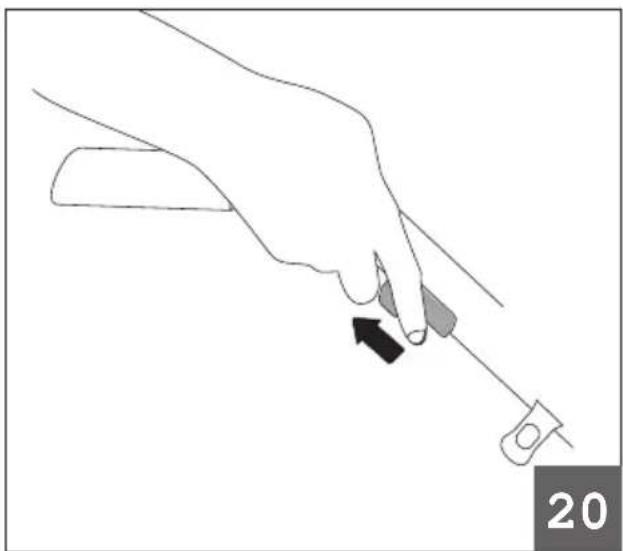
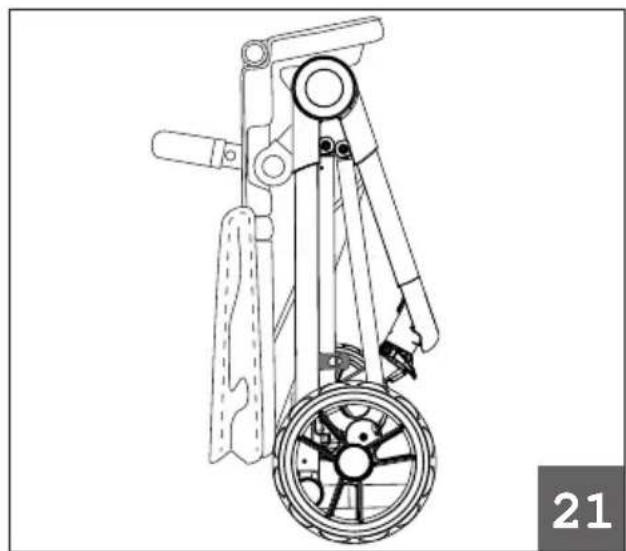
To fold the frame:
press and pull the buttons as shown in figure 20 hold it and push the same time the handle to fold frame as shown in figure 21.
Carry Cot
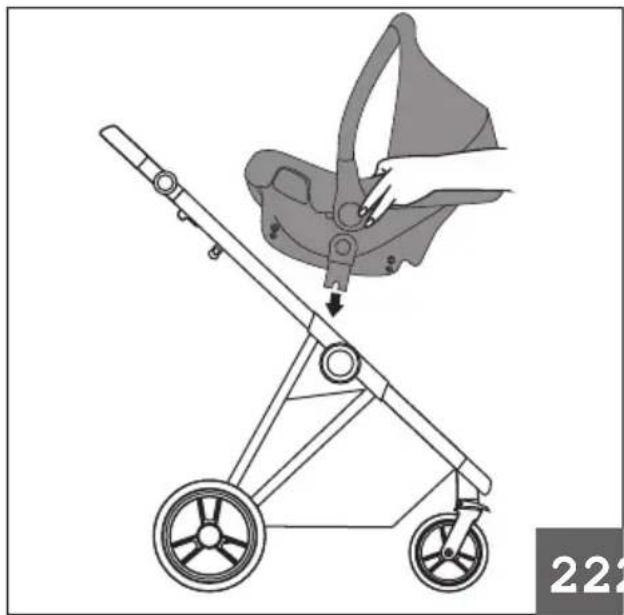
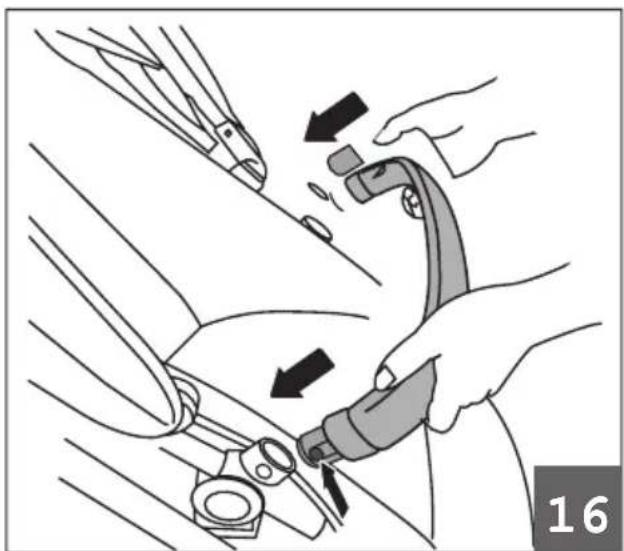
Car Seat assembly: insert the car seat like the arrow shows.
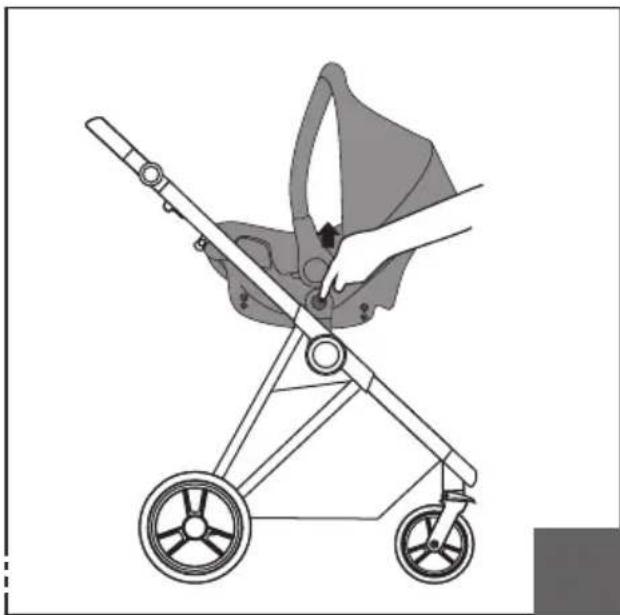
Car Seat take off:
press the buttons like the arrow shows and lift up the car seat.
To close safety harness buckle:
-
combine the two plugs.
-
insert the combined plugs into the buckle and push until you hear a „click".
Unlock the safety harness buckle: press the knobs on both sides of the buckle and pull the buckle plugs out like arrow 2 shows, to release the buckle.
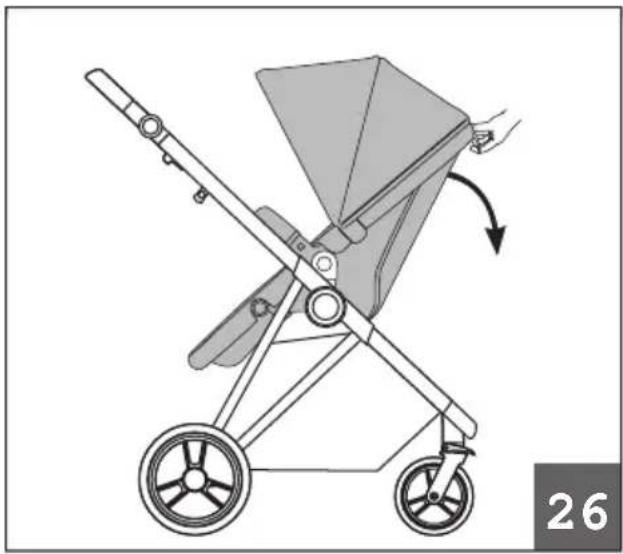
Pull the plastic handle to adjust the angle as shown in figure 26 according to the arrow mark.
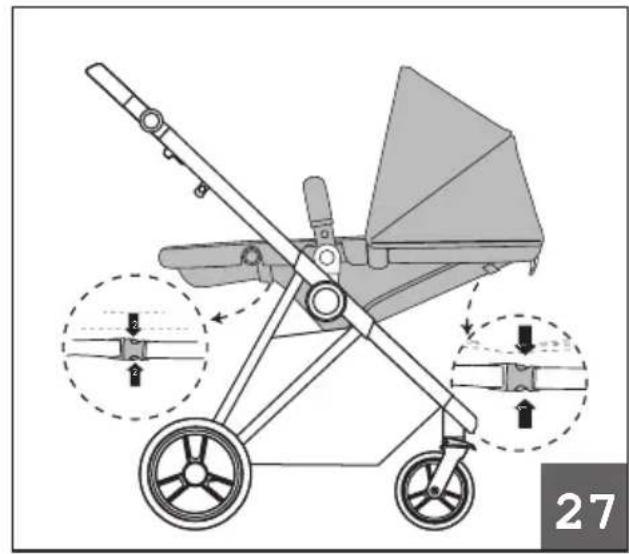
Open the belts under the seat as shown in figure 27.
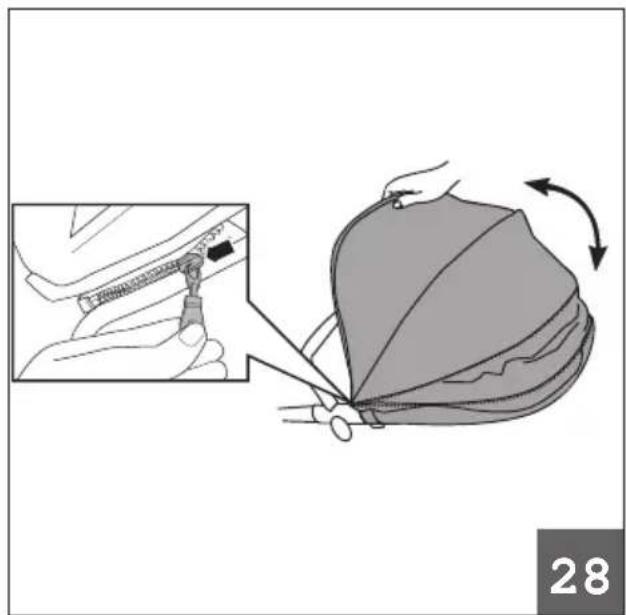
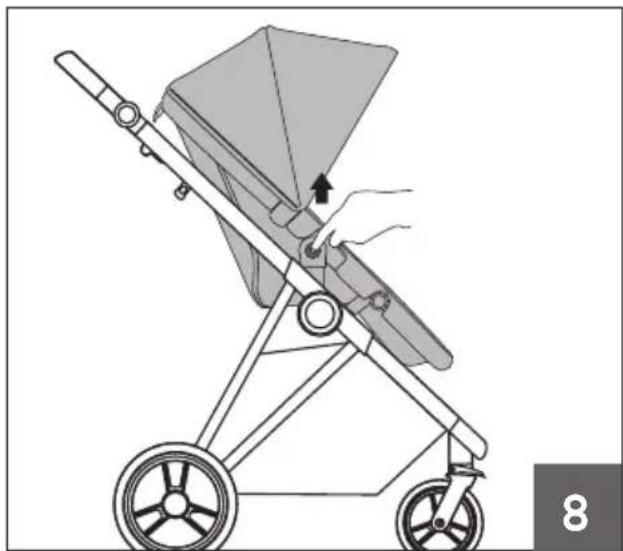
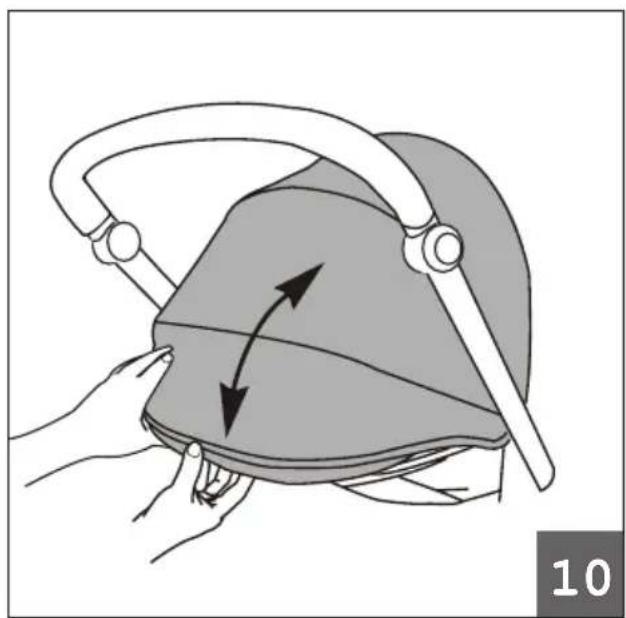
Open the zipper to fully unfold the canopy as shown in Figure 28.
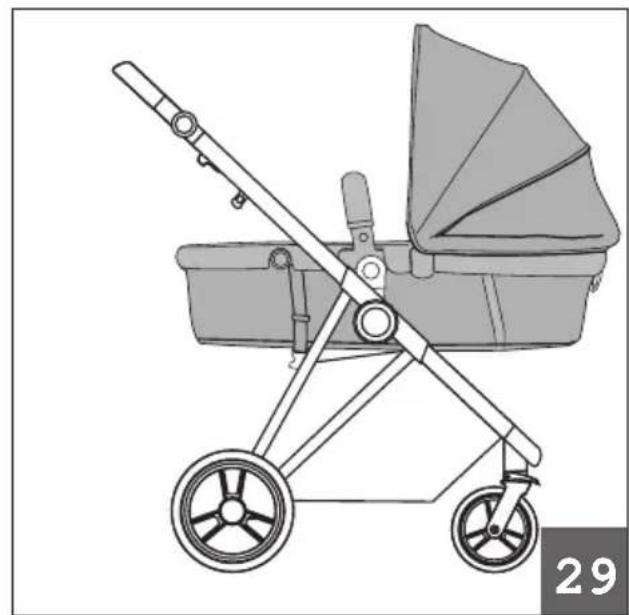
When the stroller is in carrycot mode, the carrycot must not be lifted by the handle when the baby is in it Fig. 29.
Carry Cot
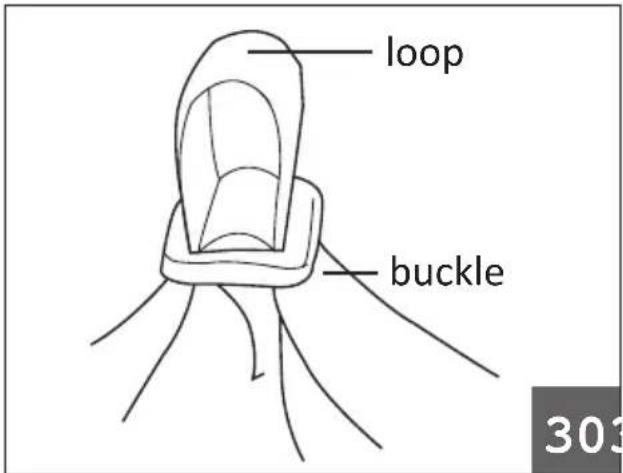
Adjust or shorten the length of the harness belt:
pull out the loop, slide the belt in the desired direction and push up the buckle to tighten.
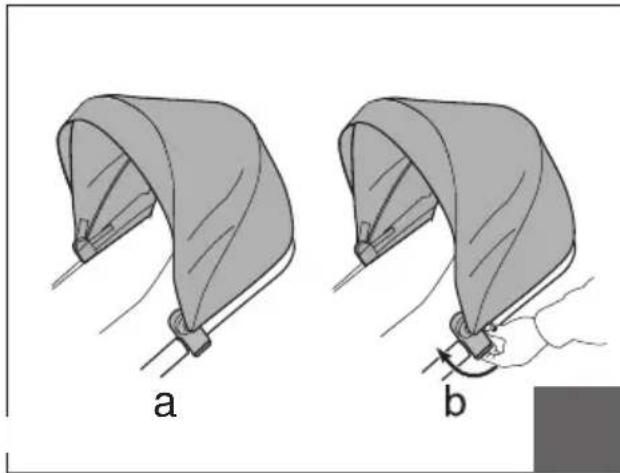
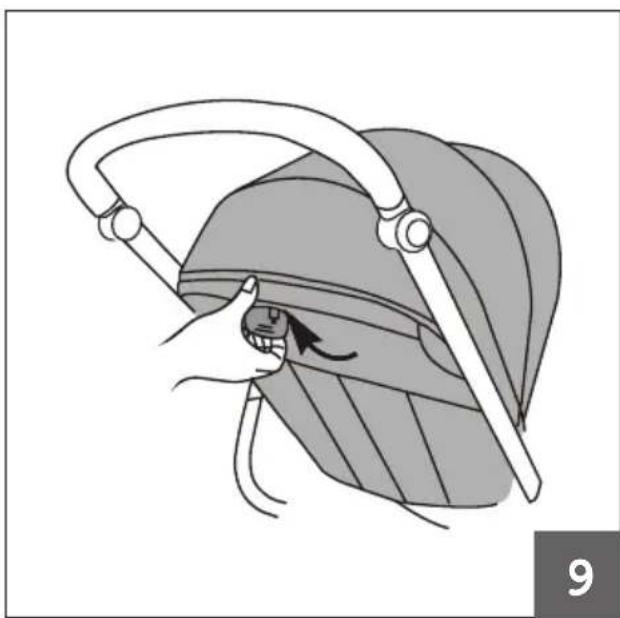
canopy assembly:
fig a, push the canopy plug into the seat slot, close the back zipper canopy take off:
fig b, open the back zipper, pull canopy plug out.
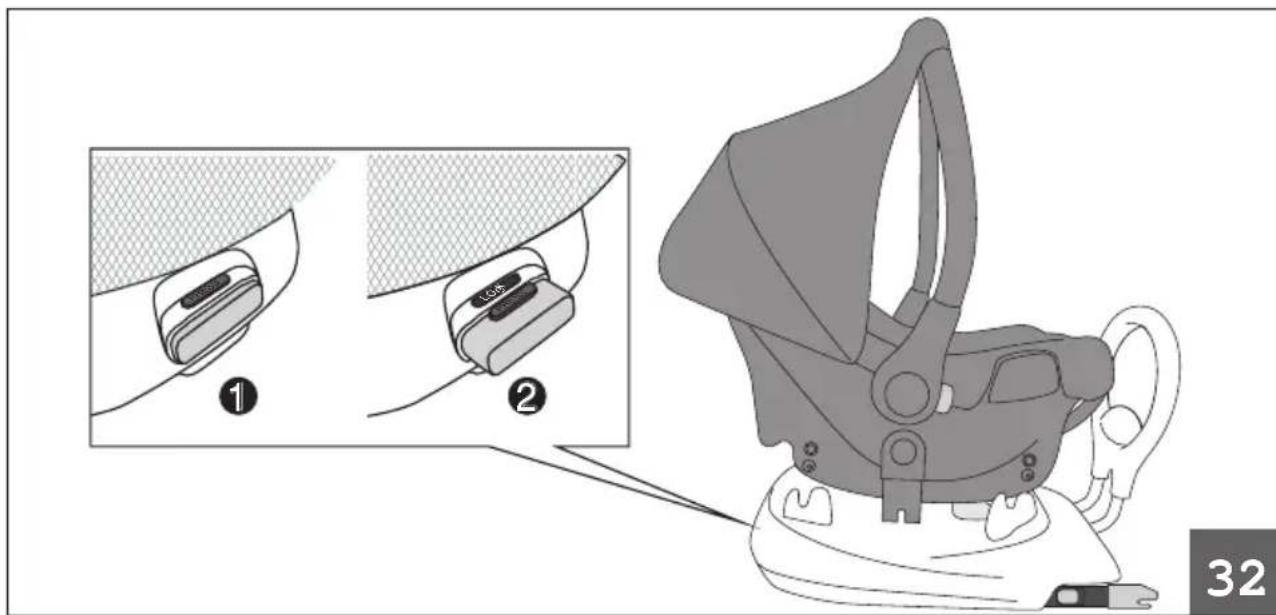
Infant car seat with ISO-FIX base assemble:
place the infant car seat vertically on the base. The red button on the front of the base will pop out and the seat will be automatically locked (fig2).
To dissassemble:
press the red button on the front to release the carseat.
33
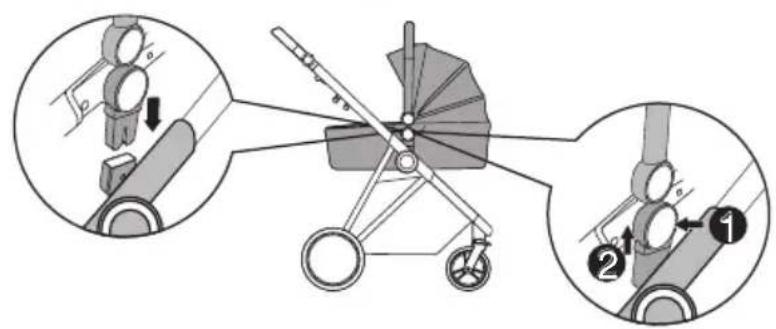
Use the carrycot: pull the two fixing bars towards both sides to open the carrycot and then put the mat inside onto the bottom.
Press the handle release buttons to adjust handle. Hold the carrycot and insert the connectors into the slots situated on the both sides of the chassis.
Push the release buttons to remove the carrycot.
Note:
- This product is only suitable for a child who cannot sit up unaided.
- Only use on a firm, horizontal level, dry surface.
- The head of the child in the carrycot should never be lower than the body of the child.
- Before carrying or lifting, make sure that the handle is in the correct position of use.
Information concerning the weight, age and/or ability of the child for which the vehicle is suitable (weighing up to 15kg , used to 0-36 months).
Important - Keep these instructions for future reference
Carry Cot
WARNING Never leave your child unattended.
WARNING Ensure that all the locking devices are engaged before use.
WARNING To avoid injury ensure that your child is kept away when unfolding and folding this product.
WARNING Do not let your child play with this product.
WARNING Always use the restraint system.
WARNING Check that pram body or seat unit or car seat attachment devices are correctly engaged before use.
WARNING This product is not suitable for running or skating.
WARNING Mattress thickness is no more than 15mm.
WARNING Parking device shall be engaged when placing and removing the children.
WARNING The maximum load of basket is 5kg
WARNING Do not attached load to handle or on the back of the backrest or on the sides of the vehicle, it will affect the ability of the vehicle.
WARNING Please check regularly if rivets are loose, if parts are broken or sewing is loose, if necessary, please change into new parts. When you assemble and disassemble, please reference to instruction. Fabric cover can not be rinsed, when you clean fabric cover, please use brush or other clean ware to outwash splodge. The rest parts can be washed, please use soap or neutral cleaning mixture. Warranty is one year.
WARNING This stroller is for one child only.
Assembler le garde-corps:


Brand : BabyGO
Model : Halime Air 3in1
Category : Stroller