
Torq K-6125 - Faucet KOHLER - Free user manual and instructions
Find the device manual for free Torq K-6125 KOHLER in PDF.


User questions about Torq K-6125 KOHLER
0 question about this device. Answer the ones you know or ask your own.
Ask a new question about this device
Download the instructions for your Faucet in PDF format for free! Find your manual Torq K-6125 - KOHLER and take your electronic device back in hand. On this page are published all the documents necessary for the use of your device. Torq K-6125 by KOHLER.
USER MANUAL Torq K-6125 KOHLER
Kitchen Sink Faucets
K-6125 K-6126
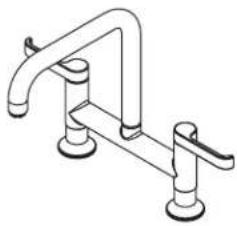
natural_image
Line drawing of a kitchen sink with faucet and handle (no text or symbols)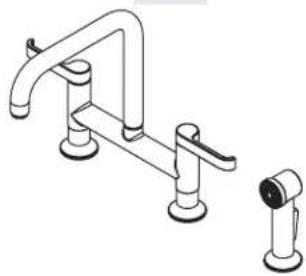
natural_image
Technical line drawing of a bathroom sink with adjustable fixtures and a close-up view of the sink (no text or symbols)Mproduct numbers are for Mexico (i.e. K-12345M)
Thank You For Choosing Kohler Company
We appreciate your commitment to Kohler quality. Please take a few minutes to review this manual before you start installation. If you encounter any installation or performance problems, please don't hesitate to contact us. Our phone numbers and website are listed on the back cover. Thanks again for choosing Kohler Company.
Tools and Materials
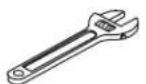
Adjustable Wrench

Two 3/8" Male Supply Connections
Before You Begin
□ Observe all local plumbing and building codes.
□ Shut off the water supplies.
Before installation, unpack the new faucet and inspect it for damage. Return the faucet to the carton until you are ready to install it.
□ Carefully inspect waste and supply tubing for any sign of damage and replace if necessary.
☐ For new installations, assemble the faucet to the sink before installing the sink.
☐ Do not use petroleum based products on this faucet.
☐ Kohler Co. reserves the right to make revisions in the design of faucets without notice, as specified in the Price Book.

text_image
Stud Escutcheon O-Ring Sink Hot Supply Bracket Washer Nut Cold Supply Sidespray Spray Holder Gasket Nut Sidespray Hose Inlet Sidespray Hose Outlet1. Install the Faucet
IMPORTANT! If you are mounting the faucet to an uneven surface (such as tile grout lines), apply a suitable sealant in addition to the O-rings and gasket provided. Donotusepetroleumbasedsealant.
☐ Slide an escutcheon and O-ring over each of the hoses and onto the faucet.
☐ Insert the faucet through the mounting surface with the cold supply hose to the right side of the user.
☐ Assemble a bracket, washer, and nut to each stud from underneath the mounting surface.
□ Securely tighten the nuts with an adjustable wrench.
☐ Ensure the handles are in the OFF position, as shown.
2. Install the Sidespray - K-6126 Model Only
☐ Insert the gasket to the underside of the spray holder.
☐ Insert the spray holder into the mounting hole.
Install the Sidespray - K-6126 Model Only (cont.)
□ From underneath the mounting surface, securely hand tighten the nut.
☐ Insert the sidespray with sidespray hose through the spray holder.
☐ Verify the sidespray hose outlet and inlet are clean and verify an O-ring is in place in the sidespray hose inlet.
□ Connect the sidespray hose inlet to the sidespray hose outlet.
□ Extend and retract the spray hose to check for smooth operation.
□ Reposition the supply hoses if necessary.
text_image
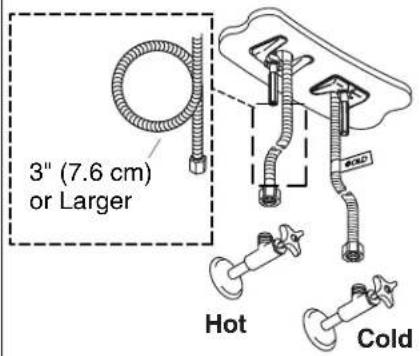
3" (7.6 cm) or Larger Hot Cold
text_image
Aerator Aerator Tool3. Install the Supplies

CAUTION: Riskofrestrictedwaterflowandproduct damage. Use extreme care to avoid kinking and twisting the supply hoses. The supply hoses must not be taut after installation.
NOTE: If the sink installation requires that you coil the supply hoses to obtain a good connection, maintain an inside coil diameter of at least 3"(7.6 cm).
□ Carefully position the hot and cold water supplies so they will not interfere with other hoses or items below the mounting surface.
□ Connect and tighten the supply hoses to the supply stops. Left is hot, right is cold.
4. Installation Checkout
□ Verify that all connections are tight and the handles are in the OFF position.
□ Turn on the main water supply.
□ Check all connections for leaks. Repair as needed.
□ Turn both handles to the ON position and allow the water to run through the spout to remove any debris.
□ Turn both handles to the OFF position.
Installation Checkout (cont.)
NOTE: If waterflow is restricted: Using the aerator tool (provided), turn the aerator to remove it from the spout. Remove the debris, then reinstall the aerator. Retain the aerator tool for future use.




