
HL-7050N - Laser printer BROTHER - Free user manual and instructions
Find the device manual for free HL-7050N BROTHER in PDF.
| Product Type | Monochrome Laser Printer |
| Brand | Brother |
| Model | HL-7050N |
| Print Technology | Laser |
| Maximum Resolution | 1200 x 1200 dpi |
| Print Speed | Up to 20 pages per minute |
| Paper Tray Capacity | 250 sheets |
| Connectivity | USB, Ethernet (network) |
| Power Supply | 220-240V AC, 50/60Hz |
| Power Consumption | Standby: approx. 10 W, printing: approx. 400 W |
| Dimensions (W x D x H) | 400 x 350 x 300 mm |
| Weight | Approx. 15 kg |
| Supported Paper Sizes | A4, A5, Letter, Legal, Envelopes |
| Supported Paper Types | Plain paper, transparencies, labels, cardstock |
| Monthly Duty Cycle | Up to 20,000 pages |
| Maintenance | Clean rollers and replace drum and toner |
| Main Consumable | Toner cartridge (reference: TN-130) |
| Repairability | Spare parts available: rollers, fuser, power supply |
| Safety | Automatic shutdown in case of jam or open door |
| Noise | Less than 50 dB standby, 55 dB printing |
Frequently Asked Questions - HL-7050N BROTHER
User questions about HL-7050N BROTHER
0 question about this device. Answer the ones you know or ask your own.
Ask a new question about this device
Download the instructions for your Laser printer in PDF format for free! Find your manual HL-7050N - BROTHER and take your electronic device back in hand. On this page are published all the documents necessary for the use of your device. HL-7050N by BROTHER.
USER MANUAL HL-7050N BROTHER
Read this "Quick Setup Guide" before using the printer. Before you can use the printer, you must set up the hardware and install the driver.
Step 1
Setting Up Your Printer

Step 2
Installing the Driver

Setup is Complete!
For the latest driver and to find the best solution for your problem or question, access the Brother Solutions Center directly from the CD-ROM/Driver or go to http://solutions.brother.com Keep this "Quick Setup Guide" and supplied CD-ROM in a convenient place for quick and easy reference at all times.
To Use the Printer Safely

Warning
Indicates warnings that must be observed to prevent possible personal injury.

Note
Indicates cautions that must be observed to use the printer properly or prevent damage to the printer.

Hint
Indicates notes and useful tips to remember when using the printer.

User's Guide
Network
User's Guide
Indicates reference to the User's Guide or Network User's Guide which is on the CD-ROM we have supplied.

Warning

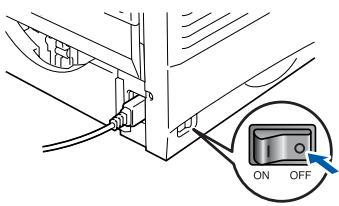
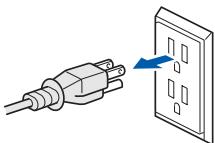
There are high voltage electrodes inside the printer. Before replacing internal parts, cleaning the printer or clearing a paper jam, make sure you have turned OFF the power switch and unplugged the power cord from the power outlet.

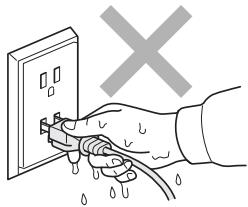
Do not handle the plug with wet hands. Doing this might cause an electrical shock.

After you have just used the printer, some internal parts of the printer are extremely hot. When you open the front cover or rear cover of the printer, never touch the shaded parts shown in the following illustration.

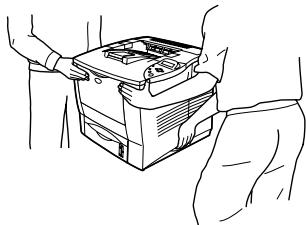
To prevent injuries, at least two people should lift the printer, holding the handles on both the right and left sides of the printer, and the front of the printer as shown in the illustration.

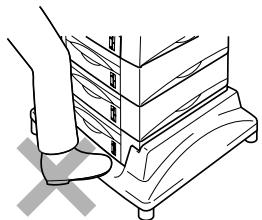
Be careful not to trip on the legs of the optional Stabilizer unit.
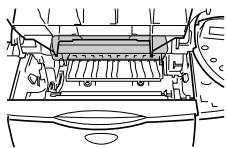
Inside the printer
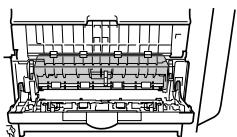
Open the face up output tray
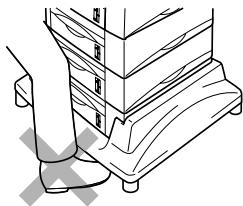

Note

Do not stand on the printer or the optional stabilizer.
Regulations 2
Getting Started
Carton Components 4
Control Panel 4
Supplied CD-ROM 5
Step 1 Setting Up Your Printer
- Remove the Protective Parts 6
- Install the Drum Unit Assembly 6
3.Load Paper in the Paper Tray 7
4.Print a Test Page 8 - Setting Your Language on the Control Panel 8
Step 2 Installing the Driver
Windows®
Macintosh®
For USB Interface Cable Users 10
- Installing the Driver and Connecting the Printer to Your PC
- Setting Your Printer as the Default Printer (For Windows® 2000/XP Users Only)
For Parallel Interface Cable Users 12
Installing the Driver and Connecting the Printer to Your PC
For Network Interface Cable Users 14
■ For Brother Peer-to-Peer Network Printer Users (LPR) 14
Installing the Driver and Connecting the Printer to Your PC
■ For Brother Peer-to-Peer Network Printer Users (NetBIOS) 16
Installing the Driver, Connecting the Cable and Configuring the NetBIOS port
■ For Network Shared Printer Users 18
Installing the Driver, Connecting the Cable and Selecting the Appropriate Printer Queue or 'Sharename'
For USB Interface Cable Users 20
For Mac® OS 8.6 to 9.2 Users 20
- Connecting the Printer to Your Macintosh & Installing the Driver
- Setting Your Printer as the Default Printer
For Mac OS X 10.1 Users 23
Connecting the Printer to Your Macintosh & Installing the BR-Script PPD File
For Network Interface Cable Users 25
For Mac OS 8.6 to 9.2 Users 25
Connecting the Printer to Your Macintosh & Installing the BR-Script PPD File
For Mac OS X 10.1 Users 26
Connecting the Printer to Your Macintosh & Installing the BR-Script PPD File
For Administrator
Network User's Guide Chapter Map 28
Setting your IP Address, Subnet Mask and Gateway
(Using the Control panel) 29
Installing the BRAdmin Professional Configuration Utility
(Windows® Users Only) 30
Print Configuration Page 30
Factory Default Setting 30
Other Information
Shipment of the Printer 31
Options 32
Troubleshooting

User's Guide Chapter 6
Regulations
Federal Communications Commission (FCC) Declaration of Conformity (For USA)
Responsible Party: Brother International Corporation
100 Somerset Corporate Boulevard
P.O.Box 6911
Bridgewater, NJ 08807-0911
USA
Telephone: (908) 704-1700
declares, that the products
Product name: Laser Printer
Model number: HL-7050 and HL-7050N
Product options: Lower Tray Unit LT-7000, Duplex Unit DX-7000,
Network Card NC-4100h, Mailbox Unit MX-7000, MX
7010
complies with Part 15 of the FCC Rules. Operation is subject to the following two conditions: (1) This device may not cause harmful interference, and (2) this device must accept any interference received, including interference that may cause undesired operation.
This equipment has been tested and found to comply with the limits for a Class B digital device, pursuant to Part 15 of the FCC Rules. These limits are designed to provide reasonable protection against harmful interference in a residential installation. This equipment generates, uses, and can radiate radio frequency energy and, if not installed and used in accordance with the instructions, may cause harmful interference to radio communications.
However, there is no guarantee that interference will not occur in a particular installation. If this equipment does cause harmful interference to radio or television reception, which can be determined by turning the equipment off and on, the user is encouraged to try to correct the interference by one or more of the following measures:
Reorient or relocate the receiving antenna.
Increase the separation between the equipment and receiver.
- Connect the equipment into an outlet on a circuit different from that to which the receiver is connected.
- Consult the dealer or an experienced radio/TV technician for help.
Important
A shielded interface cable should be used in order to ensure compliance with the limits for a Class B digital device.
Changes or modifications not expressly approved by Brother Industries, Ltd. could void the user's authority to operate the equipment.
Industry Canada Compliance Statement (For Canada)
This Class B digital apparatus complies with Canadian ICES-003.
This printer follows EN55022 (CISPR Publication 22)/Class B.
Before you use this product, make sure that you use a double-shielded interface cable with twisted-pair conductors and that it is marked "IEEE1284 compliant". The cable must not be more than 1.8 metres long.
brother
"EC" Declaration of Conformity
Manufacture
Brother Industries Ltd.,
15-1, Naeshiro-cho, Mizuho-ku,
Nagoya 467-8561, Japan
Plant
Brother Corporation (Asia) Ltd.,
Brother Buji Nan Ling Factory,
Golden Garden Ind., Nan Ling Village,
Buji Rong Gang Shenzhen, China
Plant
Brother Industries Ltd.,
Kariya Plant,
1-5, Kitajizoyama, Noda-cho,
Kariya-shi, Aichi-ken 448-0803 Japan
Herewith declare that:
Products description:
Laser Printer
HL-7050, HL-7050N
are in conformity with provisions of the Directives applied: Low Voltage Directive 73/23/EEC (as amended by 93/68/EEC) and the Electromagnetic Compatibility Directive 89/336/EEC (as amended by 91/263/EEC and 92/31/EEC and 93/68/EEC).
Standards applied:
Harmonized:
Safety:
EN60950:2000
EMC:
EN55022: 1998 Class B
EN55024:1998
EN61000-3-2: 1995 + A1: 1998 + A2: 1998
EN61000-3-3: 1995
Year in which CE marking was first affixed: 2002
Issued by: Brother Industries, Ltd.
Date: 28 March, 2002
Place: Nagoya, Japan
Signature:

Kazuhiro Dejima
Manager
Quality Audit Group
Quality Management Dept
Information & Document Company
International ENERGY STAR® Compliance Statement
The purpose of the International ENERGY STAR® Program is to promote the development and popularization of energy-efficient office equipments. As an ENERGY STAR® Partner, Brother Industries, Ltd. has determined that this product meets the ENERGY STAR® guidelines for energy efficiency.

Laser Safety (110 to 120 volt Model Only)
This printer is certified as a Class I laser product under the U.S. Department of Health and Human Services (DHHS) Radiation Performance Standard according to the Radiation Control for Health and Safety Act of 1968. This means that the printer does not produce hazardous laser radiation.
Since radiation emitted inside the printer is completely confined within protective housings and external covers, the laser beam cannot escape from the machine during any phase of user operation.
FDA Regulations (110 to 120 volt Model Only)
U.S. Food and Drug Administration (FDA) has implemented regulations for laser products manufactured on and after August 2, 1976. Compliance is mandatory for products marketed in the United States. One of the following labels on the back of the printer indicates compliance with the FDA regulations and must be attached to laser products marketed in the United States.
MANUFACTURED:
Brother Industries, Ltd.,
15-1 Naeshiro-cho Mizuho-ku Nagoya, 467-8561 Japan
This product complies with FDA radiation performance standards, 21
CFR subchapter J.
MANUFACTURED:
Brother Corporation (Asia) Ltd. Brother Buji Nan Ling Factory
Gold Garden Ind., Nan Ling Village, Buji, Rong Gang, Shenzhen, CHINA
This product complies with FDA radiation performance standards, 21
CFR Subchapter J
Caution:
Use of controls, adjustments or performance of procedures other than those specified in this manual may result in hazardous radiation exposure.
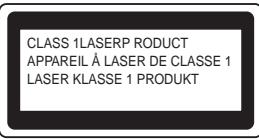
IEC 60825 specification (220 to 240 volt model only)
This printer is a Class 1 laser product as defined in IEC 60825 specifications.
The label shown below is attached in countries where it is needed.
This printer has a Class 3B laser diode which produces invisible laser radiation in the scanner unit. You should not open the scanner unit under any circumstances.
Caution:
Use of controls or adjustments or performance of procedures other than those specified herein may result in hazardous radiation exposure.
For Finland and Sweden
LUOKAN 1 LASERLAITE
KCLASS 1 LASER APPARAT
Varoitus!
Internal laser radiation
Maximum radiation power: 15 mW
Wave length:
760-810nm
Laser class:
Class I1b
(Accordance with 21 CFR Part 1040.10)
Class 3B
(Accordance with IEC 60825)
IMPORTANT - For Your Safety
To ensure safe operation the supplied three-pin plug must be inserted only into a standard three-pin power outlet that is properly grounded through the normal household wiring.
Extension cords used with this printer must be three-pin plug type and correctly wired to provide proper grounding. Incorrectly wired extension cords may cause personal injury and equipment damage.
The fact that the equipment operates satisfactorily does not imply that the power is grounded and that the installation is completely safe. For your safety, if in any doubt about the effective grounding of the power, call a qualified electrician.
Disconnect device
You must install this printer near a power outlet that is easily accessible. In case of an emergency, you must disconnect the power cord from the power outlet to shut off the power completely.
Caution for batteries
Do not replace the battery. There is a danger of explosion if the battery is incorrectly replaced. Do not disassemble, recharge or dispose of the battery in fire. Dispose of used batteries according to local regulations.
Caution for LAN connection
Connect this product to a LAN connection that is not subjected to over voltages.
IT power system (For Norway only)
This product is also designed for an IT power system with phase-to-phase voltage 230V.
Opmerking / Oplaadbare Batterij Recycle Informatie (For Netherlands Only)
Gerauschemission / Acoustic noise emission (for Germany only)
Lpa < 70 dB (A) DIN 45635-19-01-KL2
Wiring information (for UK)
Important
If the mains plug that is supplied with this printer is not suitable for your plug socket, remove the plug from the mains lead and fit an appropriate three-pin plug. If the replacement plug needs a fuse, fit the same fuse as the original.
If a moulded plug comes off the mains lead, you should destroy it because a plug with cut wires is dangerous if it is put in a live plug socket. Do not leave it where a child might find it!
If you need to replace the plug fuse, fit a fuse that is approved by ASTA to BS1362 with the same rating as the original fuse.
Always replace the fuse cover. Never use a plug that does not have a cover.
Warning - This printer must be earthed.
The wires in the mains lead are coloured in line with the following code : Green and Yellow: Earth
Blue:
Neutral
Brown:
Live
The colours of the wires in the mains lead of this printer may not match the coloured markings identifying the terminals in your plug.
If you need to fit a different plug, you should do the following.
Remove a bit of the outer cover of the lead, taking care not to damage the coloured insulation of the wires inside.
Cut each of the three wires to the appropriate length. If you can, leave the green and yellow wire longer than the others so that, if the lead is pulled out of the plug, the green and yellow wire will be the last to disconnect.
Remove a short section of the coloured insulation to expose the wires.
The wire which is coloured green and yellow must be connected to the terminal in the plug which is marked with the letter "E" or the safety earth symbol 12 , or coloured green or green and yellow.
The wire, which is coloured blue, must be connected to the terminal, which is marked with the letter "N" or coloured black or blue.
The wire, which is coloured brown, must be connected to the terminal, which is marked with the letter "L" or coloured red or brown.
The outer cover of the lead must be secured inside the plug. The coloured wires should not hang out of the plug.
Carton Components
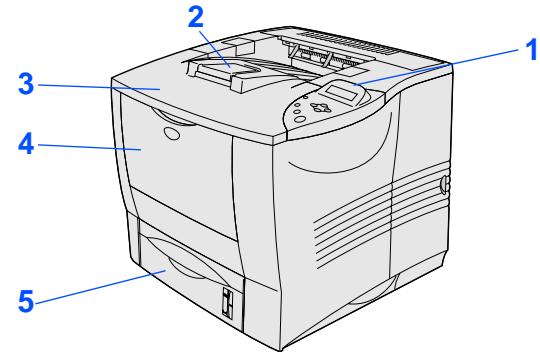
Printer
1 Control Panel
2 Extension Flap
3 Top cover
4 Multi-purpose Tray
5 Paper Tray

CD-ROM
(including User's Guide)
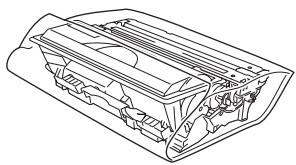
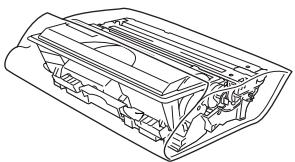
Drum Unit Assembly
(including Toner Cartridge)
Quick Setup Guide
AC Power Cord
Carton components may differ from one country to another.
Save all packing materials and the printer carton.

The interface cable is not a standard accessory. Please purchase the appropriate interface cable for the interface you intend to use (Parallel, USB or Network).
For Parallel use a shielded interface cable that is IEEE 1284-compliant.
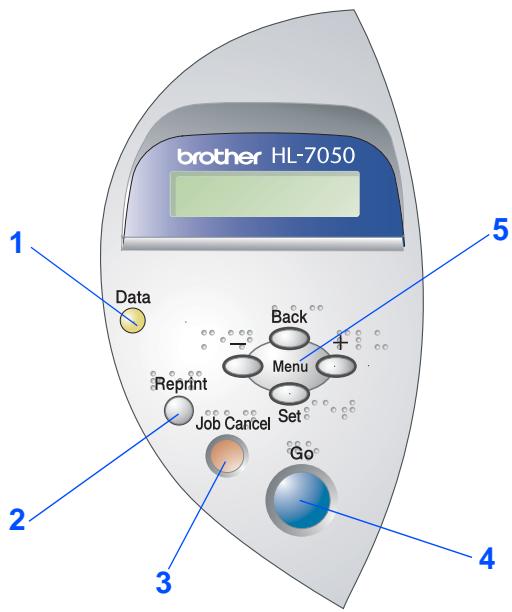
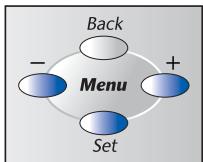
Control Panel

The control panel has a buzzer function for visually-impaired users. See Chapter 3 in the User's Guide for more information.

User's Guide Chapter 3.
1 Data LED : Orange
| On | Data remains in the printer buffer. |
| Blinking | Receiving or processing data. |
| Off | No remaining data. |
2 Reprint Button
Select the Reprint menu.

Please enhance the RAMDISK size when you want to use the Reprint functions without the optional HDD or CompactFlash.

User's Guide Chapter 4.
3 Job Cancel Button
Stop and cancel the printer operation in progress.
4 Go Button
Exit from the control panel menu.
Reprint setting or clear error messages.
Pause / Continue printing.
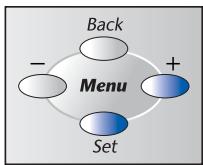
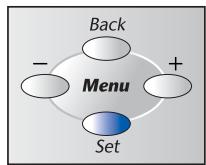
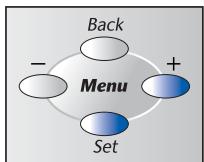
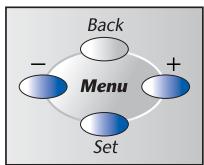
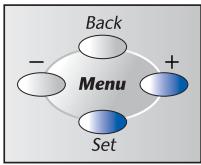
5 Menu Buttons
| + | Move forward through menus. |
| - | Move backward through menus. |
| Set | Select the Control Panel. Set the selected menus and settings. |
| Back | Go back one level in the menu structure. |
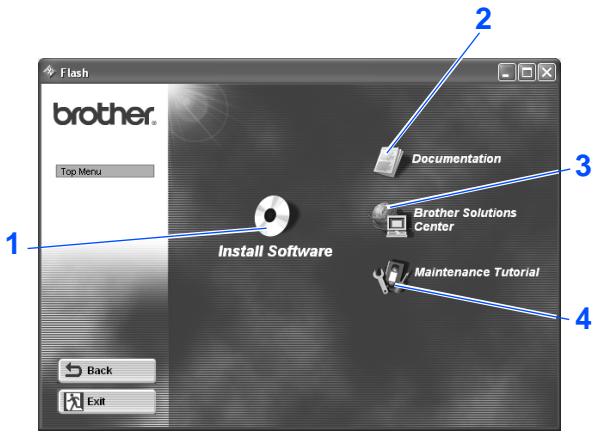
Supplied CD-ROM
You can find a variety of information on the CD-ROM.
Windows®
Macintosh®


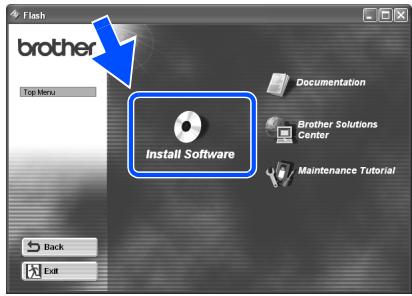
1 Install Software
Install the printer driver and utilities.
(Mac® OS X is not supported by Install Software)
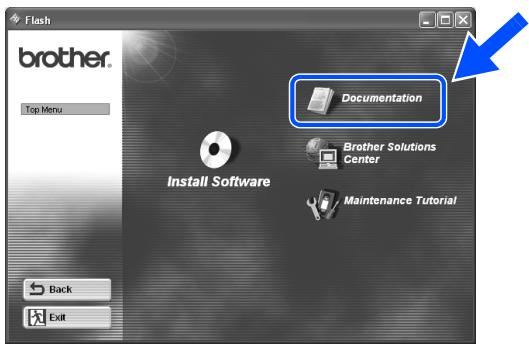
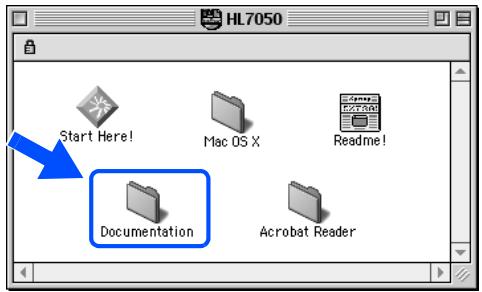
2 Documentation
View the Printer User's Guide and Network User's Guide in PDF
format. (Viewer included)
3 Brother Solutions Center
The Brother Solutions Center
(http://solutions.brother.com) is your one-stop resource for all your printer needs. Download the latest drivers and utilities for your printers, read the FAQs and troubleshooting tips, or learn about printer solutions.
4 Maintenance Tutorial
Instruction movie for printer maintenance.

For visually impaired users, we have prepared two HTML files on the supplied CD-ROM: index_win.html and index_mac.html. These files can be read by Screen Reader 'text-to-speech' software.
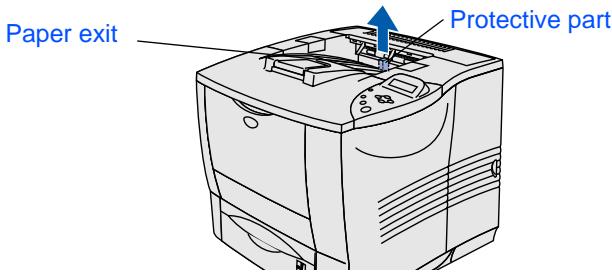
1 Remove the Protective Parts

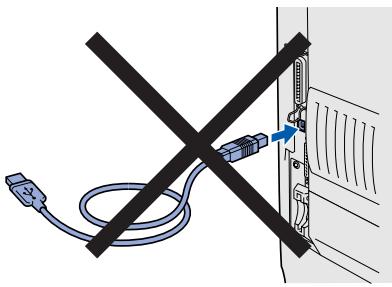
Do NOT connect the interface cable. Connecting the Interface cable is done when installing the driver.

1 Remove the protective part from the paper exit of the printer.
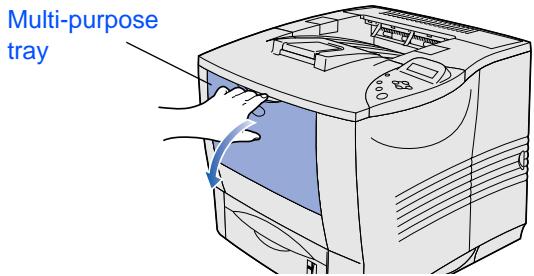
2 Open the multi-purpose tray and lower it gently.
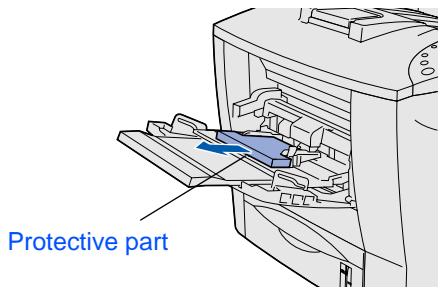
3 Remove the protective part from in the multi-purpose tray.
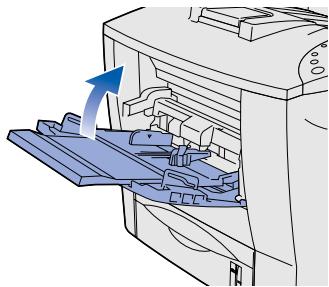
4 Close the multi-purpose tray.
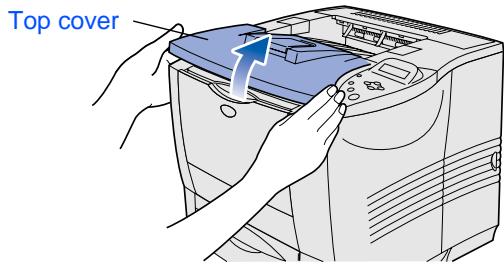
2
Install the Drum Unit Assembly
1 Open the top cover of the printer.
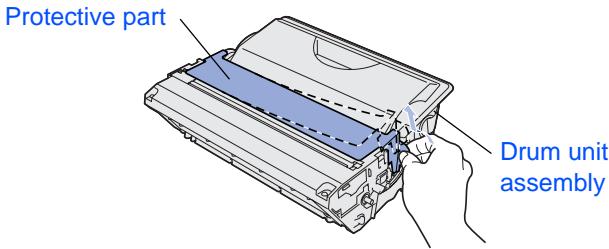
Unpack the drum unit assembly. Remove the protective part.
Rock it from side to side several times to distribute the toner evenly inside the assembly.
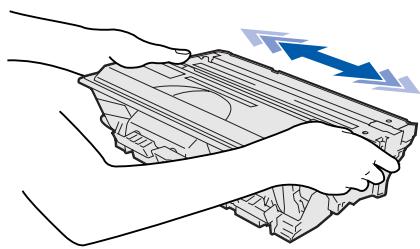
Put the drum unit assembly into the printer.

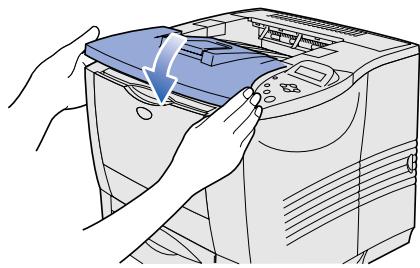
5 Close the top cover of the printer.
3 Load Paper in the Paper Tray
Pull the paper tray completely out of the printer.
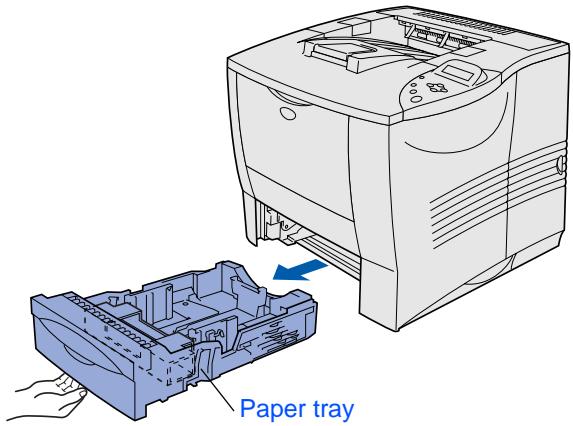
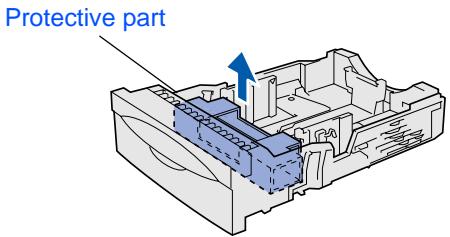
2 Remove the protective part from inside the paper tray.
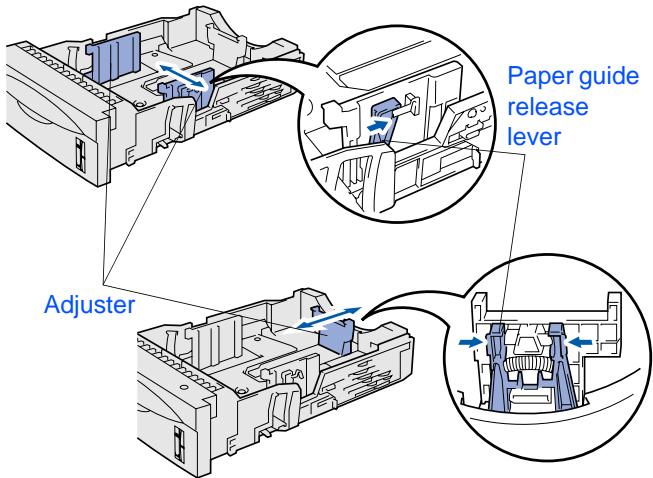
While pressing the paper guide release lever, slide the adjusters to fit the paper size. Check that they fit correctly into the slots.

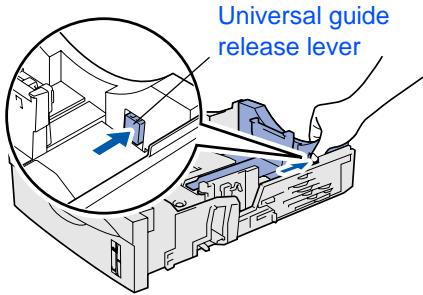
For Legal size paper, press the universal guide release button and pull out the rear of the paper tray.
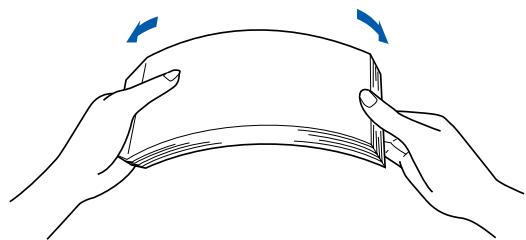
Fan the stack of paper well to avoid paper jams and misfeeds.
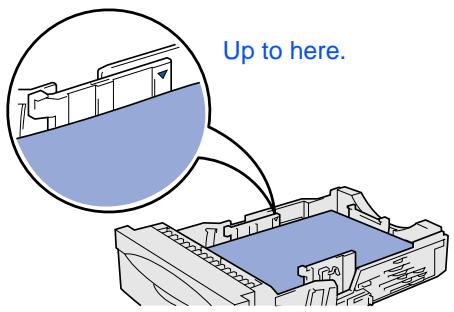
Load paper into the paper tray. Check that the paper is flat in the tray and below the maximum paper mark.
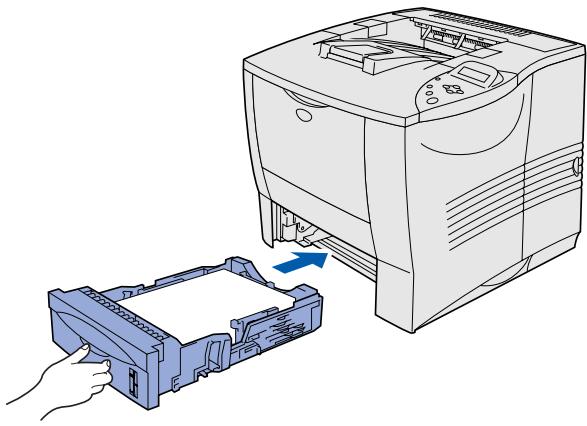
Put the paper tray back into the printer.
Go to the next page
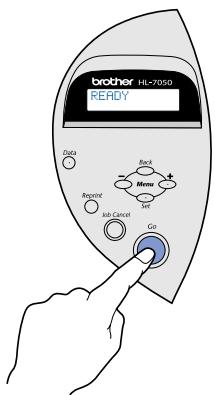
4 Print a Test Page
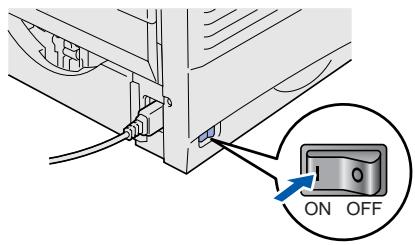
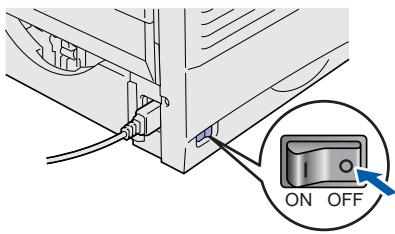
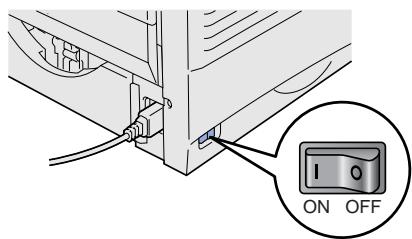
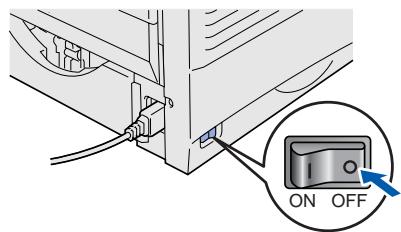
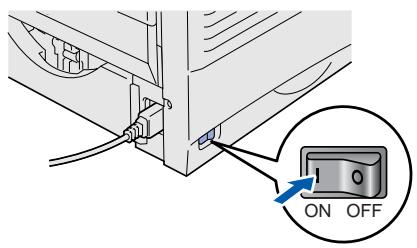
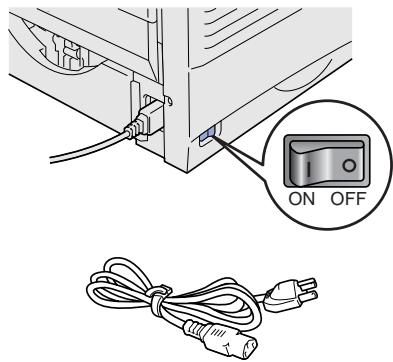
1 Make sure that the printer power switch is off.
Connect the AC power cord to the printer.
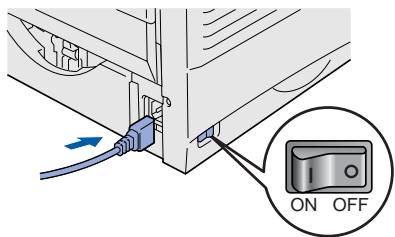
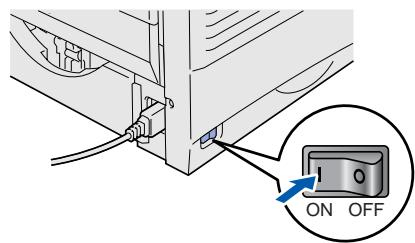
Plug the AC power cord into an AC outlet. Turn the power switch on.
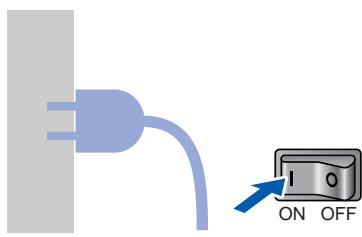
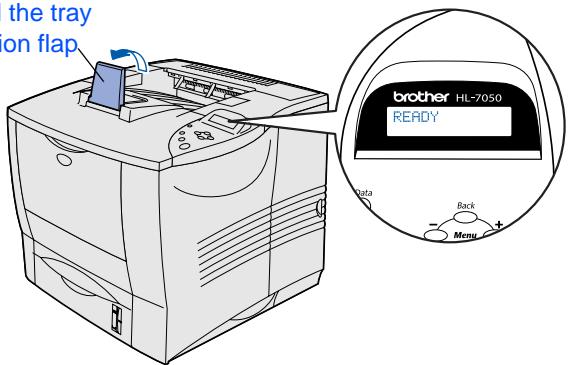
After the printer has finished warming up, the READY message appears.
Extend the tray
extension flap
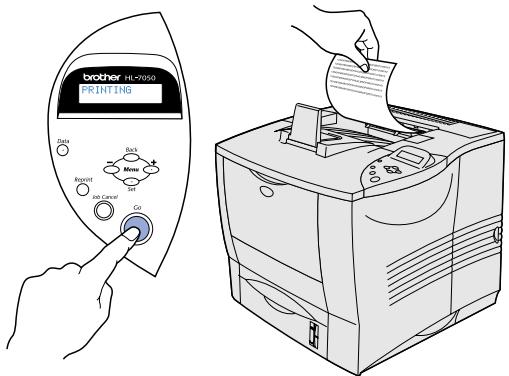
Press the Go button. The printer prints a test page.
Check that the test page has printed correctly.
5
Setting Your Language on the Control Panel
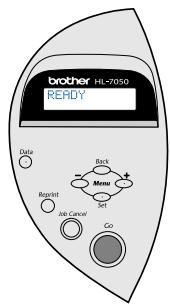
Press the ^+ button until SETUP is displayed. Press the Set button.
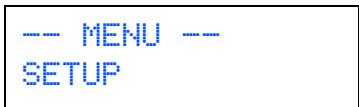
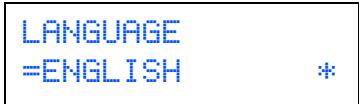
Press the Set button again.
SETUP LANGUAGE
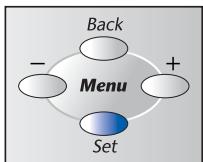
Press the + or - button to select your language. Press the Set button to accept.
Go to the next pageto install the driver.
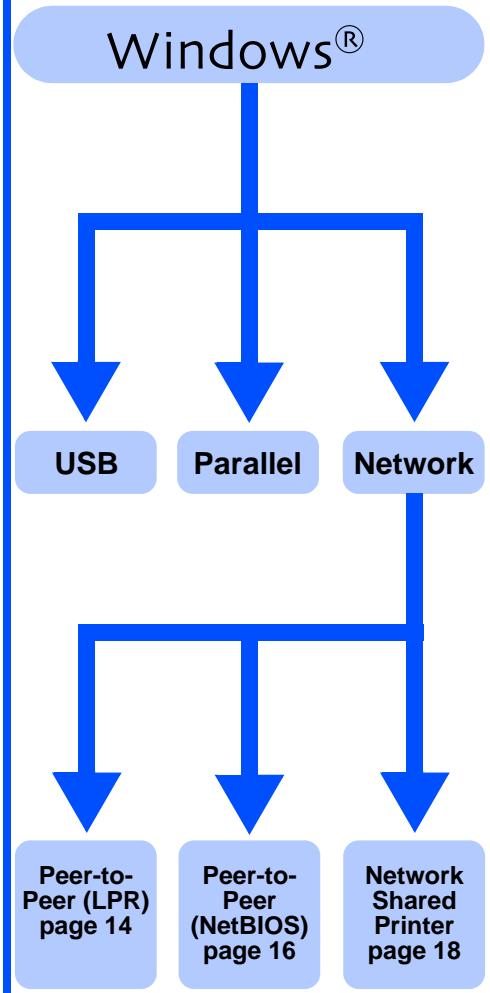
Follow the instructions on this page for your operating system and interface cable. The screens for Windows® in this Quick Setup Guide are based on Windows® XP.
| For USB Interface Cable Users......Go to page 10 | |
| For Parallel Interface Cable Users......Go to page 12 | |
| For Network Interface Cable Users | |
| ■ Brother Peer-to-Peer Network Printer Users (LPR) ....... Go to page 14 | |
| ■ Brother Peer-to-Peer Network Printer Users (NetBIOS) ....... Go to page 16 | |
| ■ Network Shared Printer Users...... Go to page 18 | |
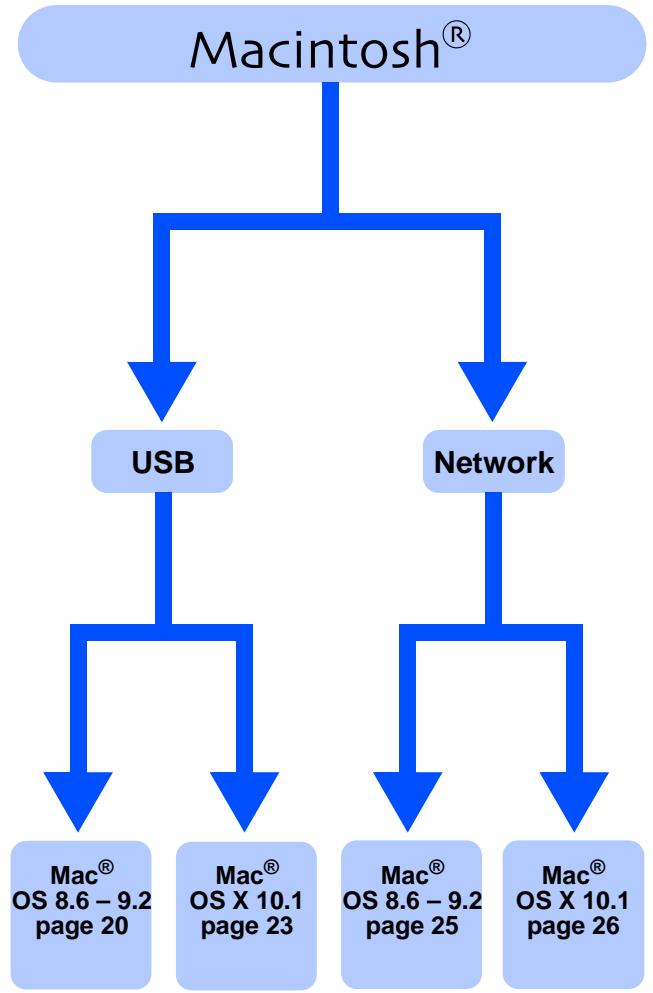
| For USB Interface Cable Users | |
| ■ Mac® OS 8.6 to 9.2 Users ....... Go to page 20 | |
| ■ Mac® OS X 10.1 Users ....... Go to page 23 | |
| For Network Interface Users | |
| ■ Mac® OS 8.6 to 9.2 Users ....... Go to page 25 | |
| ■ Mac® OS X 10.1 Users ....... Go to page 26 | |
| For Administrator .......Go to page 28 |
1. Installing the Driver and Connecting the Printer to Your PC

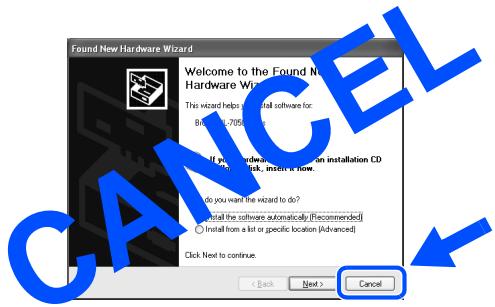
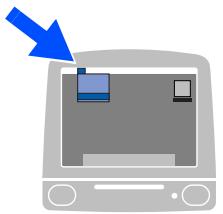
When the "Found New Hardware Wizard" appears on your PC, click the Cancel button.
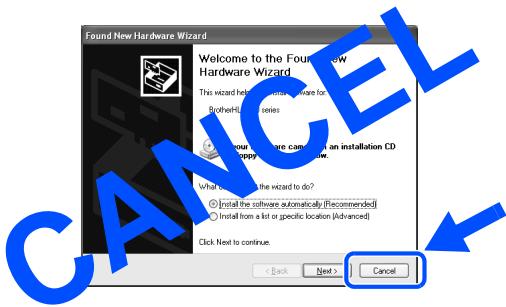
Make sure the USB interface cable is NOT connected to the printer, and then begin installing the driver. If you have already connected the cable, remove it.
2 Insert the CD-ROM into your CD-ROM drive. The opening screen will appear automatically.
Follow the instructions on the screen.

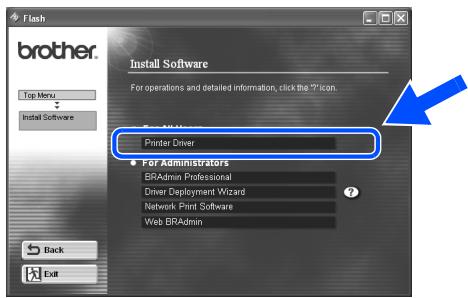
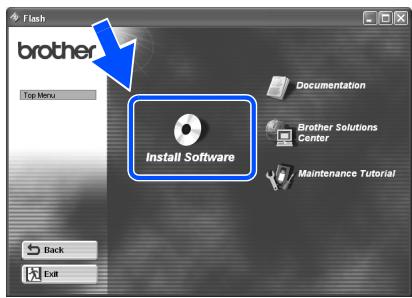
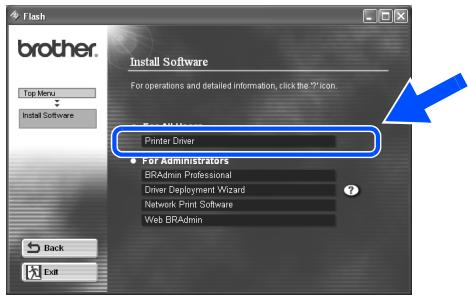
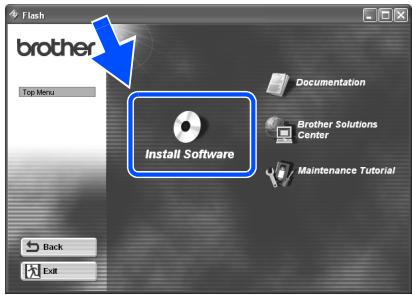
3 Click "Install Software" icon on the Menu screen.

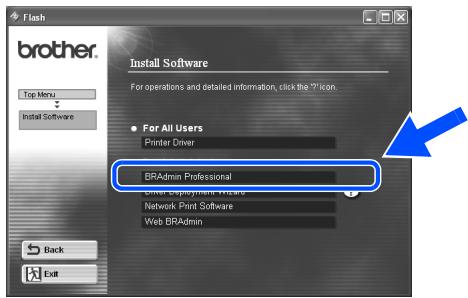
4 Click "Printer Driver."
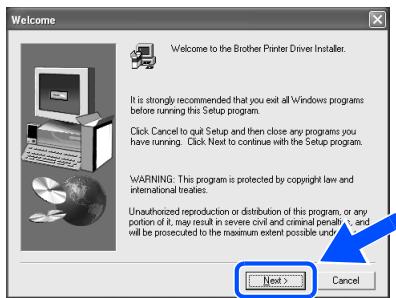
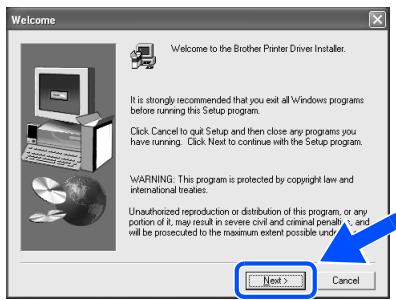
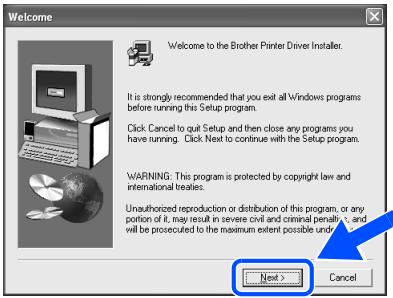
5 Click the Next button. Follow the instructions on the screen.

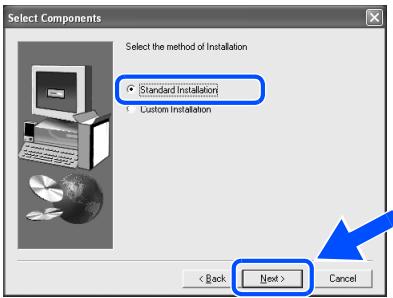
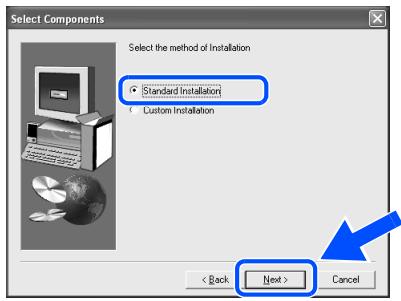
6 Select "Standard Installation," and then click the Next button.
7 Select "Local Printer with USB cable," and then click the Next button.

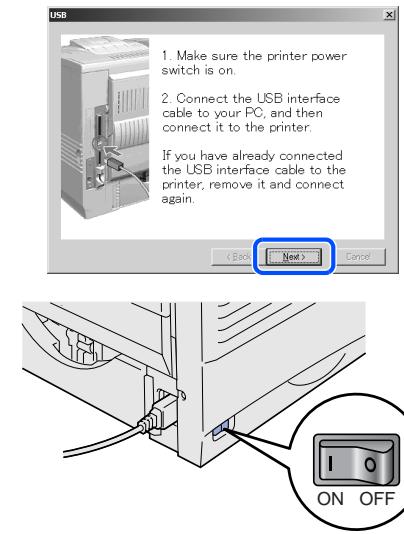
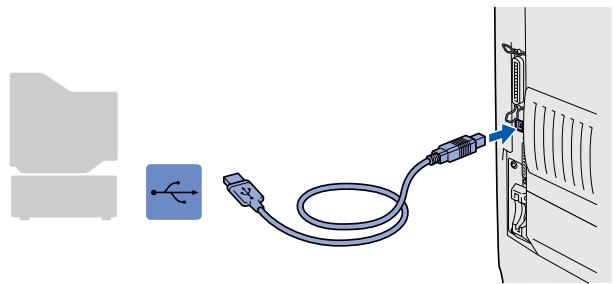
When this screen appears, make sure the printer power switch is on. Connect the USB interface cable to your PC, and then connect it to the printer. Click the Next button.
9 Click the Finish button.
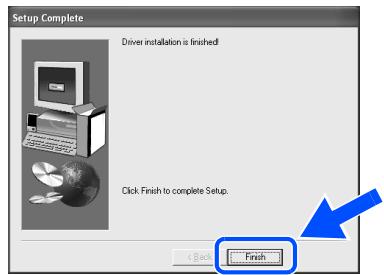
OK! For Windows® 98 / Me users: The Setup is now complete.
For Windows® 2000/XP users: Go to “2. Setting Your Printer as the Default Printer”.
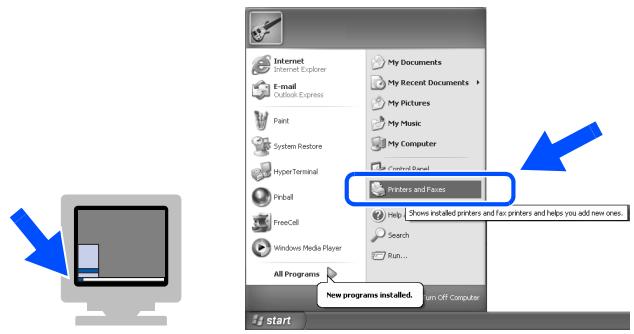
- Setting Your Printer as the Default Printer (For Windows® 2000/XP Users Only)
1 Click Start and Printers and Faxes.
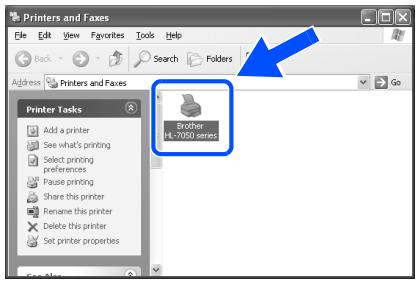
2 Select the Brother HL-7050 series icon.
3 From the File menu, select Set as Default printer.
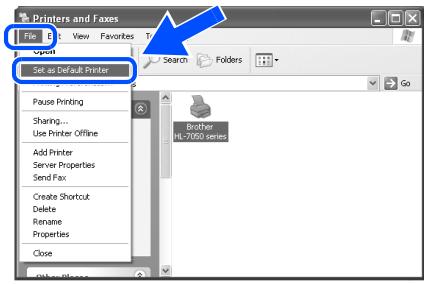
OK! The setup is now complete.
Installing the Driver and Connecting the Printer to Your PC
1 Turn off the printer power switch.

2 Connect the parallel interface cable to your PC, and then connect it to your printer.
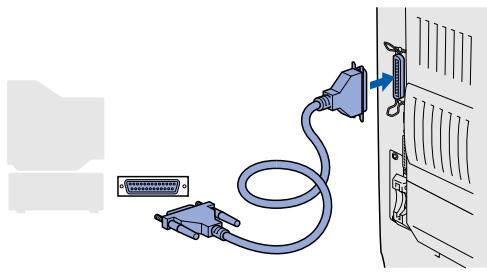
3 Turn on the printer power switch.

If the "Found New Hardware Wizard" appears on your PC, click the Cancel button.
4 Insert the CD-ROM into your CD-ROM drive. The opening screen will appear automatically.
Follow the instructions on the screen.

5 Click "Install Software" icon on the Menu screen.
6 Click "Printer Driver."

7 Click the Next button. Follow the instructions on the screen.
8 Select "Standard Installation," and then click the Next button.
9 Select "Local Printer," and then click the Next button.
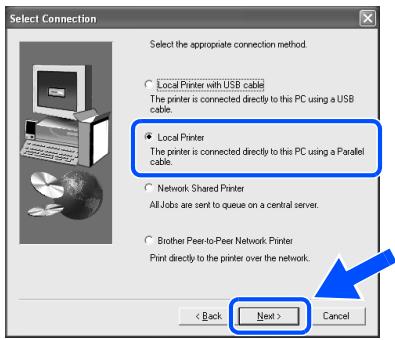
10 Select the port where your printer is connected, and then click the Next button.
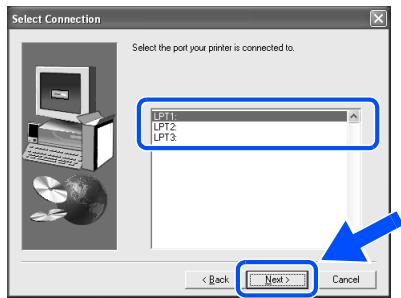
11 Click the Finish button to restart your PC.
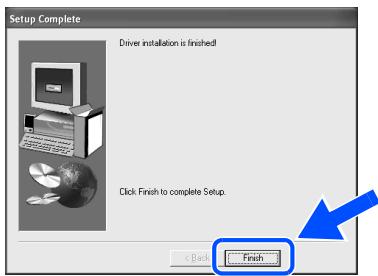
OK! The Setup is now complete.
For Brother Peer-to-Peer Network Printer Users (LPR)

If you are going to connect the printer to your network, we recommended that you contact your system administrator prior to installation.
Installing the Driver and Connecting the Printer to Your PC
1 Turn off the printer power switch.
Connect the network interface cable to the printer, and then connect it to a free port on your hub.
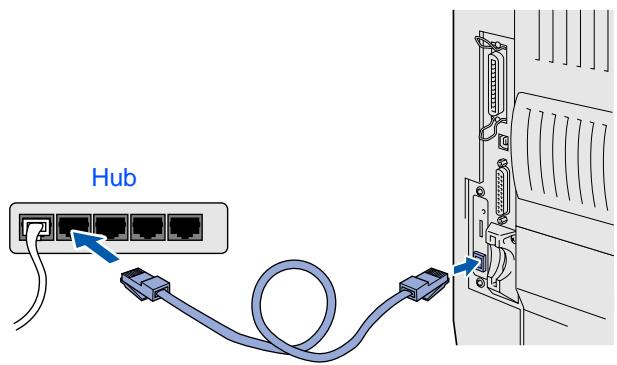
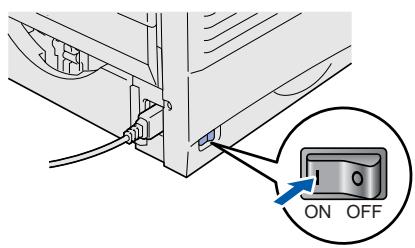
3 Turn on the printer power switch.
4 Insert the CD-ROM into your CD-ROM drive. The opening screen will appear automatically.
Follow the instructions on the screen.

5 Click "Install Software" icon on the Menu screen.
Click "Printer Driver."

7 Click the Next button. Follow the instructions on the screen.
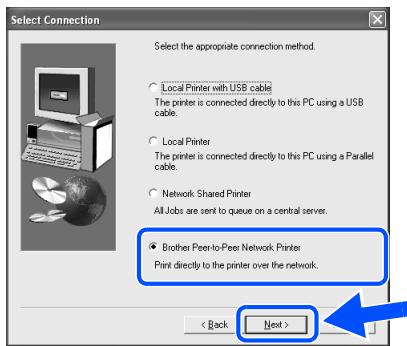
8 Select "Standard Installation," and then click the Next button.

9 Select "Brother Peer-to-Peer Network Printer," and then click the Next button.
10 Select "Search from a list of available printers" or enter your printer IP address. Click the Next button.
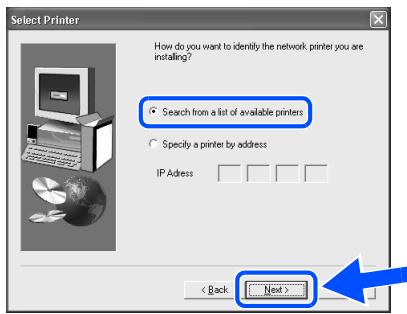

Contact your Administrator about the Printer's IP Address.
11 Select the IP address of your printer and LPR, and then click the Next button.
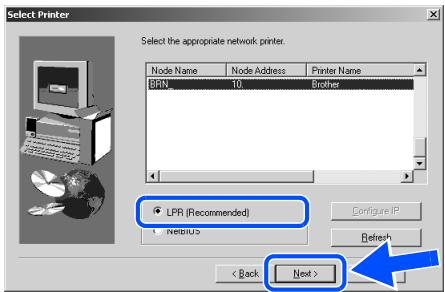
12 Click the Finish button.
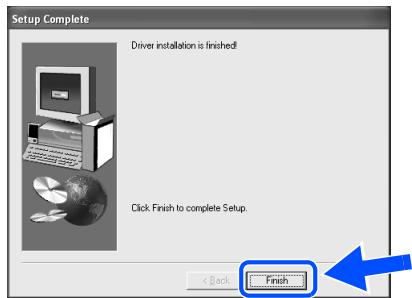
OK! For Windows NT® 4.0 and Windows® 2000/XP users: The Setup is now complete.
OK! For Windows® 95 / 98 / Me users: After your PC has restarted, setup will be complete.
For Brother Peer-to-Peer Network Printer Users (NetBIOS)

If you are going to connect the printer to your network, we recommended that you contact your system administrator prior to installation.
Installing the Driver, Connecting the Cable and Configuring the NetBIOS port
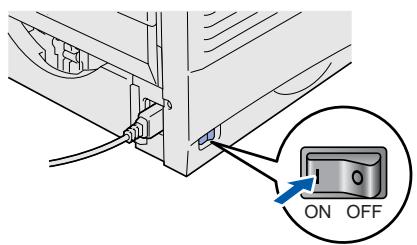
1 Turn off the printer power switch.

Connect the network interface cable to the printer, and then connect it to a free port on your hub.
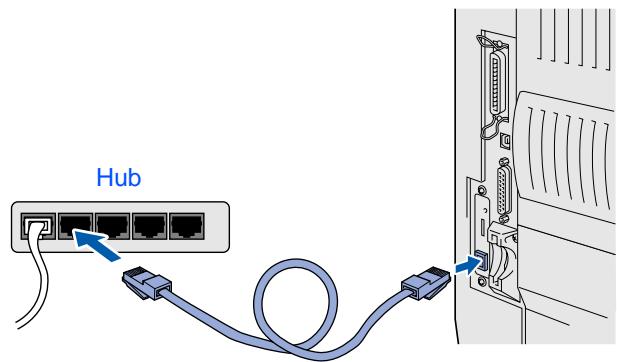
3 Turn on the printer power switch.

4 Insert the CD-ROM into your CD-ROM drive. The opening screen will appear automatically.
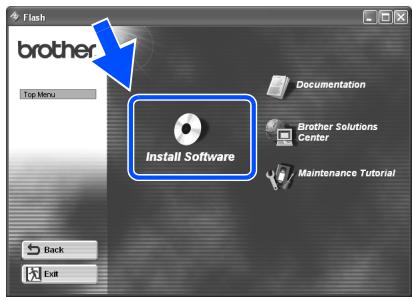
Follow the instructions on the screen.

5 Click "Install Software" icon on the Menu screen.

Click "Printer Driver."
7 Click the Next button. Follow the instructions on the screen.
8 Select "Standard Installation," and then click the Next button.

9 Select "Brother Peer-to-Peer Network Printer," and then click the Next button.

10 Select "Search from a list of available printers" or enter your printer IP address. Click the Next button.


Contact your Administrator about the Printer's IP Address.
11 Select the IP address of your printer and NetBIOS, and then click the Next button.
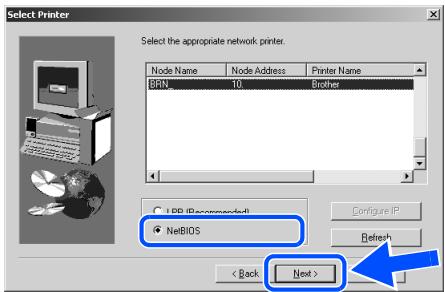
12 Click the Finish button.
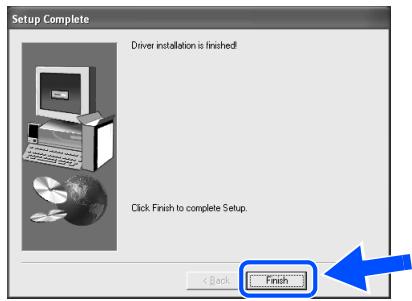
OK! For Windows NT® 4.0 and Windows® 2000/XP users: The Setup is now complete.
OK! For Windows® 95 / 98 / Me users: After your PC has restarted, setup will be complete.
For Network Shared Printer Users

If you are going to connect the printer to your network, we recommended that you contact your system administrator prior to installation.
Installing the Driver, Connecting the Cable and Selecting the Appropriate Printer Queue or 'Sharename'
1 Turn off the printer power switch.

Connect the network interface cable to the printer, and then connect it to a free port on your hub.

3 Turn on the printer power switch.
4 Insert the CD-ROM into your CD-ROM drive. The opening screen will appear automatically.
Follow the instructions on the screen.

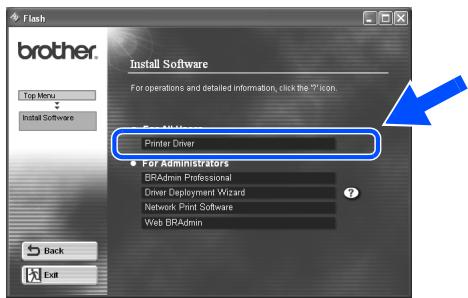
5 Click "Install Software" icon on the Menu screen.
6 Click "Printer Driver."
7 Click the Next button.
Follow the instructions on the screen.

8 Select "Standard Installation," and then click the Next button.

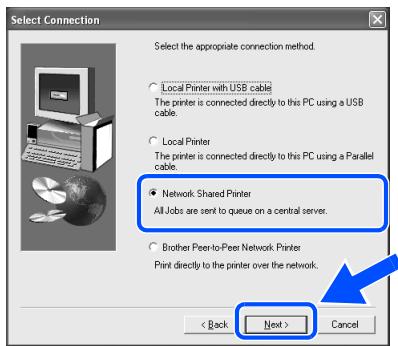
9 Select the "Network Shared Printer", and then click the Next button.
10 Select your printer's queue, and then click the OK button.
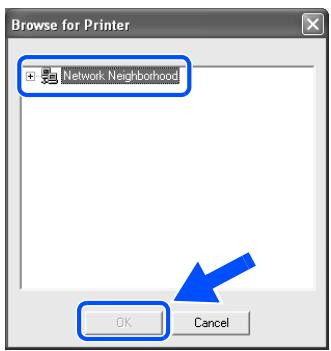

Contact your Administrator about the Printer's queue.
11 Click the Finish button.
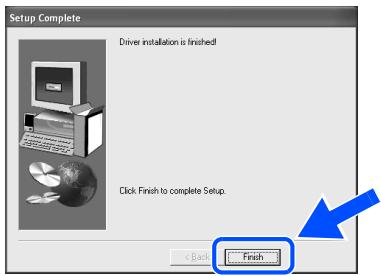
OK! The setup is now complete.
For Mac® OS 8.6 to 9.2 Users
1. Connecting the Printer to Your Macintosh & Installing the Driver
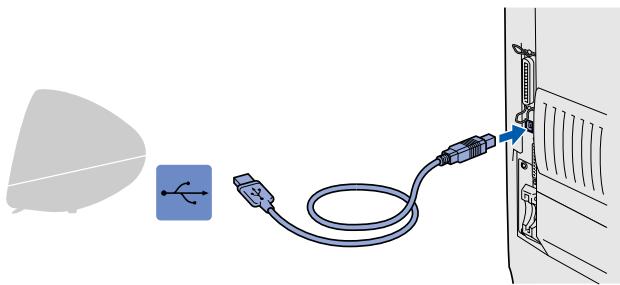
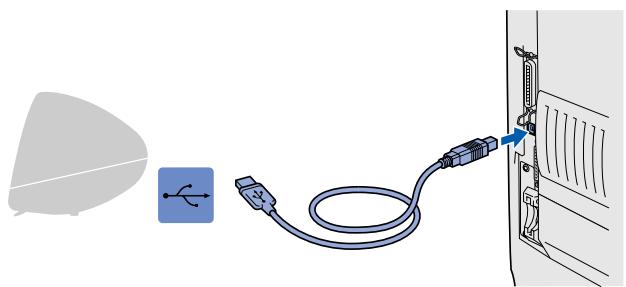
1 Make sure the printer power switch is on.

Connect the USB interface cable to your Macintosh, and then connect it to the printer.

Do not connect the USB cable to the keyboard USB Port or a non-powered USB Hub.
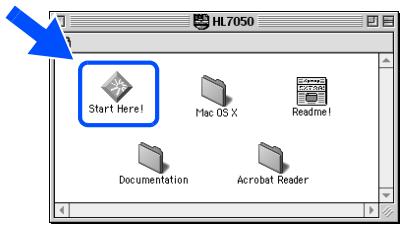
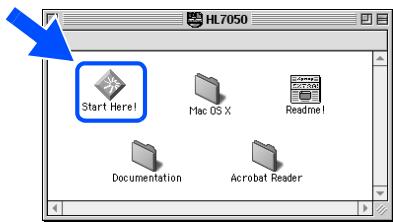
3 Insert the CD-ROM into your CD-ROM drive.

Double-click the Start Here! icon. Follow the instructions on the screen.
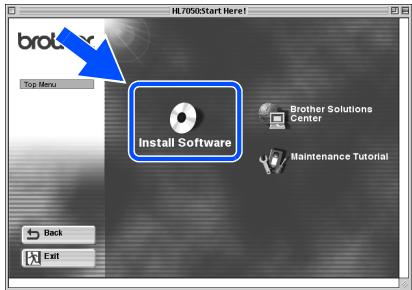
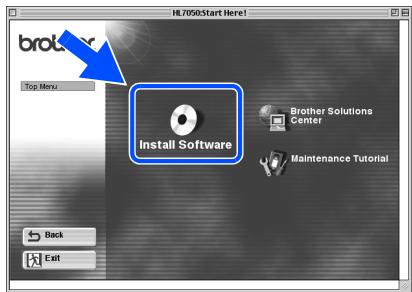
5 Click the "Install Software" icon on the Menu screen. Follow the instructions on the screen.
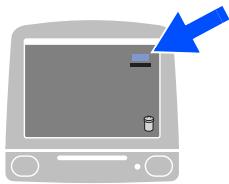
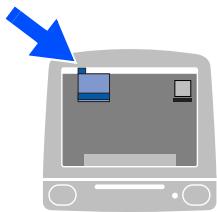
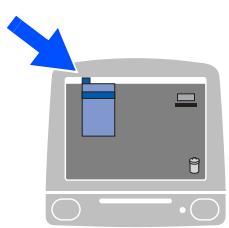
6 Open the Macintosh HD icon.
7 For Mac® OS 8.6 to 9.04 Users:
Open the Apple Extras folder.
Open the Apple LaserWriter Software folder.
For Mac® OS 9.1 to 9.2 Users: Open the Application (Mac® OS 9) folder. Open the Utilities folder.
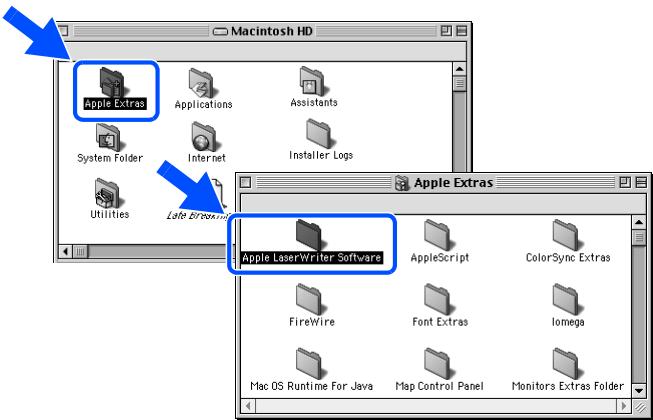
- The screens are based on Mac® OS 9.04.
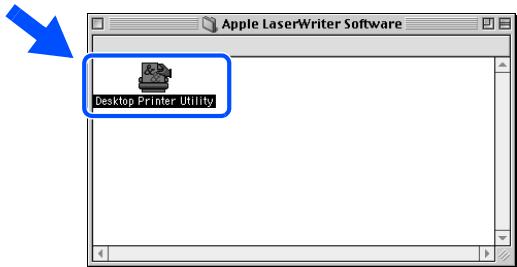
8 Open the Desktop Printer Utility icon.
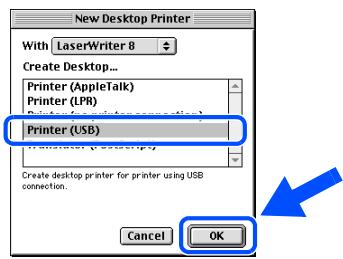
9 Select Printer (USB), and then click the OK button.
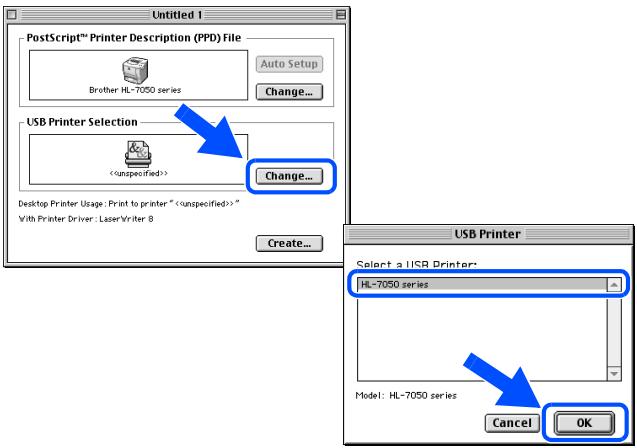
10 Click the Change... button in PostScriptTM Printer Description (PPD) file. Select Brother HL-7050 series, and then click the Select button.
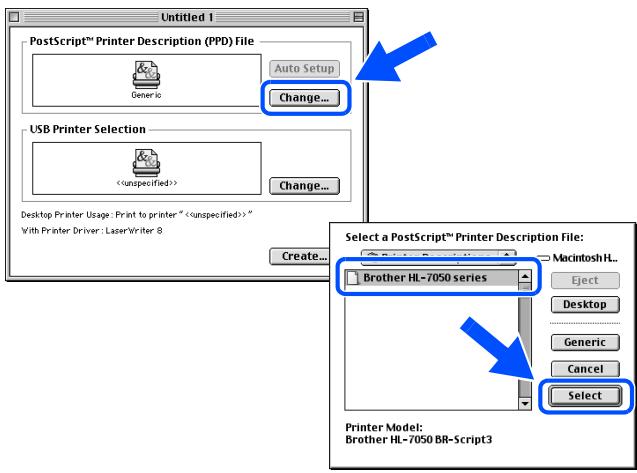
11 Click the Change... button in USB Printer Selection. Select HL-7050 series, and then click the OK button.
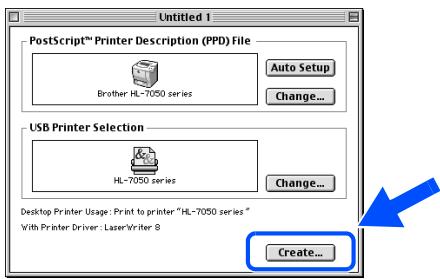
12 Click the Create... button.
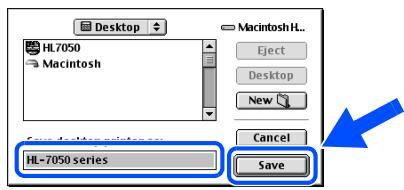
13 Enter your printer name (HL-7050 series), and then click the Save button.
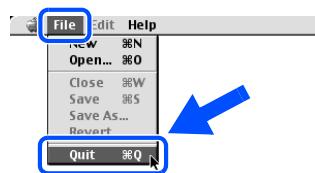
14 Select Quit from the File menu.

For Mac® OS 8.6 to 9.2 Users
2. Setting Your Printer as the Default Printer
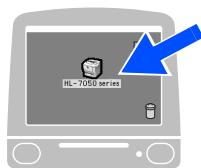
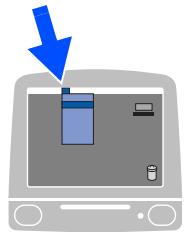
1 Click the HL-7050 series icon on the Desktop.
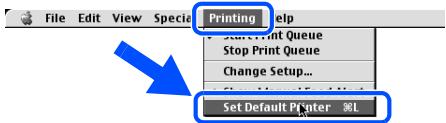
2 Select Set Default Printer from the Printing menu.

The setup is now complete.
For Mac® OS X 10.1 Users
Connecting the Printer to Your Macintosh & Installing the BR-Script PPD File
1 Make sure the printer power switch is on.
Connect the USB interface cable to your Macintosh, and then connect it to the printer.

Do not connect the USB cable to the keyboard USB Port or a non-powered USB Hub.
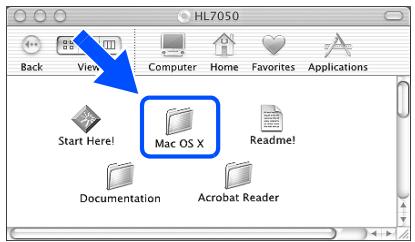
3 Insert the CD-ROM into your CD-ROM drive.
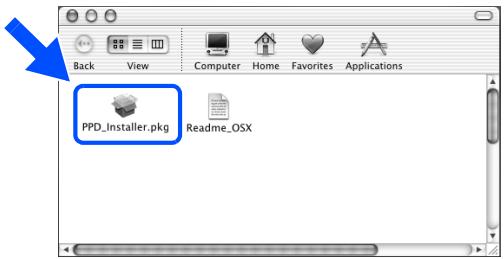
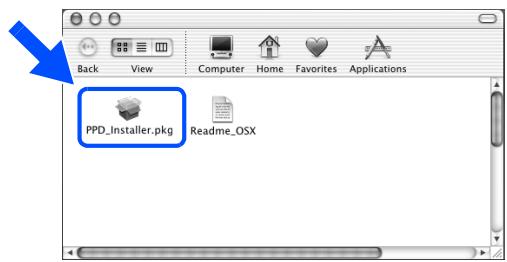
Open the Mac OS X folder.


Double-click the PPD Installer.pkg icon. Follow the instructions on the screen.
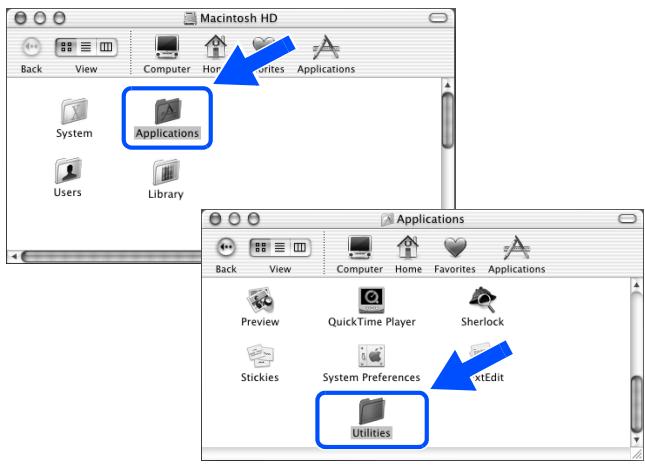
5 Open the Macintosh HD icon.
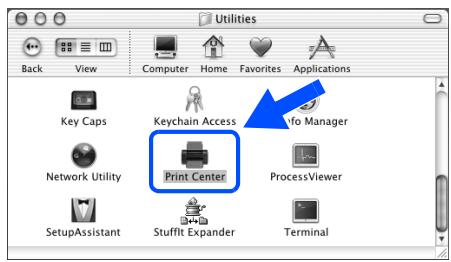
6 Open the Applications folder. Open the Utilities folder.
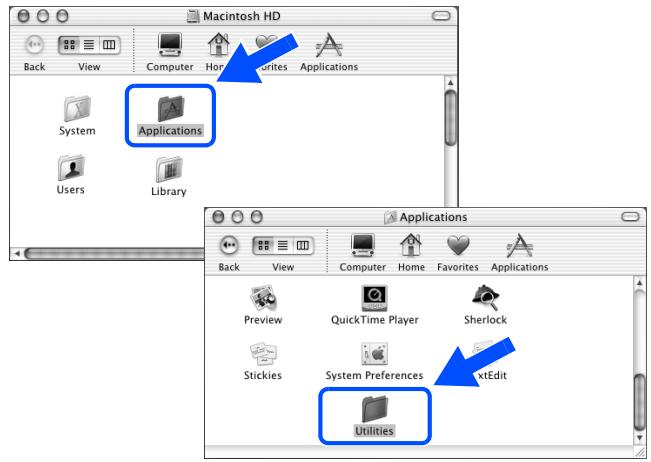
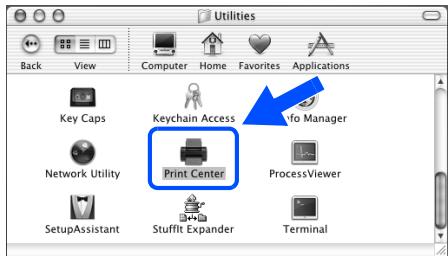
7 Open the Print Center icon.
Continue to the next page
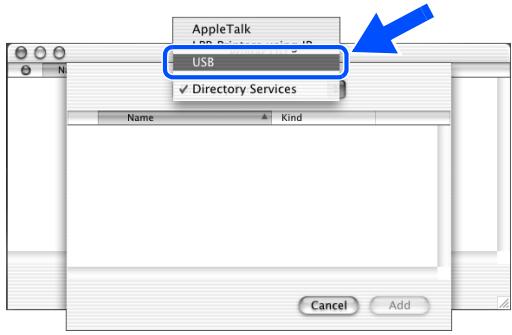
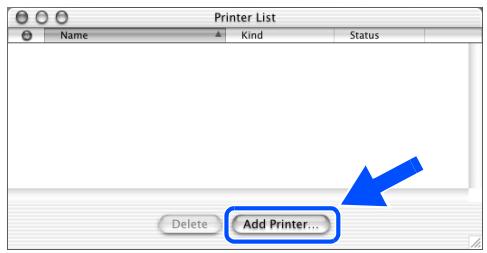
8 Click the Add Printer... button.

9 Select USB.
10 Select HL-7050 series, and then click the Add button.
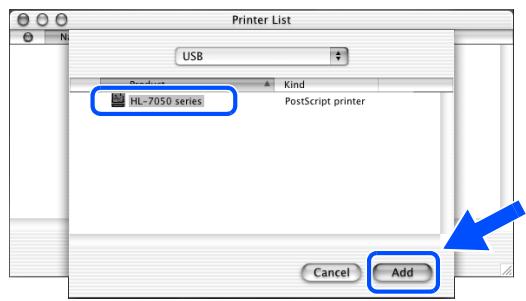
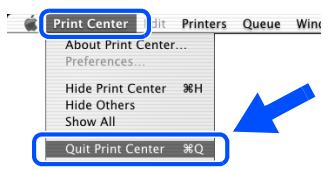
11 Select Quit Printer Center from the Printer Center menu.
OK! The setup is now complete.
For Mac® OS 8.6 to 9.2 Users
Connecting the Printer to Your Macintosh & Installing the BR-Script PPD File
1 Turn off the printer power switch.
2 Connect the network interface cable to the printer, and then connect it to a free port on your hub.

3 Turn on the printer power switch.
4 Insert the CD-ROM into your CD-ROM drive.

Double-click the Start Here! icon. Follow the instructions on the screen.
6 Click the "Install Software" icon on the Menu screen. Follow the instructions on the screen.
7 Open the Chooser from the Apple Menu.

8 Click the LaserWriter8 ^1 icon, and then select BRN_xxxxxxxxx_P1_AT. ^2 Click the Setup... button. Close the Chooser.
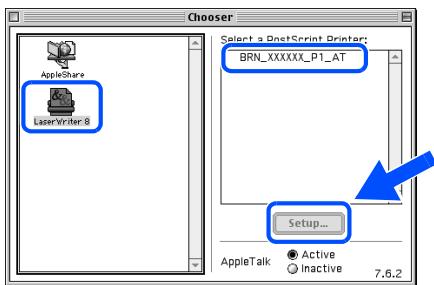
1 If the Apple LaserWriter8 Driver is not already installed on your system, you can download it from http://www.apple.com
2 xxxxxx are the last six digits of the Ethernet address.

Network User's Guide Chapter 7.

The setup is now complete.
For Mac® OS X 10.1 Users
Connecting the Printer to Your Macintosh & Installing the BR-Script PPD File
1 Turn off the printer power switch.

Connect the network interface cable to the printer, and then connect it to a free port on your hub.

3 Turn on the printer power switch.
4 Insert the CD-ROM into the CD-ROM drive. Open the Mac OS X folder.

Double-click the PPD Installer.pkg icon. Follow the instructions on the screen.
6 Open the Macintosh HD icon.
7 Open the Applications folder. Open the Utilities folder.
8 Open the Print Center icon.
9 Click the Add Printer... button.
10 Select AppleTalk.
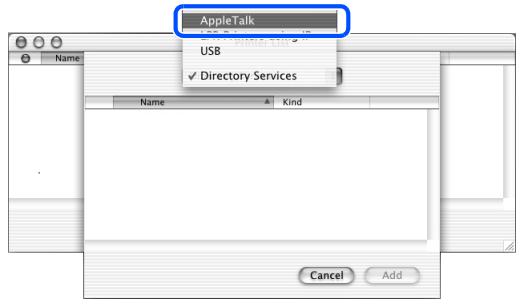
11 Select BRN_xxxxx_P1_AT ^*1 , and then click the Add button.
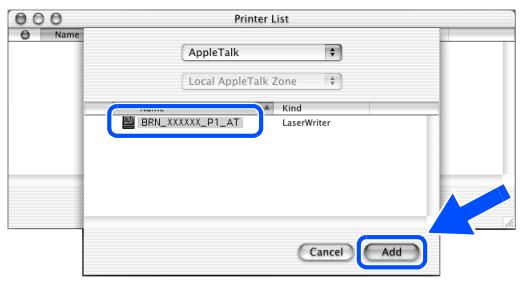
*1 xxxxxx are the last six digits of the Ethernet address.

Network User's Guide Chapter 7.
12 Select Quit Printer Center from the Printer Center menu.
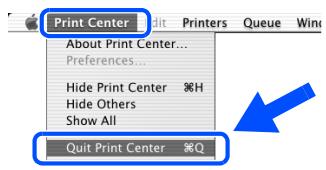
OK! The setup is now complete.
This section is for using the printer on a Network. An administrator should setup with the following steps.

For HL-7050 users: If you are going to connect the printer to your network, purchase the optional Network Board (NC-4100h).

Network User's Guide Chapter Map
Windows®
Macintosh®
| Windows® 95/98/ME | Peer-to-Peer | TCP/IP | Chapter 3 | Peer-to-Peer Printing |
| NetBIOS | Chapter 4 | NetBIOS Peer-to-Peer Printing | ||
| Brother Internet Print | TCP/IP | Chapter 5 | How to Configure Internet Print | |
| Netware | IPX/SPX | Chapter 6 | Novell Netware Printing | |
| Windows NT® | Peer-to-Peer | TCP/IP | Chapter 2 | TCP/IP Printing |
| NetBIOS | Chapter 4 | NetBIOS Peer-to-Peer Printing | ||
| DLC/LLC | Chapter 8 | DLC Printing | ||
| Brother Internet Print (NT® 4.0 only) | TCP/IP | Chapter 5 | How to Configure Internet Print | |
| Netware | IPX/SPX | Chapter 6 | Novell Netware Printing | |
| Windows® 2000/XP | Peer-to-Peer (Windows® 2000 only) | TCP/IP | Chapter 2 | TCP/IP Printing |
| NetBIOS | Chapter 4 | NetBIOS Peer-to-Peer Printing | ||
| DLC/LLC | Chapter 8 | DLC Printing | ||
| IPP (Internet Printing Protocol) | TCP/IP | Chapter 2 | TCP/IP Printing | |
| Brother Internet Print | TCP/IP | Chapter 5 | How to Configure Internet Print | |
| Netware | IPX/SPX | Chapter 6 | Novell Netware Printing | |
| UNIX/Linux | TCP/IP | Chapter 1 | UNIX Printing | |
| Macintosh® | AppleTalk | Chapter 7 | Macintosh Printing | |
| TCP/IP | Chapter 7 | Macintosh Printing | ||
| OS2 Warp Server LAN Server | TCP/IP | Chapter 2 | TCP/IP Printing | |
| NetBIOS | Chapter 4 | NetBIOS Peer-to-Peer Printing | ||
Setting your IP Address, Subnet Mask and Gateway (Using the Control panel)

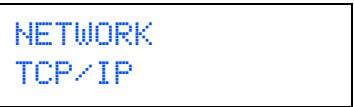
Press the + button until NETWORK is displayed.
Press the Set button.


Press the Set button again.
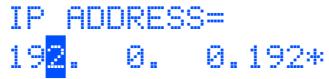
Press the + button until IP ADDRESS= is displayed.
Press the Set button.

4 Enter the IP address of the printer using the + and - buttons. Press the Set button to go to the next digit. Press the Set button to complete the IP address.
An asterisk mark (*) appears on the LCD.
Press the + button until SUBNET MASK= is displayed. Press the Set button.


6 Enter the subnet mask settings in the same way that you entered the IP address.
An asterisk mark (*) appears on the LCD.
SUBNET MASK=

日
日
日中
7 Press the + button until GATEWAY= is displayed. Press the Set button.
TCP/IP GATEWAY=
8 Enter the gateway settings in the same way that you entered the IP address.
An asterisk mark (*) appears on the LCD.
GATEWAY= 0. 0.

Press the Go button to put the printer back into its READY state.
REDO
Installing the BRAdmin Professional Configuration Utility (Windows® Users Only)
The BRAdmin Professional software is designed to manage your Brother network connected devices. For example, Brother network ready printers and Brother network ready Multifunction devices can be managed using the BRAdmin Professional software. The BRAdmin Professional software can also be used to manage devices from other manufacturers whose products support the SNMP (Simple Network Management Protocol). For more information on the BRAdmin Professional utility go to http://solutions.brother.com
1 Insert the CD-ROM into your CD-ROM drive. The opening screen will appear automatically.
Follow the instructions on the screen.

2 Click the "Install Software" icon on the Menu screen.
3 Follow the instructions on the screen. Click the "BRAdmin Professional".

The default password for the print server is 'access'. You can use the BRAdmin Professional software or a web browser to change this password.
Print Configuration Page
To print a configuration page, use a fine ball point pen to hold down the Network Test Button for less than 5 seconds.
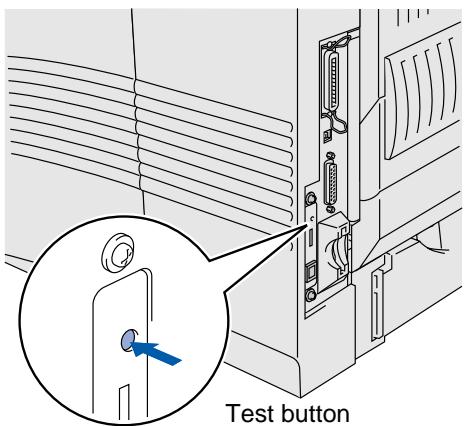
(less than 5 seconds)
Factory Default Setting
If you wish to reset the print server back to its default factory settings (resetting all information such as the password and IP address information), use a fine ball point pen to hold down the Network Test Button for more than 5 seconds.
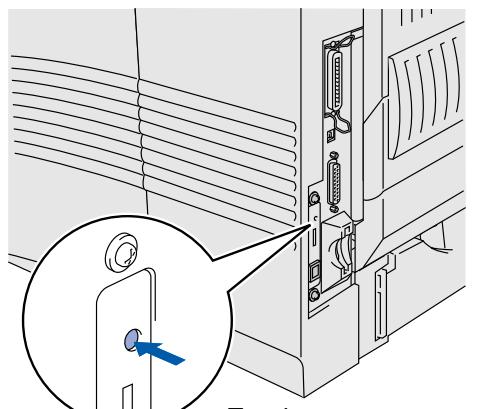
Test button
(more than 5 seconds)
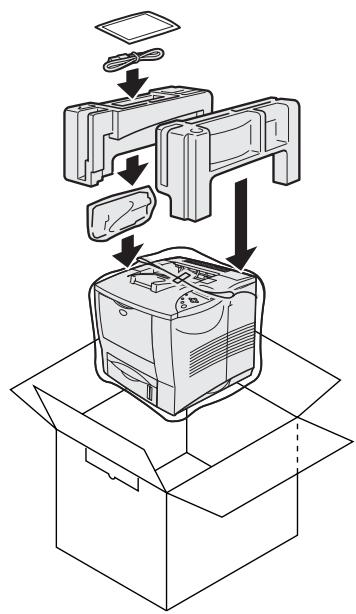
Shipment of the Printer
If for any reason you must ship your Printer, carefully package the Printer to avoid any damage during transit. It is recommended that you save and use the original packaging. The Printer should also be adequately insured with the carrier.

When shipping the Printer, the DRUM UNIT assembly including the TONER CARTRIDGE must be removed from the Printer and placed in the plastic bag. Failure to remove the unit and place it in the plastic bag during shipping will cause severe damage to the Printer and will Void THE WARRANTY.
1 Turn off the printer power switch, and then unplug the AC power cord.
Remove the drum unit assembly. Place it in the plastic bag and seal the bag completely.
3 Re-pack the printer.
Trademarks
The Brother logo is a registered trademark of Brother Industries, Ltd.
Windows® and Windows NT® are registered trademarks of Microsoft Corporation in the U.S and other countries.
Apple Macintosh, iMac, LaserWriter, and AppleTalk are trademarks of Apple Computer, Inc
HP, HP/UX, JetDirect and JetAdmin are trademarks of Hewlett-Packard Company.
UNIX is a trademark of UNIX Systems Laboratories.
Adobe PostScript and PostScript3 are trademarks of Adobe Systems Incorporated.
Netware is a trademark of Novell, Inc.
ENERGY STAR is a U.S. registered mark.
All other brand and product names mentioned in this User's Guide are registered
Compilation and Publication
Under the supervision of Brother Industries Ltd., this manual has been compiled and published, covering the latest product descriptions and specifications.
The contents of this manual and the specifications of this product are subject to change without notice.
Brother reserves the right to make changes without notice in the specifications and materials contained herein and shall not be responsible for any damages (including consequential) caused by reliance on the materials presented, including but not limited to typographical and other errors relating to the publication.
This product is designed for use in a Professional Environment.
Options
The printer has the following optional accessories. You can increase the capabilities of the printer with these items.

User's Guide Chapter 4.
| Lower Tray Unit | Stabilizer | Duplex Unit | Mailbox Unit |
| LT-7000 | SB-4000 | DX-7000 | MX-7000 series |
| You can install up to three 500 sheet Lower tray units. | When you install 3 Lower trays units and Mailbox unit, you must install the optional stabilizer. | The Duplex unit is an optional device that allows you to print on both sides of a page. | The Mailbox unit allows you to sort or direct output to any bin. |
| Network Board (For HL-7050 only) | Compact Flash Card | DIMM Memory | HDD |
| NC-4100h | HD-EX | ||
| If you are going to connect the printer to your network, purchase the optional Network board. | The printer accepts a CompactFlash card for saving macros, print jobs, fonts and print logs. | You can expand the memory up to 288 MB by installing (100-pin DIMM) memory modules. | With the HDD installed you can save macros, print jobs, fonts and print logs. |
| Ir-DA Interface | Font Package | Barcode Font |
| IR-1000 | BS-3000 | BT-1000 |
| The IR-1000 connects to the parallel interface for infrared wireless printing. | The optional font package (BS-3000) is the CD-ROM you need for installing the 136 PS3 Agfa and TrueType Fonts. | The optional Barcode fonts package (BT-1000) is the CD-ROM you need for installing the Barcode Fonts. |