
KU8071K2 - Fridge Atag - Free user manual and instructions
Find the device manual for free KU8071K2 Atag in PDF.


User questions about KU8071K2 Atag
0 question about this device. Answer the ones you know or ask your own.
Ask a new question about this device
Download the instructions for your Fridge in PDF format for free! Find your manual KU8071K2 - Atag and take your electronic device back in hand. On this page are published all the documents necessary for the use of your device. KU8071K2 by Atag.
USER MANUAL KU8071K2 Atag
Description of the appliance. 10
Disposal notes. 10
Safety instructions and warnings 11
Range of appliance use. 11
Climate rating 12
Setting up 12
Electrical connection 12
Door opening mechanism (TipOpen) 12
Operating and control elements. 13
Switching the appliance on and off 13
Setting the temperature. 13
Fan 13
Door open alarm. 13
Temperature alarm 14
Set-up mode 14
Interior light. 15
Air exchange with activated charcoal filter 15
Labels 16
Storage diagram. 16
Cleaning 16
Removing and inserting the wooden shelves. 17
Malfunctions 17
Shutting your appliance down 17
Disposal notes
The appliance contains reusable materials and should be disposed of properly - not simply with unsorted household refuse. Appliances which are no longer needed must be disposed of in a professional and appropriate way, in accordance with the current local regulations and laws.
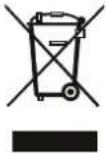
When disposing of the appliance, ensure that the refrigerant circuit is not damaged to prevent uncontrolled escape of the refrigerant it contains (data on type plate) and oil.
- Disable the appliance.
- Pull out the mains plug.
- Cut through the connection cable.
WARNING
Danger of suffocation due to packing material and plastic film!
Do not allow children to play with packaging material.
Take the packaging material to an official collection point.
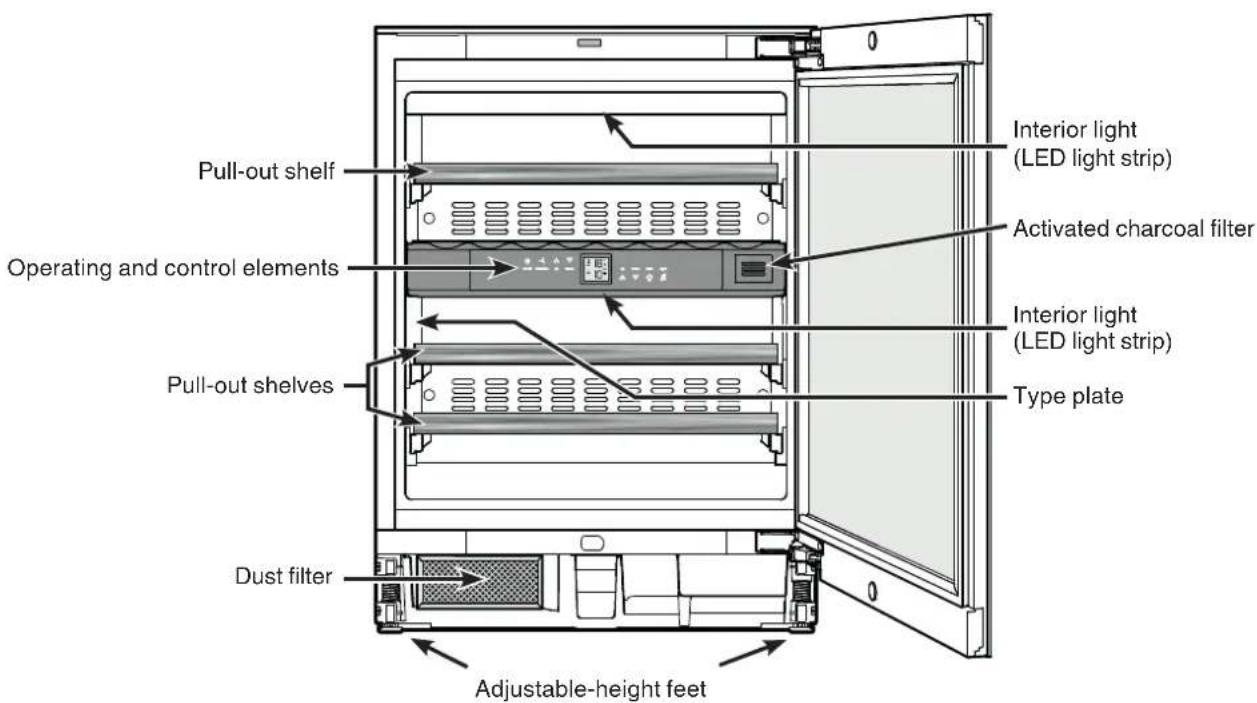
Description of the appliance
Safety instructions and warnings
- To prevent injury or damage to the unit, the appliance should be unpacked and set up by two people.
- In the event that the appliance is damaged on delivery, contact the supplier immediately before connecting to the mains.
- To guarantee safe operation, ensure that the appliance is set up and connected as described in these operating instructions.
- Disconnect the appliance from the mains if any fault occurs. Pull out the plug, switch off or remove the fuse.
- When disconnecting the appliance, pull on the plug, not on the cable.
- Any repairs and work on the appliance should only be carried out by the customer service department, as unauthorised work could prove highly dangerous for the user. The same applies to changing the mains power cable.
- Do not allow naked flames or ignition sources to enter the appliance. When transporting and cleaning the appliance, ensure that the refrigerant circuit is not damaged. In the event of damage, make sure that there are no ignition sources nearby and keep the room well ventilated.
- Do not stand on the plinth, drawers or doors or use them to support anything else.
- This appliance can be used by children of 8 years old and over, and also by persons with restricted physical, sensory or mental capacity or lack of experience and knowledge, if they are supervised or have been instructed on safe use of the appliance and understand the resulting risks. Children must not be allowed to play with the appliance. Cleaning and user maintenance must not be carried out by children without supervision.
- Avoid prolonged skin contact with cold surfaces or chilled/frozen food. This could cause pain, numbness and frostbite. In the case of prolonged skin contact, protective measures should be taken, e.g. gloves should be worn.
-
Do not consume food which has been stored for too long, as it could cause food poisoning.
-
Do not store explosives or sprays using combustible propellants such as butane, propane, pentane, etc. in the appliance. Electrical components might cause leaking gas to ignite. You may identify such sprays by the printed contents or a flame symbol.
- Do not use electrical appliances inside the appliance.
- If you have a lockable appliance, do not keep the key near the appliance or within reach of children.
- The appliance is designed for use in enclosed areas. Do not operate the appliance outdoors or in areas where it is exposed to splash water or damp conditions.
- The LED light strips illuminate the interior of the appliance. They are not suitable for lighting a room.
- When transporting or operating the appliance at an altitude of more than 1500m above sea level, the glass pane in the door can break due to the reduction in air pressure. Broken fragments are sharp-edged and can cause serious injury.
Range of appliance use
The appliance is suitable solely for storing wine in a domestic environment or similar. This includes, for example, use
- in staff kitchenettes, bed and breakfast establishments,
- by guests in cottages, hotels, motels and other forms of accommodation,
- in catering and similar services in the wholesale trade.
Use the appliance solely as is customary within a domestic environment. All other types of use are inadmissible.
The appliance is not suitable for storing and cooling medicines, blood plasma, laboratory preparations or similar substances and products covered by the 2007/47/EC Medical Devices Directive. Any misuse of the appliance may result in damage to or spoilage of stored goods.
Furthermore, the appliance is not suitable for operation in potentially explosive atmospheres.
Climate rating
The climate rating indicates the room temperature at which the appliance may be operated in order to achieve full refrigeration performance.
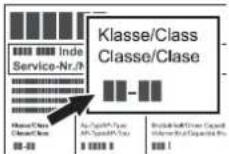
The climate rating is indicated on the type plate.
The position of the type plate is shown in the section entitled Description of the appliance.
Climate rating Room temperature
SN +10^ to +32^
N +16°C to +32°C
ST +16^ to +38^
T +16°C to +43°C
SN-ST +10^ to +38^
SN-T +10^ to +43^
Do not operate the appliance outside the specified room temperature range.
Setting up
- Avoid positioning the appliance in direct sunlight or near cookers, radiators and similar sources of heat.
- Standard EN 378 specifies that the room in which you install your appliance must have a volume of 1m^3 per 8g of R 600a refrigerant used in the appliance, so as to avoid the formation of inflammable gas/air mixtures in the room where the appliance is located in the event of a leak in the refrigerant circuit. The quantity of refrigerant used in your appliance is indicated on the type plate on the inside of the appliance.
- Do not cover ventilation openings or grille.
Electrical connection
Only operate the appliance with alternating current (AC).
The permissible voltage and frequency are indicated on the type plate. The position of the type plate is shown in the section entitled Description of the appliance.
The socket must be properly earthed and protected by a fuse.
The tripping current of the fuse must be between 10 A and 16 A.
The socket must not be situated behind the appliance and must be easily accessible.
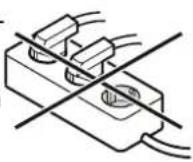
Do not connect the appliance using an extension cable or extension socket.
Do not use stand-alone inverters (conversion of direct current to alternating/three-phase current) or energy-saving plugs. Risk of damage to the electronic control system!
Door opening mechanism (TipOpen)
The TipOpen function is disabled when the appliance is delivered.
The TipOpen function must be enabled after installation in the recess by pressing the On/Off button.
Opening the door
Push the door slightly inwards on the top left-hand side and release again.
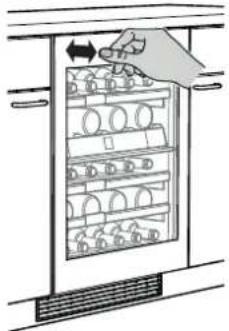
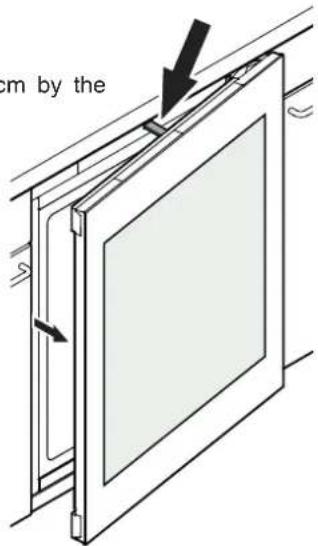
The door is opened approx. 7 cm by the push rod.
The door can then be fully opened.
Note
The door will close again automatically after approx. 3 seconds if it has not been fully opened.
Note on door opening cycles
If the door is closed, it can only be opened again using the TipOpen function after 3 seconds.
Important notes
Do not operate the appliance near magnetic fields or place magnetic objects near the appliance.
The door may otherwise open when you do not want it to.
Do not block the door or hold on to it while it is opening.
If the door is blocked or held open during opening, the internal safety coupling will be activated.
Loud, repeated cracking noises will be heard.
Do not push the push rod in or hold on to it during closing.
If the push rod is blocked during closing, it will no longer be able to reach its initial position.
In the initial position, the push rod is flush with the front of the appliance.
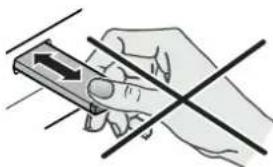
Setting the push rod back in its initial position
Disconnect the appliance from the mains, wait for approx. 5 seconds and plug it back in again.
The push rod returns to its initial position.
Operating and control elements
The electronic control panel has the new "touch capacitance technology". Any function can be activated by touching the corresponding icon.
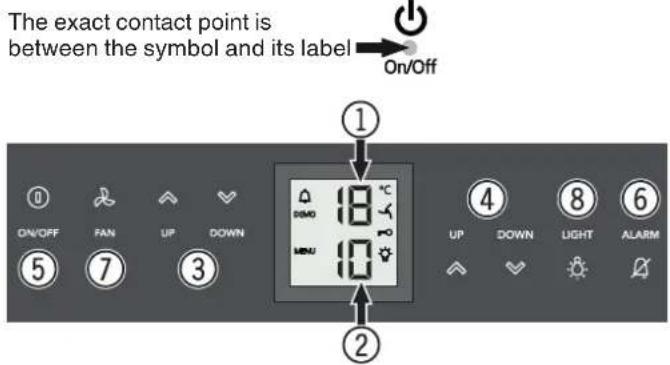
① Upper compartment temperature display
② Lower compartment temperature display
③ Upper compartment temperature setting buttons
Lower compartment temperature setting buttons
⑤ On/Off button (switching the appliance on and off)
⑥ Audible warning On/Off button
⑦ Fan switch
⑧ Interior light On/Off button
Symbols in the display
Alarm (symbol flashes if the temperature inside the appliance is too high or too low)
DEMO Demo mode is activated
MENUsetupmodeisactivatedactivatingthechildlockand adjusting the display brightness
The interior fan runs constantly
Child lock is activated
The interior light is switched on constantly
Switching the appliance on and off
Switching the appliance on

Press the On/Off button until the temperature display lights up.
ON/OFF
Switching the appliance off
Keep the On/Off button pressed for approx. 3 seconds so that the temperature display goes out.
Setting the temperature
The temperature of both compartments can be set separately.
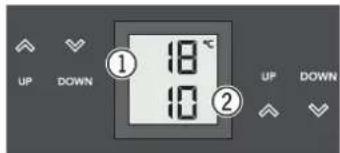
① Upper compartment
② Lower compartment
Reducing the temperature
Press the Down button.
Increasing the temperature
Press the Up button.
- When pressing one of the buttons for the first time, the display will start to flash.
- Pressing this button again enables you to change the temperature setting.
- The electronic control system will switch over automatically about 5 seconds after the last time you pressed the button, and the actual temperature will be displayed.
The temperature can be set at between +5^ and +20^ .
The following drinking temperatures are recommended for the various types of wine.
Red wines: +14°C to +20°C
Rose wines: +10°C to +12°C
White wines: +8^ C to +12^ C
Sparkling wines,Prosecco: +7^ to +9^
Champagne: +5^ to +7^
If you are storing wine for long periods of time, it should be stored at a temperature of between +10^ and +12^ .
Fan
The interior fan ensures a constant and even interior temperature and a suitable climate for wine storage.
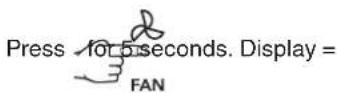
The humidity in the appliance can be increased even further by activating the Ventilation button. This has a particularly positive effect for long-term storage.

FAN
The increased level of humidity prevents the corks from drying out.
Door open alarm
If the door is left open for more than 60 seconds, the audible warning signal will sound.
If the door must be opened for a lengthy period to place items into the appliance, cancel the audible warning signal by pressing the Alarm button.
ALARM

The alarm switches back to standby when the door is shut.
Temperature alarm
If the temperatures in the interior are out of the permitted range, the audible warning signal will sound and the temperature display will flash.
- Cancel the audible warning signal by pressing the Alarm button.
After a lengthy power failure, the temperature in the interior may have risen to too high a level. After the power supply returns, the fall in temperature can be watched on the display.
The temperature display will stop flashing as soon as the temperature in the interior has reached the set value.
Temperature alarm after a fault in the appliance
If the appliance develops a fault, the temperature in the interior may rise too high or fall too low. The audible warning signal will sound and the temperature display will flash.
- Cancel the audible warning signal by pressing the Alarm button.
If the temperature displayed is too high (warm), first check whether the door is closed correctly.
If the temperature display continues to show a value that is too high or too low after one hour, contact the customer service department.
If F1, F8, E1, E2, E7 or E8 appears in the display, the appliance has suffered a fault.
In this case, contact the customer service department.
Set-up mode
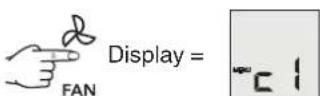
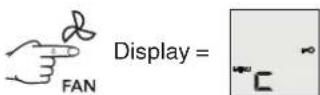
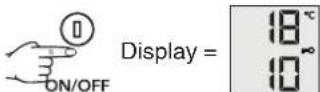
In set-up mode, you can set the child lock and adjust the brightness of the display. The child lock is designed to protect the appliance from being switched off and the temperature setting from being changed accidentally.
Activating the child lock

Deactivating the child lock
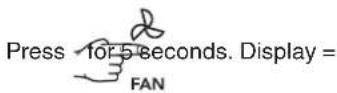

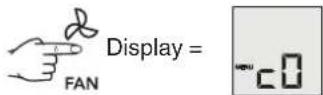
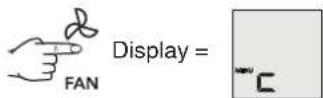
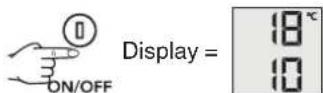
Adjusting the display brightness

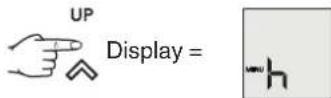

Use buttons Up and Down to select the desired setting.
h0 = display lighting off
h1 = minimum brightness
h5 = maximum brightness

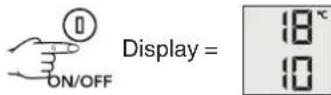
The adjusted brightness will be activated after one minute.
Note
If a button is pressed, the display lights up for one minute at maximum brightness.
When commissioning the appliance, the adjusted brightness will only be active once the set interior temperature of the appliance has been reached.
Interior light
The interior of the appliance is lit by an LED light strip at the top of each compartment.
The interior light will always switch on when the appliance door is opened. The interior light will go out approx. 5 seconds after the door is closed.
LIGHT
Press the Light button if you want the interior light to be on even when the door is closed.

Note
This function applies to the lighting of both compartments.
Furthermore, the brightness of the lighting can be adjusted.
-
Press the Light button.
-
Press and hold the Light button and at the same time press the temperature setting buttons to increase or decrease the brightness.
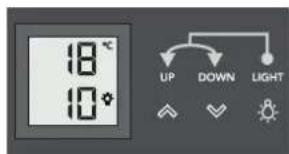
Note: The brightness will change in all compartments.
The light intensity of the LED light corresponds to laser class 1/1M.
Important
The light cover may only be removed by customer service staff.
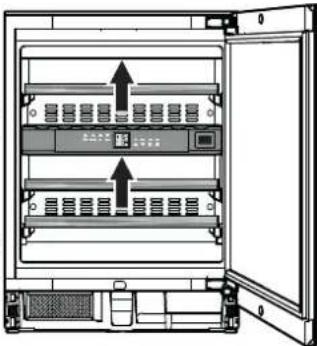
If the cover is removed, do not look directly at the light through optical lenses from close distance. This can damage your eyes.
Air exchange with activated charcoal filter
The way in which wines continue to mature depends on the ambient conditions.
The quality of the air is therefore decisive for preserving the wine.
We recommend that you replace the illustrated filter once a year. Filters can be obtained from your dealer.
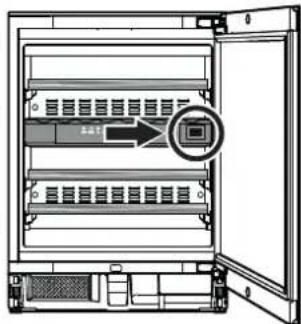
Changing the filter
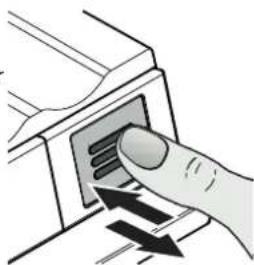
- Push the filter in and release it again.
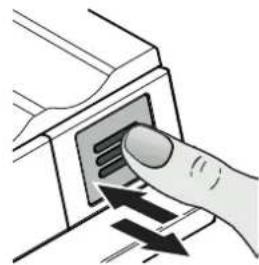
- Pull out the filter.
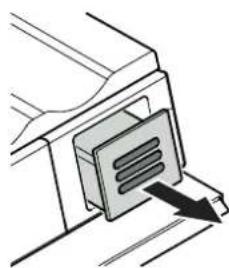
- Remove the back part of the filter.
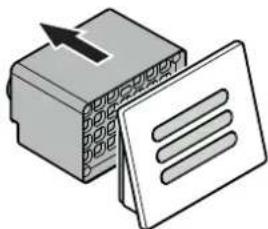
- Fit the new filter to the cover.
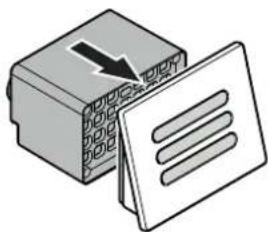
- Insert the filter, push it in as far as it will go and then release it again.
The filter is automatically locked into place. You will hear a click.
Labels
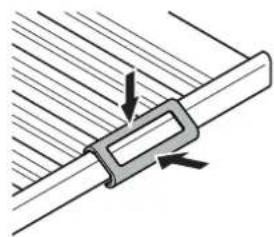
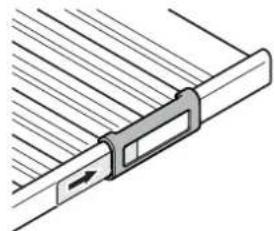
The appliance is supplied with a label holder with labels for each shelf.
Use these to label the type of wine stored on each shelf.
Additional labels can be obtained from your dealer.
Click the label holder into place and slide the label in from the side.
Storage diagram
for 0.75 | Bordeaux bottles to standard NF H 35-124
Number of bottles
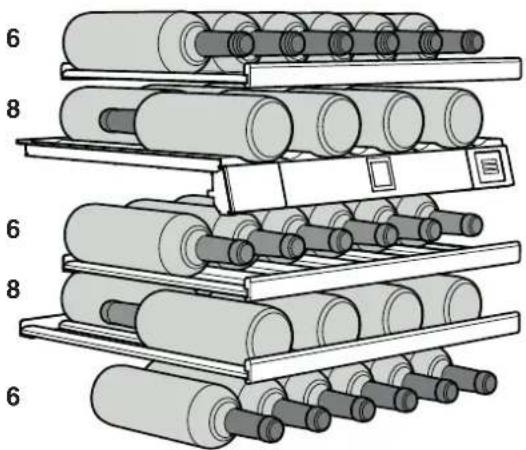
Total 34 bottles

Important
The maximum load per wooden shelf is 25kg
Cleaning
Before cleaning, always switch off the appliance. Disconnne from the mains or switch off or unscrew the fuse.
- Clean the inside and outer walls with lukewarm water and a little detergent. Do not use abrasive or acid cleaners or chemical solvents.
- Use a glass cleaner to clean the glass surfaces and a commercially available stainless-steel cleaning agent for the stainless-steel surfaces.
Do not use steam cleaners because of the risk of injury and damage.
- Ensure that no cleaning water penetrates into the electrical components or ventilation grille.
- Do not damage or remove the type plate on the inside of the appliance. It is very important for servicing purposes.
Cleaning the dust filter
The dust filter in the appliance plinth must be cleaned at least once a year.
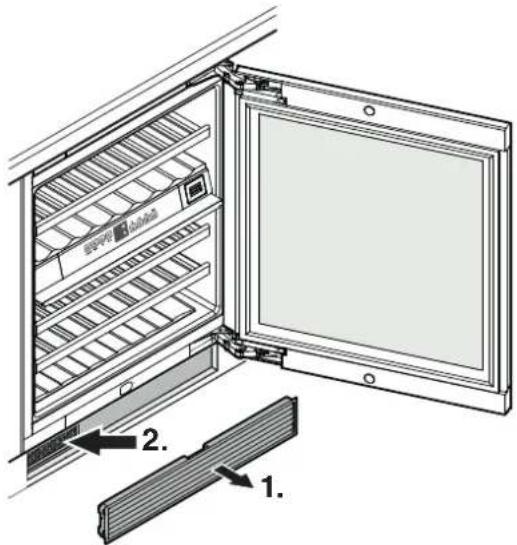
- Remove the ventilation grille from the unit plinth.
- Clean the dust filter using a vacuum cleaner.
- Re-fit the ventilation grille.
Removing and inserting the wooden shelves
The wooden shelves can be removed for easier cleaning of the inside of the appliance.
Removing the wooden shelf
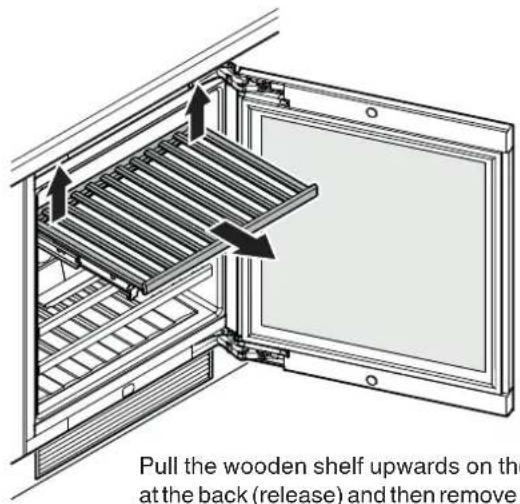
Pull the wooden shelf upwards on the right and left at the back (release) and then remove it towards you.
Inserting the wooden shelf
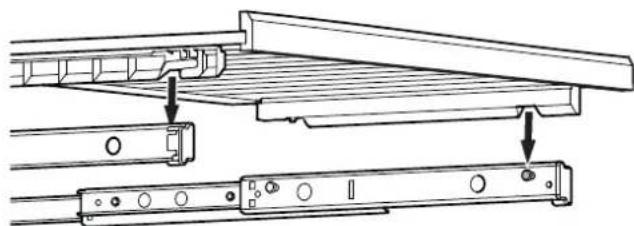
Extend the pull-out rails as far as they will go. Place the front recesses of the wooden shelf on the securing pins.
Slide the wooden shelf together with the pull-out rails into the appliance as far as they will go.
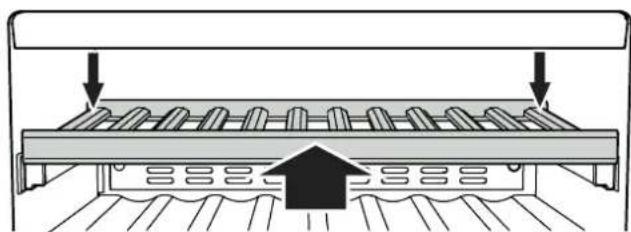
Push the wooden shelf right to the back so that it clicks into place at the front.
Push the wooden shelf downwards on the right and left at the back and click into place.
Malfunctions
F1, F8, E1, E2, E7 or E8 appears in the display.
- The appliance has suffered a fault. Contact the customer service department.
- The fans inside the appliance are running although the fan function has been deactivated and the compressor (refrigeration unit) is idle.
- This is a normal operating state depending on the set interior temperature and ambient temperature at the place of installation.
You may be able to rectify the following faults by checking the possible causes yourself.
-
Appliance does not function:
-
Is the appliance switched on?
- Is the plug correctly fitted in the mains socket?
-
Is the fuse intact?
-
When inserting the mains plug, the refrigeration unit does not switch on, but a value is shown in the temperature display.
-
Demo mode is activated. Contact the customer service department.
-
Loud running noise:
-
Is the appliance set up firmly on the floor?
- Does the appliance cause nearby items of furniture or objects to vibrate? Please note that noises caused by the refrigerant circuit cannot be avoided.
The temperature is not low enough:
- Is the temperature setting correct (see "Setting the temperature")?
- Does the separately installed thermometer show the correct reading?
Is the ventilation system working properly? - Is the dust filter in the appliance plinth soiled? See section entitled "Cleaning the dust filter".
- Is the appliance set up too close to a heat source?
If none of the above causes apply and you cannot rectify the fault yourself, contact the nearest customer service department stating the type designation ① ,service number ② and appliance number ③ as indicated on the type plate.
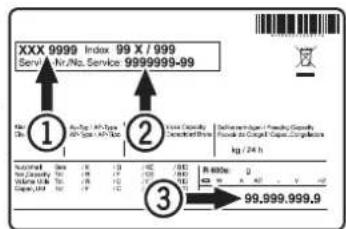
The position of the type plate is shown in the section entitled Description of the appliance.
Shutting your appliance down
If your appliance is to be shut down for any length of time, switch it off and disconnect the plug or switch off or unscrew the fuse.
Clean the appliance and leave the door open in order to prevent unpleasant smells.
The appliance complies with the relevant safety regulations and EU Directives 2014/30/EU and 2014/35/EU.
ATAG - www.atag.nl