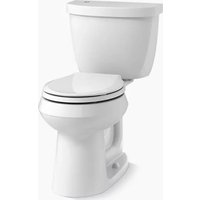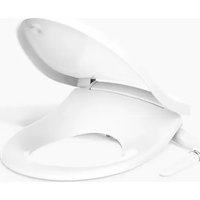
PureWash K-76923 - Toilet KOHLER - Free user manual and instructions
Find the device manual for free PureWash K-76923 KOHLER in PDF.


User questions about PureWash K-76923 KOHLER
0 question about this device. Answer the ones you know or ask your own.
Ask a new question about this device
Download the instructions for your Toilet in PDF format for free! Find your manual PureWash K-76923 - KOHLER and take your electronic device back in hand. On this page are published all the documents necessary for the use of your device. PureWash K-76923 by KOHLER.
USER MANUAL PureWash K-76923 KOHLER
Installation and Users Guide
Cleansing Seat
K-5724, K-76923
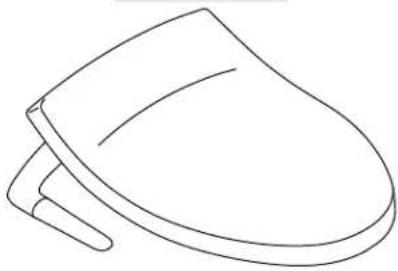
natural_image
Line drawing of a toilet with handle and seat (no text or symbols)natural_image
Line drawings of two wrench and screwdriver tools (no text or symbols)Before You Begin

WARNING: Riskofscalding. High water temperature can cause severe burns. Do not connect this device to a water supply with a maximum temperature above 104^ F ( 40^ C).
□ Observe all local plumbing, electrical, and building codes.
☐ Only connect the seat to a cold water supply of drinking quality at a pressure of 20 (139 kPa) - 80 psi (551 kPa).
1263904-2-C 2 Kohler Co.
text_image
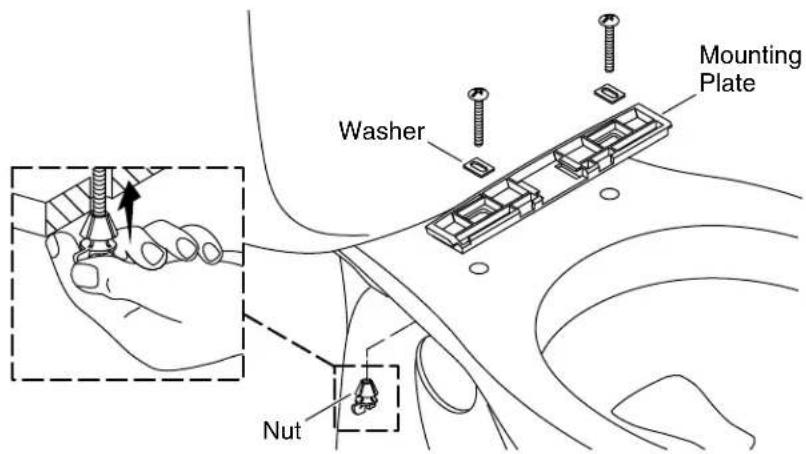
Mounting Plate Washer Nut1. Install the Mounting Plate
☐ Position the mounting plate over the mounting holes on the bowl.
□ Position the washers to rest in the openings of the mounting plate.
☐ Insert each bolt through the mounting plate and into the mounting holes.
NOTE: The nut should not be threaded onto the bolt. It will not tighten by threading it into place.
☐ While holding the bolts in place, push a nut up onto each bolt as far as possible.
text_image
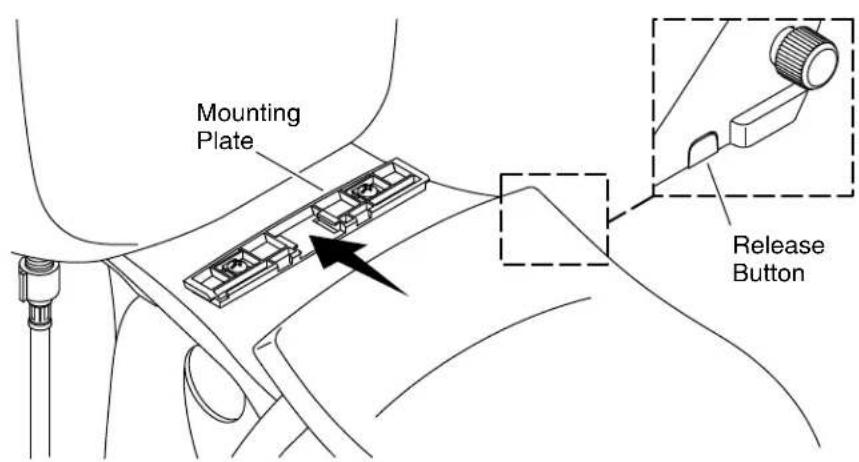
Mounting Plate Release Button2. Install the Seat
Position the Seat
☐ Slide the seat onto the mounting plate until you feel it snap into place.
□ Check the positioning of the seat. Adjust the position if needed.
Adjust the Seat
☐ To adjust the seat position, remove the seat by pressing in the release button and sliding the seat forward.
□ Reposition the mounting plate as needed.
Install the Seat
□ Securely tighten the mounting plate bolts and nuts.
☐ Slide the seat onto the mounting plate until you feel it snap into place.
text_image
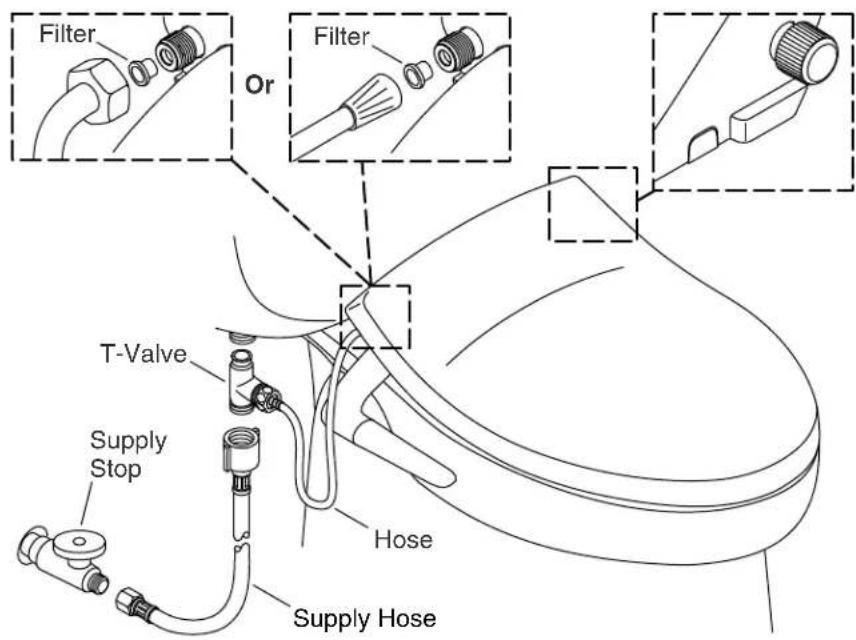
Filter Or Filter T-Valve Supply Stop Hose Supply Hose3. Connect the Water Supply

CAUTION: Riskofpropertydamage. Do not push or pull on the water connection between the seat and the water supply stop. This will prevent water leakage.
NOTICE: Use care to avoid cross threading or overtightening the connections. Unless otherwise indicated, use an adjustable wrench to tighten one-quarter turn past hand-tight.
□ Connect the T-valve to the seat hose.
☐ If needed, connect the supply hose to the supply stop.
□ Connect the supply hose to the T-valve.
□ Confirm the filter is in place. Install if needed.
□ Install the seat hose to the orange colored inlet.
IMPORTANT! The white cap must be in place on the side opposite the seat hose.
□ Connect the T-valve to the water inlet on the toilet tank.
□ Turn on the water supply.
Connect the Water Supply (cont.)
□ Check all connections for leaks and make any adjustments as needed.
Care and Cleaning
For best results, keep the following in mind when caring for your KOHLER product:
- Always test your cleaning solution on an inconspicuous area before applying to the entire surface. Avoid using aerosol products.
- Wipe surfaces clean and rinse completely with water immediately after applying cleaner. Rinse and dry any overspray that lands on nearby surfaces.
- Do not allow cleaners to soak on surfaces.
- Use a soft, dampened sponge or cloth. Never use an abrasive material such as a brush or scouring pad to clean surfaces.
- Do not allow chemicals and cosmetics (such as fingernail polish and aftershave) to come in contact with the seat.
- The ideal cleaning mixture is dishwashing soap and water. Rinse and dry with a soft cloth.
For detailed cleaning information and products to consider, visit www.kohler.com/clean. To order Care & Cleaning information, call 1-800-456-4537.
natural_image
Diagram showing two mechanical or fluidic configurations with directional arrows indicating movement, no text or symbols present.Operation
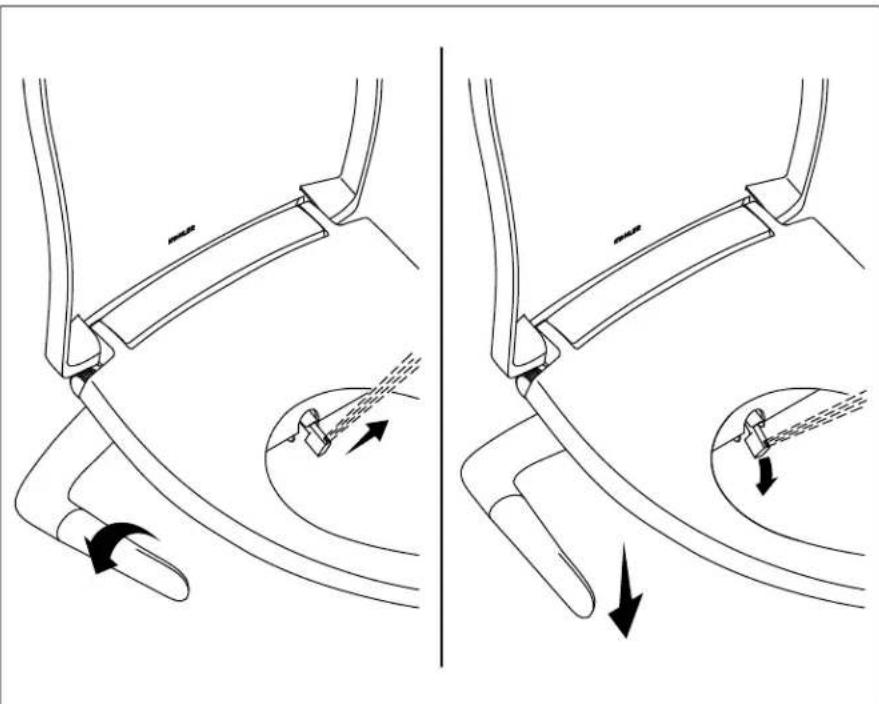
IMPORTANT! Water can spray when no one is sitting on the seat. Do not activate the water until seated.
□ Toactivatethespraywand, twist the handle away from you.
☐ Tocontrolthewaterflow, twist the handle away from you to increase the flow, toward you to decrease the flow.
☐ Toadjustthespraywandposition, push the handle down until the desired position is found.
□ Toturnthespraywandoff, twist the handle toward you until it stops.
text_image
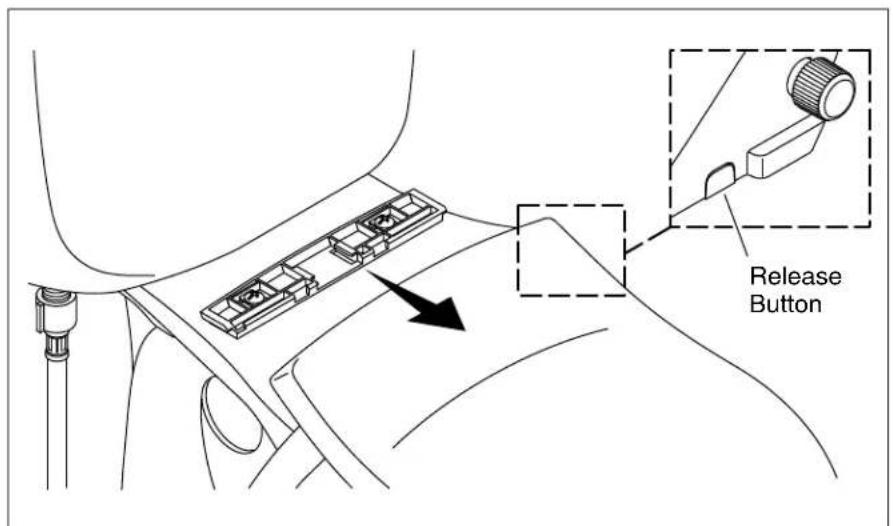
Release ButtonRemoving the Seat
□ Turn the water supply off.
☐ Press the button on the right side of the seat, located near the water inlet.
□ Slide the seat forward.
1263904-2-C 8 Kohler Co.
text_image
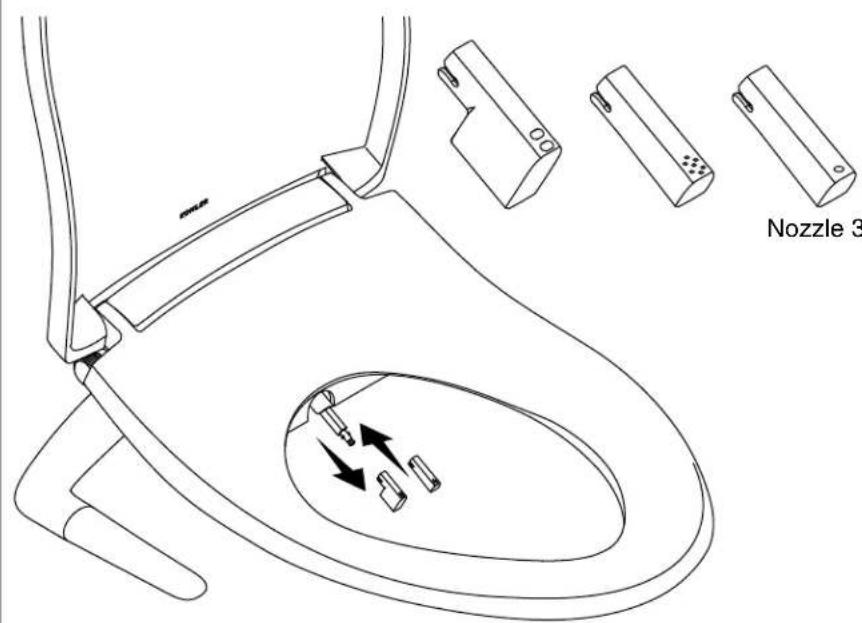
Nozzle 3Nozzle 3 Nozzle 2 Nozzle 1
Nozzle Options
NOTE: Two additional nozzles are provided. Each has a different spray intensity. Choose the nozzle that best suits your needs.
☐ Nozzle1-Comes installed. Mid level intensity.
☐ Nozzle2-Soft spray. For users who prefer a gentle spray or homes with high water pressure.
☐ Nozzle3-Intense spray. Best for installations with low water pressure.
Changing the Nozzles
□ Manually pull the wand out.
□ Firmly grip the wand, then pull the nozzle and remove.
□ Select the replacement nozzle.
☐ With the outlet holes facing up, grasp the wand and firmly push the replacement nozzle into place.
Warranty
ONE-YEAR LIMITED WARRANTY
KOHLER plumbing products are warranted to be free of defects in material and workmanship for one year from date of installation.
Kohler Co. will, at its election, repair, replace or make appropriate adjustment where Kohler Co. inspection discloses any such defects occurring in normal usage within one (1) year after installation. Kohler Co. is not responsible for removal or installation costs. Useofin-tank toiletcleanerswillvoidthewarranty.
To obtain warranty service contact Kohler Co. either through your Dealer, Plumbing Contractor, Home Center or E-tailer, or by writing Kohler Co., Attn.: Customer Care Center, 444 Highland Drive, Kohler, WI 53044, USA, or by calling 1-800-4-KOHLER (1-800-456-4537) from within the USA and Canada, and 001-800-456-4537 from within Mexico, or visit www.kohler.com within the USA, www.ca.kohler.com from within Canada, or www.mx.kohler.com in Mexico.
IMPLIEDWARRANTIESINCLUDINGTHATOF MERCHANTABILITYANDFITNESSFORAPARTICULAR PURPOSEAREEXPRESSLYLIMITEDINDURATIONTOTHE DURATIONOFTHISWARRANTY.KOHLERCO.AND/OR SELLERDISCLAIMANYLIABILITYFORSPECIAL,INCIDENTAL ORCONSEQUENTIALDAMAGES.Some states/provinces do not allow limitations on how long an implied warranty lasts, or the exclusion or limitation of special, incidental or consequential damages, so these limitations and exclusions may not apply to you. This warranty gives you specific legal rights. You may also have other rights which vary from state/province to state/province.
ThisisKohlerCo.'sexclusivewrittenwarranty.
natural_image
Line drawings of two wrench and screwdriver tools (no text or symbols)Avant de commencer

natural_image
Diagram showing two mechanical or fluidic configurations with directional arrows indicating movement, no text or symbols present.Fonctionnement
GARANTIE LIMITÉE D'UN AN
natural_image
Line drawings of two wrench and screwdriver tools (no text or symbols)Antes de comenzar

natural_image
Diagram showing two mechanical or fluidic configurations with directional arrows indicating movement, no text or symbols present.Funcionamiento
□ Turn the water supply off.
☐ Press the button on the right side of the seat, located near the water inlet.
□ Slide the seat forward.
1263904-2-C Español-7 Kohler Co.
text_image
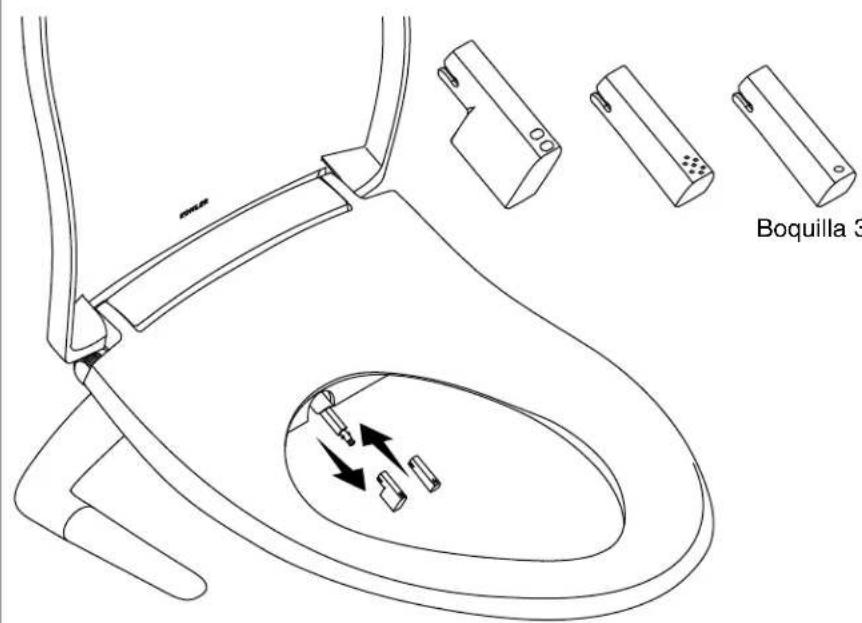
Boquilla 3Boquilla 3Boquilla 2Boquilla 1