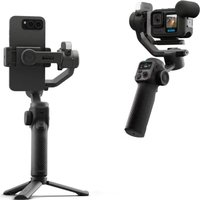
Fluid Pro AI - Tripod GOPRO - Free user manual and instructions
Find the device manual for free Fluid Pro AI GOPRO in PDF.


User questions about Fluid Pro AI GOPRO
0 question about this device. Answer the ones you know or ask your own.
Ask a new question about this device
Download the instructions for your Tripod in PDF format for free! Find your manual Fluid Pro AI - GOPRO and take your electronic device back in hand. On this page are published all the documents necessary for the use of your device. Fluid Pro AI by GOPRO.
USER MANUAL Fluid Pro AI GOPRO
| What's Included 3 | |
| Meet Fluid Pro AI 4 | |
| Understanding Gimbal Axes 6 | |
| Compatibility 6 | |
| Charging 7 | |
| Setting Up Your Gimbal 8 | |
| Attaching Your Phone 9 | |
| Attaching Your Camera 10 | |
| Balancing Your Gimbal 13 | |
| Powering On + Off 14 | |
| Connecting via Bluetooth® 14 | |
| How to Use Fluid Pro AI 15 | |
| Buttons + Ports 15 | |
| Gimbal Movement Modes 20 | |
| Manual Tilt Adjustment | 21 |
| Ultra-Wide Angle Mode 22 | |
| AI Tracking | 22 |
| Mounting + Setup | 22 |
| Gesture Controls | 23 |
| Customized Composition 24 | |
| The Fill Light | 24 |
| The Gimbal Display | 25 |
| The GoPro Fluid App | 28 |
| Using Fluid Pro AI as a Power Bank | 29 |
| Auto Calibration + Software Updates | 29 |
| Safety Guidelines | 31 |
| Regulatory Information | 31 |
What's Included
| Gimbal | AI Tracker | Tripod |
| Camera Bracket | Phone Clamp | Finger Adapter |
| Thumb Screw | USB-C Gimbal Charging Cable | USB-C Device Charging Cable |
Carrying Case
Meet Fluid Pro AI
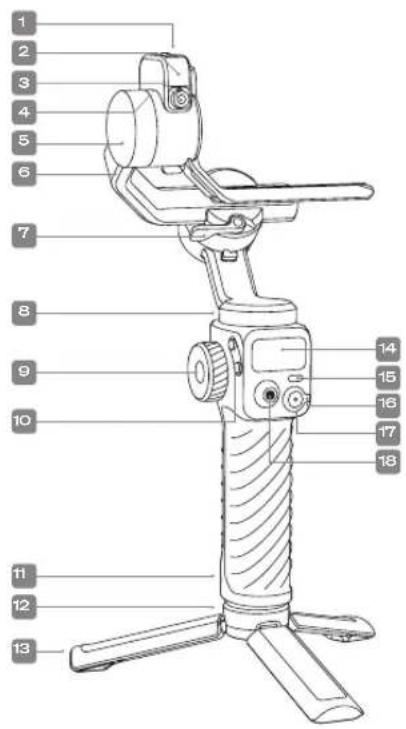
text_image
Labeled diagram of a 3D handheld device with numbered parts for identification- AI Tracker Power Switch
- Fill Light (CCT)
- AI Tracker Vision Sensor
- AI Tracker Mounting Port (USB-C)
- Tilt Motor
- Roll Arm
- Roll Arm Latch
- Pan Motor
-
Control Wheel
-
A/B Button
- Handle
- 1/4-20 Mounting Threads
- Tripod
- LED Screen
- M (Mode) Button
- Zoom Lever
- Shutter Button
- Joystick
Meet Fluid Pro AI
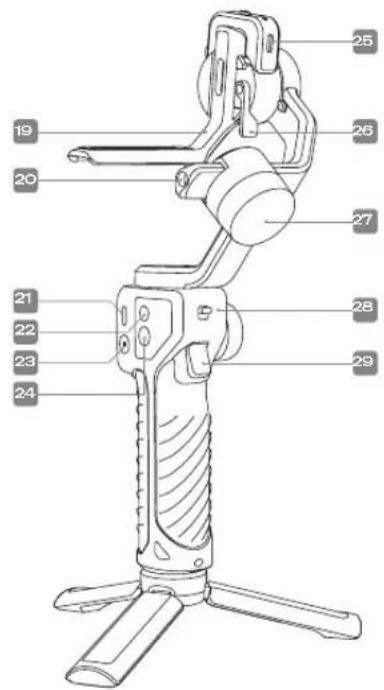
text_image
Technical diagram of a 3D handheld device with numbered parts labeled for identification.- Camera Bracket
- 1/4-20 Mounting Threads
- Gimbal Charging Port (USB-C)
- Positioning Hole
- Power Button
-
1/4-20 Mounting Threads
-
Reverse Charging Port (USB-C)
- Bracket Latch
- Roll Motor
- Pan Lock
- Trigger Button
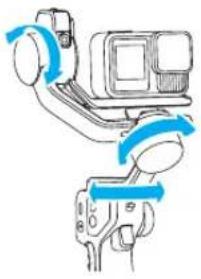
Fluid Pro AI features 3 motors that rotate your camera along the tilt, roll, and pan axes. The motors work together to keep your footage steady and capture a variety of specialized shots.
- The tilt axis motor controls the up and down movement of your phone or camera.
• The roll axis motor keeps the horizon level by keeping your phone or camera from rolling to either side. - The pan axis motor rotates your phone or camera horizontally from side to side. Fluid Pro AI can continuously pan a full 360° to create amazing panoramic shots.
natural_image
Diagram of a robotic arm with blue directional arrows indicating motion or force (no text or symbols)Compatibility
Fluid Pro AI is compatible with mobile phones and all GoPro cameras. The camera bracket can also be used with some compact point-and-shoot cameras. Fluid Pro AI can support the weight of your device, plus accessories, up to a total of 400g.
Wireless control is available for mobile phones and GoPro HERO13 Black, HERO12 Black, HERO11 Black, HERO10 Black, and HERO9 Black cameras.
ChargingUnderstanding Gimbal Axes
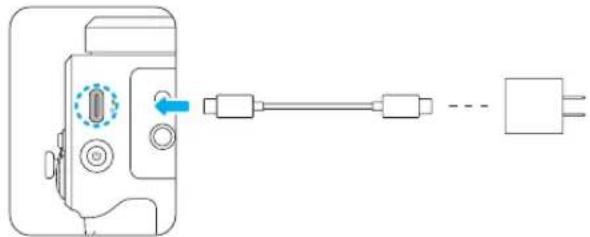
Charge your Fluid Pro AI before using it for the first time.
- Plug the included USB-C charging cable into the gimbal charging port, above the Power button.
- Plug the other end of the cable into a USB charger. A 5V-2A USB charger is recommended (not included).
natural_image
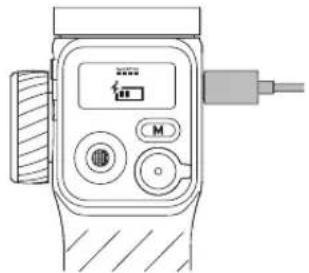
Diagram of a device with a switch and connector, showing connection to a power outlet (no text or symbols present)You can check the charge status on the LED screen. It will take about 3 hours to fully charge the battery. Your gimbal will run for up to 18 hours on a full charge, up to 11 hours when also using the AI Tracker, and up to 6 hours when using the gimbal, AI Tracker, and light at full strength simultaneously.
natural_image
Line drawing of a handheld electronic device with control buttons and a connector (no text or symbols)Setting Up Your Gimbal
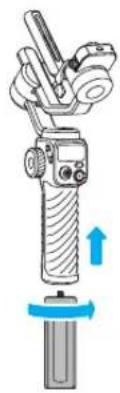
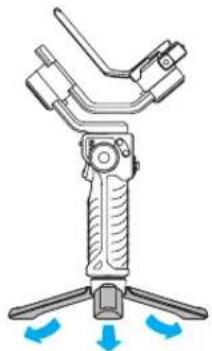
- Attach the tripod to the base of the gimbal.
natural_image
Illustration of a handheld device with a scroll and directional arrow indicating motion (no text or symbols)- Open the legs and place the gimbal on a flat, stable surface.
natural_image
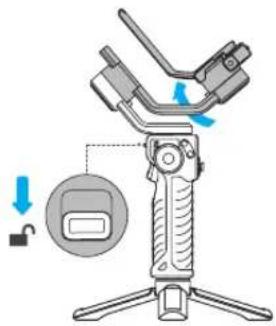
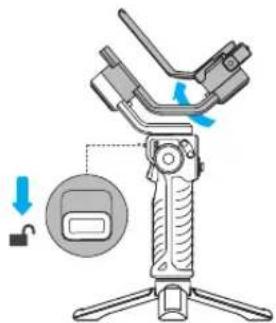
Mechanical device with three legs and a central shaft, showing directional arrows (no text or symbols)- Switch the pan lock (located above the trigger button) down into the unlocked position.
text_image
Diagram of a handheld device with labeled parts and directional arrows indicating motion or controlSetting Up Your Gimbal
ATTACHING YOUR PHONE
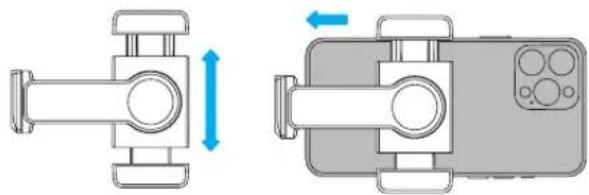
Insert your phone into the clamp with your phone's camera facing the direction marked on the clamp (your phone's screen should not be blocked by the clamp). Make sure that your camera rests snugly against the rubber pad at the base of the clamp.
natural_image
Technical diagram showing two mechanical components with directional arrows indicating movement (no text or symbols)Landscape Installation
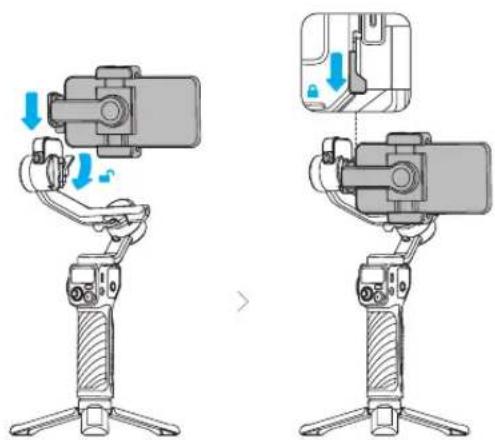
- Unlock the bracket latch (located on the tilt motor).
- Slide the phone clamp into the gimbal.
- Tighten the latch to lock the clamp in place.
natural_image
Two identical diagrams showing a hand operating a smartphone on a tripod, with arrows indicating motion direction (no text or symbols present)Setting Up Your Gimbal
Rotating Your Phone to Portrait Mode
- Shift your phone away from the rubber pad at the base of the clamp.
- Rotate the clamp 90° counter clockwise into the vertical position.
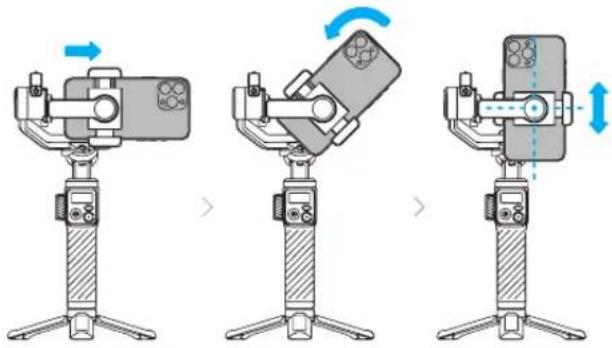
natural_image
Three-step diagram showing a device being mounted on a tripod, with no visible text or symbols.ATTACHING YOUR CAMERA
Insert the 1/4-20 mounting screw through the slot in the camera bracket and use it to attach your GoPro or compact point-and-shoot camera. Make sure your GoPro camera's Mode button is facing away from the tilt motor.
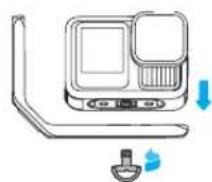
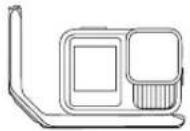
Setting Up Your Gimbal
Heads Up: Use the mounting finger adapter if your GoPro camera doesn't have 1/4-20 mounting threads.
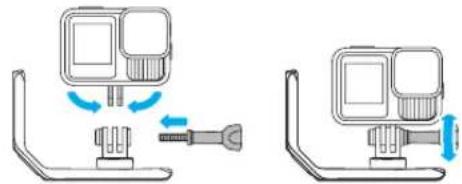
natural_image
Diagram showing two identical setups of a device with blue arrows indicating motion or movement (no text or symbols present)Landscape Installation
- Unlock the bracket latch (located on the tilt motor).
- Slide the bracket into the gimbal.
- Tighten the latch to lock the bracket in place.
See the balancing instructions for more information on positioning the bracket.
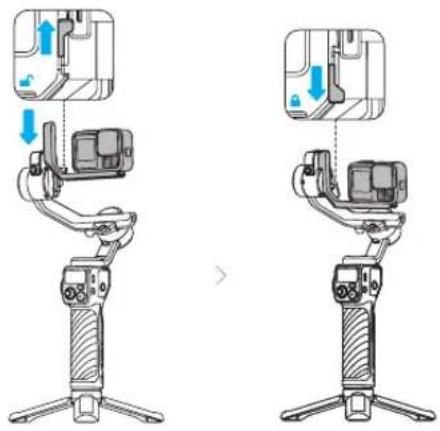
text_image
Diagram showing two views of a handheld device with directional arrows indicating movement or operation, likely illustrating a camera or navigation system.Setting Up Your Gimbal
Portrait Orientation Installation
- Attach your GoPro camera to the bracket using the mounting finger adapter. The mounting fingers must be used to ensure proper balance.
- Rotate the bracket 90° clockwise and slide it into the gimbal.
- Tighten the latch to lock the bracket in place.
See the balancing instructions for more information on positioning the bracket.
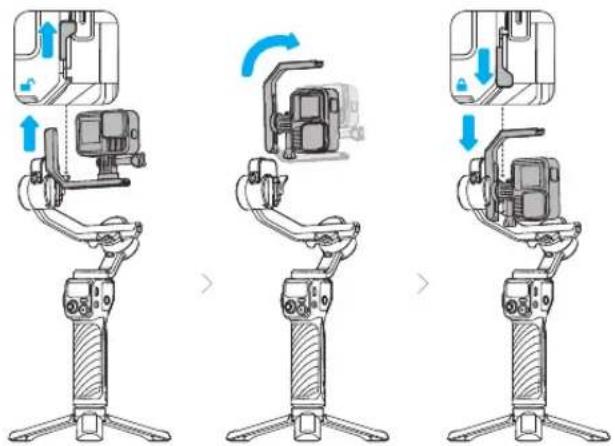
text_image
Diagram illustrating the step-by-step installation of a camera on a tripod-mounted device, showing motion changes and component placement.Heads Up: Point and shoot cameras cannot be used in portrait orientation due to size and balance.
Setting Up Your Gimbal
BALANCING YOUR GIMBAL
Your gimbal must be properly balanced before you can use it. The steps are the same whether you've attached your phone or camera. Be sure that your gimbal is turned off before balancing.
Balancing the Roll Axis
- Unlock the roll latch (located on the roll motor).
- Slide the roll arm to the left or right until your phone or camera is balanced. Adjust the position of the 1/4-20 screw along the slot in the mounting bracket if your camera continues to fall to one side.
- Lock the roll latch once your phone or camera is perfectly straight.
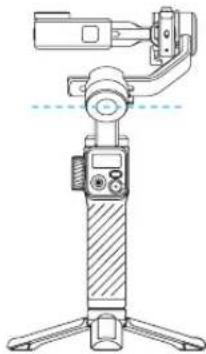
natural_image
Technical line drawing of a handheld device with tripod base and control panel (no text or symbols)Balancing the Vertical Tilt
- Unlock the bracket latch (located on the tilt motor).
- Rotate your phone or camera until the lens is pointing upward.
- If your phone or camera easily rotates forward or backward, slide the mounting bracket up or down until the camera lens is level and faces upward on its own.
- Lock the bracket latch once your phone or camera lies flat.

natural_image
Technical line drawing of a handheld device with tripod base and camera mount (no text or symbols)Setting Up Your Gimbal
POWERING ON + OFF
Make sure that your gimbal is balanced and that the pan and roll locks are unlocked before powering on your gimbal.
- Press and hold for 3 seconds: Power on/off
- Press twice: Enter Sleep mode
- Press once again: Wake up the gimbal
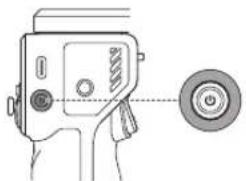
natural_image
Line drawing of a handheld device with a circular button and handle, no text or symbols presentConnecting via Bluetooth®
Setting up Bluetooth® on Your Gimbal
- Press and hold the M (Mode) button to access the LED sub-menu.
- Press the A button (located next to the Control wheel) to enter pairing mode.
- Use the joystick to select [PAIR] or [UNPAIR].
- Press the M (Mode) button to confirm.
Connect Your Phone With Bluetooth®
- With your gimbal on, go to the Bluetooth® settings on your phone and select "GoPro Fluid Pro AI" from the list of devices.
- Follow the on-screen instructions to connect and pair.
- A steady icon on the gimbal's LED screen will let you know that pairing was successful.
- Press and hold the M (Mode) button to exit the pairing screen.
PRO TIP: You can also connect using the GoPro Fluid app. It will automatically search for your gimbal.
Connecting Your GoPro Camera With Bluetooth®
- Swipe down on your GoPro's rear screen to access the Dashboard, and then swipe left.
- Tap Pair Device. Your GoPro will automatically start searching for compatible devices.
- Your GoPro will find all available devices. Tap Fluid Pro AI to start pairing.
- A steady 📄 icon on the gimbal's LED screen will let you know that pairing was successful.
Heads Up: The pairing process for your GoPro may be different. Check your camera's user manual for full pairing instructions.
Connecting via Bluetooth®
Resetting Bluetooth ^® Connections
If the gimbal doesn't appear in the list of available devices or was previously paired with another device, clear the Bluetooth® connections before trying to reconnect.
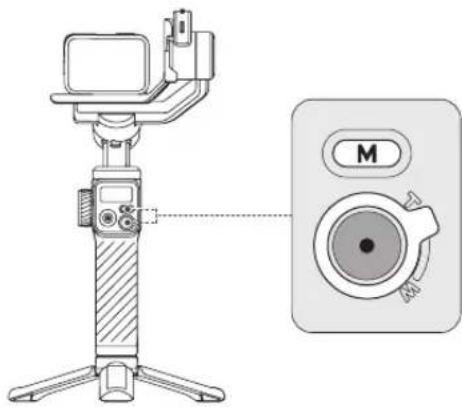
- Press and hold the M button for 5 seconds.
- While holding the M button, push the Zoom lever upward.
- A ✗ icon will let you know that all previous pairings have been cleared. You can now try pairing a new device.
text_image
Diagram showing a selfie stick with a camera module labeled 'M' connected to its screen, alongside a separate view of the device.How to Use Fluid Pro AI
BUTTONS + PORTS
Power Button
- Press and hold for 3 seconds: Turn your gimbal on or off
- Press once when your gimbal is on: Wake your gimbal
- Press once when your gimbal is off: Check the battery level or start charging your device
- Press twice when your gimbal is on: Enter Sleep mode
How to Use Fluid Pro AI How to Use Fluid Pro AI
text_image
M ROLL PF CCT 00 PTF +100=500 SEEN CCT 00 L +100=500 SEEN FOCUS POVM (Mode) Button
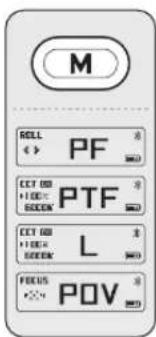
- Press once: Switch between modes
- Press twice: Pause/resume AI tracking
- Press three times: Switch to Inception mode
- Press five times: Auto calibration (use when gimbal is mounted on the tripod with the tripod on a flat, level surface)
- Press and hold: Access sub-menu on the LED screen
- Press and hold with zoom lever up: Clear Bluetooth® connections
Joystick
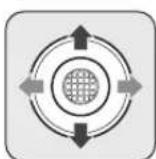
- Push up/down: Tilt up/down
- Push left/right: Pan left/right
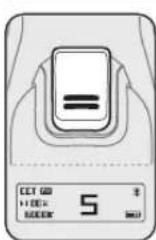
Trigger Button
• Tap twice: Recenter the gimbal
- Tap three times: Rotate pan motor position 180^
- Tap four times: Move roll motor and arm out of the way for wide-angle shots
- Press and hold: Switch to Sport (S) mode
- Tap once, then press and hold: Temporarily switch to All Lock (L) mode (release the trigger to return to the original mode)
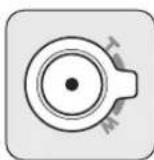
All Zoom lever/shutter button features require a Bluetooth® connection to your phone or GoPro camera.
Zoom Lever
Lever up/down: Zoom in/out
Shutter Button
• Half press: Auto focus*
- Press once; Start or stop recording video or take a photo
- Press twice: Switch between video and photo modes
- Press three times: Switch between front and rear camera on your phone*
*Available on phones when using the GoPro Fluid app
text_image
FOCUS • ××4 ROLL 4 > CCT 600 •100K SCREENControl Wheel
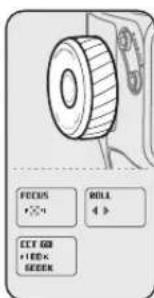
The Control wheel is a multi-function control wheel and button. Press the wheel to select a function and roll to make adjustments.
Focus Control + Roll Rotation
Press the wheel twice: Cycle between focus control, roll rotation, and light settings. The current setting will be shown on the LED screen.
Heads Up: Even though you can cycle to the light settings, you must still press and hold the wheel to turn the light on and off.
Fill Light Control
- Press and hold the wheel: Turn fill light on or off
- Press the wheel once: Toggle between brightness and color temperature control

WARNING: Avoid touching the AI Tracker module during continuous use of the fill light. After turning the light off, wait until the module cools before handling.
How to Use Fluid Pro AI
A-B Button
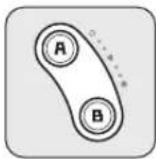
Set the starting and ending point for track shots or time lapse footage along a designated path.
Heads Up: This feature should be used separately from the time lapse feature in the GoPro Fluid app.
- Setting position A: Use the joystick to aim the camera at the starting point. Press and hold the A button. A short beep lets you know it's locked in.
- Setting position B: Use the joystick to aim the camera at the end point. Press and hold the B button B to set. A short beep will confirm the setting.
- A-B motion: Press the A button to return the camera to position A. Press the B button twice. The gimbal will track the camera from point A to point B at a constant speed.
- B-A motion: Press the B button to return the camera to position B. Press the A button twice. The gimbal will track the camera from point B to point A at a constant speed.
PRO TIP: The default tracking time is 1 minute. This can be customized in the GoPro Fluid app.
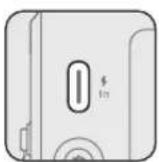
Gimbal Charging Port (USB-C)
Connect to a power source to charge your gimbal.
How to Use Fluid Pro AI
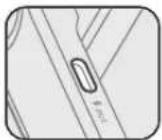
Reverse Charging Port (USB-C)
Can be used to charge your phone, GoPro, or any other USB-C device.
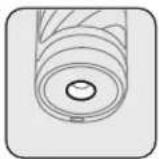
1/4-20 Mounting Threads
The 1/4-20 mounting threads on the bottom of the gimbal can be used to attach it to the included tripod, extension poles, and other industry-standard 1/4-20 mounts.
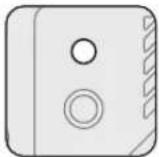
The 1/4-20 mounting threads on the roll arm and the side of the handle can be used to attach microphones, additional lights, and other accessories.
How to Use Fluid Pro AI
GIMBAL MOVEMENT MODES
Fluid Pro AI features pro-quality gimbal movement modes that help you easily capture incredible cinematic shots. Simply press the M button to cycle through your options.
Gimbal Mode Description Gimbal Action
Pan Follow (PF) Follows your actions on the pan axis. 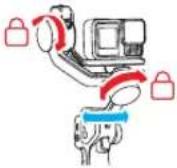 | Lets you smoothly pan your camera from left or right. Tilt and roll are kept stable throughout your shot. |
Pan and Tilt Follow (PTF) Follows your actions on the pan and tilt axes. 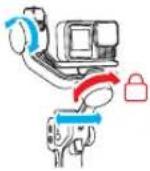 | Lets you smoothly pan (left/right) and tilt (up/down) with more dynamic control over framing. Roll is locked to keep the horizon level. |
Point of View (POV) Follows your actions on all axes. 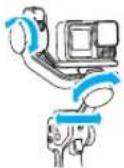 | Smoothly follows your movements in all directions. Great for capturing immersive first-person POV footage. |
How to Use Fluid Pro AI
Gimbal Mode Description Gimbal Action
All Lock (L) Activates each 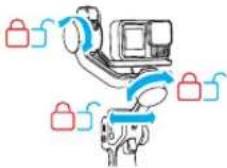 | axis as needed to hold your camera in place. | Holds your camera in place and steady even if the gimbal pans, tilts, or rolls during capture. |
Sport Mode (S) Increases the 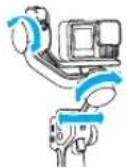 | speed of gimbal on all axes. | Increased follow speed makes this mode ideal for capturing quick-moving subjects and high-speed action shots. |
Inception Mode (ICP) Allows 360° 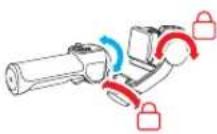 | infinite spin on pan axis while holding the gimbal horizontally. | Great for artistic shots, cinematic storytelling, or any time you want a dramatic change of perspective. Press the M button once or the trigger twice to recenter the gimbal when recording in this mode. |
MANUAL TILT ADJUSTMENT
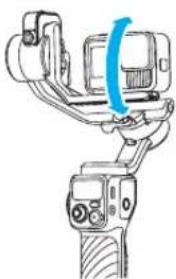
Your camera's tilt angle can be adjusted by hand. Simply tilt your camera to the angle you want and hold in that position for 2 seconds. Your camera will be fixed at that angle.
natural_image
Line drawing of a hand holding a camera with a blue arrow indicating rotation (no text or symbols)Ultra-Wide Angle Mode AI Tracking
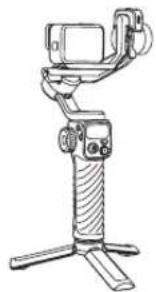
In its normal capture mode, the gimbal itself can sometimes appear in ultra-wide angle shots. Tap the trigger 4 times for Ultra-Wide Angle mode. This will flip your camera so that all of the gimbal components are behind the lens and out of the shot.
natural_image
Line drawing of a handheld device with tripod base and camera module (no text or symbols)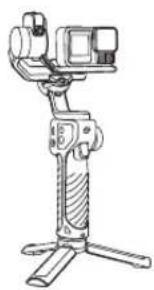
natural_image
Line drawing of a handheld device with tripod base and camera module (no text or symbols)AI Tracking
MOUNTING + SETUP
Plug the AI Tracker into the USB-C port on the tilt axis motor.
The tracker can be mounted facing either direction depending on whether you want forward- or rear-tracking shots.
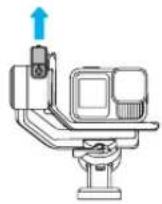
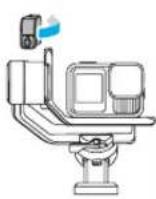
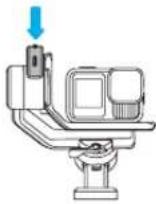
Use the switch on the AI Tracker to turn it on. The light will flash twice to let you know that it's ready for action.
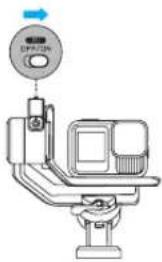
natural_image
Diagram of a medical device with a circular dial and control panel (no text or symbols)GESTURE CONTROLS
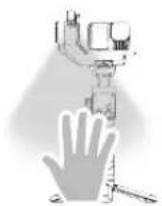
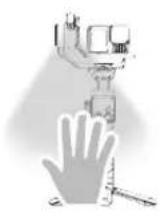
The AI Tracker lets you use hand gestures to start, stop, and fine-tune your tracking shots. It will sense gestures from a distance of 1.64ft\~11.48ft (0.5m\~3.5m) away and track objects 1.64ft\~16.40ft (0.5m\~5m) away.
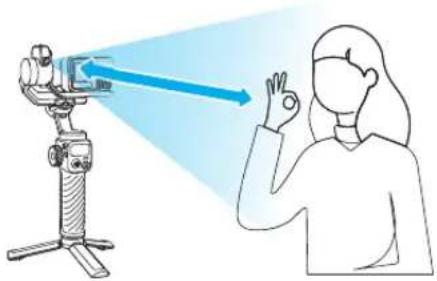
natural_image
Illustration of a person using a handheld device to observe a blue light beam, with no text or symbols present.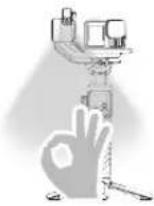
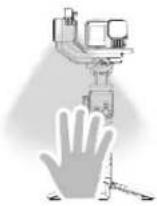
Start AI Tracking Stop AI Tracking
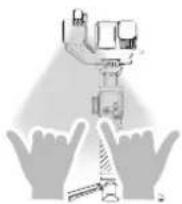
Start/Stop Recording
Take Photo
(Device must be connected via Bluetooth®)

Customized Composition
(Steps: 1. ↓ ↓ 2. Reposition yourself in the frame 3. ↓ ↓)
AI Tracking
CUSTOMIZED COMPOSITION
The tracker will keep you centered in your shot by default, but you can adjust the framing using hand gestures.
- Make sure that the AI Tracker is on (indicator light is solid green).
- Make the Customized Composition gesture towards the tracker. The indicator will blink green quickly.
- While staying within range of the tracker, move to your preferred position.
- Repeat the gesture to confirm and lock in your new position.
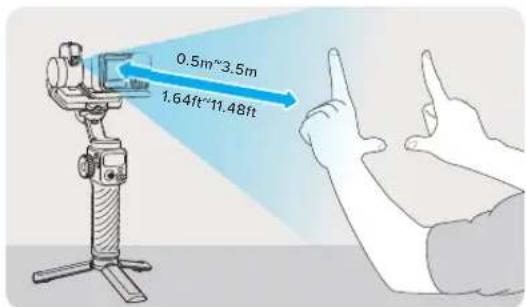
text_image
0.5m~3.5m 1.64ft~11.48ftThe Fill Light
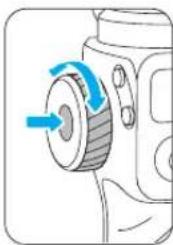
The CCT fill light can be controlled using the Control wheel. Press and hold the wheel to turn the light on or off. Once it's on, you can adjust the light by using the wheel. Press the wheel to toggle between the brightness and color temperature control (color temperature can be adjusted between 2700K to 6500K).
natural_image
Diagram of a mechanical component with a blue arrow indicating rotation (no text or symbols)
WARNING: Avoid touching the AI Tracker module during continuous use of the fill light. After turning the light off, wait until the module cools before handling.
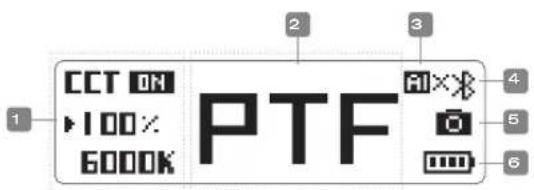
The Gimbal Display
text_image
CCT ON 100% 6000K PTF AI O 6 1 2 3 4 5 61. CONTROL WHEEL SETTINGS
ROLL
◀ ▷
Roll Axis Control
·100%
Fill Light Brightness
FOCUS
1
Focus Control
6000K
Color Temperature
2. CURRENT GIMBAL MODE
PF
Pan Follow Mode
L
All Lock Mode
5
Sport Mode
PTF
Pan + Tilt Follow Mode
POV
All Follow Mode
ICP
Inception Mode
3. AI TRACKER STATUS

Tracker is Active
- PHONE CONNECTION

Bluetooth® Connected

Bluetooth® Disconnected
- GOPRO CAMERA CONNECTION

Bluetooth ^® Connected

Bluetooth® Disconnected
- BATTERY LEVEL

Current Level

Low Battery

Charging
The Gimbal Display
| ADDITIONAL ALERTS | |
| Standby | |
| [SLEEP] | Gimbal Is in Standby Mode |
| Pan Axis Latch | |
| [IMAGE] | Pan Motor Must Be Unlocked |
| Error Messages | |
| [!]ERROR 01] | Firmware Error |
| [!]ERROR 02] | Gyroscope Error |
| [!]ERROR 03] | Unbalancing/Motor Unlocking/Overloading(may be caused by external disturbance) |
| [!]ERROR 03-m1] | Tilt Motor Must Be Unlocked |
| [!]ERROR 03-m2] | Roll Motor Must Be Unlocked |
| [!]ERROR 03-m3] | Pan Motor Must Be Unlocked |
| A-B Motion | |
| O+ AO---→A | Move to position A from the Current Position |
| O+ BO---→B | Move to position B from the Current Position |
The Gimbal Display
| Auto Calibration | |
| (WCSW) | Calibrating in Progress |
 | |
| Software Update | |
| (HSTT) | Software Update in Progress |
| UPDRTING... | |
| Motor Torque Adjustment | |
| Motor Torque Levels | |
| (A9HC) | Flashing AUTO bars indicate that the motors are making automatic adjustments. The bars will stop flashing when the adjustments are complete. |
| Motor Angle Fine-Tuning | |
| (TAV4) | Current Angle Adjustment of Each Motor |
| Follow Speed Level | |
| (TZW4) | Current Follow Speed of Each Motor |
The GoPro Fluid App
DOWNLOADING
Scan the QR code or download "GoPro Fluid" in the Apple® App Store® or Google Play".


CONNECTING YOUR PHONE
- Attach your phone to the gimbal and turn on the gimbal.
- Turn on Bluetooth ^® on your phone.
- Open the GoPro Fluid app and follow the on-screen instructions to connect.
FLUID APP FEATURES

Advanced Capture Settings
For manually setting the shutter speed, ISO, and EV comp.

Resolution and Frame Rate
Set video resolution and video frame rate.

Light Settings
Customize light settings.

General Settings
Set gimbal parameters and camera parameters, and see gimbal Information.

Zoom/Focus Switch
Choose to use the Zoom lever to control zoom or focus. Set up by tapping "Settings." Scroll down and select "Seamless Zoom." Close and tap the Z icon to toggle between zoom and focus control.
The GoPro Fluid App
FLUID APP FEATURES

Filters Choose a video or photo filter.

Gesture Control
For remote subject tracking and shutter control.
PRO TIP: You can also drag to select and track objects on the app screen.
Moment Templates
Use Moment templates to help you tell your story with special effects and pre-programmed camera movements.
Using Fluid Pro AI as a Power Bank
Charging Your Phone or Camera
- Connect your phone, GoPro camera, or any other compatible device to the Reverse Charging Port on the back of the AI Tracking module.
- Press the Power button to start charging if your gimbal is off. Charging will start automatically if your gimbal is already on.
Heads Up: Using Fluid Pro AI to charge your phone or GoPro camera will reduce your gimbal's runtime.
Auto Calibration + Software Updates
AUTO CALIBRATION
Use Auto Calibration to fix stabilization and tracking problems.
-
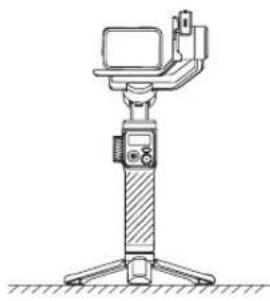
Turn on your gimbal and put it on a hard, flat surface.
-
Tap the trigger twice.
natural_image
Line drawing of a handheld device mounted on a tripod stand (no text or symbols)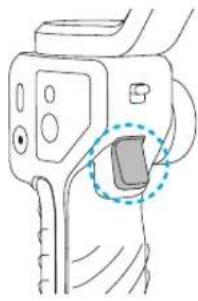
natural_image
Line drawing of a handheld device with a highlighted grip (no text or symbols)-
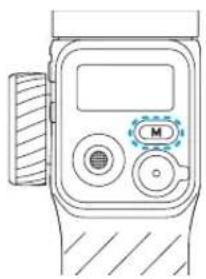
Press the M button five times. Your gimbal will start calibrating itself.
-
Your gimbal will beep once when calibration is complete.
natural_image
Line drawing of a handheld electronic device with control buttons and a display (no text or symbols)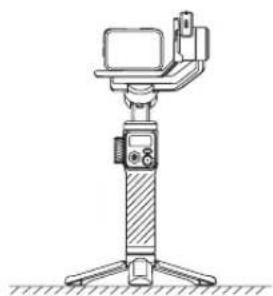
natural_image
Line drawing of a mounted camera setup with tripod base and mounted device (no text or symbols)SOFTWARE UPDATES
The GoPro Fluid app will let you know if a software update is available and tell you how to install it. Be sure that your gimbal's battery is at least 25% charged before starting the update.
Safety Guidelines
Fluid Pro Al's normal operating temperature range 14°F\~113°F (-10°C\~45°C). It will shut down if it gets too hot. Let it cool before using it again.
It will also shut down if it is used in a way that risks damaging the motors.
Regulatory Information
To see additional information regarding country certifications, refer to the Important Product + Safety Instructions included with your gimbal.
The Bluetooth word mark and logos are registered trademarks owned by bluetooth SIG, Inc., and any use of such marks is under license.

Fluid Pro AI
MANUEL DE L'UTILISATEUR
Table des matières
text_image
Labeled diagram of a 3D handheld device with numbered parts for identificationtext_image
Technical diagram of a 3D handheld device with numbered parts labeled for identification.natural_image
Diagram of a robotic arm with blue directional arrows indicating motion or force (no text or symbols)Compatibilité
natural_image
Diagram of a device with a switch and connector, showing connection to a power outlet (no text or symbols present)natural_image
Line drawing of a handheld electronic device with control panel and power connector (no text or symbols)natural_image
Diagram of a handheld device with a scroll and directional arrow indicating motion (no text or symbols)text_image
Diagram illustrating a device lock mechanism with labeled components and directional arrowsnatural_image
Mechanical device with three legs and a handle, showing blue directional arrows indicating motion (no text or symbols)natural_image
Technical diagram showing two mechanical components with blue directional arrows indicating movement or force (no text or symbols present)natural_image
Two identical diagrams of a handheld device with blue arrows indicating motion, showing no text or symbols.natural_image
Three-step diagram showing a device being mounted on a tripod stand, with no visible text or symbols.FIXATION DE VOTRE CAMÉRA
natural_image
Two identical line drawings of a device with blue arrows indicating motion or force, no text or symbols present.natural_image
Diagram of a robotic device with two views showing mechanical components and directional arrows (no text or symbols)text_image
Diagram illustrating the step-by-step installation of a camera on a tripod-mounted device, showing motion changes and component placement.natural_image
Technical line drawing of a hand pump device with tripod base and control panel (no text or symbols)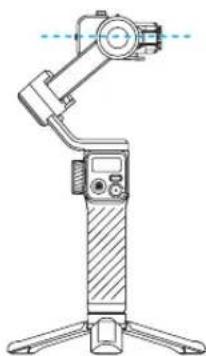
natural_image
Technical line drawing of a handheld device with tripod base and camera mount (no text or symbols)natural_image
Line drawing of a handheld device with a circular button and pointer, no text or symbols presentConnexion via Bluetooth
natural_image
Technical line drawing of a selfie stick with attached camera module (no text or symbols)Comment utiliser Fluid Pro AI Comment utiliser Fluid Pro AI
BOUTONS + PORTS
Bouton Alimentation
natural_image
Line drawing of a hand holding a camera with a blue circular motion arrow indicating rotation (no text or symbols)Mode ultra grand-angle
natural_image
Line drawing of a handheld device with tripod base and camera module (no text or symbols)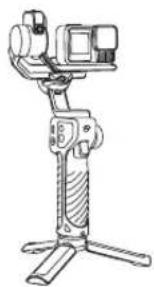
natural_image
Line drawing of a handheld device with tripod base and camera module (no text or symbols)Suivi IA
FIXATION + CONFIGURATION
natural_image
Illustration of a person using a handheld device to observe a light beam, with no visible text or symbols.text_image
0.5m~3.5m 1.64ft~11.48ftLumière d'appoint
natural_image
Diagram of a mechanical device with a rotating knob and blue arrow indicating rotation (no text or symbols)text_image
CCT ON 100% 6000K PTF AI O Battery- RÉGLAGES DE LA MOLETTE DE CONTRÔLE
Application GoPro Fluid
TÉLÉCHARGEMENT
natural_image
Line drawing of a mounted device with tripod base and control panel (no text or symbols)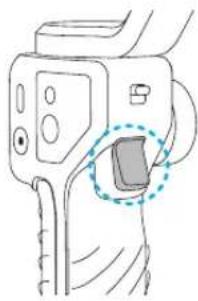
natural_image
Line drawing of a handheld device with a highlighted grip (no text or symbols)natural_image
Line drawing of a medical device with control panel and buttons (no text or symbols)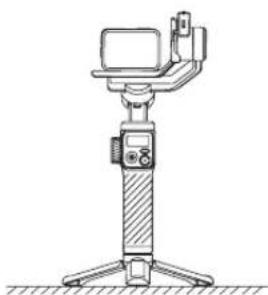
natural_image
Line drawing of a handheld device with a mounted screen and tripod base (no text or symbols)MISES À JOUR LOGICIELLES
text_image
Labeled diagram of a 3D handheld device with numbered parts for identificationtext_image
Technical diagram of a 3D handheld device with numbered parts labeled for identification.natural_image
Diagram of a robotic arm with blue motion arrows indicating movement or force (no text or symbols)Kompatibilität
natural_image
Diagram of a device with a switch and connector, showing connection to a power outlet (no text or symbols present)natural_image
Line drawing of a handheld electronic device with control buttons and a display (no text or symbols)Gimbal einrichten
natural_image
Diagram of a handheld device with rotating arm and scroll, showing motion direction (no text or symbols)text_image
Diagram illustrating a camera setup with labeled components and directional arrows indicating motion or movement.natural_image
Mechanical device with three legs and a handle, showing blue directional arrows indicating motion (no text or symbols)Gimbal einrichten
SMARTPHONE ANBRINGEN
natural_image
Technical diagram showing two mechanical components with directional arrows indicating movement (no text or symbols)natural_image
Two identical diagrams showing a hand operating a small device on a tripod, with arrows indicating motion direction (no text or symbols present)Gimbal einrichten
natural_image
Three-step diagram of a handheld device on a tripod stand, showing motion and rotation (no text or symbols)natural_image
Diagram showing two views of a shared air conditioner unit with a water drop and cooling fan (no text or symbols)Gimbal einrichten
natural_image
Two identical line drawings of a camera seat assembly with blue directional arrows indicating motion (no text or symbols)natural_image
Two identical line drawings of a robotic device with control buttons and directional arrows, no text or symbols present.Gimbal einrichten
Hochformat installieren
text_image
Diagram illustrating the step-by-step installation of a handheld device on a tripod, showing motion changes and control buttons.natural_image
Technical line drawing of a handheld device with tripod base and adjustment knob (no text or symbols)natural_image
Technical line drawing of a handheld device with tripod base and camera mount (no text or symbols)Gimbal einrichten
natural_image
Line drawing of a handheld device with a circular button and handle, no text or symbols presentnatural_image
Technical line drawing of a selfie stick with attached camera module and control panel (no text or symbols)So verwendest du Fluid Pro KI
text_image
M ROLL PF CCT 00 PTF +100=500 SEEN CCT 00 L +100=500 SEEN FOCUS POVTaste „M“ (Modus)
natural_image
Line drawing of a camera with a blue circular motion indicator (no text or symbols)natural_image
Technical line drawings of two different types of hand tools or devices, shown from left and right views (no text or symbols present)KI-Tracking
natural_image
Three-step diagram showing a device on a lift, with arrows indicating motion direction (no text or symbols)text_image
Diagram of a device with a circular control knob and directional arrow, showing a mechanical or electrical component.KI-Tracking
GESTENSTEUERUNG
natural_image
Illustration of a person using a handheld device to observe a light beam, with no text or symbols present.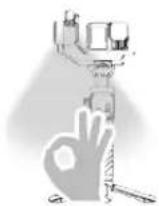
KI-Tracking starten KI-Tracking stoppen
natural_image
Diagram of a mechanical component with a blue arrow indicating rotation (no text or symbols)natural_image
Line drawing of a mounted device with tripod base and mounted screen (no text or symbols)natural_image
Line drawing of a handheld device with a highlighted grip (no text or symbols)natural_image
Line drawing of a medical device with control panel and buttons (no text or symbols)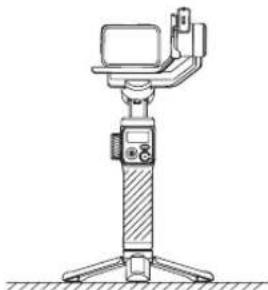
natural_image
Line drawing of a handheld device mounted on a tripod stand (no text or symbols)SOFTWARE-UPDATES
text_image
Labeled diagram of a 3D handheld device with numbered parts for identificationtext_image
Technical diagram of a 24-pin walk-in device with numbered parts labeled for identification.natural_image
Diagram of a robotic arm with blue motion arrows indicating movement or force (no text or symbols)Compatibilità
natural_image
Diagram of a device with a switch and connector, showing connection to a power outlet (no text or symbols present)natural_image
Line drawing of a handheld electronic device with control panel and power connector (no text or symbols)natural_image
Diagram of a handheld device with rotating arm and scroll, showing motion direction (no text or symbols)natural_image
Mechanical device with three legs and a handle, showing blue directional arrows indicating motion (no text or symbols)text_image
Diagram of a device with labeled parts and directional arrows, including a lock icon and a magnified view of the device.natural_image
Technical diagram showing two mechanical components with directional arrows indicating movement (no text or symbols)natural_image
Two identical diagrams of a handheld device with blue arrows indicating motion, showing no text or symbols.natural_image
Three-step diagram showing a device being mounted on a tripod, with no visible text or symbols.FISSAGGIO DELLA FOTOCAMERA
natural_image
Diagram showing two views of a shared appliance with a handle and control panel, no text or symbols presentnatural_image
Two identical line drawings of a device with blue arrows indicating motion or force, no text or symbols present.text_image
Diagram showing two views of a robotic device with labeled parts and directional arrows indicating movement or positioning.text_image
Diagram illustrating the step-by-step installation of a camera on a tripod-mounted device, showing motion changes and component placement.natural_image
Technical line drawing of a handheld device with tripod base and control panel (no text or symbols)natural_image
Technical line drawing of a handheld 3D scanning device with tripod base (no text or symbols)natural_image
Line drawing of a handheld device with a circular button and handle, no text or symbols presentnatural_image
Technical line drawing of a selfie stick with a camera module and a control panel labeled M (no text or symbols on the device itself)text_image
M ROLL PF CCT 00 PTF +100- SEEN CCT 00 L +100- SEEN FOCUS POVtext_image
FLOOD +0.1 BEILA 4 >> ECC 600 +1.00 BEENARotella di comando
natural_image
Diagram of a camera with a blue circular motion indicator on the top right (no text or symbols)natural_image
Line drawing of a handheld 3D camera with tripod base (no text or symbols)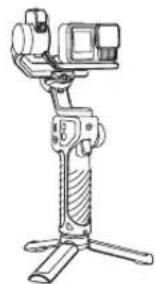
natural_image
Line drawing of a handheld device with tripod base and camera module (no text or symbols)natural_image
Three sequential illustrations of a mechanical device with arrows indicating motion, showing no text or symbols.natural_image
Illustration of a person using a handheld device to observe a light beam, with no visible text or symbols.text_image
0.5m~3.5m 1.64ft~11.48ftLuce di riempimento
natural_image
Diagram of a mechanical component with a blue arrow indicating rotation or force direction (no text or symbols)
natural_image
Line drawing of a handheld device mounted on a tripod stand (no text or symbols)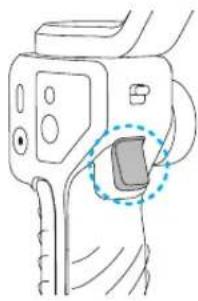
natural_image
Line drawing of a handheld device with a highlighted grip (no text or symbols)natural_image
Line drawing of a handheld electronic device with control buttons and a display (no text or symbols)
natural_image
Line drawing of a mounted camera or testing device with tripod base (no text or symbols)AGGIORNAMENTI SOFTWARE
text_image
Labeled diagram of a 3D handheld device with numbered parts for identificationtext_image
Technical diagram of a 3D handheld device with numbered parts labeled for identification.natural_image
Diagram of a robotic arm with blue directional arrows indicating motion or force (no text or symbols)Compatibiliteit
natural_image
Diagram of a device with a switch and connector, showing connection to a power outlet (no text or symbols present)natural_image
Line drawing of a handheld electronic device with control panel and connector (no text or symbols)natural_image
Diagram of a handheld device with rotating arm and scroll, showing motion direction (no text or symbols)natural_image
Mechanical device with three legs and a handle, showing blue directional arrows indicating motion (no text or symbols)- Zet de panvergrendeling (boven de activeringsknop) omlaag in de ontgrendelde stand.
text_image
Diagram illustrating a camera setup with labeled components and directional arrows indicating motion or movement.natural_image
Mechanical assembly diagram showing two configurations: a left-side bracket with blue arrows indicating direction and a right-side device with blue arrows indicating rotation (no text or symbols present)Installatie in liggende stand
natural_image
Two identical diagrams showing a hand operating a smartphone on a tripod, with arrows indicating motion direction (no text or symbols present)natural_image
Three-step diagram of a handheld device on a tripod stand, showing motion changes with no text or symbols.JE CAMERA BEVESTIGEN
natural_image
Diagram showing two views of a shared appliance with a handle and control panel, no text or symbols presentnatural_image
Two identical line drawings of a camera seat assembly with blue directional arrows indicating motion (no text or symbols)Installatie in liggende stand
natural_image
Two identical line drawings of a robotic device with control buttons and directional arrows, no text or symbols present.natural_image
Line drawing of a handheld device with a circular button and pointer (no text or symbols)Verbinding maken via Bluetooth
Bluetooth instellen op je cardanische stabilisatie
natural_image
Technical line drawing of a selfie stick with a camera module and a labeled control panel (no text or symbols present)text_image
M KILL PF CCT GO PTF +1.00% SODEN CCT GO L +1.00% SODEN FOCUS POVM-knop (modus)
natural_image
Diagram of a camera frame with a blue circular motion indicator (no text or symbols)natural_image
Technical line drawing of a two-tiered robotic device with tripod base (no text or symbols)AI Tracking
MONTEREN + INSTELLEN
natural_image
Three sequential illustrations of a mechanical device with arrows indicating motion, showing progressive assembly or assembly (no text or symbols present)natural_image
Diagram of a medical device with a circular dial and control panel (no text or symbols)AI Tracking
BEDIENING MET GEBAREN
natural_image
Illustration of a person using a handheld device to observe a blue light beam, with no visible text or symbols.
text_image
0.5m~3.5m 1.64ft~11.48ftHet invullicht
natural_image
Diagram of a mechanical component with a blue arrow indicating rotation (no text or symbols)
natural_image
Line drawing of a handheld device mounted on a tripod stand (no text or symbols)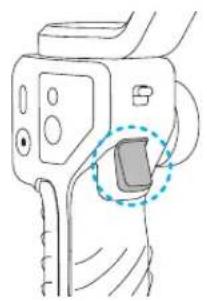
natural_image
Line drawing of a handheld device with a highlighted square component (no text or symbols)natural_image
Line drawing of a medical device with control buttons and a display (no text or symbols)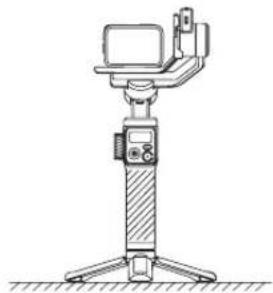
natural_image
Line drawing of a mounted device with tripod base and control panel (no text or symbols)SOFTWARE-UPDATES