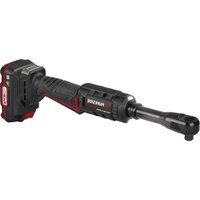
PARP 20-Li A1 - Drill PARKSIDE - Free user manual and instructions
Find the device manual for free PARP 20-Li A1 PARKSIDE in PDF.


| Product type | Cordless ratchet wrench |
| Brand | Parkside |
| Model | PARP 20-Li A1 |
| Power supply | Lithium-ion battery 20 V (DC) |
| Battery included | PAP 20 B1, 2.0 Ah, 5 cells |
| Charger included | PLG 20 C1, 230-240 V~, 50 Hz, 65 W |
| No-load speed | 0-230 min⁻¹ |
| Max. torque | 75 Nm |
| Drive square | 1/2" |
| Adapter included | 1/2" to 3/8" |
| LED work light | Yes |
| Rotation direction switch | Yes |
| Safety lock | Yes |
| Rotating head | Yes |
| Sound pressure level (LpA) | 83.7 dB(A), uncertainty K 3 dB |
| Sound power level (LWA) | 91.7 dB(A), uncertainty K 3 dB |
| Vibrations (screwing) | < 2.5 m/s², uncertainty K 1.5 m/s² |
| Weight (with battery) | Approx. 1.5 kg |
| Included items | Ratchet wrench, battery, charger, adapter, carrying case, instruction manual |
| Warranty | 5 years (tool), 3 years (battery) |
| Maintenance | No special maintenance, clean with a dry cloth |
| Intended use | Tightening and loosening of hex head screws and nuts (non-professional use) |
Frequently Asked Questions - PARP 20-Li A1 PARKSIDE
User questions about PARP 20-Li A1 PARKSIDE
0 question about this device. Answer the ones you know or ask your own.
Ask a new question about this device
Download the instructions for your Drill in PDF format for free! Find your manual PARP 20-Li A1 - PARKSIDE and take your electronic device back in hand. On this page are published all the documents necessary for the use of your device. PARP 20-Li A1 by PARKSIDE.
USER MANUAL PARP 20-Li A1 PARKSIDE
20V CORDLESS RATCHET / 20 V AKKU-RATSCHE / 20 V AKKU-RATSCHE / 20 V CLÉ À CLIQUET SANS FIL PARP 20-Li A1
GB / IE
20V CORDLESS RATCHET
Translation of the original instructions
FR / BE
20 V CLÉ À CLIQUET SANS FIL
Before reading, unfold the page containing the illustrations and familiarise yourself with all functions of the device.
DE / AT / CH
GB/IE Translation of the original instructions Page 1
| DE/AT/CH Originalbetriebsanleitung Seite 15 | ||||
| FR/BE Traduction des instructions d'origine Page 29 | ||||
| NL/BE Vertaling van de originele gebruiksaanwijzing Pagina 47 | ||||
| CZ Překlad originálního provozního návodu Strana 63 | ||||
| PL | Tłumaczenie oryginalnej instrukcji obsługi | Strona | 77 | |
| SK Preklad originálneho návodu na obsluhu | Strana | 93 | ||
| ES | Traducción del manual de instrucciones original | Página | 107 | |
| DK | Oversættelse af den originale driftsvejledning | Side | 123 | |
| IT | Traduzione delle istruzioni d’uso originali | Pagina | 137 | |
| HU | Az originál használati utasítás fordítása | Oldal | 153 | |
A
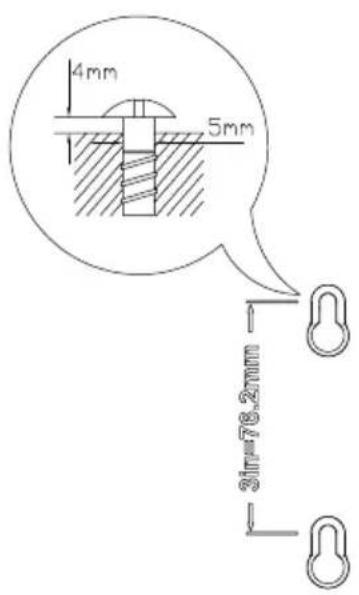
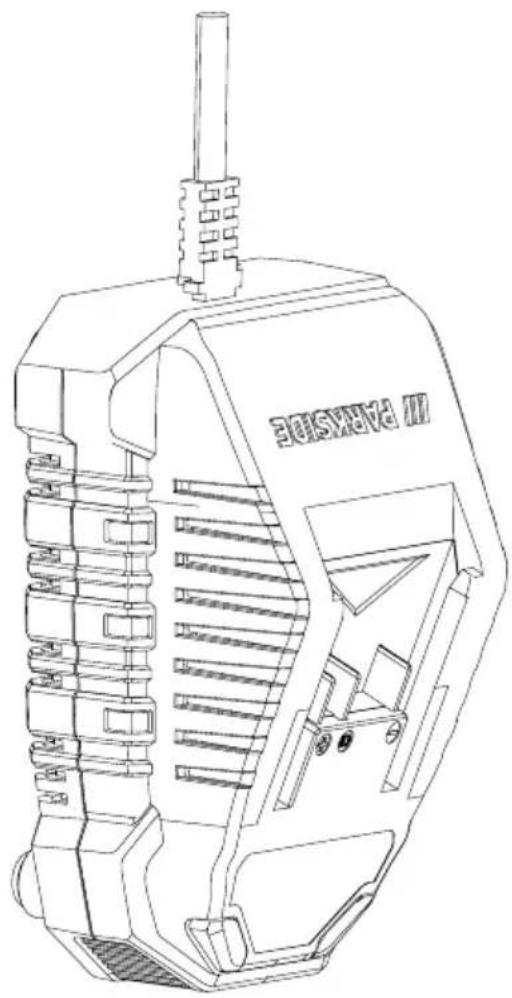
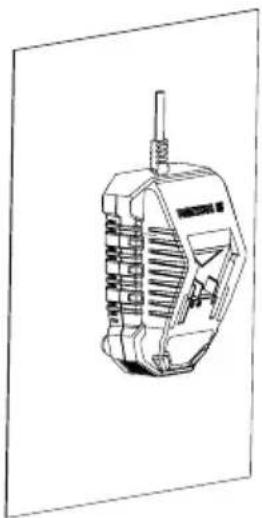


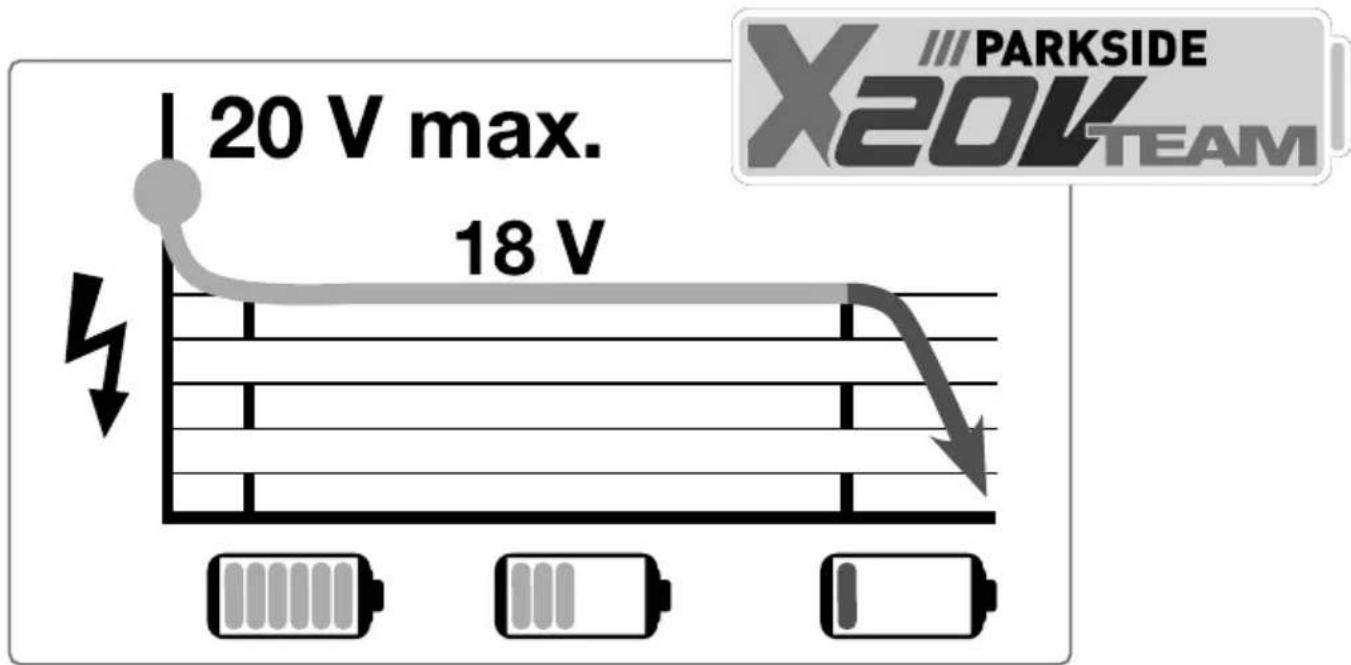
All Parkside tools and the chargers of the X20V Team series are compatible with the following battery packs.
General power tool safety warnings 4
-
Work area safety 4
-
Electrical safety 4
-
Personal safety 5
-
Power tool use and care 5
-
Use and handling of the cordless electrical power tool 6
-
Service 7
Appliance-specific safety guidelines for cordless ratchets 7
Safety instructions for battery chargers 8
Before use 8
Charging the battery pack (see Fig. A) 8
Inserting/removing the battery pack 9
Checking the battery charge level 9
Getting started 9
Selecting the direction of rotation 9
Switching on/off 9
Attaching the adapter 9
Maintenance and cleaning 10
Disposal....10
Kompernass Handels GmbH warranty....11
Service....12
Importer....12
Translation of the original Conformity Declaration....13
Ordering a replacement battery and charger 14
Introduction
Congratulations on the purchase of your new appliance. You have selected a high-quality product. The operating instructions are part of this product. They contain important information about safety, usage and disposal. Before using the product, please familiarise yourself with all instructions regarding safety and use. Use the product only as described and for the specified range of applications. Please also pass on all documents to any future owner.
Intended use
This appliance is intended for tightening and loosening hexagonal bolts and nuts. Use this appliance only as described and for the areas of applications specified. Any other usage of or modification to the machine is deemed to be improper and carries the risk of serious personal injury. The manufacturer accepts no responsibility for damage(s) attributable to misuse. The appliance is not intended for commercial use.
Features
① Rotation direction switch
② Rotating adjusting ring
③ Safety lock-out
4 Handle
⑤ Battery display LED
⑥ Battery charge level button
⑦ Battery pack
8 Release button for the battery pack
9 ON/OFF switch
⑩ LED work light
⑪ Adapter (1/2" to 3/8")
⑫ Tool holder (1/2")
13 Rotating appliance head
14 High-speed battery charger
15 Red charge indicator LED
16 Green charge indicator LED
Package contents
1 20V Cordless Ratchet
1 battery pack PAP 20 B1
1 high-speed battery charger PLG 20 C1
1 adapter 1/2" to 3/8"
1 carrying case
1 set of instructions for use
Technical data
20V Cordless Ratchet
Idle speed n 0–230 rpm
Max. torque 75 Nm
Square drive 1/2"
Rated voltage 20 V = (DC)
Battery 20 V PAP 20 B1
Type
L1-on
LITHIUM ION
Rated voltage 20 V --- (DC)
Capacity 2.0 Ah
Cells 5
Battery charger PLG 20 C1
INPUT
Rated voltage 230–240 V \~ 50 Hz (AC)
Rated power
consumption 65 W
Fuse (internal) 3.15 A T3.15A
OUTPUT
Rated voltage 21.5 V
(DC)
Rated current 2.4 A
Charging time approx. 60 minutes
Protection class II/ □ (double insulation)
The appliance is part of the Parkside
X20V team series and can be operated using Parkside batteries.
Batteries from the Parkside X2014TEAM
series may only be charged using Parkside
X20V series chargers.
We recommend that you only operate this appliance with the following batteries:
PAP20A1/PAP 20A2/PAP 20A3/
PAP20B1/PAP 20B3/Smart PAPS 204A1/
Smart PAPS 208A1.
We recommend that you charge these batteries with the following chargers:
PLG 20 A3/PLG 20 A4/PLG 20 C1/
PLG 20 C3/PDSLG 20 A1/
Smart PLGS 2012 A1
Noise emission values
Noise measurement value determined in accordance with EN 62841. The A-rated noise level of the power tool at the working location is typically as follows:
Sound pressure level L = 83.7 dB
Uncertainty KpA = 3 dB
Sound power level L WA = 91.7 dB
Uncertainty KWA = 3 dB

Wear hearing protection!
Total vibration values (vector sum of three directions) determined in accordance with EN 62841:
Screwing ah < 2.5 m/s2
Uncertainty K = 1.5 m/s 4
NOTE
The vibration emission values and noise emission values given in these instructions have been measured in accordance with a standardised test procedure and can be used for comparison of the power tool with another tool.
The specified total vibration values and the noise emission values can also be used to make a provisional load estimate.

WARNING!
▶ Depending on the manner in which the power tool is being used, and in particular the kind of workpiece being worked, the vibration and noise emission values can deviate from the values given in these instructions during actual use of the power tool.
▶ Try to keep the vibration load as low as possible. Measures to reduce the vibration load are, e.g. wearing gloves and limiting the working time. Wherein all states of operation must be included (e.g. times when the power tool is switched off and times where the power tool is switched on but running without load).
General power tool safety warnings

WARNING!

Read all safety warnings, instructions, illustrations and specifications provided with this power tool. Failure to follow all instructions listed below may result in electric shock, fire and/or serious injury.
Save all warnings and instructions for future reference.
The term "power tool" in the warnings refers to your mains-operated (corded) power tool or battery-operated (cordless) power tool.
1. Work area safety
a) Keep work area clean and well lit. Cluttered or dark areas invite accidents.
b) Do not operate power tools in explosive atmospheres, such as in the presence of flammable liquids, gases or dust. Power tools create sparks which may ignite the dust or fumes.
c) Keep children and bystanders away while operating a power tool. Distractions can cause you to lose control.
2. Electrical safety
a) Power tool plugs must match the outlet. Never modify the plug in any way. Do not use any adapter plugs with earthed (grounded) power tools. Unmodified plugs and matching outlets will reduce risk of electric shock.
b) Avoid body contact with earthed or grounded surfaces, such as pipes, radiators, ranges and refrigerators. There is an increased risk of electric shock if your body is earthed or grounded.
c) Do not expose power tools to rain or wet conditions. Water entering a power tool will increase the risk of electric shock.
d) Do not abuse the cord. Never use the cord for carrying, pulling or unplugging the power tool. Keep cord away from heat, oil, sharp edges or moving parts. Damaged or entangled cords increase the risk of electric shock.
e) When operating a power tool outdoors, use an extension cord suitable for outdoor use. Use of a cord suitable for outdoor use reduces the risk of electric shock.
f) If operating a power tool in a damp location is unavoidable, use a residual current device (RCD) protected supply. Use of an RCD reduces the risk of electric shock.
3. Personal safety
a) Stay alert, watch what you are doing and use common sense when operating a power tool. Do not use a power tool while you are tired or under the influence of drugs, alcohol or medication. A moment of inattention while operating a power tool may result in serious personal injury.
b) Usepersonal protective equipment. Always wear safety goggles. Protective equipment such as a dust mask, non-skid safety shoes, hard hat or hearing protection used for appropriate conditions will reduce personal injuries.
c) Prevent unintentional starting. Ensure the switch is in the off-position before connecting to power source and/or battery pack, picking up or carrying the tool. Carrying power tools with your finger on the switch or energising power tools that have the switch on invites accidents.
d) Remove any adjusting key or wrench before turning the power tool on. A wrench or a key left attached to a rotating part of the power tool may result in personal injury.
e) Do not overreach. Keep proper footing and balance at all times. This enables better control of the power tool in unexpected situations.
f) Dress properly. Do not wear loose clothing or jewellery. Keep your hair and clothing away from moving parts. Loose clothes, jewellery or long hair can be caught in moving parts.
g) If devices are provided for the connection of dust extraction and collection facilities, ensure these are connected and properly used. Use of dust collection can reduce dust-related hazards.
h) Do not allow yourself to get lulled into a false sense of security, and do not ignore the safety regulations for power tools, even if you are familiar with the power tool after repeated use. A careless action can cause severe injury within a fraction of a second.
- Power tool use and care
a) Do not force the power tool. Use the correct power tool for your application. The correct power tool will do the job better and safer at the rate for which it was designed.
b) Do not use the power tool if the switch does not turn it on and off. Any power tool that cannot be controlled with the switch is dangerous and must be repaired.
c) Disconnect the plug from the power source and/or remove the battery pack, if detachable, from the power tool before making any adjustments, changing accessories, or storing power tools. Such preventive safety measures reduce the risk of starting the power tool accidentally.
d) Store idle power tools out of the reach of children and do not allow persons unfamiliar with the power tool or these instructions to operate the power tool. Power tools are dangerous in the hands of untrained users.
e) Maintain power tools and accessories. Check for misalignment or binding of moving parts, breakage of parts and any other condition that may affect the power tool's operation. If damaged, have the power tool repaired before use. Many accidents are caused by poorly maintained power tools.
f) Keep cutting tools sharp and clean. Properly maintained cutting tools with sharp cutting edges are less likely to bind and are easier to control.
g) Use the power tool, accessories and tool bits, etc. in accordance with these instructions, taking into account the working conditions and the work to be performed. Use of the power tool for operations different from those intended could result in a hazardous situation.
h) Keep handles and grasping surfaces dry, clean and free from oil and grease. Slippery handles and grasping surfaces do not allow for safe handling and control of the tool in unexpected situations.
5. Use and handling of the cordless electrical power tool
a) Only charge rechargeable batteries using the chargers recommended by the manufacturer. Chargers are often designed for a particular type of rechargeable battery unit. There is a risk of fire if other types of rechargeable battery units are used.
b) Only the rechargeable battery units supplied are to be used with an electrical power tool. The use of other rechargeable battery units may lead to the danger of injury or fire.
c) When they are not being used, store rechargeable battery units away from paperclips, coins, keys, nails, screws or other small metal objects that could cause the contacts to be bridged. Short-circuiting the contacts of a rechargeable battery unit may result in heat damage or fire.
d) Fluids may leak out of rechargeable battery units if they are misused. If this happens, avoid contact with the fluid. If contact occurs, flush the affected area with water. Seek additional medical help if any of the fluid gets into your eyes. Escaping battery fluid may cause skin irritation or burns.
e) Do not use a damaged or modified battery. Damaged or modified batteries may behave unexpectedly and cause fires, explosions or pose a risk of injury.
f) Do not expose a battery to fire or excessively high temperatures. Fire or temperatures in excess of 130°C (265°F) can cause an explosion.
g) Follow all instructions regarding charging, and never charge the battery or the cordless tool outside of the temperature range given in the operating instructions. Incorrect charging or charging outside the permissible temperature range can destroy the battery and increase the risk of fire.

CAUTION! RISK OF EXPLOSION!
Never charge non-rechargeable batteries.

Protect the rechargeable battery from heat; for example, from continuous exposure to sunlight, fire, water and moisture. There is a risk of explosion.
- Service
a) Have your power tool serviced by a qualified repair person using only identical replacement parts. This will ensure that the safety of the power tool is maintained.
b) Never try to repair damaged batteries. Maintenance of batteries should only be carried out by the manufacturer or an approved customer service centre.
Appliance-specific safety guidelines for cordless ratchets
■ Hold the power tool by the insulated gripping surfaces when performing an operation where a screw may contact hidden wiring. Contact with a live wire may electrify exposed metal parts of the tool and could give the operator an electric shock.
- Secure the workpiece. A workpiece securely held by a clamping device or vice is much safer than one held in your hand.
- Hold the power tool firmly. High reaction moments can occur for brief periods while tightening and loosening screws.
■ Switch the power off immediately if the tool blocks while in use. Be prepared for high reaction moments as these can cause kickback.
■ Disconnect the battery pack before carrying out any work on the appliance. This prevents the power tool from starting up unintentionally.
■ CAUTION, PIPES AND CABLES! DANGER!
Ensure that you are not likely to hit power, gas or water supply lines when you are working with the power tool.
Safety instructions for battery chargers
■ This appliance may be used by children aged 8 years and above and by persons with limited physical, sensory or mental capabilities or lack of experience and knowledge, provided that they are under supervision or have been told how to use the appliance safely and are aware of the potential risks. Do not allow children to play with the appliance. Cleaning and user maintenance tasks may not be carried out by children unless they are supervised.
- To avoid potential risks, a damaged power cord for this appliance should be replaced by the manufacturer or the manufacturer’s customer service department
RU☐DIVLPODUO\TXDOLηHG☐SHU-
son.
The charger is suitable for indoor use only.
WARNING!
■ To avoid potential risks, a damaged power cord for this appliance should be replaced by the manufacturer or the manufacturer's customer service GHSDUWPHQW□RU□D□VLPLODUO□TXDOLηF person.
ATTENTION!
This charger can only charge the IROORZLQJEDWWHULHV 3 3 3 3 3 3 3 3 3 3 3 3 3 3 3 3 3 3 3 3 3 3 3 3 3 3 3 3 3 3 3 3 3 3 3 3 3 3 3 3 3 3 3 3 3 3 3 3 3 3 3
Before use
Charging the battery pack (see Fig. A) CAUTION!
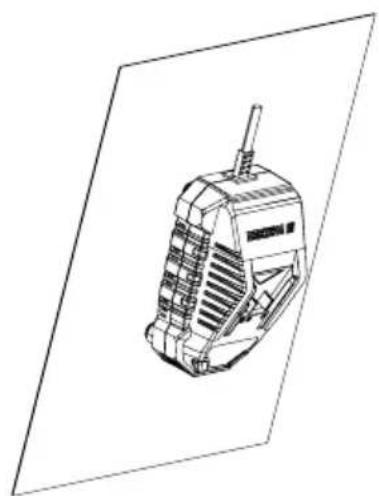
▶ Always unplug the tool before you remove the battery pack from or connect the battery pack to the charger.
▶ Never charge the battery pack if the ambient temperature is below 10° C or above 40° C. If a lithium-ion battery is going to be stored for an extended period, the charge level should be checked regularly. The optimum charge level is between 50% and 80%. The storage climate should be cool and dry, and the ambient temperature should be between 0° C and
♦ ,QVHUW□WKH□EDWWHU□SDFN7 into the high-VSHHG□FKDUJHUr (see Fig. A).
♦ Plug the plug into the power outlet. The green charge indicator LED z lights up EULHΘ\□WKHQ□WKH□UHG□LQGLFDWRU□/(‘t lights up.
The green charge indicator LED 16 indicates that the charging process is complete and the battery pack 7 is ready for use.

ATTENTION!
If the red charge indicator LED 15 flashes, this means that the battery pack 7 has overheated and cannot be charged.
If the red and green charge indicator LEDs 15/16 both flash, this means that the battery pack 7 is defective.
♦ Push the battery pack ⑦ into the appliance.
- Switch off the charger for at least 15 minutes between successive charging sessions. Also disconnect the mains plug.
Inserting/removing the battery pack
Inserting the battery pack
◆ Snap the battery pack ⑦ into the handle.
Removing the battery pack
◆ Press the release button ⑧ and remove the battery pack ⑦.
Checking the battery charge level
- To check the battery status, press the battery charge level button ⑥. The status/remaining charge is shown on the battery display LED ⑤ as follows: RED/ORANGE/GREEN = maximum charge RED/ORANGE = medium charge RED = low charge - charge the battery
Getting started
Selecting the direction of rotation

WARNING!
The rotation direction switch ① may only be used/adjusted when the appliance is at a standstill.
♦ Select the direction of rotation by moving the rotation direction switch ① to the right or left.
Switching on/off
Switching on
◆ Press and hold down the safety lock-out ③. Then press the ON/OFF switch ⑨ and keep it pressed in. Once the appliance is running, you can release the safety lock-out ③. The LED work light ⑩ lights up when the ON/OFF switch ⑨ is pressed lightly or fully. This provides illumination of the work area in poor lighting conditions.
NOTE
- Pressing the ON/OFF switch ⑨ lightly yields a low speed/torque. Increasing the pressure increases the speed/tightening torque.
Switching off
◆ Release the ON/OFF switch ⑨.

ATTENTION!
◆ The tightening torque actually attained must always be checked with a torque wrench!
Attaching the adapter
♦ Push the adapter ⑪ onto the tool holder ⑫.
Maintenance and cleaning

WARNING! RISK OF INJURY!
Always switch off the appliance and remove the battery before carrying out any work on the appliance.
The appliance is maintenance-free.
■ The appliance must always be kept clean, dry and free from oil or grease.
■ Never allow liquids to get inside the appliance.
■ Use a dry cloth to clean the housing. Never use petrol, solvents or cleansers which can damage plastic.
If a lithium-ion battery is going to be stored for an extended period, the charge level should be checked regularly. The optimum charge level is between 50% and 80%. The optimum storage environment is cool and dry.
NOTE
▶ Replacement parts that are not listed (such as batteries, switches) can be ordered via our Service Hotline.
Disposal
Applies only to France

The product, its packaging and the operating instructions are recyclable. They are subject to an extended manufacturer responsibility and will be collected separately.
Do not dispose of power tools in your normal domestic waste!
The adjacent symbol of a crossed-out dustbin means
that this appliance is subject to Directive 2012/19/EU. This directive states that this appliance may not be disposed of in the normal household waste at the end of its useful life, but must be taken to specially set-up collection locations, recycling depots or disposal companies.
The disposal is free of charge for the user. Protect the environment and dispose of this appliance properly.

Your local community or municipal authorities can provide information on how to dispose of the worn-out product.
Li-ion
Do not dispose of batteries in your normal household waste! Defective or worn-out rechargeable batteries must be recycled.
Batteries/rechargeable batteries must be treated as hazardous waste and must therefore be disposed of in an environmentally sound manner by appropriate bodies (dealers, specialist dealers, public municipal bodies, commercial disposal companies). Batteries/recharge able batteries may contain toxic heavy metals.
If it is possible to do so without destroying the old appliance, remove the old batteries or rechargeable batteries before returning the appliance for disposal and take them to a separate collection point. In the case of permanently installed rechargeable batteries, you must indicate during disposal that the appliance contains a battery.
For this reason, do not dispose of batteries/rechargeable batteries in domestic waste. Take them to a specialist collection point. Only return batteries that are fully discharged.

The packaging is made from environmentally friendly material and can be disposed of at your local recycling plant.

Dispose of the packaging in an environmentally friendly manner. Note the labelling on the packaging and separate the packaging material components for disposal if necessary. The packaging material is labelled with abbreviations (a) and numbers (b) with the following meanings: 1–7: plastics, 20–22: paper and cardboard, 80–98: composites.
Applies only to Spain:
The packaging contains paper and/or cardboard components.

The packaging contains plastic and/or metal components.
This appliance comes with a 5-year warranty valid from the date of purchase. If included with the product on delivery, the battery packs of the X12V and X20V Team series come with a 3-year warranty from the date of purchase. In the event that this product has any defects, you, the buyer, have certain statutory rights. Your statutory rights are not limited in any way by the warranty described below.
Warranty conditions
The warranty period starts on the date of purchase. Please keep your receipt in a safe place. This will be required as proof of purchase.
If any material or manufacturing fault occurs within three years of the date of purchase of the product, we will either repair or replace the product for you or refund the purchase price (at our discretion). This warranty service requires that you present the defective appliance and the proof of purchase (receipt) within the three-year warranty period, along with a brief written description of the fault and of when it occurred.
If the defect is covered by the warranty, your product will either be repaired or replaced by us. The repair or replacement of a product does not signify the beginning of a new warranty period.
Warranty period and statutory claims for defects
The warranty period is not prolonged by repairs effected under the warranty. This also applies to replaced and repaired components. Any damage and defects present at the time of purchase must be reported immediately after unpacking. Repairs carried out after expiry of the warranty period shall be subject to a fee.
Scope of the warranty
This appliance has been manufactured in accordance with strict quality guidelines and inspected meticulously prior to delivery.
The warranty covers material faults or production faults. The warranty does not cover product parts that are subject to normal wear and tear and can therefore be considered wearing parts, such as saw blades, replacement blades, abrasive papers, etc. or for damage to fragile parts, such as switches or parts made of glass.
The warranty does not apply if the product has been damaged, improperly used or improperly maintained. The directions in the operating instructions for the product regarding proper use of the product are to be strictly followed. Uses and actions that are discouraged in the operating instructions or which are warned against must be avoided.
This product is intended solely for private use and not for commercial purposes. The warranty shall be deemed void in cases of misuse or improper handling, use of force and modifications/repairs which have not been carried out by one of our authorised Service centres.
The warranty does not apply to
■ Normal reduction of the battery capacity over time
■ Commercial use of the product
■ Damage to or alteration of the product by the customer
■ Non-compliance with safety and maintenance instructions, operating errors
■ Damage caused by natural hazards
Warranty claim procedure
To ensure quick processing of your case, please observe the following instructions:
■ Please have the till receipt and the item number (IAN) 492261_2410 available as proof of purchase.
■ You will find the item number on the type plate on the product, an engraving on the
product, on the front page of the operating instructions (below left) or on the sticker on the rear or bottom of the product.
If functional faults or other defects occur, please first contact the service department listed below by telephone or use our contact form, which you can find on parkside-diy.com in the Service category.
■ You can return a defective product to us free of charge to the service address that will be provided to you. Ensure that you enclose the proof of purchase (till receipt) and information about what the defect is and when it occurred.
You can view and download these instructions along with many other manuals at parkside-diy.com. This QR code will take you directly to parkside-diy.com. Select your
country and use the search box to search for the operating instructions. Enter the article number (IAN) 492261_2410 to find the operating instructions for your article.
Service
GB Service Great Britain
Tel.: 0800 051 897 0
Contact form on parkside-diy.com
IE Service Ireland
Tel.: 1800 851251
Contact form on parkside-diy.com
IAN 492261_2410
Importer
Please note that the following address is not the service address. Please use the service address provided in the operating instructions.
KOMPERNASS HANDELS GMBH
BURGSTRASSE 21 • 44867 BOCHUM
GERMANY
www.kompernass.com
Translation of the original Conformity Declaration
We, KOMPERNASS HANDELS GMBH, document officer: Mr Semi Uguzlu, BURGSTR. 21, 44867 BOCHUM, GERMANY, hereby declare that this product complies with the following standards, normative documents and EC directives:
Machinery Directive (2006/42/EC)
EMC (Electromagnetic Compatibility) (2014/30/EU)
EC Low Voltage Directive (2014/35/EU, charger only)
RoHS Directive (2011/65/EU)*
* The manufacturer bears the sole responsibility for compliance with this conformity declaration. The subject of the declaration described above meets the requirements of Directive 2011/65/EU of the European Parliament and Council of 8 June 2011 on the restriction of the use of certain hazardous substances in electrical and electronic equipment.
Applied harmonised standards
EN 62841-1:2015/A11:2022
EN 62841-2-2:2014
EN 60335-1:2012/A15:2021
EN 60335-2-29:2021/A1:2021
EN 62233:2008
EN IEC 55014-1:2021
EN IEC 55014-2:2021
EN IEC 61000-3-2:2019/A1:2021
EN 61000-3-3:2013/A2:2021
EN IEC 63000:2018
Type/tool designation: 20V Cordless Ratchet PARP 20-Li A1
Year of manufacture: 02–2025
Serial number: IAN 492261_2410
Bochum, 31/01/2025

Semi Uguzlu
- Quality Manager -
We reserve the right to make technical changes in the context of further product development.
Ordering a replacement battery and charger
You can easily order a replacement battery or charger on the Internet at www.kompernass.com.


Scan the QR code with your smartphone/tablet. You can use this QR code to go directly to our website to view and order the available replacement parts.
NOTE
▶ If you have problems with your online order, you can contact our Service Centre by phone or email.
▶ Always include the article number (IAN) 492261_2410 with your order.
▶ Please note that online ordering of replacement parts is not possible for all countries.
Inhaltsverzeichnis
Einleitung 16
KOMPERNASS HANDELS GMBH
BURGSTRASSE 21
44867 BOCHUM
GERMANY
www.kompernass.com

Courant nominal 2,4A
Durée
de la recharge env. 60 min
Classe
de protection II/ □ (Double isolation)
Directive relative aux machines (2006/42/EG)
Directive RoHS (2011/65/EU)*

WAARSCHUWING! LETSELGEVAAR!
KOMPERNASS HANDELS GMBH
BURGSTRASSE 21
44867 BOCHUM
DUITSLAND
www.kompernass.com

KOMPERNASS HANDELS GMBH
BURGSTRASSE 21
44867 BOCHUM
NĚMECKO
www.kompernass.com

Akumulator 20 V PAP 20 B1
Typ Li-Ion LITOWO- JONOWY
Napięcie
KOMPERNASS HANDELS GMBH
BURGSTRASSE 21
44867 BOCHUM
NIEMCY
www.kompernass.com

7HQWR|SUkVWURM|MHI:XUěHQØ|QD|GRYDKRYDQH|2WR|Q|KODYD|SUkVWURMD
DXYRňŐRYDQLH☐VNUXWLHN☐VRůHVÝKUDQ☐QŘKÓR☐DEkMDěND☐DNXPXOůWRUD
YRX□DPDWkF□3UkVWURM□SRXIkYDMWH□OHQ□WDN□DNR
MHRSkVDQgDIOHQYXYHGHQEFKREODVWLDFK
SRXILWLD N NR Y HN L Q VS RVRE SRX K Y D- HOHQ u /("NRQWUROND Q DEkMDQLD
QLDDOHERÍZSUDYDIVWURMDVDSRYDXMHJDSRX- Onsan halenia
IkYDQLH□YUR]SRUH□VXUěHQ∃P□ŽěHORP□DVZ□
V□QkP□VSRMHQg□]QDěQg□QHEH]SHěHQVWY#□□□9\$NX□UDěORY∂□XYDKRYůN
KOMPERNASS HANDELS GMBH
BURGSTRASSE 21
44867 BOCHUM
NEMECKO
www.kompernass.com

Smartfónom/tabletom naskenujte QR kód.
KOMPERNASS HANDELS GMBH
BURGSTRASSE 21
44867 BOCHUM
ALEMANIA
www.kompernass.com

KOMPERNASS HANDELS GMBH
BURGSTRASSE 21 • 44867 BOCHUM
TYSKLAND
www.kompernass.com

Scan QR-koden med din smartphone/tablet.
KOMPERNASS HANDELS GMBH
BURGSTRASSE 21
44867 BOCHUM
GERMANIA
www.kompernass.com
Semi Uguzlu


KOMPERNASS HANDELS GMBH
BURGSTRASSE 21
44867 BOCHUM
GERMANY
www.kompernass.com
Last Information Update · Stand der Informationen · Version des informations
Stand van de informatie · Stav informací · Stan informacji · Stav informácií
Estado de las informaciones · Tilstand af information · Versione delle informazioni



- 20V CORDLESS RATCHET / 20 V AKKU-RATSCHE / 20 V AKKU-RATSCHE / 20 V CLÉ À CLIQUET SANS FIL PARP 20-LI A1
- DE / AT / CH
- INTRODUCTION
- INTENDED USE
- FEATURES
- PACKAGE CONTENTS
- 20V CORDLESS RATCHET
- BATTERY 20 V PAP 20 B1
- BATTERY CHARGER PLG 20 C1
- WEAR HEARING PROTECTION
- NOTE
- WARNING
- GENERAL POWER TOOL SAFETY WARNINGS
- WORK AREA SAFETY
- ELECTRICAL SAFETY
- PERSONAL SAFETY
- USE AND HANDLING OF THE CORDLESS ELECTRICAL POWER TOOL
- CAUTION! RISK OF EXPLOSION
- APPLIANCE-SPECIFIC SAFETY GUIDELINES FOR CORDLESS RATCHETS
- ATTENTION
- BEFORE USE
- CHARGING THE BATTERY PACK (SEE FIG. A) CAUTION
- REMOVING THE BATTERY PACK
- GETTING STARTED
- SWITCHING ON/OFF
- SWITCHING OFF
- ATTACHING THE ADAPTER
- MAINTENANCE AND CLEANING
- WARNING! RISK OF INJURY
- DISPOSAL
- APPLIES ONLY TO FRANCE
- APPLIES ONLY TO SPAIN
- WARRANTY CONDITIONS
- WARRANTY PERIOD AND STATUTORY CLAIMS FOR DEFECTS
- SCOPE OF THE WARRANTY
- THE WARRANTY DOES NOT APPLY TO
- WARRANTY CLAIM PROCEDURE
- SERVICE
- IMPORTER
- TRANSLATION OF THE ORIGINAL CONFORMITY DECLARATION
- APPLIED HARMONISED STANDARDS
- ORDERING A REPLACEMENT BATTERY AND CHARGER
- INHALTSVERZEICHNIS
- DIRECTIVE ROHS (2011/65/EU)
- WAARSCHUWING! LETSELGEVAAR
- AKUMULATOR 20 V PAP 20 B1
- KOMPERNASS HANDELS GMBH
Brand : PARKSIDE
Model : PARP 20-Li A1
Category : Drill