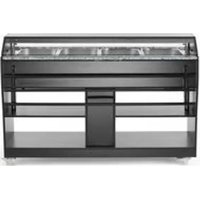
274064 - Refrigerator Arktic - Free user manual and instructions
Find the device manual for free 274064 Arktic in PDF.


| Product Type | Professional hot holding bain-marie |
| Intended Use | Holding food hot in professional kitchens (restaurants, canteens, etc.) |
| Dimensions (W x D x H) | Approximately 900 x 700 x 900 mm (estimated for 4 GN 1/1 containers) |
| Weight | Approximately 80 kg (estimated for a professional appliance of this size) |
| Power Supply | 230 V / 50 Hz, protection class I, requires grounded outlet |
| Power | Not specified in manual, estimated 2000-3000 W |
| Temperature Range | 30 °C to 90 °C |
| Water Tank Capacity | Between MIN and MAX marks (not specified in liters) |
| Included Containers | 4 GN 1/1 containers |
| Lid Material | Glass with built-in lighting |
| Swivel Casters | Yes, 4 wheels, 2 with brake |
| Functions | Resistance heating, digital thermostat, lid lighting, drain hose |
| Cleaning | Clean surfaces with a soft cloth and mild detergent, descale regularly |
| Descaling | Heat a descaling solution (vinegar or citric acid) at maximum temperature for 15 minutes, then rinse |
| Safety | Automatic overload breaker, thermal cut-out, emergency stop via switch |
| Repairability | Repairs only by qualified technician, replaceable power cord |
| Warranty | 1 year, subject to proper use and regular maintenance |
| Climate Class | Not specified, indoor use only |
| Included Accessories | Adjustable supports for glass lid, foldable tray guides |
Frequently Asked Questions - 274064 Arktic
User questions about 274064 Arktic
0 question about this device. Answer the ones you know or ask your own.
Ask a new question about this device
Download the instructions for your Refrigerator in PDF format for free! Find your manual 274064 - Arktic and take your electronic device back in hand. On this page are published all the documents necessary for the use of your device. 274064 by Arktic.
USER MANUAL 274064 Arktic
GB: Read user manual and keep this with the appliance.
GB: For indoor use only.
natural_image
Simple line drawing of a wine glass with a fork (no text or symbols)

GB: NOTE: This manual is translated from original English manual using AI and machine translations.
GB: Technical specifications / DE: Technische Angaben / NL: Technische gegevens / PL: Dane techniczne / FR: Données techniques / IT: Parametri di base / RO: Parametrii de bază / GR: Bašukéç paráµetrot / HR: Tehnički podaci / CZ: Technická specifikace / HU: Můszaki adatok / UA: Texníční характеристики / EE: Tehnilised andmed / LV: Tehniskās specifikacijas / LT: Techninės specifikacijos / PT: Especificações técnicas / ES: Especificaciones técnicas / SK: Technické špecifikácie / DK: Tekniske specifikationer / FI: Tekniset tiedot / NO: Tekniske spesifikasjoner / SI: Tehnične specifikacije / SE: Tekniska specifikationer / BG: Texнически спецификации / RU: Texнические данные
| A 274064 | |
| B 220-240V ~ 50 Hz / 220-240B ~ 50 Гц | |
| C 2000W / Вт | |
| D | 9A |
| E 30°C - 90°C | |
| F | I |
| G IPX4 | |
| H 4 x GN 1/1 (H)150 mm / мм | |
| I 20 kg / кг | |
| J 15 kg / кг | |
| K 1490 x 765 x (H)1025 mm / мм (Closed state*), 1490 x 1260 x (H)1370mm / мм (Open state**) | |
| L 109kg / кг | |
A: GB:Item no. / DE:Art.-Nr. / NL:Artikelnr. / PL:Nr pozycji / FR:N° d'article / IT:N. articolo / RO:Nr. articolului/ GR:Ap. είδους / HR:Broj stavke / CZ:Položka č. / HU:Cikkszám / UA:Homer elementa / EE:Artikli nr / LV:Vienums Nr. / LT:Prekès Nr. / PT:Item n.o / ES:N.o de artículo / SK:Č. položky / DK:Varenr. / FI:Kohteen nro / NO:Varenr. / SI:Št. izdelka / SE:Art.nr / BG:Homer na element / RU:Homer позиции
B: GB: Rated voltage and frequency / DE: Nennspannung und Frequenz / NL: Nominale spanning en frequentie / PL: Znamionowe napięcie i częstotliwość / FR: Tension et fréquence nominales / IT: Tensione e frequenza nominali / RO: Tensiune nominală și frecvență / GR: Ovojaotikn táon kai ouxvótnta / HR: Nazivni napon i frekvencija / CZ: Jmenovité napětí a frekvence / HU: Névleges feszültség és frekvencia / UA: Nominalna napругa ta частota / EE: Nimipinge ja -sagedus / LV: Nominalais spriegums un frekvence / LT: Vardinė jtampa ir dažnis / PT: Tensão e frequência nominais / ES: Tensión y frecuencia nominales / SK: Menovité napätie a frekvencia / DK: Nominel spænding og frekvens / FI: Nimellisjännite ja -taajuus / NO: Nominell spenning og frekvens / SI: Nazivna napetost in frekvenca / SE: Märkspänning och frekvens / BG: Nominalno напрежение и честота / RU: Nominalnohe напряжение и частота
C: GB: Rated input power / DE: Nenneingangsleistung / NL: Nominaal ingangsvermogen / PL: Znamionowa moc wejściowa / FR: Puissance d'entrée nominale / IT: Potenza nominale in ingresso / RO: Putere nominală de intrare / GR: Ovojaotikn ioxuç eioóbou / HR: Nazivna ulazna snaga / CZ: Jmenovitý vstupní výkon / HU: Névleges bemeneti teljesítmény / UA: Номінальна вхідна потужність / EE: Nimisisendvõimsus / LV: Nominālā ieejas jauda / LT: Vardinė jejimo galia / PT: Potência de entrada nominal / ES: Potencia de entrada nominal / SK: Menovitý vstupný výkon / DK: Nominel indgangseffekt / FI: Nimellistuloteho / NO: Nominell inngangseffekt / SI: Nazivna vhodna moč / SE: Märkineffekt / BG: Номинална входяща мощност / RU: Номинальная входная мощность
D: GB: Rated Current / DE: Nennstrom / NL: Nominale stroom / PL: Prąd znamionowy / FR: Courant nominal / IT: Corrente nominale / RO: Curent nominal / GR: Ovojaotikn' évtaon peúmatoç / HR: Nazivna struja / CZ: Jmenovitý proud / HU: Névleges áramerősség / UA: Hominálalýний струм / EE: Hinnatud praegune / LV: Nominálā strāva / LT: Vardinè srove / PT: Corrente nominal / ES: Corriente nominal / SK: Menovitý prúd / DK: Vurderet aktuel / FI: Nimellisvirta / NO: Nominell strøm / SI: Nazivni tok / SE: Nominell ström / BG: Hominalen tok / RU: Hominálalýний tok
E: GB: Temperature settings / DE: Temperatur-Einstellungen / NL: Temperatuur instellingen / PL: Ustawienia temperatury / FR: Réglages de température / IT: Impostazioni della temperatura / RO: Setări de temperatură / GR: Руθμίσεις θερμοκρασίας / HR: Postavke temperature / CZ: Nastavení teploty / HU: Hőmérséklet-beállítások / UA: Налаштування температури / EE: Temperatuurisätted / LV: Temperatūras iestatījumi / LT: Temperatūros nuostatos / PT: Definições de temperatura / ES: Ajustes de temperatura / SK: Nastavenie teploty / DK: Temperaturindstillinger / FI: Lämpötila-asetukset / NO: Temperaturinnstillinger / SI: Nastavitve temperature / SE: Temperaturinställningar / BG: Настройки на температурата / RU: Настройки температуры
F: GB:Protection class (Class) / DE:Schutzklasse (Klasse) / NL:Beschermingsklasse (klasse) / PL:Klasa ochrony (klasa) / FR:Classe de protection (classe) / IT:Classe di protezione (classe) / RO:Clasă de protectie (clasă) / GR:Kláon prostaociaç (katnyopia) / HR:Klasa zaštite (klasa) / CZ:Třída ochrany (třída) / HU:Védelmi osztály (osztály) / UA:Kлас захисту (klac) / EE:Kaitseklass (klass) / LV:Aizsardzības klase (klase) / LT:Apsaugos klasė (klasė) / PT:Classe de proteção (classe) / ES:Clase de protección (clase) / SK:Trieda ochrany (trieda) / DK:Beskyttelsesklasse (klasse) / FI:Suojausluokka (luokka) / NO:Beskyttelsesklasse (klasse) / SI:Razred zaščite (razred) / SE:Skyddsklass (klass) / BG:Kлас на защита (Klac) / RU:Klacc защиты (klacc)
G: GB: Waterproof protection rating / DE: Wasserdichtigkeitsschutzklasse / NL: Beschermingsgraad tegen water / PL: Klasa wodoodporności / FR: Indice de protection étanche / IT: Grado di protezione impermeabile / RO: Clasificare protecție impermeabilă / GR: Baθμός αδιάβροχης προστασίας / HR: Vodootporna zaštita / CZ: Odolnost proti vodě / HU: Vízálló védelmi besorolás / UA: Рейтинг водонепроникности / EE: Veekindluse kaitseaste / LV: Üdensnecaurlaidības klase / LT: Apsaugos nuo vandens klase / PT: Classificação de proteção à prova de água / ES: Grado de impermeabilidade / SK: Stupeň ochrany proti vode / DK: Vandtæt beskyttelsesklassificering / FI: Vedenpitävä suojausluokitus / NO: Vanntett beskyttelsesklassifisering / SI: Stopnja zaščite pred vodorom vode / SE: Vattentät skyddsklassning / BG: Клас на водоустойчивост / RU: Рейтинг водонепроницаемости
H: GB: Storage volume / DE: Lagervolumen / NL: Opslagvolume / PL: Pojemność magazynowa / FR: Volume de stockage / IT: Volume di stoccaggio / RO: Volum de depozitare / GR: Oykoç anoßnkeuonç / HR: Volumen pohrane / CZ: Úložný objem / HU: Tárolási térfogat / UA: Об'єм зберігання / EE: Hoiustamise maht / LV: Uzglabăšanas apjoms / LT: Laikymo tūris / PT: Volume de armazenamento / ES: Volumen de almacenamiento / SK: Kapacita úložiska / DK: Opbevaringsvolumen / FI: Tilavuus / NO: Lagringsvolum / SI: Prostornina shranjevanja / SE: Förvaringsvolym / BG: Obem на съхранение / RU: Полезный объем
I: GB: Maximum load for wooden shelf / DE: Maximale Beladung für Holzablage / NL: Maximale belasting voor houten plank / PL: Maksymalne obciążenie pótki drewnianej / FR: Charge maximale pour étagère en bois / IT: Carico massimo per ripiano in legno / RO: Încărcătură maximă pentru raftul de lemn / GR: Méγιστο φορτίο για ξύλινα ράφια / HR: Maksimalna količina za drvenu policu / CZ: Maximální náplň pro dřevěnou polici / HU: Maximális töltet fapolchoz / UA: Максимальне завантаження для дерев'яної полиці / EE: Puidust riiuli maksimaalne koormus / LV: Maksimālā slodze koka plauktam / LT: Didžiausia medinės lentynos apkrova / PT: Carga máxima para prateleira de madeira / ES: Carga máxima para estante de madera / SK: Maximálne zaťaženie drevenej poličky / DK: Maksimal fyldning for træhylde / FI: Puisen hyllyn maksimitäyttömäärä / NO: Maksimal belastning for trehylle / SI: Največja obremenitev za leseno polico / SE: Maximal last för trähylla / BG: Максimalen товар за дървен рафт / RU: Максимальная загрузка для деревянной полки
J: GB: Maximum load for folding tray guides / DE: Maximale Beladung für faltbare Trayführungen / NL: Maximale belasting voor vouwbakgeleiders / PL: Maksymalne obciążenie prowadnic tacek skladanych / FR: Charge maximale pour les guides de plateau pliable / IT: Carico massimo per le guide del vassoio pieghevole / RO: Încărcătură maximă pentru ghidajele tăvii de pliere / GR: Méyioto portio yia oðnyouç ovadinloúμενων διακων / HR: Maksimalno opterećenje za preklopne vodilice pretinca / CZ: Maximální náplň pro vodicí lišty skladacího podnosu / HU: Maximális terhelés a tálcavezetők összehajtásához / UA: Максимальне навантаження для направляючих лотків для складання / EE: Maksimaalne koormus kokkuklapitavatele alusejuhikutele / LV: Maksimālā slodze salokāmajām paplātes vadotnēm / LT: Didžiausia lankstymo déklo kreipiamuju apkrova / PT: Carga máxima para guias de tabuleiros dobráveis / ES: Carga máxima para guías de bandeja plegable / SK: Maximálne zataženie pre vodiace lišty skladacieho podnosu / DK: Maksimal belastning for foldebakkestyr / FI: Maksimitäyttömäärä tarjottimen ohjaimille / NO: Maksimal belastning for brettebrettguider / SI: Največja količina perila za zložljiva vodila pladnja / SE: Maximal belastning för att vika brickguider / BG: Максimalen товар за сгъваеми водачи на tabla / RU: Максимальная загрузка для направляющих складных лотков
K: GB:Dimensions / DE:Abmessungen / NL:Afmetingen / PL:Wymiary / FR:Dimensions / IT:Dimensioni / RO:Dimensiuni / GR:Diastáσεις / HR:Dimenzije / CZ:Rozměry / HU:Méretek / UA:Pozmípi / EE:Mõõtmed / LV:Izmēri / LT:Matmenys / PT:Dimensões / ES:Dimensiones / SK:Rozmery / DK:Mål / FI:Mitat / NO:Mål / SI:Mere / SE:Mått / BG:Размери / RU:Размеры
*GB: Closed state / DE: Geschlossener Zustand / NL: Gesloten status / PL: Stan zamknięty / FR: État fermé / IT: Stato chiuso / RO: Stare închisă / GR: Kčelotn katástaon / HR: Zatvoreno stanje / CZ: Uzavřený stav / HU: Zárt állapot / UA: Закритий стан / EE: Suletud olek / LV: Slęgts stāvoklis / LT: Uždara valstybė / PT: Estado fechado / ES: Estado cerrado / SK: Uzavretý stav / DK: Lukket tilstand / FI: Suljettu tila / NO: Lukket tilstand / SI: Zaprto stanje / SE: Stängt tillstånd/ BG: Затворено състояние / RU: Закрытое состояние
**GB: Open state / DE: Offener Zustand/ NL: Staat openen / PL: Stan otwarty / FR: État ouvert / IT: Stato aperto / RO: Stare deschisă / GR: Avouktn kataotaon / HR: Otvoreno stanje/ CZ: Otevřit stav / HU: Nyitott állapot / UA: Bídkritий стан / EE: Avatud olek / LV: Atvěrt stāvokli / LT: Atviroji būsena/ PT: Estado aberto / ES: Estado abierto / SK: Otvorený stav/ DK: Āben tilstand / Fl: Avoin tila / NO: Āpen tilstand / Sl: Odprto stanje/ SE: Öppna tillstånd / BG: Отворено състояние / RU: Открытое состояние
L: GB:Net weight / DE:Nettogewicht / NL:Nettogewicht / PL:Waga netto / FR:Poids net / IT:Peso netto / RO:Greutate netä / GR:Kaθαρό βάρος / HR:Nelo težina / CZ:Čistá hmotnost / HU:Nettó tömeg / UA:Bara нетто / EE:Netokaal / LV:Neto svars / LT:Grynasis svoris / PT:Peso líquido / ES:Peso neto / SK:Čistá hmotnosť / DK:Nettovægt / FI:Nettopaino / NO:Nettovekt / SI:Neto teža / SE:Nettovikt / BG:Нетно тегло / RU:Вес нетто
GB: Remark: Technical specification is subjected to change without prior notification.
DE: Anmerkung: Die technische Spezifikation kann ohne vorherige Ankündigung geändert werden.
NL: Opmerking: De technische specificatie zijn onderworpen aan wijzigingen zonder voorafgaande kennisgeving.
PL: Uwaga: Specyfikacja techniczna może zostać zmieniona bez powiadomienia.
FR: Remarque: La spécification technique peut être modifiée sans notification préalable.
IT: Osservazione: Le specifiche tecniche sono soggette a modifiche senza preavviso.
RO: Observatie: Specificația tehnică se poate modifica fără notificare prealabilă.
GR: Σημείωση: Οι τεχνικές προδιαγραφές μπορούν να αλλάξουν χωρίς προειδοποίηση.
HR: Napomena: Tehničke specifikacije podložne su promjenama bez prethodne obavijesti.
CZ: Poznámka: Technická specifikace se může změnit bez předchozího upozornění.
HU: Megjegyzés: A műszaki adatok előzetes értesítés nélkül változhatnak.
UA: Зауваження: Технічні характеристики можуть змінюватися без попереднього повідомлення.
EE: Märkus: Tehnilisi andmeid võidakse muuta ilma eelneva teavitamiseta.
LV: Piezīme: Tehniskās specifikācijas var tikt mainītas bez iepriekšēja brīdinājuma.
LT: Pastaba: Techninė specifikacija gali būti keičiama be išankstinio įspėjimo.
PT: Observação: As especificações técnicas estão sujeitas a alterações sem notificação prévia.
ES: Observación: Las especificaciones técnicas están sujetas a cambios sin previo aviso
SK: Poznámka: Technické špecifikácie podliehajú zmenám bez predchádzajúceho oznámenia.
DK: Bemærkning: Tekniske specifikationer kan ændres uden forudgående varsel.
Fl: Huomautus: Teknisiä tietoja voidaan muuttaa ilman ennakkoilmoitusta.
NO: Merknad: Teknisk spesifikasjon kan endres uten forhåndsvarsel.
Sl: Opomba: Tehnične specifikacije se lahko spremenijo brez predhodnega obvestila.
SE: Anmärkning: Tekniska specifikationer kan ändras utan föregående meddelande.
BG: Забележка: Техническите спецификации подлежат на промяна без предварително уведомление.
RU: Примечание. Технические характеристики могут быть изменены без предварительного уведомления.
ENGLISH
Dear Customer,
Thank you for purchasing this HENDI appliance. Read this user manual carefully, paying particular attention to the safety regulations outlined below, before installing and using this appliance for the first time.
Safety instructions
- Only use the appliance for the intended purpose it was designed for, as described in this manual.
- The manufacturer is not liable for any damage caused by incorrect operation and improper use.
- DANGER! RISK OF ELECTRIC SHOCK! Do not attempt to repair the appliance by yourself. Do not immerse the electrical parts of the appliance in water or other liquids. Never hold the appliance under running water.
- NEVER USE A DAMAGED APPLIANCE! Check the electrical connections and cord regularly for any damage. When damaged, disconnect the appliance from the power supply. Any repairs should only be carried out by a supplier or qualified person to avoid danger or injury.
- WARNING! When positioning the appliance, route the power cable safely if necessary to avoid unintentional pulling, being damaged, coming into contact with the heating surface, or causing a tripping hazard.
- WARNING! As long as the plug is in the socket the appliance is connected to the power supply.
- WARNING! ALWAYS switch off the appliance before disconnecting from the power supply, cleaning, maintenance or storage.
- Only connect the appliance to an electrical outlet with the voltage and frequency mentioned on the appliance label.
- Do not touch the plug/electrical connections with wet or damp hands.
- Keep the appliance and electrical plug/connections away from water and other liquids. If the appliance falls into water, remove the power supply connections immediately. Do not use the appliance until it has been checked by a certified technician. Failure to follow these instructions will cause life threatening risks.
- Connect the power supply into an easily accessible electrical outlet so you can disconnect the appliance immediately in case of emergency.
- Make sure the cord does not come in contact with sharp or hot objects and keep it away from open fire. Never pull the power cord to unplug it from the socket, always pull the plug instead.
- Never carry the appliance by its cord.
- Never try to open the housing of the appliance yourself.
- Do not insert objects into the housing of the appliance.
- Never leave the appliance unattended during use.
- This appliance should be operated by trained personnel in kitchen of the restaurant, canteens or bar staff, etc.
- This appliance should not be operated by persons with reduced physical, sensory or mental capabilities, or persons that have a lack of experience and knowledge.
- This appliance should, under any circumstances, not be used by children.
- Keep the appliance and its electrical connections out of reach of children.
- Never use accessories or any extra devices other than those
supplied with the appliance or recommended by the manufacturer. Failure to do so could pose a safety risk to the user and could damage the appliance. Only use original parts and accessories.
- Do not operate this appliance by means of an external timer or remote-control system.
- Do not place the appliance on a heating object (gasoline, electric, charcoal cooker, etc.).
- Do not cover the appliance in operation.
- Do not place any objects on top of the appliance.
- Do not use the appliance near any open flames, explosive or flammable materials. Always operate the appliance on a horizontal, stable, clean, heat-resistant and dry surface.
- The appliance is not suitable for installation in an area where a water jet could be used.
- Leave a space of at least 20 cm around the appliance for ventilation during use.
- WARNING! Keep all ventilation openings on the appliance free from obstruction.
Special safety instructions
• This appliance is intended for commercial use.
- CANTION! RISK OF BURNS! HOT SURFACES! The temperature of the accessible surfaces could be very
- high during use. Touch only the control panel, handles, switches, timer control knobs or temperature control knobs.
- If the supply cord is damaged, it must be replaced by the manufacturer, its service agent or similarly qualified persons in order to avoid a hazard. (Fixed supply cord inside, but it could be replaced)
- ATTENTION! Do not fill water over MAX level or below MIN level.
- WARNING! During installation, do not place on surfaces or near walls, partitions or kitchen furniture and the like – unless they are made of non-combustible material or clad with non-combustible heat-insulating material, and pay attention to the fire prevention regulations.
- Do not use the shelves for storage and processing of acidic, alkaline or salty food.
- Do not place articles on top of the appliance. Do not place objects with open sources of fire (e.g. candles) on top or beside the appliance. Do not place objects filled with water (e.g. vases) on or near the appliance.
- Do not use hard utensils to hit the glass surface. Do not pour out the water towards the glass surfaces, the glass surfaces may break during operation.
- Never cover the appliance during use. This may cause a fire hazard.
- Do not overload the shelves. The maximum load refers to "Technical specifications".
Intended use
- This appliance is intended to be used for commercial applications, for example in kitchens of restaurants, canteens, hospital and in commercial enterprises such as bakeries, butcheries, etc., but not for continuous mass production of food.
- The appliance is designed for keeping food warm. Any other use may lead to damage to the appliance or personal injury.
- Operating the appliance for any other purpose shall be deemed a misuse of the device. The user shall be solely liable for improper use of the device.
Grounding installation
This appliance is classified as protection class I and must be connected to a protective ground. Grounding reduces the risk of electric shock by providing an escape wire for the electric current.
This appliance is fitted with a power cord with grounding plug or electrical connections with grounding wire. The connections must be properly installed and grounded.
Main parts of the product
(Fig.1 on page 3)
- Glass cover with lighting
- Extendable support poles for glass cover
- GN 1/1 container x 4
- Folding tray guides
- Digital temperature controller
- Power switch
- Shelf
- Swivel wheels x 4 (2 with lock)
Remark: The content of this manual applies for all listed items unless specified otherwise. The appearance may vary from the shown illustrations.
Control panel
(Fig.2 on page 3)
-
Heating indicator
-
Up
-
Down
-
Light ON/OFF
-
SET
Preparation before use
- Remove all protective packaging and wrapping.
- Check that the device is in good condition and with all accessories. In case of incomplete or damaged delivery, please contact the supplier immediately. In this case, do not use the device.
- Clean the accessories and the appliance before use (See ==> Cleaning & Maintenance).
- Make sure the appliance is completely dry.
- Place the appliance on a horizontal, stable and heat resistant surface that is safe against water splashes.
- Keep the packaging if you intend to store your appliance in the future.
- Keep the user manual for future reference.
NOTE! Due to manufacturing residues, the appliance may emit a light odor during the first few uses. This is normal and does not indicate any defect or hazard. Make sure the appliance is well ventilated.
Operating instructions
- Lock on the wheels to fix your desired position.
- Move the glass cover to highest position by adjusting the extendable support holes.
- Unfold the sliding tray shelf if necessary.
- Close the drain completely.
- Fill the water container above MIN mark and below MAX mark.
1). Setting the temperature
- Press SET to enter into the setting mode. The set temperature is displayed.
- Press Up or Down to increase or decrease the set temperature.
- Press SET again to confirm the setting and exit.
Note: - If no button is pressed within 10 seconds. The newly set temperature will be stored.
- The temperature setting range from 30^ to 90^ .
2). Illumination at glass cover
- Press Light ON/OFF to switch ON the light. Press Light ON/OFF again to switch OFF the light.
3). Heating LED indicator
- During heating, LED indicator will lights up constantly.
- When the temperature is reached, the LED indicator light off.
- Now, it is ready to put the GN container with food on the appliance for warming
- Check the water level regularly during operation. Add water if the water level below MIN level.
- This appliance is fitted with an automatic overload circuit breaker. To make the appliance operational again, first allow the appliance to cool down, then fill with additional water
After use
- Turn off the appliance by power switch.
- Unplug the appliance from the electrical outlet.
- Allow the appliance & water to cool down.
- Drain out water from water tank by draining hose.
Note:
Due to manufacturing residues, the appliance may emit a slight odor. This is normal and does not indicate any defect or hazard. Make sure the appliance is well ventilated.
Cleaning & maintenance
- ATTENTION! Always disconnect the appliance from the power supply and cool down before storage, cleaning & maintenance.
- Do not use water jet or steam cleaner for cleaning and do not push the appliance under the water as the parts will get wet and electric shock might be resulted.
- If the appliance is not kept in a good state of cleanliness, this can adversely affect the life of the appliance and result in a dangerous situation.
- Food residues should be regularly cleaned and removed from the appliance. If the appliance is not cleaned properly, it will reduce its lifespan and may result in a dangerous condition during use.
Cleaning
- Clean the cooled exterior surface with a cloth or sponge slightly dampened with a mild soap solution.
- For reasons of hygiene, the appliance should be cleaned before and after use.
- Avoid water contacting the electrical components.
- Never immerse the appliance in water or other liquids.
- Never use aggressive cleaning agents, abrasive sponges, or cleaning agents containing chlorine. Do not use steel wool, metallic utensils, or any sharp or pointed objects for clean-
ing. Do not use petrol or solvents!
- No parts are dishwasher safe.
- Clean and descale the container at regular intervals (see chapter "Descaling")
| Parts How to | clean Remark | |
| All accessories such as containers. | Soak in warm, soapy water for about 10 to 20 minutes.Rinse under running water thoroughly. | Dry all parts well at last. |
| External glass surfaces | Wipe clean with a soft cloth and a little mild detergent. Make sure no water or moisture enters inside the of the appliance. | |
| Interior glass surfaces | Remove any food deposits.Wipe clean with a soft cloth and a little mild detergent. Make sure no water or moisture enters inside the of the appliance. |
Maintenance
- Check the operation of the appliance regularly to prevent serious accidents.
- If you see that the appliance is not working properly or that there is a problem, stop using it, switch it off and contact the supplier.
- All maintenance, installation and repair work must be carried out by specialised and authorised technicians, or recommended by the manufacturer.
Transportation and Storage
- Before storage, always make sure that the appliance has been disconnected from the power supply and completely cooled down.
- Store the appliance in a cool, clean and dry place.
- Never place heavy objects on the appliance as this could damage it.
- Do not move the appliance while it is under operation. Disconnect the appliance from power supply when moving and hold it at the bottom.
- Special care must be taken when moving or transporting the machine due to its heavy weight. With at least 2 persons or using a cart. Move the machine slowly, carefully, and never incline more than 45^ .
Descaling
- This appliance should be cleaned and descaled frequently. To keep this appliance in optimum condition and to ensure its operation, it is crucial that you descale the appliance on a regular basis. Depending on the hardness of the water and the frequency of use, you need to repeat the following procedure regularly.
- To descale use a descaling agent that is suitable for the appliance.
-
You can also use pure lemon juice, citric acid or cleaning vinegar as a de-scaling agent. To ensure the proper mixture, read the instructions supplied with the agent. For pure lemon juice or cleaning vinegar the general mixture applies of 1/3 cleaning vinegar or lemon juice to 2/3 water.
-
Pour the solution in the appliance above the "MIN" level.
- Heat the solution by maximum temperature for 15mins.
-
Wait to allow the solution to loosen the build-up.
-
Rub lightly and gently with a brush with soft bristles.
- Drain off the dirty water.
- Repeat steps 1\~5 until build-up has been removed.
- Use a dry cloth to wipe the solution away.
- When you drain off dirty water, leave the tap open(if applicable) and rinse the boiler with clean water till taste and smell are completely gone.
- Now you can use the appliance again.
NOTE! Warranty is void if failure to descale regularly leads to reduced functioning or failure of the appliance.
Troubleshooting
If the appliance does not function properly, please check the below table for the solution. If you are still unable to solve the problem, please contact the supplier/service provider.
| Problems Possible cause | Possible solution | |
| When connected to the electrical power supply, the temperature level is set & the power indicator lights on. But the appliance does not heat up. | Thermal cut-out activated | Contact the supplier. |
| Heating element is burnt out. | ||
| When connected to the electrical power supply, temperature level is set. The appliance heat up but the lamp indicator does not light up. | The indicator light is defective. | |
| Neither the power indicator light up nor the heating elements heat up | The power plug is not connected correctly with the electrical power outlet | Check the connection and make sure all the connections are correctly connected. |
Warranty
Any defect affecting the functionality of the appliance which becomes apparent within one year after purchase will be repaired by free repair or replacement provided the appliance has been used and maintained in accordance with the instructions and has not been abused or misused in any way. Your statutory rights are not affected. If the appliance is claimed under warranty, state where and when it was purchased and include proof of purchase (e.g. receipt).
In line with our policy of continuous product development we reserve the right to change the product, packaging and documentation specifications without notice.
Discarding & Environment
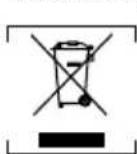
When decommissioning the appliance, the product must not be disposed of with other household waste. Instead, it is your responsibility to dispose to your waste equipment by handing it over to a designated collection point. Failure to follow this
rule may be penalized in accordance with applicable regulations on waste disposal. The separate collection and recycling of your waste equipment at the time of disposal will help conserve natural resources and ensure that it is recycled in a man-
ner that protects human health and the environment.
For more information about where you can drop off your waste for recycling, please contact your local waste collection company. The manufacturers and importers do not take responsibility for recycling, treatment and ecological disposal, either directly or through a public system.
DEUTSCH
Ohutusalased erijuhised
-
Indikator for oppvarming
-
Opp
-
Ned
-
Lys PÅ/AV
-
SETT
39100 Bolzano (BZ), Italy
Tel: +39 800 727 438
Email: office.italy@hendi.eu
HENDI GmbH
Ehring 15
1201, 12/F Exchange Tower
33 Wang Chiu Road, Kowloon Bay, Hong Kong
Tel: +852 2154 2618
Email: info-hk@hendi.eu
HENDI Romania S.R.L.
https://www.linkedin.com/company/hendi-tools-for-chefs/
www.youtube.com/HendiEquipment
GB: Changes, printing and typesetting errors reserved.
- ENGLISH
- Dear Customer,
- Safety instructions
- Special safety instructions
- Intended use
- Grounding installation
- Main parts of the product
- (Fig.1 on page 3)
- Control panel
- (Fig.2 on page 3)
- Preparation before use
- Operating instructions
- 1). Setting the temperature
- 2). Illumination at glass cover
- 3). Heating LED indicator
- After use
- Note:
- Cleaning & maintenance
- Cleaning
- Maintenance
- Transportation and Storage
- Descaling
- Troubleshooting
- Warranty
- Discarding & Environment
- DEUTSCH
- Ohutusalased erijuhised
- HENDI GmbH
- HENDI Romania S.R.L.
Brand : Arktic
Model : 274064
Category : Refrigerator