
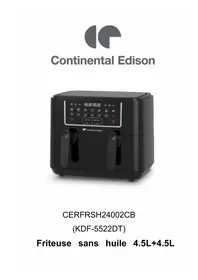
CEFR24001TB - Deep fryer CONTINENTAL EDISON - Free user manual and instructions
Find the device manual for free CEFR24001TB CONTINENTAL EDISON in PDF.

| Product Type | Oil-free fryer (air fryer) |
| Total Capacity | 10.5 L |
| Number of Zones | 2 independent zones |
| Capacity per Basket | 450 g maximum |
| Basket Material | Non-stick coating |
| Temperature Range | 50 °C to 200 °C (in 10 °C increments) |
| Timer | Up to 24 h (dehydration mode) |
| Automatic Programs | 14 (Fries, Steak, Fish, Chicken, Pizza, Vegetables, Shrimp, Cake, Dehydration, etc.) |
| Special Functions | DUAL COOK, SYNC FINISH, Preheat |
| Display | Digital (temperature and remaining time) |
| Standby Consumption | 0.3 W |
| Cooling Time Before Cleaning | 30 minutes |
| Basket Cleaning | Hot water + liquid soap, non-abrasive sponge |
| Heating Element Cleaning | Cleaning brush |
| Safety | Automatic shut-off, overheat protection |
| Cord Length | Approx. 0.8 m (cord storage) |
| Brand | Continental Edison |
| Model | CEFR24001TB |
Frequently Asked Questions - CEFR24001TB CONTINENTAL EDISON
User questions about CEFR24001TB CONTINENTAL EDISON
0 question about this device. Answer the ones you know or ask your own.
Ask a new question about this device
Download the instructions for your Deep fryer in PDF format for free! Find your manual CEFR24001TB - CONTINENTAL EDISON and take your electronic device back in hand. On this page are published all the documents necessary for the use of your device. CEFR24001TB by CONTINENTAL EDISON.
USER MANUAL CEFR24001TB CONTINENTAL EDISON
natural_image
Abstract geometric shapes resembling partial arcs or crescent, rendered in grayscale with no text or symbols.Continental Edison
CEFR24001TB
Surfaces chaudes
EN (translated from the original)
MISE AU REBUT CORRECTE DE CE PRODUIT
This appliance is intended to be used in household and similar applications such as:
- staff kitchen areas in shops, offices and other working environments;
- farm houses;
– by clients in hotels, motels and other residential type environments; - bed and breakfast type environments.
Please read this user manual carefully before using the appliance, and keep it safe for future reference.
This appliance can be used by children aged from 8 years and above and persons with reduced physical, sensory or mental capabilities or lack of experience and knowledge if they have been given supervision or instruction concerning use of the appliance in a safe way and understand the hazards involved.
Children shall not play with the appliance.
Cleaning and user maintenance shall not be made by children unless they are older than 8 and supervised.
Keep the appliance and its cord out of reach of children less than 8 years.
Never immerse the housing in water, as it contains electrical components and heating elements.
Do not let any water or other liquid enter the appliance, in order to prevent electric shock.
Always put the ingredients to be fried in the tray, so as to prevent them from coming into contact with the heating elements.
Do not cover the air inlet and the air exhaust openings while the appliance is operating.
Do not fill the frying tray with oil as this may cause a fire hazard.
Never touch the inside of the appliance while it is operating.
Check whether the voltage indicated on the appliance corresponds to the local mains voltage in your country before you connect the appliance.
Do not use the appliance if the plug, the power cord or the appliance itself is damaged.
If the supply cord is damaged, it must be replaced by the manufacturer, its service agent or similarly qualified persons in order to avoid a hazard.
Keep the appliance and its mains cord out of the reach of children when the appliance is switched on or is cooling down.
Keep the main cord away from hot surfaces.
Do not plug in the appliance or operate the control panel with wet hands.
Only connect the appliance to an earthed wall socket, and always make sure that the plug is inserted into the wall socket properly.
The appliance is not intended to be operated by means of an external timer or separate remote-control system.
Do not place the appliance on or near combustible materials such as a tablecloth or curtains.
Do not place the appliance against a wall or against other appliances.
Leave at least 10 cm of free space at the back side and 10 cm of free space above the appliance.
Do not place anything on top of the appliance.
Do not use the appliance for any purpose other than what is described in this manual.
Do not leave the appliance unattended while in operation.
During hot air frying, hot steam is released through the air exhaust openings. Therefore, keep your hands and face at a safe distance from the steam and the air exhaust openings.
Be careful of hot steam and hot air when you remove the frying tray from the appliance.

CAUTION: Hot surface.
Attention! Accessible surfaces may become hot during operation of the device.
Unplug the appliance immediately if you see dark smoke coming out of the appliance. Wait for the smoke emission to stop before you remove the frying tray from the appliance.
This appliance is intended to be used in households only.
For details on how to clean surfaces in contact with food, please refer to the “Cleaning” section of this manual.
This user guide is available in the following language versions for reference:
French (original version)
English (translated from the original text)
Any other translation will be a translation of the original version.
This user guide and any revised or new versions thereof can be found on our website.
Caution
Place the appliance on a horizontal and stable surface.
Always unplug the appliance after use.
Let the appliance cool down for about 30 minutes before handling or cleaning it.
Remove any burnt remains of food.
If the appliance is used improperly or if it is not used according to the instructions in the user manual, the warranty will become invalid, and the seller will not be held liable for any damage that may be caused.
Before using your air fryer for the first time
- Remove all packaging.
- Remove any stickers or labels from the appliance, other than the rating label.
- Thoroughly clean the frying tray with hot water and some liquid washing soap using a non-abrasive sponge.
- Wipe the inside and outside of the appliance with a damp cloth.
Preparing for use
- Place the appliance on a stable, horizontal, and heat-resistant surface.
- Place the crisper rack correctly in the frying tray.
Do not fill the frying tray with oil or any other liquid.
Do not put anything on top of the appliance. This may disrupt the airflow and affect the air-frying result..
General description
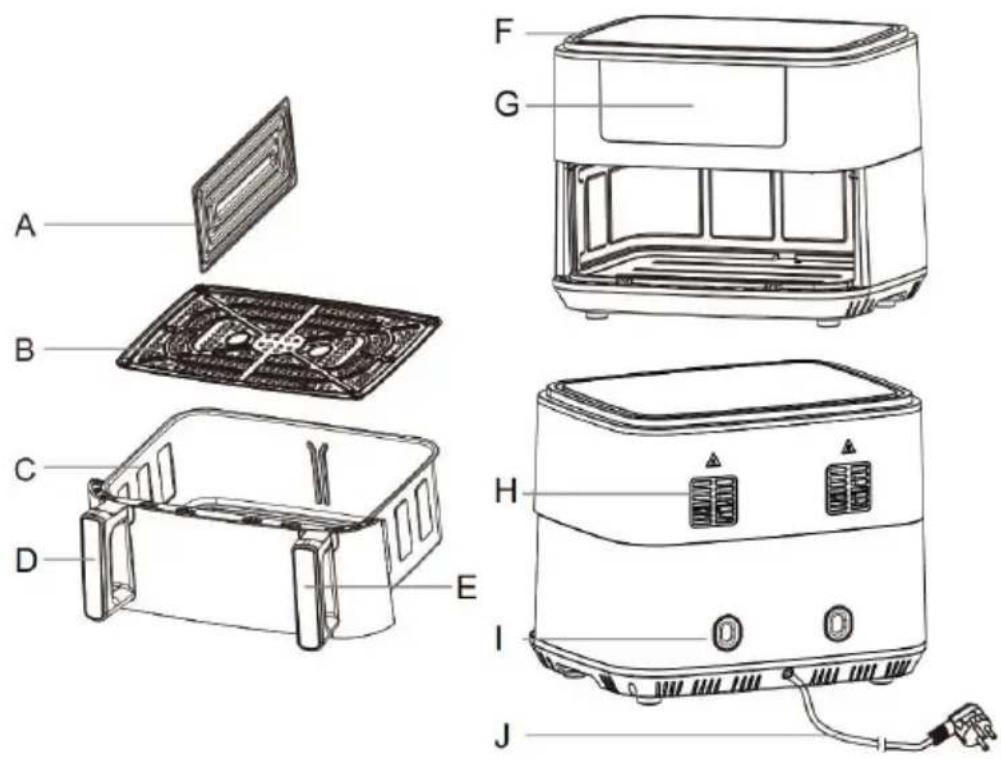
A: Divider board
B: Rack
C: The tray
D/E: Basket handle
F: Air inlet
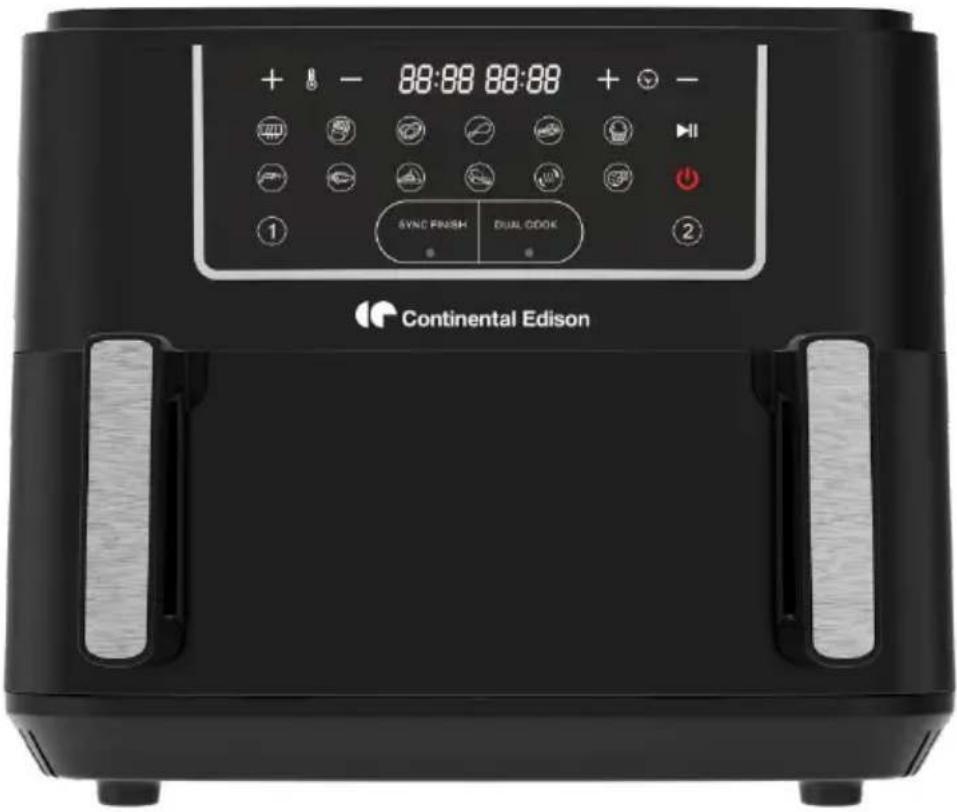
G: Control panel
H: Vent windows
I : Power cord storage point
J : Power cord
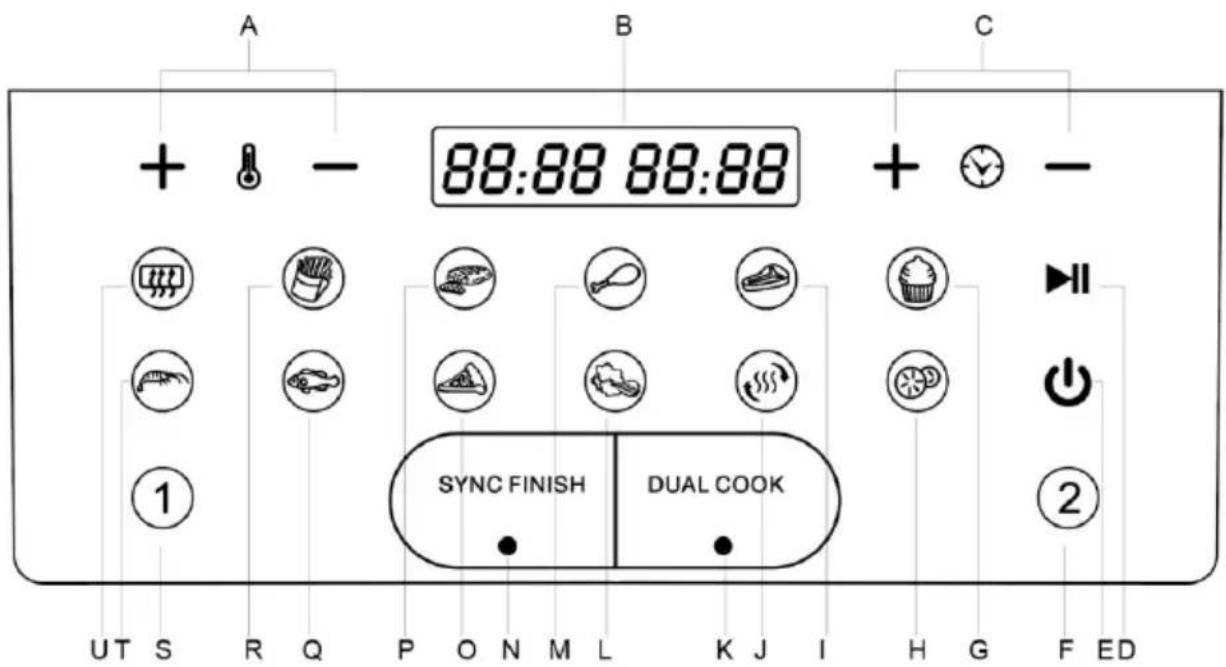
A: Temperature plus/minus B: Time/Temperature display
C: Timer plus/minus D: Start/Pause E: on/off F: Zone 2
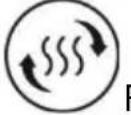
G: Cake H: Dehydrate I: Steak J: Re-heat K: DUAL Cook
L: Vegetables M: Drumsticks N: SYNC Finish O: Pizza
P: Meat Q: Fish R: French fries S: Zone 1 T: Shrimp
U: Pre-heat
Using the appliance
1. Power on
Plug in the appliance. A BEEP will sound and the display will light up. After one second, the appliance will return to standby mode. All
lights will be off except
2. Menu selection/Temperature/Time
To use zone 1 or 2 separately:
Plug in the appliance. When the appliance returns to standby
mode. press ⏻ Then, press or , and select the cooking function. You can adjust the time and temperature freely by pressing the Time +/- and Temperature +/- buttons. You can
also press any function icon to cook different food. Then press ▶, and the appliance will then start the operation.
To use zones 1 and 2 simultaneously:
1) Plug in the appliance. When the appliance returns to standby mode, press . Then press , and select the cooking function. You can adjust the time and temperature freely by pressing the Time +/- and Temperature +/- buttons. You can also press any function icon to cook different food.
2) After the function finishes, press and select the cooking function. You may adjust the time and temperature freely by using the Time +/- and Temperature +/- buttons. You can also press any function icon to cook different food.
3) After the above program finishes, press ▶ twice, and the appliance will start operating. Every function has its own default time and temperature, as shown in the table. You may adjust the time and temperature freely by using the Time +/- and Temperature +/- buttons.
The temperature control range is 50-200°C. Every click on the +/- temperature button will increase or decrease by 10°C. At 200°C, pressing the “+” button will loop the temperature back to 50°C, At 50°C, pressing the “-” button will cycle the temperature back to 200°C. While the temperature is being set, the temperature digital display will flash on the screen (it will not flash during operation). After flashing three times, the temperature is set.
The time range is 1 to 60 minutes. Each press on the + / - buttons will increase or decrease the time by 1 minute. At 60 minutes, if you press the "+" button, the time will cycle back to 1 min. At 01 min, if you press "-", the temperature will cycle back to 60 min. When the timer is being set, the time digital display will flash on the screen (it will not flash during operation). After flashing three
times, the time is set.
3. Start, pause/stop
After selecting the function, and setting the right time and temperature, press ▶the symbol will start to flash. After a BEEP sounds, the machine will start operating. While the machine is in operation, the ▶symbol is displayed. After ten BEEP sounds, the machine will stop working, press ▶and the symbol will stop flashing. When the machine is in operation, press ⏻After a BEEP sound, the machine will stop and return to standby mode.
Note:
(1). During operation, you can stop the machine to take the frying tray out, check the cooking result or add more food. The machine will continue to work according to the set program if you reinsert the frying tray.
4. End of program
The heating element will stop working when the operating time is complete and when 00 min is displayed. The motor will still run for 1 minute to cool down, and a warning buzzer will sound during this cooling period. After cooling is complete, the machine will enter standby mode.
SYNC FINISH

This button is used to cook two foods using two different functions, temperatures or cooking times, so that they finish at the same time.
Step1: Press smart finish button.
Step2: Program Zone 1
Place food in basket
Press ①
Select a cooking function and cooking time
Step3: Program Zone 2
Place food in basket
Press ②
Select a cooking function and cooking time
Step4: Begin cooking
Press ▶ to begin cooking

DUAL COOK
Cooking the same food in each zone
Set Zone 1 and use DUAL COOK to automatically match settings to zone 2.
Step1: Select DUAL COOK.
Step2: Select a cooking function.
Step3: Press ▶ to begin cooking.
Menu table
| Program Logistics | |||
| menu | Default time(min) | Default temperature (°C) | |
| Function | 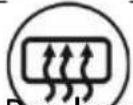 Pre-peat Pre-peat | 3 | 180 |
 Frenen fries Frenen fries | 18 | 200 | |
 Meat Meat | 12 | 200 | |
 Drumsticks Drumsticks | 20 | 200 | |
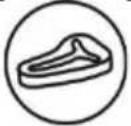 Steak Steak | 12 | 180 | |
 | 25 | 160 | |
 Shrimp Shrimp | 8 | 180 | |
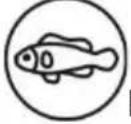 Fish Fish | 10 | 180 | |
 Pizza Pizza | 20 | 180 | |
 Vegetable Vegetable | 10 | 160 | |
 Re-heat Re-heat | 15 | 150 | |
 Dehydrate Dehydrate | 360(Adjustable time: 0.5 hour to 24 hours) | 60 | |
Caution: Do not touch the pan during and about 30mins after use, as it gets very hot.
Only hold the pan by the handle.
Operation steps
- Put the mains plug in an earthed wall socket.
- Put the ingredients into the frying tray.
- Put the frying tray in the right position. Choose a function from the menu and press START/PAUSE to start cooking.
- Screen display
The screen display will show the temperature and time. The temperature is the set temperature and time is the remaining operating time.
The function selected will flash.
- Some ingredients require shaking halfway through the preparation time (see the 'Settings' section in this chapter). To shake the ingredients, you can pull the frying tray out of the appliance by the handle and shake it. You can then slide the frying tray back into the air fryer.
- When the timer bell sounds, the set preparation time has elapsed. You can now pull the pan out of the appliance and place it on a heat-resistant surface.
- Check whether the ingredients are ready.
If the ingredients are not ready, you can simply slide the frying tray back into the appliance and continue cooking.
- Empty the tray into a bowl or onto a plate. Take care to empty it with a utensil so as not to risk the plate falling inside.
Tip: To remove large or fragile ingredients, you can use a pair of tongs to lift the ingredients out of the tray.
- When a batch of ingredients is ready, the air fryer is instantly ready to prepare another batch.
Note: When you use the Air Fryer for the first time, the appliance may emit a small amount of smoke or an odor. This is normal and will soon disappear. It is essential to ensure that there is sufficient ventilation around the Air Fryer.
Air Fry Cooking Chart
| Time (minutes) | Temperature(°C) | Action | Additional information |
Potatoes
| Frozen fries (300 to 400g each zone) | 18-21 | 200 | Shake the basket when halftime of cooking | |
| Fresh fries (8x8mm) (200 to 300g each zone) | 18-25 | 180 | Shake the basket when halftime of cooking | Add 1/2 tablespoon of oil in each zone |
| Fresh potatoes in quarters (200 to 300g each zone) | 18-22 | 180 | Shake the basket when halftime of cooking | Add 1/2 tablespoon of oil in each zone |
| Fresh cubed potatoes (200 to 300g each zone) | 12-18 | 200 | Shake the basket when halftime of cooking | Add 1/2 tablespoon of oil in each zone |
| Rosti (300 to 400g each zone) | 15-18 | 180 | ||
| Potato gratin (300 to 400g each zone) | 18-22 | 180 |
Meat and poultry
| Steak (300 to 400g each zone) | 8-22 | 180 | ||
| Pork (300 to 400g each zone) | 10-14 | 180 | ||
| Beef burger (300 to 400g each zone) | 7-14 | 180 |
Dehydrate
| Nuts (300 to 400g each zone) | 360 | 60 | Shake the basket when halftime of cooking |
Quick Meal
| Spring rolls (300 to 400g each zone) | 8-10 | 200 | Shake the basket when halftime of cooking | |
| Frozen chicken nuggets (300 to 400g each zone) | 6-10 | 200 | Shake the basket when halftime of cooking | |
| Frozen fish sticks (300 to 400g each zone) | 6-10 | 200 | ||
| Stuffed vegetables (300 to 400g each zone) | 10 | 160 |
Settings
In addition to the preset menu, you also can use this air fryer to make other food by setting the time and temperature. This table below helps you to select the basic settings for the ingredients you want to prepare.
Note: Keep in mind that these settings are for reference only. As ingredients differ in origin, size, shape and brand, we cannot guarantee the best setting for your ingredients.
Because the Rapid Air Technology instantly reheats the air inside the appliance, pulling the frying tray briefly out of the appliance during hot air frying will barely affect the cooking process.
Cooking Tips
The air fryer and parts will become hot during the cooking process.
Do not over fill the frying tray with food(max 450g).
Do not pack food into the frying tray.
Using Oil
Adding a small amount of oil to food can make it crispier.
Oil sprays are good for applying small amounts of oil evenly to food.
Food Tips
You can air fry frozen food that can be baked in the oven.
To make cakes, small pies, or any foods with filling or batter, you can place these foods in a heat-safe container and put them in the fry tray.
Coat dry foods with marinades before adding to the fry tray.
Reheating Foods
Simply set the temperature to 150^ C for up to 10 minutes.
COOKING GUIDE – Note: these settings are for guidance only. As ingredients differ in size shape and brand, you may need to adjust cooking times and temperatures.
Note: It is recommended to add minutes to the preparation time before you start frying if the appliance is cold
Cleaning
Clean the appliance after every use.
The frying tray, and the inside of the appliance have a non-stick coating. Do not use metal kitchen utensils or abrasive cleaning materials to clean them, as this may damage the non-stick coating.
- Remove the mains plug from the wall socket and let the appliance cool down.
Note: Remove the frying tray to let the air fryer cool down more quickly.
-
Wipe the outside of the appliance with a damp cloth.
-
Clean the frying tray with hot water, some washing liquid soap and a non-abrasive sponge.
You can use a washing liquid to remove any remaining dirt.
Note: The frying tray is dishwasher-proof.
Tip: If dirt is stuck to the crisper rack or at the bottom of the frying tray, you can fill the frying tray with hot water and some washing liquid soap, put the crisper rack in the frying tray, and let the frying tray and the crisper rack soak for approximately 10 minutes.
-
Clean the inside of the appliance with hot water and a non-abrasive sponge.
-
Clean the heating element with a cleaning brush to remove any food residue.
Storage
-
Unplug the appliance and let it cool down.
-
Make sure all parts are clean and dry.
Troubleshooting
| Problem | Possible cause | Solution |
| The air fryer does not work | The appliance is not plugged into the mains. | Put the mains plug in an earthed wall socket. |
| You have not set the timer. | Turn the timer knob to the required preparation time to switch on the appliance. | |
| Food not fully cooked | There is too much food in the frying tray. | Put smaller batches of food in the frying tray. Smaller batches will fry more evenly. |
| The set temperature is too low. | Turn the temperature control knob to the required temperature setting (see 'Settings' section). | |
| The preparation time is too short. | Turn the timer knob to the required preparation time (see 'Settings' section). | |
| The ingredients are fried unevenly in the air fryer. | Certain types of the ingredients need to be shaken halfway through the preparation time. | Ingredients that lie on the top of or across each other (e.g. fries) need to be shaken halfway throughout the preparation time (see 'Settings' section). |
| Fried snacks are not crispy when the come out of the air fryer | You may be cooking a type of snack intended for traditional deep fryers. | Use oven snacks or lightly brush some oil onto the snacks for a crispier result. |
| The pan doesn't slide into the appliance properly. | There is too much food in the frying tray. | Do not fill the tray beyond the maximum amount indicated in the table on the previous page. |
| White smoke is coming out of the appliance | You are preparing greasy ingredients. | Note that the temperature is well-controlled to be under 180°C when you fry greasy food in the air |
| Problem | Possible cause | Solution |
| The pan still contains greasy residue from the previous use. | White smoke is caused by grease heating up in the pan. Make sure you clean the pan properly after each use. | |
| Fresh potato fries arefried unevenly in the air fryer. | You may not have soaked the potato sticks properly before you fried them. | Soak the potato sticks in a bowl of water for at least 30 minutes. Take them out and dry them with kitchen paper. |
| You did not use the right type of potato. | Use fresh potatoes and make sure they stay firm during frying. | |
| Fresh potato fries are not crispy when they come out of the air fryer. | The crispiness of the fries depends on the amount of oil and water in the fries. | Make sure you dry the potato sticks properly before you coat them with oil. |
| Cut the potato into thinner sticks for a crispier result. | ||
| Add slightly more oil for a crispier result. |
Displaying error codes
If a technical problem prevents your device from functioning, an error code will appear on the screen. Please refer to the table below for its description.
| Code Error | Cause Possible | Solution |
| E1, E2 | The sensor probe error | Re-start the Air Fryer, if the error code remains the same, suggest contacting after-sales service. |
| E3 | The internal temperature of the product is too high, it may be a faulty heating pipe and fan. | Power off and wait for 20 minutes, When the temperature drops down to normal, re-start the Air fryer. If the error code still active, suggest contacting after-sales service. |
ENERGY CONSUMPTION
Product information for power consumption and maximum time to reach applicable low power mode.
| Standby mode | 0.3 W |
| The maximum time needed for the air fryer to automatically reach the applicable low power Mode or condition. | 5 minutes |
Correct Disposal of This Product
This marking indicates that this product should not be disposed with other household wastes throughout the EU. To prevent possible harm to the environment or human health from uncontrolled waste disposal, recycle it responsibly to promote the sustainable reuse of material resources. To return your used device, please use the return and collection systems or contact the retailer where the product was purchased. They can take this product for environmental safe recycling.
CONTINENTAL EDISON
120/126 Quai de Bacalan 33000
Bordeaux
France
natural_image
Abstract geometric shapes with overlapping semicircles (no text or symbols)Continental Edison
CEFR24001TB_IM_FR&EN_112025_v1

natural_image
Three black-and-white icons: a person recycling with arrows, a document, and a trash bin with an 'Recycle' symbol (no text or numbers present)www.continentaledison.fr CE

- MISE AU REBUT CORRECTE DE CE PRODUIT
- CAUTION: Hot surface.
- Attention! Accessible surfaces may become hot during operation of the device.
- Caution
- Before using your air fryer for the first time
- Preparing for use
- General description
- Using the appliance
- Power on
- Menu selection/Temperature/Time
- To use zone 1 or 2 separately:
- To use zones 1 and 2 simultaneously:
- Start, pause/stop
- Note:
- End of program
- SYNC FINISH
- Press ①
- Press ②
- DUAL COOK
- Operation steps
- Settings
- Cooking Tips
- Using Oil
- Food Tips
- Reheating Foods
- Cleaning
- Storage
- Displaying error codes
- ENERGY CONSUMPTION
- Correct Disposal of This Product
- Continental Edison
Brand : CONTINENTAL EDISON
Model : CEFR24001TB
Category : Deep fryer