T0691 - Lighting Vaxcel - Free user manual and instructions
Find the device manual for free T0691 Vaxcel in PDF.


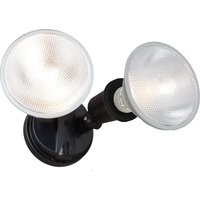
| Product Type | Adjustable Outdoor Light Fixture |
| Brand | Vaxcel |
| Model | T0691 |
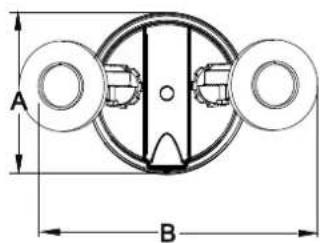
| Dimensions (A x B x C) | 10.80 cm x 17.15 cm x 13.33 cm |
| Approximate Weight | 1.3 kg |
| Power Supply | 120 V AC, 60 Hz |
| Maximum Bulb Wattage | 150 W (type PAR38) |
| Number of Bulbs | 2 (not included) |
| Operating Temperature | -25 °C to 45 °C |
| Protection Rating | Not specified, but suitable for outdoor use with caulking |
| Materials | Metal, plastic, rubber |
| Main Functions | On/off via wall switch, low intensity mode (30%) |
| Orientation | Manually tiltable left/right, up to 30° below horizontal |
| Installation | Wall or eave mount, requires outlet box |
| Maintenance and Cleaning | Silicone caulking around back plate for sealing |
| Safety | Turn off power before installation, comply with local electrical codes |
| Available Spare Parts | Mounting screws (3 sizes), mounting strap, decorative cover, connectors, gasket, fixture mounting screw |
| Warranty | 1 year against manufacturing and finish defects |
Frequently Asked Questions - T0691 Vaxcel
User questions about T0691 Vaxcel
0 question about this device. Answer the ones you know or ask your own.
Ask a new question about this device
Download the instructions for your Lighting in PDF format for free! Find your manual T0691 - Vaxcel and take your electronic device back in hand. On this page are published all the documents necessary for the use of your device. T0691 by Vaxcel.
USER MANUAL T0691 Vaxcel
ASSEMBLY AND INSTALLATION INSTRUCTIONS
T0689 / T0690 / T0691
WARNING: TO AVOID RISK OF ELECTRICAL SHOCK, BE SURE TO SHUT OFF POWER BEFORE INSTALLING OR SERVICING THIS FIXTURE.
NOTES: 1. Before installing, consult local electrical codes for wiring and grounding requirements. 2. READ AND SAVE THESE INSTRUCTIONS.
Hardware Package (included):

text_image
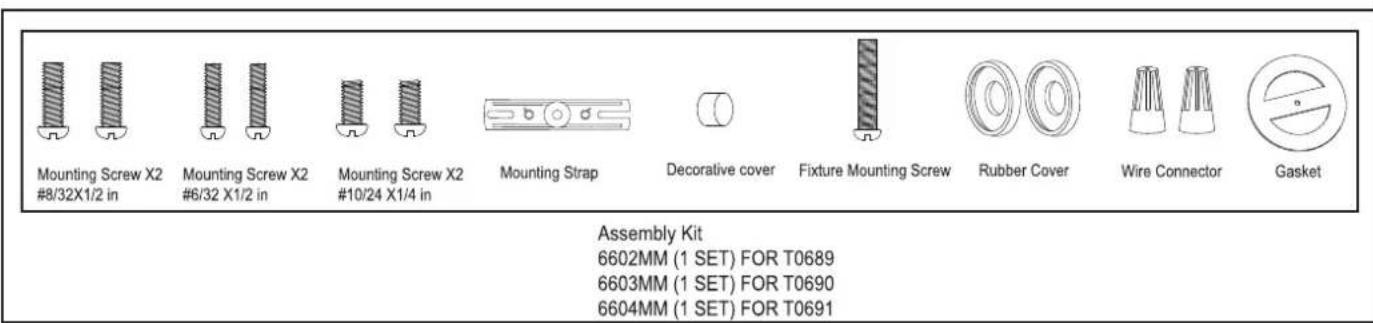
Mounting Screw X2 #8/32X1/2 in Mounting Screw X2 #6/32 X1/2 in Mounting Screw X2 #10/24 X1/4 in Mounting Strap Decorative cover Fixture Mounting Screw Rubber Cover Wire Connector GasketTools Needed:
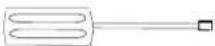
(1) Phillips-head Screwdriver
- Phillips-head screwdriver for attaching mounting screws to mounting strap, mounting bracket and fixture to mounting bracket.
Important to Know:
- If you are not familiar with state and local electrical codes, it is recommended that you consult with a qualified electrician.
- This fixture requires a 120 VAC, 60 Hz power source.
Maximum Wattage: 2-150 W (bulb not included) Working Temperature Range: -13°F \~ 113°F
Features:
- Switch Control: turns light ON and OFF by flicking the wall switch.
- Adjust between full brightness and low-level brightness by toggling the wall switch.
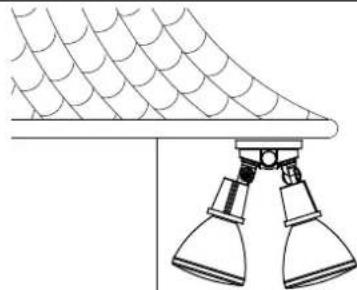
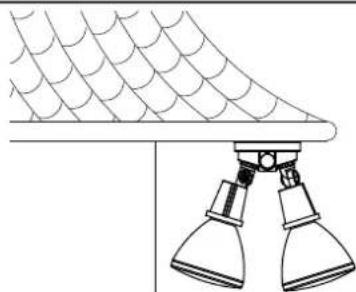
Note: Fixture can be wall mounted or eave mounted.

natural_image
Diagram showing a roof structure with scalloped roof and circular components, no text or symbols presentWall Mounted
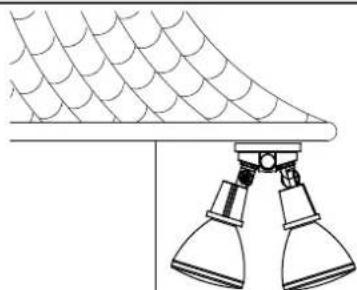
natural_image
Line drawing of a roof structure with two hanging lamps (no text or symbols)Eave Mounted
text_image
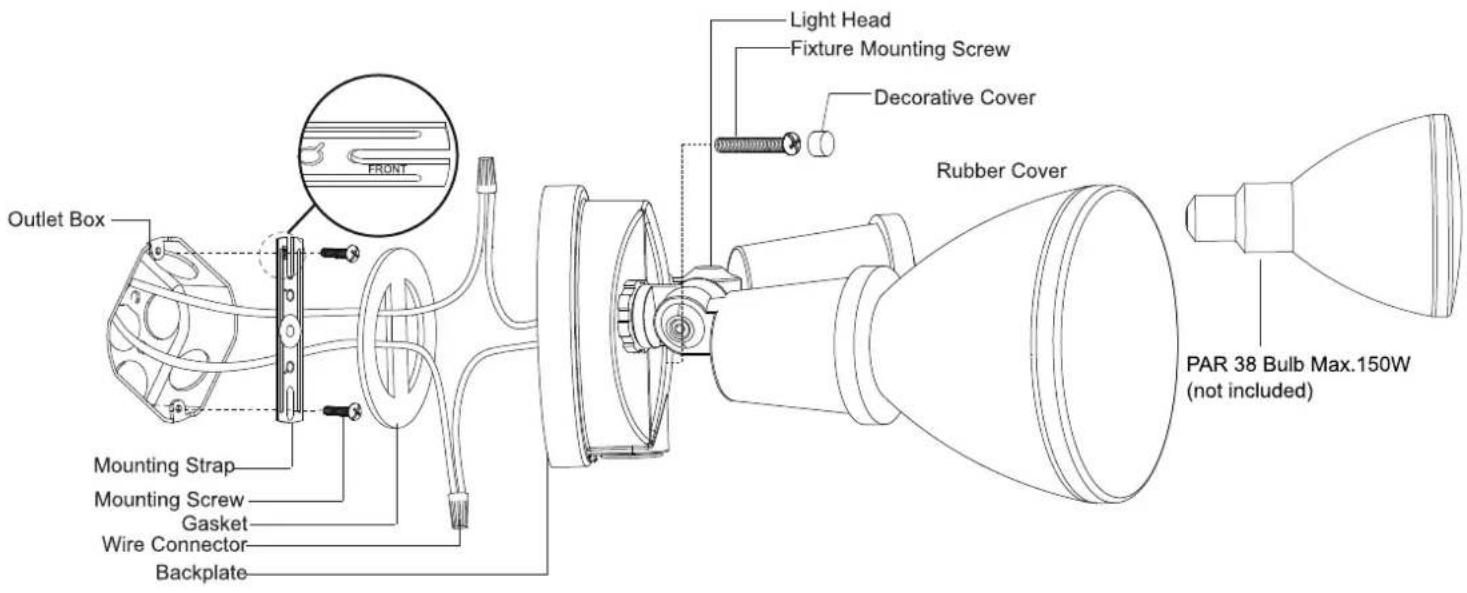
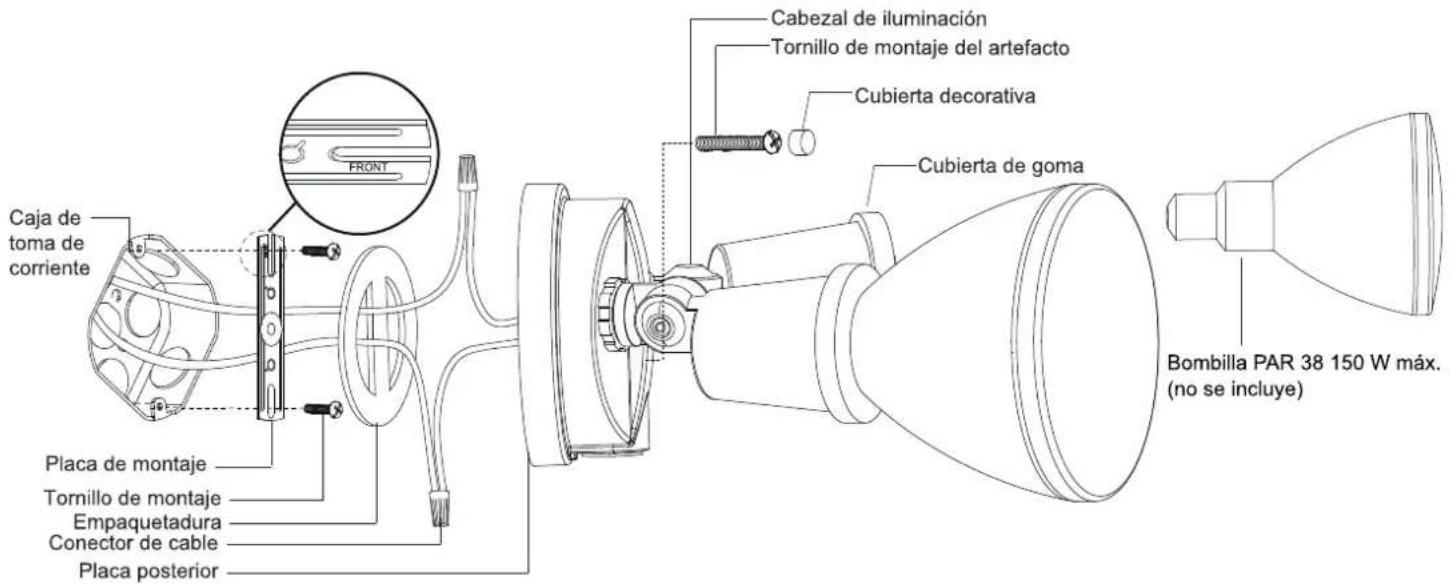
Outlet Box Mounting Strap Mounting Screw Gasket Wire Connector Backplate FRONT Light Head Fixture Mounting Screw Decorative Cover Rubber Cover PAR 38 Bulb Max.150W (not included)Installation Steps
Turn off the power at fuse or circuit box.
- Install the mounting strap to the outlet box with the stamped word "FRONT" facing away from the outlet box, using two mounting screws that best fit the outlet box. Back plate should sit flush against wall surface when secured. (Choose one matching pair of suitable mounting screws from the 3 pairs provided)
- Fixture wires thread through gasket, then attach the gasket into back plate.
- Pull out the source wires from the outlet box. Make wire connections using wire connector as follows: ---Connect the black wire from the fixture to the "hot" wire from the power source. (black) ---Connect the white wire from the fixture to the neutral wire from the power source. (white) Carefully tuck the wires back into the outlet box.
- Attach the back plate of the light fixture to the mounting strap, secure it with the fixture mounting screw.
- Push the decorative cover firmly into the fixture mounting screw hole on the light.
- Install bulbs (not included). See relamping label at socket area or packaging for maximum allowed wattage.
- With silicone caulking compound, caulk completely around where the back plate meets the wall surface. CAUTION: Be sure to caulk completely where the back plate meets the wall surface to prevent water from seeping into the outlet box.
Turn on the power at fuse or circuit box.
Adjusting the Light Head:
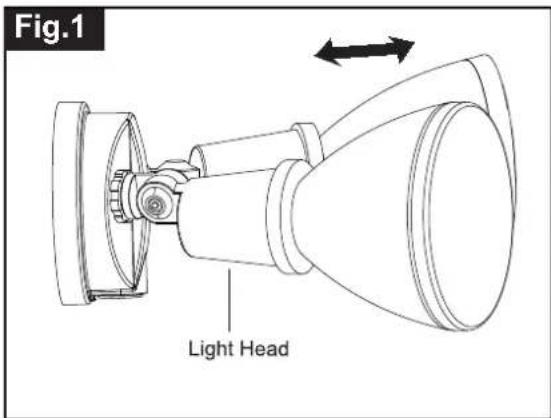
- Gently grasp the light heads and tilt them left or right to adjust the light coverage area. (See Fig. 1)
- Keep the light heads (B) 30° below horizontal to avoid water damage and electrical shock.
Functions and Operations
- Wall switch control
Turn on the wall switch on the light.
- Low-level Mode
Turn the wall switch "OFF", and turn it "ON" twice within 3 seconds.
The light enters low-level at 30% of full brightness.
To revert back to Default 100% full brightness, turn the wall switch "OFF" and then turn it "ON" after 60 seconds.
text_image
Fig.1 Light HeadThe following parts are available for re-order if damaged or missing.
text_image
Mounting Screw X2 #8/32X1/2 in Mounting Screw X2 #6/32 X1/2 in Mounting Screw X2 #10/24 X1/4 in Mounting Strap Decorative cover Fixture Mounting Screw Rubber Cover Wire Connector Gasket Assembly Kit 6602MM (1 SET) FOR T0689 6603MM (1 SET) FOR T0690 6604MM (1 SET) FOR T0691Troubleshooting
---The light does not work.
- Make sure the wall switch and circuit breaker are on.
- Make sure the wiring is correct.
text_image
A B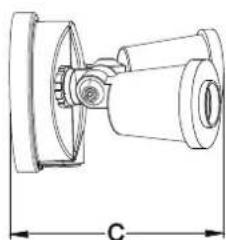
natural_image
Technical line drawing of a mechanical component with dimension label C (no text or symbols present)A: 4-1/4"
B: 6-3/4"
C: 5-1/4"
1 Year Warranty
Vaxcel warrants all of our products against defects in workmanship and finishes for one year following the date of shipment.
Exclusions: This warranty does not include the failure of products from extreme acts of nature; environmental conditions not suited for the products intended use; operation in temperatures outside of the range specified in the instruction manual; usage with improper power supply, power surges or dips. For coastal locations, some corrosion is considered normal for the environment.
Vaxcel reserves the right to repair, replace or issue a credit for any properly installed product, provided it is returned per RMA instruction. This warranty is limited to the cost of the product only and does not extend to transportation, installation or replacement costs.
How can warranty service be obtained?
info@vaxcel.com
1-800-482-9235
natural_image
Diagram showing a curved roof structure above two circular components with a central cross-section (no text or symbols)Montaje en la pared
natural_image
Simple line drawing of a roof structure with two hanging lamps (no text or symbols)Montaje en el alero
natural_image
Technical line drawing of a mechanical component with dimension label C (no text or symbols present)A: 4-1/4 in (11 cm)
B: 6-3/4 in (17 cm)
C: 5-1/4 in (17 cm)
natural_image
Diagram showing a roof structure with curved roof tiles and circular components (no text or symbols)Montage mural