Kids Bike - Bike Deryan - Free user manual and instructions
Find the device manual for free Kids Bike Deryan in PDF.


User questions about Kids Bike Deryan
0 question about this device. Answer the ones you know or ask your own.
Ask a new question about this device
Download the instructions for your Bike in PDF format for free! Find your manual Kids Bike - Deryan and take your electronic device back in hand. On this page are published all the documents necessary for the use of your device. Kids Bike by Deryan.
USER MANUAL Kids Bike Deryan
Read the following instructions carefully before use.
IMPORTANT!À CONSERVER POUR TOUTERÉFERENCE ULTÉRIEURE.
- Before using this bike, the user or guardian should carefully read the product manual. This will help you use the product correctly.
- Adult assembly required.
- Please confirm whether the product has any problems before each use.
- Do not use the product if there is any problem with it and contact the manufacturer.
- Please fully understand this instruction manual before use.
- Users and guardians shall carefully read the instructions before use and properly keep them for future reference. If it is not used according to the instructions, the safety of children may be affected.
- The caregiver shall not leave when the child is riding.
- Do not use the vehicle at uneven places such as doorsill and stairs to avoid injury.
- Ensure that all fasteners are fastened in place when using the vehicle.
- Please follow local traffic laws and regulations when riding on the road.
- When this product is deformed into a child balance bike, the maximum load is 30kg , and it shall not be used overweight.
- It is prohibited to use accessories not produced by this manufacturer. The assembly of this vehicle must be completed by adults.
- Must wear a helmet and safety pads when riding.
- Regular check on brakes, tires, steering and rims to ensure the vehicle is safe to ride.
- CAUTION! Braking distance may increase in wet weather, please slow down.
Maintenance: wipe with dry and wet cloth.
WARNING
Common accessories: outer tube and part replacement:
Only use genuine replacement parts for safety-critical components. Otherwise may cause injuries to riders due to product size doesn't fit, structural strength and other reasons.
Outer and inner tubes:
When the outer tube pattern is polished, the outer tube shall be replaced immediately. The inner tube deflates after being filled with chlorine, replace the inner tube immediately. When the tire is chlorinated, the chlorine pressure is recommende by the manufacturer of the tire surface markings. Maximum chlorine filling pressure, and if the tire pressure exceeds the maximum chlorine filling pressure recommende by the manufacturer. The finger can be pressed into the chlorine pressure valve in the air port to release chlorine to the maximum chlorine filling pressure recommended by the manufacturer. Then cover the air outlet. Purchasing of appropriate spares such as tires, tubes and brake friction-components are recommended.
- When a new bike is used for about two weeks, the rotating front axle, rear axle, wheels and other components should be readjusted to keep working normal.
- Paint parts should not be wrapped with plastic bags and wax cloth, and should not be wiped with wet cloth to avoid loss of light, bubbles and peeling.
- Electroplated parts have a yellow/brownish surface and are recticular, it can be wiped frequently with neutral engine oil or sewing machine oil to prevent the reticular expansion.
- The rotating parts of the bike shall not be lubricated with grease frequently to prolong the service life. Disassemble and wash the whole bike every six months.
- Add grease to rotating parts.
- When the bike body is cleaned, please wipe it with a dry cloth directly.
- Loose front fork bowl, first rotate the collet nut, press the collet tightly against the front fork bowl, and then tighten the collet nut.
WARNING
- If the front axle is loose or too tight, the operation or use will be affected. When adjusting, loosen the nut on one side of the front axle first, then use a wrench to adjust the gear nut, hold the wheel in the middle of the front fork and finally tighten the nut.
- The rear axle is loose or too tight, unscrew the nut on the left side of the rear axle first, then adjust the retaining nut with a wrench to keep the wheels flat. Tighten the nut between the two legs of the fork.
| Lubrication position | Lubrication cycle | Recommended lubricating oil |
| Headset | One year | Butter (lithium base grease) |
| Front/rear hub | One year | Butter (lithium base grease) |
| Bottom bracket | One year | Butter (lithium base grease) |
| Crank set | One year | Butter (lithium base grease) |
| Chainwheel | One month | Cleaning |
| Chain | One month (lubricating after cleaning) | Lubricating oil |
| Freewheel | One month (lubricating after cleaning) | Lubricating oil |
| Brake | One month lubricating oil | |
| Brakepool | Half a year lubricating oil | |
| Fork | One month (lubricating after cleaning) | Butter (lithium base grease) |
WARNING
To avoid serious injury
Please do not ride when the safety line is visible, may fall off the bicycle.
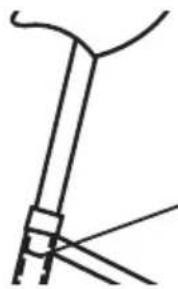
Safety line
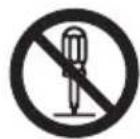
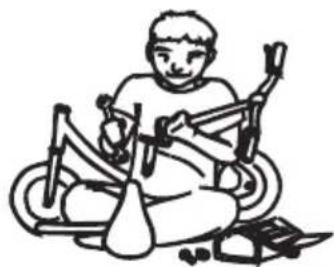
Remodel or divide the bicycle into parts is not allowed. Lubricate on places it is not needed is not allowed. Damage of components or failure of brake may cause injury.
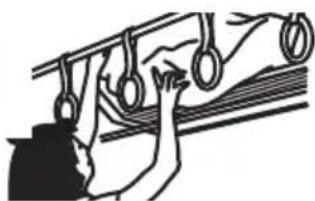
Putting the bicycle on the upper shelf is not allowed. It can easily fall and may cause serious injuries. Please put it in a corner to avoid injury.
Before riding
2-Bend your elbows slightly
4 - Pedal with your tiptoes
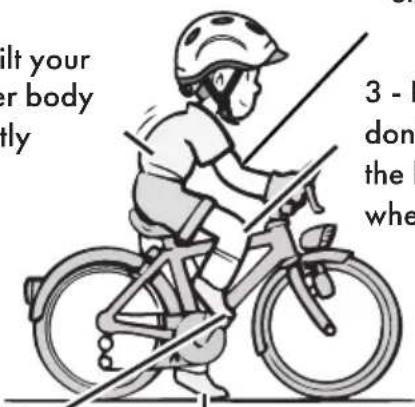
3 - Knees don't touch the handlebar when you ride
Adjust the bike with the rider's height as shown in the figure to the left. Please confirm the rider can:
-
Operate the brakes firmly.
-
Operate the steering easily.
-
Pedal on the ground smoothly.
WARNING
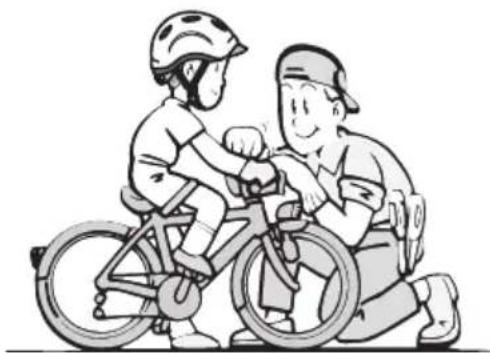
Please check the following:
-
Read the manual carefully before use, if unclear contact the manufacturer.
-
Riding on a not fully assembled bike is prohibited.
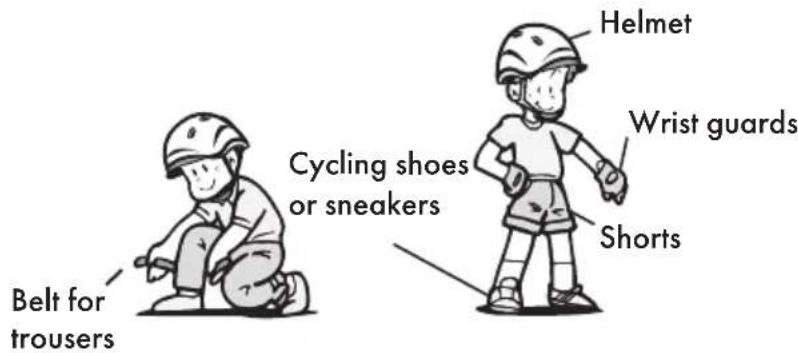
Please wear safe clothing when cycling:
-
DO NOT wear clothes that can easily get caught in wheel. Please fasten the bottom of your trousers with a belt before cycling.
-
Always wear a helmet and safety pads when cycling.
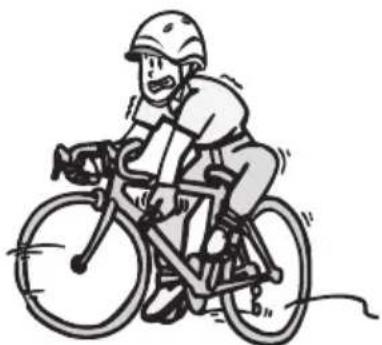
Please practice cycling:
-
Practice in a safe place such as an open space or park.
-
Make sure you practice before you hit the road.
WARNING
To prevent falling accidents
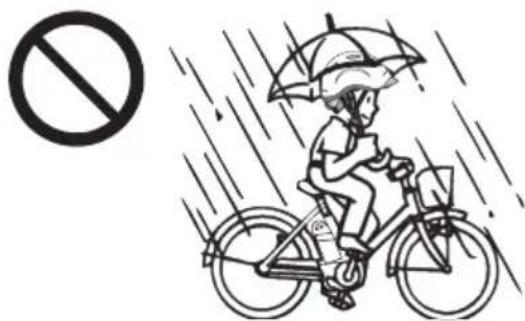
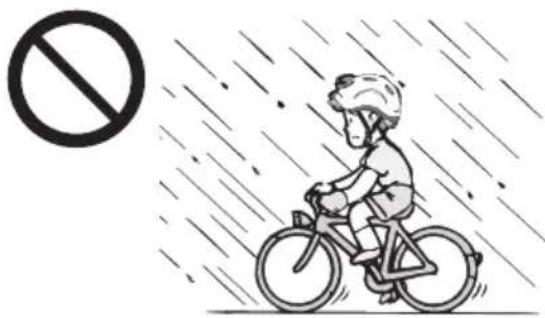
No riding during bad weather, such as strong winds, heavy rain or snow. As this may cause injury by slipping and falling.
Always keep your hands on the handlebar. It will be difficult to keep balance if your hands leave the handlebar, you could fall and get injured.
Do not ride where it is easy to slip (snow or icy roads, iron plates or mud, etc.) May cause injury by slipping and falling. Please get off your bike, push it further along the road.
Do not ride on uneven areas (sidewalk drops, grooves, etc.) May cause damage to the frame and wheels. Please get off your bike and push it further along the road.
Improper ways to cycle
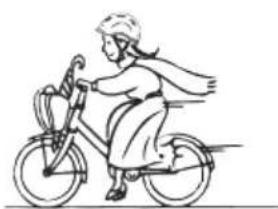
Do not let objects near wheels or gears which can easily get stuck (long skirts, scarves, umbrellas, pet ropes, etc.). Risk of being caught in a wheel or gear, falling and injuring yourself.
WARNING
To prevent falling accidents
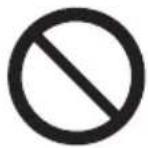
Do not wear shoes that slip easily (high heels, platform shoes, etc.) Risk of falling and injuring yourself if your foot slips of the pedal.
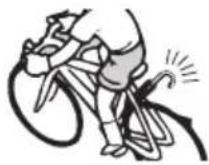
Do not put an umbrella, wlaking stick, fishing rod, etc. in the bicycle body, and do not hang the fishing rod on your body. Risk of getting caught in the wheel, hitting other people or things causing an accident or falling and injuring yourself.
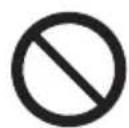
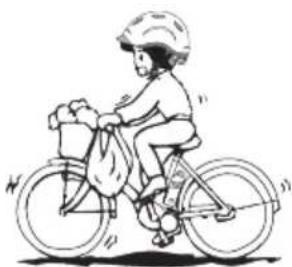
Do not carry luggage on your hands or handlebar, do not hold pets. Risk of falling and injuring yourself if the luggage or rope gets caught in the wheel.
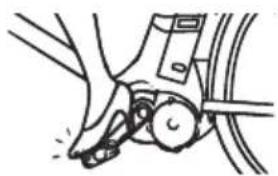
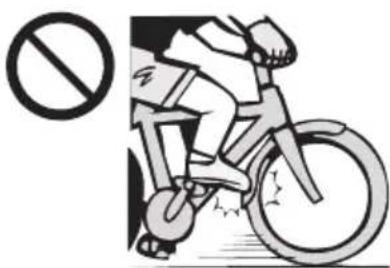
Do not pedal with your heels. The tiptoe may touch the front wheel while turning, risk of falling and injuring yourself.
WARNING
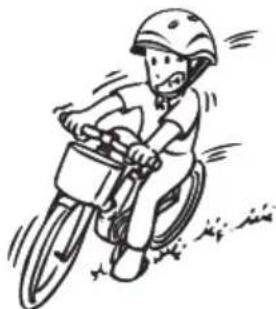
Do not lower the pedal on the turning side when turning. Risk of falling and injuring yourself if the pedal will touch the ground.
Improper ways to use
Do not use it for any other purpose than cycling. Risk of falling and injuring yourself.
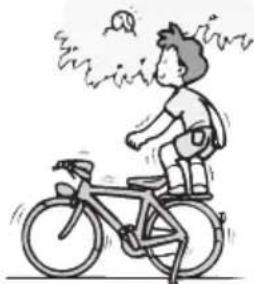
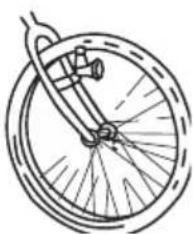
Do not put objects (balls, etc.) between the spokes. Risk of falling and injuring yourself if being rolled into the wheels and get overturned.
Installing the handlebar
Insert the handlebar bracket into the frame. Turn the fixing nut clockwise to fix the handlebar bracket.
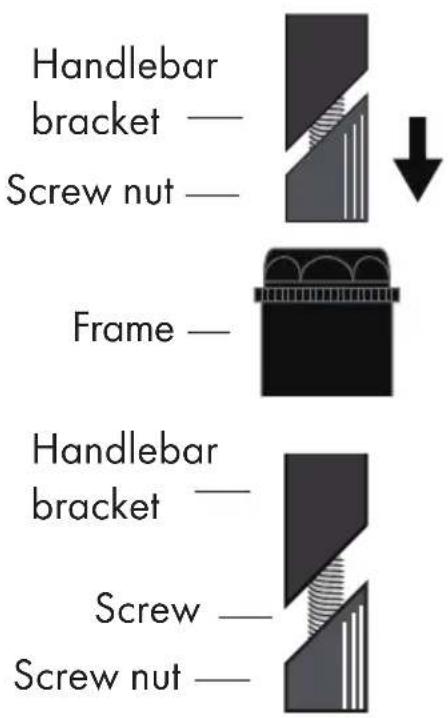
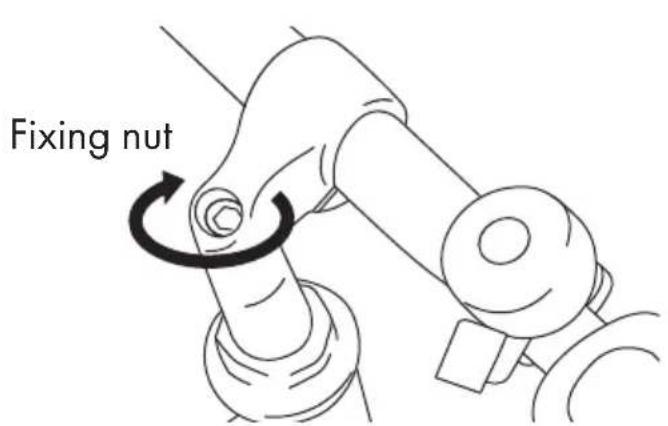
If it is difficult to insert into the frame, turn the fixing nut on the handlebar bracket half clockwise several times. If you over-spin the fixing nut, it will fall into the frame. Please pay attention.
Installing the stopper
Put on the stopper when you finish installing the handlebar.
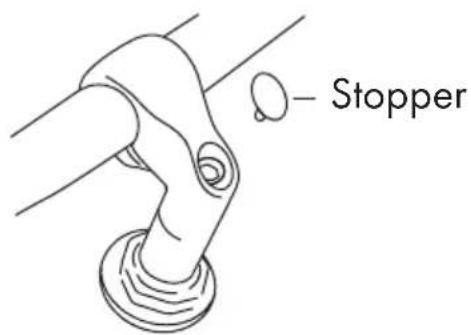
Handlebar angle adjustment
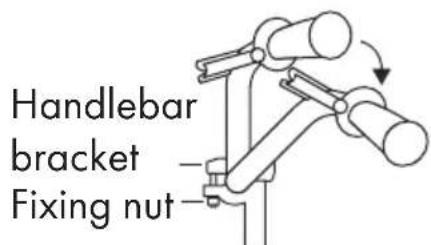
Loosen the fixing nut to adjust the angle. Tighten the nut when you are done
ASSEMBLY
Installing training wheels
Remove the nuts from the rear hub and insert the training wheels in. Tighten the nut slightly first, and adjust the height between the training wheels and ground, then thighten te nut.
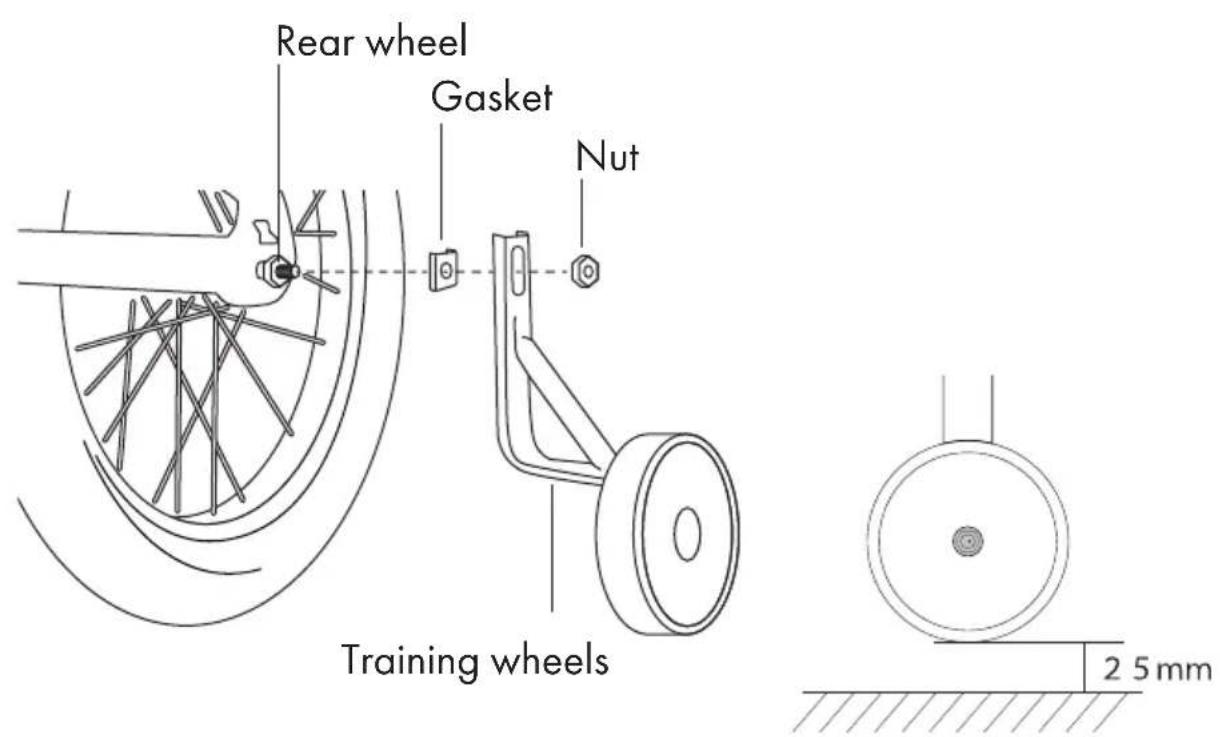
The training wheels shall not touch the ground at the same time and shall be installed away from the ground. The training wheels are not in contact with the ground so that they can still operate when turning or when the air pressure of the rear tire decreases.
Installing saddle
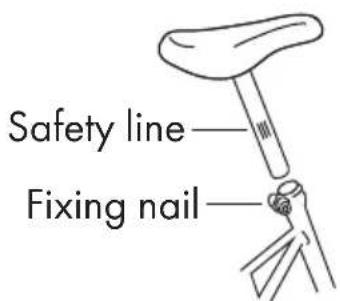
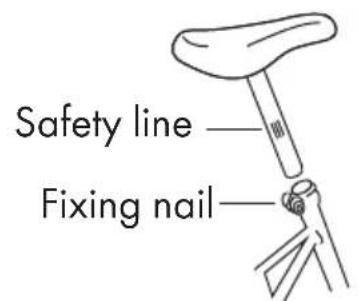
Insert the saddle into the frame. When inserting, adjust the height while the safety line is invisible. Then tighten the fixing nails.
ASSEMBLY
Adjust angle of the brake lever
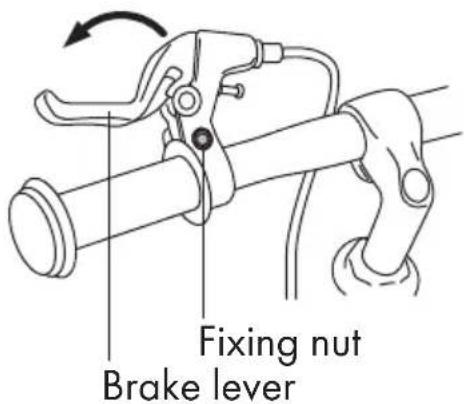
Loosen the fixing nut on the brake lever and adjust the angle. Tighten the fixing nut after adjustment.
Make sure the brake wires are wrapped around the handlebar bracket. If not please contact the manufacturer.
Installing pedals
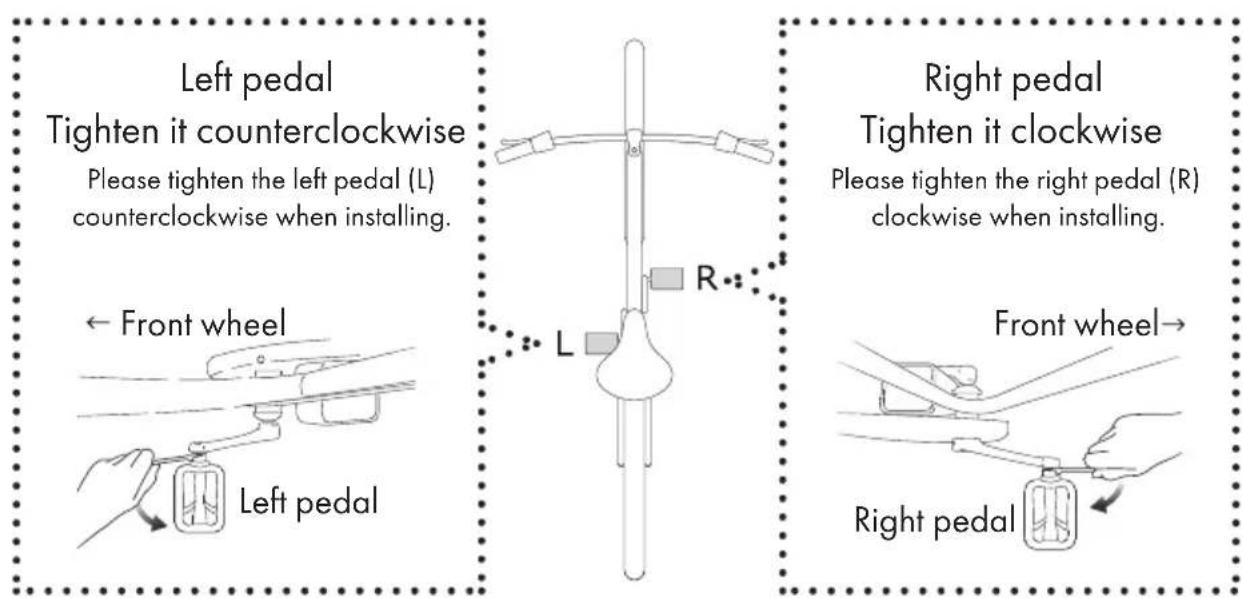
WARNING! Do not tighten the crooked screw. Forcing a screw that is crooked may cause the pedal to fall off.
Check the installation of the pedals, if the left and right pedals are installed in reverse the installation will fail because the screws cannot go in, the screws are broken etc.
Notice left (L) and right (R) pedal are different. Please do not use tools at first, tighten by hand, double check the pedals are installed correctly, then tighten them by tools.
ASSEMBLY
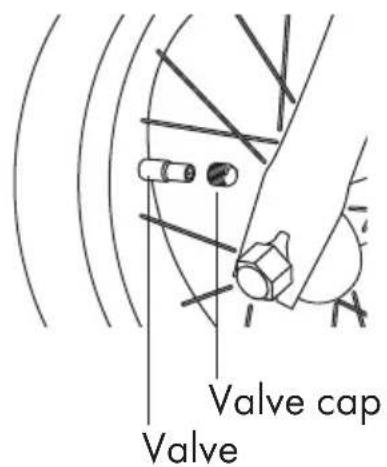
Installing valve cap
Put the valve cap on the valve.
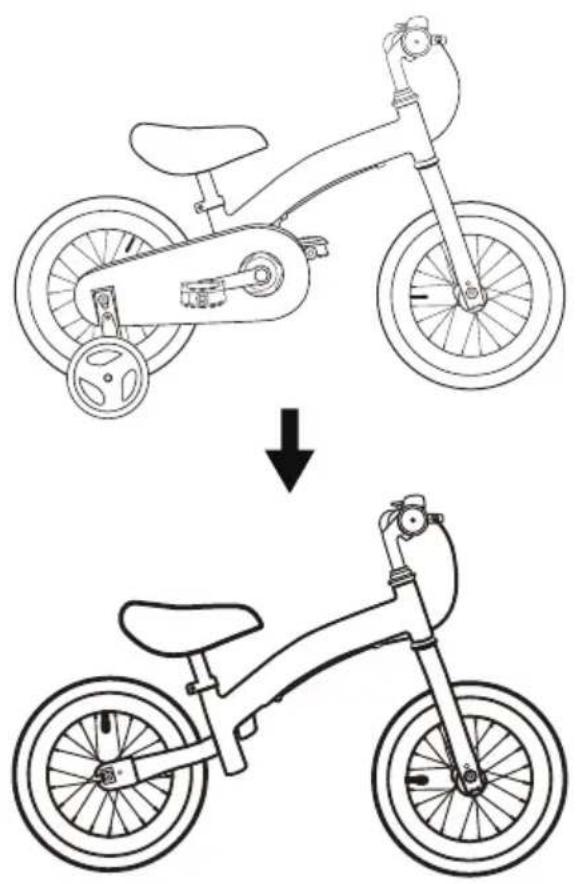
Change mode from bicycle to balance bike
ASSEMBLY
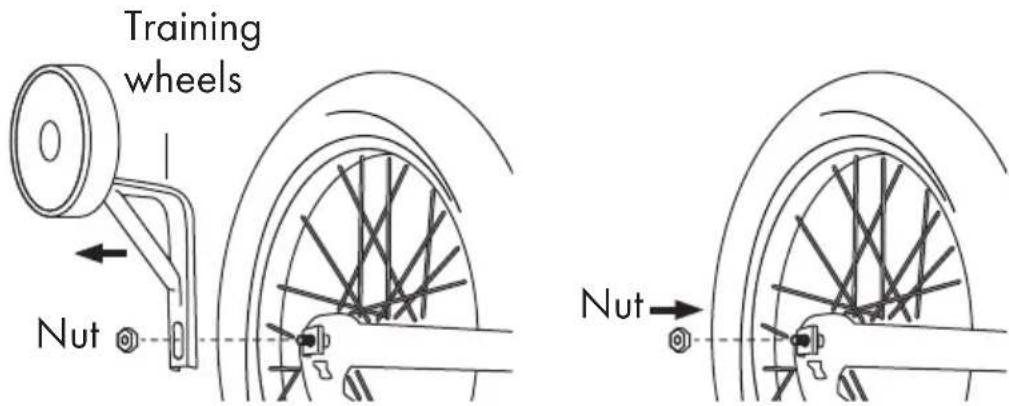
Remove the training wheels
Remove the nuts on the rear wheels and remove the training wheels. Tighten the nut after removing it.
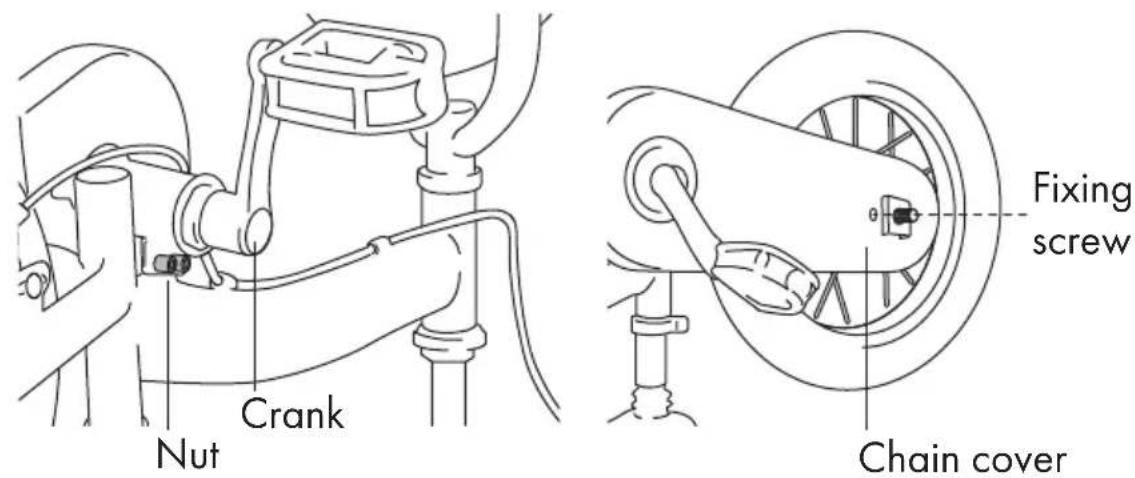
Remove the fixing screw
Remove the nut at the crank. Remove the fixing screw on the side of the chain cover.
ASSEMBLY
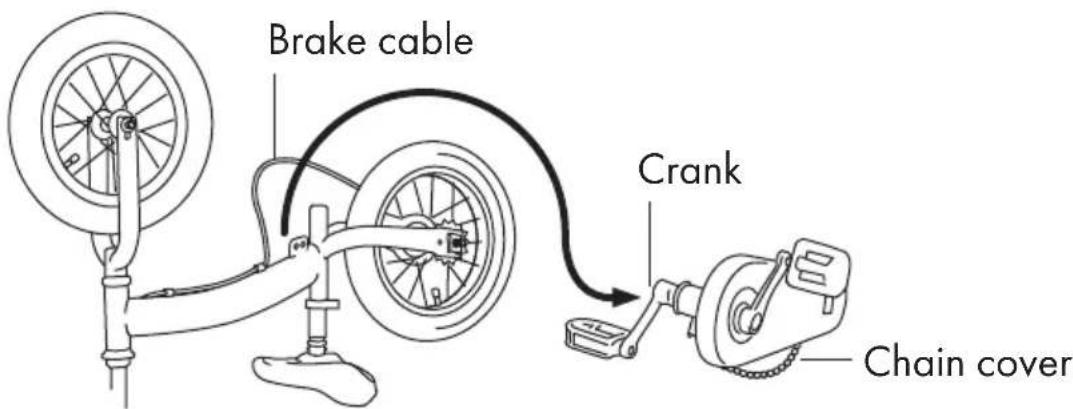
Remove the chain cover
Remove the pedal, chain cover and chain from the gap between the bicycle body and the brake cable.
Seat height adjustment
Loosen the seat fixing nail and adjust the height with the safety line invisible, then tighten.
Handlebar height adjustment
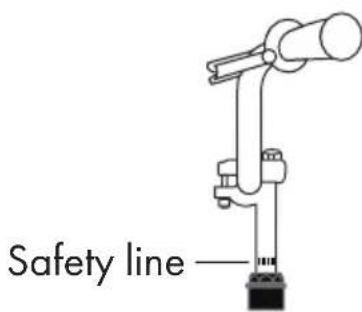
Loosen the fixing nut and adjust the height with the safety line invisible, then tighten it.
Tire pressure adjustment
Tire contact lenght is about 6-8 cm when in bicycle mode.
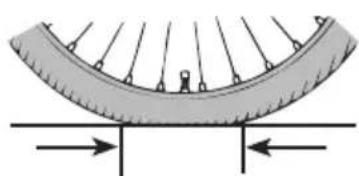
About 6-8 cm
ASSEMBLY
Caliper brake adjustment
Turn the adjustment screw to adjust. If a slight adjustment of the screw does not improve, loosen the steel wire fixing nut, change the position of steel wire to adjust.
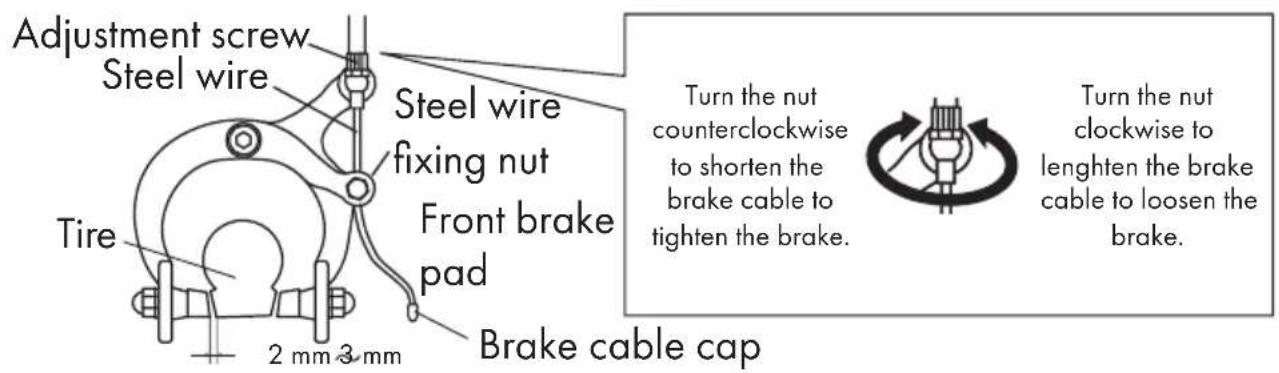
Band-type brake adjustment
Confirm the effect of the brake while tightening the fixing nut. If the brake is not fully effective, loosen the brake cable fixing nut, tighten the brake line upward, and tighten it again. Please confirm the effect of the brake and repeat until the right condition is reached.
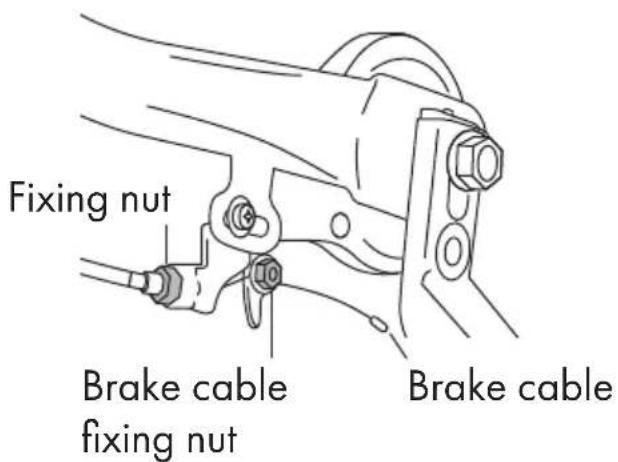
ASSEMBLY
Chain tension and gear adjustment
1 - Remove the left and right training wheel fixing nuts.
2 - Remove training wheels and training wheel clips.
3 - Loosen rear wheel fixing nut, no need to remove.
4 - Pull the rear wheel to adjust the chain to a suitable state: the sag is about 7 mm.
5 - Pre-lock the fixing nut of the rear wheel, turn front sprocket forward and backward to check whether there is any abnormal sound, too tight on too loose, if there is, continue to adjust.
6 - Lock the rear wheel fixing nut when adjustment is done.
7 - Install training wheels and training wheel clips.
8 - Tighten the training wheel fixing nuts.
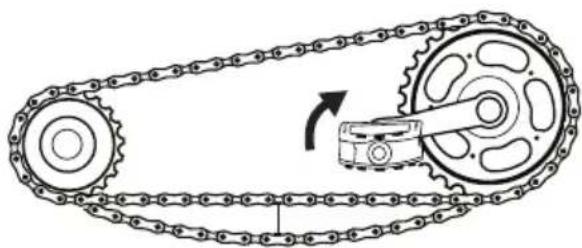
The sag is about 5 - 7mm
Please check the brake friction components before riding. Replace it with a new one is recommende if it is worn too much. Otherwise it may effect the braking effect. Try not to only use the front caliper brake, easy to slip or rollover. You can use the band-type brake to slow down your bicycle. Or double-brake to slow down faster.
Company address
DERYAN B.V.
Marithaime 8
6662 WD Elst
The Netherlands
Telephone
+31 481 351 070
team@deryan.com
Website
www.deryan.com