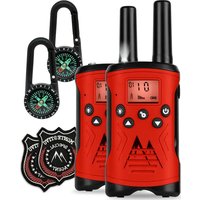
Kingen - Talkie Walkie Monte Stivo - Free user manual and instructions
Find the device manual for free Kingen Monte Stivo in PDF.


User questions about Kingen Monte Stivo
0 question about this device. Answer the ones you know or ask your own.
Ask a new question about this device
Download the instructions for your Talkie Walkie in PDF format for free! Find your manual Kingen - Monte Stivo and take your electronic device back in hand. On this page are published all the documents necessary for the use of your device. Kingen by Monte Stivo.
USER MANUAL Kingen Monte Stivo
natural_image
Abstract black-and-white graphic with diagonal stripes and a large upward arrow, no text or symbols present.MONTE STIVO
Flyweight
Walkie-Talkie-Set
Walkie-talkie Set
Ensemble talkie-walkie
Set walkie-talkie
text_image
QR code image containing encoded data, no visible human-readable textINHALTSVERZEICHNIS
text_image
Diagram of a walkie-talkie with numbered parts for identification and function| Kanal Frequenz (MHz) | |
| 1 446.00625 | |
| 2 446.01875 | |
| 3 446.03125 | |
| 4 446.04375 | |
| 5 446.05625 | |
| 6 446.06875 | |
| 7 446.08125 | |
| 8 446.09375 |
Member of Berlin Brands Group
Handwerkerstr. 11
15366 Dahlwitz-Hoppegarten
Deutschland
natural_image
Symbol of a trash bin crossed with a diagonal line, no text or numbers presentBerlin Brands Group UK Ltd
PO Box 1145
Oxford, OX1 9UW
United Kingdom
Congratulations on purchasing this device. Please read the following instructions carefully and follow them to prevent possible damages. We assume no liability for damage caused by disregard of the instructions and improper use. Scan the QR code to get access to the latest user manual and more product information.

text_image
QR code image containing encoded data, no visible human-readable textCONTENTS
Safety Instructions 14
Device Overview 15
Commissioning 16
Operation 16
Channels and Frequencies 19
Disposal Considerations 20
Declaration of Conformity 20
TECHNICAL DATA
| Item number 10038927, 10038928, 10038929 | |
| Power supply 3 AAA alkaline batteries | |
| Frequency 400-470 MHz | |
| Number of channels 8 | |
| Subchannel code CTCSS | |
| Transmitting power ≤0.5 W | |
| Range Up to 3 km in open field | |
| Note: License-free radio operates on the 400-470 MHZ frequency band.The device has 8 radio channels. If there are many device users in the vicinity, there is a possibility that some users will transmit on the same radio channel. When using CTCSS, a low frequency tone (between 67 and 250 Hz) is transmitted together with the voice signal. There are 99 available sub-channels that can be freely selected. | |
SAFETY INSTRUCTIONS
General information
- This device contains electronic parts that are operated by a power source (batteries). Use only as described in the instructions, otherwise there is a risk of electric shock.
- Keep packaging materials, such as plastic bags, wrist straps and the like, away from children to avoid injury.
- Do not expose the device to high temperatures. Do not short-circuit the device and the batteries and do not throw the device and the batteries into a fire! Excessive heat can cause short circuits, fires and even explosions.
- Do not disassemble the device and its accessories. In case of a defect, please contact your dealer.
Notes on the batteries
- Keep the batteries away from children so that they do not injure themselves.
- Pay attention to the correct polarity when inserting the battery.
- Leaking battery acid can cause chemical burns. Avoid contact of battery acid with skin, eyes and mucous membranes. In case of contact with the acid, immediately rinse the affected areas with plenty of clean water and seek medical attention.
- Always replace weak or used batteries with a complete new set of batteries. Do not use batteries of different brands, or types.
- Remove batteries from the unit if it will not be used for a long period of time.
Notes on cleaning
- Only clean the outside of the device with a dry cloth. Do not use cleaning fluid to avoid damage to the electronics.
- Protect the device from dust and moisture.
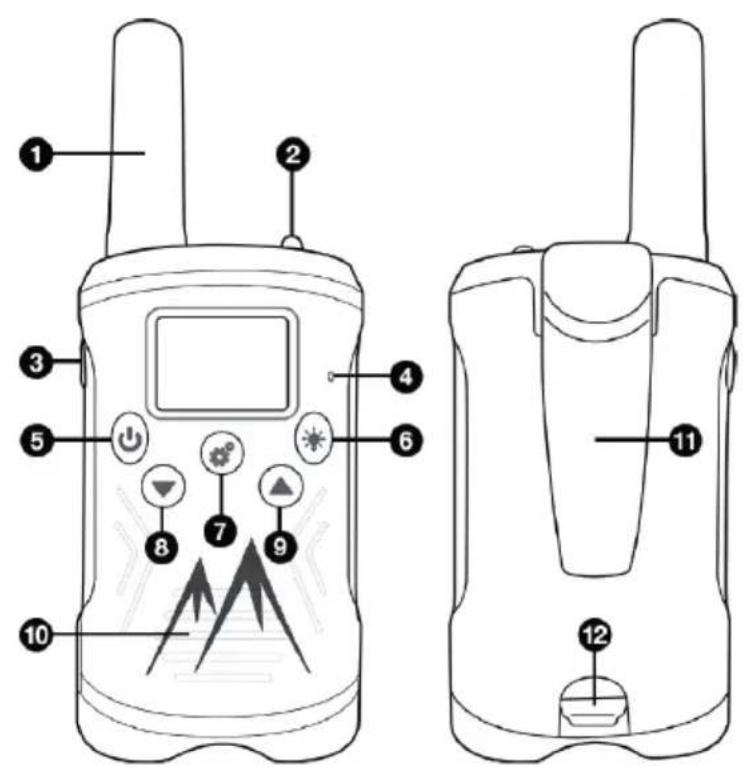
DEVICE OVERVIEW
EN
text_image
Diagram of a walkie-talkie with numbered parts for identification and function| 1 Antenna 7 MENU key | ||
| 2 Flashlight 8 DOWN key | ||
| 3 PTT button (press button to talk) 9 UP key | ||
| 4 Microphone 10 Loudspeaker | ||
| 5 POWER button 11 Mounting clip | ||
| 6 Illumination on/off 12 Battery compartment |
COMMISSIONING
Introduction
The set includes 2 walkie-talkies, communication devices operating on mobile radio frequencies. The devices have 8 channels and a display with backlight. The devices are suitable for communication up to 3 km (in open areas).
Removing the mounting clip and inserting the batteries
Before the batteries can be inserted into the unit, the mounting clip must be removed.
- Remove the clip to attach to pants.
- Open the battery compartment at the bottom of the battery compartment cover.
- Insert 3 AAA alkaline batteries into each unit (note: batteries are not included).
- Insert the batteries the correct way around.
- After the batteries are inserted, close the cover and fasten the clip. Now you can use the devices.
Note: When the battery level is low, the battery icon will start flashing and a beep will sound to indicate that the batteries need to be replaced.
OPERATION
Turning the unit on/off switch
Press and hold the POWER button for about 3 seconds until a short beep sounds and the display turns on.
Adjusting the volume
Press the UP key to increase the volume. Press the DOWN key to decrease the volume. The bars indicate the current volume (1-8 levels).
Receiving and transmitting messages
After switching on, the device is immediately ready for use and is in receive mode. When a signal is received on the current channel, the display shows the reception and the message becomes audible. As soon as the PTT (push-to-talk) button is pressed, the device switches to transmit mode.
Note: It is only possible to transmit OR receive.
The device will send a „roger tone“ at the end of each message, signaling when the other party's message has ended. To speak, press and hold the PTT button and speak into the microphone (3-5 cm from your mouth) in a normal voice. When the message is finished, release the PTT button.
Range note: The range depends on the environment and conditions and will be affected by obstacles such as hills, buildings or other equipment. Do not use the two walkie-talkies when they are less than 1.5 m apart. Doing so may cause unpleasant noise interference.
Send call tone
Press the PTT button twice in quick succession to send a call tone on the current channel.
Change call tone
The device has 10 call tones. Press the MENU button ⚙° three times in succession until the display shows [CA]. Press the UP or DOWN button ▲/▼ to change the call tone, and then press the PTT button to confirm the selected call tone.
Change channel
Press the MENU button once to change the channel. The channel number appears on the display. Press UP or DOWN button ▲ to change the channel and then press PTT button to confirm selected channel.
Optional: Change subchannel (CTCSS)
Each channel has 99 subchannels. The current channel and subchannel are indicated by the large and small numbers in the upper right corner of the display.
Note: Change only the channel (see Change Channel) and leave the subchannel untouched. A change is only necessary if all channels are occupied or disturbed.
To change the subchannel, press the MENU key Ⓧ 2 times. The current subchannel flashes on the display. Press the UP or DOWN key ▲ to select one of 99 available subchannels, then press the PTT key to confirm the selected subchannel.
Note about the channel: To communicate, both walkie-talkies must be set to the same channel and subchannel.
Searching for active radio channels
Press and hold the UP button ▲ for 2 seconds. The indication [SCAN] appears on the display and the unit continuously cycles between channel 1 to channel 8. Once an active channel is found, the scan stops and the transmission starts. If the transmission stops on the found channel, the scan will continue automatically. In this case, press the PTT button to keep the one channel and stop the search.
Locking and unlocking the device
Press and hold the MENU key for 3 seconds to lock or unlock the device.
Switching the confirmation signal (roger tone) on and off
After the PTT key is released, the device sends a beep to confirm that the transmission has ended. The so-called roger signal tone can be deactivated in the menu. To do this, press the MENU key four times until [RO] is shown on the display. Press the UP or DOWN key ▲/ to activate or deactivate the roger tone and confirm the selection with the PTT key.
Flashlight
The unit has a built-in flashlight that can be used to send light signals (such as Morse code) or as normal illumination. To switch on the light, press the flashlight key 🌐
CHANNELS AND FREQUENCIES
| Channel Frequency (MHz) | |
| 1 446.00625 | |
| 2 446.01875 | |
| 3 446.03125 | |
| 4 446.04375 | |
| 5 446.05625 | |
| 6 446.06875 | |
| 7 446.08125 | |
| 8 446.09375 |
EN
DISPOSAL CONSIDERATIONS
natural_image
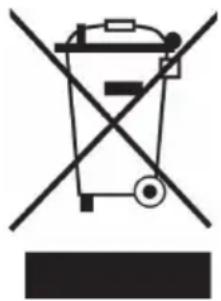
Symbol of a trash bin crossed with a diagonal line, no text or numbers presentIf there is a legal regulation for the disposal of electrical and electronic devices in your country, this symbol on the product or on the packaging indicates that this product must not be disposed of with household waste. Instead, it must be taken to a collection point for the recycling of electrical and electronic equipment. By disposing of it in accordance with the rules, you are protecting the environment and the health of your fellow human beings from negative consequences. For information about the recycling and disposal of this product, please contact your local authority or your household waste disposal service.
This product contains batteries. If there is a legal regulation for the disposal of batteries in your country, the batteries must not be disposed of with household waste. Find out about local regulations for disposing of batteries. By disposing of them in accordance with the rules, you are protecting the environment and the health of your fellow human beings from negative consequences.
DECLARATION OF CONFORMITY

text_image
CE UK CAManufacturer:
Chal-Tec GmbH, Wallstrasse 16, 10179 Berlin, Germany.
Importer for Great Britain:
Berlin Brands Group UK Ltd
PO Box 1145
Oxford, OX1 9UW
United Kingdom
Hereby, Chal-Tec GmbH declares that the radio equipment type Flyweight is in compliance with Directive 2014/53/EU. The full text of the EU declaration of conformity is available at the following internet address: use.berlin/10038929
For Great Britain: Hereby, Chal-Tec GmbH declares that the radio equipment type Flyweight is in compliance with the relevant statutory requirements. The full text of the declaration of conformity is available at the following internet address: use.berlin/10038929
Estimado cliente:
text_image
QR code image containing encoded data, no visible human-readable textÍNDICE
text_image
Diagram of a walkie-talkie with numbered parts for identification and functionnatural_image
Symbol of a trash bin crossed with a diagonal line, no text or numbers presentBerlin Brands Group UK Ltd
PO Box 1145
Oxford, OX1 9UW
United Kingdom
Cher client, chère cliente,
text_image
QR code image containing encoded data, no visible human-readable textSOMMAIRE
text_image
Diagram of a walkie-talkie with numbered parts for identification and functionnatural_image
Symbol of a trash bin crossed with a diagonal line, no text or numbers presentDÉCLARATION DE CONFORMITÉ

text_image
CE UK CAFabricant :
Chal-Tec GmbH, Wallstraße 16, 10179 Berlin, Allemagne.
Berlin Brands Group UK Ltd
PO Box 1145
Oxford, OX1 9UW
United Kingdom
text_image
QR code image containing encoded data, no visible human-readable textINDICE
natural_image
Symbol of a trash bin crossed with a diagonal line, no text or numbers presentBerlin Brands Group UK Ltd
PO Box 1145
Oxford, OX1 9UW
United Kingdom