GQ-160 - Drain cleaning tool Vevor - Free user manual and instructions
Find the device manual for free GQ-160 Vevor in PDF.

| Product Type | Drain cleaning tool (electric drain snake) |
| Brand | Vevor |
| Model | GQ-160 |
| Available Cable Lengths | 15 m (50 ft), 23 m (75 ft), 30 m (100 ft) |
| Cable Diameter | 3/8" (9.5 mm) or 1/2" (12.7 mm) depending on version |
| Cable Material | 65Mn Steel |
| Suitable Pipe Diameter | 50 to 100 mm (2 to 4 inches) |
| Included Accessories | 4 cutting tools (arrow cutter, drill bit, C-cutter, spade cutter) |
| Power Supply | Electric (mains, voltage not specified – domestic standard) |
| Motor Power | Not specified (estimated 500-1000 W) |
| Weight | Not specified (estimated 15-25 kg depending on cable) |
| Dimensions (L × W × H) | Not specified (estimated 60 × 40 × 80 cm for the drum) |
| Operation | Foot pedal control for cable rotation and feed |
| Recommended Use | Household drains, sinks, showers, toilets (not for roots) |
| Safety Equipment | Safety glasses, gloves, hearing protection, dust mask |
| Maintenance and Cleaning | Clean cable after use, check motor grease, replace brushes if necessary |
| Repairability | Repair by specialized workshop or manufacturer; contact www.vevor.com/support |
| Warranty | Electronic warranty via Vevor website |
| Country of Manufacture | China |
Frequently Asked Questions - GQ-160 Vevor
User questions about GQ-160 Vevor
0 question about this device. Answer the ones you know or ask your own.
Ask a new question about this device
Download the instructions for your Drain cleaning tool in PDF format for free! Find your manual GQ-160 - Vevor and take your electronic device back in hand. On this page are published all the documents necessary for the use of your device. GQ-160 by Vevor.
USER MANUAL GQ-160 Vevor
Technical Support and E-Warranty Certificate www.vevor.com/support
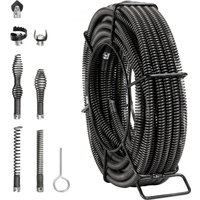
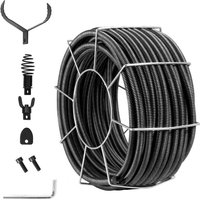
Drain Cleaning Cable
Model: 50ft*1/2/50ft*3/8/75FT*1/2
100Ft3/8/100Ft3/8
We continue to be committed to provide you tools with competitive price "Save Half", "Half Price" or any other similar expressions used by us only rep estimate of savings you might benefit from buying certain tools with us compared major top brands and does not necessarily mean to cover all categories of tools. You are kindly reminded to verify carefully when you are placing an order that are actually saving half in comparison with the top major brands.
Model: 50ft*1/2/50ft*3/8/75FT*1/2/100Ft3/8/100Ft1/2
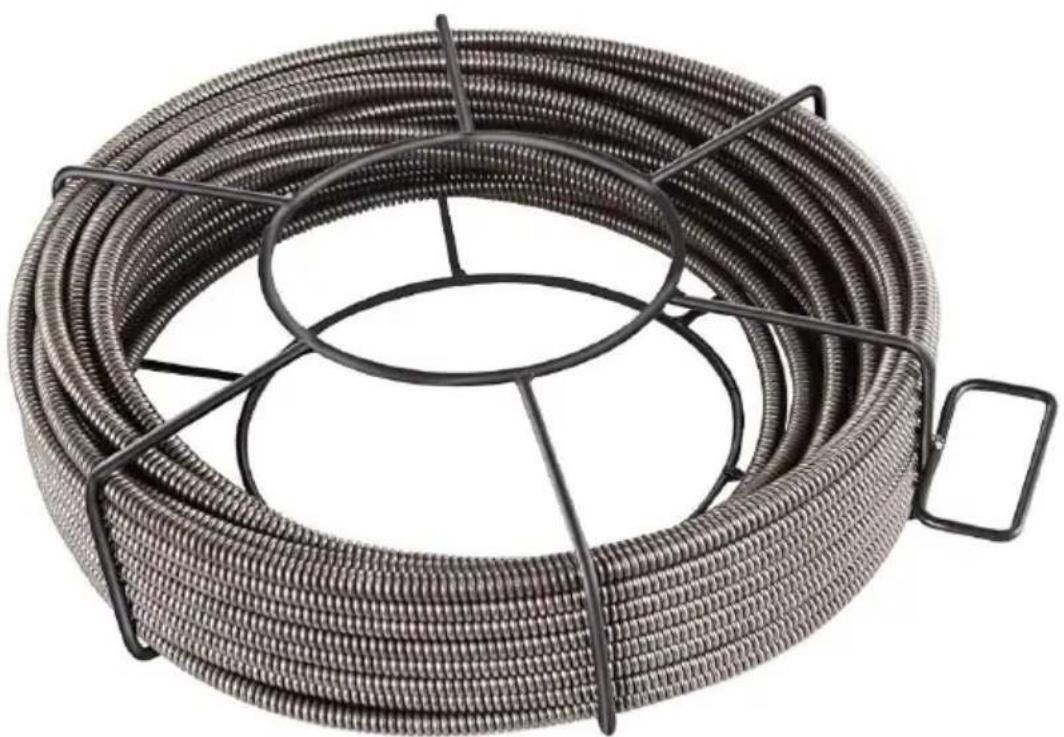
natural_image
Coiled metal wire with black metal frame and metal bracket, no text or symbols visibleNEED HELP? CONTACT US!
Have product questions? Need technical support? Please feel fr contact us:
Technical Support and E-Warranty Certificate www.vevor.com/support
This is the original instruction, please read all manual instruction carefully before operating. VEVOR reserves a clear interpretation user manual. The appearance of the product shall be subject to product you received. Please forgive us that we won't inform you there are any technology or software updates on our product.
1. Save This Manual
Keep this manual for the safety warnings and precautions, assembly, operating, inspection, maintenance and cleaning procedures. Write the product's serial number in the back of the manual near the assembly diagram (or month and year of purchase if product has no number). Keep this manual the receipt in a safe and dry place for future reference.
You must abide by certain safety precautions when using the equipment. In order to prevent injuries and damages from occurring, you must always read through this operating manual carefully.
| WARNING SYMBOLS AND DEFINITIONS | |
 | This is the safety alert symbol. It is used to ale potential personal injury hazards. Obey all safety messages that follow this symbol avoid possible injury or death. |
 | Indicates a hazardous situation which, if not avoi will result in death or serious injury. |
 | Indicates a hazardous situation which, if not avoi could result in death or serious injury. |
 | Indicates a hazardous situation which, if not avoi could result in minor or moderate injury. |
  | Addresses practices not related to personal injury |
2. SPECIEICATIONS
| Model No. | 50ft*1/2 | 50ft*3/8 | 75FT*1/2 | 100Ft3/8 | 100Ft1/2 |
| Cable length | 50ft | 50ft | 75ft | 100ft | 100ft |
| Outside diameter | 1/2" | 3/8" | 1/2" | 3/8" | 1/2" |
| Pipe Size | 2 - 4" | 2 - 4" | 2 - 4" | 2 - 4" | 2 - 4" |
| Colour | black | black | black | black | black |
| Material quality | 65Mn | 65Mn | 65Mn | 65Mn | 65Mn |
| Application | VEVOR | VEVOR | VEVOR | VEVOR | VEVOR |
3. Personal safety
a) Stay alert, watch what you are doing and use common sense when operate power tool. Do not use a power tool while you are tired or under the influence of drugs, alcohol or medication. A moment of inattention while operating power may result in serious personal injury.
b) Use personal protective equipment. Always wear eye protection.
Protective equipment such as dust mask, non-skid safety shoes, hard hat, or hearing protection used for appropriate conditions will reduce personal injuries.
c) Prevent unintentional starting. Ensure the switch is in the off-position bet fi connecting to power source and/or battery pack, picking up or carrying the tc Carrying power tools with your finger on the switch or energizing power tools have the switch on invites accidents.
d) Do not overreach. Keep proper footing and balance at all times. This ena better control of the power tool in unexpected situations.
f) Dress properly. Do not wear loose clothing or jewellery. Keep your hair, clothing and gloves away from moving parts. Loose clothes, jewellery or long hair can be caught in moving parts.
4. Use
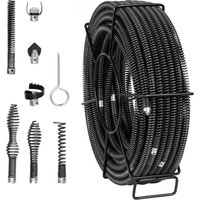
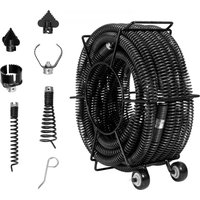
Cutting Tool Accessories
There are four Cutting Tools included with each Drain Cleaner. Select the appropriate tool for the cleaning job and attach to Cable. Each is described table below.
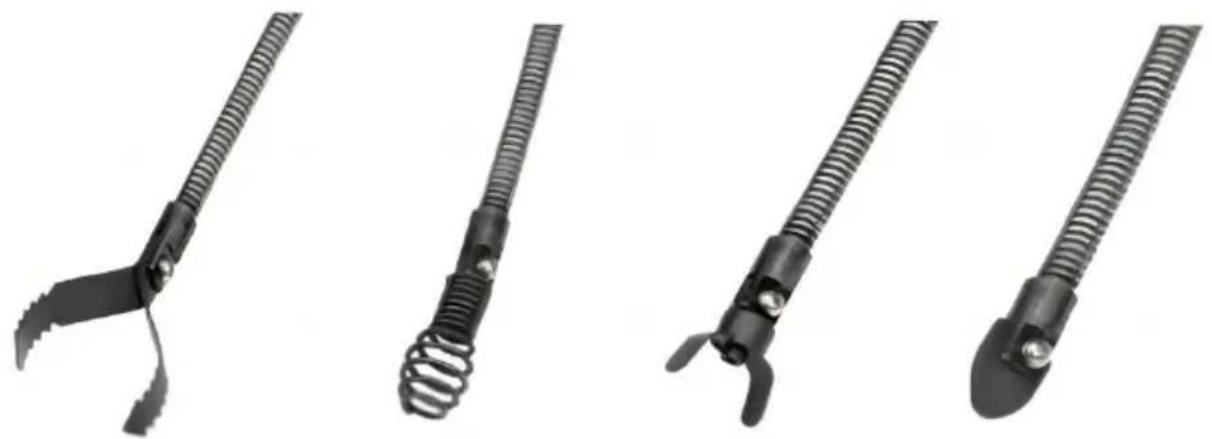
natural_image
Four different types of black plastic-coated tool holders, shown from different angles (no text or symbols visible)Arrow Cutter
Boring Bulb Cutter
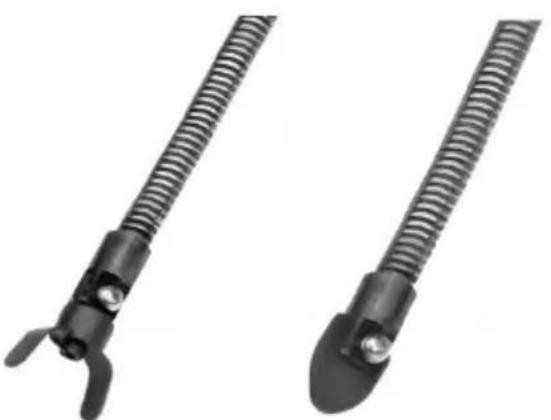
natural_image
Two black plastic-coated cable connectors with metallic clips, shown from different angles (no text or symbols visible)C-Cutter
Spade Cutter
| Cutter Tool | Applications |
| Arrow Cutter (2 piece) | Starting tool; ideal for cutting and scraping |
| Boring Bulb Cutter | Starting tool; ideal for removing loose objects |
| C-Cutter | Finishing tool; ideal for grease stoppages and cleaning pipe walls. |
| Spade Cutter | Finishing tool; used for scraping the inside edg pipes. |
NOTICE: If the cause of the obstruction is unknown, use the Boring Bulb Cutter to explore the obstruction and, if possible, retrieve a piece to inspect. Once you can see the cause of the obstruction, select the appropriate tool for the job. Run the smallest available tool through the blockage to allow the backed up water to flow and carry away the debris as the drain is cleaned. Once the drain is flowing, more appropriate tools can be used on the rest of the blockage.
Keep in mind that the largest tool used should be no bigger than the drain's inside diameter, minus an inch.
If properly used, the Drain Cleaners and assorted Drain Cleaner
Accessories will not damage a drain that is in good condition and properly designed, constructed, and maintained.
However, if the drain is in poor condition or has not been properly designed, the drain cleaning work may damage the drain. If possible, visually inspect the drain's quality before operation.
- Determine the correct drain cleaning cable size for the drain cleaning job. See Cable/Pipe Size chart below.
| Cable Size | Pipe Size | Typical Applications |
| 1/2 Inch | 50-100MM to 200MM | Roof stacks and small floor drains (no roots) |
| 3/8 Inch | 50-100MM to 200MM | Roof stacks and small floor drains (no roots) |
| 3/4 Inch | 100MM to 200MM | Roof stacks and small floor drains (no roots) |
- If needed, place protective covers over the work area floor. Cleaning the clogged drain can be a messy operation.
- Make sure that the Drain Cleaner handle is locked into the upright position for transport. If the Drain Cleaner needs to be lifted, use proper lifting techni
or seek assistance if needed. Use caution when moving equipment up and d stairs. Wear appropriate footwear to help prevent slipping on floor.
- Set the Drain Cleaner so that the drum opening is within 2 feet of the drain access. The greater the distance from the drain access, the higher the risk of cable twisting or kinking.
- If the machine cannot be placed with the drum opening within 2' of the dra access, use appropriate-sized pipes and fittings to extend the drain access ba to within 2' of the drum opening. Improper cable support can allow the cable kink and twist and can damage the cable or injure the operator.
- If needed, set up barriers to keep bystanders away from the Drain Cleaner work area during operation.
- Select proper cutting tool. (See Cutting Tool Accessories).
- Install the tool to the end of the cable. Slide the base of the Cutter Tool the slot at the end of the cable. Fasten together using a screwdriver.
- Position the Foot Switch for easy accessibility. You must be able to hold a control the cable, control the Foot Switch, and reach the Rotation Switch.
5. CORRECTIVE ACTION IN CASE OF FAILURE
1) The operating switch is switched on, but the motor is not working.
-- Wires in the mains plug or in the socket are loose.
Have socket and plug checked or repaired.
-- The switch is faulty.
Have the switch replaced.
2) The operating switch is switched on, but unusual noises can be h the motor is not working or only very slowly.
-- Switch contact has failed.
Have the switch replaced.
-- Component jammed.
Have the electric tool checked or repaired.
-- Too much thrust, as a result the motor is dragging.
Use less thrust during the task.
3) Motor gets hot.
-- Foreign substances have got inside the motor.
Have the foreign substances removed.
-- Lack of or contaminated lubrication grease.
Have lubricating grease applied or replaced.
-- Pressure too high
Use less thrust during the task
4) Frequent or strong sparks on the commutator.
-- Short circuit on the armature.
Have the armature replaced.
-- Carbon brushes worn out or jammed
Have the carbon brushes checked.
-- Rough running of the commutator.
Have the surface of the commutator cleaned or ground.
For your own safety, never remove parts or accessories of the electri during operation. In case of fault or damage have the electric tool re only by a specialist workshop or by the manufacturer.
For your personal safety, READ and UNDERSTAND before using. Save This Instruction For Future Reference.
Always Wear Ear Protection With This Tool.
Always Wear Eye Protection With This Tool.
Always Wear a breathing Mask With This Tool.
Address: Baoshanqu Shuangchenglu 803long 11hao 1602A-1609shi Shanghai
Imported to AUS: SIHAO PTY LTD, 1 ROKEVA STREETEASTWOOD NSW 2122 Australia
Imported to USA: Sanven Technology Ltd., Suite 250, 9166 Anaheim Place, Rancho Cucamonga, CA 91730
UK REP Pooledas Group Ltd Unit 5 Albert Edward House, The Pavilions Preston, United Kingdom
SHUNSHUN GmbH Römeräcker 9 Z2021, 76351 Linkenheim-Hochstetten, Germany
Made In China
VEVOR®
TOUGH TOOLS, HALF PRICE
Technical Support and E-Warranty Certificate
www.vevor.com/support
VEVOR®
TOUGH TOOLS, HALF PRICE
natural_image
Coiled black wire with metal frame, no visible text or symbolsBESOIN D'AIDE? CONTACTEZ-NOUS!
natural_image
Coiled metal wire with coiled spring, no text or symbols visiblenatural_image
Coiled metal wire with coiled spring, no text or symbols visible100Pies3/8/100Pies3/8
natural_image
Coiled metal wire with coiled spring, no text or symbols visiblenatural_image
Coiled metal wire with coiled spring, no text or symbols visiblePOTRZEBUJESZ POMOCY? SKONTAKTUJ SIĘ Z NAMI!
natural_image
Coiled black wire with metal frame, no visible text or symbolsHULP NODIG? NEEM CONTACT MET ONS OP!
-- De schakelaar is defect.
-- Schakelcontact is defect.
Unit 5 Albert Edward House, De Paviljoens
natural_image
Coiled metal wire with coiled spring, no text or symbols visibleBEHÖVER HJÄLP? KONTAKTA OSS!
Enhet 5 Albert Edward House, The Pavilions
www.vevor.com/support