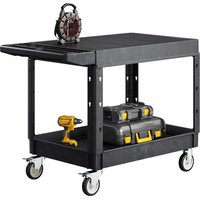
JY-BS - Utility cart Vevor - Free user manual and instructions
Find the device manual for free JY-BS Vevor in PDF.

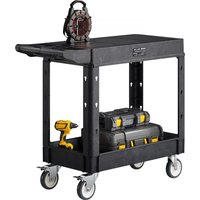
| Product Type | Utility Cart |
| Brand | Vevor |
| Model | JY-BS / UD253-3 |
| Main Material | Steel |
| Intended Use | Transport and storage of heavy loads |
| Assembly Required | Yes, assembly needed before use |
| Tools Needed for Assembly | Wrenches, screwdrivers (not included) |
| Load Capacity | 150 kg (estimated) |
| Recommended Use Surface | Flat, hard, smooth and level |
| Push/Pull Handle | Yes, use only the provided handle |
| Safety - Do not step on the item | Do not sit, stand, or step on it |
| Safety - Children | Do not allow children to play with or near it |
| Safety - Inspection before use | Check for loose or damaged parts |
| Safety - Dynamic loading | Beware of sudden movements that can cause overload |
| Maintenance and Cleaning | Clean with a damp cloth; inspect regularly |
| Technical Support | www.vevor.com/support |
| Warranty | Electronic warranty certificate available online |
| Spare Parts | Contact Vevor support for replacement parts |
| Repairability | Repair possible by a professional, parts available on request |
Frequently Asked Questions - JY-BS Vevor
User questions about JY-BS Vevor
0 question about this device. Answer the ones you know or ask your own.
Ask a new question about this device
Download the instructions for your Utility cart in PDF format for free! Find your manual JY-BS - Vevor and take your electronic device back in hand. On this page are published all the documents necessary for the use of your device. JY-BS by Vevor.
USER MANUAL JY-BS Vevor
Technical Support and E-Warranty Certificate www.vevor.com/support
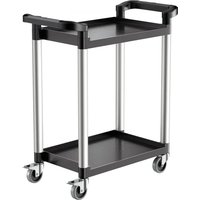
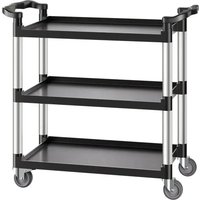
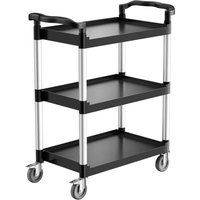
UTILITY CARTS
USER MANUAL
MODEL:UD253-3
We continue to be committed to provide you tools with competitive price. "Save Half", "Half Price" or any other similar expressions used by us only represents an estimate of savings you might benefit from buying certain tools with us compared to the major top brands and does not necessarily mean to cover all categories of tools offered by us. You are kindly reminded to verify carefully when you are placing an order with us if you are actually saving half in comparison with the top major brands.
MODEL:UD253-3
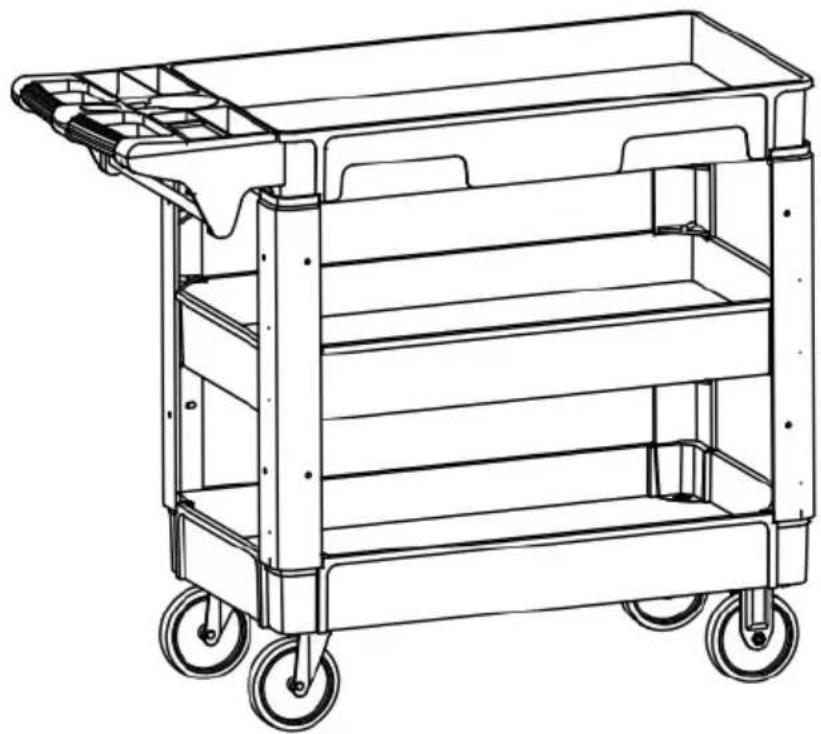
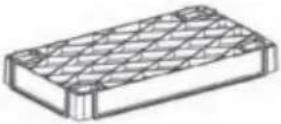
natural_image
Line drawing of a multi-level industrial cart with wheels and handle (no text or symbols)NEED HELP? CONTACT US!
Have product questions? Need technical support? Please feel free to contact us:
Technical Support and E-Warranty Certificate www.vevor.com/support
This is the original instruction, please read all manual instructions carefully before operating. VEVOR reserves a clear interpretation of our user manual. The appearance of the product shall be subject to the product you received. Please forgive us that we won't inform you again if there are any technology or software updates on our product.

WARNING:
Read this material before using this product. Failure to do so can result in serious injury. SAVE THIS MANUAL
Assembly precautions
- Assemble only according to these instructions. Improper assembly can create hazards.
- Wear ANSI-approved safety goggles and heavy-duty work gloves during assembly.
- Keep assembly area clean and well lit.
4.Keep bystanders out of the area during assembly.
5.Do not assemble when tired or when under the influence of alcohol, drugs or medication. - Weight capacity and other product capabilities apply to properly and completely assembled product only.
- Assemble on a flat, level, hard and smooth surface capable of safely supporting a fully loaded service cart.
Use precautions
TO PREVENT SERIOUS INJURY AND DEATH FROM TIPPING:
- DO NOT SIT, STAND OR cLIMB ON THIS ITEM.
- This product is not a toy nor a toy chest. Do not allow children to play with or near this item.
-
Do not exceed weight capacities, evenly distributed from bottom up. Be aware of dynamic loading! Sudden load movement may briefly create excess load causing product failure. Do not exceed capacity of bench or shelf supporting Top Chest.
-
Use only on a flat, level, hard and smooth surface capable of safely supporting a fully loaded Chest.
-
Do not lift while loaded.
-
To prevent tipping, push/pull using supplied handle only.
-
Use as intended only.
- Inspect before every use; do not use if parts are loose or damaged.
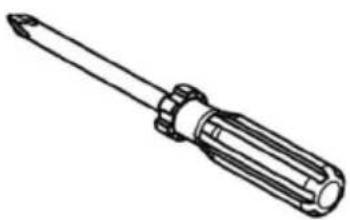
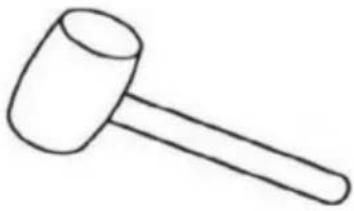
TOOL REQUIRED FOR INSTALLATION
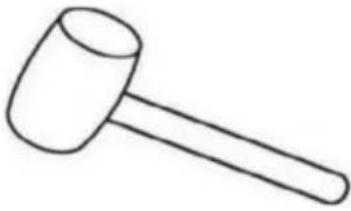
| Phillips Screwdriver | Rubber mallet | Note: The phillips screwdriver and rubber maller tools not included with this product |
 |  |
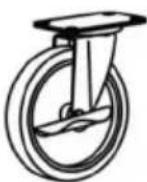
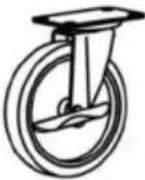
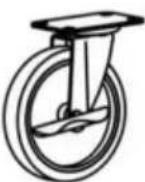
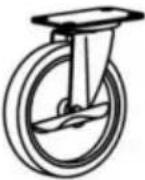
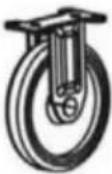
PARTS LIST
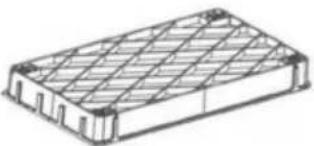
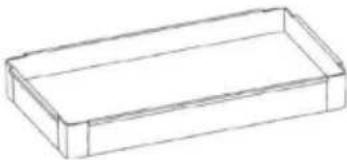
| 1-TOP Tray | 2-Middle Tray | 3-Bottom Tray | 4-Beams |
 |  |  |  |
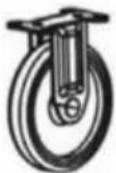
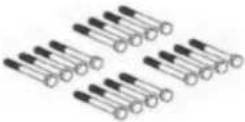
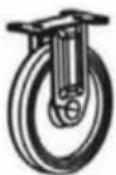
| 5-SwivelCaster | 6-FixedCaster | 7-Bolts | 8-Nuts |
  | 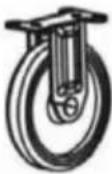 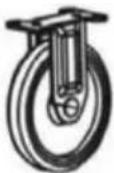 | 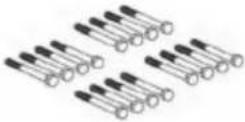 |     |
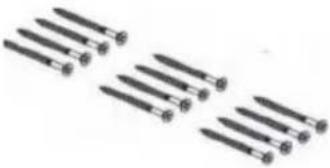
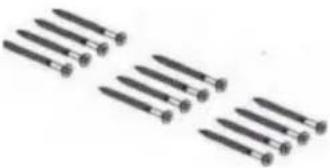
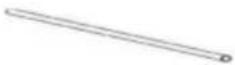
| 9-M6Screw | 10-SpringWasher | 11-Handletray | 12-Towelbar |
 |  |  |  |
ASSEMBLY
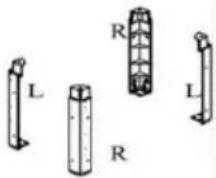
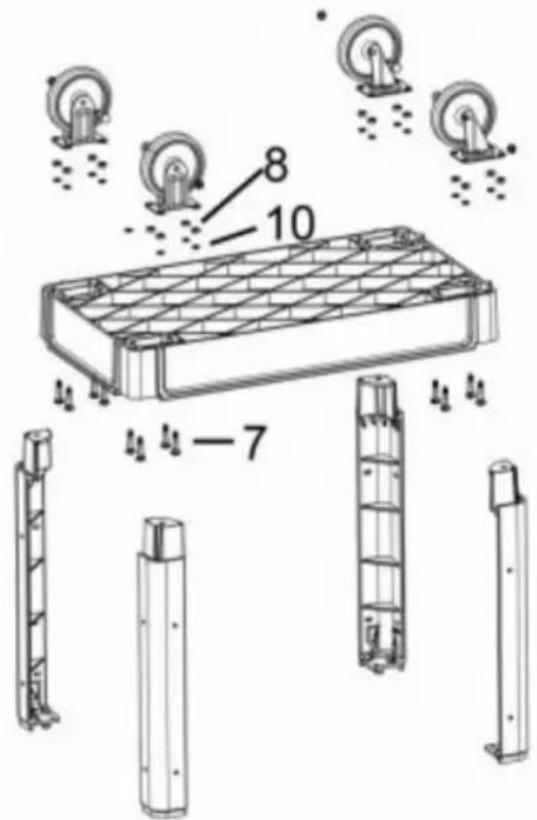
1.
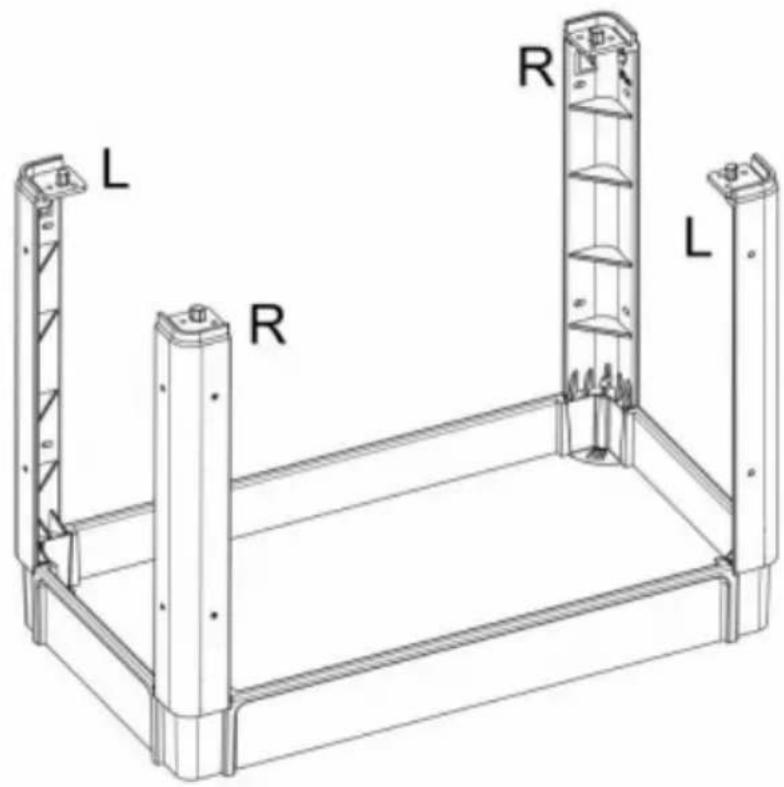
Insert Beam(4) to the Bottom Shelf(3)
* R to R, L to L
2.

Put 4 wheels(5) & (6) on the Bottom Shelf with Blot(7), Washer(10), Nut(8).
3.

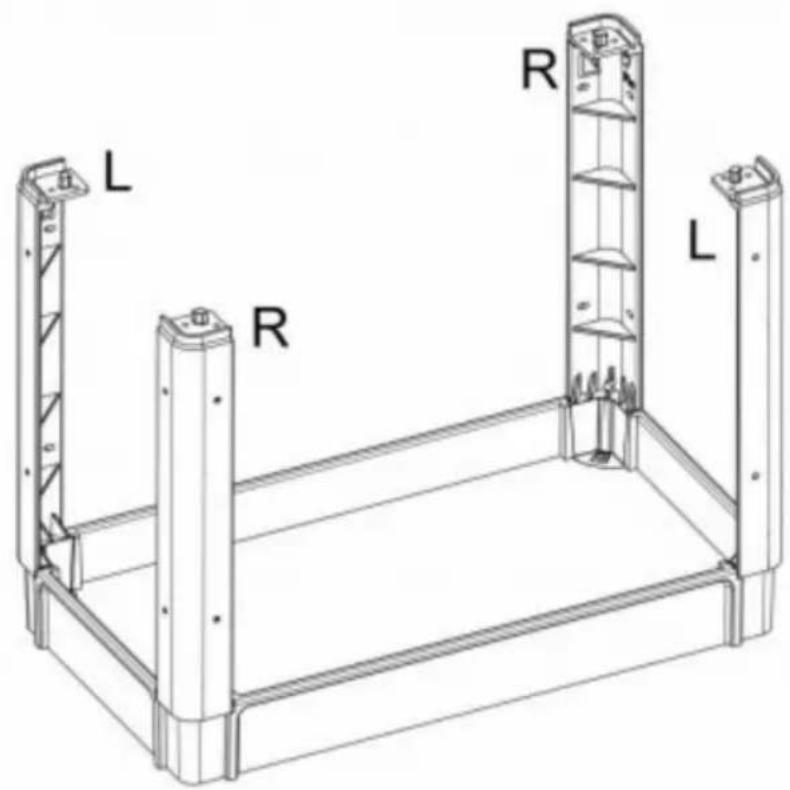
natural_image
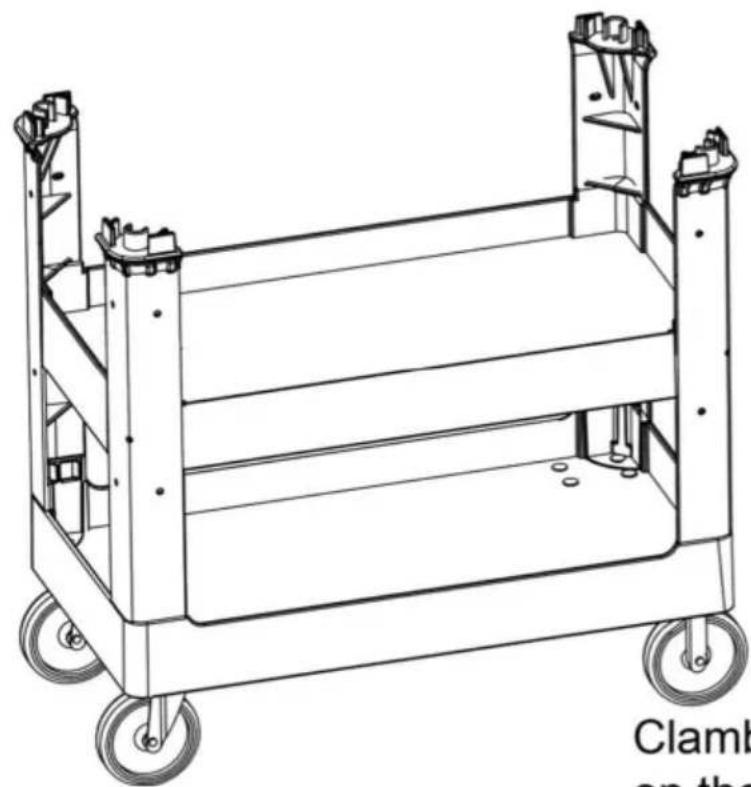
Line drawing of a multi-wheeled cart with wheels and side-mounted legs (no text or symbols)Clamb the Middle Tray (2) on the Beams (4)
4.
natural_image
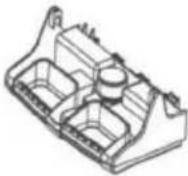
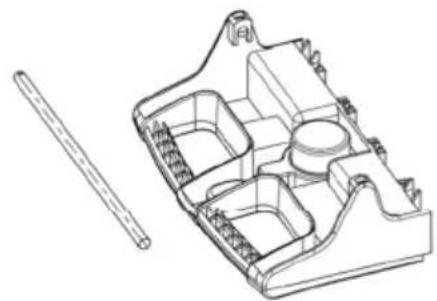
Technical line drawing of a mechanical component with internal compartments and a separate cylindrical part (no text or symbols)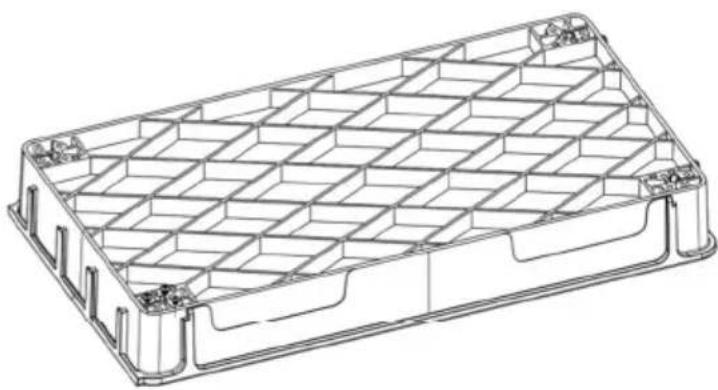
natural_image
Technical line drawing of a rectangular plastic container with internal grid structure (no text or symbols)Insert Handle Tray(11) to the TOP Shelf(1), Knock & reinforce with Rubber Mallet. Put the Towel Bar (12) in to Handle Tray.
5.
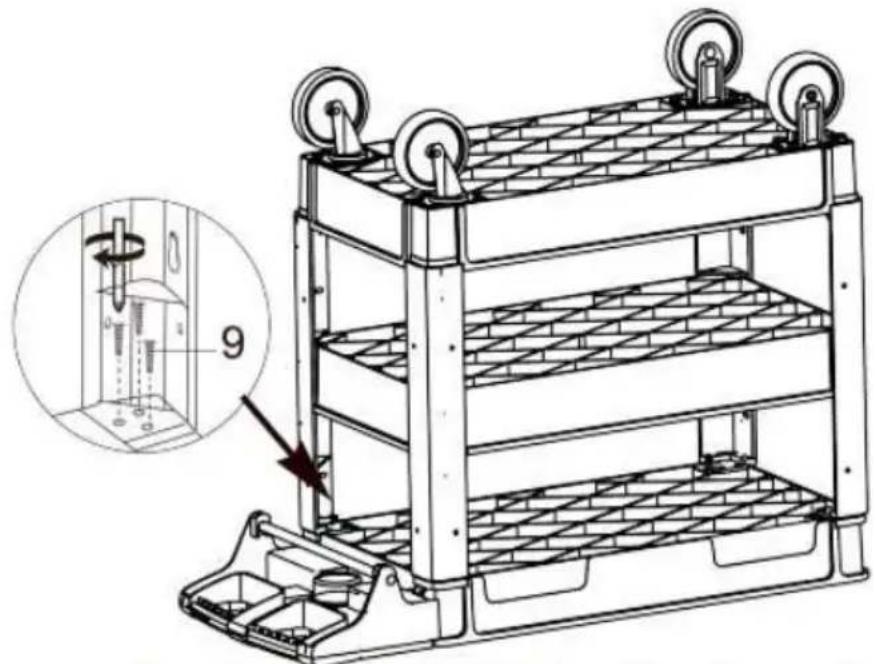
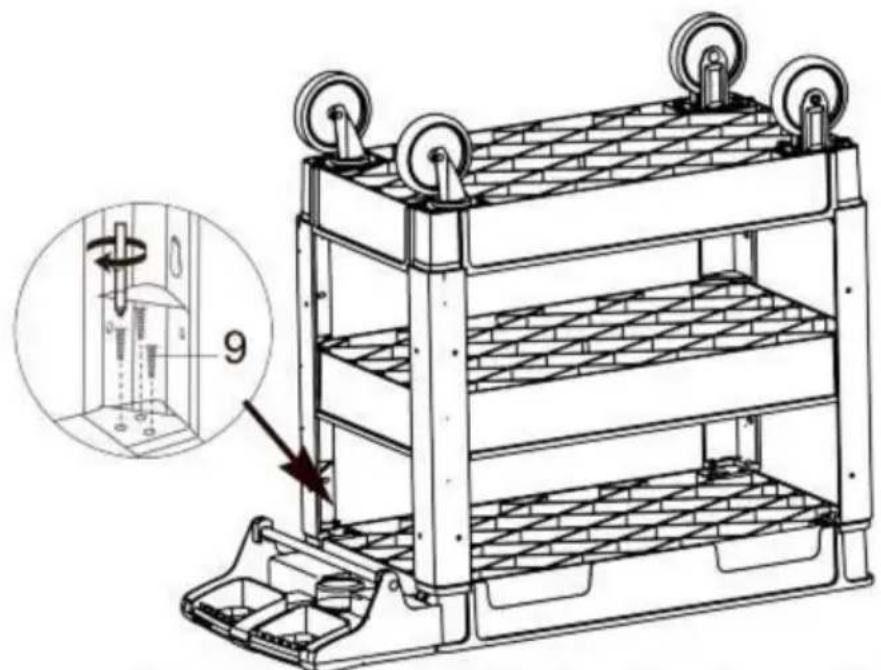
Fix the Beams (4) with TOP Tray (1) by Screws (9).
VEVOR®
TOUGH TOOLS, HALF PRICE
Technical Support and E-Warranty Certificate
www.vevor.com/support
VEVOR®
TOUGH TOOLS, HALF PRICE
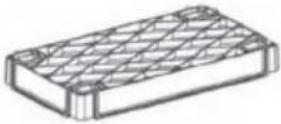
natural_image
Line drawing of a multi-level cleaning cart with wheels and handle (no text or symbols)BESOIN D'AIDE? CONTACTEZ-NOUS!
SAFETY INSTRUCTION AND PRECAUTIONS

AVERTISSEMENT:
| Phillips Screwdriver | Rubber mallet | Note: The phillips screwdriver and rubber maller tools not included with this product |
 |  |
PARTS LIST
| 1-TOP Tray | 2-Middle Tray | 3-Bottom Tray | 4-Beams |
 |  |  |  |
| 5-SwivelCaster | 6-FixedCaster | 7-Bolts | 8-Nuts |
  |   |  |     |
| 9-M6Screw | 10-SpringWasher | 11-HandleTray | 12-Towelbar |
 |  |  |
ASSEMBLY

Insert Beam(4) to the Bottom Shelf(3)
* R to R, L to L
Put 4 wheels(5) & (6)
on the Bottom Shelf with Blot(7),
Washer(10), Nut(8).

natural_image
Line drawing of a multi-wheeled cart with wheels and side-mounted legs (no text or symbols)Clamb the Middle Tray (2) on the Beams (4)

natural_image
Technical line drawing of a mechanical component with internal compartments and a rod (no text or symbols)
natural_image
Technical line drawing of a rectangular plastic container with internal grid structure (no text or symbols)Insert Handle Tray(11) to the TOP Shelf(1), Knock & reinforce with Rubber Mallet. Put the Towel Bar (12) in to Handle Tray.

Fix the Beams (4) with TOP Tray (1) by Screws (9).
VEVOR®
TOUGH TOOLS, HALF PRICE
natural_image
Line drawing of a multi-level cleaning cart with wheels and handle (no text or symbols)SAFETY INSTRUCTION AND PRECAUTIONS

WARNUNG:
| Phillips Screwdriver | Rubber mallet | Note: The phillips screwdriver and rubber maller tools not included with this product |
| |
PARTS LIST
| 1-TOP Tray | 2-Middle Tray | 3-Bottom Tray | 4-Beams |
| | | |
| 5-SwivelCaster | 6-FixedCaster | 7-Bolts | 8-Nuts |
|  | | |
| 9-M6Screw | 10-SpringWasher | 11-HandleTray | 12-Towelbar |
| | |
ASSEMBLY

Insert Beam(4) to the Bottom Shelf(3)
* R to R, L to L

Put 4 wheels(5) & (6)
on the Bottom Shelf with Blot(7),
Washer(10), Nut(8).

natural_image
Line drawing of a multi-wheeled cart with wheels and side-mounted legs (no text or symbols)Clamb the Middle Tray (2) on the Beams (4)

natural_image
Technical line drawing of a mechanical component with internal compartments and a rod (no text or symbols)
natural_image
Technical line drawing of a rectangular plastic container with internal grid structure (no text or symbols)Insert Handle Tray(11) to the TOP Shelf(1), Knock & reinforce with Rubber Mallet. Put the Towel Bar (12) in to Handle Tray.

Fix the Beams (4) with TOP Tray (1) by Screws (9).
VEVOR®
TOUGH TOOLS, HALF PRICE
www.vevor.com/support
VEVOR®
TOUGH TOOLS, HALF PRICE
natural_image
Line drawing of a multi-level modular cart with wheels and handle (no text or symbols)SAFETY INSTRUCTION AND PRECAUTIONS

AVVERTIMENTO:
| Phillips Screwdriver | Rubber mallet | Note: The phillips screwdriver and rubber maller tools not included with this product |
| |
PARTS LIST
| 1-TOP Tray | 2-Middle Tray | 3-Bottom Tray | 4-Beams |
| | | |
| 5-SwivelCaster | 6-FixedCaster | 7-Bolts | 8-Nuts |
| | | |
| 9-M6Screw | 10-SpringWasher | 11-HandleTray | 12-Towelbar |
| | |
ASSEMBLY

Insert Beam(4) to the Bottom Shelf(3)
* R to R, L to L

Put 4 wheels(5) & (6)
on the Bottom Shelf with Blot(7),
Washer(10), Nut(8).

natural_image
Line drawing of a multi-wheeled cart with wheels and side-mounted legs (no text or symbols)Clamb the Middle Tray (2) on the Beams (4)

natural_image
Technical line drawing of a mechanical component with internal compartments and a rod (no text or symbols)
natural_image
Technical line drawing of a rectangular plastic container with internal grid structure (no text or symbols)Insert Handle Tray(11) to the TOP Shelf(1), Knock & reinforce with Rubber Mallet. Put the Towel Bar (12) in to Handle Tray.

Fix the Beams (4) with TOP Tray (1) by Screws (9).
VEVOR®
TOUGH TOOLS, HALF PRICE
elettronica www.vevor.com/support
VEVOR®
TOUGH TOOLS, HALF PRICE
natural_image
Line drawing of a multi-level modular cart with wheels and handle (no text or symbols)SAFETY INSTRUCTION AND PRECAUTIONS

ADVERTENCIA:
| Phillips Screwdriver | Rubber mallet | Note: The phillips screwdriver and rubber maller tools not included with this product |
| |
PARTS LIST
| 1-TOP Tray | 2-Middle Tray | 3-Bottom Tray | 4-Beams |
| | | |
| 5-SwivelCaster | 6-FixedCaster | 7-Bolts | 8-Nuts |
| | | |
| 9-M6Screw | 10-SpringWasher | 11-HandleTray | 12-Towelbar |
| | |
ASSEMBLY
Insert Beam(4) to the Bottom Shelf(3)
* R to R, L to L

Put 4 wheels(5) & (6)
on the Bottom Shelf with Blot(7),
Washer(10), Nut(8).

natural_image
Line drawing of a multi-wheeled cart with wheels and side-mounted legs (no text or symbols)Clamb the Middle Tray (2) on the Beams (4)

natural_image
Technical line drawing of a mechanical component with internal compartments and a rod (no text or symbols)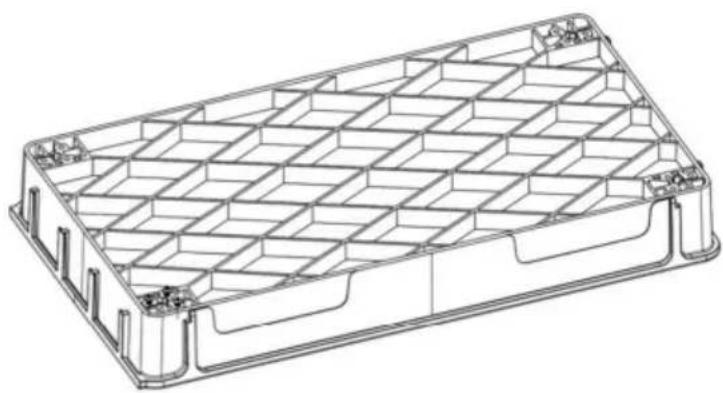
natural_image
Technical line drawing of a rectangular plastic container with internal grid structure (no text or symbols)Insert Handle Tray(11) to the TOP Shelf(1), Knock & reinforce with Rubber Mallet. Put the Towel Bar (12) in to Handle Tray.

Fix the Beams (4) with TOP Tray (1) by Screws (9).
VEVOR®
TOUGH TOOLS, HALF PRICE
natural_image
Line drawing of a multi-level modular cart with wheels and handle (no text or symbols)POTRZEBUJESZ POMOCY? SKONTAKTUJ SIĘ Z NAMI!
SAFETY INSTRUCTION AND PRECAUTIONS

OSTRZEŻENIE:
| Phillips Screwdriver | Rubber mallet | Note: The phillips screwdriver and rubber maller tools not included with this product |
| |
PARTS LIST
| 1-TOP Tray | 2-Middle Tray | 3-Bottom Tray | 4-Beams |
| | | |
| 5-SwivelCaster | 6-FixedCaster | 7-Bolts | 8-Nuts |
| | | |
| 9-M6Screw | 10-SpringWasher | 11-Handletray | 12-Towelbar |
|  [IMAGE][IMAGE][IMAGE][IMAGE][IMAGE] [IMAGE][IMAGE][IMAGE][IMAGE][IMAGE] | 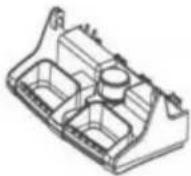 | |
ASSEMBLY

Insert Beam(4) to the Bottom Shelf(3)
* R to R, L to L

Put 4 wheels(5) & (6)
on the Bottom Shelf with Blot(7),
Washer(10), Nut(8).

natural_image
Line drawing of a multi-wheeled cart with wheels and side-mounted legs (no text or symbols)Clamb the Middle Tray (2) on the Beams (4)

natural_image
Technical line drawing of a mechanical component with internal compartments and a rod (no text or symbols)
natural_image
Technical line drawing of a rectangular plastic container with internal grid structure (no text or symbols)Insert Handle Tray(11) to the TOP Shelf(1), Knock & reinforce with Rubber Mallet. Put the Towel Bar (12) in to Handle Tray.

Fix the Beams (4) with TOP Tray (1) by Screws (9).
VEVOR®
TOUGH TOOLS, HALF PRICE
natural_image
Line drawing of a multi-level modular cart with wheels and handle (no text or symbols)HULP NODIG? NEEM CONTACT MET ONS OP!
SAFETY INSTRUCTION AND PRECAUTIONS

WAARSCHUWING:
| Phillips Screwdriver | Rubber mallet | Note: The phillips screwdriver and rubber maller tools not included with this product |
| |
PARTS LIST
| 1-TOP Tray | 2-Middle Tray | 3-Bottom Tray | 4-Beams |
| | | |
| 5-SwivelCaster | 6-FixedCaster | 7-Bolts | 8-Nuts |
| | | |
| 9-M6Screw | 10-SpringWasher | 11-HandleTray | 12-Towelbar |
| [IMAGE][IMAGE][IMAGE][IMAGE][IMAGE] | | |
ASSEMBLY

Insert Beam(4) to the Bottom Shelf(3)
* R to R, L to L

Put 4 wheels(5) & (6)
on the Bottom Shelf with Blot(7),
Washer(10), Nut(8).

natural_image
Line drawing of a multi-wheeled cart with wheels and side-mounted legs (no text or symbols)Clamb the Middle Tray (2) on the Beams (4)

natural_image
Technical line drawing of a mechanical component with internal compartments and a rod (no text or symbols)
natural_image
Technical line drawing of a rectangular plastic container with internal grid structure (no text or symbols)Insert Handle Tray(11) to the TOP Shelf(1), Knock & reinforce with Rubber Mallet. Put the Towel Bar (12) in to Handle Tray.
Fix the Beams (4) with TOP Tray (1) by Screws (9).
VEVOR®
TOUGH TOOLS, HALF PRICE
Technische ondersteuning en e-garantiecertificaat www.vevor.com/support
VEVOR®
TOUGH TOOLS, HALF PRICE
natural_image
Line drawing of a multi-level cleaning cart with wheels and handle (no text or symbols)BEHÖVER HJÄLP? KONTAKTA OSS!
SAFETY INSTRUCTION AND PRECAUTIONS

WARNING:
| Phillips Screwdriver | Rubber mallet | Note: The phillips screwdriver and rubber maller tools not included with this product |
| |
PARTS LIST
| 1-TOP Tray | 2-Middle Tray | 3-Bottom Tray | 4-Beams |
| | | |
| 5-SwivelCaster | 6-FixedCaster | 7-Bolts | 8-Nuts |
| | | |
| 9-M6Screw | 10-SpringWasher | 11-HandleTray | 12-Towelbar |
| | | |
ASSEMBLY

Insert Beam(4) to the Bottom Shelf(3)
* R to R, L to L

Put 4 wheels(5) & (6)
on the Bottom Shelf with Blot(7),
Washer(10), Nut(8).
natural_image
Line drawing of a multi-wheeled cart with wheels and side-mounted legs (no text or symbols)Clamb the Middle Tray (2) on the Beams (4)

natural_image
Technical line drawing of a mechanical component with internal compartments and a rod (no text or symbols)
natural_image
Technical line drawing of a rectangular plastic container with internal grid structure (no text or symbols)Insert Handle Tray(11) to the TOP Shelf(1), Knock & reinforce with Rubber Mallet. Put the Towel Bar (12) in to Handle Tray.

Fix the Beams (4) with TOP Tray (1) by Screws (9).
VEVOR®
TOUGH TOOLS, HALF PRICE
www.vevor.com/support