
SYTCSS10 - Utility cart Vevor - Free user manual and instructions
Find the device manual for free SYTCSS10 Vevor in PDF.
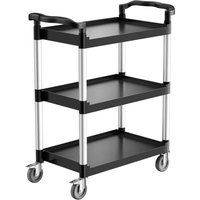


| Product Type | Utility Cart |
| Brand | Vevor |
| Model | SYTCSS10 |
| Load Capacity | 136 kg (evenly distributed) |
| Dimensions (L x W x H) | 880 x 410 x 990 mm |
| Top Platform Size | 620 x 410 x 60 mm |
| Number of Shelves | 3 (lower, middle, upper) |
| Material | Aluminum (poles) and steel (shelves) |
| Casters | 4 swivel casters of 100 mm, 2 with brake |
| Handles | 2 tubular handles |
| Weight | Approximately 12 kg |
| Use Surface | Flat, level, and hard |
| Assembly Required | Yes, with rubber mallet and Phillips screwdriver |
| Safety | Do not sit or stand; do not overload; brakes to be operated by foot |
| Maintenance | Check screw tightness periodically; clean with a damp cloth |
| Repairability | Spare parts available via Vevor support (website) |
| Warranty | Electronic warranty certificate at www.vevor.com/support |
| Manufacturer | Shanghaimuxinmuyeyouxiangongsi, Shanghai, China |
| EU Importer | E-CrossStu GmbH, Frankfurt am Main |
Frequently Asked Questions - SYTCSS10 Vevor
User questions about SYTCSS10 Vevor
0 question about this device. Answer the ones you know or ask your own.
Ask a new question about this device
Download the instructions for your Utility cart in PDF format for free! Find your manual SYTCSS10 - Vevor and take your electronic device back in hand. On this page are published all the documents necessary for the use of your device. SYTCSS10 by Vevor.
USER MANUAL SYTCSS10 Vevor
Technical Support and E-Warranty Certificate
www.vevor.com/support
UTILITY CARTS USER MANUAL
MODEL: SYTCSS10 / SYTCSS11
We continue to be committed to providing you with tools at competitive prices. "Save Half", "Half Price", or any other similar expressions used by us only represent an estimate of savings you might benefit from buying certain tools with us compared to the major top brands and do not necessarily mean to cover all categories of tools offered by us. You are kindly reminded to verify carefully when placing an order with us if you are actually saving half in comparison with the top major brands.
MODEL: SYTCSS10 / SYTCSS11
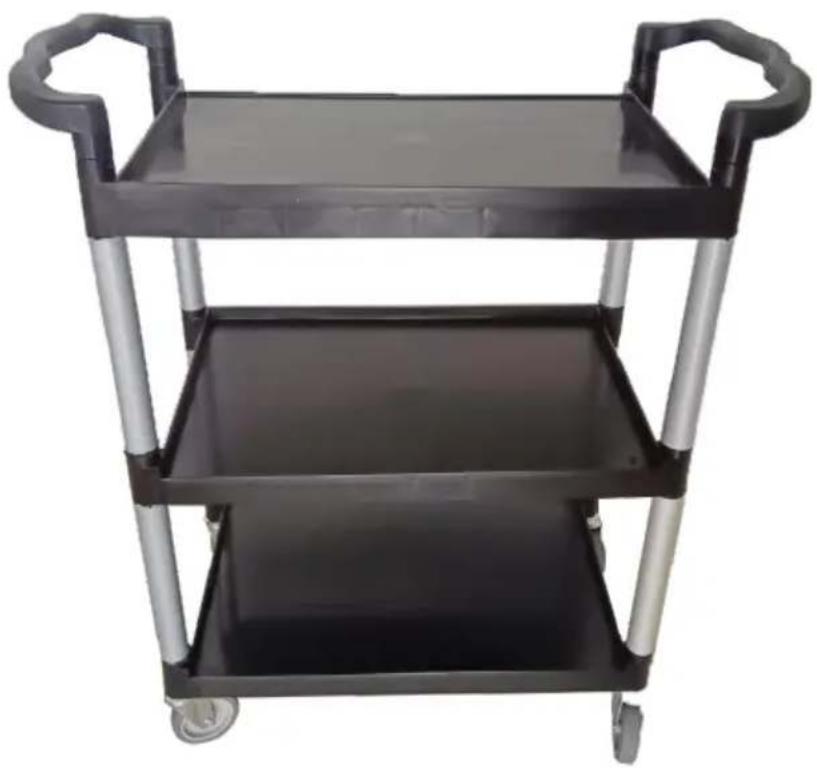
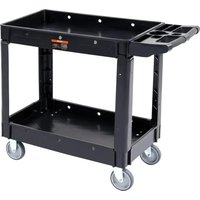
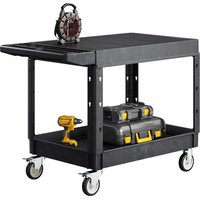
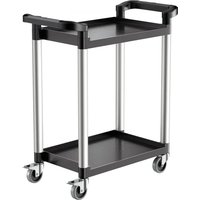
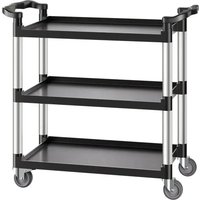
Photo for reference
NEED HELP? CONTACT US!
Have product questions? Need technical support? Please feel free to contact us:
Technical Support and E-Warranty Certificate www.vevor.com/support
This is the original instruction. Please read all manual instructions carefully before operating. VEVOR reserves the right to a clear interpretation of the user manual. The appearance of the product shall be subject to the product you received. Please forgive us that we won't inform you of any technology or software updates on our product.
PRODUCT PARAMETERS
| Specifications of SYTCSS10 | Specifications of SYTCSS11 | ||
| Load Capacity: | 136kg | Load Capacity: | 226kg |
| Upper Platform Size: | 620*410*60mm | Upper Platform Size: | 790*490*55 mm |
| Castor Size: | 100mm | Castor Size: | 100mm |
| Dimensions (L x W x H) | 880*410*990 mm | Dimensions (L x W x H) | 1060*490*980 mm |
WARNING:
Please read this manual carefully before using the product. Failure to do so may result in serious injury.
ASSEMBLY PRECAUTIONS
- Assemble needs to follow these instructions. Improper assembly can cause personal injury and/or property damage.
- Do not assemble when tired or under the influence of alcohol, drugs, or medication.
- Weight capacity and other product capabilities only apply to a correctly assembled product.
- Do not overload the cart. See specifications for load capacity (distribute evenly).
- Keep the assembly area clean and well-lit.
- Keep bystanders out of the area during assembly.
- The weight of the plate is heavy; pay attention to the installation to avoid injury. If necessary, find someone to assist with the installation.
USE PRECAUTIONS

WARNING: TO PREVENT SERIOUS INJURY AND DEATH FROM TIPPING:
- This product is not a toy. Do not allow children to play with or around this item.
- Use as intended only. Do not sit or stand on the product.
- Inspect before every use. Do not use it if parts are loose or damaged.
- Use on flat, level, and hard surfaces only.
- Do not exceed the listed weight capacity. Tighten all knobs securely before applying load. Be aware of dynamic loading! Sudden load movement may briefly create an excess load, causing product failure.
- When moving heavy loads for a long time, check whether the screws are loose to avoid the body shaking during movement.
Part list
| KEY | Description | QTY |
| 1 | Handle | 2 |
| 2 | Top shelf | 1 |
| 3 | Aluminium rod | 8 |
| 4 | Middle shelf | 1 |
| 5 | Bttom shelf | 1 |
| 6 | Caster | 2 |
| Caster with break 2PCS | 2 | |
| 7 | ASSEMBLY CAP | 7 |
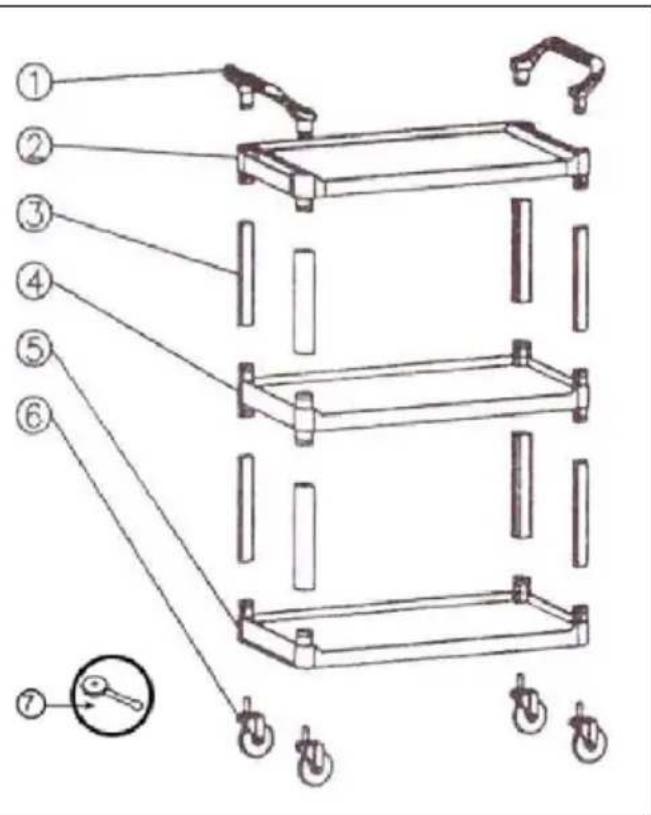
ASSEMBLY STEPS
Remarks:
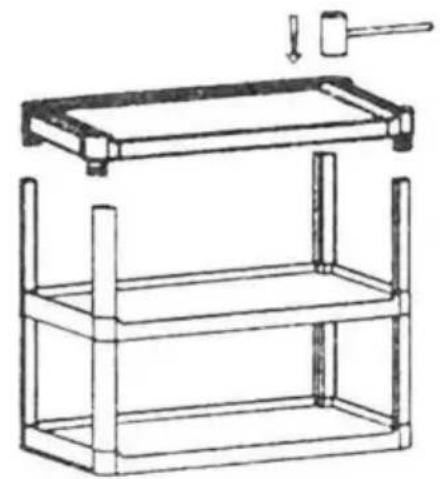
Before assembly, please: 1. Read this instruction carefully. 2. Prepare a rubber hammer (not included). 3. The three shelves are different. Note the corner on each and match them to the assembly diagram. Ensure all shelves face the same way. Ensure all joints are flush - a rubber mallet may be required.
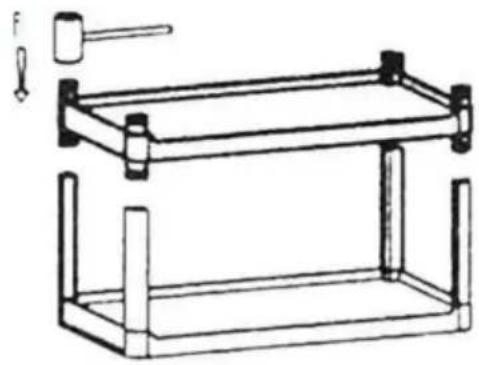
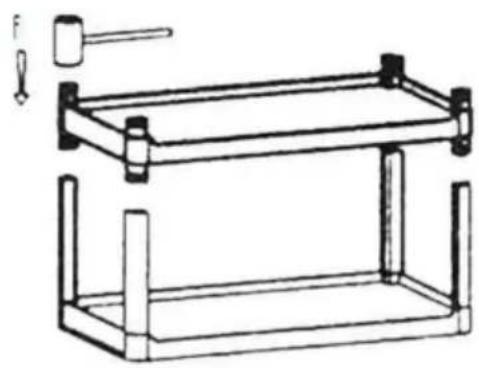
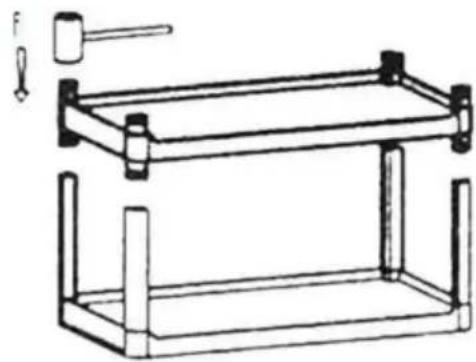
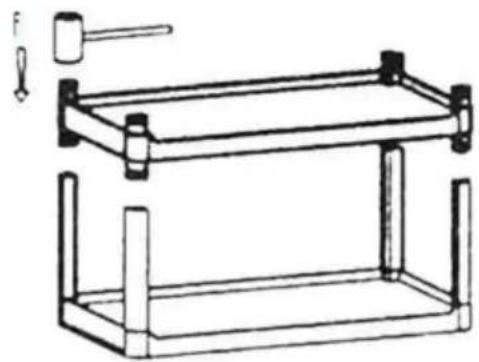
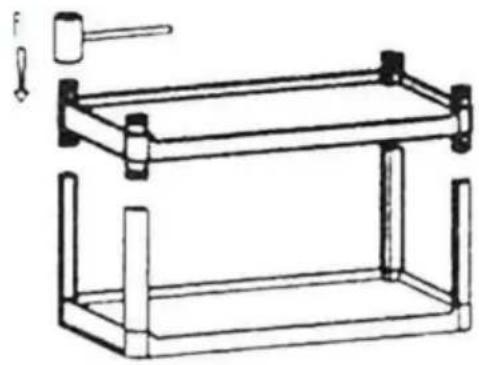
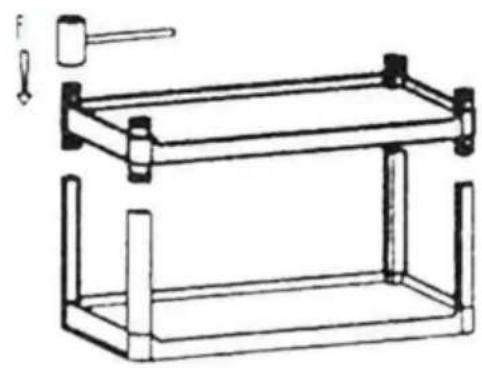
Step 1. Wedge 4 PCS aluminium rods above the bottom shelf.
Step 2. Wedge the middle shelf on an aluminium rod.
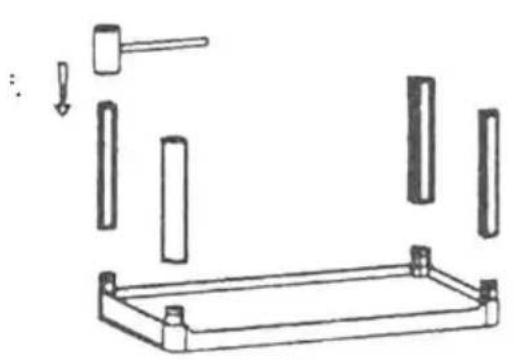
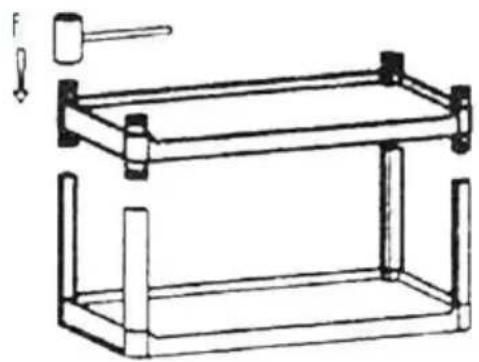
Step 1 Step 2
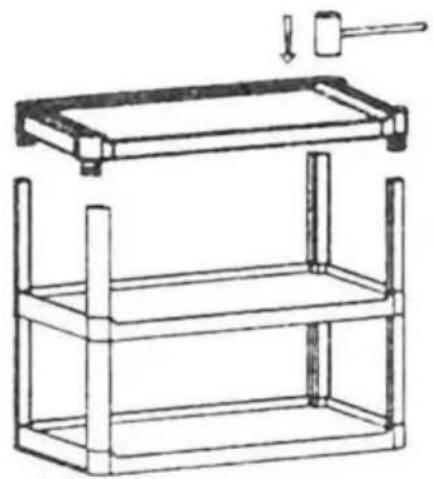
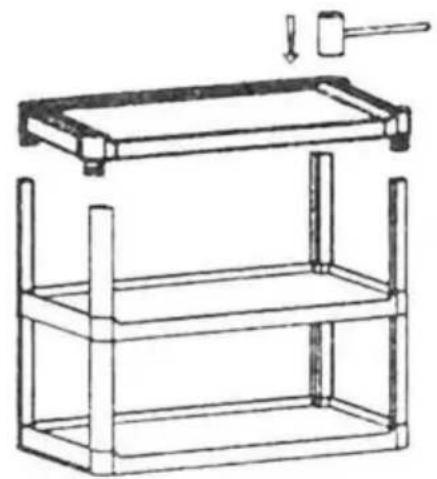
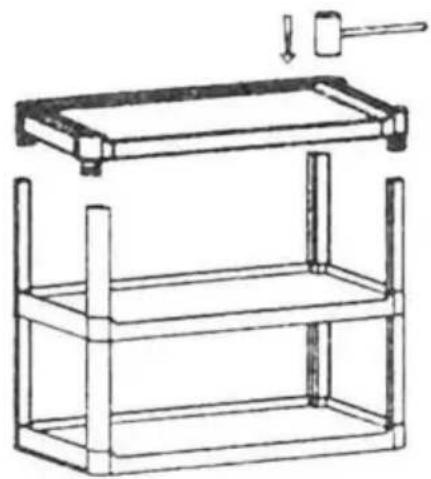
Step 3. Wedge the other 4 PCS aluminium rods above the middle shelf.
Step 4. Wedge the top shelf.
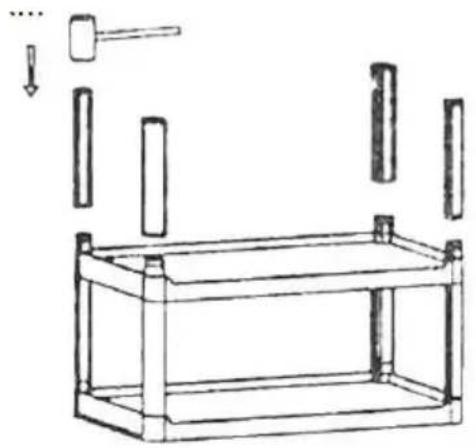
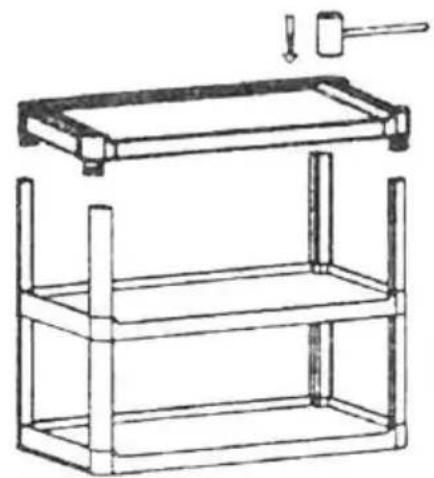
Step 3 Step 4
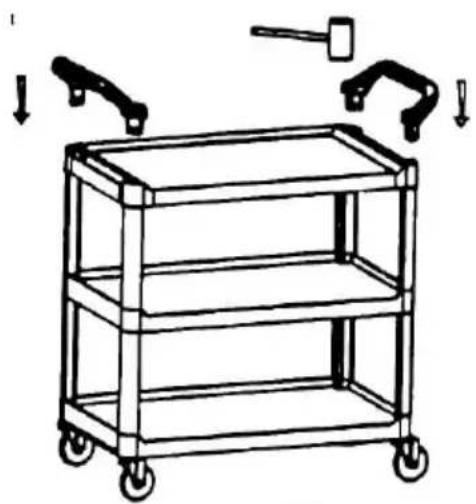
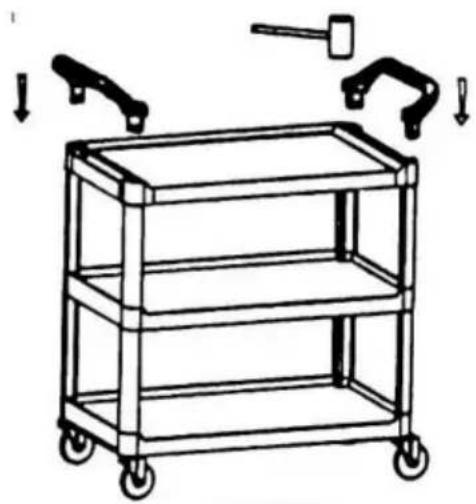
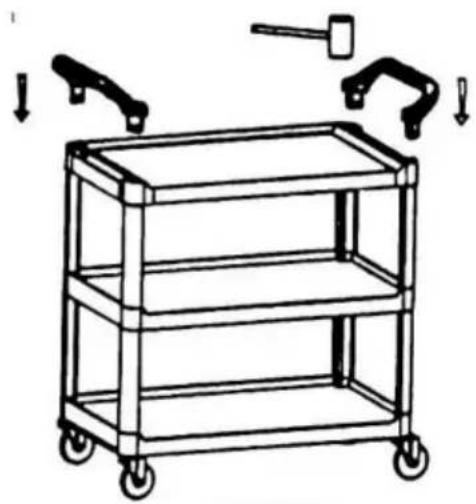
Step 5. Wedge the 4 PCS casters.
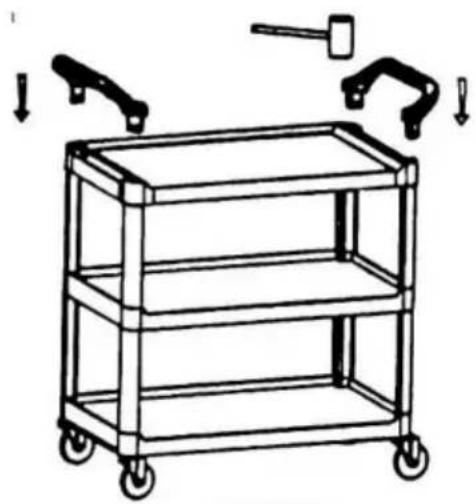
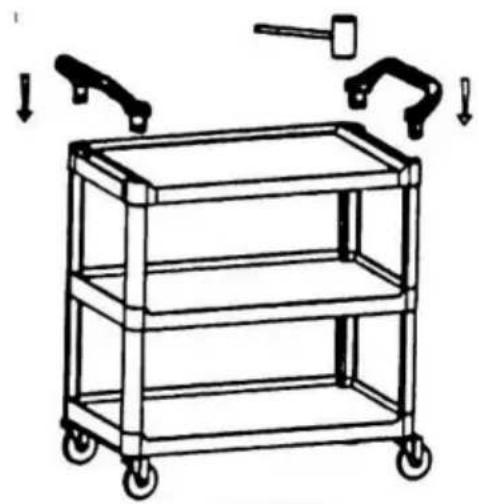
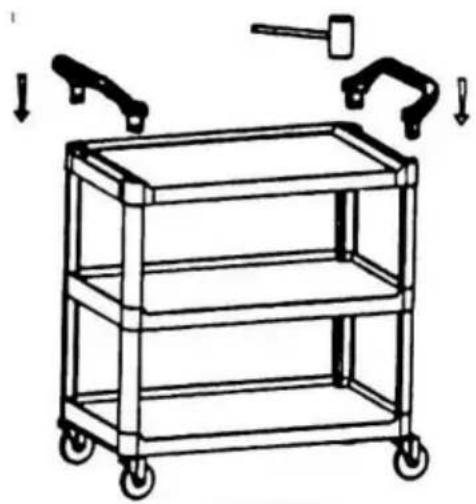
Step 6. Turn over the cart, then plug in the 2 PCS handle.
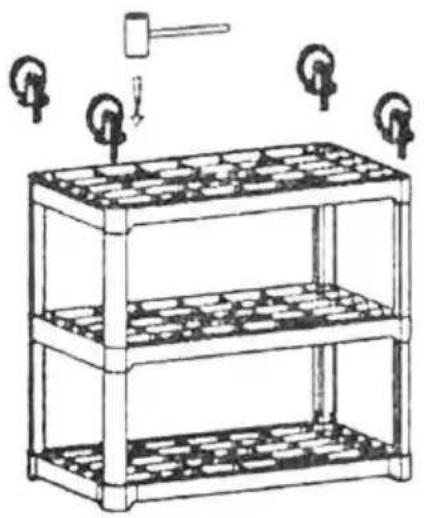
Step 5 Step 6
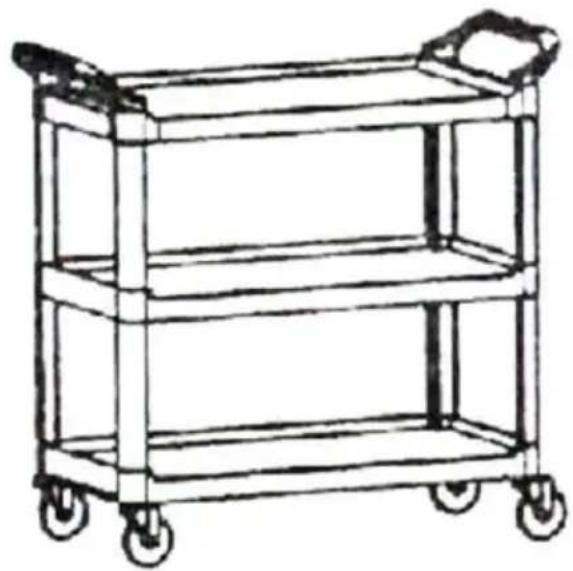
Step 7. Assembly completed.
ASSEMBLY NOTES
- Use a soft rubber mallet to assemble pressure-fit interlocking components. This may require significant force.
- Orient the TOP SHELF and BOTTOM SHELF so that the shorter-lipped edges are on the same side of the Cart.
- Place ASSEMBLY CAP on top of VERTICAL POSTS and SHELF corners before striking with a mallet to avoid damage.
- Alternate between posts when striking with a mallet to seat all components evenly. This will ensure product integrity and secure fit between parts.
- Snug HANDLES by alternating from side to side of each handle until fully seated in position.
- Position CASTERS with Brakes in corners of the Cart with the easiest access to the foot-activated Brakes.
Tools required: Cross-point screwdriver and rubber or wood mallet.
Use the mallet to tap down the parts to ensure they are seated properly before fastening them with screws.
Manufacturer: Shanghaimuxinmuyeyouxiangongsi
Address: Shuangchenglu 803nong11hao1602A-1609shi, baoshanqu, shanghai 200000 CN.
Imported to AUS: SIHAO PTY LTD. 1 ROKEVA STREETEASTWOOD NS 2122 Australia
Imported to USA: Sanven Technology Ltd. Suite 250, 9166 Anaheim Place Rancho Cucamonga, CA 91730
| EC | REP |
| UK | REP |
E-CrossStu GmbH
Mainzer Landstr.69, 60329 Frankfurt am Main
YH CONSULTING LIMITED.
C/O YH Consulting Limited Office 147, Centurion House London Road, Staines-upon-Thames, Surrey, TW18 4
VEVOR®
TOUGH TOOLS, HALF PRICE
Technical Support and E-Warranty Certificate www.vevor.com/support
VEVOR®
TOUGH TOOLS, HALF PRICE
PRODUCT PARAMETERS
ASSEMBLY STEPS
Notes:
Step 1
Step 2
Step 3
Step 4
Step 5
Step 6
ASSEMBLY NOTES
C/O YH Consulting Limited Bureau 147, Centurion House, London Road, Staines-upon-Thames, Surrey, TW18 4AX
VEVOR®
TOUGH TOOLS, HALF PRICE
www.vevor.com/support
USER MANUAL FOR UTILITY CART
MODEL: SYTCSS10 / SYTCSS11
Photo for reference
ASSEMBLY INSTRUCTIONS
Remarks:
Step 1
Step 2
Step 3,
Step 4

Step 6Step 5.
ASSEMBLY INSTRUCTIONS
C/O YH Consulting Limited Office 147, Centurion House, London Road, Staines-upon-Thames, Surrey, TW18 4AX
VEVOR®
TOUGH TOOLS, HALF PRICE
electronics www.vevor.com/support
UTILITY CARTS USER MANUAL
MODEL: SYTCSS10 / SYTCSS11
Reference photo
ASSEMBLY STEPS
Notes:
Step 1
Step 2
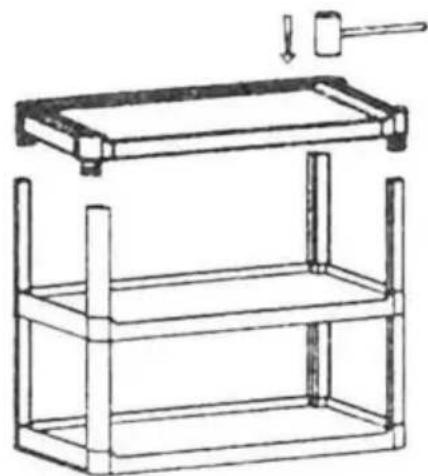
Step 4, Phase 3
Phase 5. Insert the 4 wheels.
Phase 5
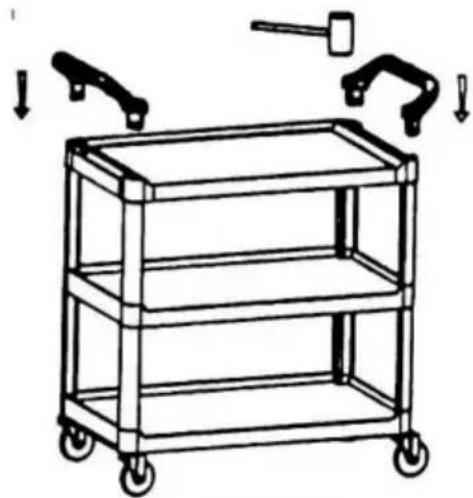
Step 6
ASSEMBLY NOTES
Imported in AUS: SIHAO PTY LTD. 1 ROKEVA STREETEASTWOOD NSW 2122 Australia
Imported in the USA: Sanven Technology Ltd. Suite 250, 9166 Anaheim Place, Rancho Cucamonga, CA 91730
Reference photo
ASSEMBLY STEPS
Observations:
Step 1
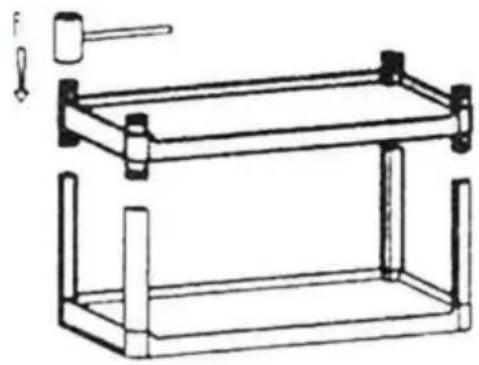
Step 2
Step 3
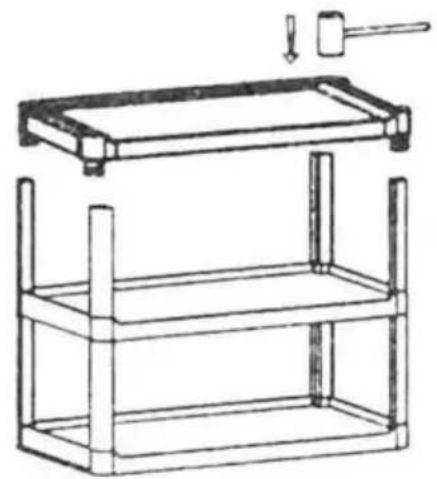
Step 4
Step 6 Step 5
ASSEMBLY NOTES
C/O YH Consulting Limited Office 147, Centurion House,
London Road, Staines-upon-Thames, Surrey, TW18 4AX
VEVOR®
TOUGH TOOLS, HALF PRICE
ASSEMBLY STEPS
Notes:
Step 1
Step 2
Step 3
Step 4
Step 6Step 5
ASSEMBLY NOTES
C/O YH Consulting Limited Office 147, Centurion House, London Road, Staines-upon-Thames, Surrey, TW18 4AX
VEVOR®
TOUGH TOOLS, HALF PRICE
Photo for reference
NEED HELP? CONTACT US!
ASSEMBLY STEPS
Notes:
Step 1 Step 2
Step 3. Clamp the remaining 4 aluminum rods above the middle shelf.
Step 3

Step 4
Step 6 Step 5
Step 7. Assembly complete.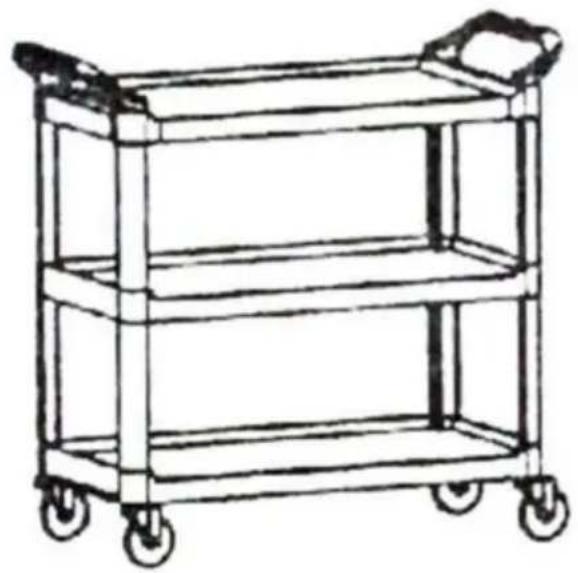
ASSEMBLY NOTES
C/O YH Consulting Limited Office 147, Centurion House, London Road, Staines-upon-Thames, Surrey, TW18 4AX
VEVOR®
TOUGH TOOLS, HALF PRICE
Technical support and e-warranty certificate www.vevor.com/support
VEVOR®
TOUGH TOOLS, HALF PRICE
www.vevor.com/support
UTILITY CARTS USER MANUAL
MODEL: SYTCSS10 / SYTCSS11
Photo for reference
NEED HELP? CONTACT US!
ASSEMBLY DIAGRAM
Notes:
Step 1 Step 2
Step 4 Step 3
Step 5. Wedge the 4 wheels.
Step 6 Step 5
ASSEMBLY NOTES
C/O YH Consulting Limited Office 147, Centurion House, London Road, Staines-upon-Thames, Surrey, TW18 4AX
VEVOR®
TOUGH TOOLS, HALF PRICE
- UTILITY CARTS USER MANUAL
- MODEL: SYTCSS10 / SYTCSS
- NEED HELP? CONTACT US
- PRODUCT PARAMETERS
- WARNING
- ASSEMBLY PRECAUTIONS
- USE PRECAUTIONS
- WARNING: TO PREVENT SERIOUS INJURY AND DEATH FROM TIPPING
- ASSEMBLY STEPS
- REMARKS
- ASSEMBLY NOTES
- VEVOR®
- TOUGH TOOLS, HALF PRICE
- NOTES
- USER MANUAL FOR UTILITY CART
- ASSEMBLY INSTRUCTIONS
- OBSERVATIONS
- ASSEMBLY DIAGRAM
Brand : Vevor
Model : SYTCSS10
Category : Utility cart