
YG-20 - Hand tool Vevor - Free user manual and instructions
Find the device manual for free YG-20 Vevor in PDF.
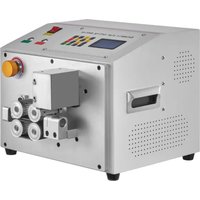


| Product Type | Automatic Tube Cutting Machine |
| Brand | Vevor |
| Model | YG-20 |
| Power Supply | 120 V~60 Hz or 220-240 V~50 Hz |
| Power | 135 W (120 V) / 152 W (220-240 V) |
| Cutting Diameter | Φ1 to 20 mm |
| Cutting Length | 0.1 to 99999 mm |
| Control | Microcomputer with numeric keypad |
| Functions | Automatic batch cutting, length adjustment, feed and cutting speed |
| Material | Steel (body), high-speed steel blade |
| Safety | Emergency stop, overload protection, FCC compliance |
| Maintenance | Regular lubrication, blade sharpening, non-abrasive cleaning |
| Estimated weight | Approximately 8 kg (not specified in the manual) |
| Approx. dimensions | 400 x 300 x 250 mm (not specified in the manual) |
| Included accessories | User guide, warranty certificate |
| Repairability | Spare parts available via Vevor after-sales service |
| General information | Vevor brand, electronic warranty at www.vevor.com/support |
Frequently Asked Questions - YG-20 Vevor
User questions about YG-20 Vevor
0 question about this device. Answer the ones you know or ask your own.
Ask a new question about this device
Download the instructions for your Hand tool in PDF format for free! Find your manual YG-20 - Vevor and take your electronic device back in hand. On this page are published all the documents necessary for the use of your device. YG-20 by Vevor.
USER MANUAL YG-20 Vevor
Automatic Microcomputer Cutting Machine MODEL: YG-20
We continue to be committed to provide you tools with competitive price.
"Save Half", "Half Price" or any other similar expressions used by us only represents an estimate of savings you might benefit from buying certain tools with us compared to the major top brands, not necessarily mean to cover all categories of tools offered by us. You are kindly reminded to carefully consider when you are placing an order with us if you are actually saving half in comparison with major brands.
VEVOR®
TOUGH TOOLS, HALF PRICE
Automatic Microcomputer
Cutting Machine
NEED HELP? CONTACT US!
Have product questions? Need technical support? Please feel free to contact us:
This is the original instruction. Please read all manual instructions carefully before operating. VEVOR reserves a clear interpretation of the user manual. The appearance of the product shall be subject to the product you received. Please forgive us that we won't inform you if there are any technology or software updates on our product.
Warning - To reduce the risk of injury, user must read instruction manual carefully.
SAFETY WARNINGS AND PRECAUTIONS
Thank you for using this product. In order to make sure that you can operate the machine correctly, read this instruction carefully before operation and keep it properly for future reference. Please be sure to read the precautions and safe rules on this page to ensure your safe use. This manual will outline safety warnings and precautions, operating, and maintenance. The warnings and instructions reviewed in this manual cannot cover all possible conditions and situations that may occur. Caution and common sense are not built into this product, since we believe the users will comply with these codes.
Please read ALL the instructions before using your machine.
- Assembly must follow these instructions. Incorrect assembly can be a hazard.
- Do not assemble when tired or when under the influence of alcohol, drugs, or medication.
- Weight, elasticity, and other product properties are only applicable to correctly and completely assembled products.
- Keep the assembly area clean and well-lit.
- Keep bystanders out of the area during assembly.
- This is equipment, not a toy; it needs to be used under the guidance of a professional. Do not allow children and pets to play alone or approach this item.
- Use as intended only. Do not sit or stand on the product.
- Inspect before every use. Do not use it if parts are loose or damaged.
- Do not apply this unit to any other purposes than the indicated usage.
- Do not use it for commercial purposes.
- Do not clean it with any abrasive material.
- Never leave it unattended while in use.
- Pet urine and feces can damage the product; please keep away.
- Do not place the product on or near hot air, electric burners, or heaters.
WARNING:
The warnings, cautions, and instructions discussed in this manual cannot cover all possible conditions or situations that could occur. It must be understood by the operator that common sense and caution are factors which cannot be built into this product, but must be supplied by the operator.
- Keep work area clean. Cluttered areas invite injuries.
- Observe work area conditions. Do not use machines or power tools in damp or wet locations. Don't expose to rain. Keep work area well lighted. Do not use electrically powered tools in the presence of flammable gases or liquids.
- Keep children away. Children must never be allowed in the work area. Do not let them handle machines, tools, or extension cords.
- Store idle equipment. When not in use, tools must be stored in a dry location to inhibit rust. Always lock up tools and keep them out of reach of children.
- Do not force tool. It will do the job better and more safely at the rate for which it was intended. Do not use inappropriate attachments in an attempt to exceed tool capacity.
- Use the right tool for the job. Do not attempt to force a small tool or attachment to do the work of a large industrial tool. Do not use a tool for a purpose for which it was not intended.
- Dress properly. Do not wear loose clothing or jewelry as they can be caught in moving parts. Protective, electrically non-conductive clothes and non-skid footwear are recommended when working. Wear restrictive hair covering to contain long hair.
- Use eye and ear protection. Always wear ISO approved impact safety goggles. Wear a full-face shield if you are producing metal filings or wood chips. Wear ISO approved dust mask or respirator when working around metal, and chemical dusts and mists.
- Do not overreach. Keep proper footing and balance at all times. Do not overreach or reach across a running machine.
- Maintain tools with care. Keep tools sharp and clean for better and safer performance. Follow instructions for lubricating and changing accessories. The handles must be kept clean, dry, and free from oil and grease at all times.
- Stay alert. Watch what you are doing; use common sense. Do not operate tool when you are tired.
SAVE THESE INSTRUCTIONS
| Model | YG-20 | |
| Input | 120V 60Hz | 220 -240V 50Hz |
| Power | 135W | 152W |
| Cutting diameter | Φ1-20mm | Φ1-20mm |
| Cut-off length | 0.1~99999mm | 0.1~99999mm |
FUNCTIONAL DESCRIPTION
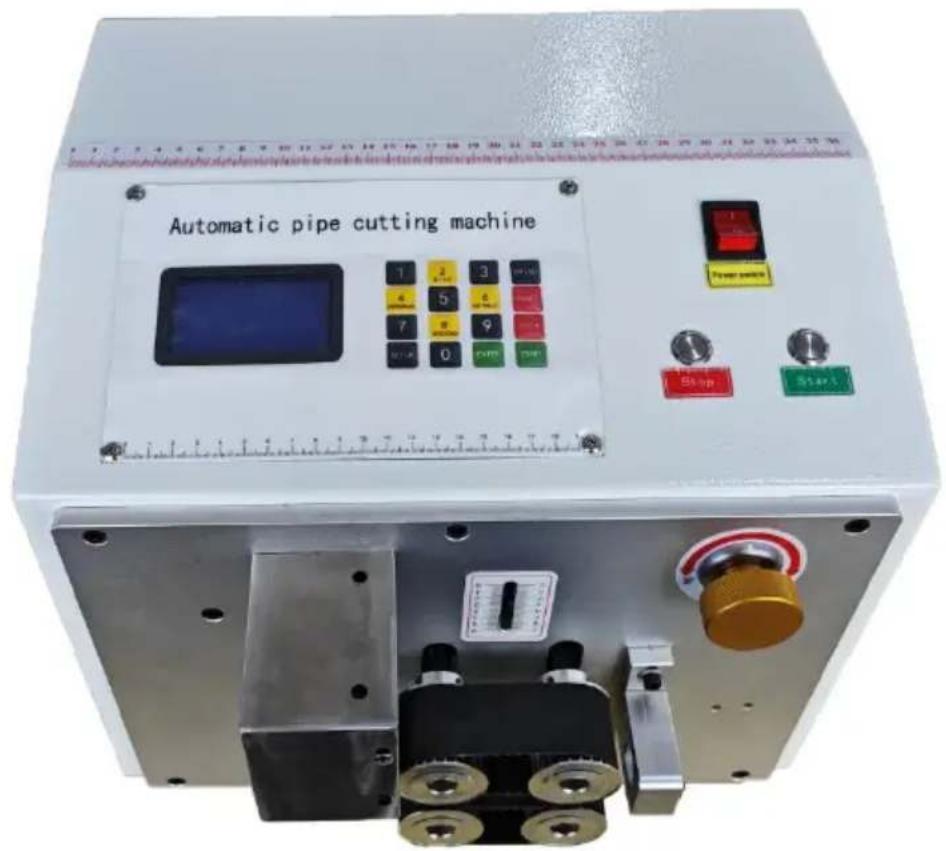
Automatic pipe cutting machine

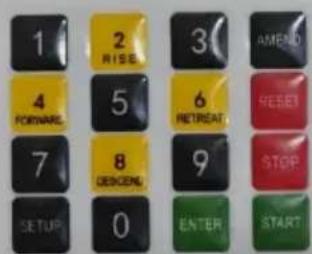
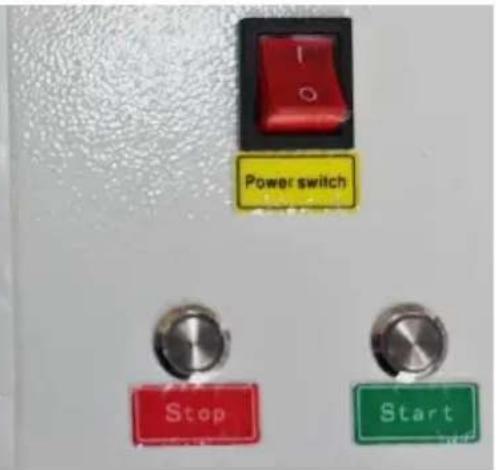
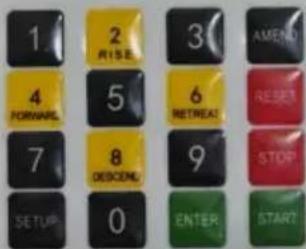
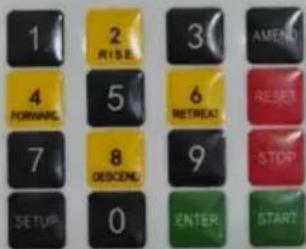
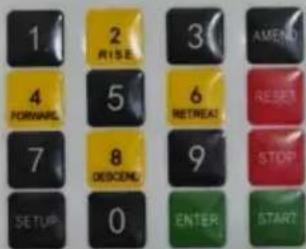
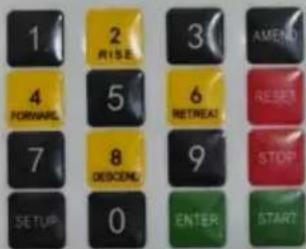
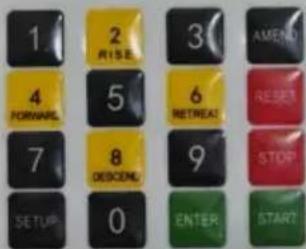
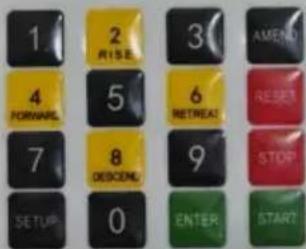
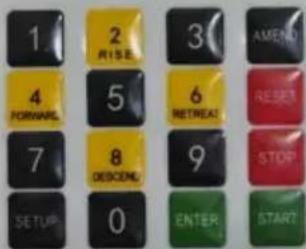
Keyboard instructions
Single press mode:
No.4 key: roller forward feed
No.6 key: back feed
No.2 key: control cutter rise
No.8 key: control cutter drop. Long press
0 key: you can clear the cut output.
"Compensation" key: the cutting length can be adjusted sometimes, a
the fixed base is 100.
Example: the "length" is set to 200mm, the actual cut pipe is 199mr the "compensation" base is adjusted to 101. Conversely, the "compensation" base is adjusted to 99.
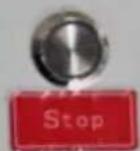
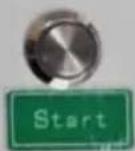
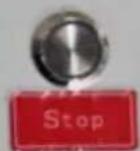
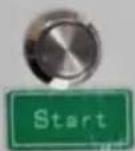
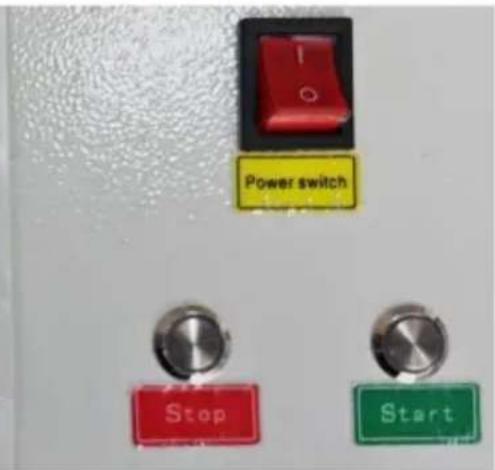
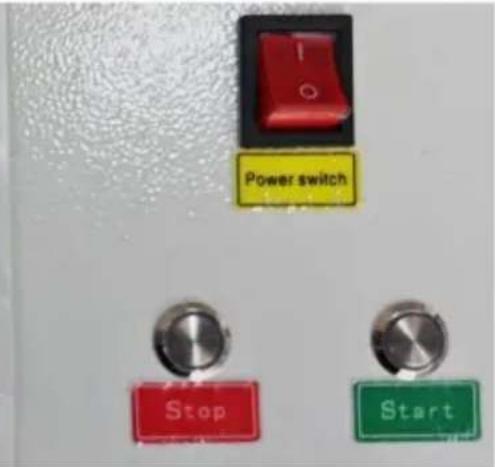
"Reset" key: make the knife rack naturally empty cut a knife reset, knife in the falling state can be naturally reset, back to the highest | The Stop and Start keys: literally, acting along with the added start key.
Set the parameters are as follows:
Press the "Settings" button to enter the setting page, set the cutting to 100mm, first press the number key 1000 (PS: press the number directly will skip the decimal point), and then press the "confirm" button. Press the "Settings" button in the same interface to turn down, set the parameters the same as above.
Cutting length: the total length of the cutting tube, resolved at 0.1m. Feed speed: refers to the speed of the machine feeding, the faster t speed, the smaller the torque; 1-99 adjustable, depending on the thick of the pipe.
Cutting knife speed: refers to the speed of material cutting; the faster the speed, the smaller the torque. Adjustable from 1 to 99, which can match the feeding speed.
Batch setting: means the total number of pieces to be processed in a batch, after which the machine automatically restarts.
Batch delay: refers to the set waiting time between batches.
Output setting: means the total number of pieces required to be cut.
Feed point moving speed: refers to the speed of manual feed return; conventionally set to 10.
Cutting knife reset speed: refers to the speed of automatic reset of the knife frame; conventionally set to 50.
Cutting depth: refers to the depth of the cut; conventionally set to 2, adjusted according to the pipe thickness.
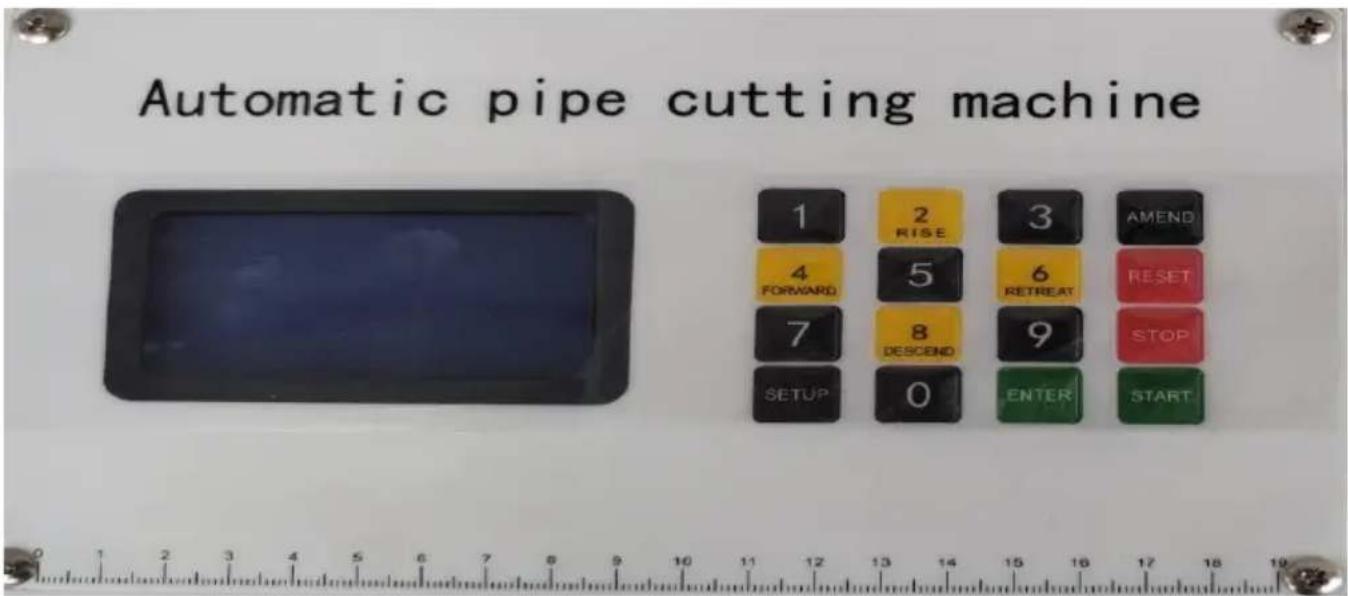
Standby: refers to the current state of the equipment, commonly known as "standby".
Length: refers to the current set length, in millimeters, with one decimal place retained.
Production: means the number of pieces cut by the equipment.
CONSIDERATIONS
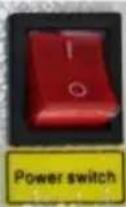
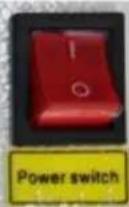
- Please confirm the power supply voltage and connect the ground wire before use.
- For safety, do not place hands or any objects near the knife during cutting.
- When making any adjustments, cut off the power to maintain safety.
- Do not remove any spare parts except for normal maintenance.
- Make sure to add oil once before starting.
- If the tool becomes blunt after a period of time, it can be used after grip knife in a professional grinder. The job must be done by a professional.
- If there is any difficulty in operation, please contact us, we will serve you wholeheartedly.
MATTERS NEEDING ATTENTION
- Press the feed and return button to adjust the feeding speed during operation.
- When the output is displayed on the interface, press the stop button first, prompt state, and then reset to start.
- In the suspended state, press start, then the last walk that has not been completed, in the standby state, press start, and a new feeding cutter.
- During the operation, press pause and then press start to continue. Press | twice, then press start again for a new feed cutter.
FCC Information:
CAUTION: Changes or modifications not expressly approved by the party responsible for compliance could void the user's authority to operate the equipment!
This device complies with Part 15 of the FCC Rules. Operation is subject to following two conditions:
1) This product may cause harmful interference.
2) This product must accept any interference received, including interference that may cause undesired operation.
WARNING: Changes or modifications to this product not expressly approved by the party responsible for compliance could void the user's authority to operate the product.
Note: This product has been tested and found to comply with the limits for a Class B digital device pursuant to Part 15 of the FCC Rules. These limits are designed to provide reasonable protection against harmful interference in a residential installation.
This product generates, uses, and can radiate radio frequency energy, and if installed and used in accordance with the instructions, may cause harmful interference to radio communications. However, there is no guarantee that interference will not occur in a particular installation. If this product does cause harmful interference to radio or television reception, which can be determined by turning the product off and on, the user is encouraged to try to correct the interference by one or more of the following measures.
- Reorient or relocate the receiving antenna.
- Increase the distance between the product and receiver.
- Connect the product to an outlet on a circuit different from that to which the receiver is connected.
- Consult the dealer or an experienced radio/TV technician for assistance.
CORRECT DISPOSAL
This product is subject to the provisions of European Directive 2012/19/EU. The symbol showing a wheelie bin crossed through indicates that the product requires separate refuse collection in the European Union. This applies to the product and all accessories marked with this symbol. Products marked as such may not be discarded with normal domestic waste, but must be taken to a collection point for recycling electrical and electronic devices.
Address: Shuangchenglu 803nong11hao1602A-1609shi, Baoshanqu, Shanghai 200000 CN.
Imported to AUS: SIHAO PTY LTD, 1 ROKEVA STREET EASTWOOD NSW 2122 Australia
Imported to USA: Sanven Technology Ltd., Suite 250, 9166 Anaheim Place, Rancho Cucamonga, CA 91730
| UK | REP |
Pooledas Group Ltd
Unit 5 Albert Edward House, The Pavilion Preston, United Kingdom
| EC | REP |
SHUNSHUN GmbH
Römeräcker 9 Z2021, 76351
Technical Support and E-Warranty Certificate
www.vevor.com/support
VEVOR®
TOUGH TOOLS, HALF PRICE
www.vevor.com/support
Automatic pipe cutting machine

Automatic pipe cutting machine

Operating instructions
Single pressure mode:
Button No. 4: Roller feed
www.vevor.com/support
VEVOR®
TOUGH TOOLS, HALF PRICE
Automatic pipe cutting machine


Imported into AUS: SIHAO PTY LTD, 1 ROKEVA STREETEASTWOOD NSW 2122 Australia
Imported into USA: Sanven Technology Ltd., Suite 250, 9166 Anaheim Place, Rancho Cucamonga, CA91730
Grupo Pooledas Ltd
electronics www.vevor.com/support
VEVOR®
TOUGH TOOLS, HALF PRICE
Automatic pipe cutting machine

Imported to AUS: SIHAO PTY LTD, 1 ROKEVA STREET, EASTWOOD, NSW 2122, Australia
Imported to USA: Sanven Technology Ltd., Suite 250, 9166 Anaheim Place, Rancho Cucamonga, CA91730
Grupo Pooledas Ltd
Automatic pipe cutting machine

NEED HELP? CONTACT US!
FUNCTIONAL DESCRIPTION
Automatic pipe cutting machine

The fixed base is 100.
Unit 5 Albert Edward House, The Pavilions
warranty certificate www.vevor.com/support
VEVOR®
TOUGH TOOLS, HALF PRICE
Automatic pipe cutting machine

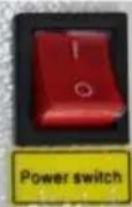
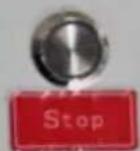
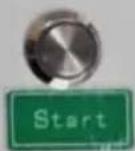
Keyboard instructions
Single press mode:
Unit 5 Albert Edward House, The Pavilions
www.vevor.com/support

- AUTOMATIC MICROCOMPUTER CUTTING MACHINE MODEL: YG
- VEVOR®
- AUTOMATIC MICROCOMPUTER
- CUTTING MACHINE
- NEED HELP? CONTACT US
- SAFETY WARNINGS AND PRECAUTIONS
- PLEASE READ ALL THE INSTRUCTIONS BEFORE USING YOUR MACHINE
- WARNING
- SAVE THESE INSTRUCTIONS
- FUNCTIONAL DESCRIPTION
- KEYBOARD INSTRUCTIONS
- SET THE PARAMETERS ARE AS FOLLOWS
- CONSIDERATIONS
- MATTERS NEEDING ATTENTION
- FCC INFORMATION
- CORRECT DISPOSAL
- TOUGH TOOLS, HALF PRICE
- AUTOMATIC PIPE CUTTING MACHINE
- OPERATING INSTRUCTIONS
Brand : Vevor
Model : YG-20
Category : Hand tool