
YFHQN242 - Murphy bed Vevor - Free user manual and instructions
Find the device manual for free YFHQN242 Vevor in PDF.
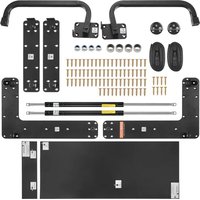


| Product Type | Murphy bed |
| Brand | Vevor |
| Model | YFHQN242 |
| Mattress Compatibility | Queen – horizontal (60 x 80 inches / 1520 x 2030 mm) |
| Recommended Mattress Thickness | 6 to 10 inches (152 to 254 mm) |
| Maximum Mattress Weight | 68 lb (31 kg) |
| Maximum System Weight Capacity | 900 lb (408 kg) |
| Bed Frame Dimensions | 2146 x 1565 x 132 mm (84.5 x 61.6 x 5.2 inches) |
| Cabinet Internal Dimensions | 2166 x 388 x 1590 mm (85.3 x 15.3 x 62.6 inches) |
| Main Material | 1 inch (25 mm) plywood for cabinet, 3/4 inch (19 mm) wood frame |
| Bed Frame Weight | 61 kg (134.2 lb) |
| Total Supported Weight (frame + mattress) | 92 kg (203 lb) maximum |
| Opening/Closing Mechanism | Gas springs with struts |
| Main Function | Allows the bed to be pivoted from vertical (stored in cabinet) to horizontal (use) position |
| Wall Mount Required | Yes, the cabinet must be securely fixed to the wall before use |
| Care and Cleaning | Clean with a damp cloth; periodically check the stability of fixings; lubricate mechanisms if necessary |
| Safety | Installation by an adult; do not use without a mattress; keep children away during use; check condition regularly |
| Spare Parts and Repairability | Replacement parts available via Vevor support; repairs by a qualified professional only |
| General Information | Murphy bed kit – does not include mattress or cabinet (to be built according to provided plans) |
| Warranty | Electronic warranty via www.vevor.com/support |
Frequently Asked Questions - YFHQN242 Vevor
User questions about YFHQN242 Vevor
0 question about this device. Answer the ones you know or ask your own.
Ask a new question about this device
Download the instructions for your Murphy bed in PDF format for free! Find your manual YFHQN242 - Vevor and take your electronic device back in hand. On this page are published all the documents necessary for the use of your device. YFHQN242 by Vevor.
USER MANUAL YFHQN242 Vevor
Technical Support and E-Warranty Certificate www.vevor.com/support
MURPHY BED KIT
MODEL: YFHQN242
We continue to be committed to provide you tools with competitive price. "Save Half", "Half Price" or any other similar expressions used by us only represents an estimate of savings you might benefit from buying certain tools with us compared to the major top brands and does not necessarily mean to cover all categories of tools offered by us. You are kindly reminded to verify carefully when you are placing an order with us if you are actually saving half in comparison with the top major brands.
MODEL: YFHQN242
NEED HELP? CONTACT US!
Have product questions? Need technical support? Please feel free to contact us:
Technical Support and E-Warranty Certificate www.vevor.com/support
This is the original instruction. Please read all manual instructions carefully before operating. VEVOR reserves a clear interpretation of the user manual. The appearance of the product shall be subject to the product you received. Please forgive us that we won't inform you if there are any technology or software updates on our product.
SAFETY INSTRUCTIONS
- Please read and understand this manual carefully before using the Murphy Bed Kit.
The installation should be done by an adult, and children should not be without supervision.
- Please install the Murphy Bed Kit completely before using the bed, otherwise it may cause serious harm to people.
- Check the stability and safety of the kit at regular intervals and use should be stopped immediately in case of damage or suspicious problems.
- Children should not use the kit alone to spread out or store the bed as they may be harmed.
Thank you very much for choosing this Murphy Bed Kit.
If there is any difference between the color of this product and the instruction manual, please refer to the physical object.
PARAMETER LIST
| Model | YFHQN242 |
| Adapted models | Queen-Horizontal |
| Mattress size | W×L:60×80in(1520×2030mm) |
| mattress thickness | 6-10in(152-254mm) |
| Maximum mattress weight | 68lbs(31kg) |
INSTRUCTIONS
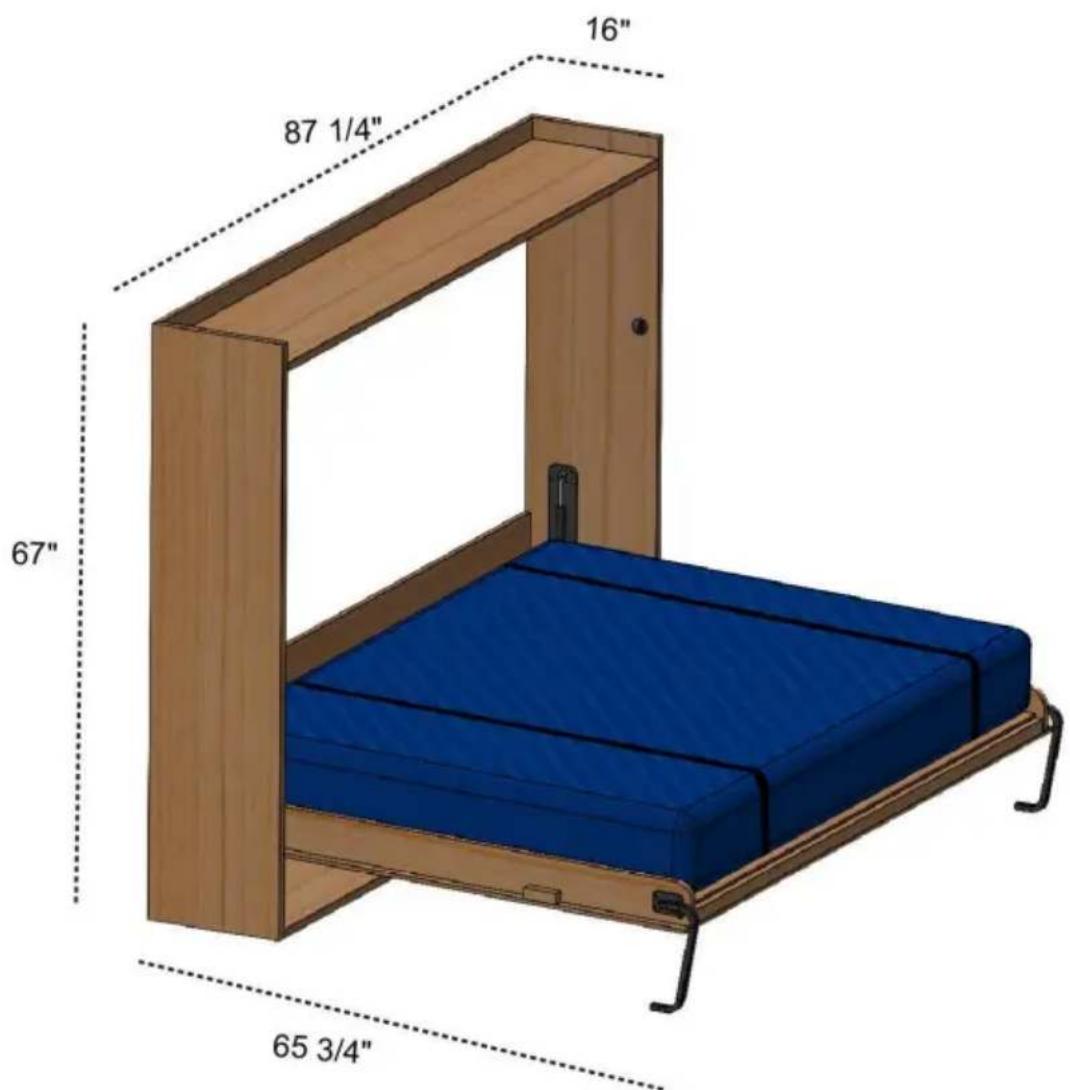
Murphy Bed Kit suitability Queen-Horizontal
Note: The Murphy Bed Kit does not include bed and bed cabinets; these need to be provided by the user.
Standard Queen Mattress
Max Weight: 68 lbs
Max Depth: 10"
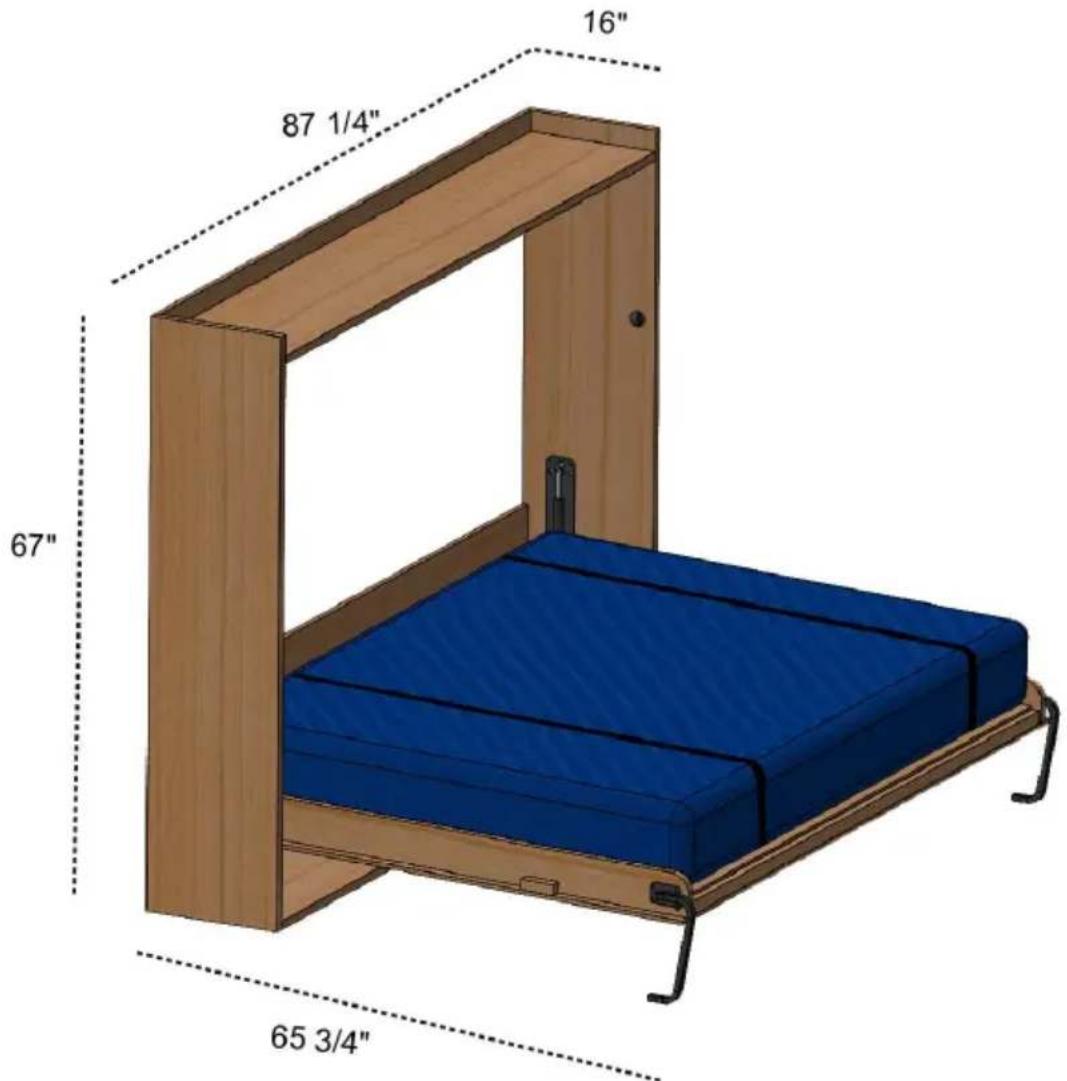
Max Weight capacity: 900 lbs
1. General description
Use
The Murphy bed system allows you to bring the bed spring from its vertical position inside the cabinet to a horizontal position, to be used in an absolutely quick and easy way, with very low effort.
Before using the Murphy bed, the user must be sure of its good condition and the good condition of its accessories.
Before using the Murphy bed, the user must make sure that on the sleeping surface there is only the mattress and bed linens.
2. Safety
Safety standard
Compliance with safety standards ensures that the user can work productively without danger of harm to themselves or others.

It is forbidden to use the product without any mattress on the sleeping surface.

It is forbidden to use the bed for any purpose other than that described in the USE section.

Incorrect installation or installation not performed by specialized craftsmen, or any detachment, breakage, or malfunction that may cause damage to others, things, or animals. All given instructions must be strictly followed.
Before starting to use the product, users must be aware of its functions and technical features, and must learn them through an accurate and complete reading of this user's guide.
Tampering with or replacing bed parts that are not allowed.
The use of accessories or spare parts other than those recommended by the supplier constitutes improper and hazardous use of the product.

It is strictly forbidden to remove any safety device or protection.
(labels) on the set; periodically check the position of blankets or other items on the mechanism. Before starting any maintenance, repair, or cleaning work, the operator must have read and understood all technical information contained in this guide. Any maintenance and repair shall be performed by qualified personnel only.

WARNING !!!
Never place the product near any heat sources. Position and lock the system so that it is clear of objects that may hinder its movement. The instructions and rules contained in this manual must be observed at all times.
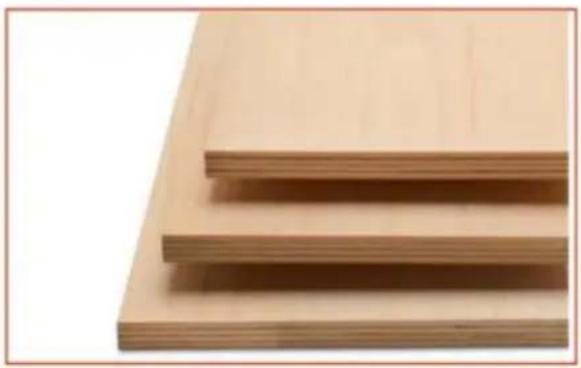
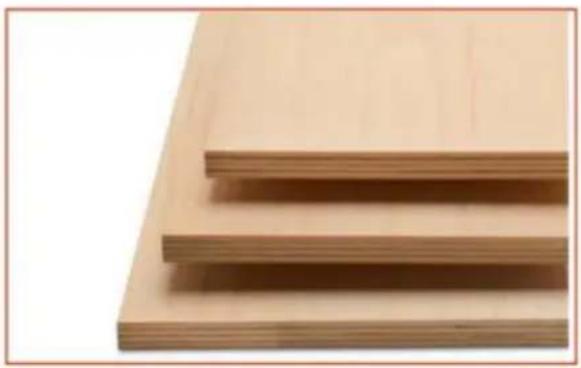
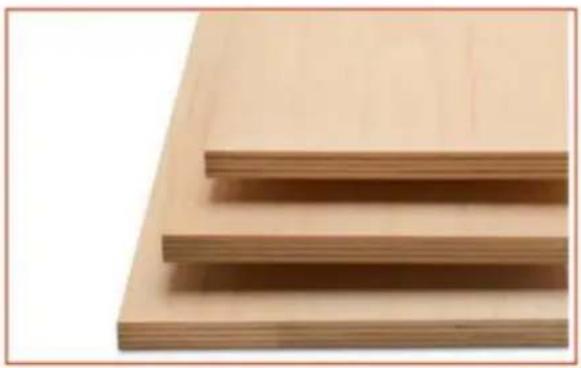
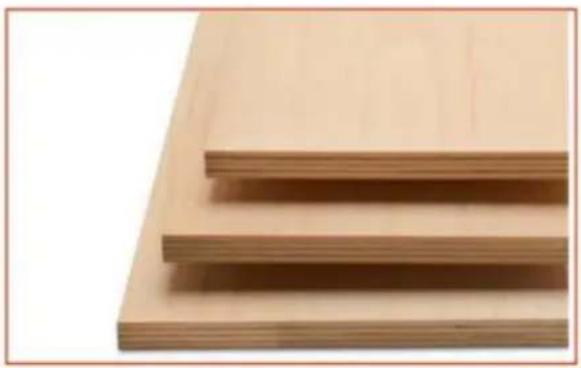
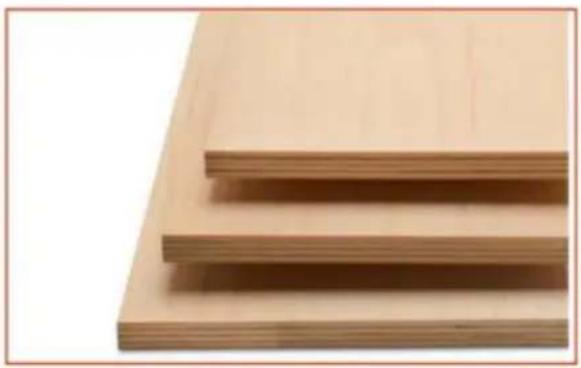
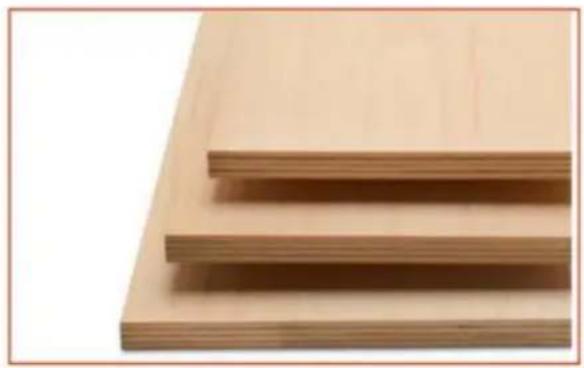
It is recommended to use the following materials for wooden cabinets and bed frames:
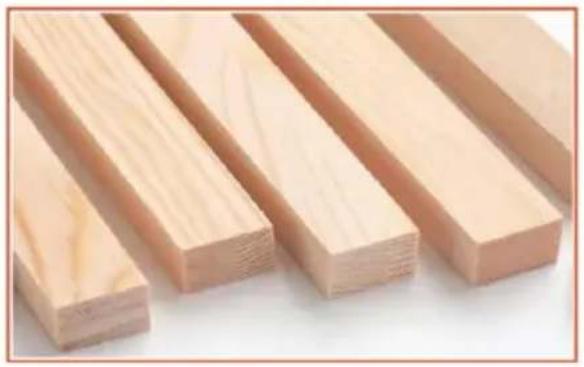
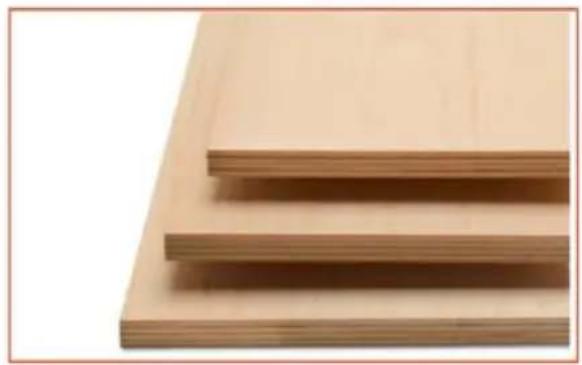
Wooden sticks, plywood sheet
Technical features
| Cabinet | 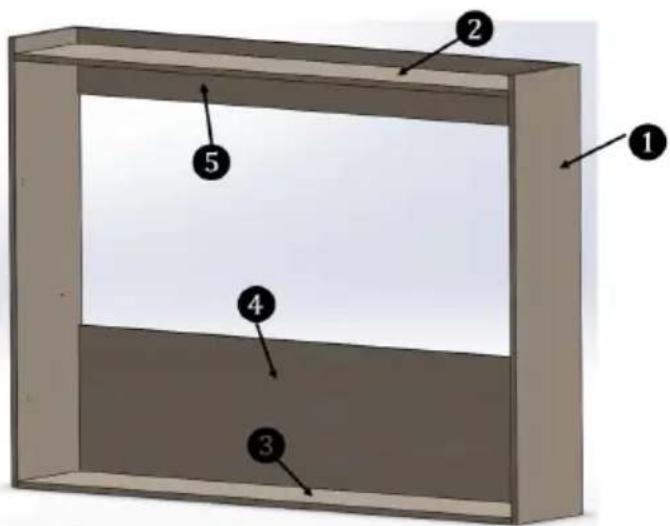 | |||
| Number | Material | Dimension | IQTY | Important |
| 1 | 1inch Plywood | 1700*406*25mm | 2 | Internal dimensions of cabinet: 2166*388*1590mm  |
| 2 | 1inch Plywood | 2166*388*25mm | 1 | |
| 3 | 1inch Plywood | 2166*406*25mm | 1 | |
| 4 | 3/4 inch Plywood | 2166*550*18mm | 1 | |
| 5 | 3/4 inch Plywood | 2166*250*18mm | 1 | |
| Bed frame | 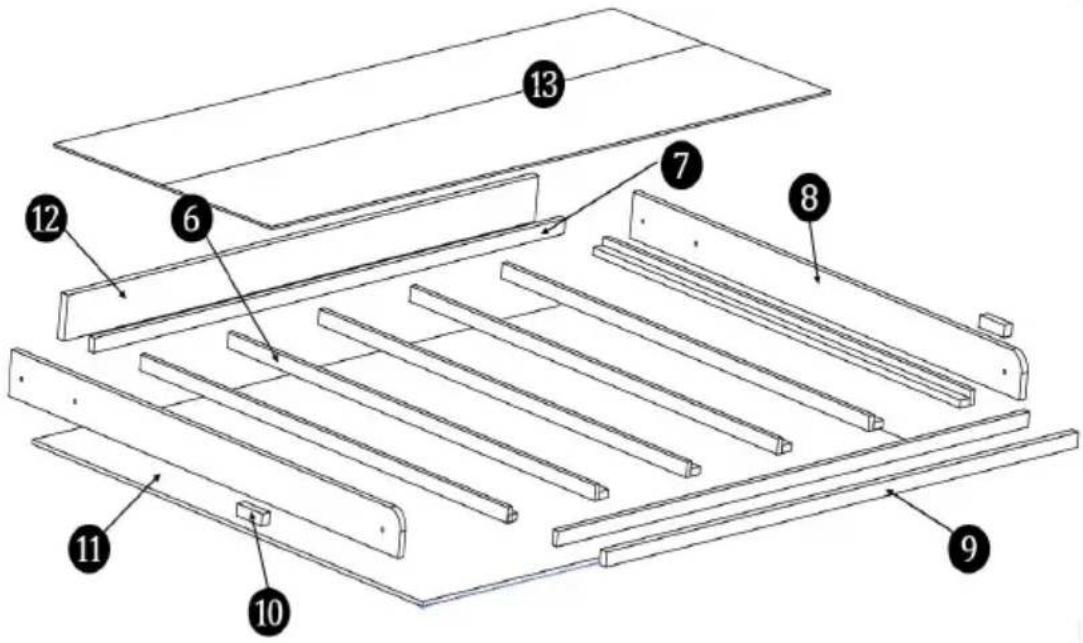 | |||
| Number | Material | Dimension | IQTY | Important |
| 6 | 3/4 inch wood | 40*20*1475mm | 12 | Weight of the bed frame : 61kgs (134.2lbs)Dimensions of bed frame : 2146*1565*132 mm |
| 7 | 3/4 inch wood | 40*20*2032mm | 2 | |
| 8 | 1inch Plywood | 1565*120*25 mm | 2 | |
| 9 | 1inch Plywood | 2032*50*25mm | 1 | |
| 10 | 1-1/2 wood | 32*32*100mm | 1 | |
| 11 | 1/2 inch Plywood | 2146*1565*12 mm | 1 | |
| 12 | 1inch Plywood | 2032*120*25 mm | 1 | |
| 13 | 3/8inch Plywood | 2027*1510*9mm | 1 | |
| 14 | mattress | 1520*2030*(152-254)mm;60*80*(6-10)inch | 1 | Weight of mattress: 31kgs (68lbs) |
| TOTAL WEIGHT OF BED FRAME AND MATT NEED TO BE: | 91-94kgs (200lbs-207lbs) | |||
Safety and Care Advice
- Check you have all the components and tools listed on the following pages.
- Remove all fittings from the plastic bags and separate them into the groups.
- Keep children and animals away from the work area, small parts can choke if swallowed. • Make sure you have enough space to layout the parts before start.
- During assembly do not stand or put weight on the product, this can cause damage.
- Assemble the item as close to its final position (in the same room if possible).
- Assemble on a soft level surface to avoid damaging the unit or your floor.
- Parts of the assembly will be easier with 2 people.
• To reduce the likelihood of damaging your product please ensure that your power drill is set on a low torque setting.
Install the required tools
 | 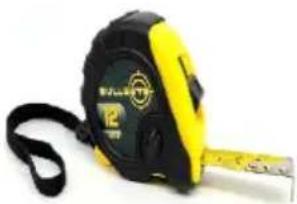 | 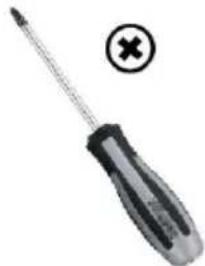 | 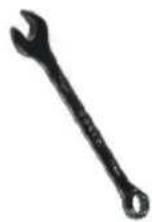 13mm OpenEnd Wrench 13mm OpenEnd Wrench |
 | 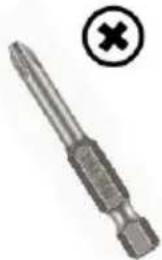 Screws Drive Bit Screws Drive Bit | 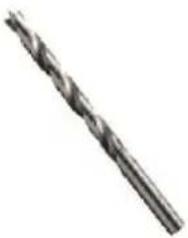 Wood Drill BitDia 6mm Wood Drill BitDia 6mm | 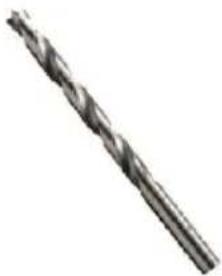 Wood Drill BitDia 11mm Wood Drill BitDia 11mm |
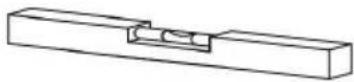  Horizontal adjustment tool Horizontal adjustment tool | |||
List of kit parts
Note: The quantities below are the correct amount to complete the assembly. In some cases more fittings may be supplied than are required.
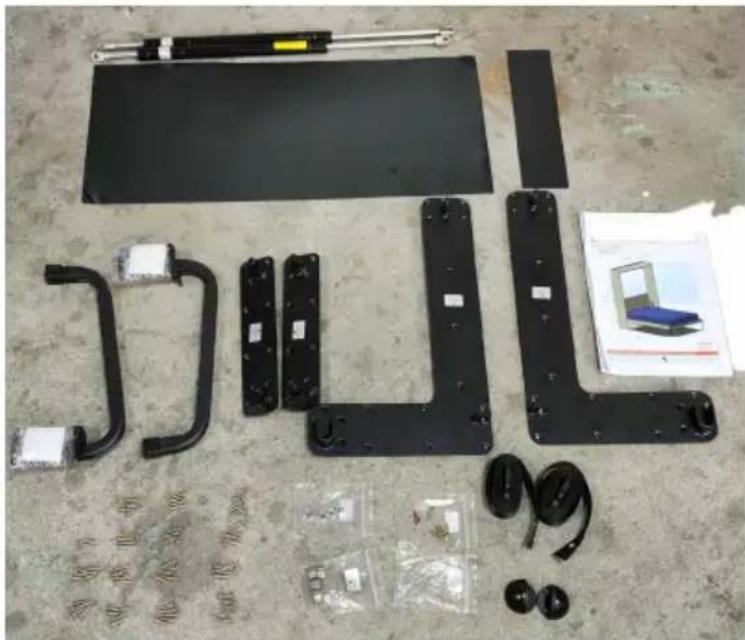
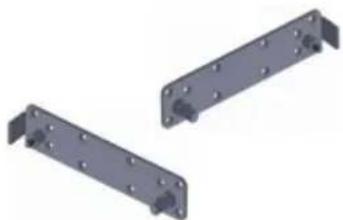
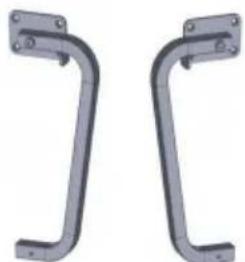
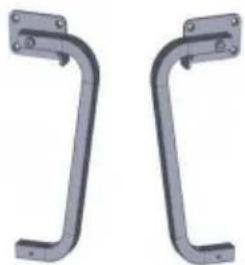
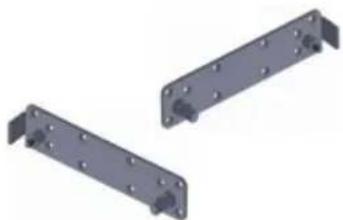
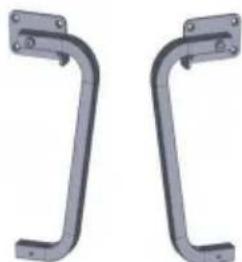
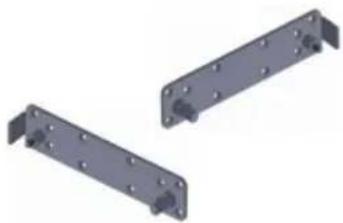
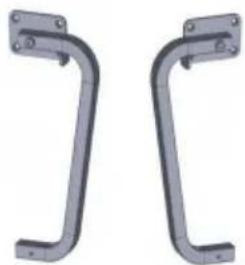
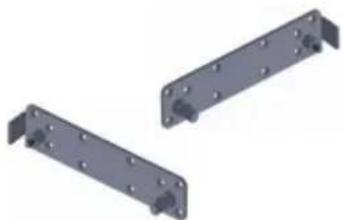
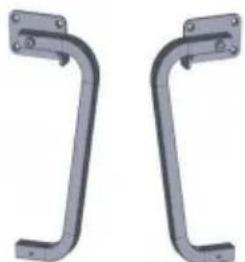
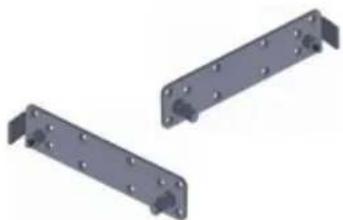
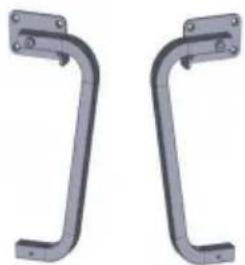
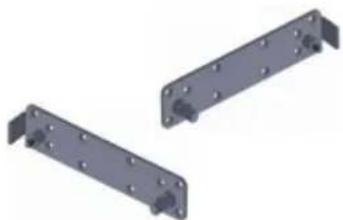
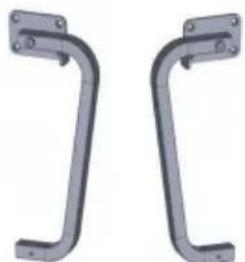
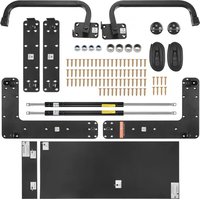
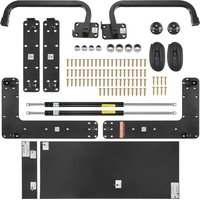
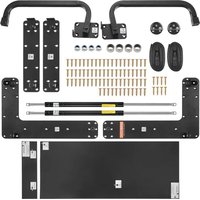
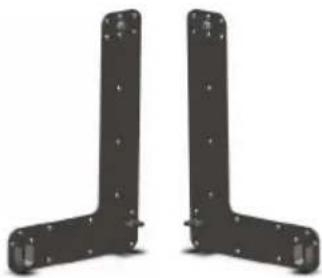 A:Side Bracket x 2pc A:Side Bracket x 2pc | 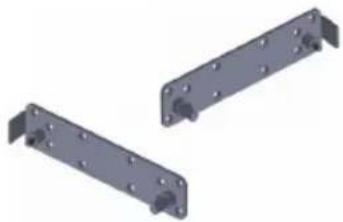 B:Connect Bracket x 2pc B:Connect Bracket x 2pc | 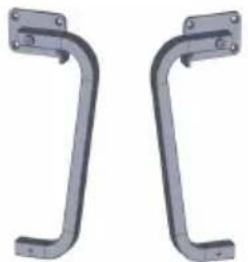 C:Leg x 2pcs C:Leg x 2pcs |
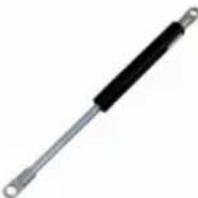 D:YFGS300700A x 2pcs D:YFGS300700A x 2pcs | 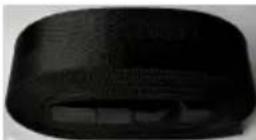 E:Mattress Strap x 2pc E:Mattress Strap x 2pc | 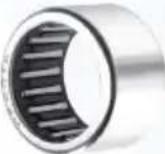 F:Bearing x 4pcs F:Bearing x 4pcs |
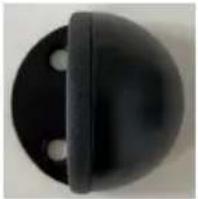 G:Stopper x 2pcs G:Stopper x 2pcs | 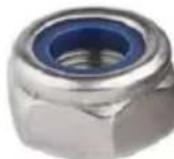 H:Metal Nut M8x 4pcs H:Metal Nut M8x 4pcs | 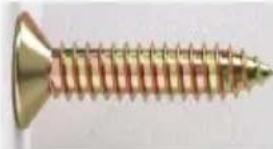 ScrewI:M5x20mm x72pcs ScrewI:M5x20mm x72pcs |
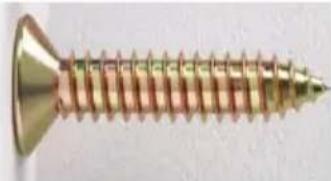 J:Screw M4x20mm x8pcs J:Screw M4x20mm x8pcs |  Drilling template: 710*294mm Drilling template: 710*294mm |  Drilling template: 306*82mm Drilling template: 306*82mm |
Construction guide
Step1:
Make the cabinet
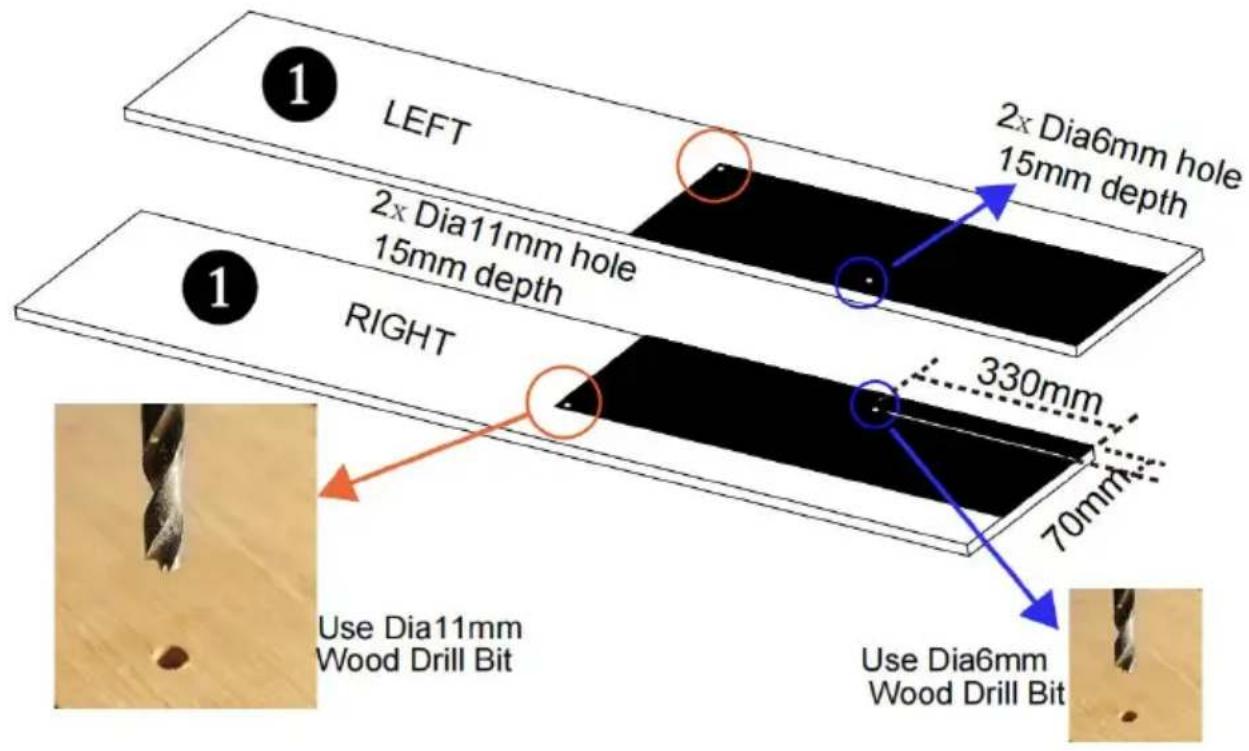
Put the drilling template of 710*294mm on the side panel and ensure the edges of the template are flush with the side panel as shown in the picture.
Mark the circular hole of the template on the side panel, then remove the template and drill a Dia11mm hole and a Dia6mm hole as shown in the picture, with a hole depth of 15mm.
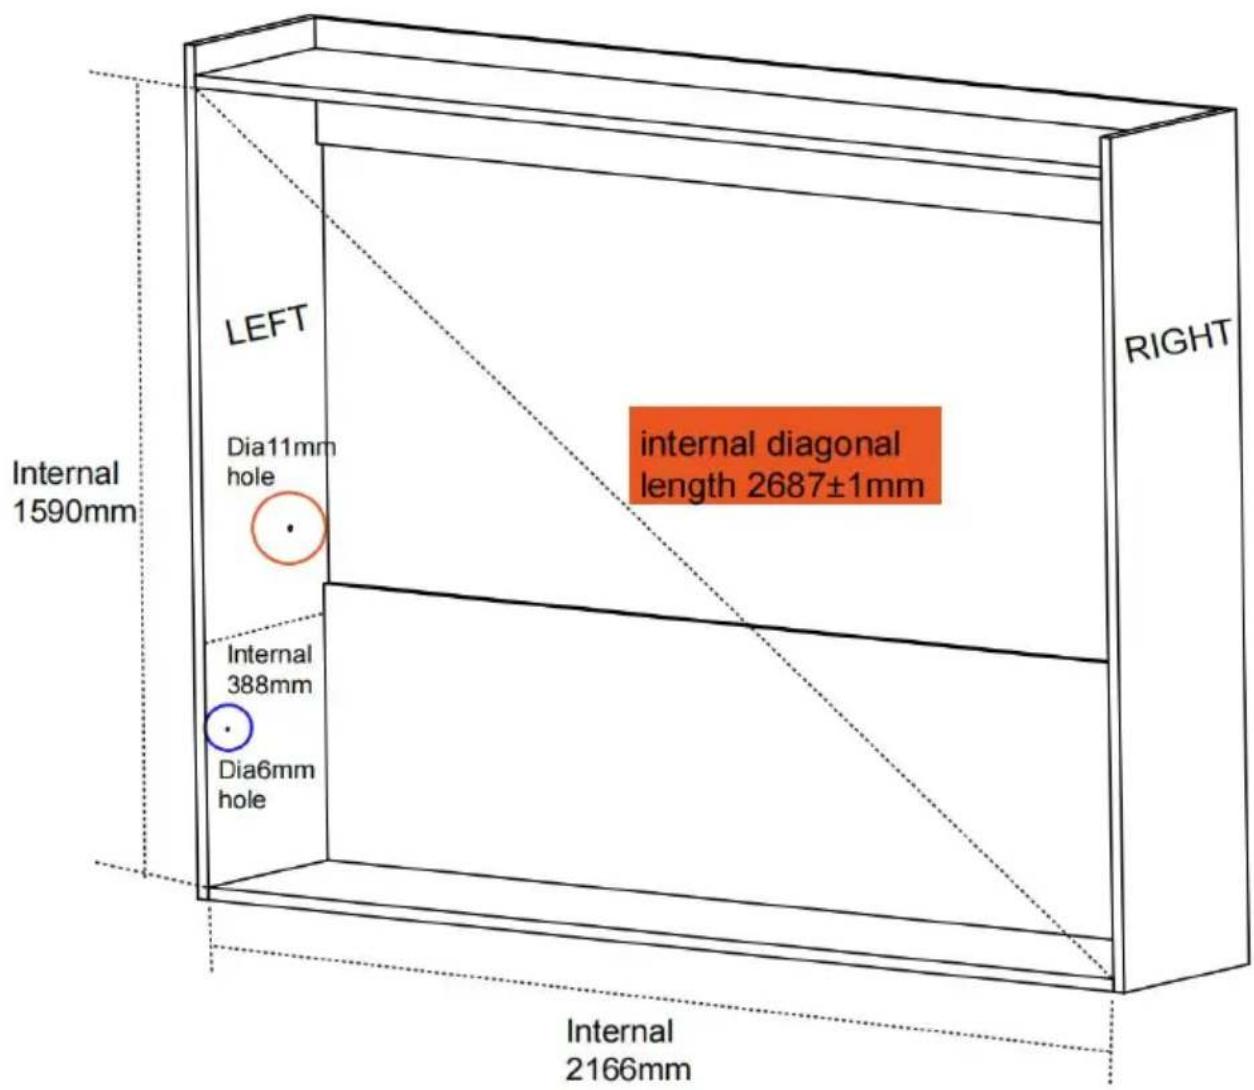
Make the cabinet with screws and waterproof wood glue, ensure the internal dimensions as shown in the picture, and ensure the cabinet is stable and safe.
Step 2:
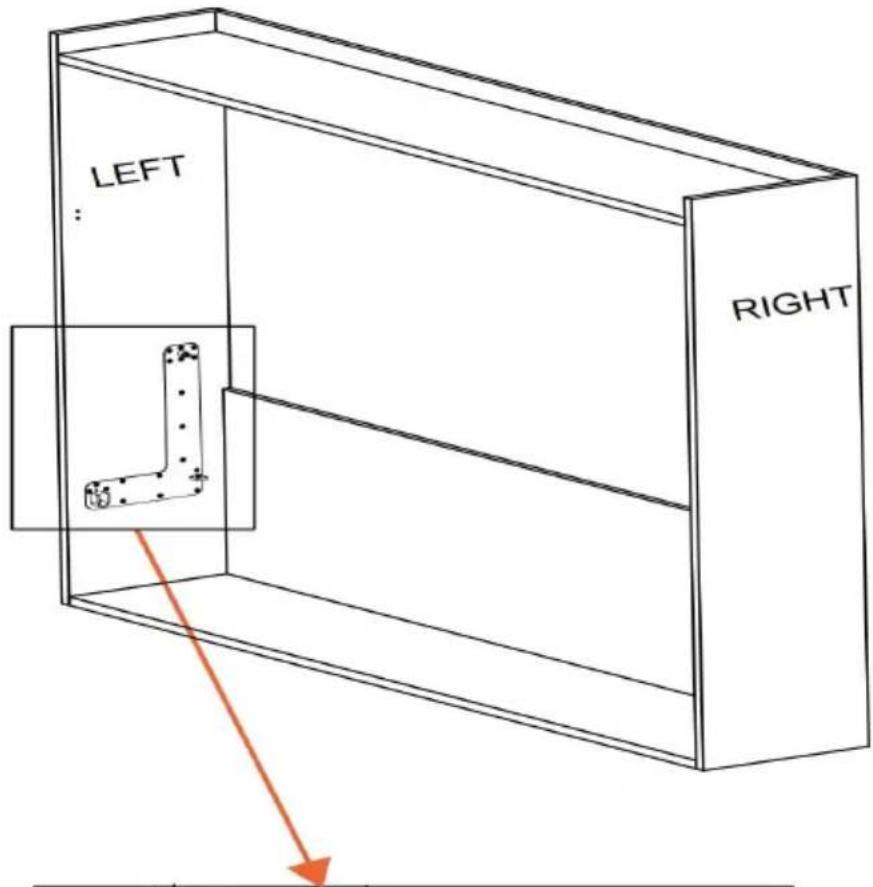
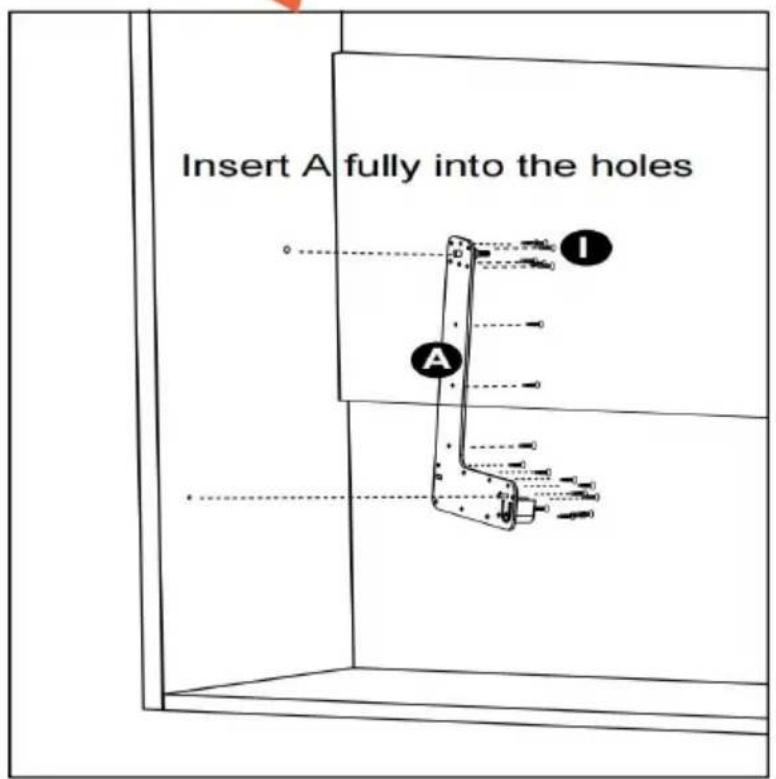
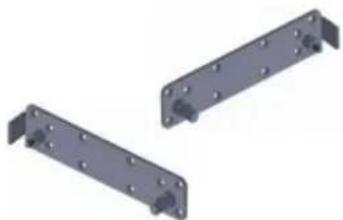
Insert the pin on the side bracket A fully into the Dia11mm hole and fix A to the cabinet with screws I.
Repeat the above installation on the other side.
Step 3:
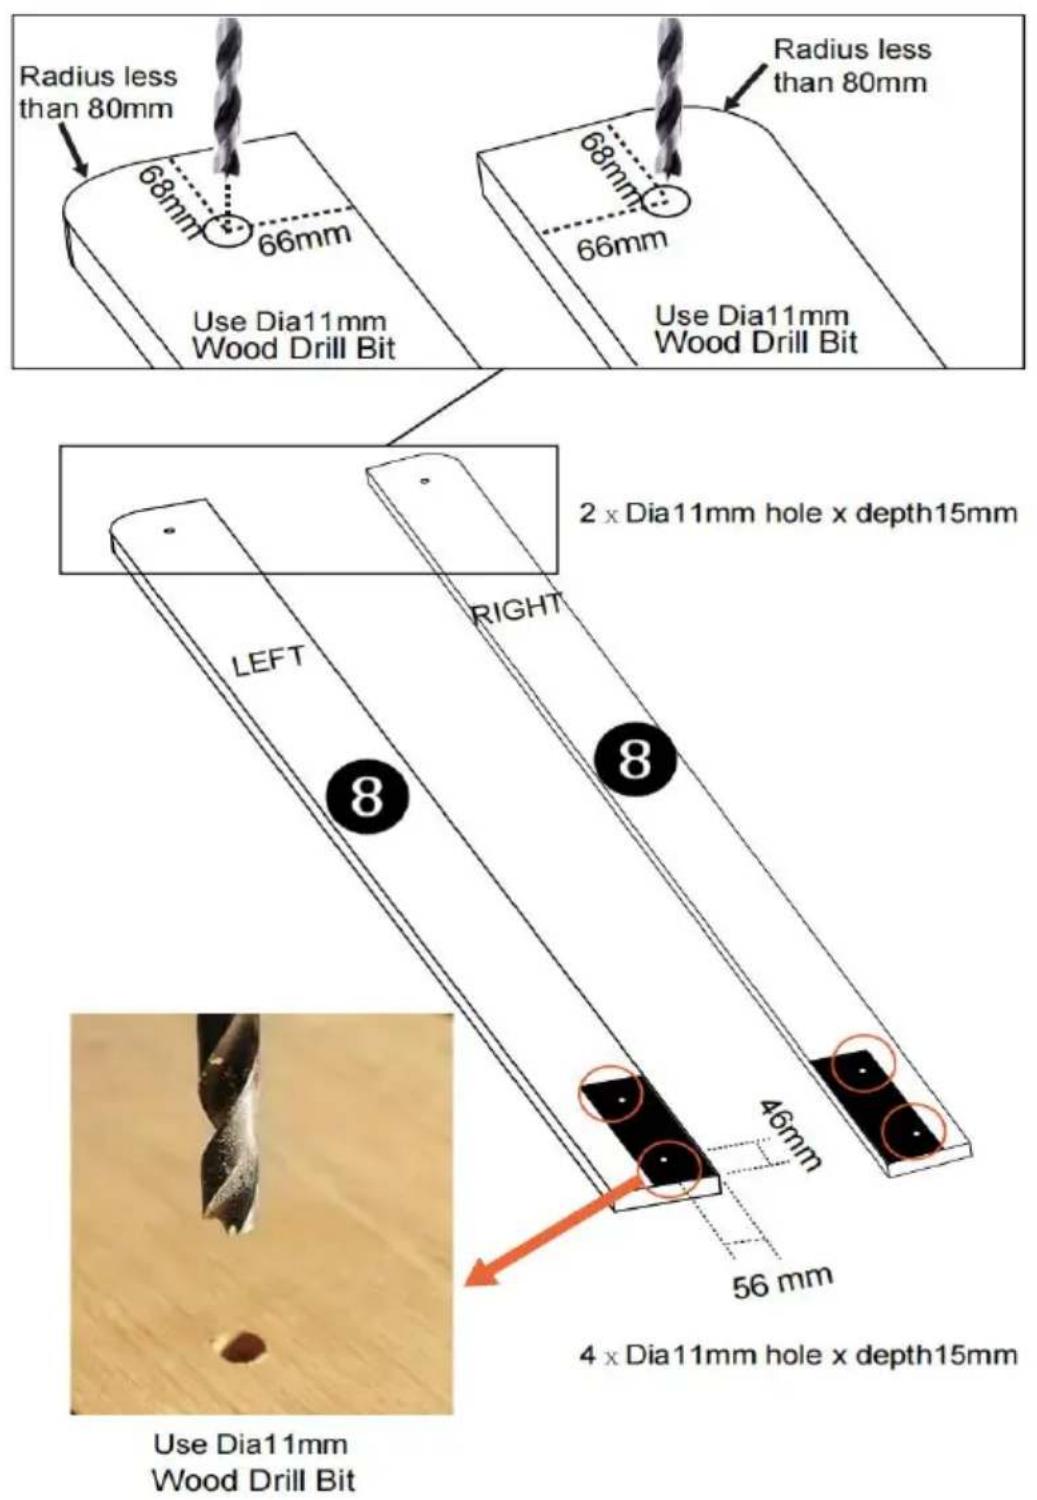
Put the drilling template of 306*82mm on panel 8 and ensure the edges of the template are flush with the panel as shown in the picture.
Mark the circular hole of the template on panel 8, then remove the template and drill a Dia11mm hole as shown in the picture, with a hole depth of 15mm. Mark the drilling holes according to the dimensions as shown in the picture on the other side of the panel, then drill a Dia11mm hole, with a hole depth of 15mm.
Step 4:
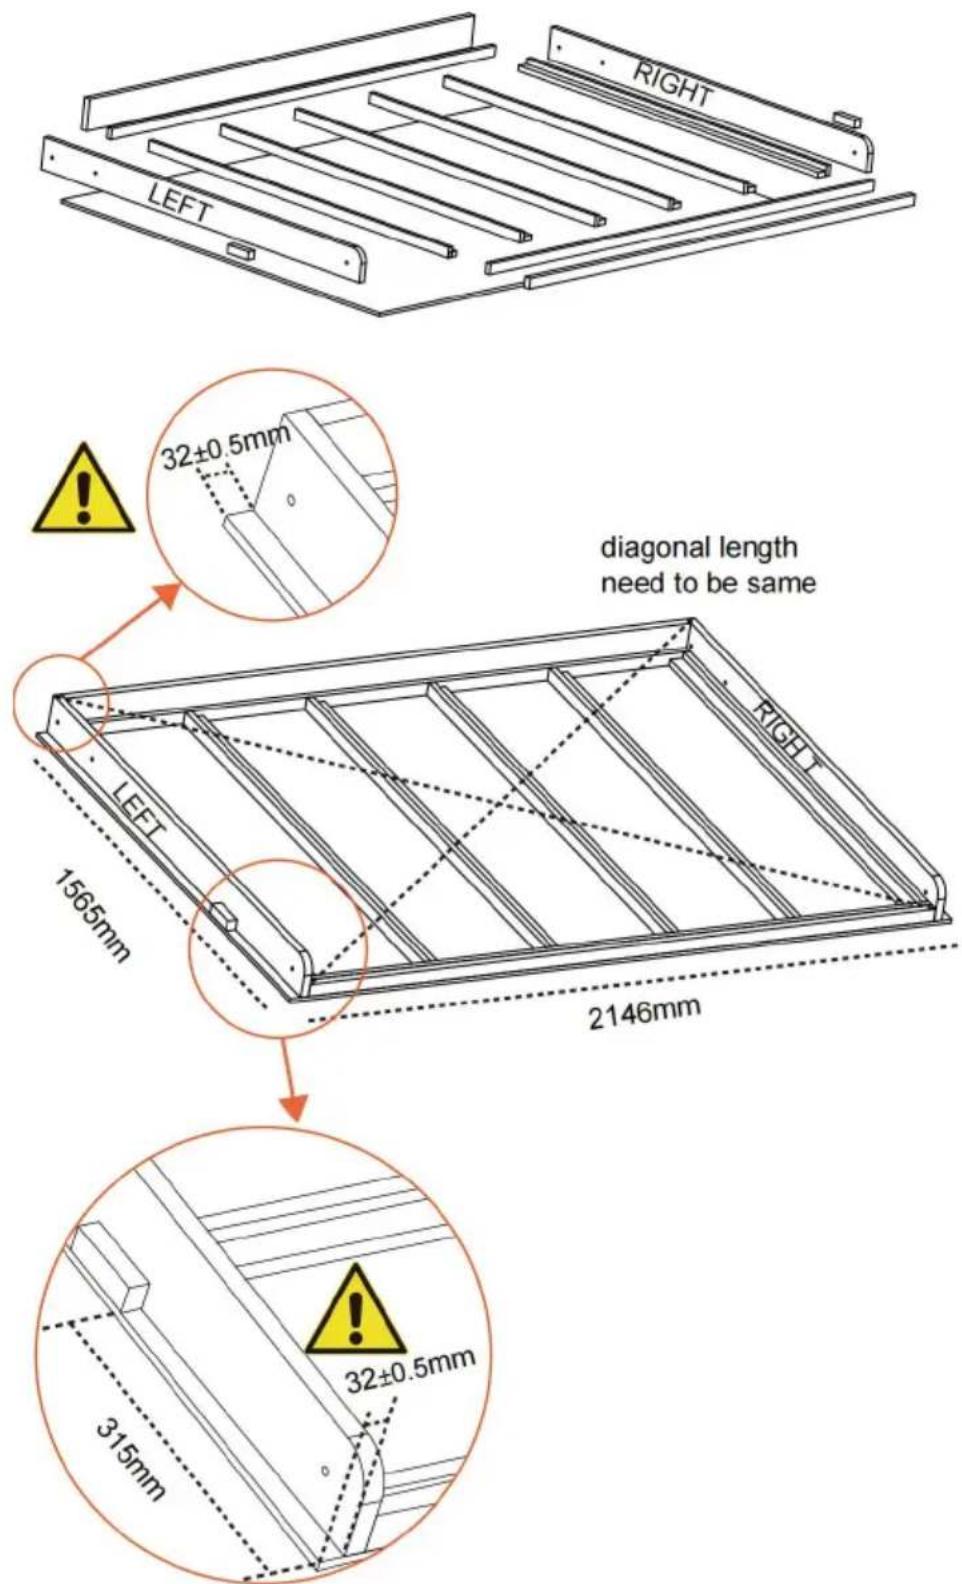
Make the bed frame with screws and waterproof wood glue as shown in the picture. Ensure the dimension from the apron panel to the edge of the door is 32mm as shown in the picture.
Keep the diagonal lengths as shown in the picture the same.
Ensure the cabinet is stable and safe.
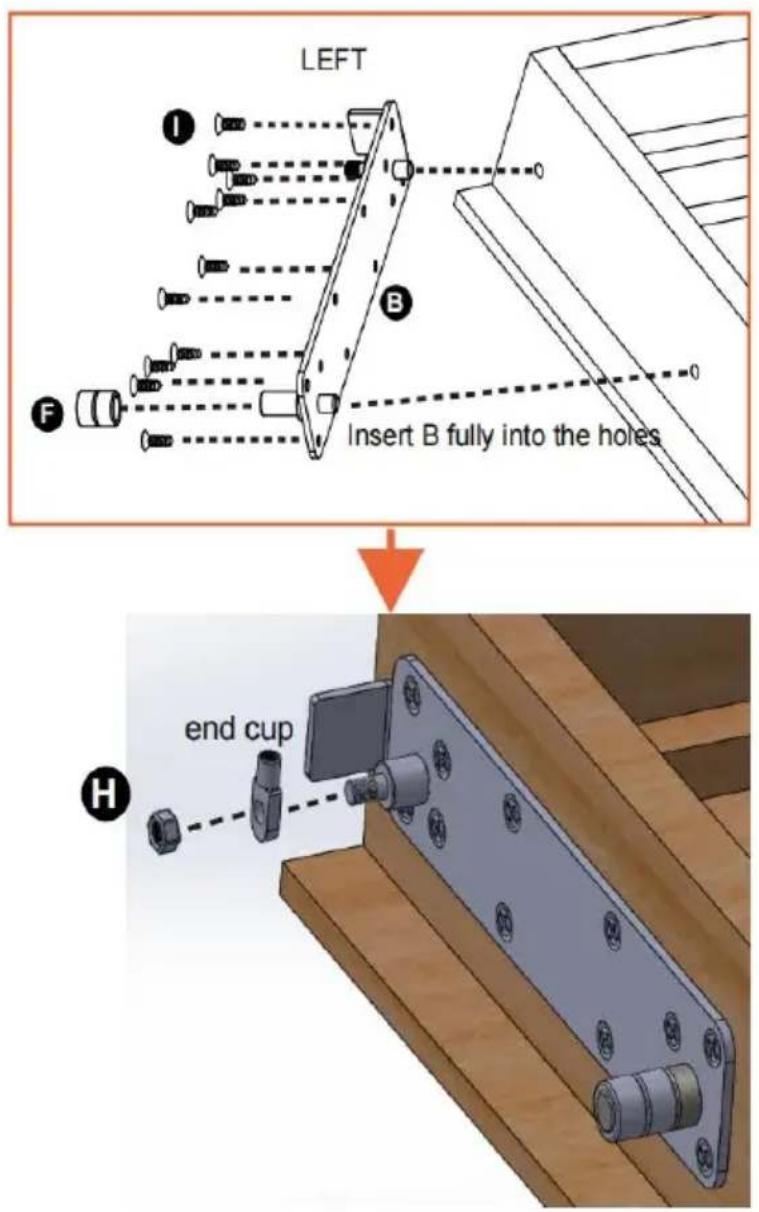
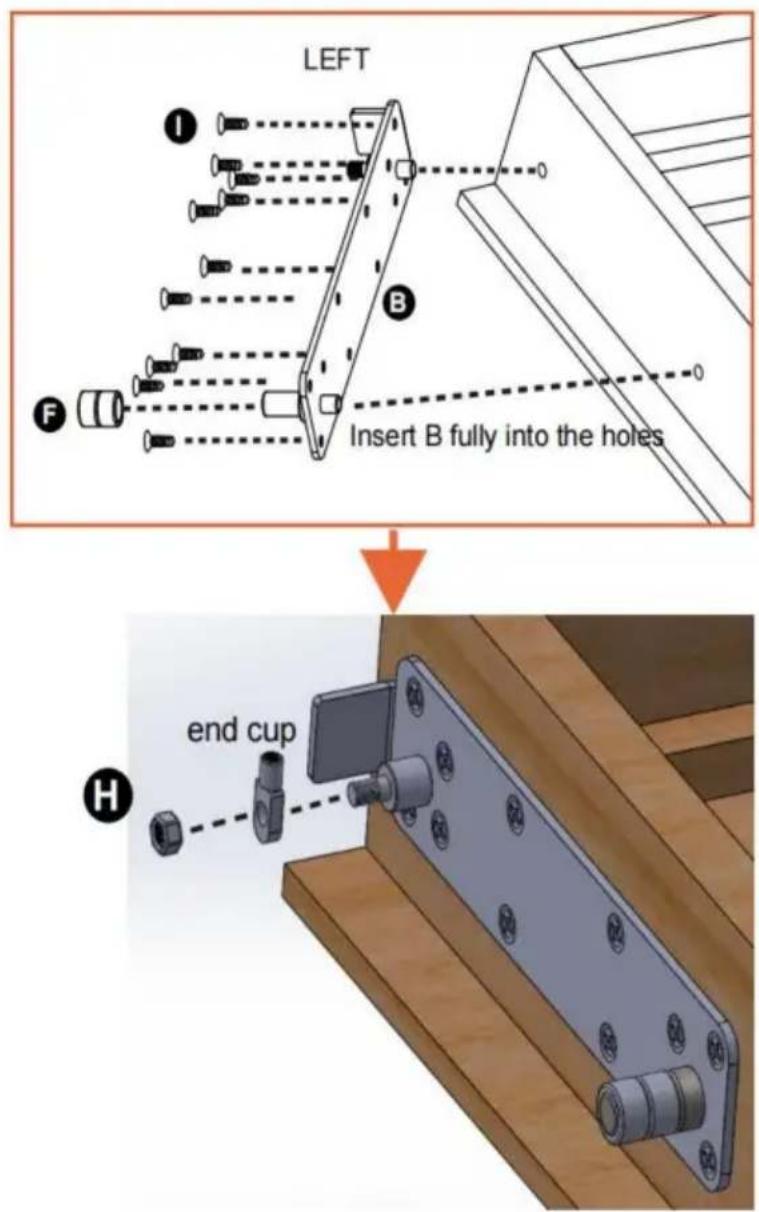
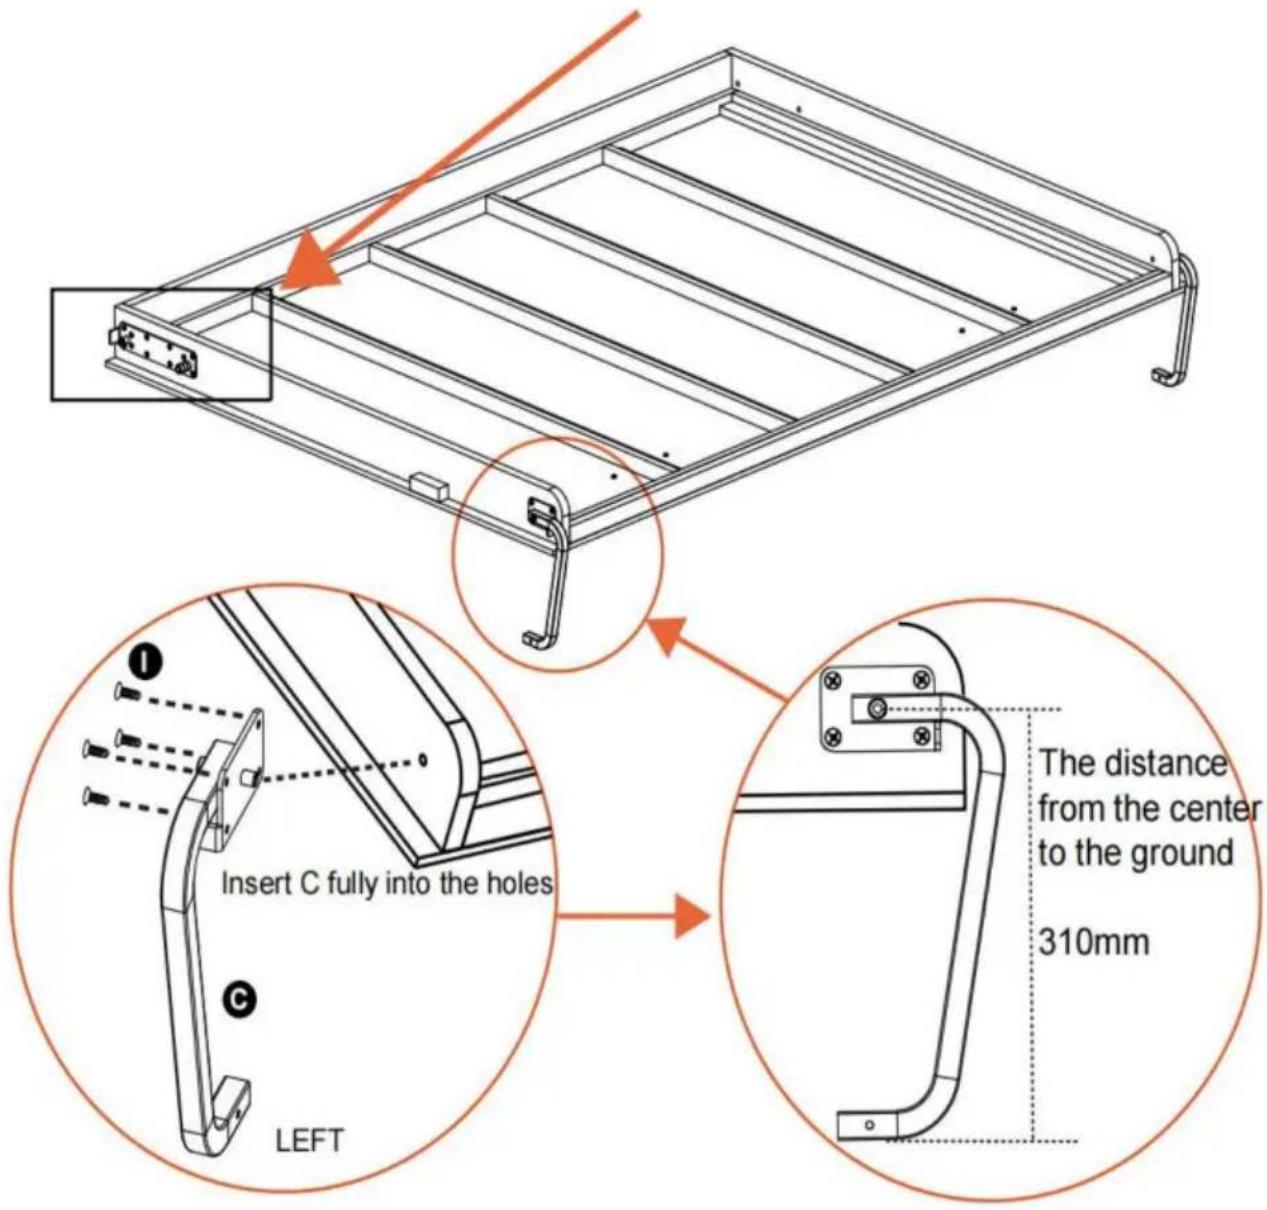
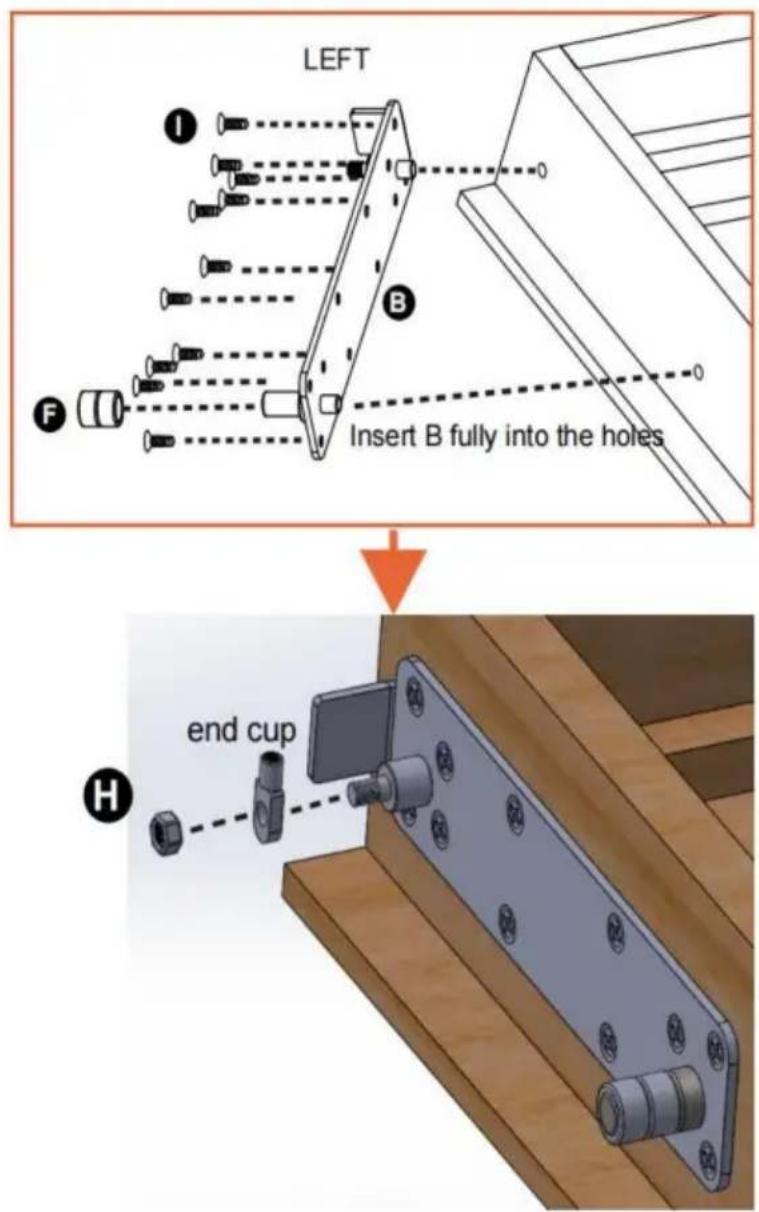
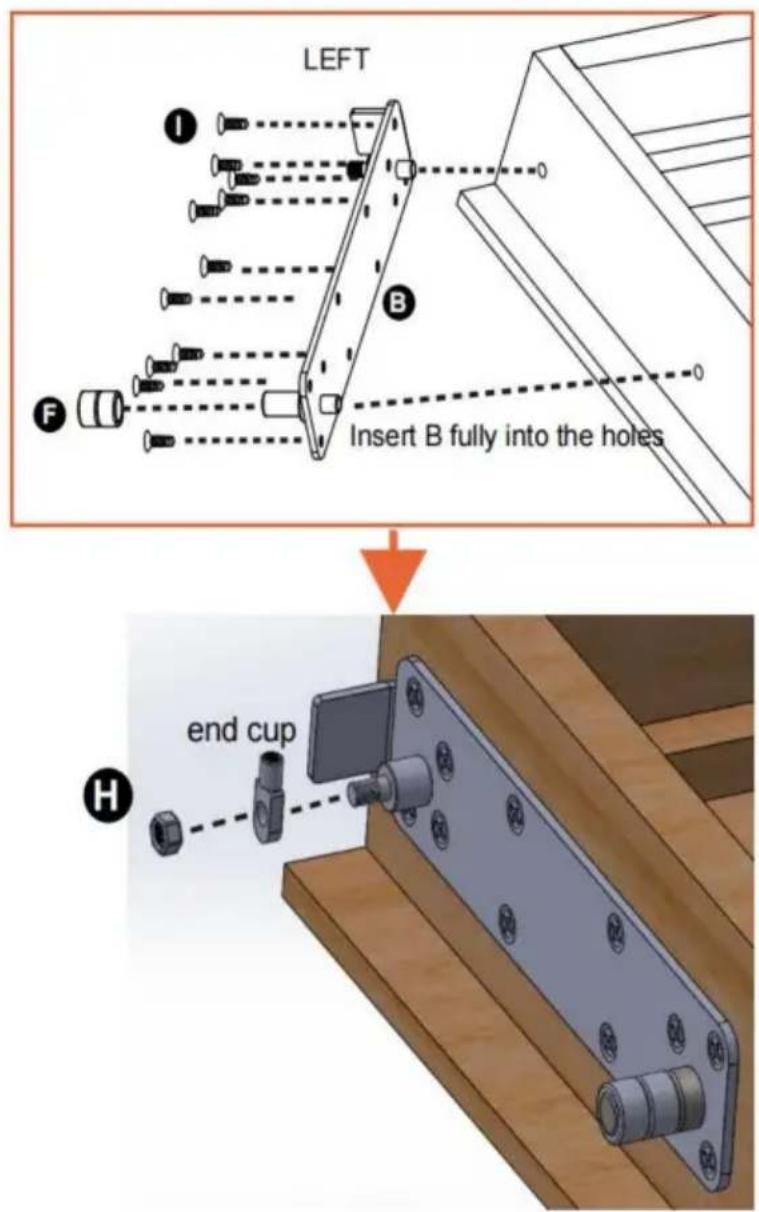
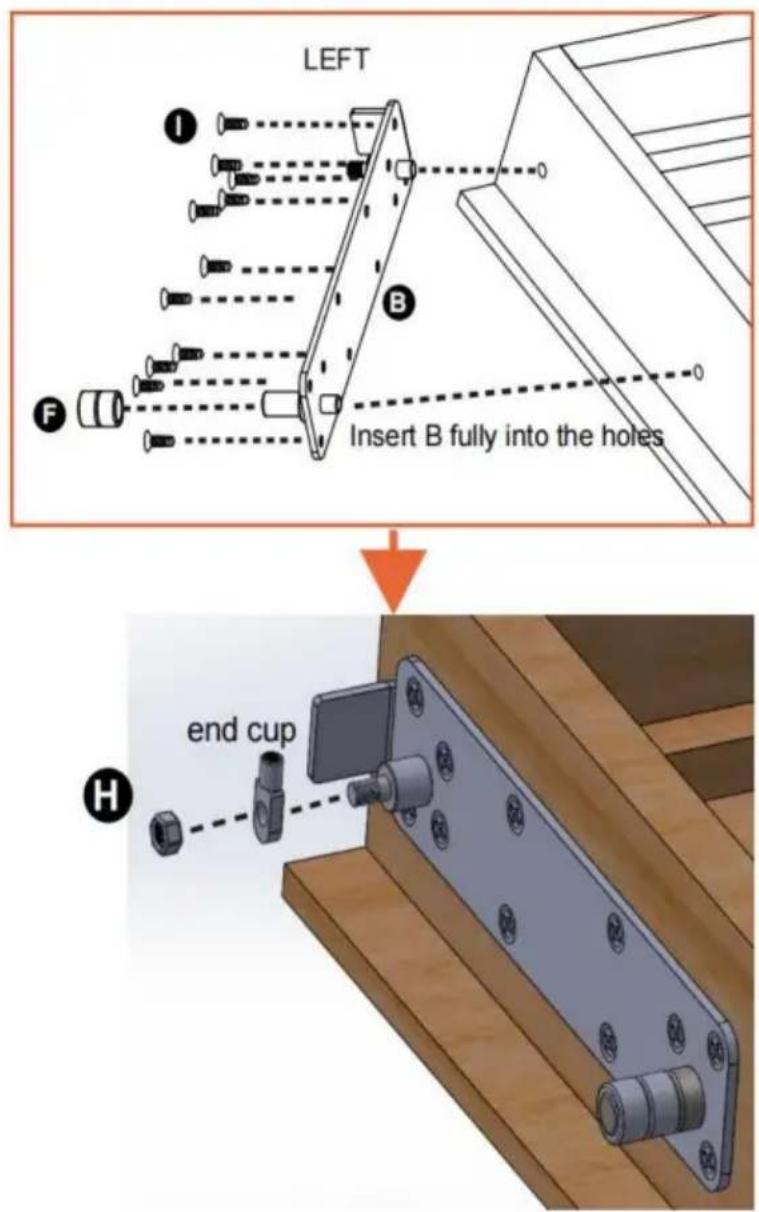
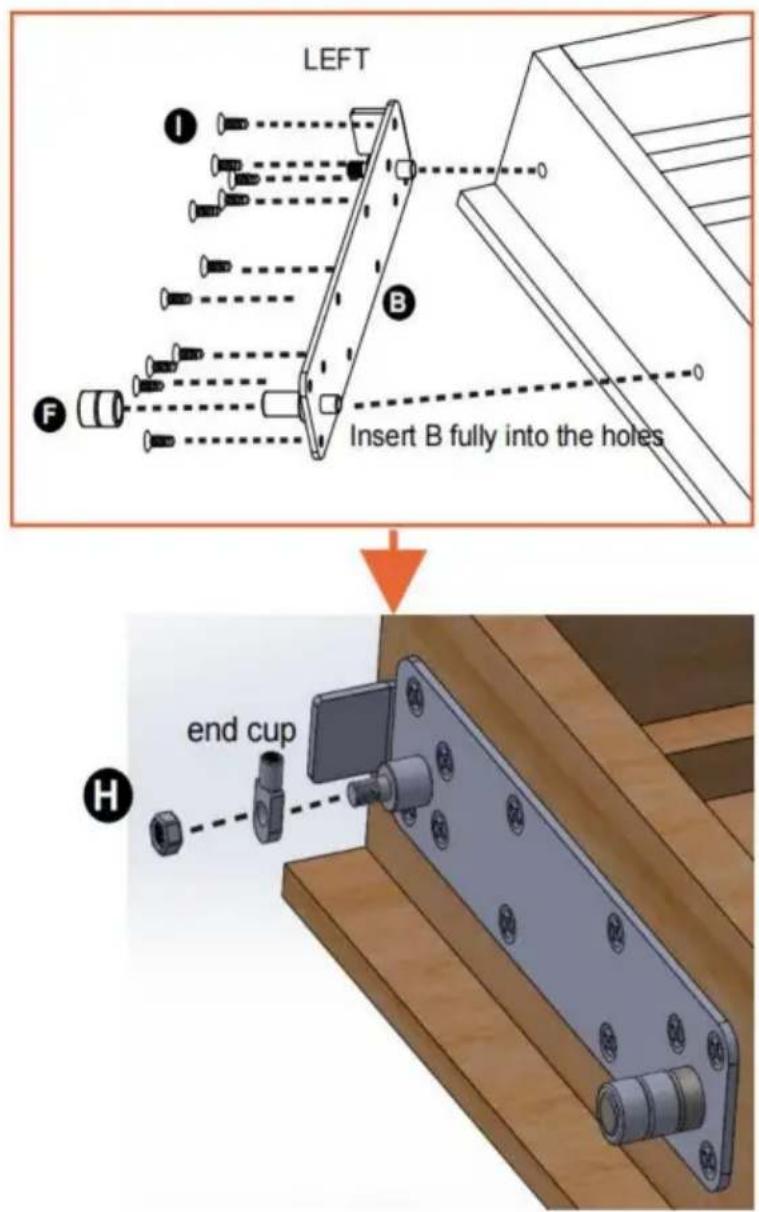
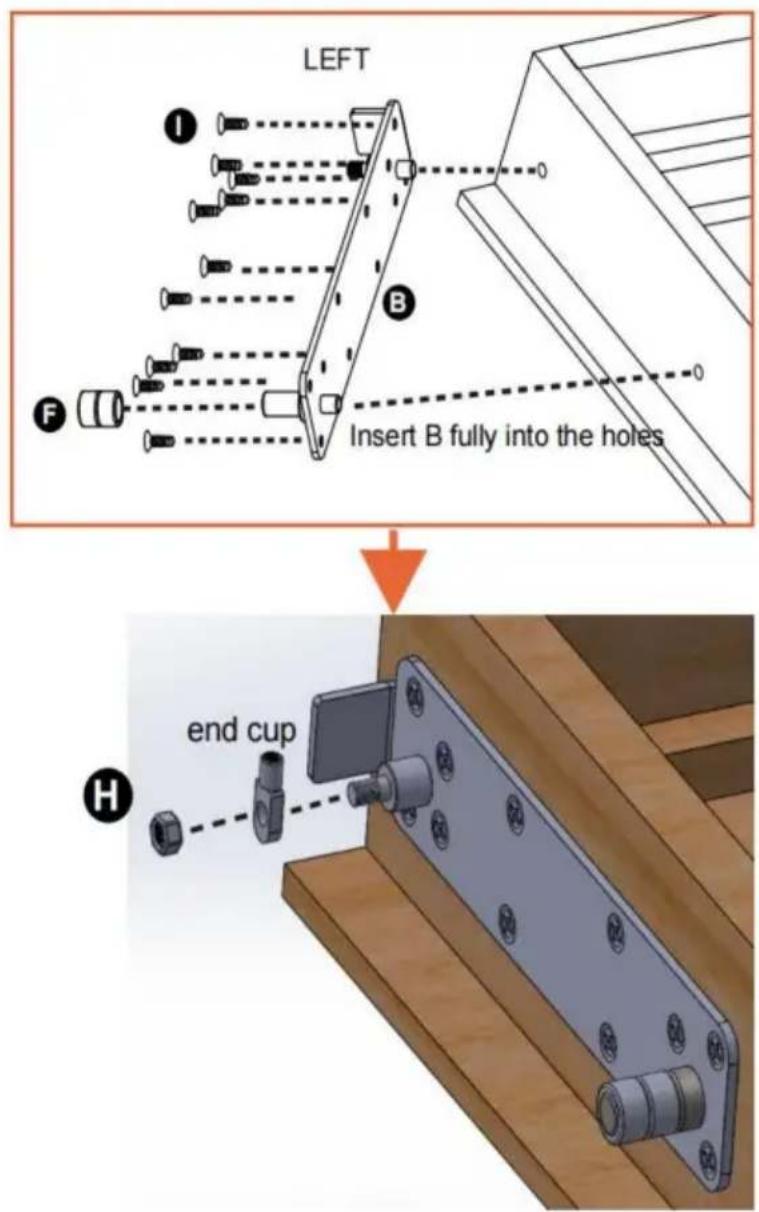
Step 5: Insert the pin on the connect bracket B fully into the Dia11mm holes, then fix B to the bed frame with screws I.
Insert 2pcs bearing F to the connect bracket B as the picture.
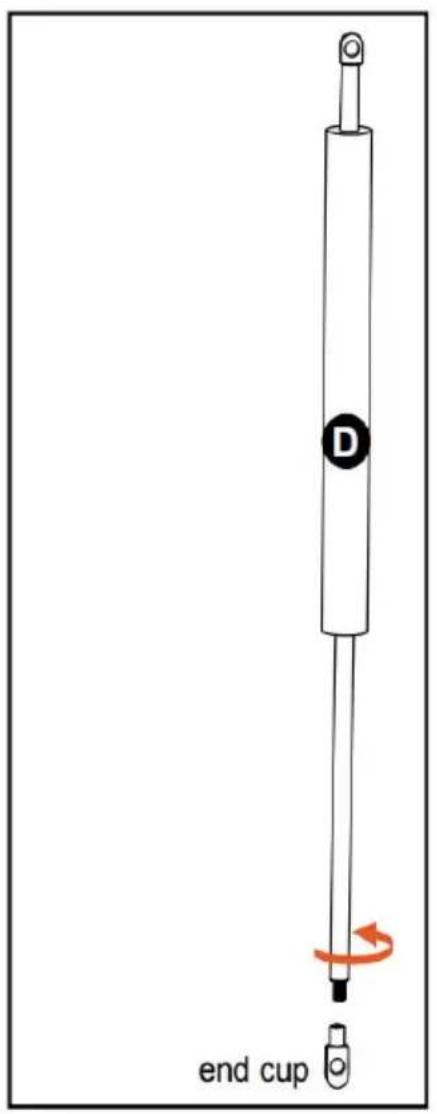
Turn the end cap of the gas spring out as the picture, then install connect bracket B and fix it with nut H as the picture.
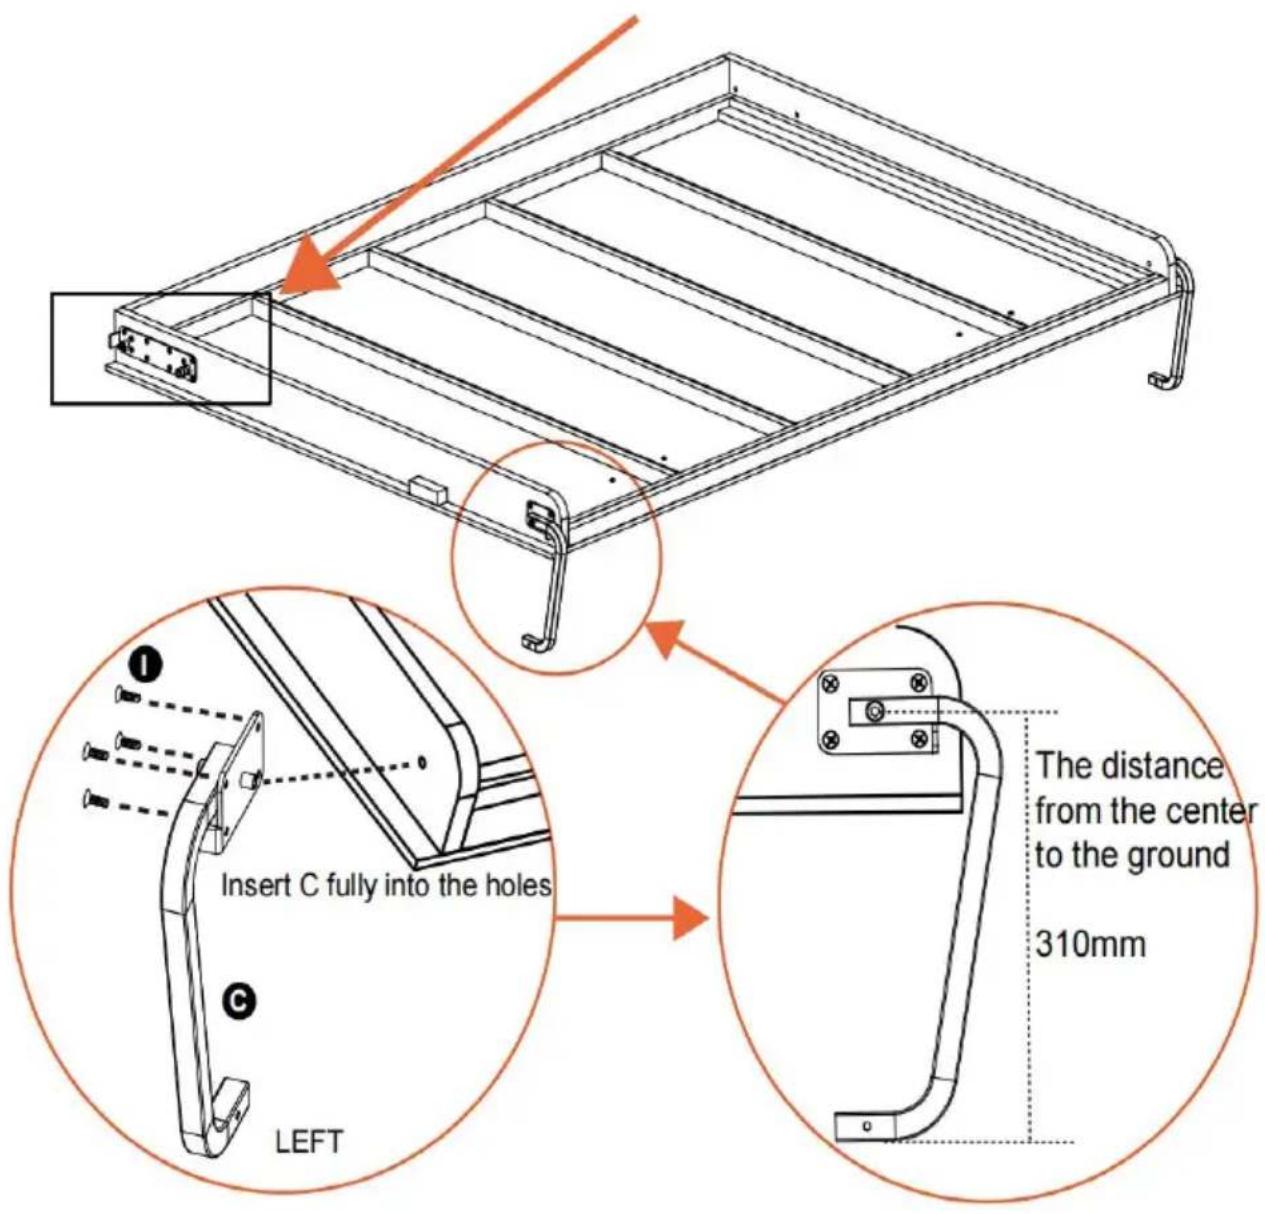
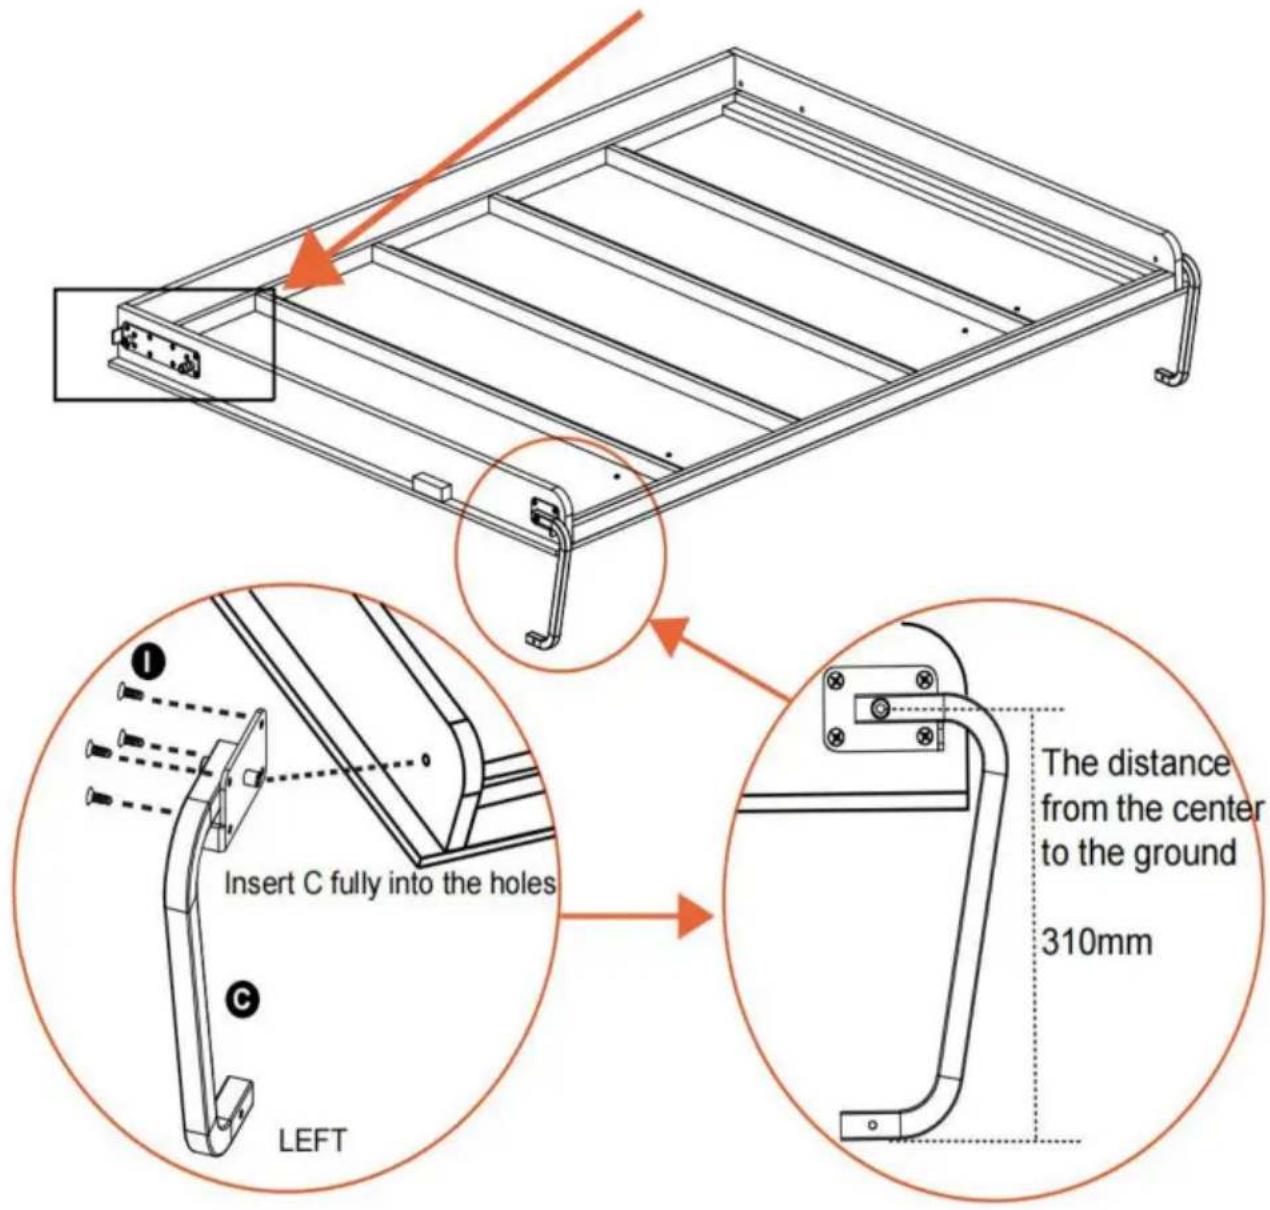
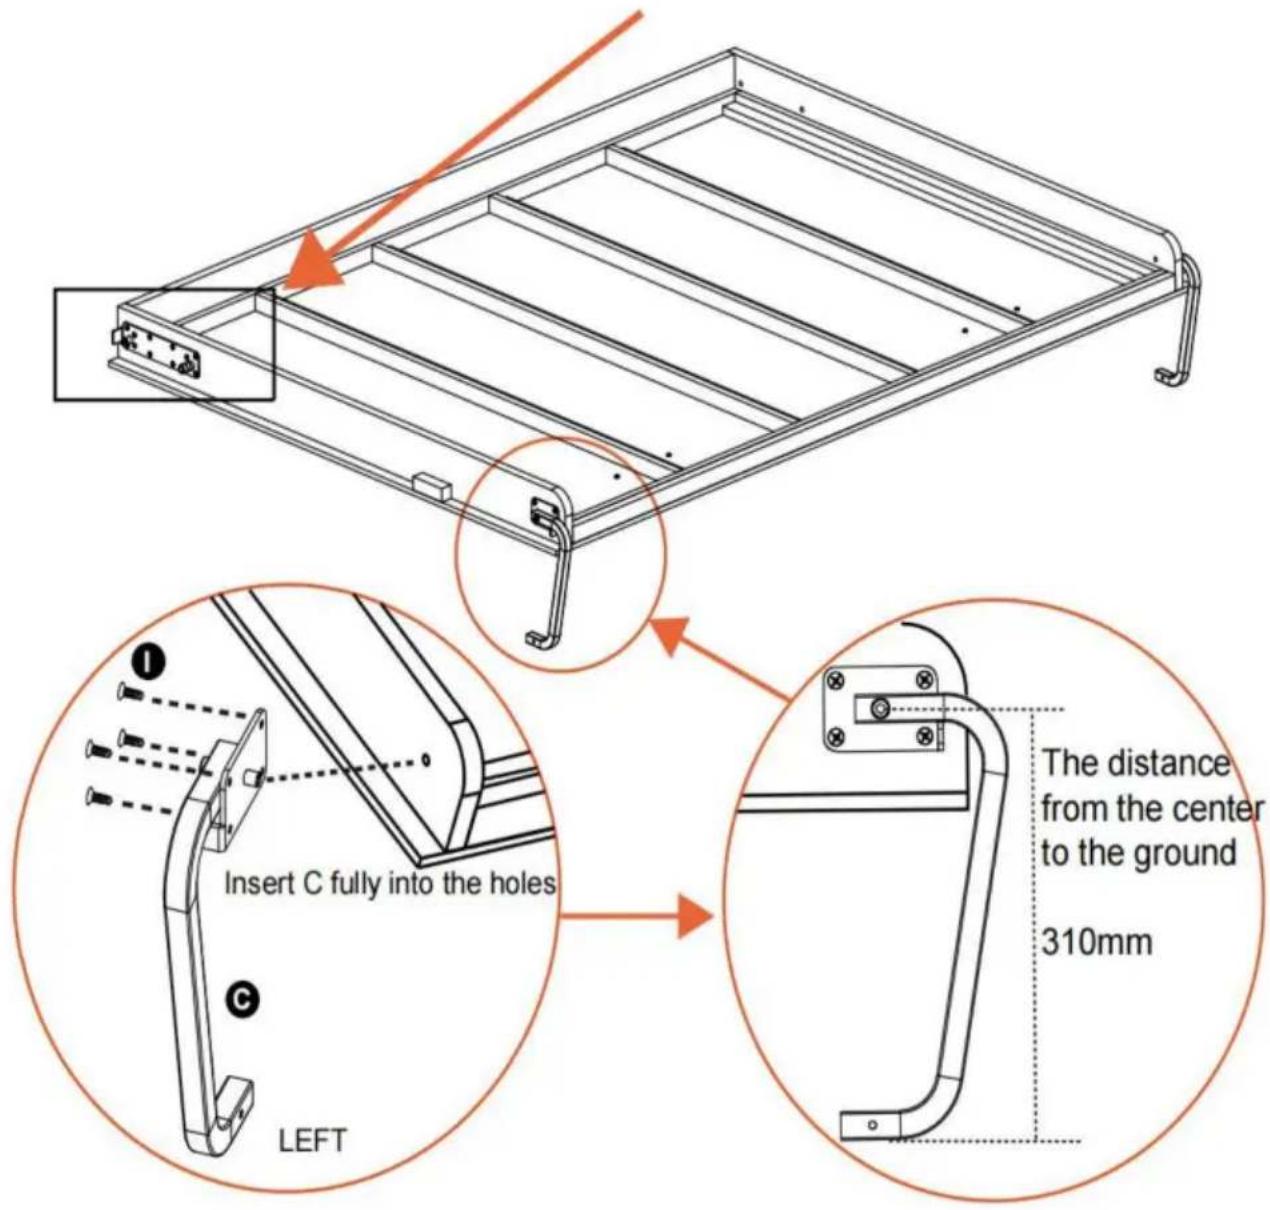
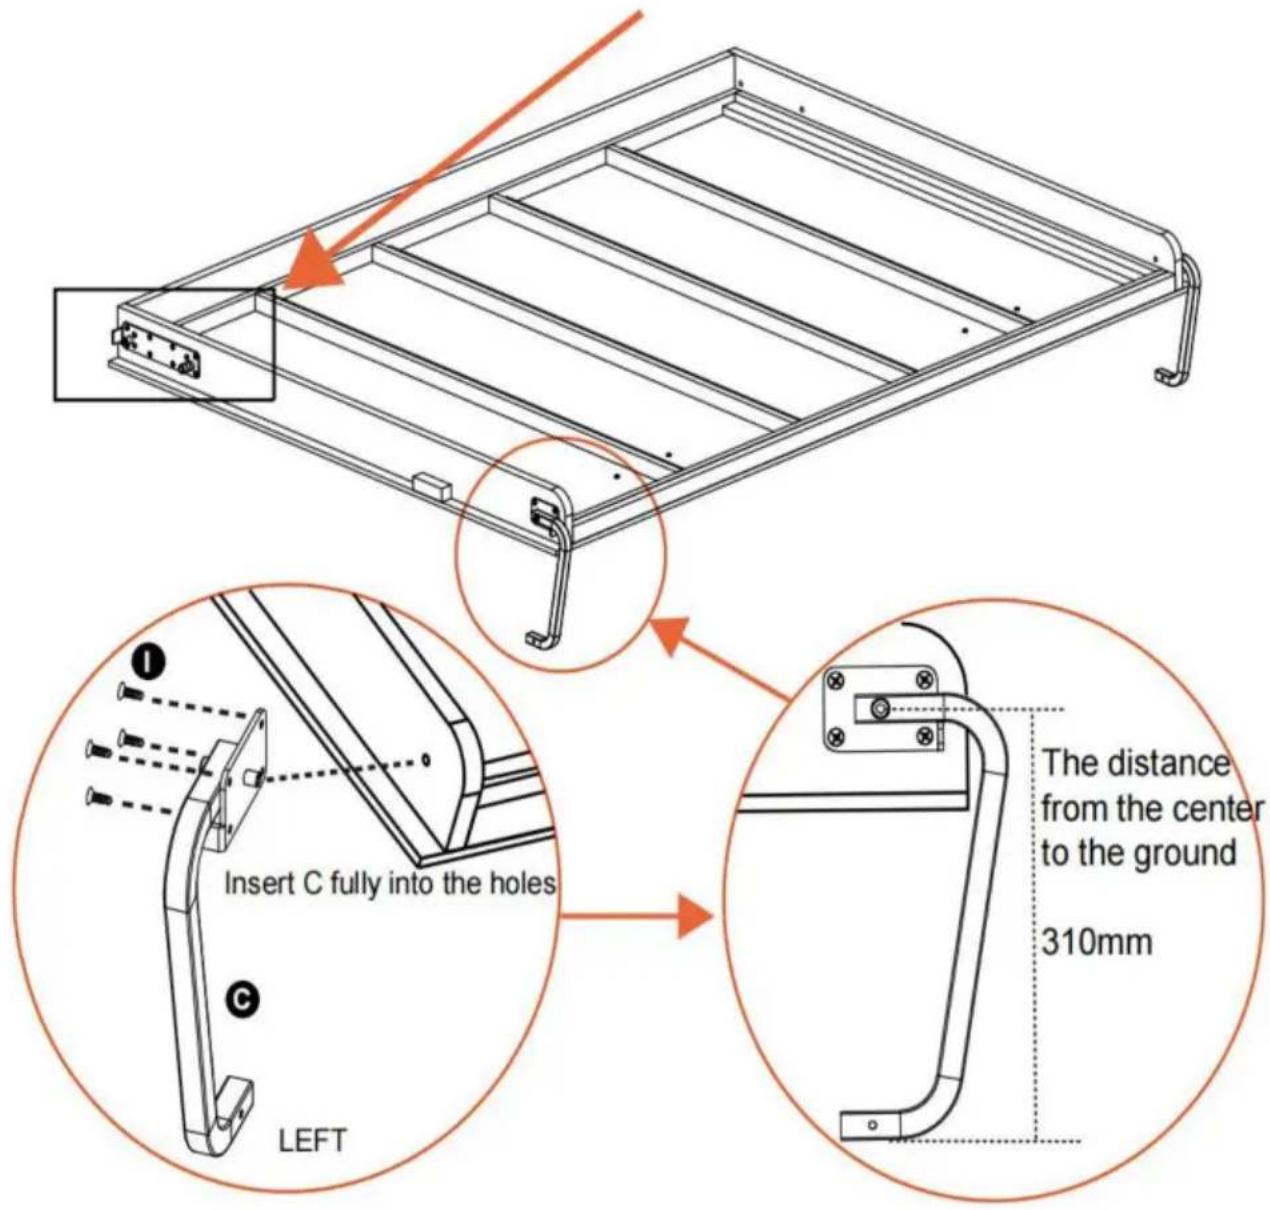
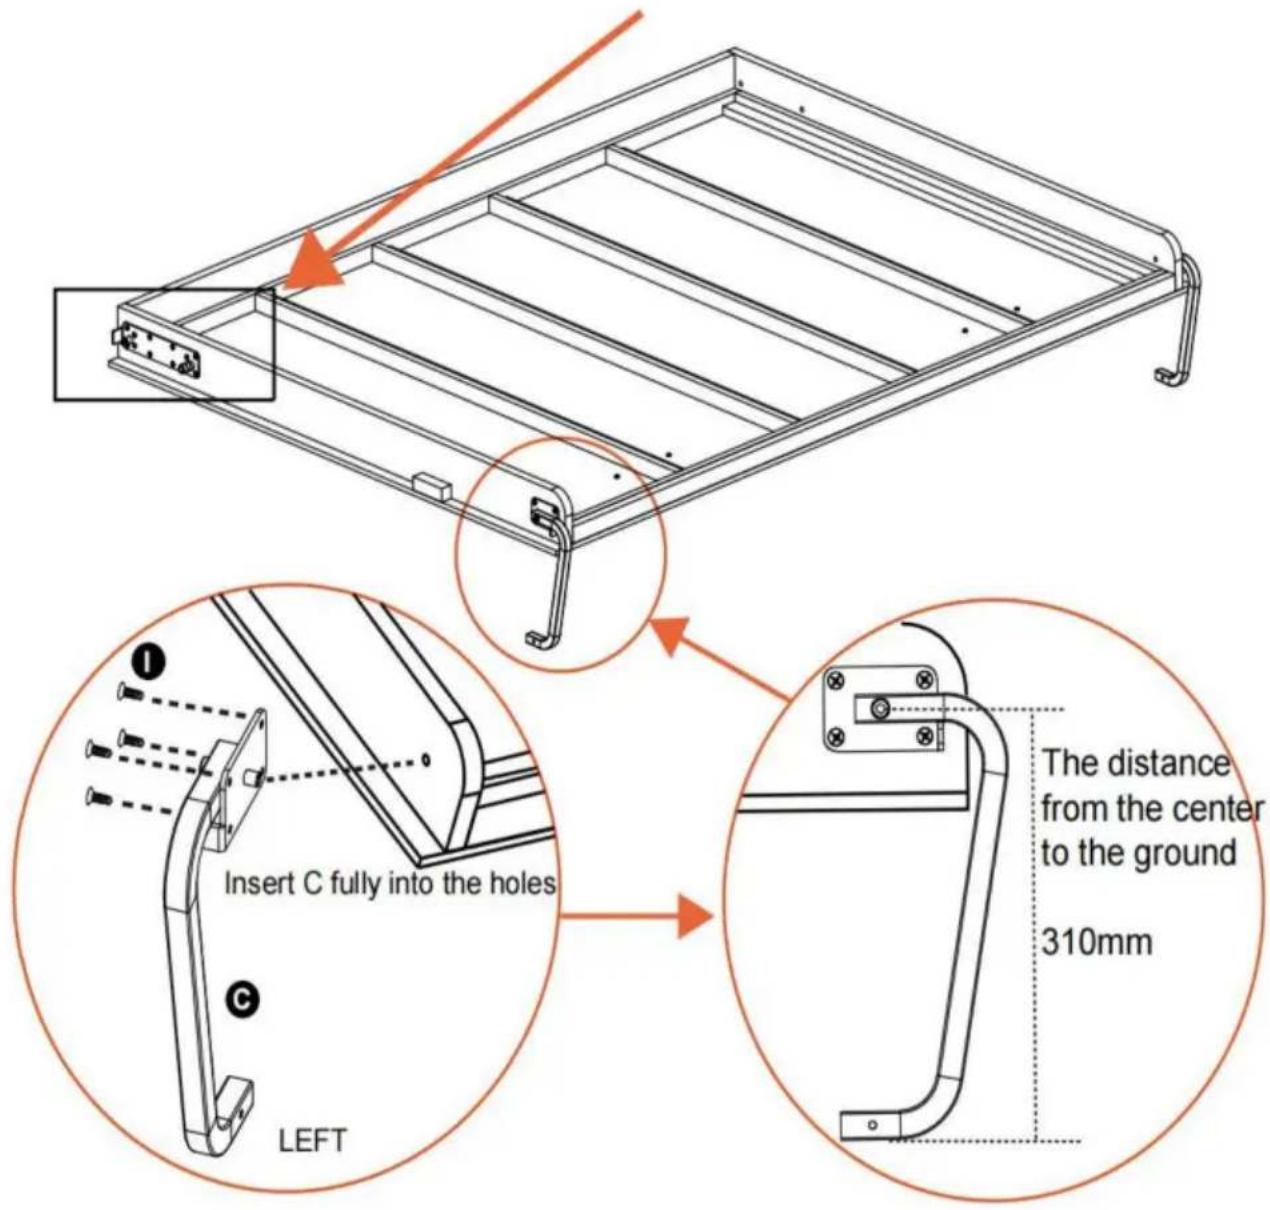
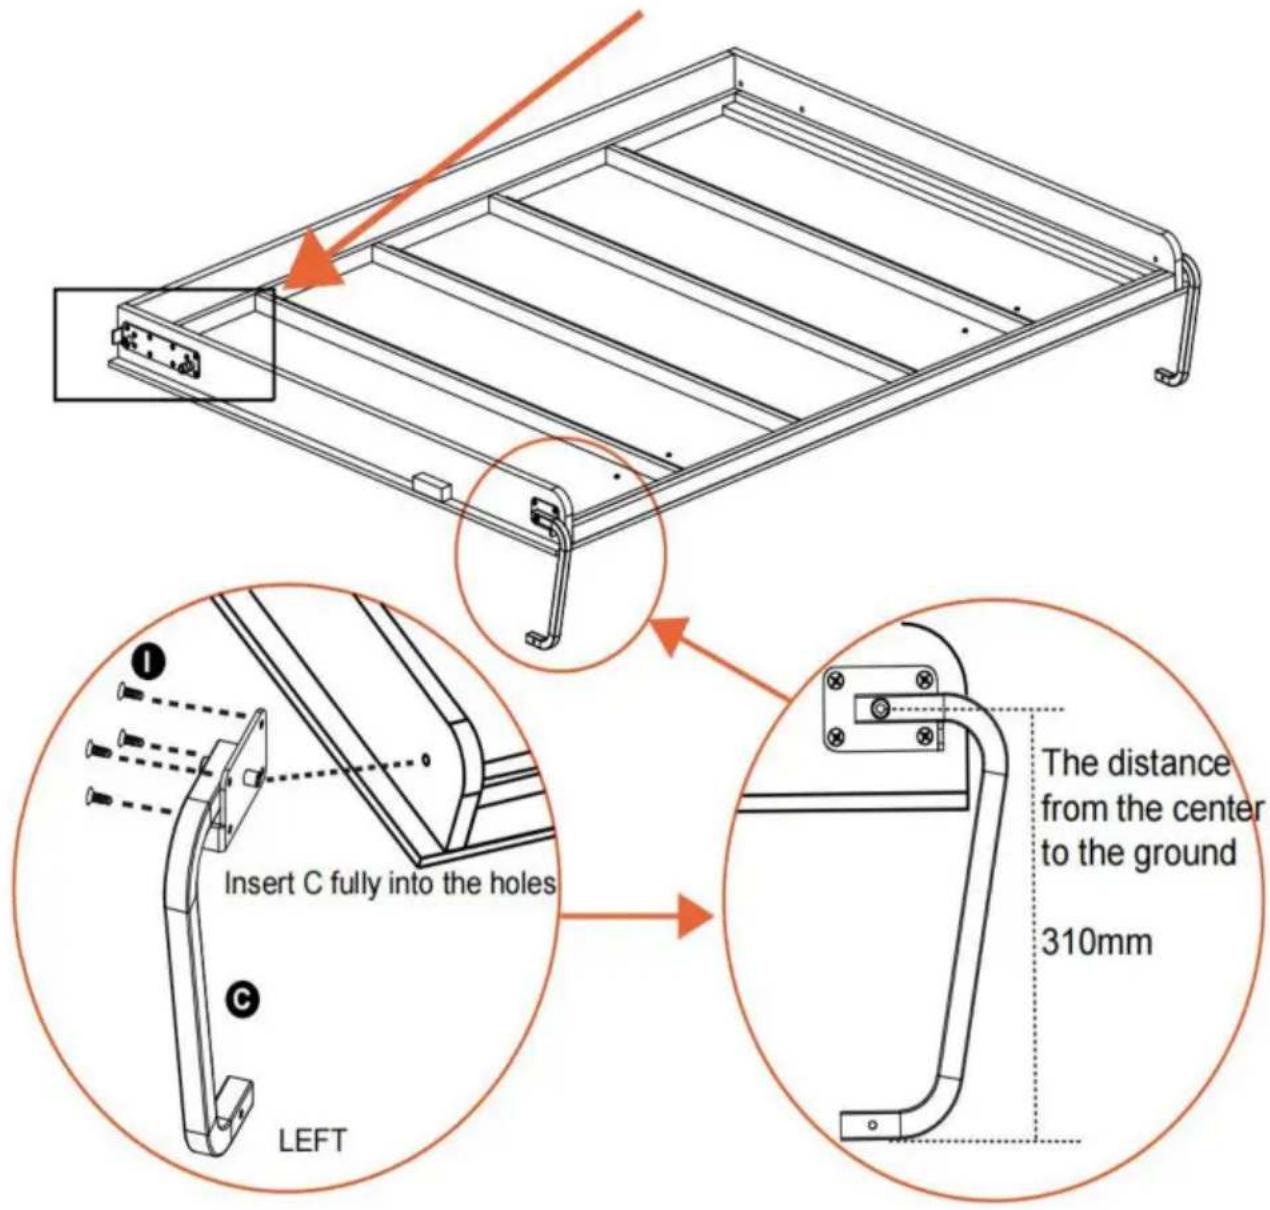
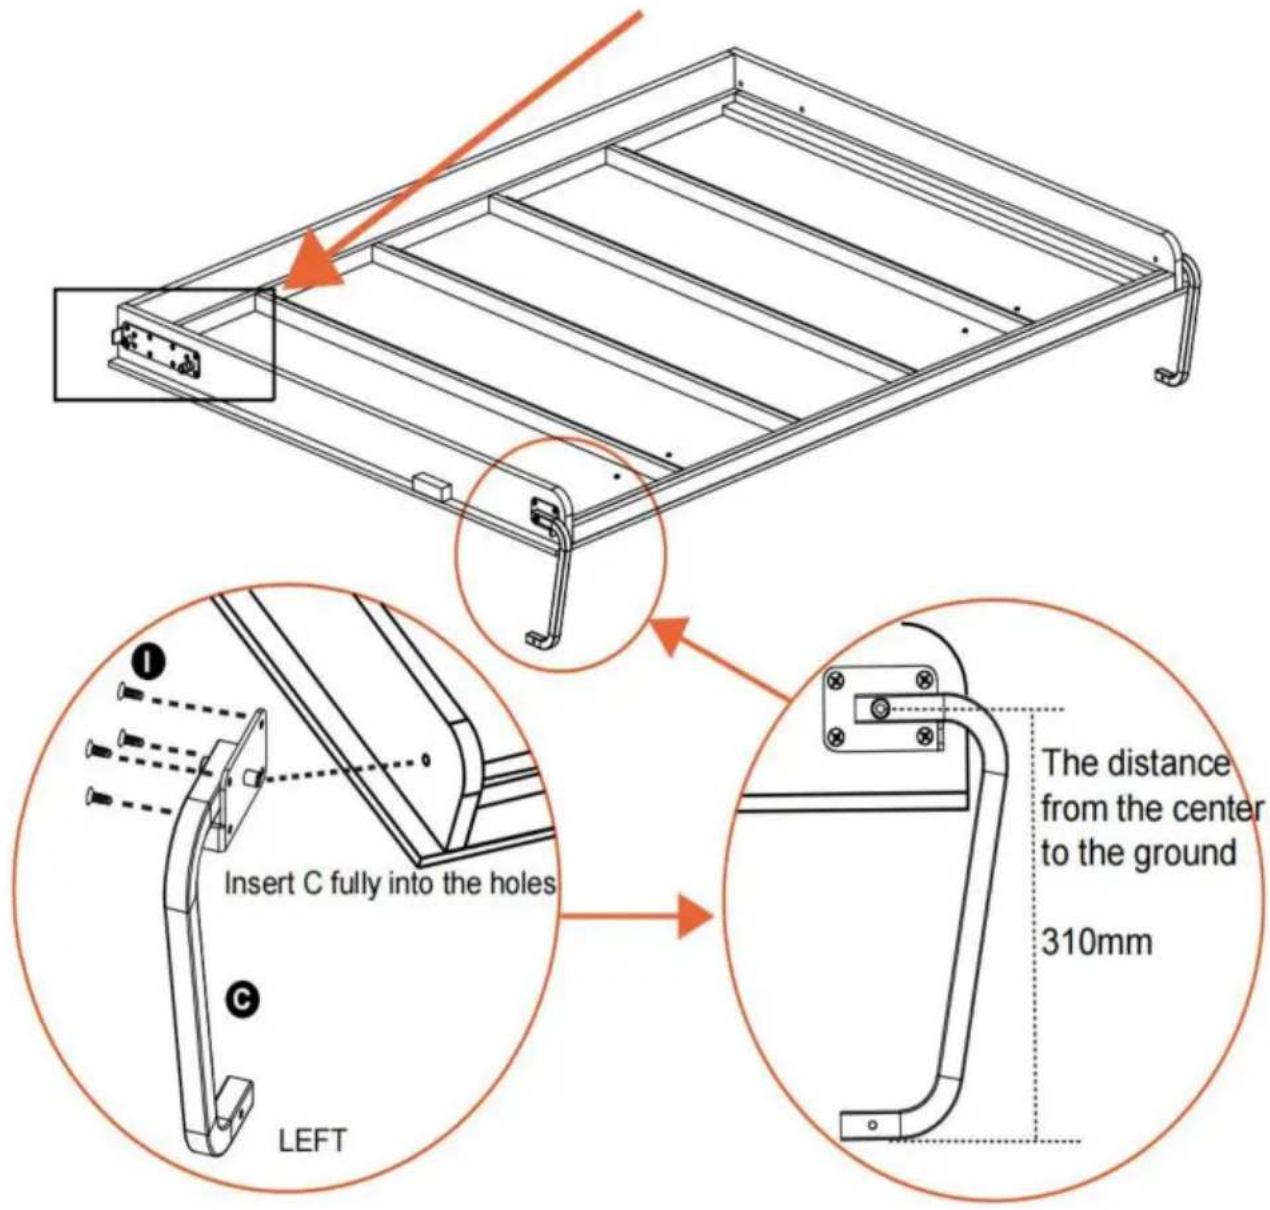
Insert the pin on the leg C fully into the Dia11mm holes, then fix C bed frame with screws I. Keep the distance from the center to the 310mm as the picture.
Repeat the above installation on the other side.
Step 6:
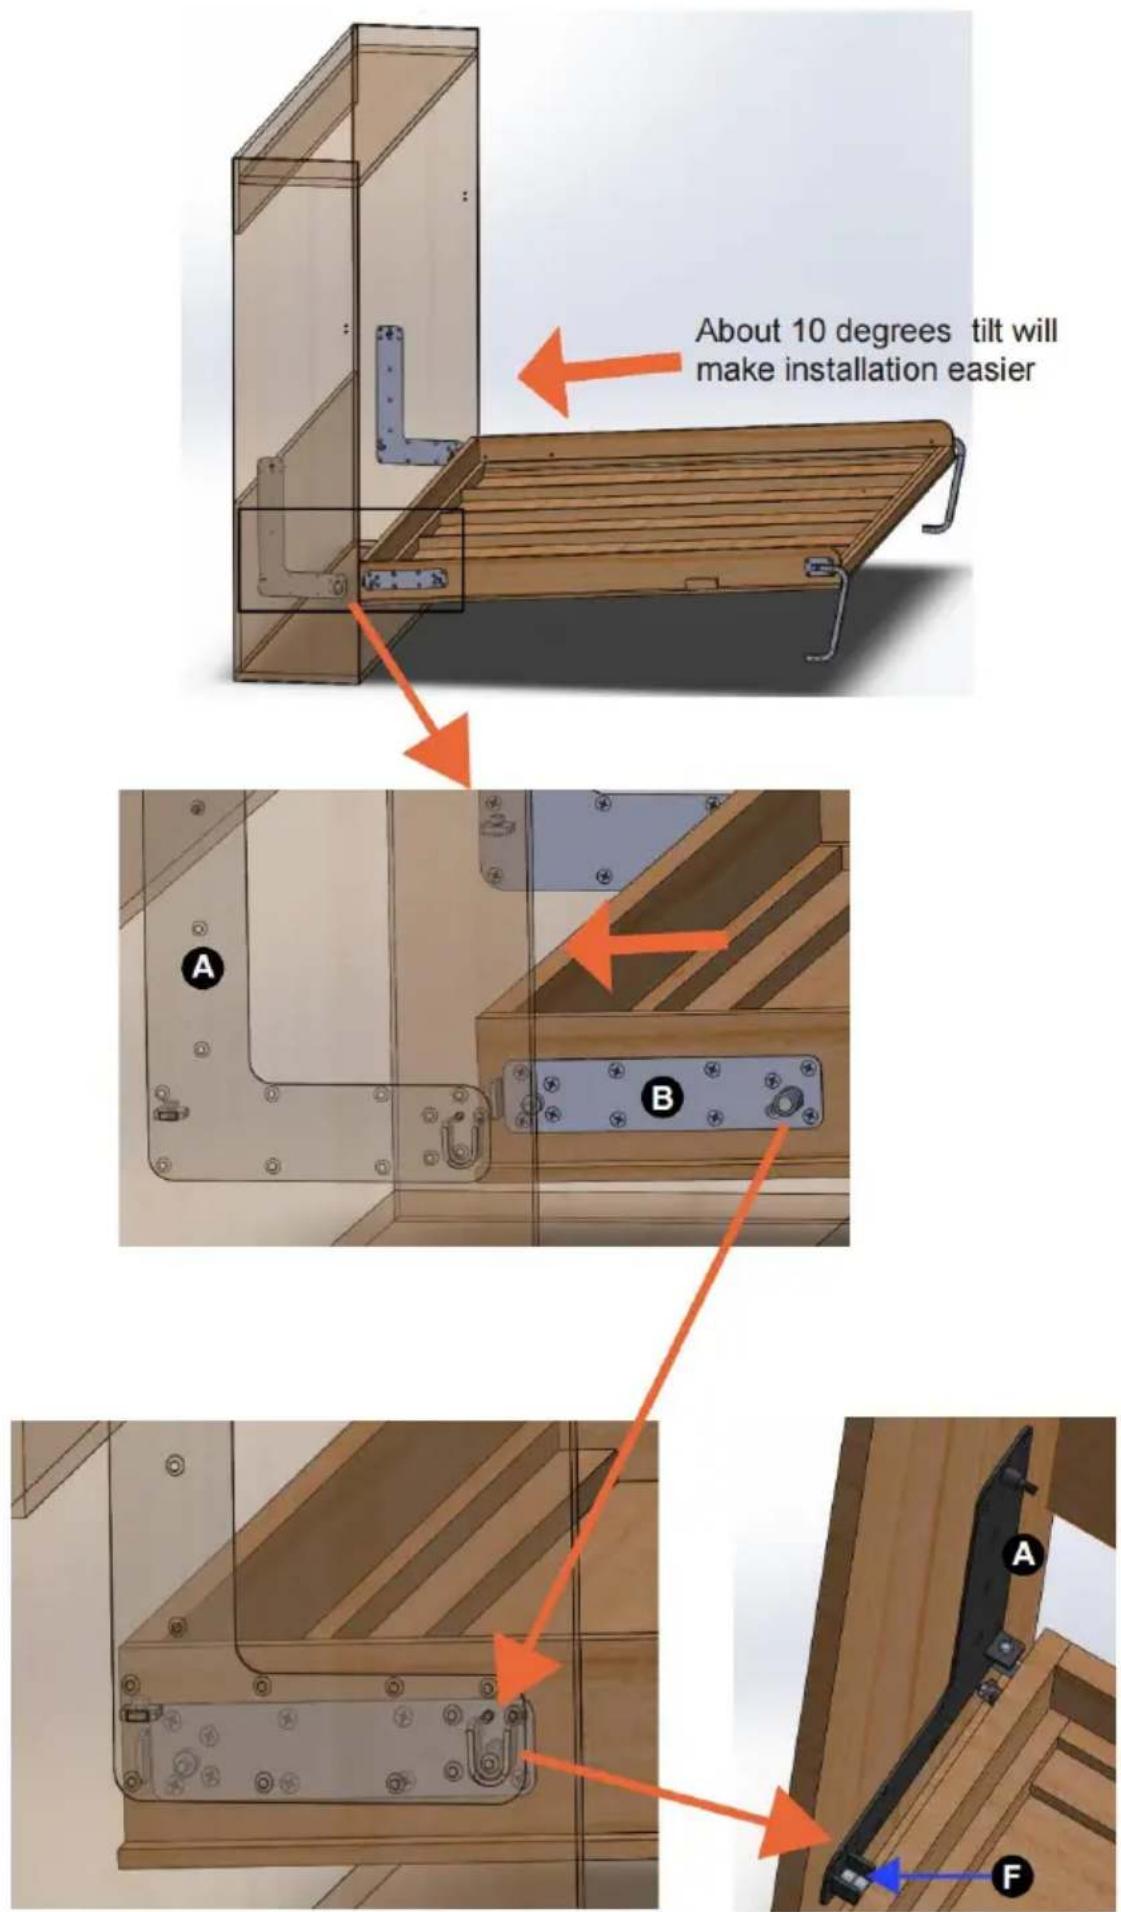
Insert the bed frame with a little angle to the cabinet as the picture. Put the connect bracket B with bearing F on the side bracket A as picture. Install the handle to the bed frame.
Step 7:
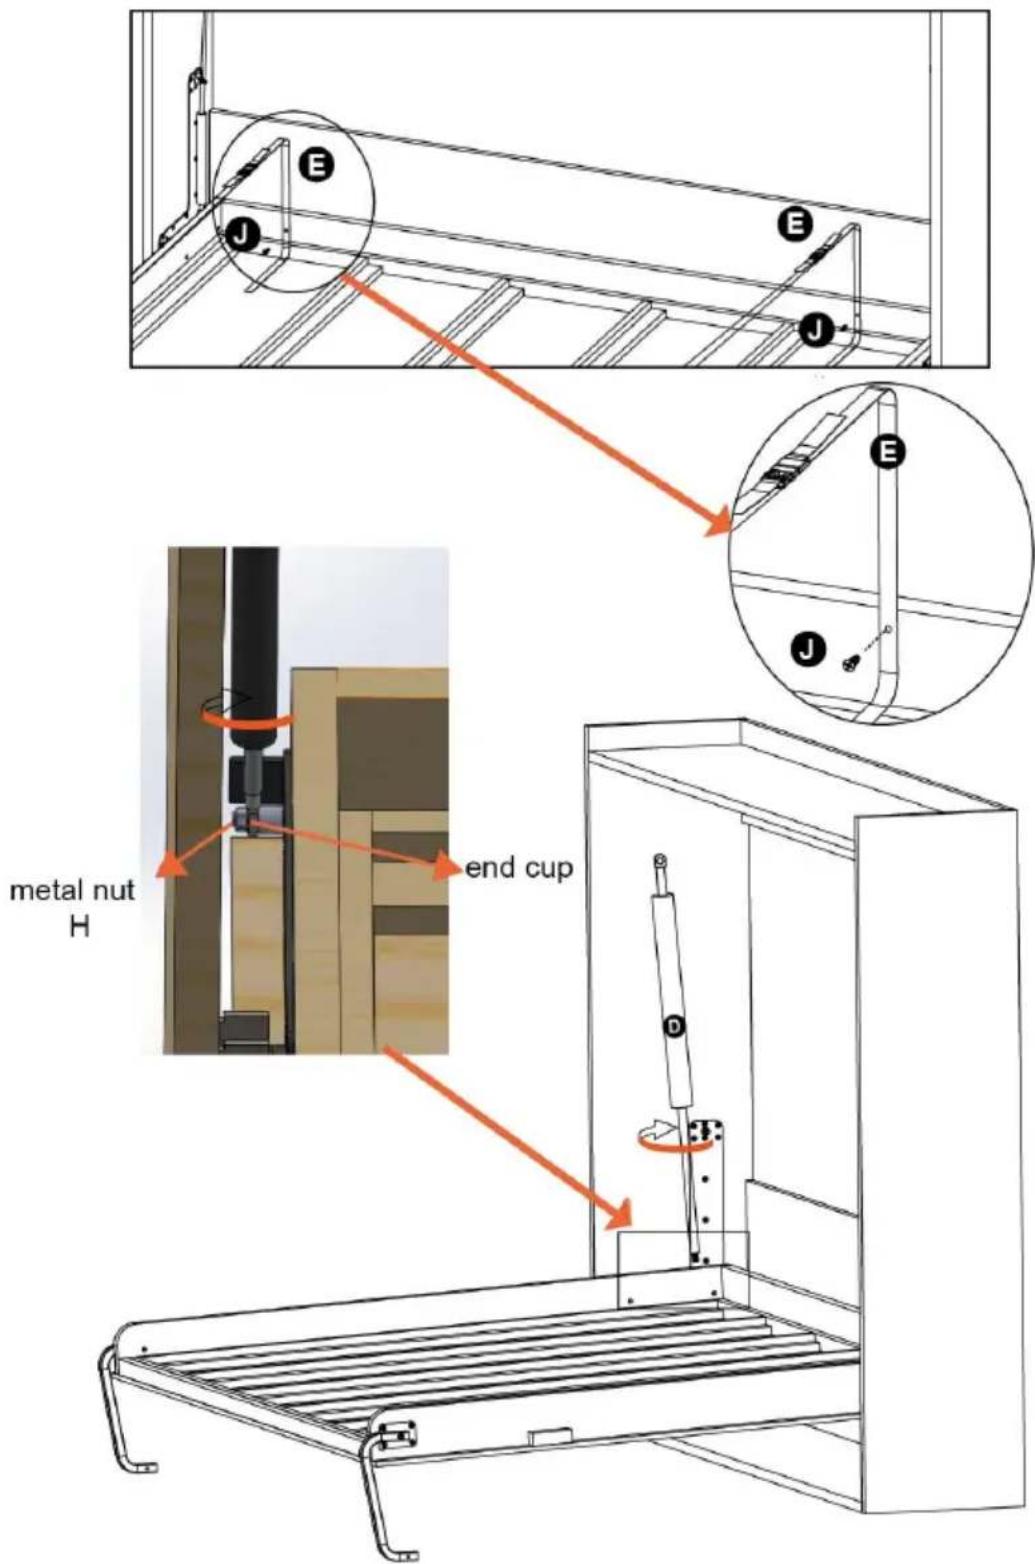
First, attach the two mattress straps E to the bed frame with a scre. Then turn the gas spring D into the end cap as the picture, tighten spring with the end cap;
Repeat the above installation on the other side.
Step 8:
Close the bed frame into the cabinet as the picture.
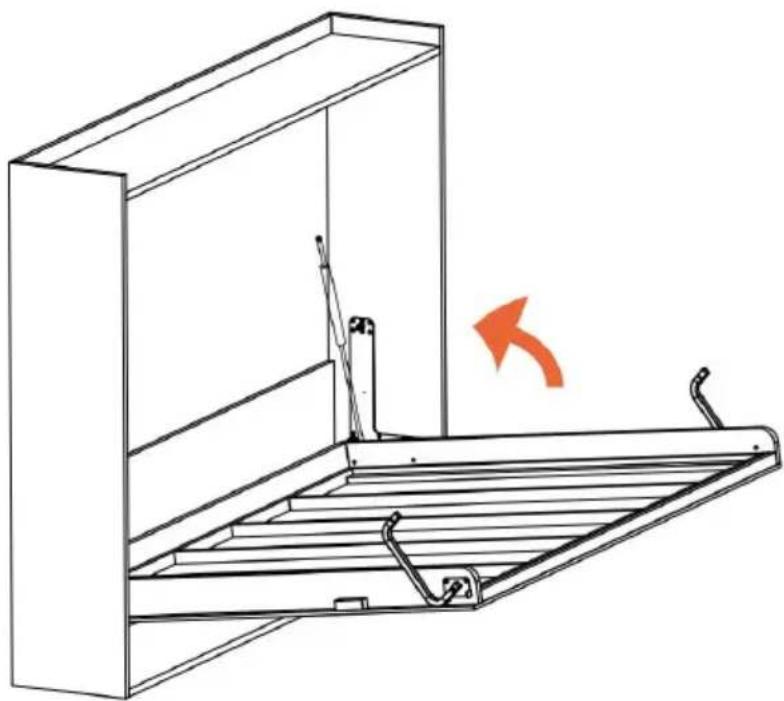
Step 9:
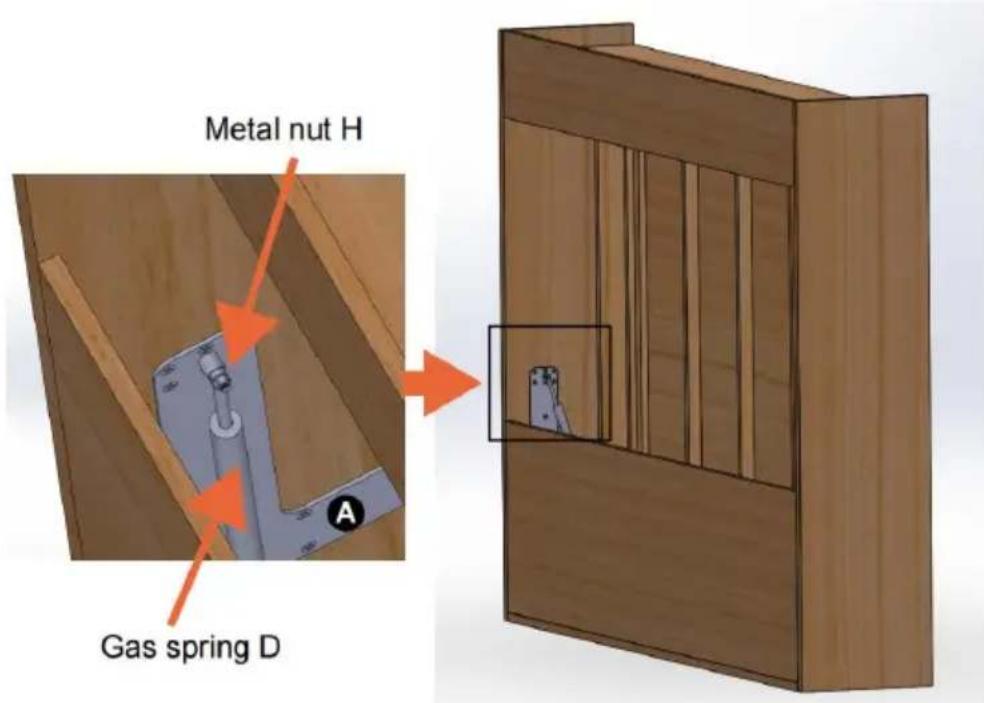
Install the gas spring D to the A bracket from the back of cabinet, metal nut H.
Repeat the above installation on the other side.
Step 10:
Fix the cabinet to a solid wall. The cabinet must be fixed to the wall when open.

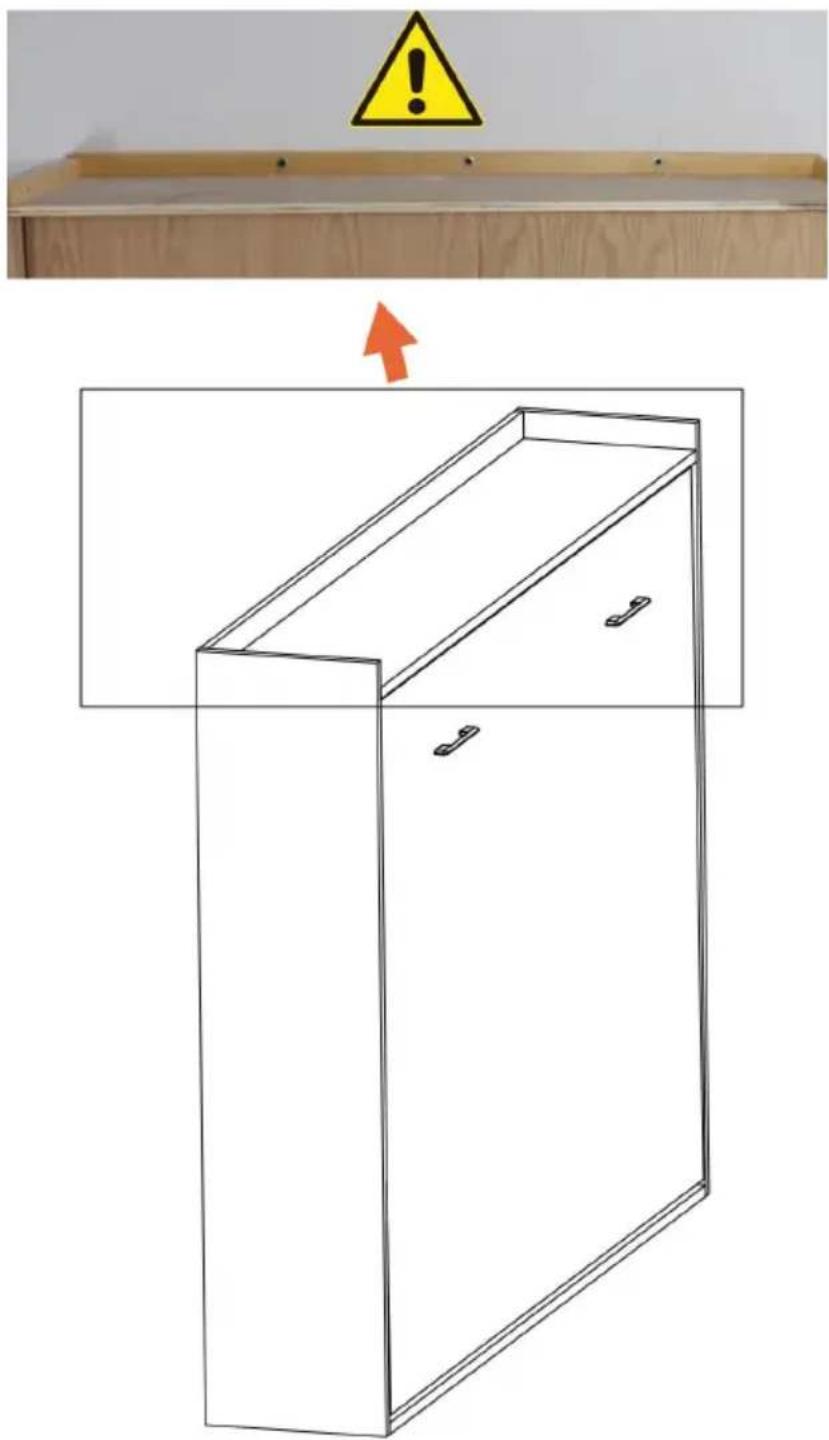
Step 11:
Open the bed, put panel 13 on the bed frame.
Put the mattress on the bed frame and fix it with the straps E.
Install the stopper G to the cabinet with screws J.
Repeat the above installation on the other side.
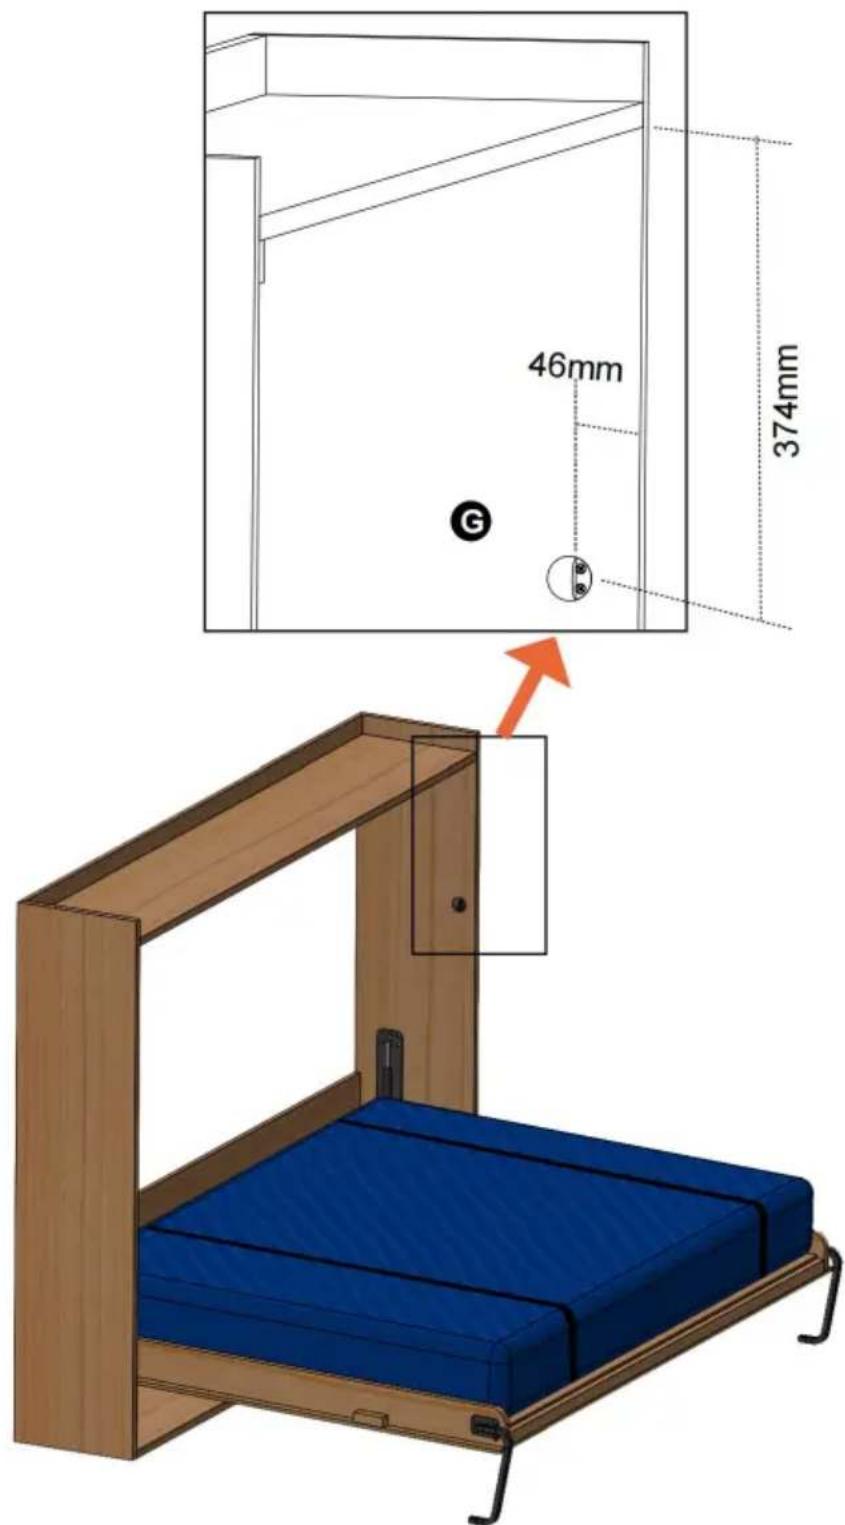
Manufacturer: Shanghai Muxin Muye Youxiangongsi
Address: Shuangchenglu 803nong11hao1602A-1609shi, Baoshanqu, Shanghai 200000 CN.
Imported to AUS: SIHAO PTY LTD. 1 ROKEVA STREETEASTWOOD NSW 2122 Australia
Imported to USA: Sanven Technology Ltd. Suite 250, 9166 Anaheim Place, Rancho Cucamonga, CA 91730
| UK | REP |
YH CONSULTING LIMITED. C/O YH Consulting Limited Office 147, Centurion House, London Road, Staines-upon-Thames, Surrey, TW18 4A>
| EC | REP |
Technical Support and E-Warranty Certificate
www.vevor.com/support
VEVOR®
TOUGH TOOLS, HALF PRICE
NEED HELP? CONTACT US!
Wooden sticks
Step 2:
Step 3:
Use Dia11mm Wood Drill Bit
Step 4:
Step 6:
Step
Step 9:
Step 11:
Manufacturer: Shanghaimuxinmuyeyouxiangongsi
Address: Shuangchenglu 803nong11hao1602A-1609shi, baoshanqu, shanghai 200000 CN.
Imported into Australia: SIHAO PTY LTD. 1 ROKEVA STREETASTWOOD NSW 2122 Australia
YH CONSULTING LIMITED. C/O YH Consulting Limited Office 147, Centurion House, London Road, Staines-upon-Thames, Surrey, TW18 4AX
E-CrossStu GmbH Mainzer Landstr.69, 60329 Frankfurt am Main.
VEVOR®
TOUGH TOOLS, HALF PRICE
Wooden sticks
Plywood board
Step 2:
Step 3:
Use Dia11mm Wood Drill Bit
Step 4:
Step 6:
Step
Step 9:
Step 11:
Manufacturer: Shanghaimuxinmuyeyouxiangongsi
Address: Shuangchenglu 803nong11hao1602A-1609shi, baoshanqu, Shanghai 200000 CN.
Imported into AUS by: SIHAO PTY LTD. 1 ROKEVA STREETEASTWOOD NSW 2122 Australia
Imported into the USA: Sanven Technology Ltd. Suite 250, 9166 Anaheim Place, Rancho Cucamonga, CA 91730
| UK | REP |
YH CONSULTING LIMITED. C/O YH Consulting Limited Office 147, Centurion House, London Road, Staines-upon-Thames, Surrey, TW18 4AX
www.vevor.com/support
VEVOR®
TOUGH TOOLS, HALF PRICE
NEED HELP? CONTACT US!
Wooden sticks

Step 3:
Use Dia11mm Wood Drill Bit
Step 4:
Step
Step
Step
Step 11:
Imported into AUS: SIHAO PTY LTD. 1 ROKEVA STREETEASTWOOD NSW 2122 Australia
YH CONSULENZA LIMITATA. C/O YH Consulting Limited Office 147, Centurion House, London Road, Staines-upon-Thames, Surrey, TW18 4AX
| REP.CE |
E-CrossStu GmbH
Mainzer Landstr.69,
electronics www.vevor.com/support
VEVOR®
TOUGH TOOLS, HALF PRICE
Wooden sticks
Plywood sheet
Step 2:
Step 3:
Use Dia11mm Wood Drill Bit
Step 4:
Step 6:
Step 7:
Step 9:
Step 11:
Manufacturer: Shanghaimuxinmuyeyouxiangongsi
Address: Shuangchenglu 803nong11hao1602A-1609shi, baoshanqu, shanghai 200000 CN.
Imported to AUS: SIHAO PTY LTD. 1 ROKEVA STREETASTWOOD NSW 2122 Australia
Imported to USA: Sanven Technology Ltd. Suite 250, 9166 Anaheim Place, Rancho Cucamonga, CA 91730
YH CONSULTING LIMITED. C/O YH Consulting Limited Office 147, Centurion House, London Road, Staines-upon-Thames, Surrey, TW18 4AX
E-CrossStu GmbH Mainzer Landstr.69, 60329 Frankfurt am Main.
VEVOR®
TOUGH TOOLS, HALF PRICE
NEED HELP? CONTACT US!
Wooden sticks
Plywood sheet
Step 2:
Step 3:
Use Dia11mm Wood Drill Bit
Step 4:

Step 6:
Step 7:
Step 9:
Step 11:
Manufacturer: Shanghaimuxinmuyeyouxiangongsi
Address: Shuangchenglu 803nong11hao1602A-1609shi, baoshanqu, Shanghai 200000 CN.
Importer for AUS: SIHAO PTY LTD. 1 ROKEVA STREETEASTWOOD NSW 2122 Australia
Importer for USA: Sanven Technology Ltd. Suite 250, 9166 Anaheim Place, Rancho Cucamonga, CA 91730
RESPONSIBILITY. C/O YH Consulting Limited
Office 147, Centurion House, London Road, Staines-upon-Thames, Surrey, TW1
E-CrossStu GmbH
Mainzer Landstr.69,
60329 Frankfurt am Main.
VEVOR®
TOUGH TOOLS, HALF PRICE
www.vevor.com/support
VEVOR®
TOUGH TOOLS, HALF PRICE
Technical support and e-warranty certificate www.vevor.com/support
MURPHY BED KIT
MODEL: YFHQN242
NEED HELP? CONTACT US!
Wooden sticks
Plywood sheet
Step 2:
Step 3:
Use Dia11mm Wood Drill Bit
Step 4:
Step 6:
Step 7:
Step 9:
Step 11:
Manufacturer: Shanghaimuxinmuyeyouxiangongsi
Address: Shuangchenglu 803nong11hao1602A-1609shi, baoshanqu, shanghai 200000 CN.
YH CONSULTING LIMITED. C/O YH Consulting Limited Office 147, Centurion House, London Road, Staines-upon-Thames, Surrey, TW18 4AX
Warranty certificate www.vevor.com/support
VEVOR®
TOUGH TOOLS, HALF PRICE
NEED HELP? CONTACT US!
Standard Queen Mattress
Max weight: 68lbs
Max depth: 10'
Max weight capacity: 900lbs
Wooden pegs
Plywood ark
Technical specifications
| Skåp | 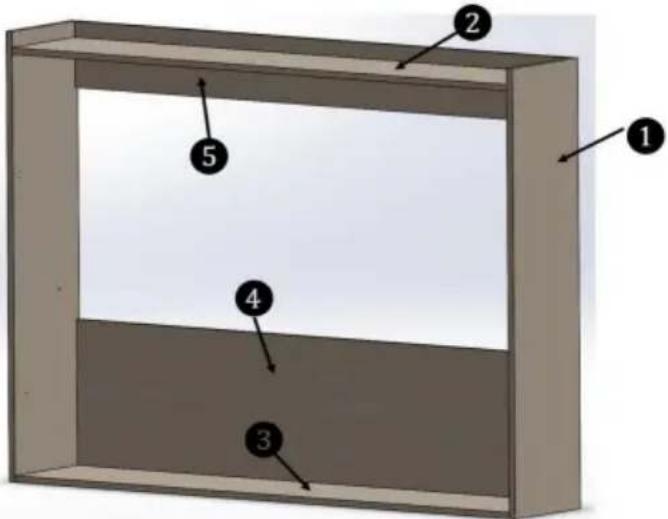 | |||
| Nummer Material | Dimensionera | IQTY | Viktig | |
| 1 | 1 tum Plywood | 1700*406*25mm 2 | Inre dimensioner av skåp: 2166*388*1590mm  | |
| 2 | 1 tum Plywood | 2166*388*25mm | 1 | |
| 3 | 1 tum Plywood | 2166*406*25mm | 1 | |
| 4 | 3/4 tum Plywood | 2166*550*18mm | 1 | |
| 5 | 3/4 tum Plywood | 2166*250*18mm | 1 | |
| Sängram | 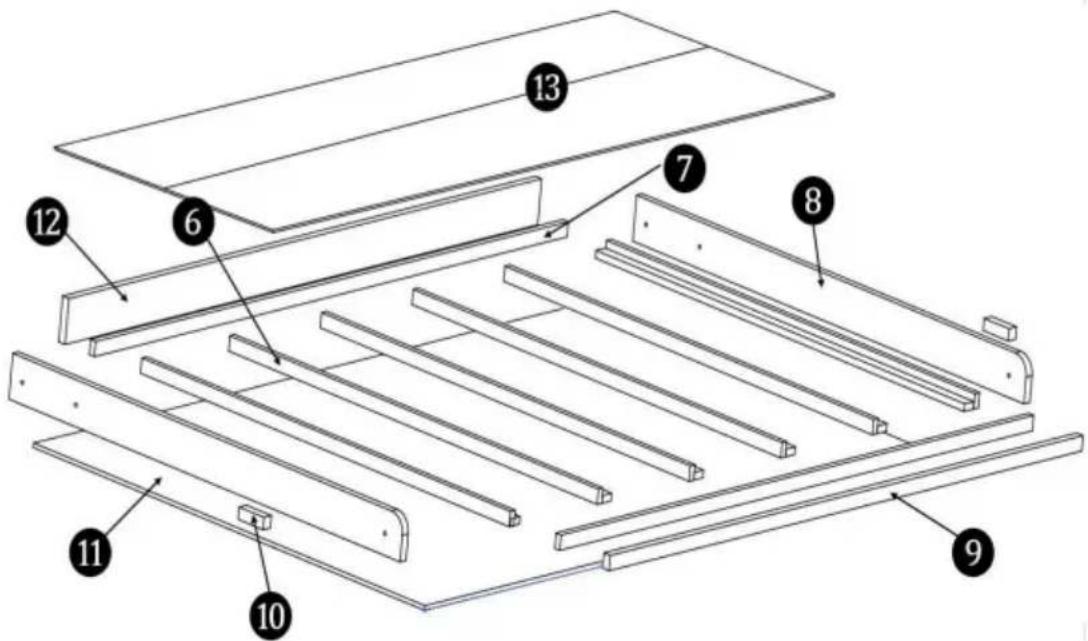 | |||
| Nummer Material | Dimensionera | IQTY | Viktig | |
| 6 | 3/4 tum trä | 40*20*1475 mm | 12 | Sängens vikt ram: 61 kg (134,2 lbs)Mått på sängram : 2146*1565*132 mm |
| 7 | 3/4 tum trä | 40*20*2032 mm | 2 | |
| 8 | 1 tum Plywood | 1565*120*25 mm 2 | ||
| 9 | 1 tum Plywood | 2032*50*25mm | 1 | |
| 10 | 1-1/2 trä | 32*32*100 mm | 1 | |
| 11 | 1/2 tum Plywood | 2146*1565*12 mm | 1 | |
| 12 | 1 tum Plywood | 2032*120*25 mm 1 | ||
| 13 | 3/8 tum Plywood | 2027*1510*9mm | 1 | |
| 14 | madrass | 1520*2030*(152-254) mm;60*80*(6-10)tum | 1 | Vikt avmadrass:31 kg (68 lbs) |
| TOTALVIKT PÅ SÄNGRAM OCH MADRASSBEHÖVER VARA: | 91-94 kg(200lbs-207lbs) | |||
Step 2:
Step 3:
Use 11mm wood drill bit
Step 4:
Step
Step
Step 9:
Step 11:
Manufacturer: Shanghaimuxinmuyeyouxiangongsi
Address: Shuangchenglu 803nong11hao1602A-1609shi, baoshanqu, shanghai 200000 CN.
Imported to AUS: SIHAO PTY LTD. 1 ROKEVA STREETEASTWOOD NSW 2122 Australia
Imported to USA: Sanven Technology Ltd. Suite 250, 9166 Anaheim Place, Rancho Cucamonga, CA 91730
| UK | REP |
YH CONSULTING LIMITED. C/O YH Consulting Limited Office 147, Centurion House, London Road, Staines-upon-Thames, Surrey, TW18 4AX
| EC | REP |
www.vevor.com/support
- MURPHY BED KIT
- MODEL: YFHQN
- NEED HELP? CONTACT US
- TECHNICAL SUPPORT AND E-WARRANTY CERTIFICATE WWW.VEVOR.COM/SUPPORT
- SAFETY INSTRUCTIONS
- INSTRUCTIONS
- MURPHY BED KIT SUITABILITY QUEEN-HORIZONTAL
- GENERAL DESCRIPTION
- USE
- SAFETY
- SAFETY STANDARD
- WARNING
- SAFETY AND CARE ADVICE
- INSTALL THE REQUIRED TOOLS
- LIST OF KIT PARTS
- CONSTRUCTION GUIDE
- STEP
- VEVOR®
- TOUGH TOOLS, HALF PRICE
- MAX WEIGHT CAPACITY: 900LBS
Brand : Vevor
Model : YFHQN242
Category : Murphy bed