
K2E01003 - Grooming set Vevor - Free user manual and instructions
Find the device manual for free K2E01003 Vevor in PDF.



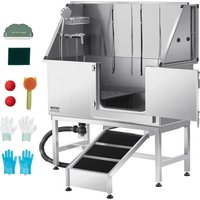
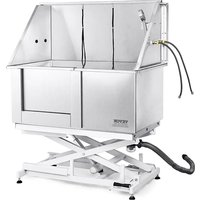
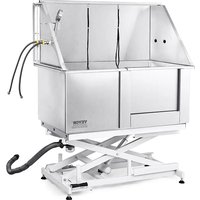
| Product Type | Pet Grooming Bathtub |
| Model | K2E01003 |
| Brand | Vevor |
| Dimensions (L x W x H) | 83.8 x 40.6 x 45.7 cm (33 x 16 x 18 inches) |
| Volume | 0.21 m³ |
| Maximum Load Capacity | 100 kg (220 lb) |
| Estimated Net Weight | 18 kg |
| Power Supply | None (manual) |
| Material | Sturdy Plastic |
| Main Functions | Bath, shower with showerhead and hot/cold water switch, storage (basket, shower holder), access stairs |
| Included Parts | Bathtub, side panels, door, horizontal tube, storage basket, showerhead, hoses, switch, adjustable feet, stair board, ladder rods, wrench, gloves, squeegee, scrub pad, adapter |
| Maintenance and Cleaning | Clean after each use with a soft cloth or sponge and mild cleaner. Regularly clean the drain and transparent cover |
| Safety | Use gloves and safety goggles during assembly. Keep away from children. Keep away from sharp objects |
| Repairability | Spare parts available: seals, hoses, switch, adjustable feet, screws and nuts |
| Warranty | Not specified |
Frequently Asked Questions - K2E01003 Vevor
User questions about K2E01003 Vevor
0 question about this device. Answer the ones you know or ask your own.
Ask a new question about this device
Download the instructions for your Grooming set in PDF format for free! Find your manual K2E01003 - Vevor and take your electronic device back in hand. On this page are published all the documents necessary for the use of your device. K2E01003 by Vevor.
USER MANUAL K2E01003 Vevor
DOG GROOMING TUB
MODEL: K2E01003 / K2E01004
MODEL: K2E01003 / K2E01004
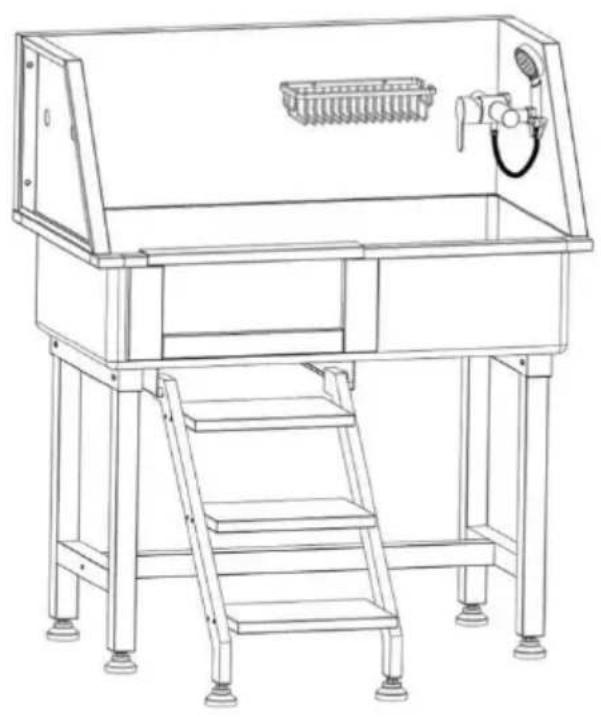
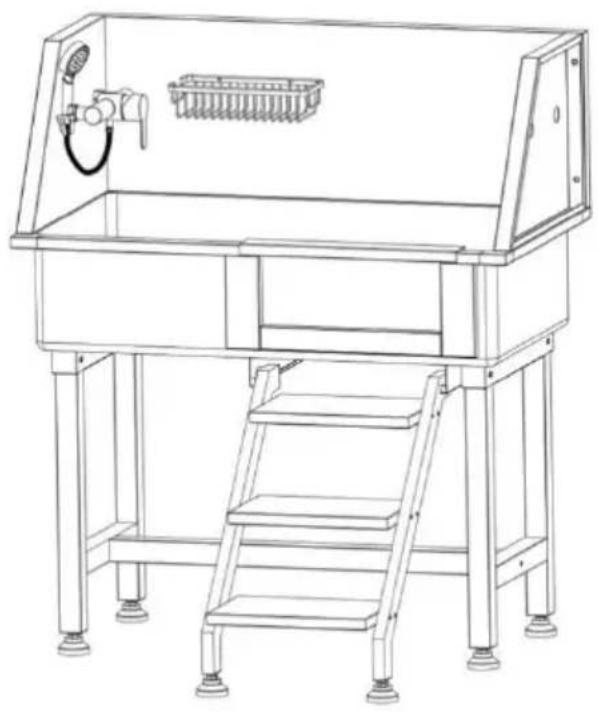
This is the original instruction. Please read all manual instructions carefully before operating. VEVOR reserves a clear interpretation of the user manual. The appearance of the product shall be subject to the product you received. Please forgive us that we won't inform you again if there are any technology or software updates on our product.
IMPORTANT SAFEGUARDS

WARNING: Read and understand this entire manual before operating or servicing this product. Failure to follow these warnings and instructions can cause personal injury or damage to valuable property.
- Avoid children using grooming tub. And this product is not a toy. Do not allow children to play.
- Keep away from sharp points, blades and other items.
- Please wipe the cylinder dry with a cloth after use to extend the life. ● Assembly precautions
- Assemble only according to these instructions. Improper assembly can create hazards.
- Wear ANSI-approved safety goggles and heavy-duty work gloves during assembly.
- Keep assembly area clean and well-lit.
- Keep bystanders out of the area during assembly.
- Do not assemble when tired or when under the influence of alcohol, drugs, or medication.
- Product capabilities apply to properly and completely assembled products only.
- For additional information regarding the parts listed in the following pages, please refer to the Assembly Diagram of this manual. Unwrap and separate all parts in a clean work area. Please keep small spare parts out of children's reach.
SAVE THESE INSTRUCTIONS
Warning! Products are only used for pet bathing.
PREPARATIONS BEFORE INSTALLATION
- Recommended Tools:
Phillips screwdriver, M4 wrench, Spirit level.
- Necessary safety equipment:
Gloves, goggles.
Caution: Before installing the product, wear gloves and goggles to avoid possible physical damage during installation.
INSTRUCTIONS
Thank you very much for choosing this pet bathtub. Please read all instructions before using it. The information will help you achieve the best possible results.
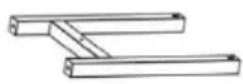
Parts List:
 |  |  |  |
| 2 pcs | 1 pc | 1 pc | 1 pc |
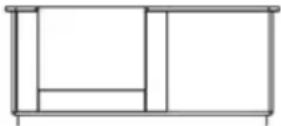
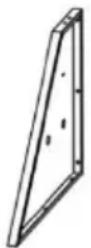
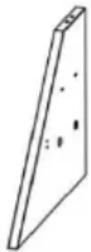
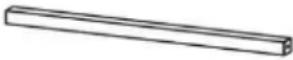
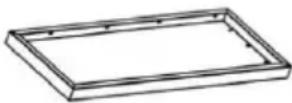
| 1: H rack | 2: Tub | 3: Right side panel | 4: Left side panel |
 |  |  |  |
| 1 pc | 1 pc | 1 pc | 1 pc |
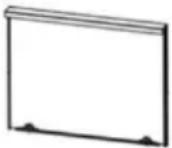
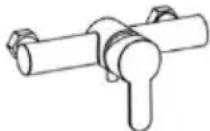
| 5: Door (Already Installed to the tub) | 6: Horizontal tube | 7: Back panel | 8: Faucet switch |
| 1 pc | 1 pc | 1 pc | 2 pcs (600mm) |
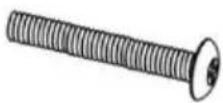
| 9: Storage basket | 10: Shower head | 11: Shower hos | 12: Inlet pipe |
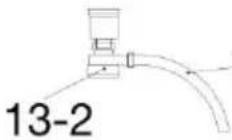 13-1 13-1 | 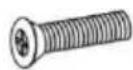 |  | 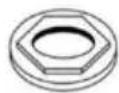 |
| 1 pc | 4 pcs(M4*16mm) | 4 pcs (M4) | 2 pcs |
| 13: Strainer13-1: Drain Pipe13-2: Transparent Cover | 14: Screw | 15: Hex flange nut | 16: Nut |
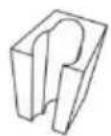 |  | 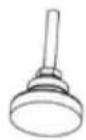 |  |
| 1 pc | 1 pc | 6 pcs | 2 pcs |
| 17: Shower bracket | 18: Comb | 19: Adjustable foot | 20: Play ball |
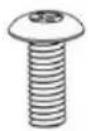 | 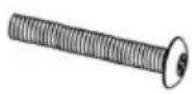 | 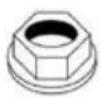 |  |
| 14 pcs(M6*16mm) | 12 pcs(M6*35mm) | 4 pcs (M8) | 6 pcs |
| 21: Screw | 22: Screw | 23: Flange nut | 24: Washer |
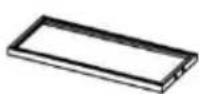 |  | 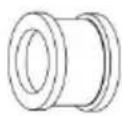 | 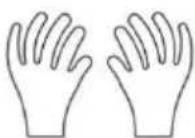 |
| 3 pcs | 2 pcs | 1 pc | 1 pair |
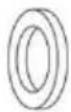
| 25: Stair board | 26: Nut | 27: Sealing tape | 28: Plastic Gloves |
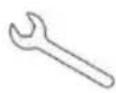 | 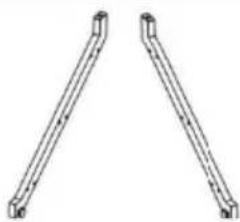 |  |  |
| 1 pc | 2 pcs | 2 pcs | 6 pcs (M8*50mm) |
| 29: Wrench | 30-1: Left Ladder Rod30-2:Right Ladder Rod | 31: Washer | 32: Screw |
 |  |  |  |
| 1 pair | 1 pc | 1 pc | 2 pcs |
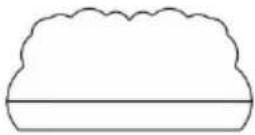
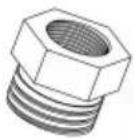
| 33: Nylon Glove | 34: Wiper | 35: Scouring pad | 36: Adapter (G1/2 to NPT9/16) |
Installation steps
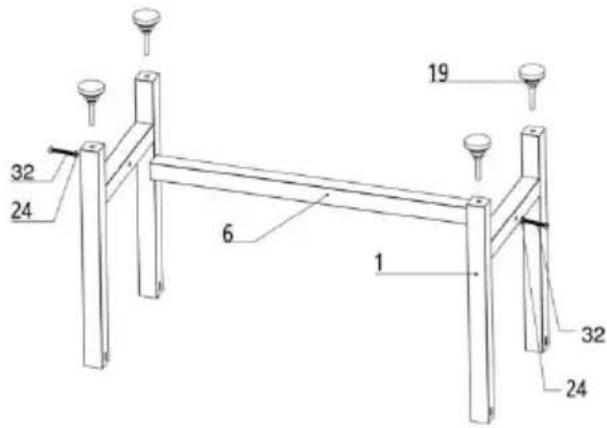 | 1 Install the adjustable feet to H rack, and fix the horizontal to the H rackCaution: Ensure that the depth adjustable feet is not less than 12mm and try to make the four adjustable feet screw in the sand depth. Please tighten the spare during the installation and adjust later. |
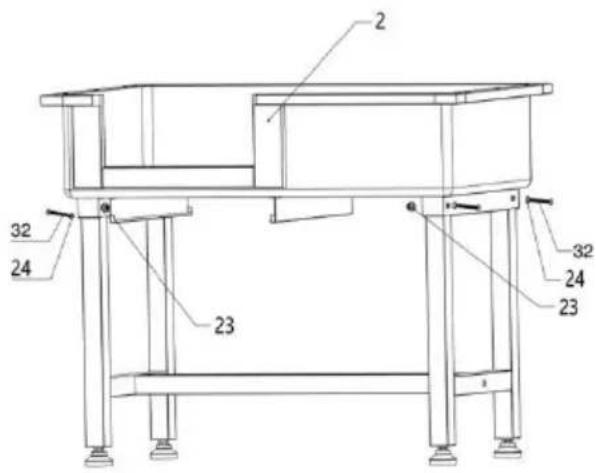 | 2 Flip the bottom bracket and u screw, washer, and flange nut to the bottom bracket and tub |
Left Door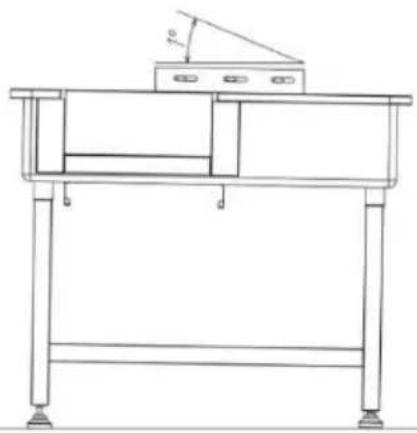 | Right Door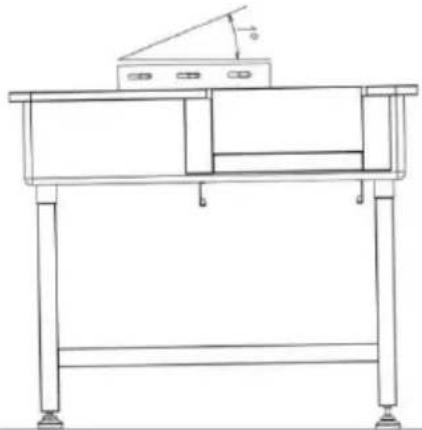 |
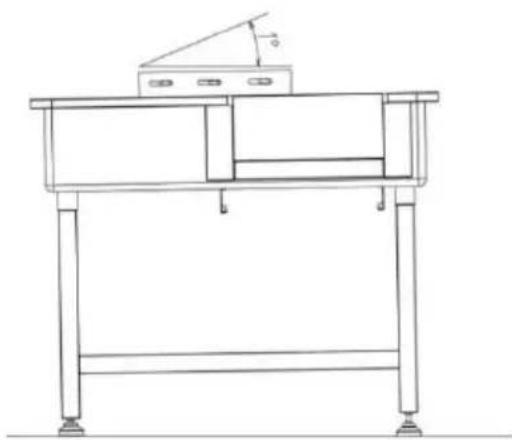
| 3 Adjust the height of the feet to make sure the height of wa side is 1-2 degrees lower than the other side (use a spirit lev | |
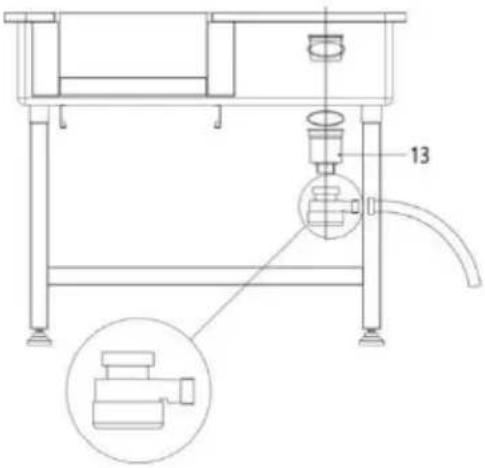 | 4 Install the strainer, ensure the sealing ring is free of dislock and wrinkles.Caution: When installing, please pay attention to whether the sealing ring is placed correctly, avoid leakage due to incorrect seal installation. And check whether to transparent cover of the drain is tightened. | |
 | 5 Use screw to fix the left and sideboard, then use screw to fix back panel, last to use screw to sideboard and back board | |
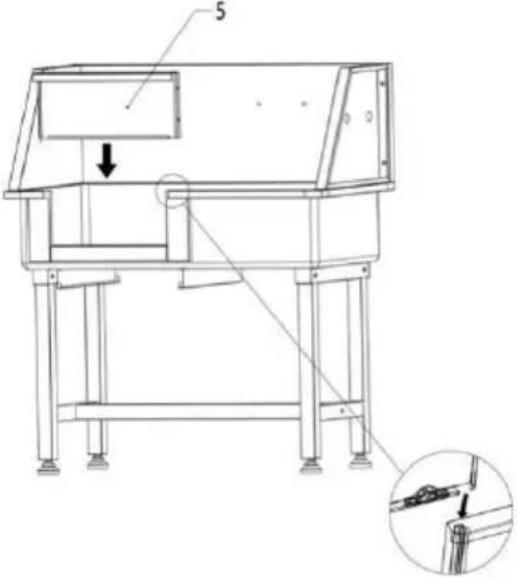 | 6 Install door and water filter | |
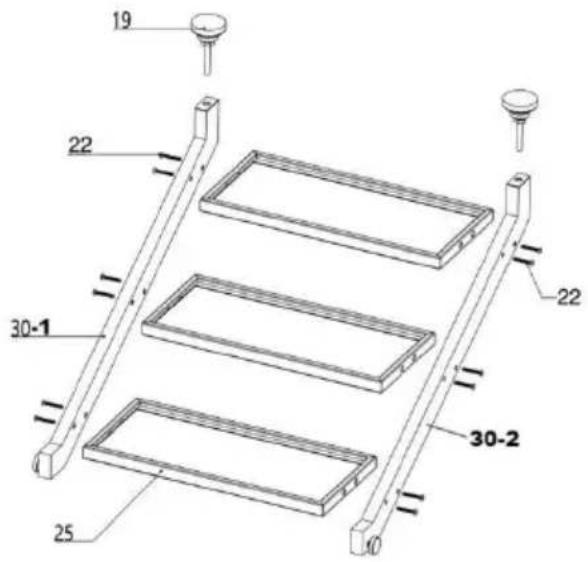 | 7 Use screw to fix the stair and ladder rod, then install the adjustable feet on the bottom of ladder rod.Caution: Ensure that the depth adjustable feet is not less than 12mm and try to make the two adjustable feet screw in the sand depth. and tighten the spare nu during the installation. | |
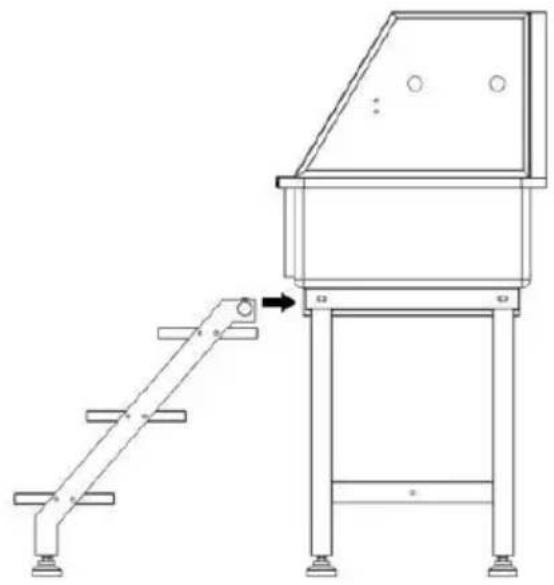 | 8 Install the stairs into the ch rails | |
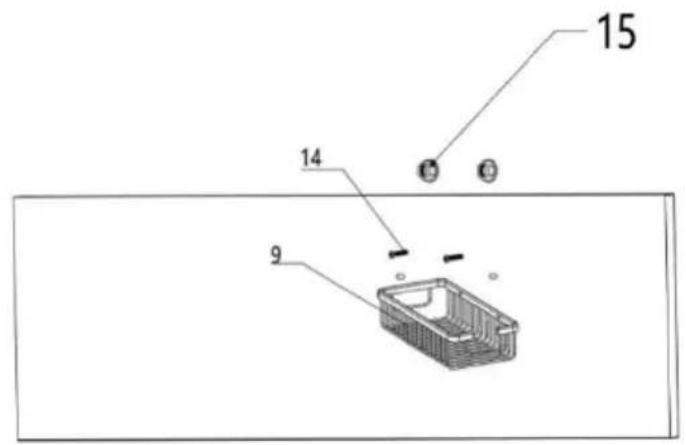 | 9 Use screw and hex fl nut to install the storage basket to the back panel | |
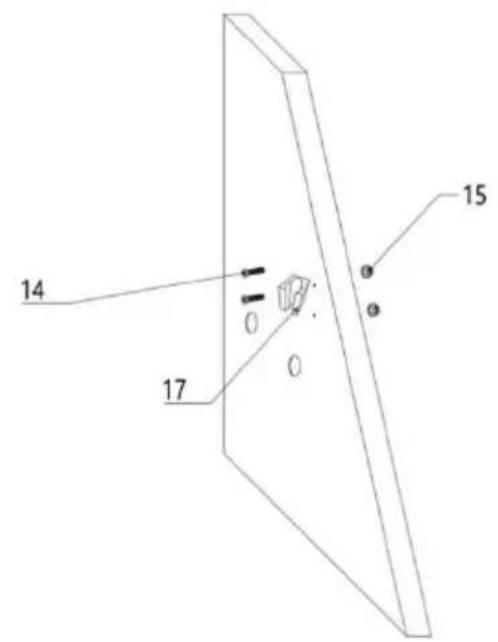
⑩ Use screw and hex flange nut to install the shower bracket to the right-side panel.
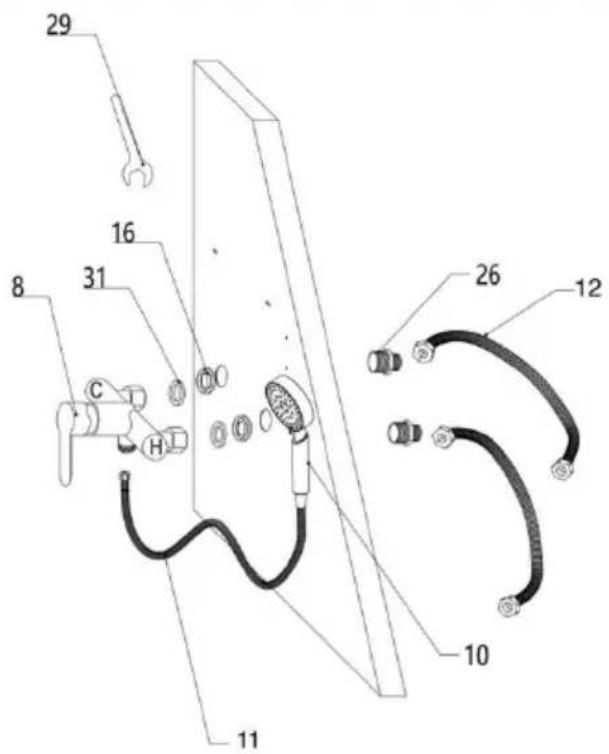
⑪ Install hot and cold shower switch and water inlet.
Caution: Before you do this, make sure that your water source is on the left or right side of the bathtub, and select the direction of installation of the tap switch.
Step 1: Pass the straight all-copper connector through the side panel (1/2" end facing outside), screw the nut into the other end of the connector, and use a wrench to screw it down.
Step 2: Align the faucet switch with the connector, then tighten the nuts on the switch, and note that the sealing ring inside the ring is intact.
Step 3: Connect the hose at the water inlet end and the shower hose at the faucet outlet. Also, when tightening the nut, pay attention that the sealing ring inside the nut is intact.
Step 4: The other end of the hose is connected to the water source. Pay
attention to the hot and cold water marks on the faucet switch. The mark represents hot water; connect the hose on that side to the hot source, while the other side is connected to the cold. Also pay attention to whether the seal ring inside the hose end nut is intact.
Caution: The inlet hose is only 600mm long. If you need a longer one, please purchase it separately (Caliber: 20mm).
Caution: Optional use of sealing tape when installing the nut. It makes the installation more sealed and helps prevent water leakage at the joint.
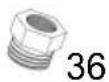
Caution: Please determine whether to install an adapter according to the actual water pipe specifications.
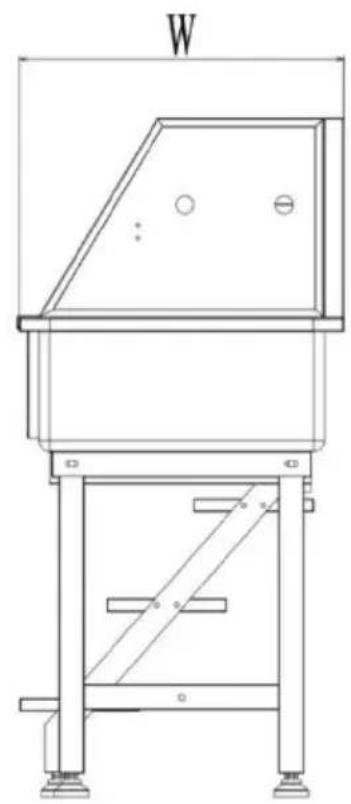
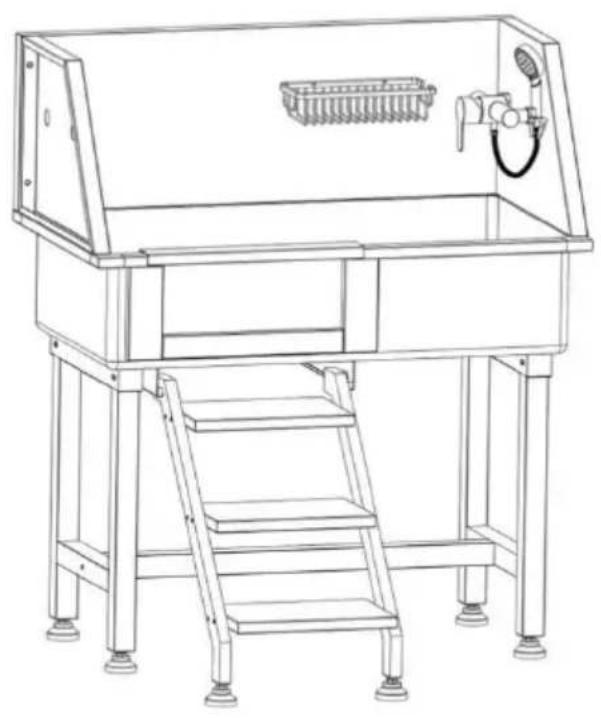
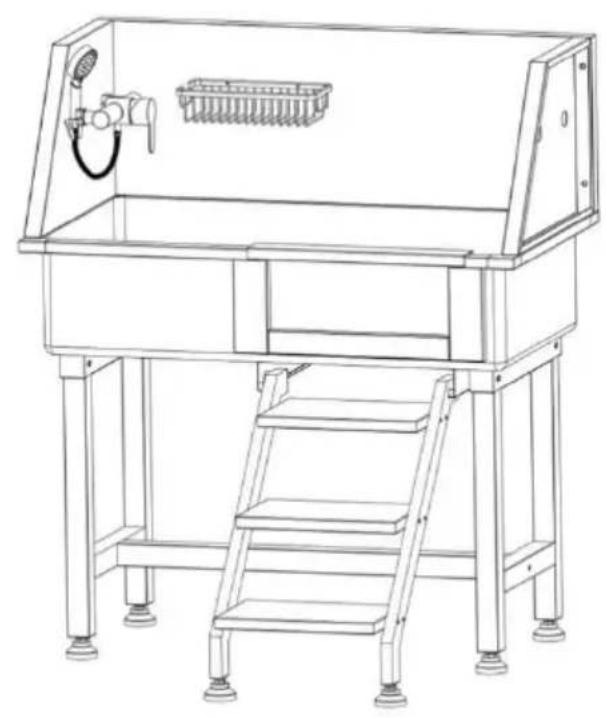
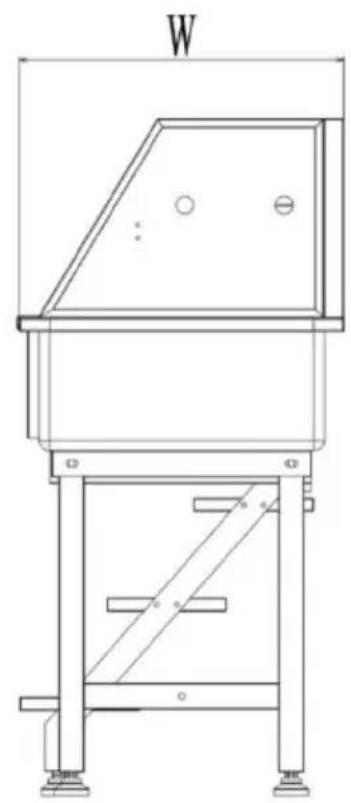
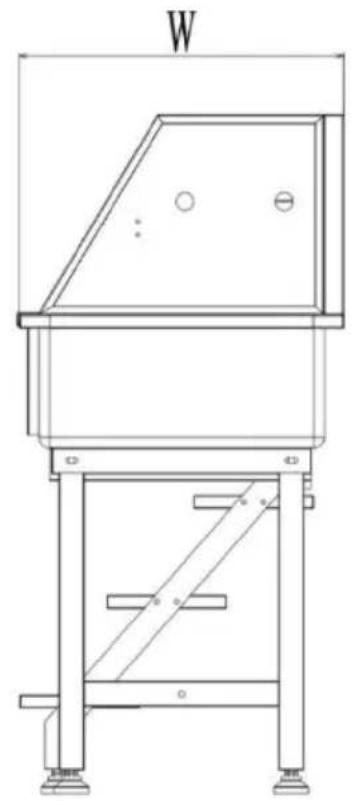
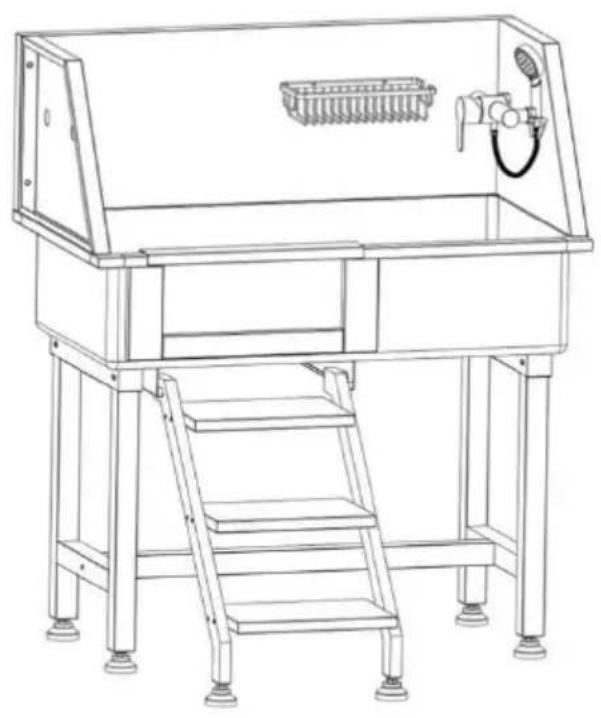
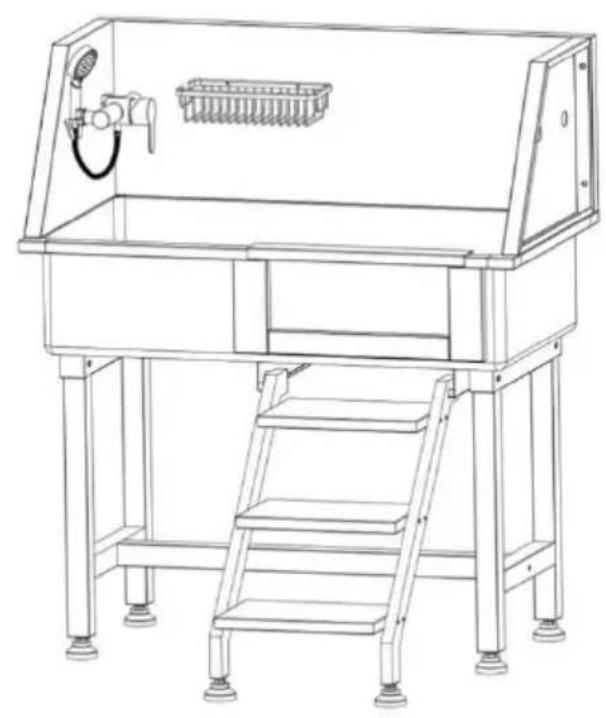
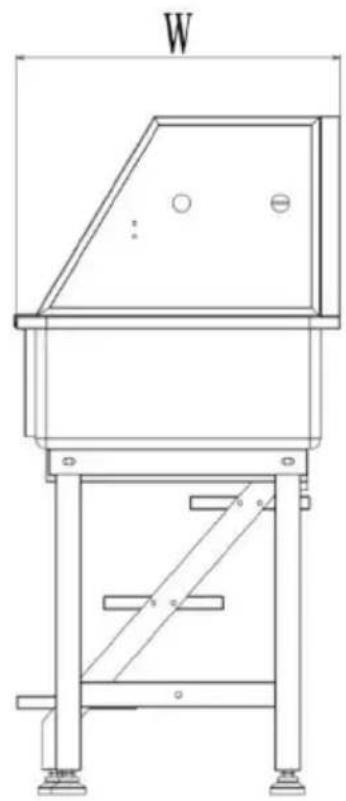
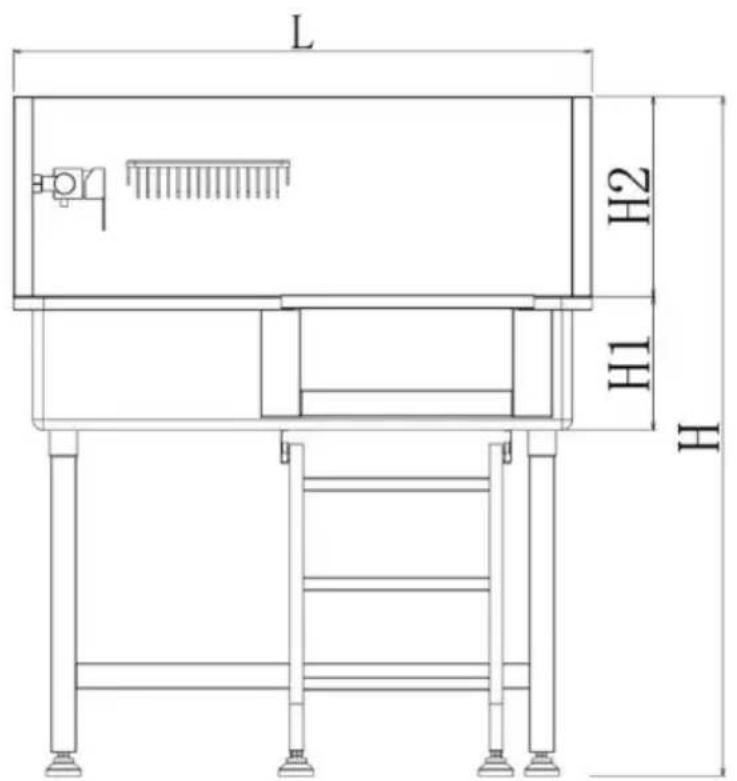
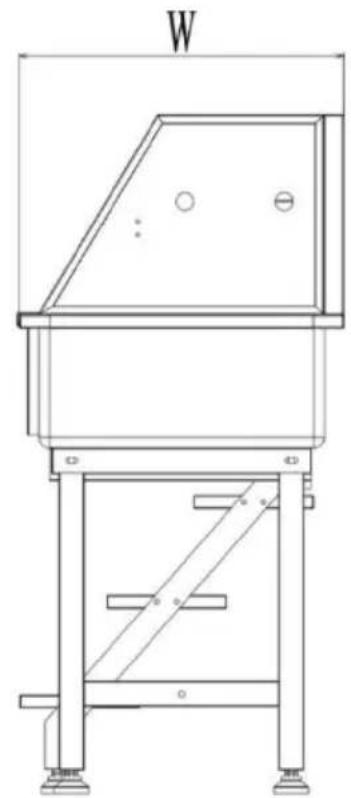
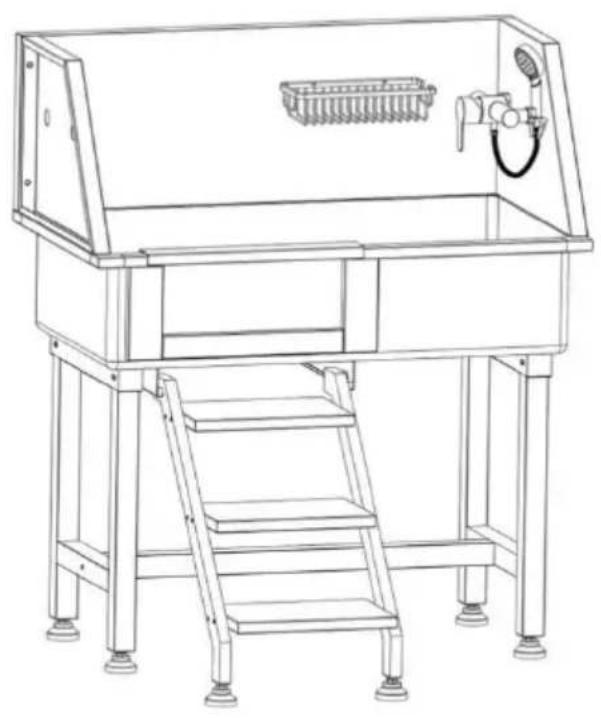
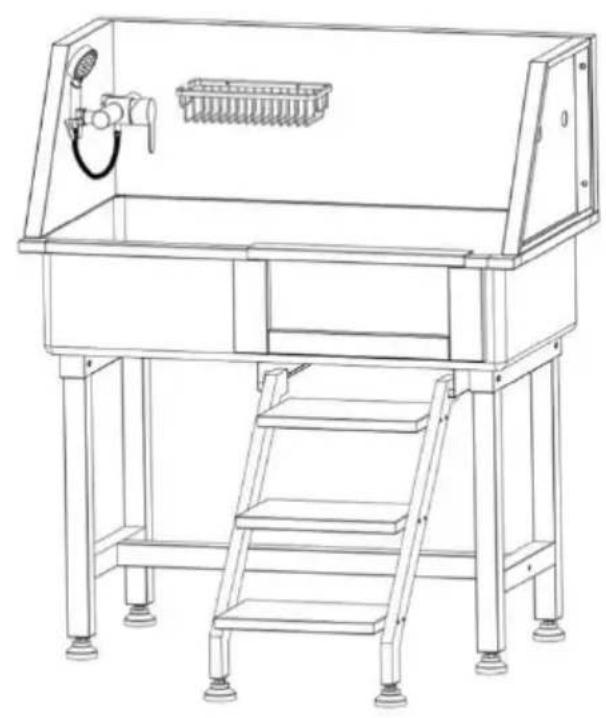
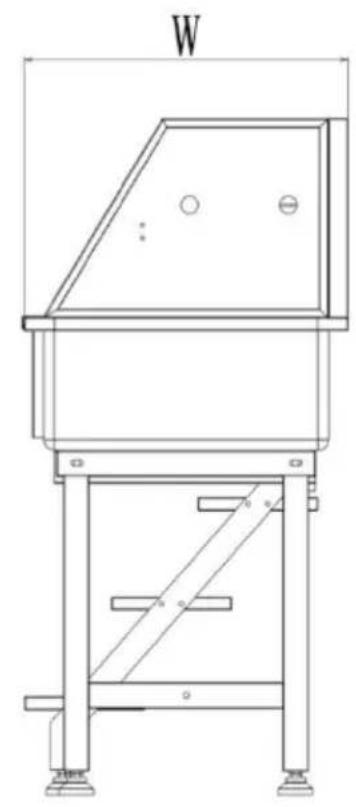
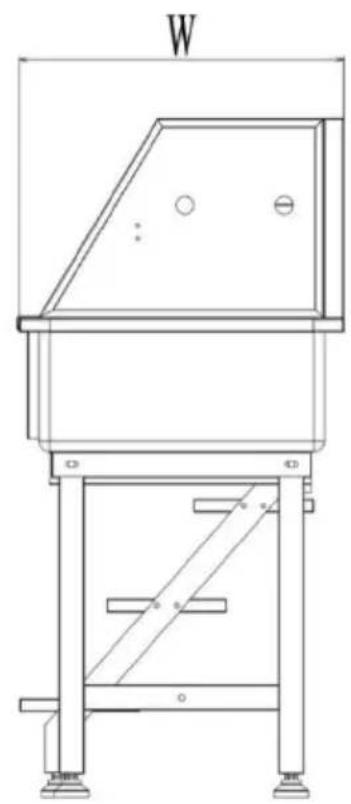
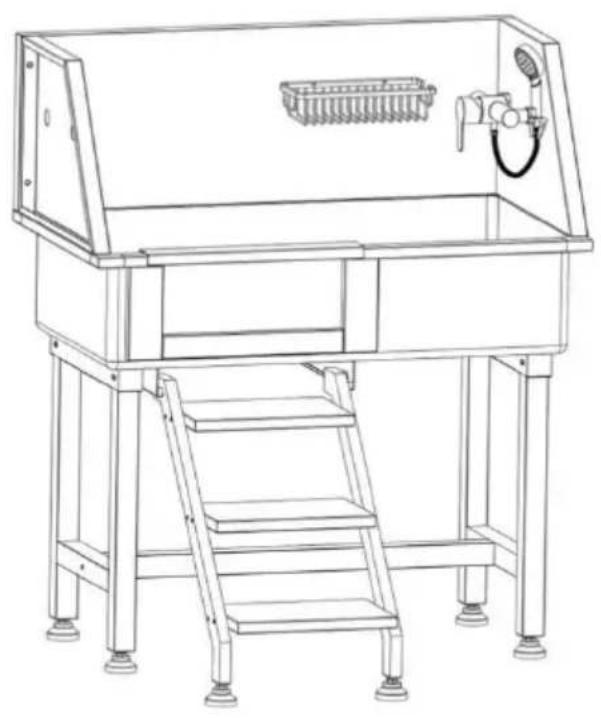
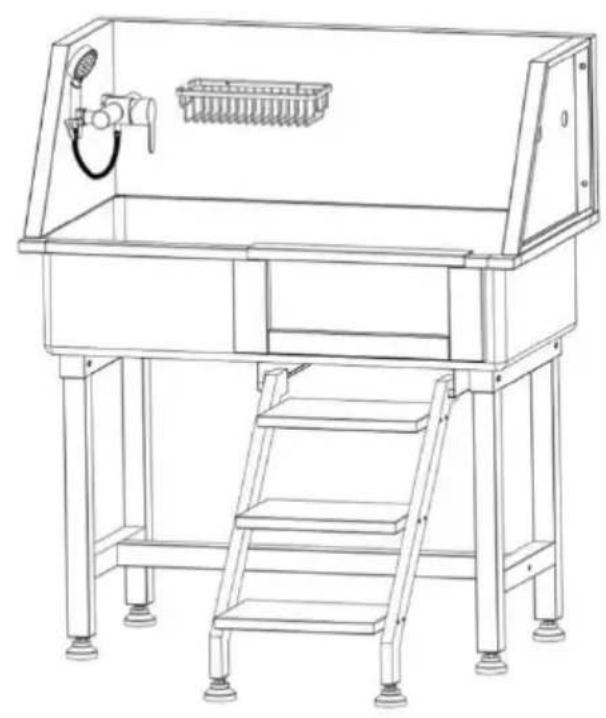
DIMENSIONS AND PARAMETERS
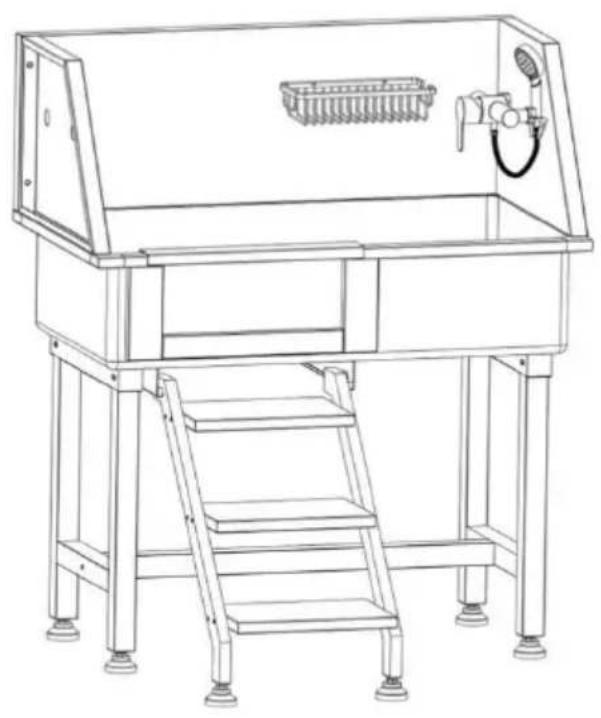
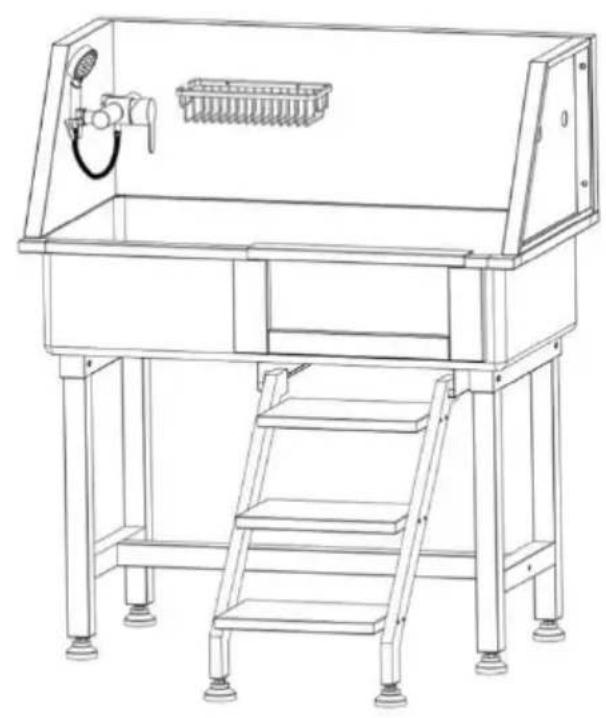
Left Door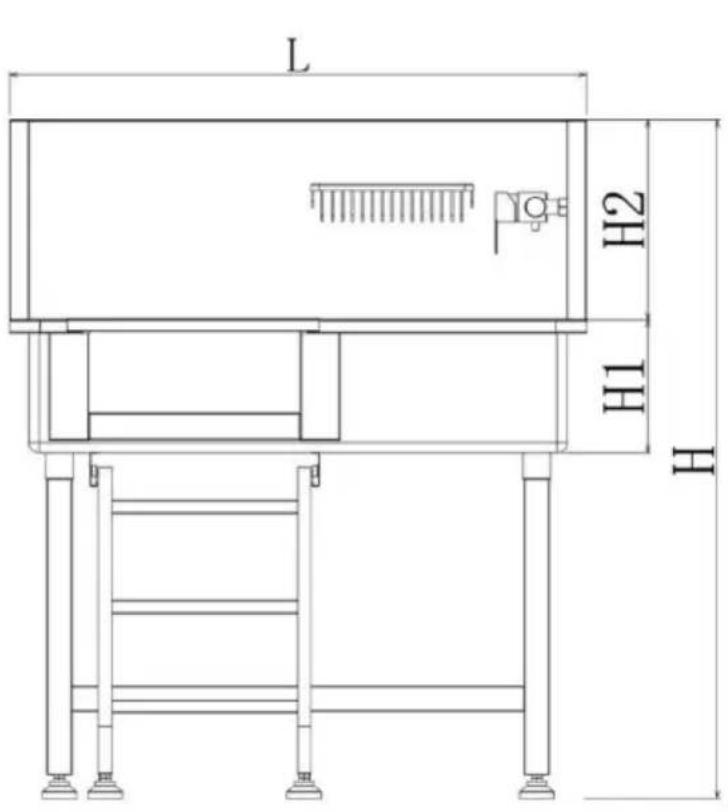
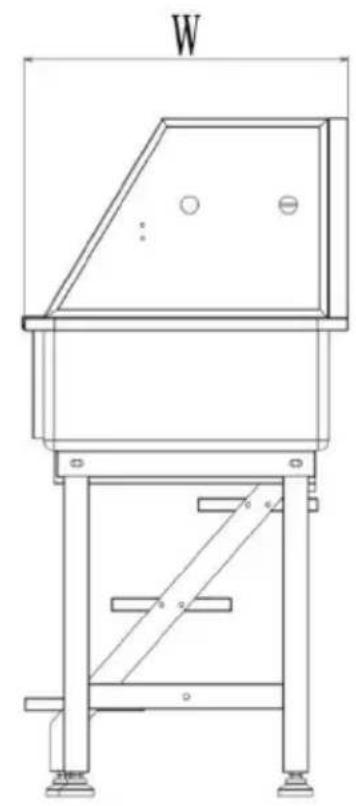
Right Door
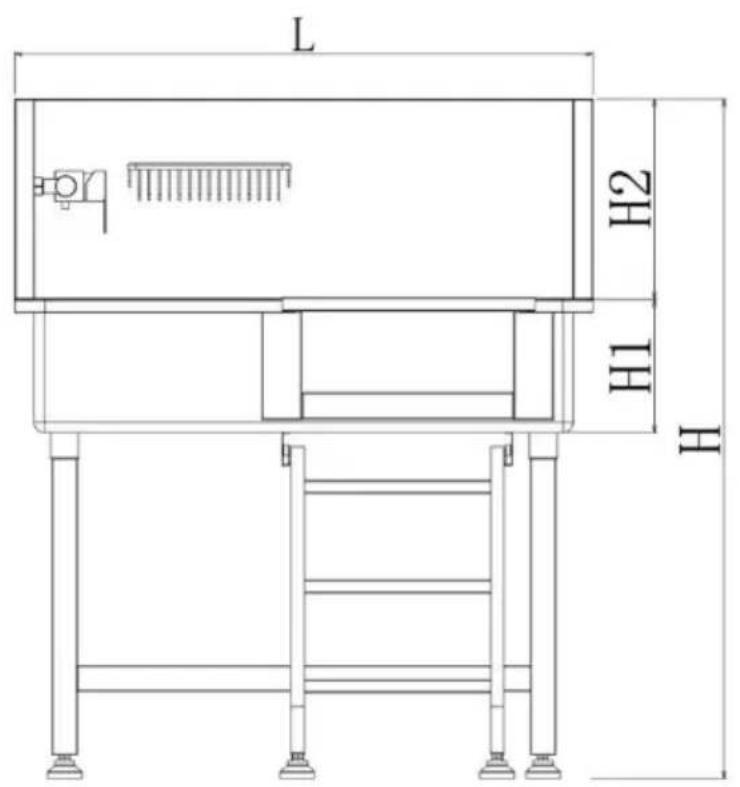
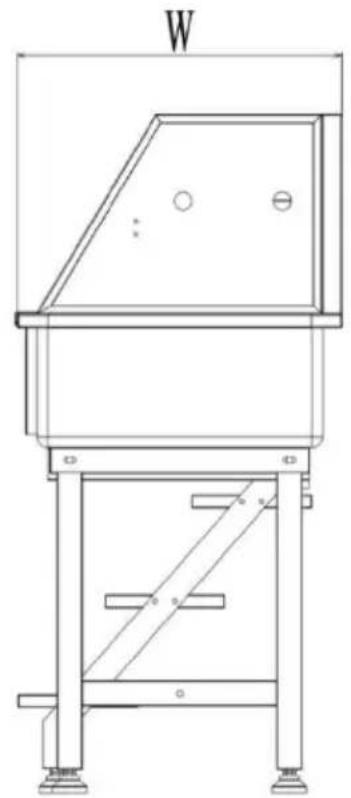
| Model# | L(mm) | H(mm) | H1(mm) | H2(mm) | W(mm) | N.W. (kg) |
| K2E01003 | 870 | 1060 | 200 | 300 | 488 | 21.4 |
| K2E01004 | 870 | 1060 | 200 | 300 | 488 | 21.4 |
| Model# | Volume (CBM) | Loading Capacity (lbs) | Recommended pet (in) |
| K2E01003 | 0.21 | 220 | L×W×H:33×16×18 |
| K2E01004 | 0.21 | 220 | L×W×H:33×16×18 |
OPERATION
- Make sure the water pipe connection is complete and the water supply is normal. (Connect the hot and cold water pipes according to the hot and cold water signs on the faucet switch.)
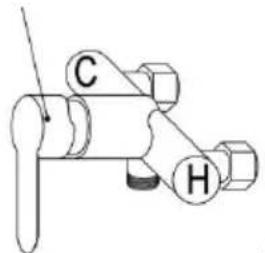
"C" indicates cold water; "H" indicates hot water.
- Pull out the stairs and open the door. Let the pet walk into the bathtub itself, or hold the pet and place it inside the tub yourself, then close the door.
- Start bathing.
- After the bath, let the water out of the tub and take the animal out.
- Clean the tub with a cloth.
MAINTENANCE
- Between uses, the tub should be cleaned with a soft cloth or sponge using a mild cleaning agent.
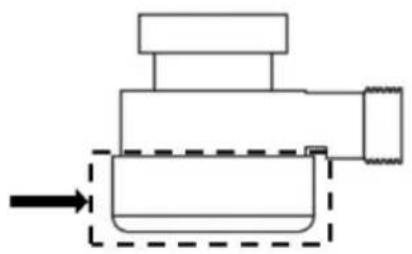
- Pay attention to regularly clean the hair from the drain to avoid clogging.
- Please clean the transparent cover of the drain regularly. After disassembling it like a nut, it can be easily cleaned. Be careful not to lose the seal ring when installing it back.
CARE INSTRUCTIONS
Do not place the bathtub on an uneven surface.
Do not drop or mistreat the bathtub.
Do not overload the scale. This will permanently damage it!
COMMON MALFUNCTIONS
If the faucet leaks, please check whether the waterproof rubber plug is installed. If it is damaged, it needs to be replaced in time.
Manufacturer: Shanghai Muxin Wood Industry Co., Ltd.
Address: Room 1602A-1609, No. 11, Lane 803, Shuangcheng Road, Baoshan District, Shanghai 200000, CN.
Imported to AUS: SIHAO PTY LTD. 1 ROKEVA STREET, EASTWOOD NSW 2122, Australia
Imported to USA: Sanven Technology Ltd. Suite 250, 9166 Anaheim Place, Rancho Cucamonga, CA 91730
| UK | REP |
YH CONSULTING LIMITED. C/O YH Consulting
Limited Office 147, Centurion House, London
Road, Staines-upon-Thames, Surrey, TW18 4AX
| EC | REP |
E-CrossStu GmbH
Mainzer Landstr. 69,
60329 Frankfurt am Main.

VEVOR
Affordable. Reliable. Home Improvement.
DOG GROOMING BATHTUB
MODEL: K 2 E010 03 / K 2 E010 04
MODEL: K 2 E010 03 / K 2 E010 04
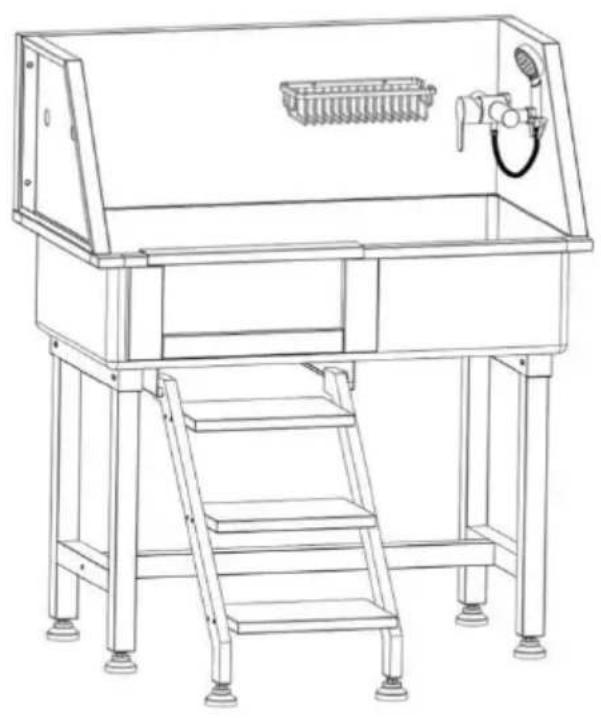
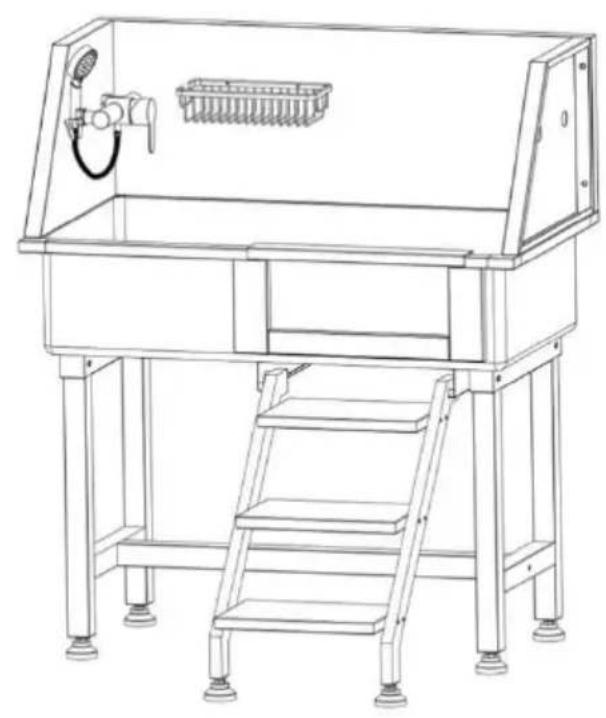
PREPARATIONS BEFORE INSTALLATION
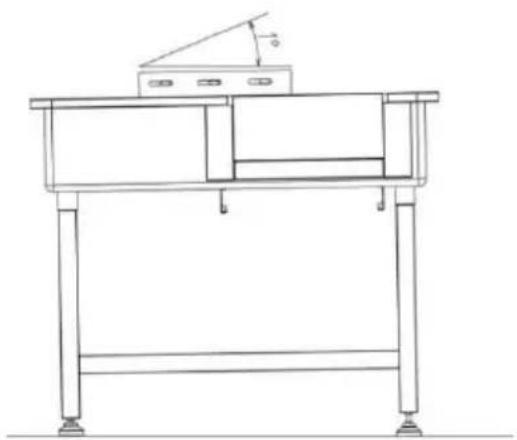

DIMENSIONS AND PARAMETERS
Left door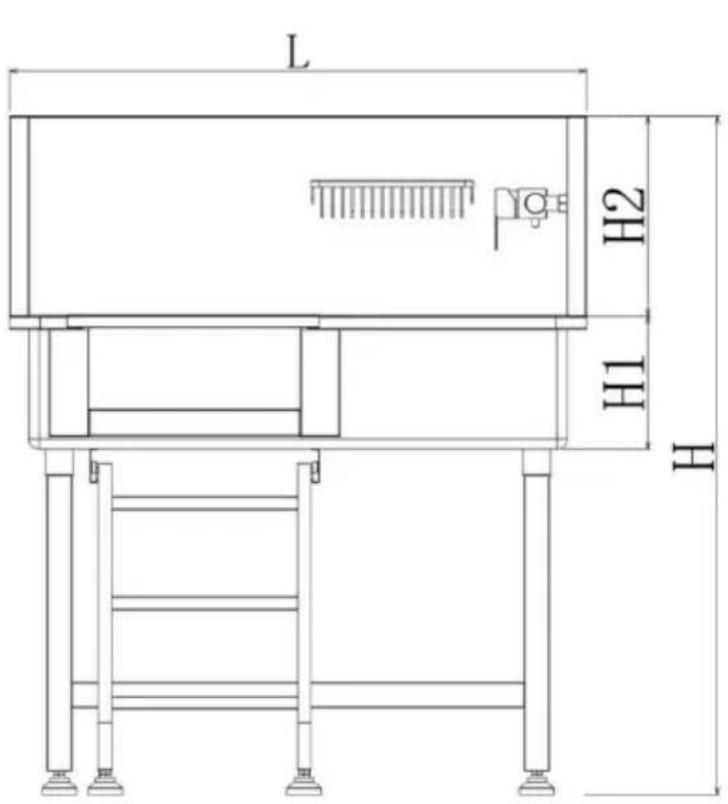
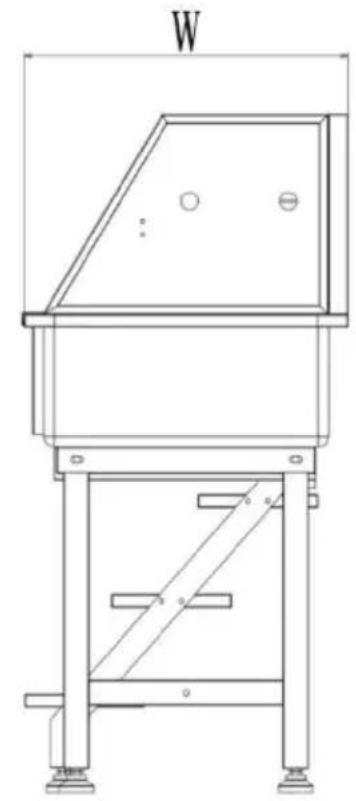
Right door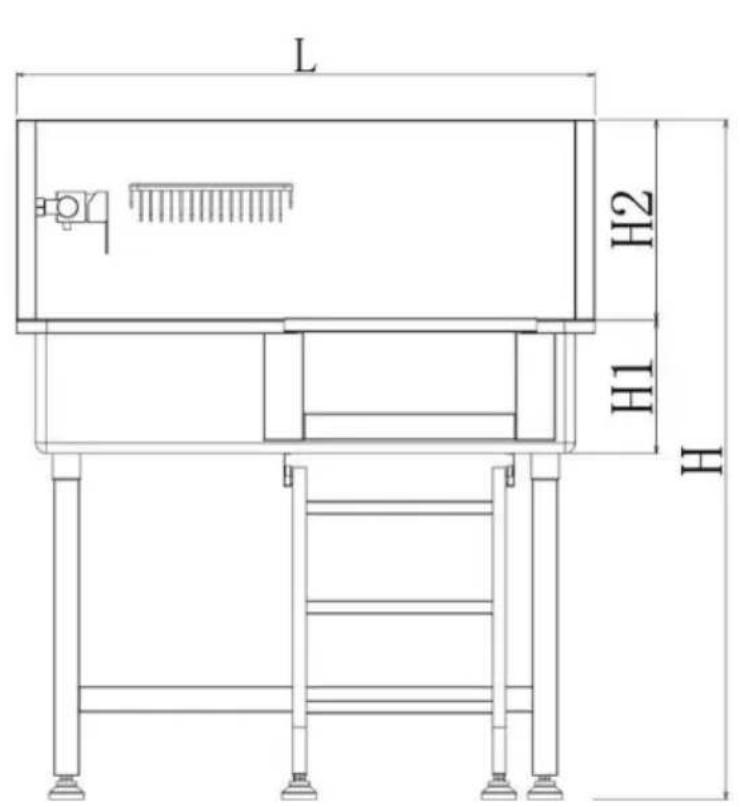
| Modèle# | L(mm) | Hmm) | H 1 ( mm) | H 2 (mm) | L (mm) | Poids net (kg) |
| K2E01003 | 870 | 1060 | 2 00 | 3 00 | 488 | 21.4 |
| K2E01004 | 870 | 1060 | 2 00 | 3 00 | 488 | 21.4 |
CARE INSTRUCTIONS
Lieu, Rancho Cucamonga, CA 91730
| UK | REP |
YH CONSULTING LIMITED. C/O YH Consulting
Limited Office 147, Centurion House, London
Road, Staines-upon-Thames, Surrey, TW18 4AX
| EC | REP |
E-CrossStu GmbH
Mainzer Landstr.69,
60329 Frankfurt am Main.

VEVOR
HUNDEPFLEGEWANNE
MODEL: K 2 E010 03 / K 2 E010 04
MODEL: K 2 E010 03 / K 2 E010 04
DIMENSIONS AND PARAMETERS
Left door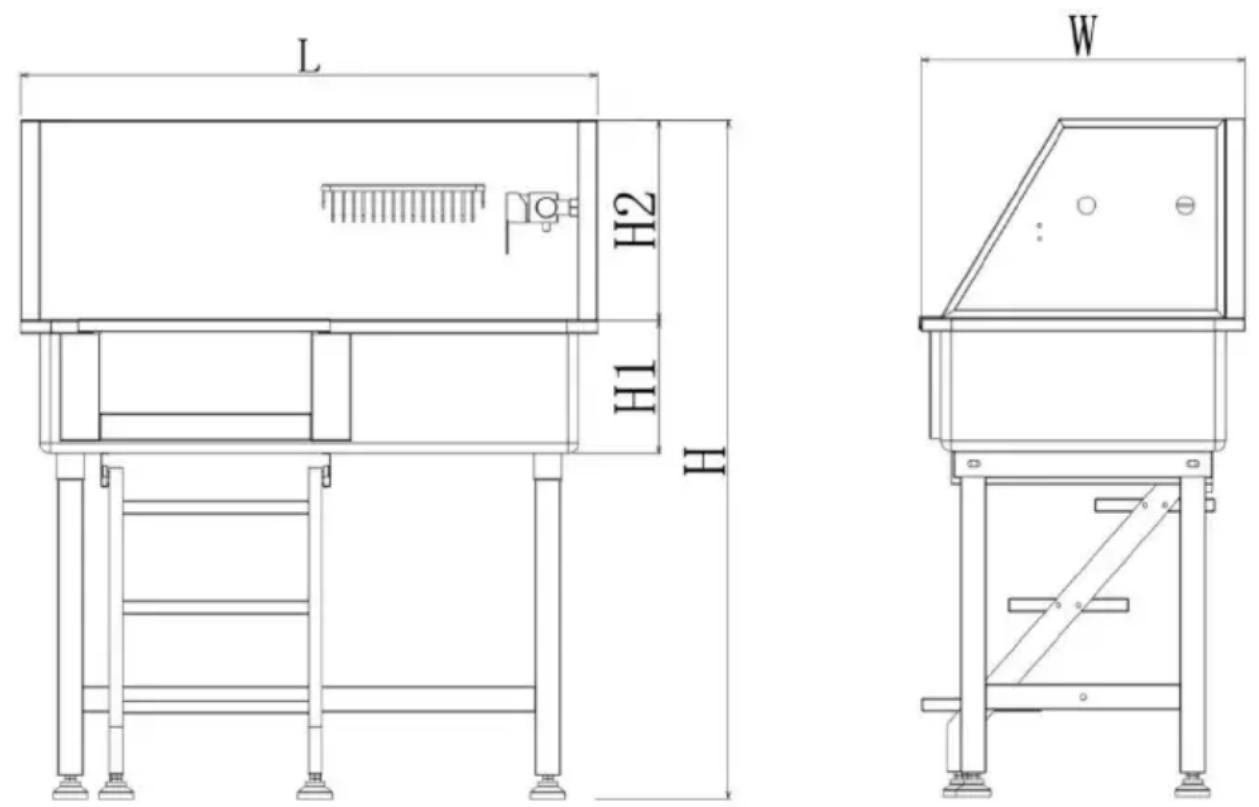
Right door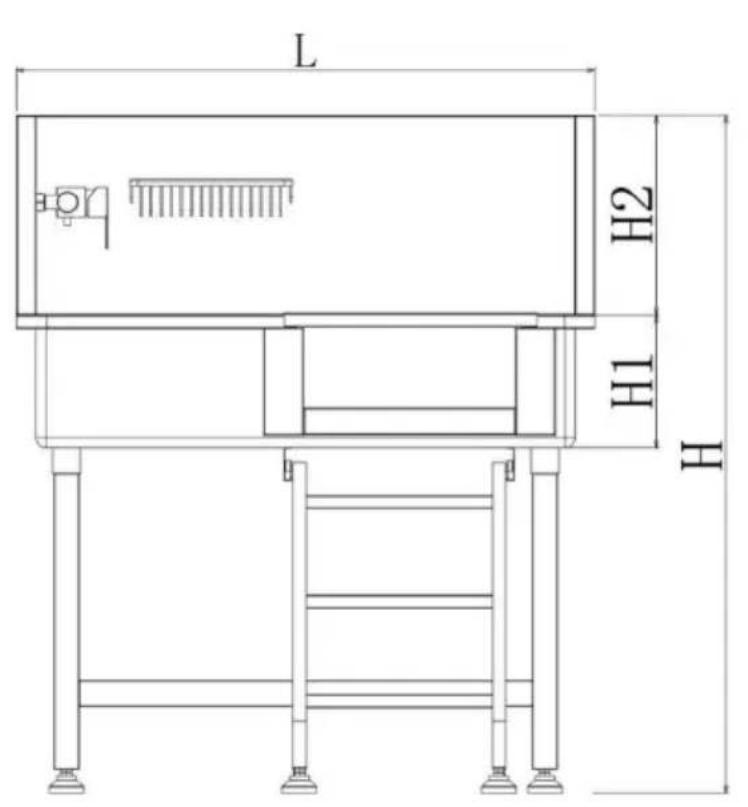
| Modell# | L(mm) | Hmm) | H 1(mm) | H 2(mm) | B (mm) | Nettogewicht(kg) |
| K2E01003 | 870 | 1060 | 2 00 | 3 00 | 488 | 21.4 |
| K2E01004 | 870 | 1060 | 2 00 | 3 00 | 488 | 21.4 |
| Modell# | Volumen (CBM) | Ladekapazität ( Pfund ) | Empfohlenes Haustier (In) |
| K 2E01003 | 0,21 | 220 | L×B×H:33×16×18 |
| K 2E01004 | 0,21 | 220 | L×B×H:33×16×18 |
OPERATION
CARE INSTRUCTIONS
YH CONSULTING LIMITED. C/O YH Consulting
Limited Office 147, Centurion House, London Road, Staines-upon-Thames, Surrey, TW18 4AX
| EC | REP |
E-CrossStu GmbH
Mainzer Landstr.69,
60329 Frankfurt am Main.

VEVOR
Dog grooming bathtub
MODEL: K 2 E010 03 / K 2 E010 04
MODEL: K 2 E010 03 / K 2 E010 04
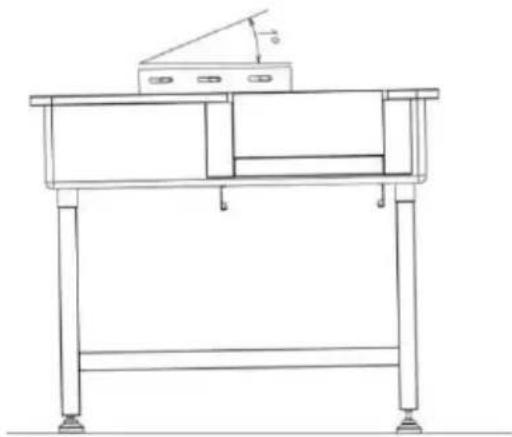
DIMENSIONS AND PARAMETERS
Left door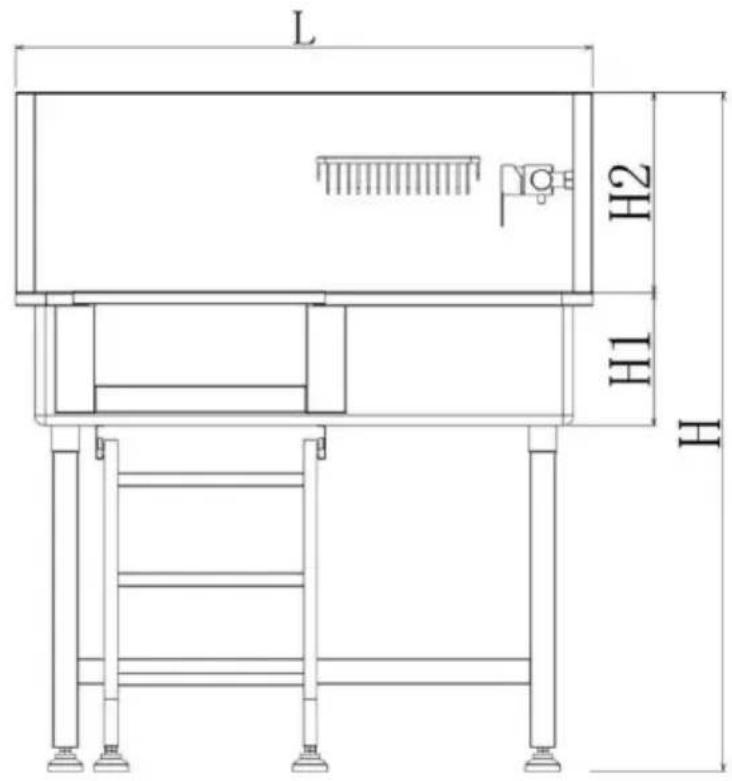
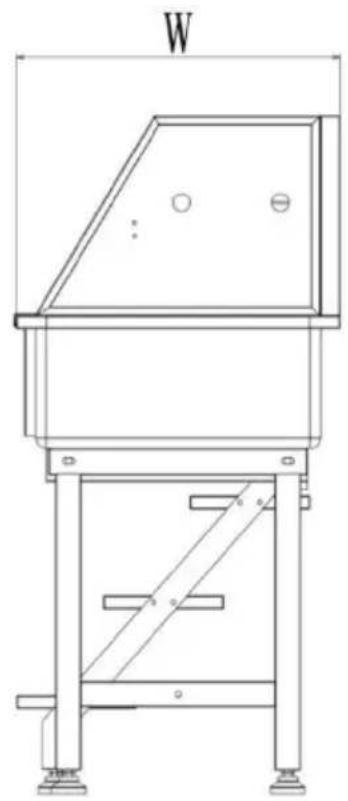
Right door
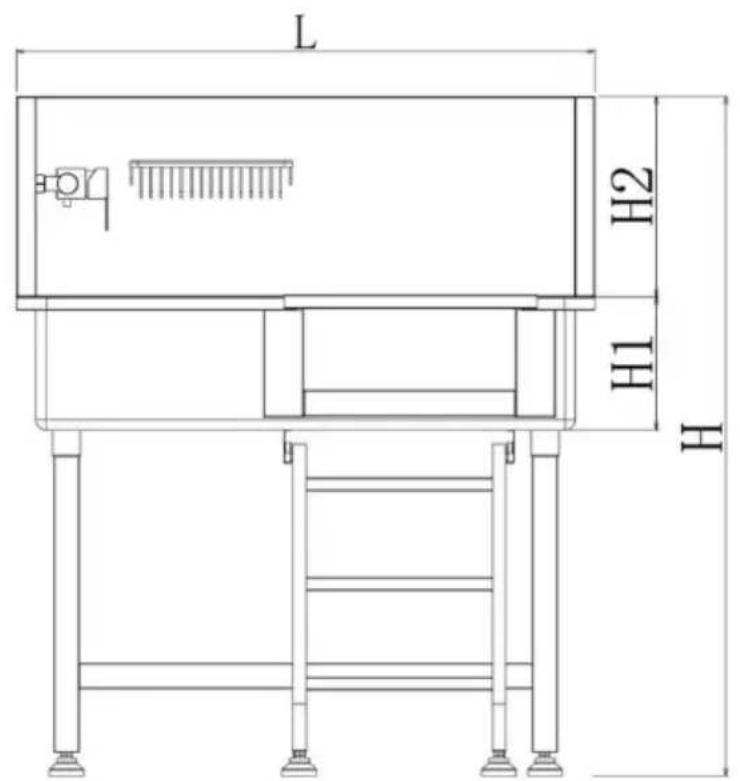
CARE INSTRUCTIONS
YH CONSULTING LIMITED. C/O YH Consulting Limited Office 147, Centurion House, London Road, Staines-upon-Thames, Surrey, TW18 4AX
| EC | REP |
Dog grooming bathtub
MODEL: K 2 E010 03 / K2E01004
MODEL: K 2 E010 03 / K2E01004
DIMENSIONS AND PARAMETERS
Left door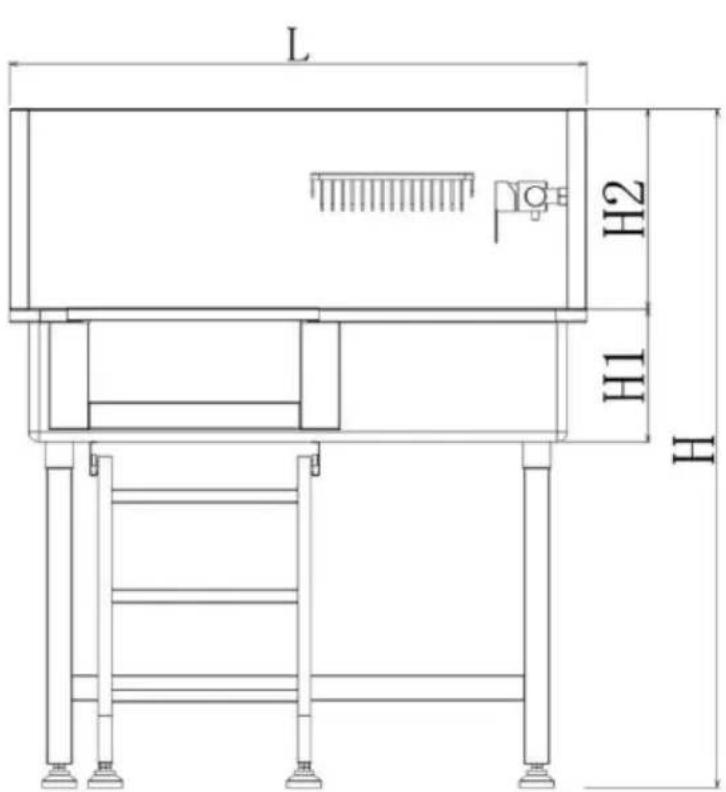
Right door
| Modelo# | Longitud (mm) | Mmm) | Alto 1 ( mm) | Alto 2 (mm) | Ancho (mm) | NO (kg) |
| K2E01003 | 870 | 1060 | 2 00 | 3 00 | 488 | 21.4 |
| K2E01004 | 870 | 1060 | 2 00 | 3 00 | 488 | 21.4 |
| Modelo# | Volumen (CBM) | Capacidad de carga (libras) | Mascota recomendada (en) |
| K 2E01003 | 0,21 | 220 | Largo × Ancho × Alto: 33 × 16 × |
| K 2E01004 | 0,21 | 220 | Largo × Ancho × Alto: 33 × 16 × |
OPERATION
CARE INSTRUCTIONS
YH CONSULTING LIMITED. C/O YH Consulting
Limited Office 147, Centurion House, London Road, Staines-upon-Thames, Surrey, TW18 4AX
| EC | REP |
E-CrossStu GmbH
Mainzer Landstr.69,
60329 Frankfurt am Main.

VEVOR
Affordable. Reliable. Home Improvement.
DOG GROOMING WAND
MODEL: K 2 E010 03 / K 2 E010 04
MODEL: K 2 E010 03 / K 2 E010 04

DIMENSIONS AND PARAMETERS
Left door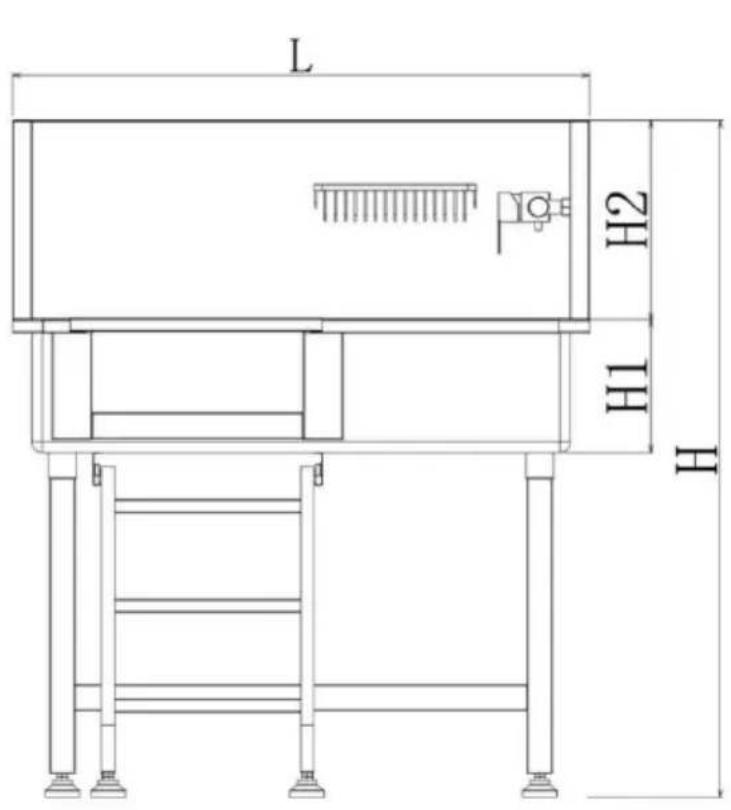
Right door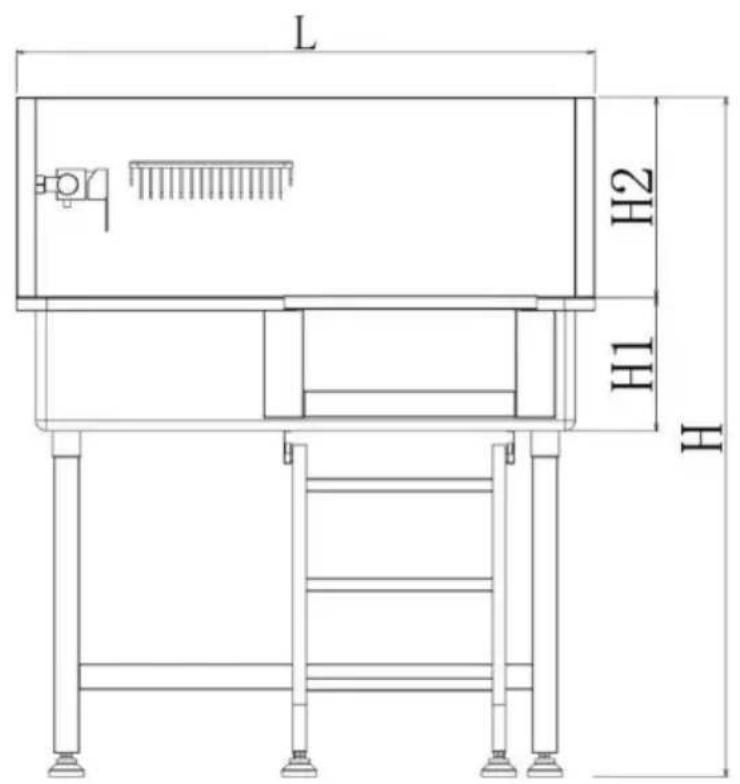
CARE INSTRUCTIONS
YH CONSULTING LIMITED. C/O YH Consulting
Limited Office 147, Centurion House, London
Road, Staines-upon-Thames, Surrey, TW18 4AX
| EC | REP |
E-CrossStu GmbH
Mainzer Landstr.69,
60329 Frankfurt am Main.

VEVOR
Affordable. Reliable. Home Improvement.
HONDENTRIMBAK
MODEL: K 2 E010 03 / K 2 E010 04
MODEL: K 2 E010 03 / K 2 E010 04
DIMENSIONS AND PARAMETERS
Left door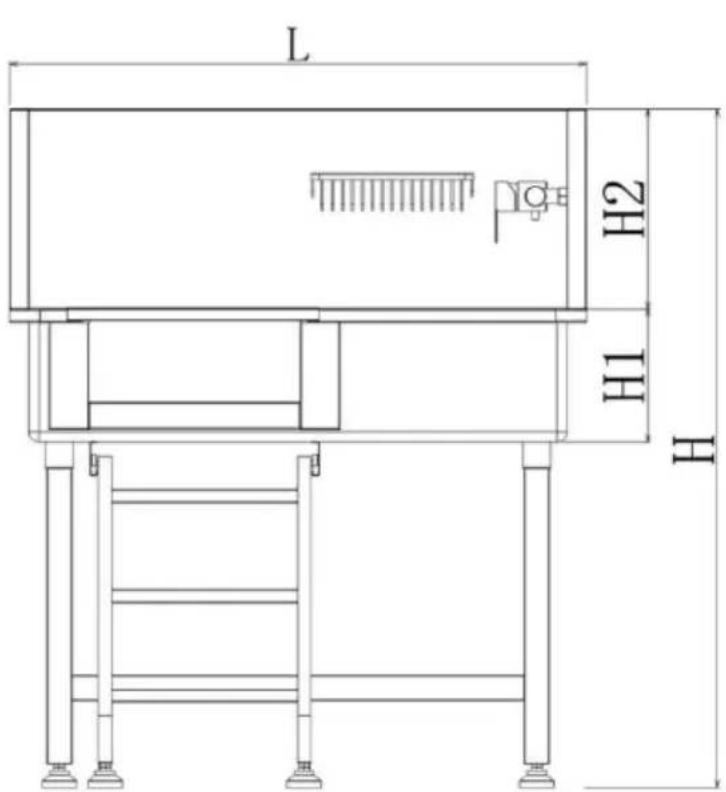
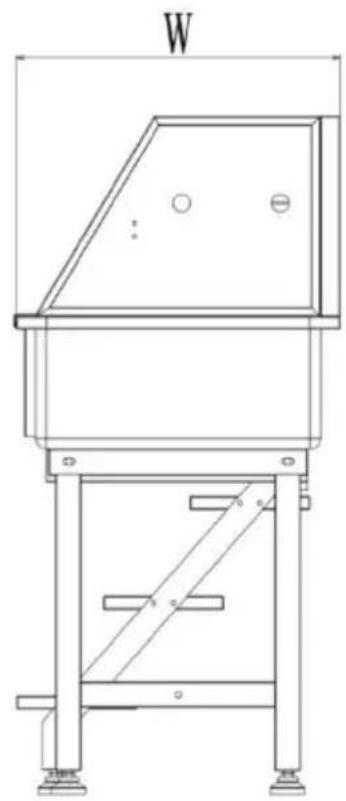
Right door
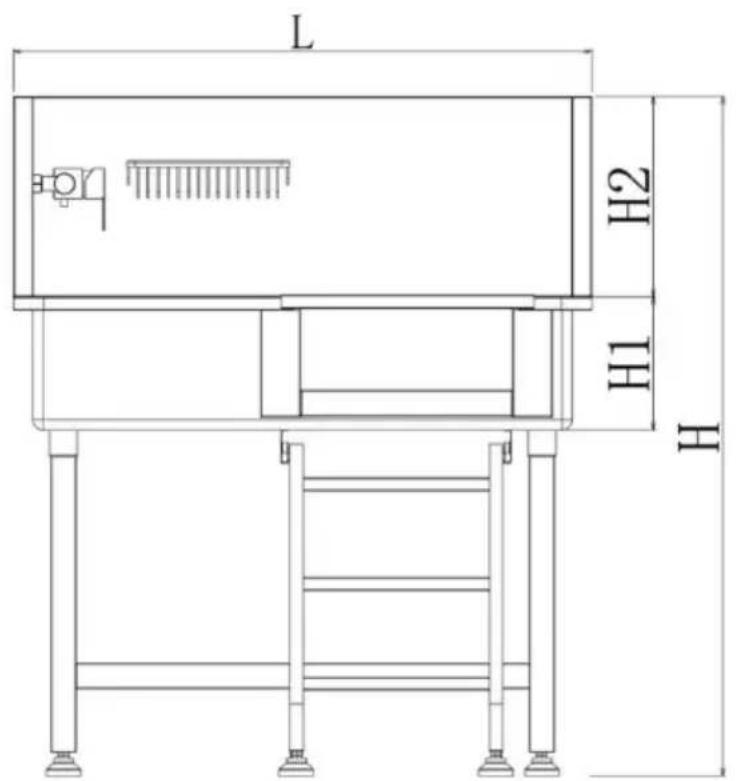
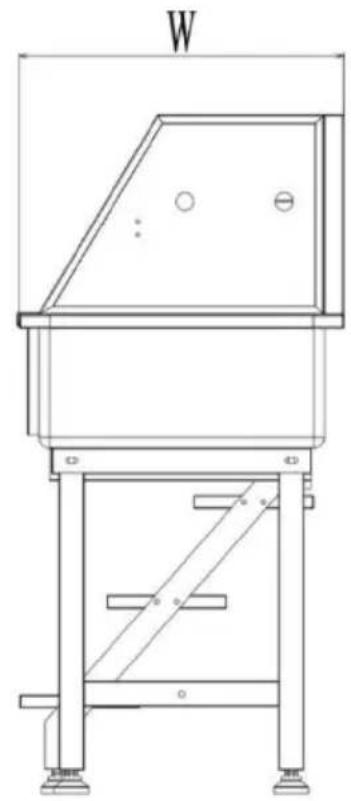
| Model# | Lengte (mm) | Hoogte (mm) | Hoogte 1 ( mm) | Hoogte 2(mm) | Breedte (mm) | NW (kg) |
| K2E01003 | 870 | 1060 | 200 | 300 | 488 | 21.4 |
| K2E01004 | 870 | 1060 | 200 | 300 | 488 | 21.4 |
| Model# | Volume (CBM) | Laadvermogen (pond) | Aanbevolen huisdier (in) |
| K 2E01003 | 0,21 | 220 | L×B×H: 33×16×18 |
| K 2E01004 | 0,21 | 220 | L×B×H: 33×16×18 |
OPERATION
"C": Cold water; "H": Hot water
CARE INSTRUCTIONS
YH CONSULTING LIMITED. C/O YH Consulting Limited Office 147, Centurion House, London Road, Staines-upon-Thames, Surrey, TW18 4AX
| EC | REP |
Affordable. Reliable. Home Improvement.
DOG BATHING TUB
MODEL: K2 E010 03 / K2 E010 04
MODEL: K2 E010 03 / K2 E010 04
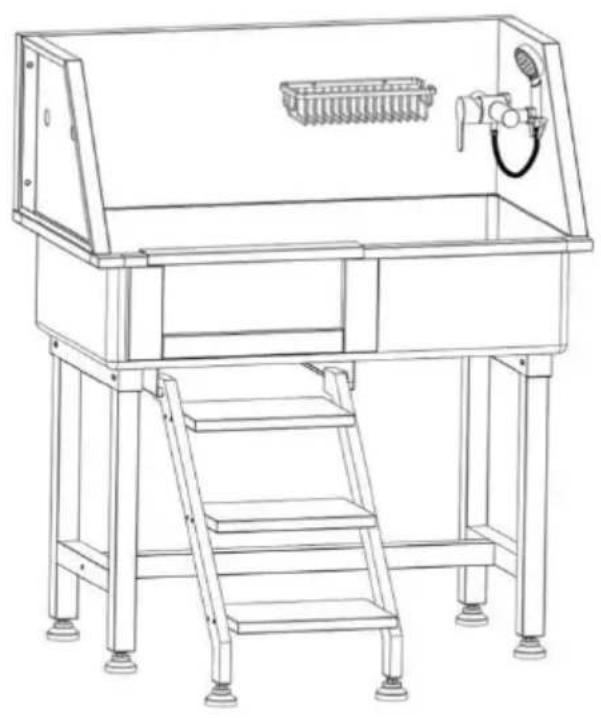
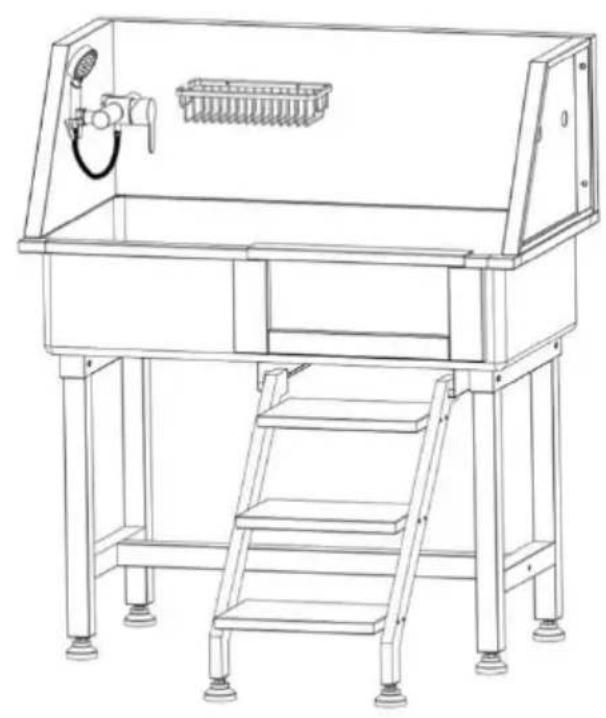
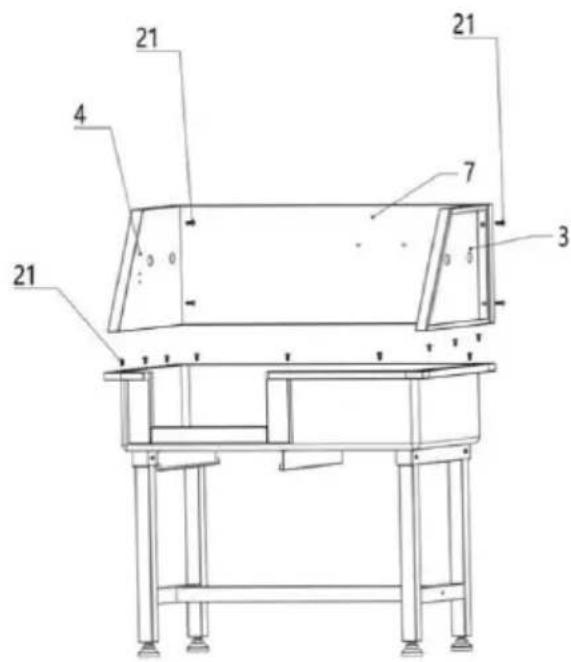
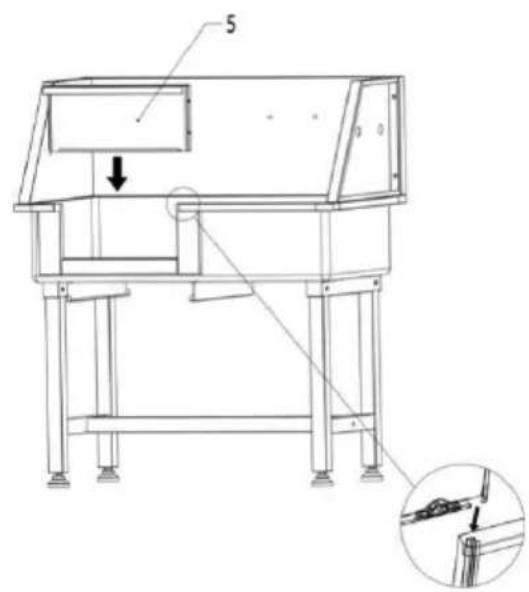
DIMENSIONS AND PARAMETERS
Left door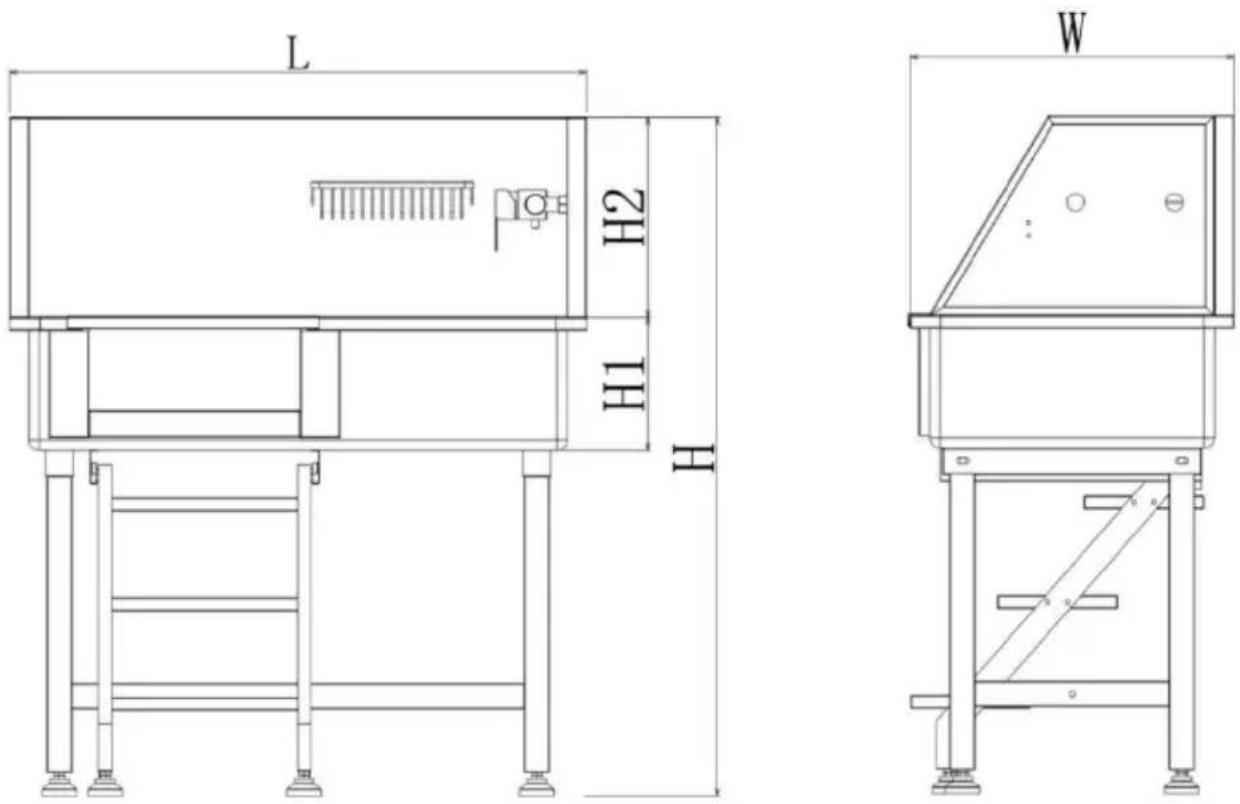
Right door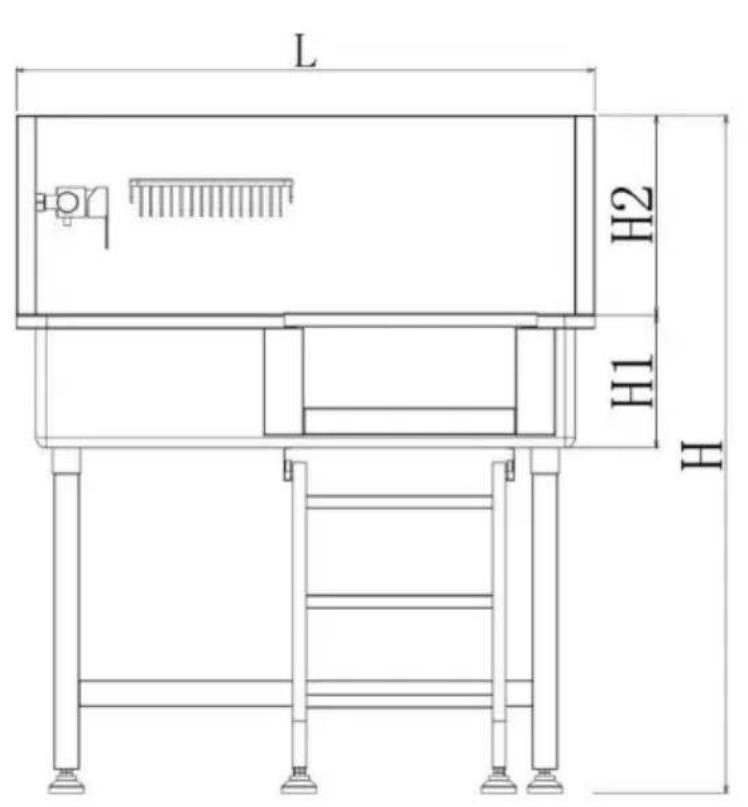
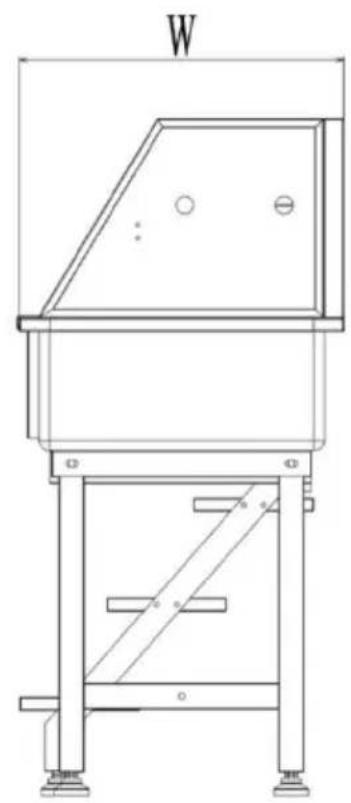
| Modell# | L(mm) | H(mm) | H1 (mm) | H2 (mm) | B (mm) | NV (kg) |
| K2E01003 | 870 | 1060 | 2 00 | 3 00 | 488 | 21.4 |
| K2E01004 | 870 | 1060 | 2 00 | 3 00 | 488 | 21.4 |
| Modell# | Volym (CBM) | Lastkapacitet (Ibs) | Rekommenderat husdjur (i) |
| K 2E01003 | 0,21 | 220 | L×B×H: 33×16×18 |
| K 2E01004 | 0,21 | 220 | L×B×H: 33×16×18 |
OPERATION
CARE INSTRUCTIONS
YH CONSULTING LIMITED. C/O YH Consulting
Limited Office 147, Centurion House, London
Road, Staines-upon-Thames, Surrey, TW18 4AX
| EC | REP |
E-CrossStu GmbH
Mainzer Landstr.69,
60329 Frankfurt am Main.


- MODEL: K2E01003 / K2E
- IMPORTANT SAFEGUARDS
- SAVE THESE INSTRUCTIONS
- PREPARATIONS BEFORE INSTALLATION
- INSTRUCTIONS
- INSTALLATION STEPS
- DIMENSIONS AND PARAMETERS
- RIGHT DOOR
- OPERATION
- MAINTENANCE
- CARE INSTRUCTIONS
- COMMON MALFUNCTIONS
- VEVOR
- DOG GROOMING BATHTUB
- MODEL: K 2 E010 03 / K 2 E
- HUNDEPFLEGEWANNE
- MODEL: K 2 E010 03 / K2E
- HONDENTRIMBAK
- DOG BATHING TUB
- MODEL: K2 E010 03 / K2 E
Brand : Vevor
Model : K2E01003
Category : Grooming set