
D17 - Vacuum Accessories Vevor - Free user manual and instructions
Find the device manual for free D17 Vevor in PDF.

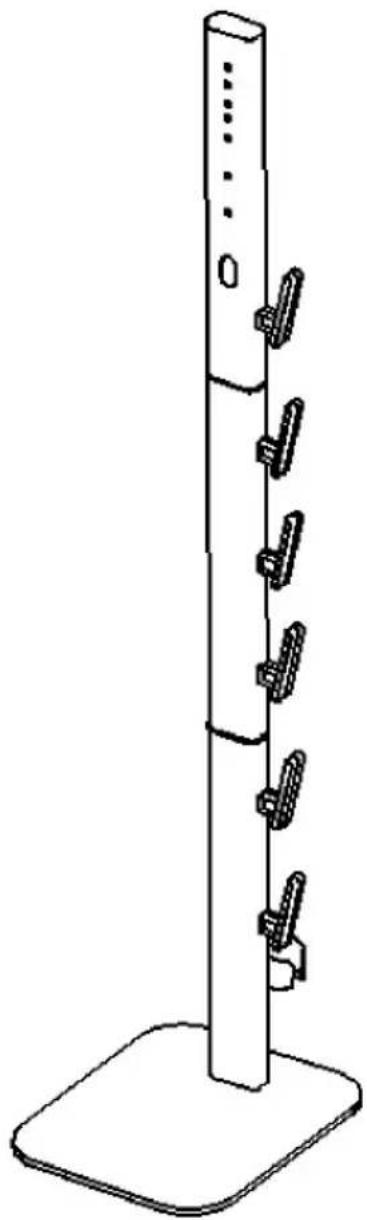
| Product Type | Vacuum Cleaner Stand |
| Brand | Vevor |
| Model | D17 |
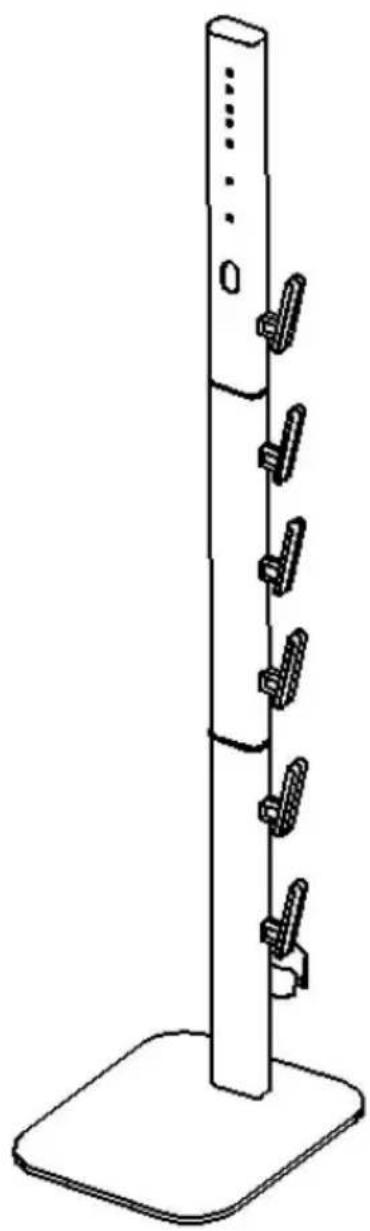
| Dimensions (L × W × H) | 320 × 260 × 1260 mm |
| Color | Silver |
| Compatibility | Dyson vacuum cleaners G5, V15, V12, V11, V10, V8, V7, V6 series (stick vacuums) |
| Number of hooks | 6 |
| Main material | Metal and plastic |
| Package contents | Base, lower/center/upper poles, suction head hooks, connectors, plug holder, screws, screwdriver, anti-slip pads |
| Installation type | Freestanding on floor, manual assembly |
| Maintenance | Clean with a dry cloth; check and tighten screws every 3 months |
| Safety precautions | Wear safety glasses and gloves during assembly; keep out of reach of children; do not use near heat sources or in direct sunlight |
| Manufacturer | Shanghai muxinmuyeyouxiangongsi, Baoshan, Shanghai, China |
| Technical support | www.vevor.com/support |
Frequently Asked Questions - D17 Vevor
User questions about D17 Vevor
0 question about this device. Answer the ones you know or ask your own.
Ask a new question about this device
Download the instructions for your Vacuum Accessories in PDF format for free! Find your manual D17 - Vevor and take your electronic device back in hand. On this page are published all the documents necessary for the use of your device. D17 by Vevor.
USER MANUAL D17 Vevor
Affordable. Reliable. Home Improvement.
VACUUM STAND
Model:D17
Technical Support and E-Warranty Certificate
www.vevor.com/suppor
Model:D17
natural_image
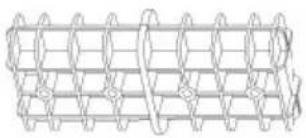
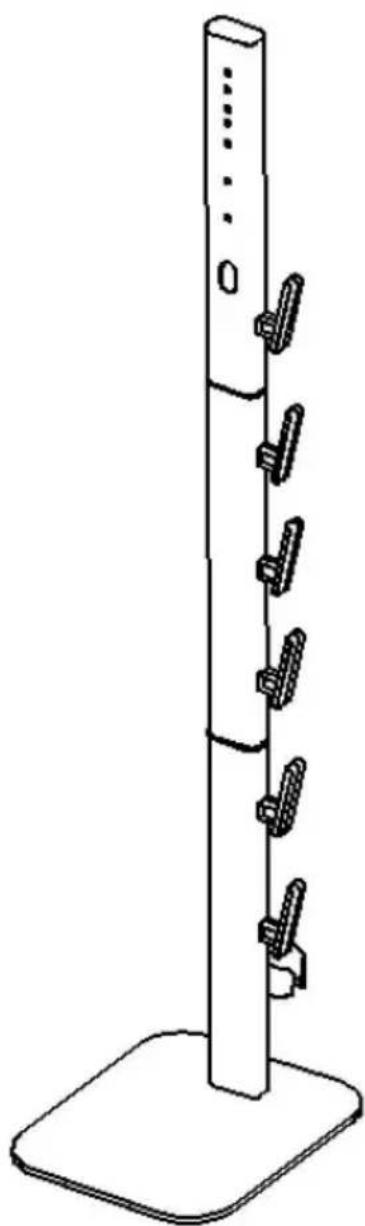
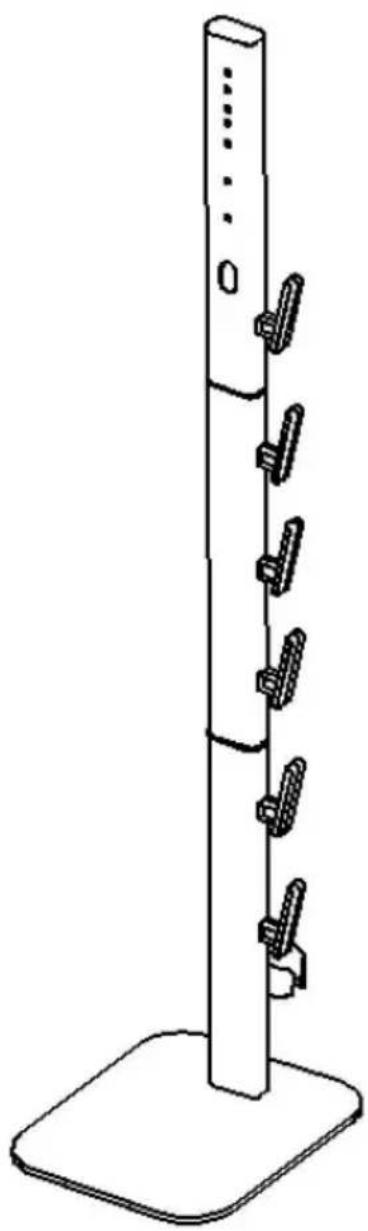
Line drawing of a vertical stand with multiple hanging clips, no text or symbols presentThis is the original instruction, please read all manual instructions carefully before operating. VEVOR reserves a clear interpretation of o user manual. The appearance of the product shall be subject to the product you received. Please forgive us that we won't inform you ag there are any technology or software updates on our product.
SAFETY INSTRUCTIONS
WARNING:
Read this material before using this product. Failure to do so can re serious injury.
Assembly precautions
- Assemble only according to these instructions. Improper assembly can create hazards.
- Do not use this product other than the design purpose
- Wear ANSI-approved safety goggles and heavy-duty work gloves du assembly.
- Keep assembly area clean and well lit.
- Do not install this product during fatigue or under the influence of drugs or drugs.
- For safety reasons, This hardware is recommended to be installed by people
- Products are installed away from children and pets;
- After the installation, the product should be placed on a stable grou use, and keep the product surface dry;
- After the installation, each bracket must be checked for complete fix before use.
- Do not drag this product to avoid damage to the floor surface.
- When placing or removing the vacuum cleaner, please be sure to cooperate with both hands, with one hand to stabilize the bracket first
- Please pay attention to the center of gravity and keep the balance
- Please note that the large impact may cause the vacuum cleaner this product to fall down and cause damage.
- Please do not use this product in direct sunlight, near fire sources temperature and other places.
SAVE THESE INSTRUCTIONS
PARAMETER LIST
| Model | D17 |
| Size | L×W×H:320×260×1260mm |
| Adapt to vacuum cleaner | Dyson G5/V15/V12/V11/V10/V8/V7/V6 series vertical vacuum cleaner |
| Receive hook | 6pcs |
| Color | silvery |
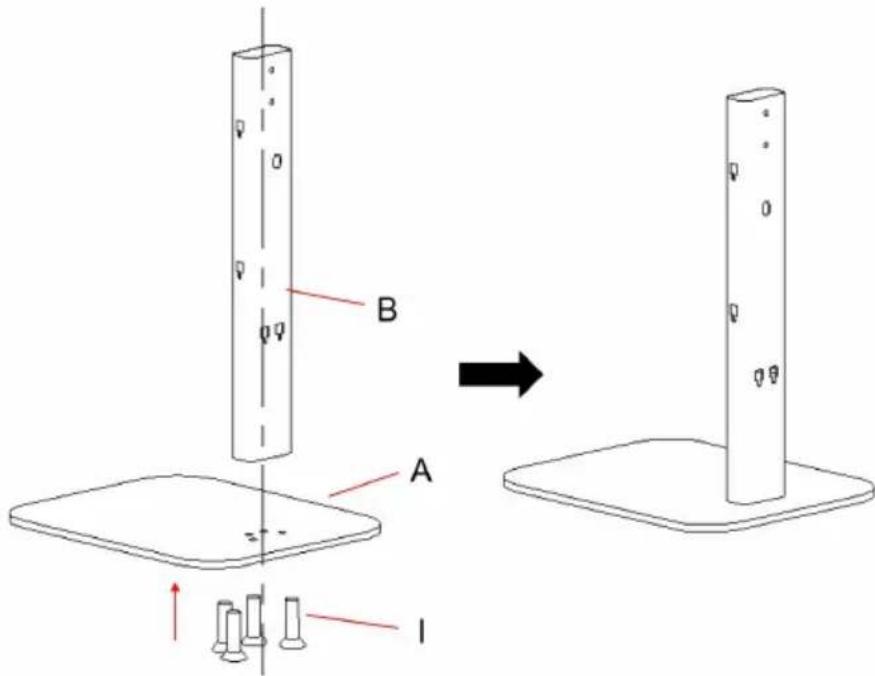
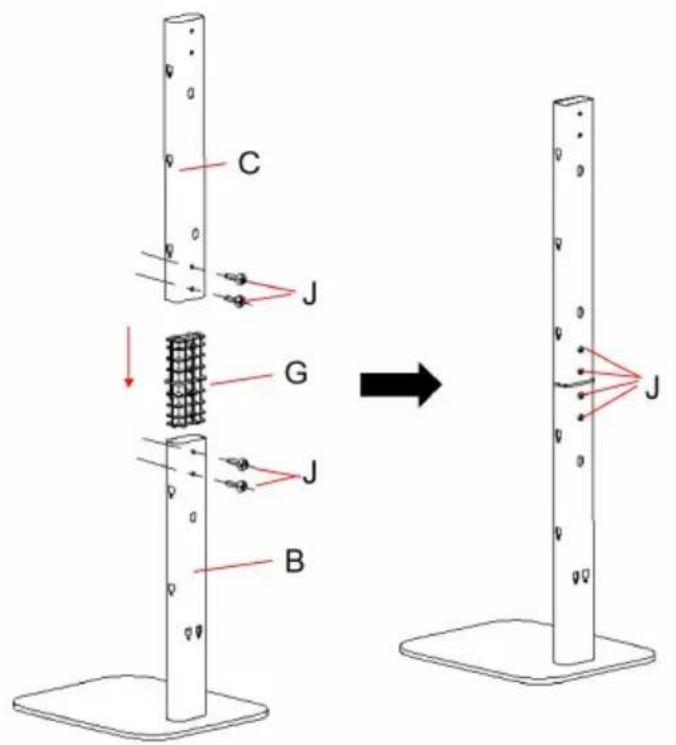
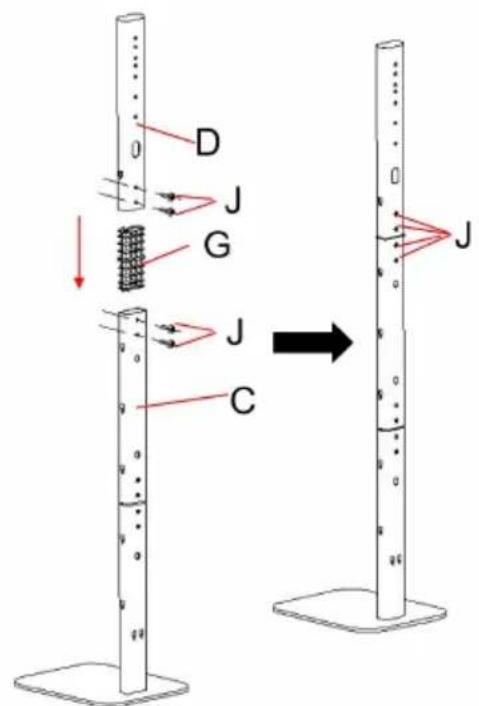
 A:Base×1pc A:Base×1pc |  B:Lower Pole× 1pc B:Lower Pole× 1pc |  C: Middle Pole × 1pc C: Middle Pole × 1pc |
 D:Upper Pole ×1pc D:Upper Pole ×1pc |  E:Wire Slot Button ×3pc E:Wire Slot Button ×3pc |  F:Suction Head Hook ×6pcs F:Suction Head Hook ×6pcs |
 G: Connector×2pcs G: Connector×2pcs | 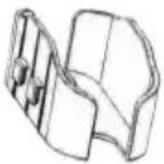 H:Plug Holder ×1p H:Plug Holder ×1p | 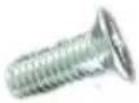 I:M6×15 Flat Head Machine Screw×4pcs I:M6×15 Flat Head Machine Screw×4pcs |
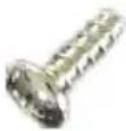 J:M5×12 Screw×8pcs J:M5×12 Screw×8pcs |  K:Phillips Screwdriver ×1pc K:Phillips Screwdriver ×1pc | 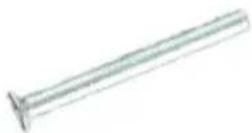 L:M5×50 Screw×2pcs L:M5×50 Screw×2pcs |
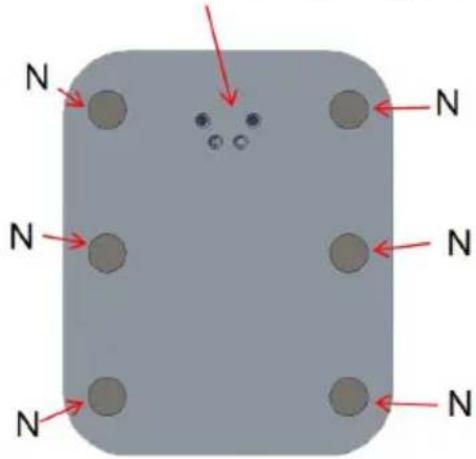
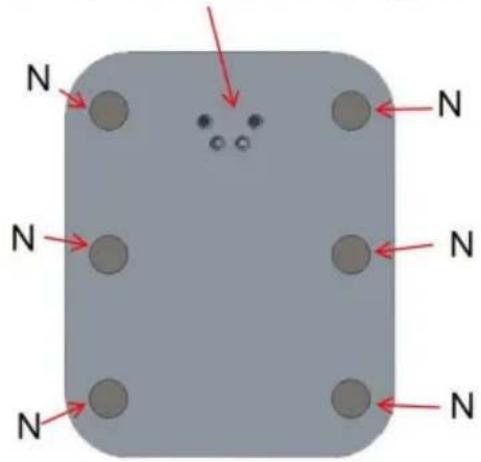
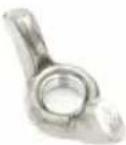 M:Wing Nuts×2pcs M:Wing Nuts×2pcs | 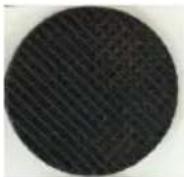 N:Mat×6pcs N:Mat×6pcs |
Note: The screwdriver K is used to turn the screws during the produc installation
Product decomposition diagram
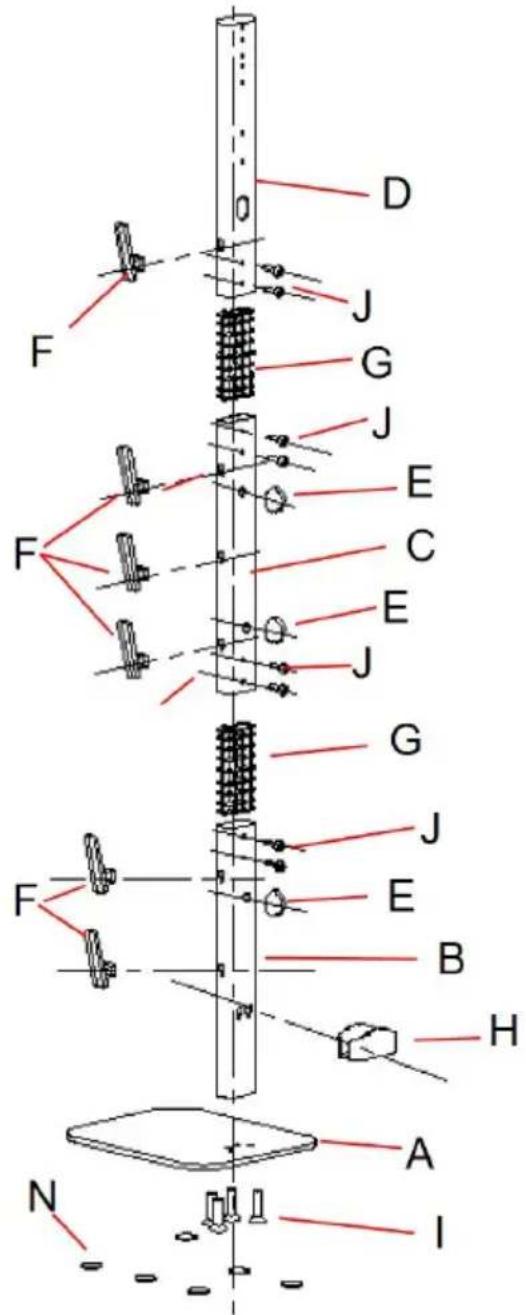
Installation Guide
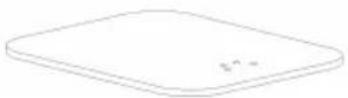
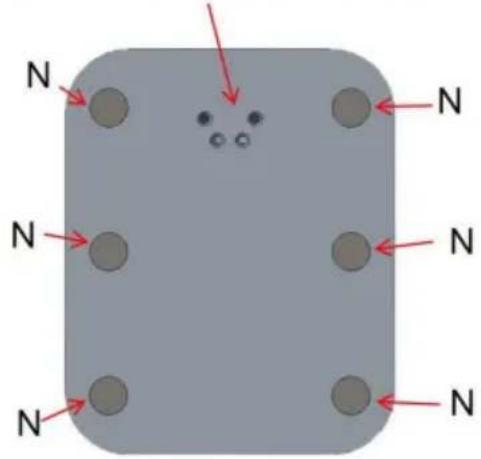
- Refer to the position of screw holes with chamfer and paste 6 mat the bottom of the base A.
Screw holes with chamfering corners
2.1. Use the 3 screws I to install the lower pole B on the base A; Sc installed upward from the chamfer screw hole at the bottom surface of base A, and finally tightened in the three screw holes of the lower p
3.Middle pole C installation.
3.1 Insert the connector G into the lower pole B, then trap the middle pole C
to the connector G; The screw through holes of the lower pole B are middle pole C should align the screw holes of the connector G.
3.2. Use 4 screws J to complete the installation; After installation, the screws J of the middle and lower poles should be on the back surface
- Install the upper pole D in the middle pole C in the same way, Refer to Step3.
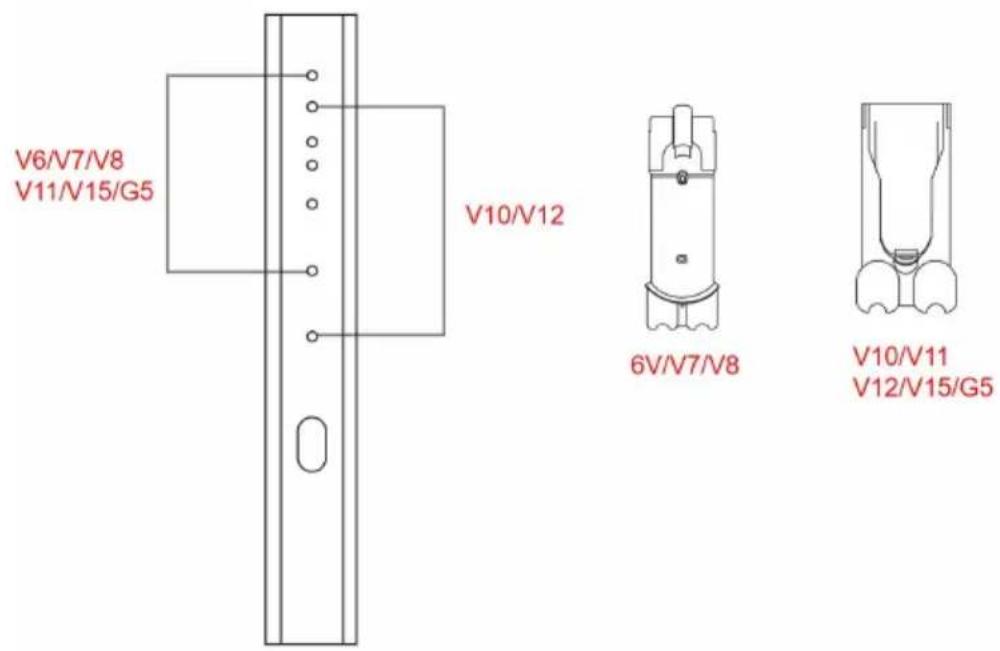
5.1. Install the cleaner hook F on the side of the pole; 2 hooks F for pole B, 3 hooks F for middle pole C, and 1 hook F for upper po D; Installing the hook F, first align the hole position on the rod, insert hole position, and then card down into the card slot.
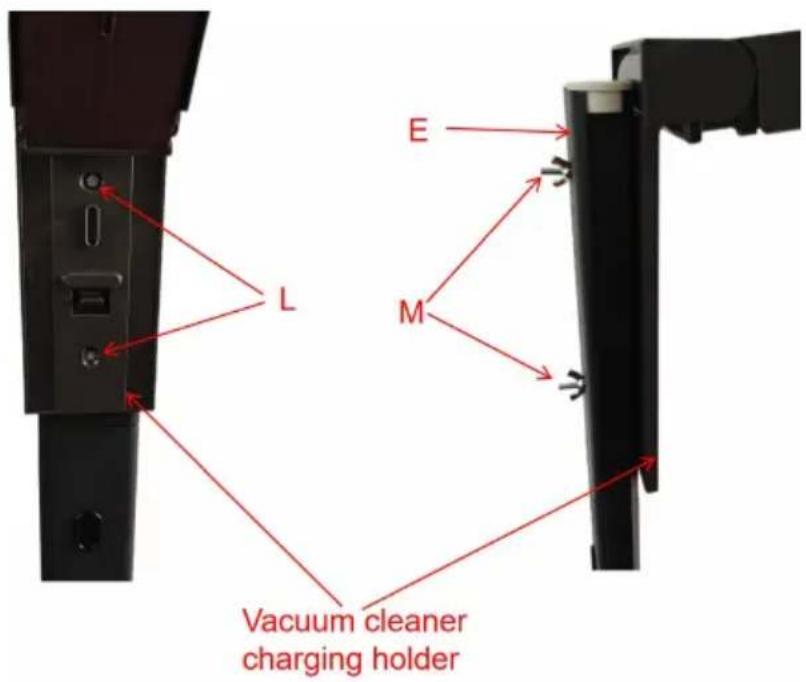
6.2. Install the Plug holder H on the back of the lower pole B, first a hole position on the rod, insert the hole position, and then card down the card slot.

- Use 2 screws L to mount the vacuum cleaner charging holder on the panel E and lock the back with a wing nuts M.
Note: Vacuum cleaner charging bracket requires additional purchase, this product does not include this accessory
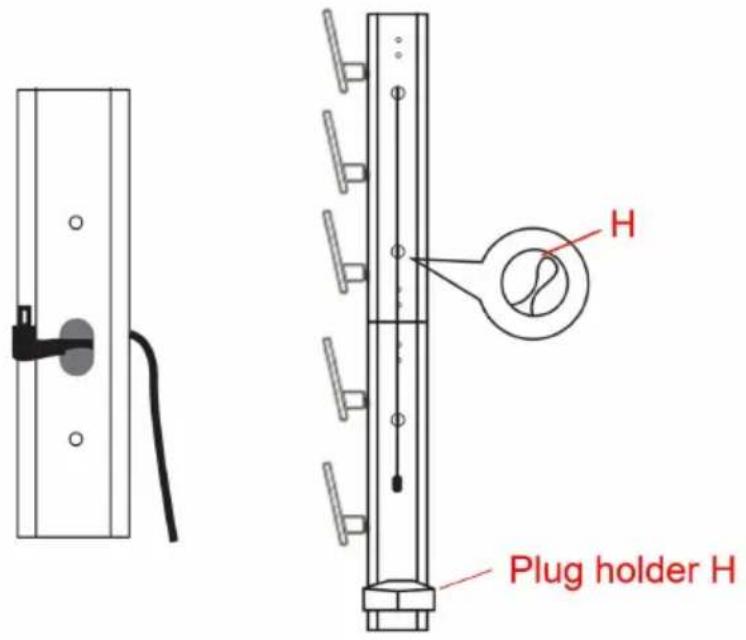
8.Storage of power cord.
8.1. Install the vacuum cleaner plug from the back through the wire protection cover into the charging bracket;
8.2.Card the power cord into the three wire slot buttons in turn
8.3.The vacuum cleaner plug is placed in the Plug holder H;
9.Cleaning and maintenance
9.1.Before cleaning the product, please disconnect the vacuum cleaner from the power supply.
9.2.Do not use sharp tools to clean stains on the product to avoid
scratching appearance or damage.
9.3. Gently wipe the surface dust and stains with a dry cloth.
9.4. Please check whether the product installation is stable every three months; If the screw is loose, please tighten it again.
9.5. Keep the product away from corrosive gases, water, and harsh rim
10. Adapt the installation hole.
Manufacturer: Shanghaimuxinmuyeyouxiangongsi
Address: Shuangchenglu 803nong11hao1602A-1609shi, baoshanqu, shanghai 200000 CN.
Imported to AUS: SIHAO PTY LTD. 1 ROKEVA STREETEASTWOOD NSW 2122 Australia
Imported to USA: Sanven Technology Ltd. Suite 250, 9166 Anaheim Place, Rancho Cucamonga, CA 91730
| UK | REP |
YH CONSULTING LIMITED. C/O YH Consultin Limited Office 147, Centurion House, London Road, Staines-upon-Thames, Surrey, TW18 4A>
| EC | REP |
Technical Support and E-Warranty Certificate
www.vevor.com/support
VEVOR
Affordable. Reliable. Home Improvement.
SUPPORT SOUS VIDE
Modèle:D17
Affordable. Reliable. Home Improvement.
natural_image
Line drawing of a vertical pole with multiple hanging clips, mounted on a base (no text or symbols)Screw holes with chamfering corners

Route, Staines-upon-Thames, Surrey, TW18 4AX

E-CrossStu GmbH
Mainzer Landstr.69,
Affordable. Reliable. Home Improvement.
VAKUUMSTÄNDER
Modell:D17
www.vevor.com/suppor
VEVOR
Vakuumständer
Affordable. Reliable. Home Improvement.
Modell:D17

natural_image
Line drawing of a vertical pole with multiple hanging clips, mounted on a base (no text or symbols)Installationshandbuch
Screw holes with chamfering corners
YH CONSULTING LIMITED. C/O YH Consulting
www.vevor.com/support
VEVOR
Affordable. Reliable. Home Improvement.
SUPPORTO PER VUOTO
Modello:D17
www.vevor.com/support
VEVOR
Affordable. Reliable. Home Improvement.
Supporto per vuoto
Modello:D17

natural_image
Line drawing of a vertical pole with multiple hanging clips, mounted on a base (no text or symbols)Screw holes with chamfering corners

Importato in AUS: SIHAO PTY LTD. 1 ROKEVA STREETEASTWOOD
Nuovo Galles del Sud 2122 Australia
Affordable. Reliable. Home Improvement.
SOPORTE DE VACÍO
Modelo:D17
Affordable. Reliable. Home Improvement.
Soporte de vacío
Modelo:D17
natural_image
Line drawing of a vertical pole with multiple hanging clips, mounted on a base (no text or symbols)Guía de instalación
Screw holes with chamfering corners
YH CONSULTING LIMITADA. A LA CARGO DE YH Consulting
Carretera, Staines-upon-Thames, Surrey, TW18 4AX
E-CrossStu GmbH
Mainzer Landstr.69,
Affordable. Reliable. Home Improvement.
STOJAK PRÓŻNIOWY
Model:D17
Affordable. Reliable. Home Improvement.
Stojak próżniowy
Model:D17

natural_image
Line drawing of a vertical pole with multiple hanging clips, mounted on a base (no text or symbols)Screw holes with chamfering corners

YH CONSULTING LIMITED. C/O YH Consulting
Biuro Limited 147, Centurion House, Londyn
Droga, Staines-upon-Thames, Surrey, TW18 4AX
| Przedsławciel UE |
E-CrossStu GmbH
Mainzer Landstr.69,
60329 Frankfurt nad Menem.

Affordable. Reliable. Home Improvement.
VACUÜMSTANDAARD
Model:D17
www.vevor.com/suppor
VEVOR
Vacuümstandaard
Affordable. Reliable. Home Improvement.
Model:D17
natural_image
Line drawing of a vertical pole with multiple hanging clips, mounted on a base (no text or symbols)Screw holes with chamfering corners

YH CONSULTING LIMITED. C/O YH Consulting
Beperkt kantoor 147, Centurion House, Londen
Weg, Staines-upon-Thames, Surrey, TW18 4AX
E-CrossStu GmbH
Mainzer Landstr.69,
60329 Frankfurt am Main.

Technische ondersteuning en e-garantiecertificaat www.vevor.com/support
VEVOR
Affordable. Reliable. Home Improvement.
VAKUUMSTÄLL
Modell: D17
www.vevor.com/suppor
VEVOR
Vakuumstativ
Affordable. Reliable. Home Improvement.
Modell: D17
natural_image
Line drawing of a vertical pole with multiple hanging clips, mounted on a base (no text or symbols)Installationsguide
Screw holes with chamfering corners

- Mellanpol C installation.
YH CONSULTING LIMITED. C/O YH Consulting Limited Office 147, Centurion House, London Road, Staines-upon-Thames, Surrey, TW18 4AX
| EC | REP |
www.vevor.com/support


