BY-288G - Ice machine Vevor - Free user manual and instructions
Find the device manual for free BY-288G Vevor in PDF.


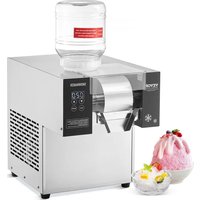
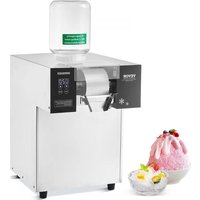
| Product Type | Electric Ice Shaver |
| Brand | Vevor |
| Model | BY-288G |
| Dimensions (L × W × H) | 395 × 296 × 515 mm |
| Power Supply / Power | 120 V / 60 Hz, 650 W (US version) or 220-240 V / 50-60 Hz, 550 W (EU version) |
| Production Capacity | ≥ 70 kg/h |
| Intended Use | Indoor only, commercial or heavy domestic use (staff kitchens, hotels, etc.) |
| Main Functions | Crushing ice cubes into fine particles; size adjustment (coarse/fine); forward, stop and reverse for unblocking |
| Maintenance and Cleaning | Unplug before cleaning; wipe the exterior with a soft cloth and mild detergent; clean the crushed ice container; do not use alcohol; clean the blade after each use |
| Safety | Three-prong grounded plug; do not use outdoors; do not immerse in water; very sharp blade handle with care; automatic shutdown every 30 minutes (10 min rest) to prevent overheating |
| Spare Parts and Repairability | Spare blade included; replaceable blade; water blocking plugs (×2); drainage hose; adjustment screw to check periodically; power cord replaceable by a professional |
| General Information | Made in China; warranty via www.vevor.com/support; FCC Part 15 compliance; WEEE directive 2012/19/EU |
Frequently Asked Questions - BY-288G Vevor
User questions about BY-288G Vevor
0 question about this device. Answer the ones you know or ask your own.
Ask a new question about this device
Download the instructions for your Ice machine in PDF format for free! Find your manual BY-288G - Vevor and take your electronic device back in hand. On this page are published all the documents necessary for the use of your device. BY-288G by Vevor.
USER MANUAL BY-288G Vevor
Technical Support and E-Warranty Certificate www.vevor.com/support
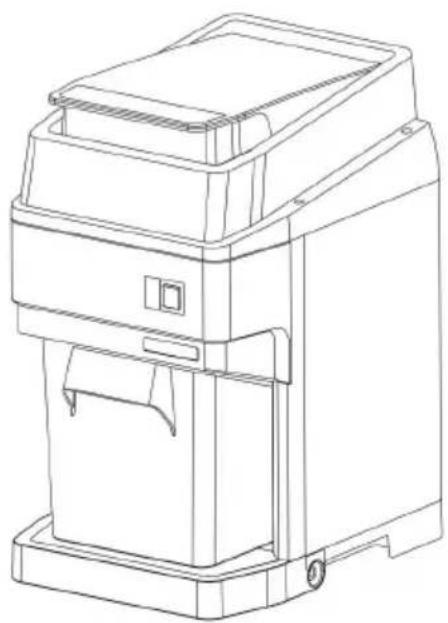
ICE SHAVER
INSTRUCTION MANUAL
MODEL:BY-288G
We continue to be committed to provide you tools with competitive price. "Save Half", "Half Price" or any other similar expressions used by us only represent of savings you might benefit from buying certain tools with us compared top brands and doses not necessarily mean to cover all categories of tools offered are kindly reminded to verify carefully when you are placing an order with us actually saving half in comparison with the top major brands.
MODEL:BY-288G
natural_image
Line drawing of a mechanical device with no visible text or symbolsNEED HELP? CONTACT US!
Have product questions? Need technical support? Please feel fr contact us:

CustomerService@vevor.com
This is the original instruction, please read all manual instructions carefully before operating. VEVOR reserves a clear interpretation of user manual. The appearance of the product shall be subject to product you received. Please forgive us that we won't inform your system where are any technology or software updates on our product.
| Symbol | Symbol Description |
 | Warning - To reduce the risk of injury, user must read in manual carefully. |
 | This symbol, placed before a safety comment, indicates a precaution, warning, or danger. Ignoring this warning may an accident. To reduce the risk of injury, fire, or electroplease always follow the recommendation shown below. |
 | Statement:This device complies with Part 15 of the FCC Rules. Op subject to the following two conditions:(1)This device may cause harmful interference, and (2)this device must accept interference received, including interference that may cause undesired operation. |
 | Correct Disposal:This product is subject to the provision of European Direc 2012/19/EC. The symbol showing a wheelie bin crossed th indicates that the product requires separate refuse collectio the European Union. This applies to the product and all accessories marked with this symbol. Products marked as may not be discarded with normal domestic waste, but m taken to a collection point for recycling electrical and elec devices. |
Important Assurance
WARNING: Before operating this device, please read this instruction manual completely and keep it handy for future reference.
Always follow basic safety precautions when using these devices. These inclu
- READ ALL OPERATING INSTRUCTIONS AND PRODUCT SAFETY LABELS! FAILURE TO FOLLOW ALL INSTRUCTIONS MAY RESULT IN SERIOUS INJURY OR PROPERTY DAMAGE!
- CHECK FOR DAMAGED PARTS: Before using the machine, check whether all parts work normally and perform the expected functions. Check for alignment, binding, and installation of moving parts. And any other condition that may affect the operation. Call the Customer Service number in this manual if any parts are damaged.
- Always unplug the power cord from the outlet when not in use before removing parts or accessories and cleaning.
- This appliance can be used by children aged from 8 years and above an persons with reduced physical, sensory or mental capabilities or lack of experience and knowledge if they have been given supervision or instructi concerning use of the appliance in a safe way and understand the haze involved. Children shall not play with the appliance. Cleaning and user maintenance shall not be made by children without supervision.
- NEVER LEAVE THE MACHINE UNATTENDED WHILE IT IS RUNNING!
- Wait until all moving parts have stopped and turned off power before removing any part from the machine.
- DO NOT operate any other electrical equipment with a damaged cord or or after the unit malfunctions. DO NOT ATTEMPT TO REPLACE THE C Call Customer Service to arrange to return the machine for examination, repair, or adjustment.
- DO NOT use outdoors. This product is intended for INDOOR USE ONLY.
- DO NOT pull the power cord to disconnect.
-
Keep the appliance and power cable away from heat sources and hot surfaces. The extension cord is not recommended to avoid overheating or Always plug directly into a grounded wall receptacle.
-
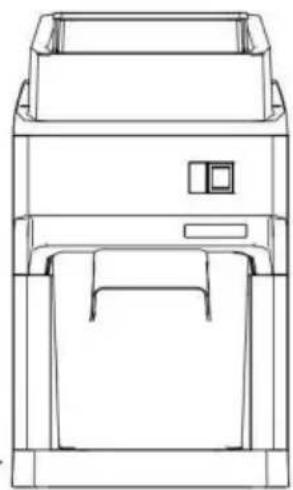
Place the machine on a firm and stable surface. Ensure that the machine is not placed near the edge of the worktop, where it can be easily pushed off or fall.
- Always protect the power cable from undue flexing and wearing – do no the cable to hang off edge of the counter or table.
- To reduce the risk of unintentional starting, check that the control is OFF before plugging the cord into wall outlet. Turn the controller off to disconnect, then remove the plug from the wall outlet.
- NEVER plug the machine in where water may flood the area.
- The ice shaver must be installed correctly before use.
- The ice tray must be installed well before operating the machine.
- The use of attachments or parts not specifically recommended or sold by the manufacturer for this grinder will void the warranty and may cause fire, electric shock or injury.
- DO NOT use the machine for other than intended use. This ice shaver is intended to be used for commercial and similar applications such as: - staff kitchen areas in shops, offices and other working environments; - by clients in hotels, motels and other residential type environments; bed breakfast type environments.
- The Manufacturer disclaims any responsibility in the case of improper use of the machine. Improper use of the machine voids the warranty.
- DO NOT REMOVE WARNING LABELS FROM THE MACHINE. Doing so will void the product warranty and may result in serious personal injury.
- This appliance must be grounded to protect the operator from electrical s. This machine uses a grounded, three prong plug that should be connected directly to a grounded 120V(US)/230V(EC), three prong grounded wall outl receptacle. Grounded plugs are used on metal-encased electric appliances protect from an electric shock. DO NOT change or alter the plugin anyway NEVER break off a grounding prong from a 3-conductor plug. Doing so the warranty and may result in electric shock.
- Type Y attachment: If the supply cord is damaged, it must be replaced manufacturer, its service agent or similarly qualified persons in order to a hazard.
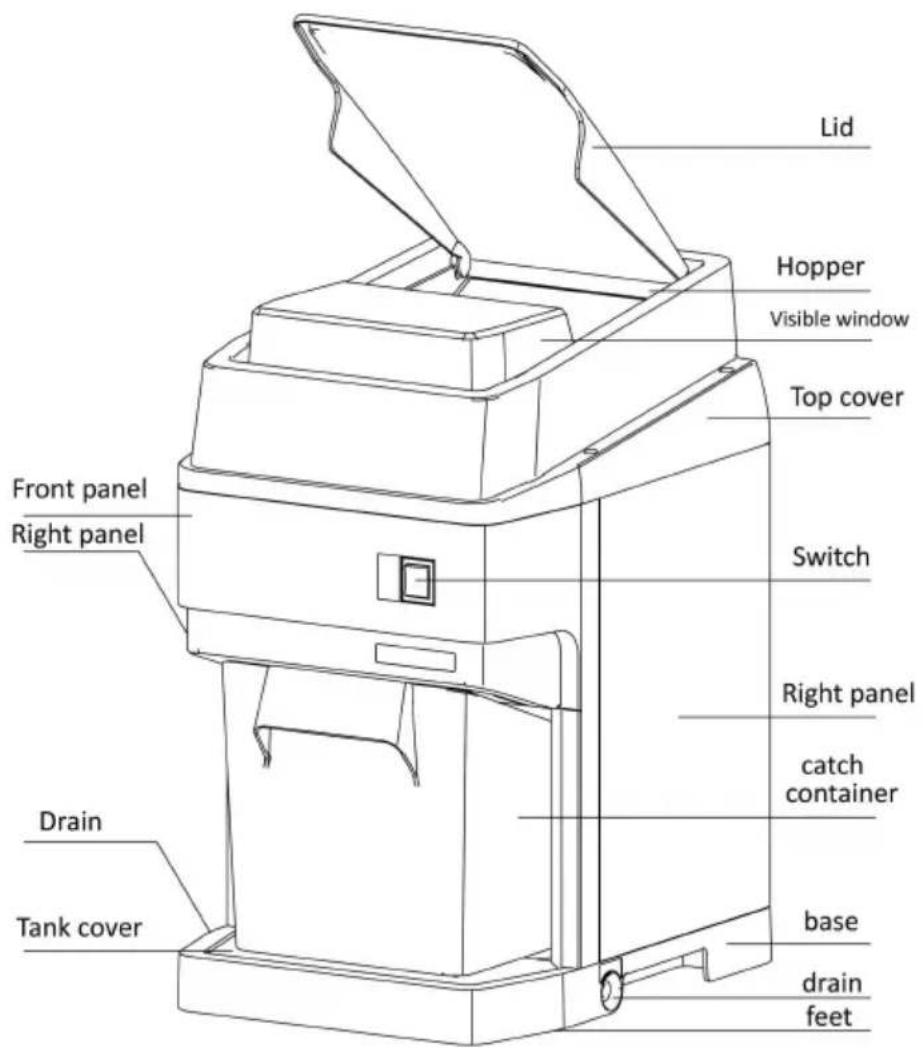
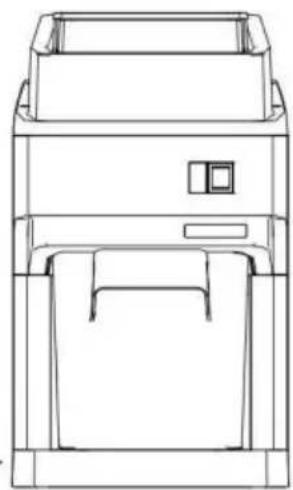
Rough Diagram
text_image
Lid Hopper Visible window Top cover Switch Front panel Right panel Right panel catch container Drain Tank cover base drain feetAccessories
Water blocking plug*2 Spare blade*1 drain-pipe*1
Technical Parameter
| Ratings | Capacity | Size |
| AC120V/60Hz 650W 4.18A | ≥70KG/H | L*W*H:395x296x515mm |
| AC220-240V 50/60Hz 550W |
Operation Instructions
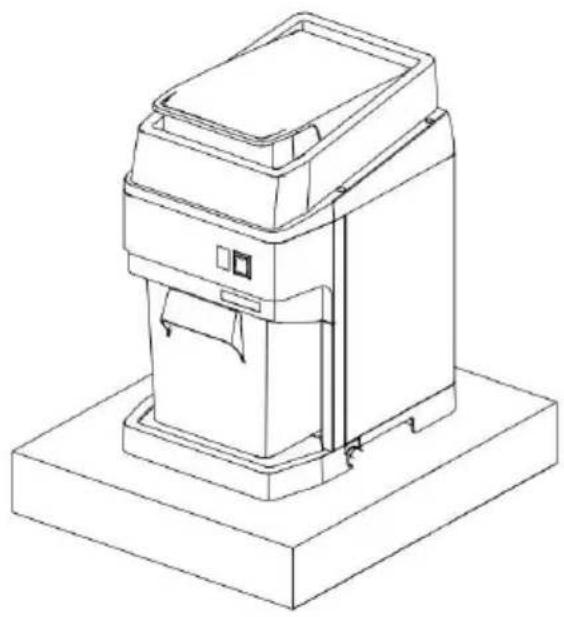
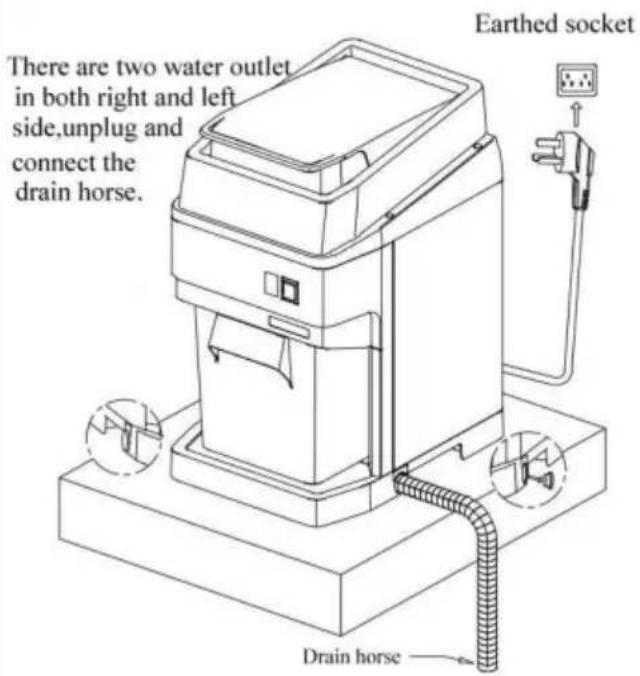
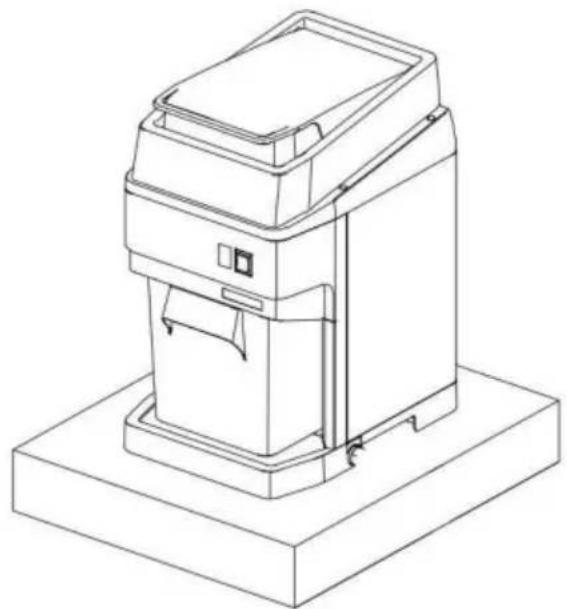
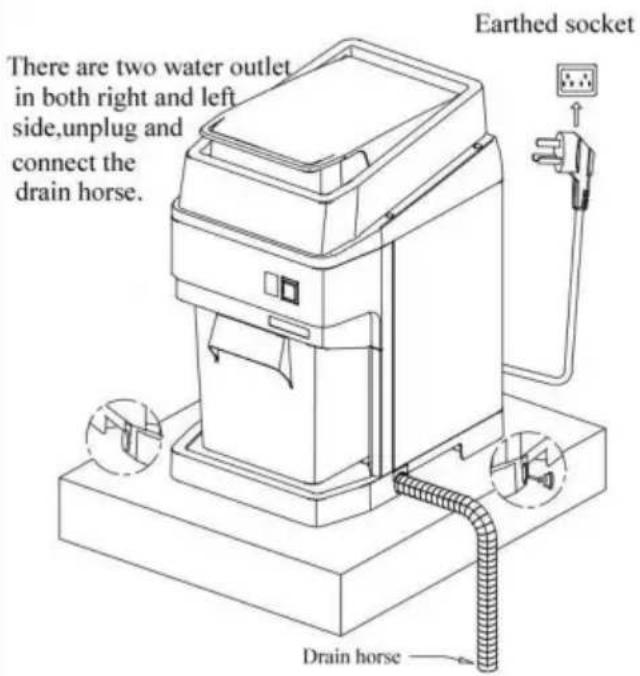
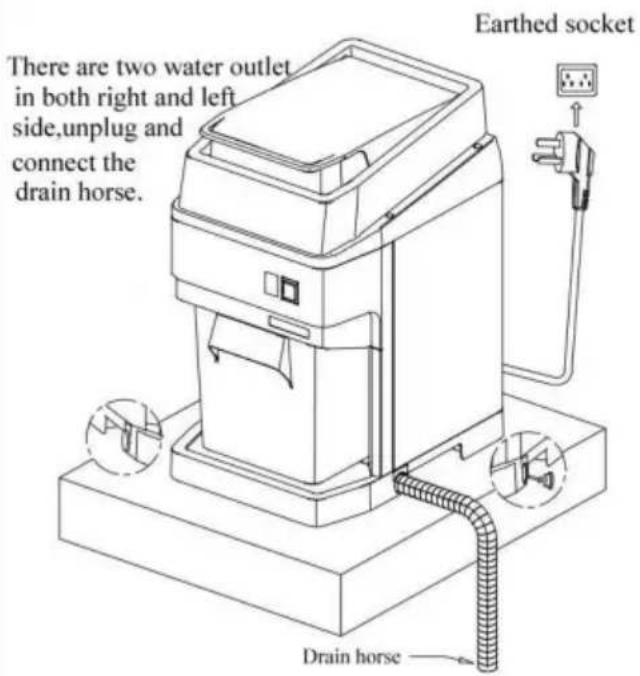
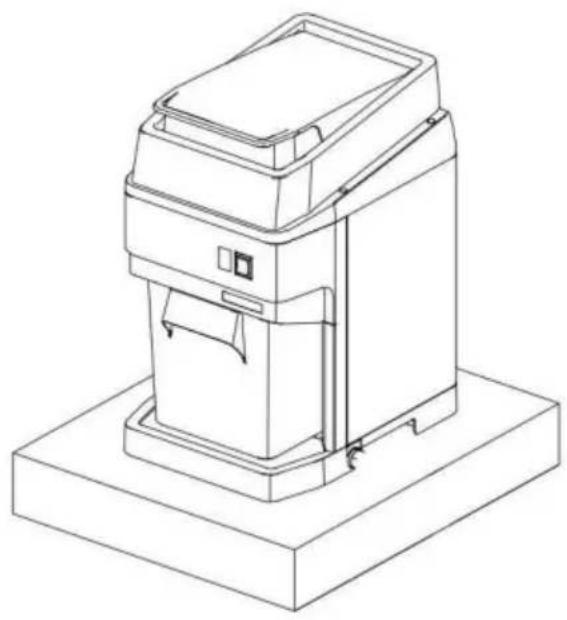
1. Install the ice shaver like as below
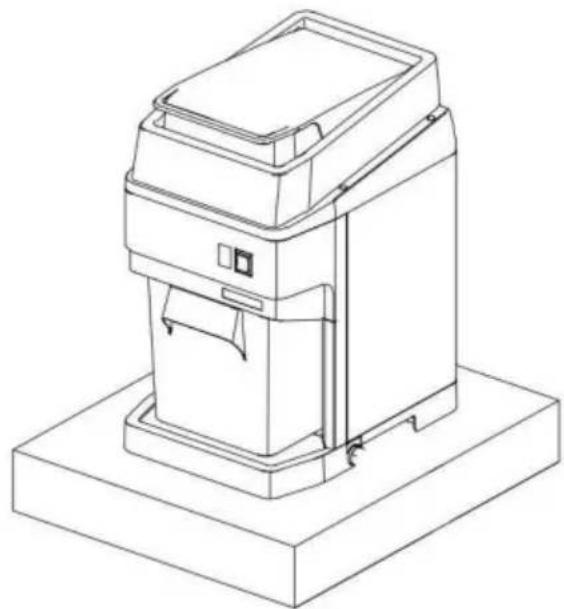
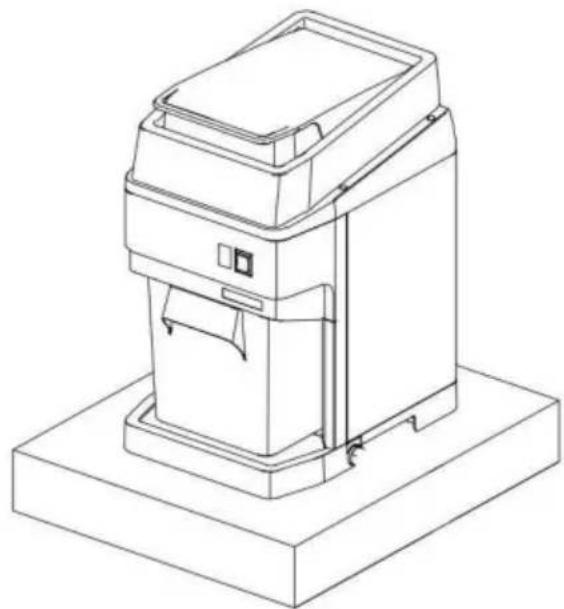
- Place the machine on a flat and level surface.
natural_image
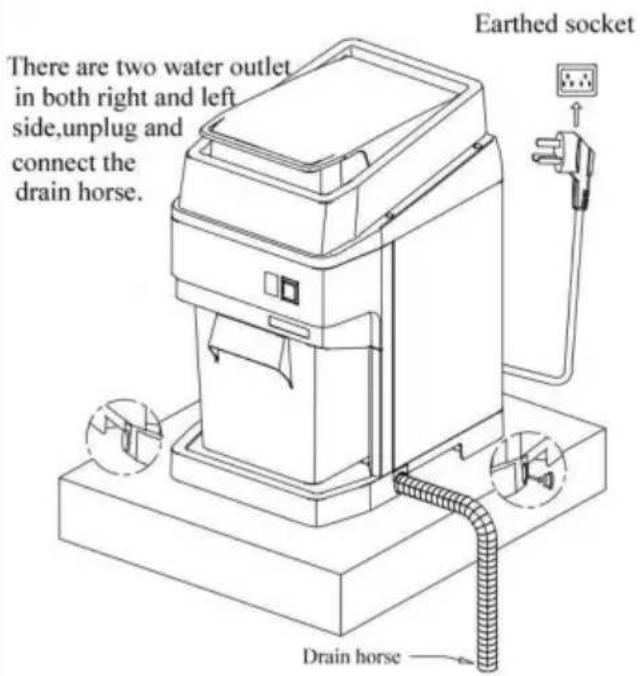
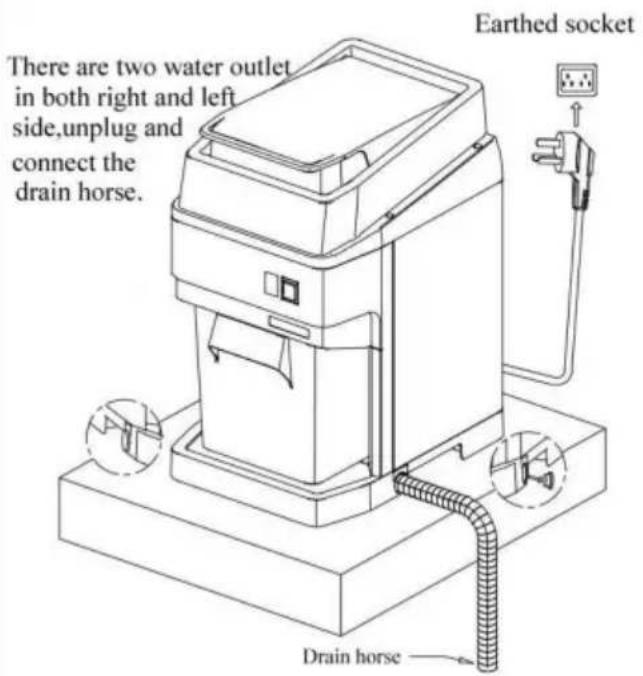
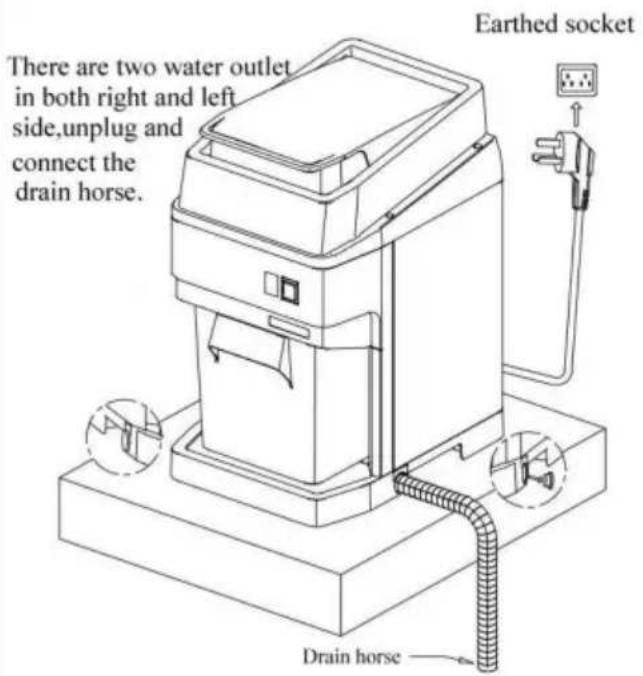
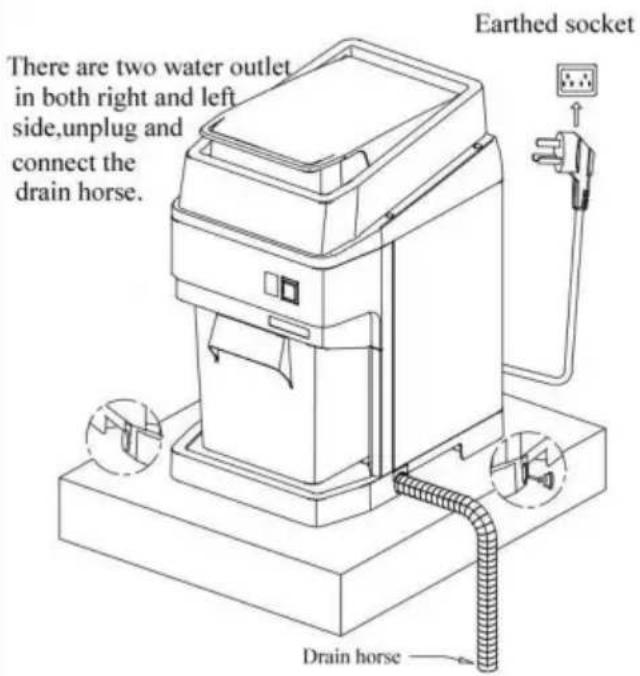
Technical line drawing of a mechanical device with a base platform and top component (no text or symbols)- Plug in the socket and connect the drain horse.

text_image
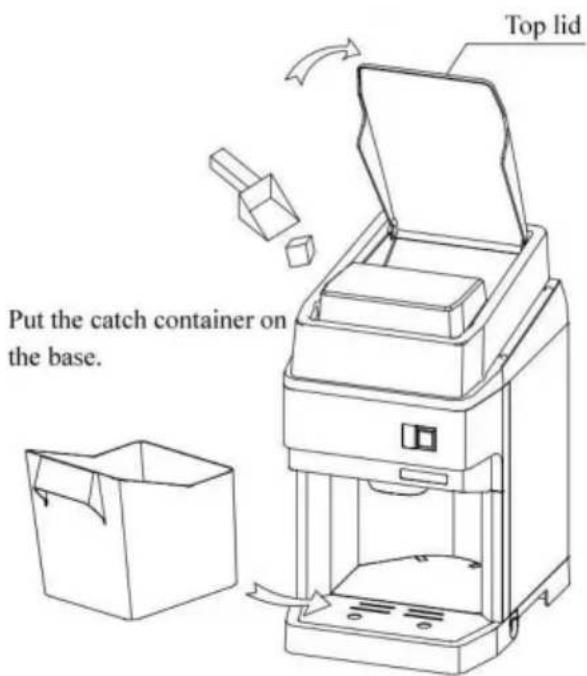
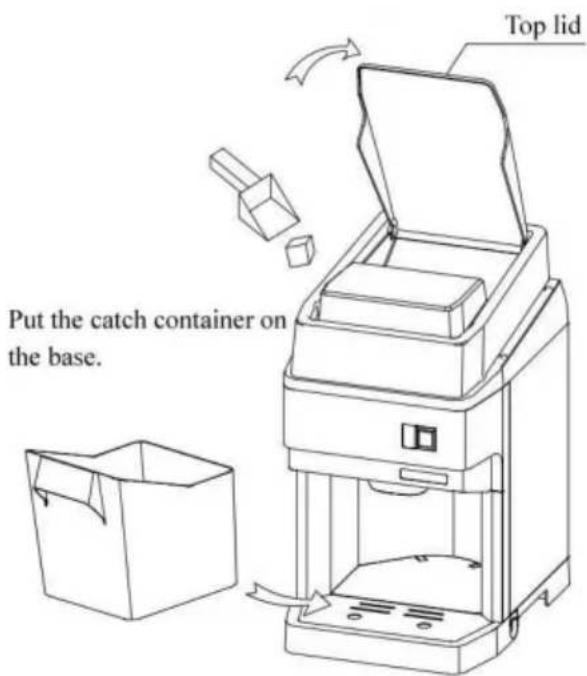
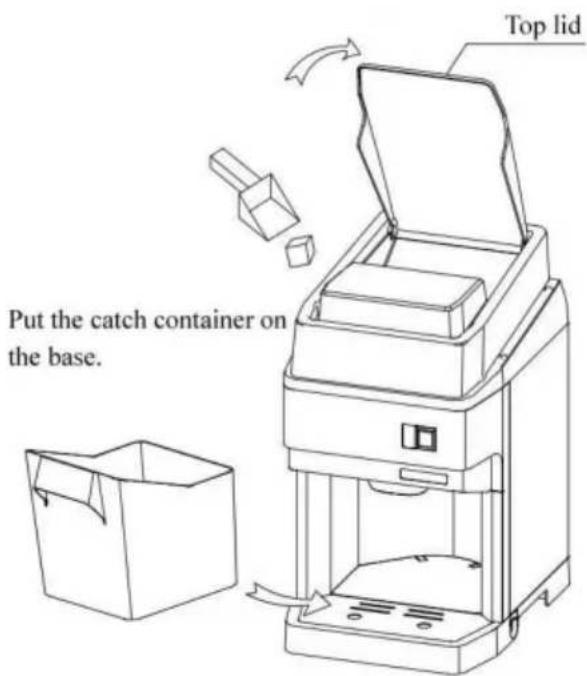
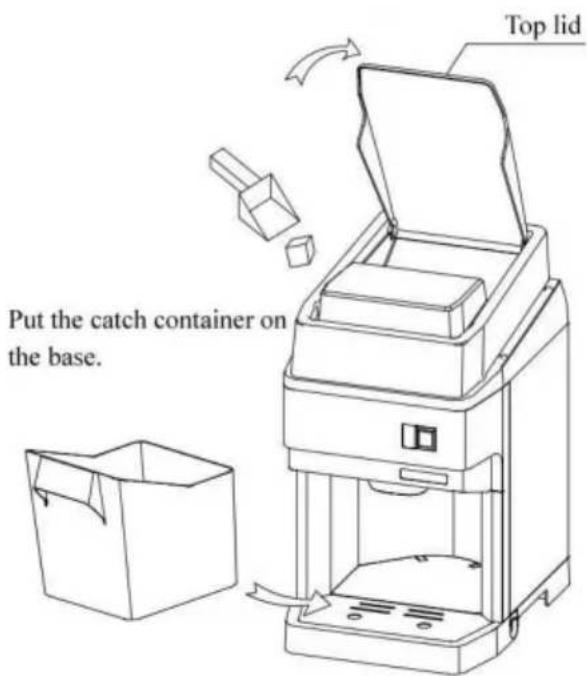
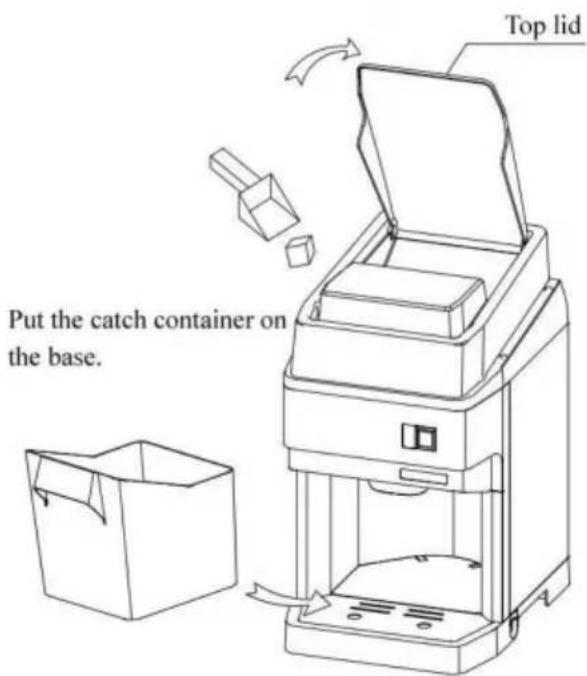
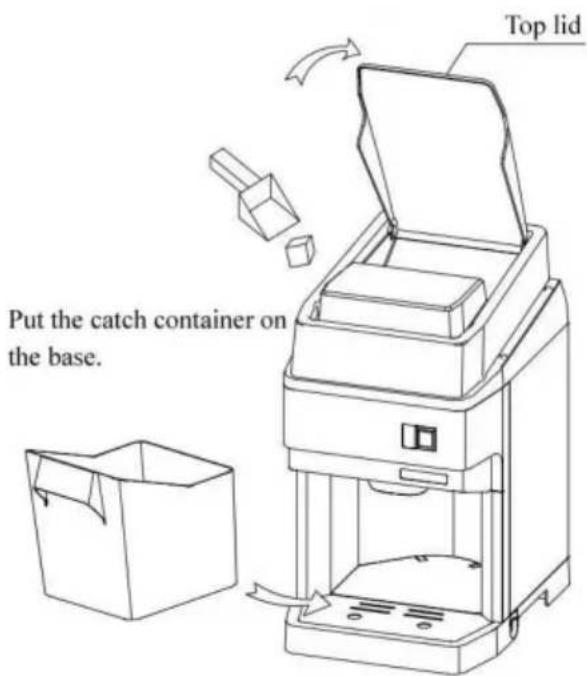
There are two water outlet in both right and left side,unplug and connect the drain horse. Earthed socket Drain horse- Lift up the top lid and load ice cubes into hopper
text_image
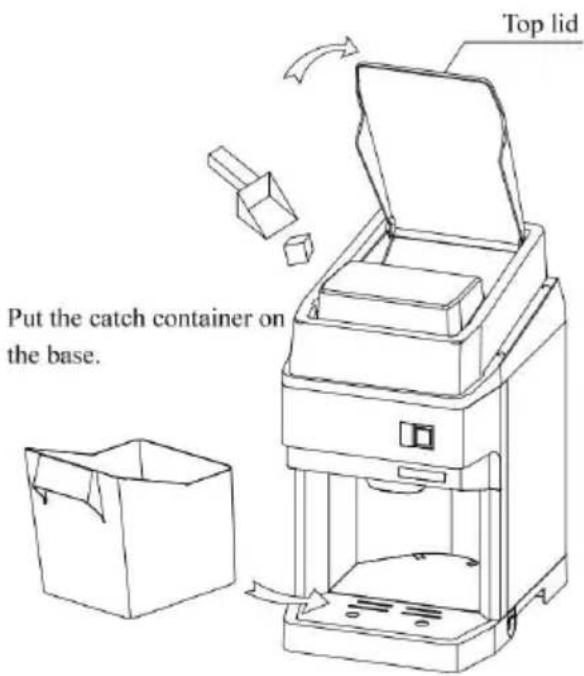
Top lid Put the catch container on the base.- Close the top lid and power on the machine
text_image
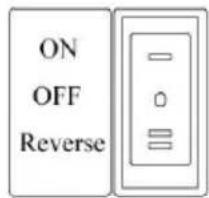
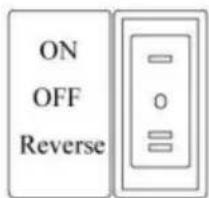
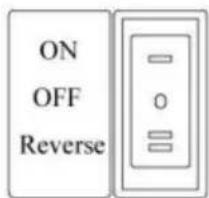
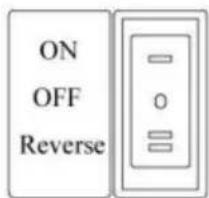
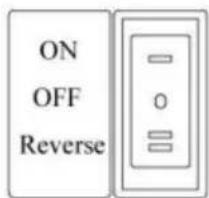
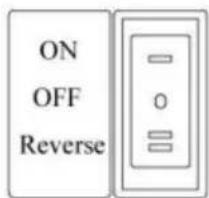
ON OFF Reverse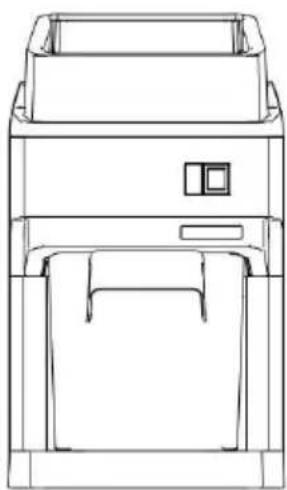
natural_image
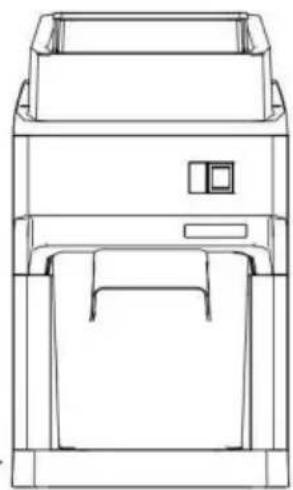
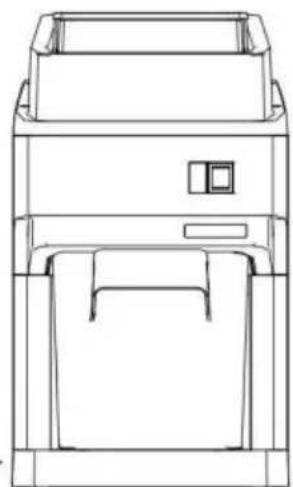
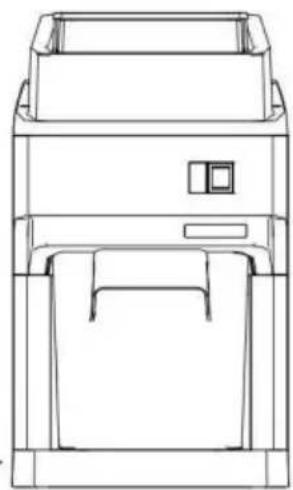
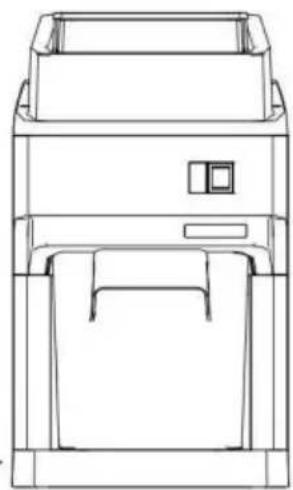
Line drawing of a printer front view showing front panel, top panel, and side cover (no text or symbols)ON: Power on
OFF: Power off
Reverse: Make the ice cubes in the hopper restart to move.
- Find a flat location for the appliance where it's protected from direct sunli and other heat sources (i.e., stove, furnace, radiator). Place the appliance on
level surface. Ensure at least 15cm of space between the back and sides of appliance and the wall. Don't place anything on the appliance.
-
The appliance must be positioned where the plug is accessible.
-
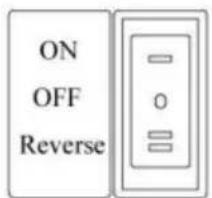
The button "ON": Put small ice cubes into the hopper, cover it, plug in t power cord, then poke the switch to ON. It will start to work and crush ice granules.
NOTE: The machine must stop working for 10min once 30min, or it will make motor overheat and stop working.
-
The button "OFF": Press the power switch to OFF, and the machine will working.
-
The button "Reverse": Use for a few seconds if hopper is jammed with ice, no crushed ice come out, then switch Reverse for a while, then back to ON resume crushing ice.
-
The button "Rough/Fine": Adjust the knob to control the size of ice particle NOTE:
If the ice cubes are compacted and don't move during working time, switch Reverse for a while, then back to ON to resume crushing ice.
The crushed ice inside the catch container can't be very full of touching the or it will get lodged in the chopped blade.
This machine can only be used to shave ice. This machine is suitable shaving small ice cubes with a side length of no more than 2-3CM. Large i cubes may cause the machine to jam or even burn out the motor.
WARNING:
The blade is very SHARP and operates with care.
Don't pour water directly into the hopper and the feed to clean, which will c electrical short circuit and increase the risk of a short circuit or electric shock. Unplug the ice shaver before cleaning.
The use of any appliance must follow basic guidelines, in particular:
A high-humidity environment will increase the risk of short circuits or electric. If in doubt, cut off the power of the ice shaver.
Turn off the machine by the switch, then pull the plug from the outlet.
Children or disabilities cannot use the ice shaver without adult supervision.
Clean and Maintenance
- Before cleaning or maintenance operations, ensure the mains switch is off, the supply plug is disconnected from the mains. Accurately clean the equipment and the discs daily for the correct operation and life of the equipment.
- After each use, it is necessary to ensure the blade is clean. The clean was be washed so the blade remains clean and is not corrupted. The service life blade is prolonged.
- Cleaning of internal and external parts
Note: Unplug the power plug before performing any cleaning or maintenance procedures. Do not use alcohol to clean the ice shaver, as this may cause parts to crack.
- Exterior
Use a clean, soft cloth to wipe the outside of the ice shaver after each use then use a damp cloth moistened with a neutral detergent to remove grease other impurities.
- Crushed Ice container cleaning (after each use)
Immerse the container in a mixture of neutral detergent and water for at least minutes, then rinse with water and dry.
- The blade belongs to the natural wear part of the equipment. After cutting certain time and quantity of ingredients, the blade will be worn. It is necessary timely purchase the blade with the corresponding specification for replacement (Improper operation or cutting too hard ingredients will also damage the blade
- Periodically check whether there is a loose set screw, timely tighten the screw and maintain the machine.
- Should the machine be idle for a long time, disconnect the main wall switch clean the machine and its accessories accurately.
Common Malfunction Analysis
| Fault diagnosis | Check item | Possible reasons | Solution |
| Not working | Power cord | Unplug or power cord get broken | Plug in or replace the power cord |
| Socket | Socket get broken | Replace the socket | |
| Motor | Motor burnt | Replace by a new on | |
| Safety switch | Damaged | Replace by a new on | |
| Power Supply | No electricity or low voltage | Contact power supply department | |
| ON/OFF switch | Broken | Replace by a new on |
MADE IN CHINA
VEVOR®
TOUGH TOOLS, HALF PRICE
Technical Support and E-Warranty Certificate
www.vevor.com/support
VEVOR®
TOUGH TOOLS, HALF PRICE
MANUEL D'INSTRUCTIONS
MODÈLE : BY-288G
natural_image
Line drawing of a mechanical device with no visible text or symbolsBESOIN D'AIDE? CONTACTEZ-NOUS!
CONSERVEZ CES INSTRUCTIONS!
text_image
Lid Hopper Visible window Top cover Switch Front panel Right panel Right panel catch container Drain Tank cover base drain feetAccessoires
natural_image
Line drawing of a mechanical device with a base platform and top frame (no text or symbols)- Plug in the socket and connect the drain horse.
text_image
There are two water outlet in both right and left side,unplug and connect the drain horse. Earthed socket Drain horse- Lift up the top lid and load ice cubes into hopper
text_image
Top lid Put the catch container on the base.- Close the top lid and power on the machine
text_image
ON OFF ReverseON: Power on
OFF: Power off
Reverse: Make the ice cubes in the hopper restart to move.
natural_image
Line drawing of a mechanical device with no visible text or symbolsnatural_image
Line drawing of a mechanical device with no visible text or symbolsKundenservice@vevor.com
text_image
Lid Hopper Visible window Top cover Switch Front panel Right panel Right panel catch container Drain Tank cover base drain feetZubehör
- Place the machine on a flat and level surface.
natural_image
Line drawing of a mechanical device with a base platform and top frame (no text or symbols)- Plug in the socket and connect the drain horse.
text_image
There are two water outlet in both right and left side,unplug and connect the drain horse. Earthed socket Drain horse- Lift up the top lid and load ice cubes into hopper
text_image
Top lid Put the catch container on the base.- Close the top lid and power on the machine
text_image
ON OFF ReverseON: Power on
OFF: Power off
Reverse: Make the ice cubes in the hopper restart to move.
natural_image
Line drawing of a mechanical device with no visible text or symbolswww.vevor.com/support
VEVOR®
TOUGH TOOLS, HALF PRICE
natural_image
Line drawing of a mechanical device with no visible text or symbolstext_image
Lid Hopper Visible window Top cover Switch Front panel Right panel Right panel catch container Drain Tank cover base drain feetAccessori
- Place the machine on a flat and level surface.
natural_image
Technical line drawing of a mechanical device with a base platform (no text or symbols)- Plug in the socket and connect the drain horse.
text_image
There are two water outlets in both right and left side,unplug and connect the drain horse. Earthed socket Drain horse- Lift up the top lid and load ice cubes into hopper
text_image
Top lid Put the catch container on the base.- Close the top lid and power on the machine
text_image
ON OFF ReverseON: Power on
OFF: Power off
Reverse: Make the ice cubes in the hopper restart to move.
natural_image
Line drawing of a mechanical device with no visible text or symbolselettronica www.vevor.com/support
VEVOR®
TOUGH TOOLS, HALF PRICE
natural_image
Line drawing of a mechanical device with no visible text or symbolstext_image
Lid Hopper Visible window Top cover Switch Front panel Right panel Right panel catch container Drain Tank cover base drain feetAccesorios
natural_image
Line drawing of a mechanical device with a base platform and top frame (no text or symbols)- Plug in the socket and connect the drain horse.
text_image
There are two water outlet in both right and left side,unplug and connect the drain horse. Earthed socket Drain horse- Lift up the top lid and load ice cubes into hopper
text_image
Top lid Put the catch container on the base.- Close the top lid and power on the machine
text_image
ON OFF ReverseON: Power on
OFF: Power off
Reverse: Make the ice cubes in the hopper restart to move.
natural_image
Line drawing of a mechanical device with no visible text or symbolsnatural_image
Line drawing of a mechanical device with no visible text or symbolsPOTRZEBUJESZ POMOCY? SKONTAKTUJ SIĘ Z NAMI!
text_image
Lid Hopper Visible window Top cover Switch Front panel Right panel Right panel catch container Drain Tank cover base drain feetAkcesoria
natural_image
Line drawing of a mechanical device with a base platform and top frame (no text or symbols)- Plug in the socket and connect the drain horse.
text_image
There are two water outlet in both right and left side,unplug and connect the drain horse. Earthed socket Drain horse- Lift up the top lid and load ice cubes into hopper
text_image
Top lid Put the catch container on the base.- Close the top lid and power on the machine
text_image
ON OFF ReverseON: Power on
OFF: Power off
Reverse: Make the ice cubes in the hopper restart to move.
natural_image
Line drawing of a mechanical device with no visible text or symbolsnatural_image
Line drawing of a mechanical device with a top panel and side panels (no text or symbols)HULP NODIG? NEEM CONTACT MET ONS OP!
Klantenservice@vevor.com
text_image
Lid Hopper Visible window Top cover Switch Front panel Right panel Right panel catch container Drain Tank cover base drain feetAccessoires
Waterafsluitende plug*2
Reservemesje*1
afvoerbuis*1
Technische parameter
| Beoordelingen | Capaciteit | Maat |
| AC120V/60Hz 650W 4,18A | 70KG/U | L*B*Hÿ |
| AC220-240V 50/60Hz 550W | 395x296x515mm |
Gebruiksaanwijzing
- Place the machine on a flat and level surface.
natural_image
Technical line drawing of a mechanical device with a base platform (no text or symbols)- Plug in the socket and connect the drain horse.
text_image
There are two water outlets in both right and left side,unplug and connect the drain horse. Earthed socket Drain horse- Lift up the top lid and load ice cubes into hopper
text_image
Top lid Put the catch container on the base.- Close the top lid and power on the machine
text_image
ON OFF ReverseON: Power on
OFF: Power off
Reverse: Make the ice cubes in the hopper restart to move.
natural_image
Line drawing of a mechanical device with no visible text or symbolsgarantiecertificaat www.vevor.com/support
VEVOR®
TOUGH TOOLS, HALF PRICE
natural_image
Line drawing of a mechanical device with a top panel and side panels (no text or symbols)BEHÖVER HJÄLP? KONTAKTA OSS!
text_image
Lid Hopper Visible window Top cover Switch Front panel Right panel Right panel catch container Drain Tank cover base drain feetTillbehör
Vattenblockerande plugg*2
Reservblad*1
avloppsrör*1
Teknisk parameter
| Betyg | Kapacitet | Storlek |
| AC120V/60Hz 650W 4,18A | 70 kg/h | L*B*H:395x296x515mm |
| AC220-240V 50/60Hz 550W |
Driftinstruktioner
1. Installera israkapparaten enligt nedan
- Place the machine on a flat and level surface.
natural_image
Line drawing of a mechanical device with a base platform and top component (no text or symbols)- Plug in the socket and connect the drain horse.
text_image
There are two water outlet in both right and left side,unplug and connect the drain horse. Earthed socket Drain horse- Lift up the top lid and load ice cubes into hopper
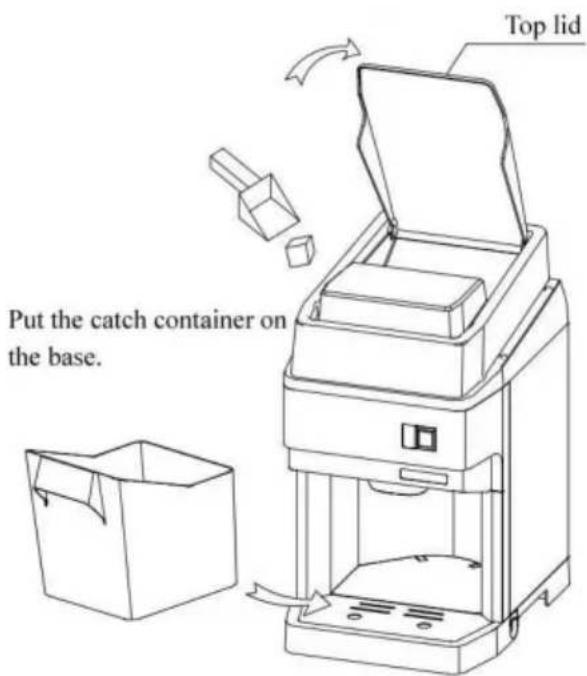
text_image
Top lid Put the catch container on the base.- Close the top lid and power on the machine
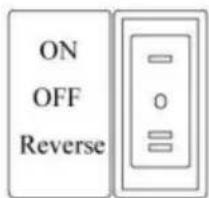
text_image
ON OFF ReverseON: Power on
OFF: Power off
Reverse: Make the ice cubes in the hopper restart to move.
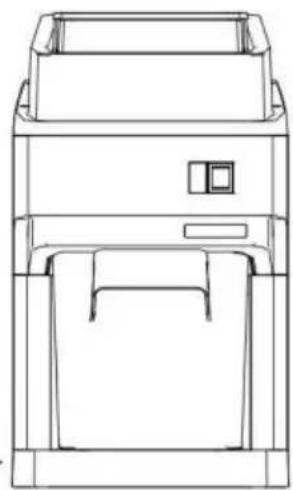
natural_image
Line drawing of a mechanical device with no visible text or symbolswww.vevor.com/support