
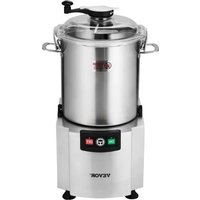
SC-7315 - Food chopper Vevor - Free user manual and instructions
Find the device manual for free SC-7315 Vevor in PDF.
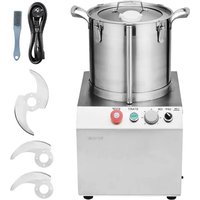


| Brand | Vevor |
| Model | SC-7315 |
| Product type | Professional food chopper |
| Bowl capacity | 15 liters |
| Motor power | 1400 W |
| Rotation speed | 1400 rpm |
| Power supply | 220-240 V ~ 50 Hz |
| Bowl material | Stainless steel |
| Blade material | Stainless steel |
| Functions | Chopping, grinding, pureeing |
| Safety | Emergency stop, lid lock, overcurrent protection |
| Cleaning | Removable parts (bowl, blade, lid) washable with water |
| Spare parts | Replacement blade available, removable blade set |
| Repairability | Blade and components replaceable |
| Warranty | Technical support and electronic warranty certificate at www.vevor.com/support |
Frequently Asked Questions - SC-7315 Vevor
User questions about SC-7315 Vevor
0 question about this device. Answer the ones you know or ask your own.
Ask a new question about this device
Download the instructions for your Food chopper in PDF format for free! Find your manual SC-7315 - Vevor and take your electronic device back in hand. On this page are published all the documents necessary for the use of your device. SC-7315 by Vevor.
USER MANUAL SC-7315 Vevor
Technical Support and E-Warranty Certificate www.vevor.com/support
FOOD CHOPPER
MODEL:SC-7304/SC-7306/SC-7310/SC-7315
We continue to be committed to provide you tools with competitive price. "Save Half", "Half Price" or any other similar expressions used by us only represents an estimate of savings you might benefit from buying certain tools with us compared to the major top brands and does not necessarily mean to cover all categories of tools offered by us. You are kindly reminded to verify carefully when you are placing an order with us if you are actually saving half in comparison with the top major brands.
MODEL:SC-7304/SC-7306/SC-7310/SC-7315
NEED HELP? CONTACT US!
Have product questions? Need technical support? Please feel free to contact us:
Technical Support and E-Warranty Certificate www.vevor.com/support
This is the original instruction, please read all manual instructions carefully before operating. VEVOR reserves a clear interpretation of user manual. The appearance of the product shall be subject to product you received. Please forgive us that we won't inform you if there are any technology or software updates on our product.
 | Warning-To reduce the risk of injury, the user must re instructions manual carefully. |
 | CORRECT DISPOSALThis product is subject to the provision of european D 2012/19/EU. The symbol showing a wheelie bin crossed through indicates that the product requires separate refu collection in the European Union. This applies to the p and all accessories marked with this symbol. Products as such may not be discarded with normal domestic w must be taken to acollection point for recycling electrica electronic devices. |
 | FCC Information:CAUTION: Changes or modifications not expressly appro by the party responsible for compliance could void the authority to operate the equipment!This device complies with Part 15 of the FCC Rules. is subject to the following two conditions:1) This product may cause harmful interference.2)This product must accept any interference received, including interference that may cause undesired operatio WARNING: Changes or modifications to this product no expressly approved by the party.responsible for compliar could void the user's authority to operate the product. Note: This product has been tested and found to com the limits for a Class B digital device pursuant to Par FCC Rules, These limits are designed to provide reasoprotection against harmful interference in a residential installation.This product generates, uses and can radiate radio fre energy, and if not installed and used in accordance wi instructions, may cause harmful interference to radio communications. However, there is no guarantee that interference will not occur in a particular installation. Ifproduct does cause harmful interference to radio or tele reception,which can be determined by turning the produ and on, the user is encouraged to try to correct the interference by one or more of the following measures.Reorient or relocate the receiving antenna.Increase the distance between the product and receivConnect the product to an outlet on a circuit differer that to which the receiver is connected.Consult the dealer or an experienced radio/TV technic assistance. |
Please read this manual carefully before connecting the appliance in order to prevent damage due to incorrect use.
Important Safety Instructions
- The AUTOMATIC FOOD CHOPPER can chop, grind and puree different vegetables such as meat, peppers, carrots, garlic, mushrooms, onions, peanuts, etc. Widely used in restaurants, canteens, hotels, food processing plants and other places.
- This machine should be operated and installed by specially trained personnel in the kitchen of the food industry such as catering, restaurant, bar, etc.
- Check for damaged parts. Before using the machine, check that all parts are included in the package, and that any moving parts are operating properly for performing the intended functions. Check for alignment of moving parts, binding of moving parts, and any other conditions that may affect the operation.
- In case of incomplete delivery or damages, contact the supplier and do not use the appliance. Do not place the machine on a heating object (gasoline, electric, charcoal cooker, etc.)
- Keep the machine away from any hot surfaces and open flames. Always operate the cutter on a level, stable, clean, heat-resistant, and dry surface. - Read all instructions on how to assemble and use this machine before attempting to use or clean it.
- Beware! Keep fingers and loose clothing away from moving parts! Injury may result!
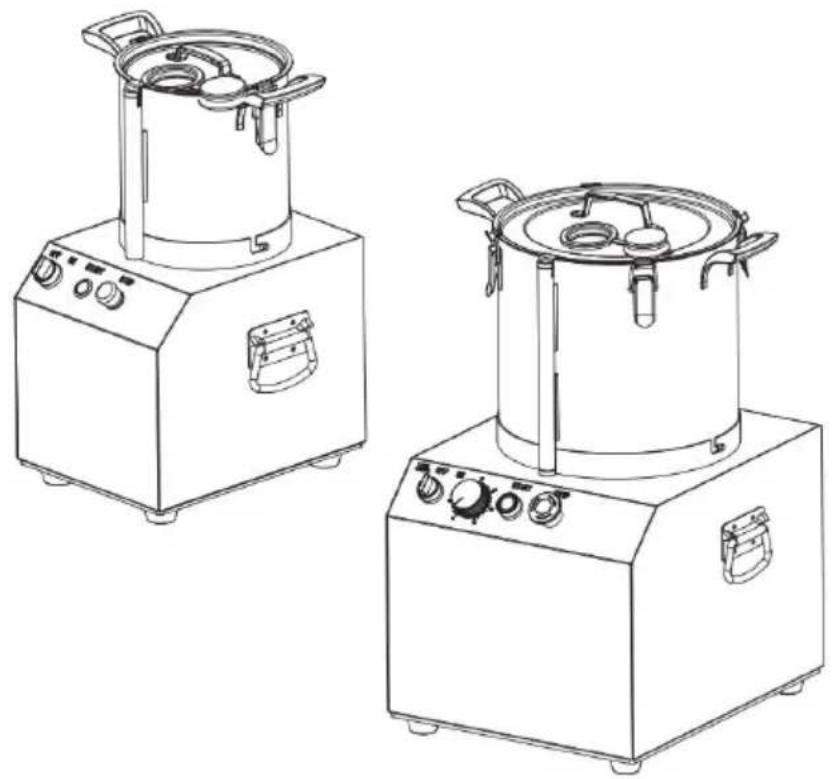
- The machine has an emergency stop function to prevent accidental damage to the machine in the event of a problem. Both the machine's material bucket and blade are removable, and they can be taken apart for cleaning after batching is completed.
- This appliance can be used by children aged from 8 years and above and persons with reduced physical, sensory or mental capabilities or lack of experience and knowledge if they have been given supervision or instruction concerning use of the appliance in a safe way and understand the hazards involved. Children shall not play with the appliance. Cleaning and user maintenance shall not be made by children without supervision.
- Keep children away from the machine.
- Clean the cutter before and after each use.
- If the supply cord is damaged, it must be replaced by the manufacturer, its service agent, or similarly qualified persons in order to avoid a hazard.
Technical Parameters
| Model | Capacity | Motor Power | Speed |
| SC-7304 | 4L | 550W | 1400r/min |
| SC-7306 | 6L | 750W | 1400r/min |
| SC-7310 | 10L | 1100W | 1400r/min |
| SC-7315 | 15L | 1400W | 1400r/min |
Use
- Put the machine on a table or floor that is stable. Connect the power supply according to safety standards. For the wire without a plug, it must be connected to a fixed position which has at least 3mm distance from all-pole disconnection. And the electric current of the disconnection device needs to be over or equal to 15A.
- Check if the voltage is the same as the label, and the ground wire is
before using.
- Open the cover, take the blade out very carefully, and avoid touching the drum so as not to damage the blade.
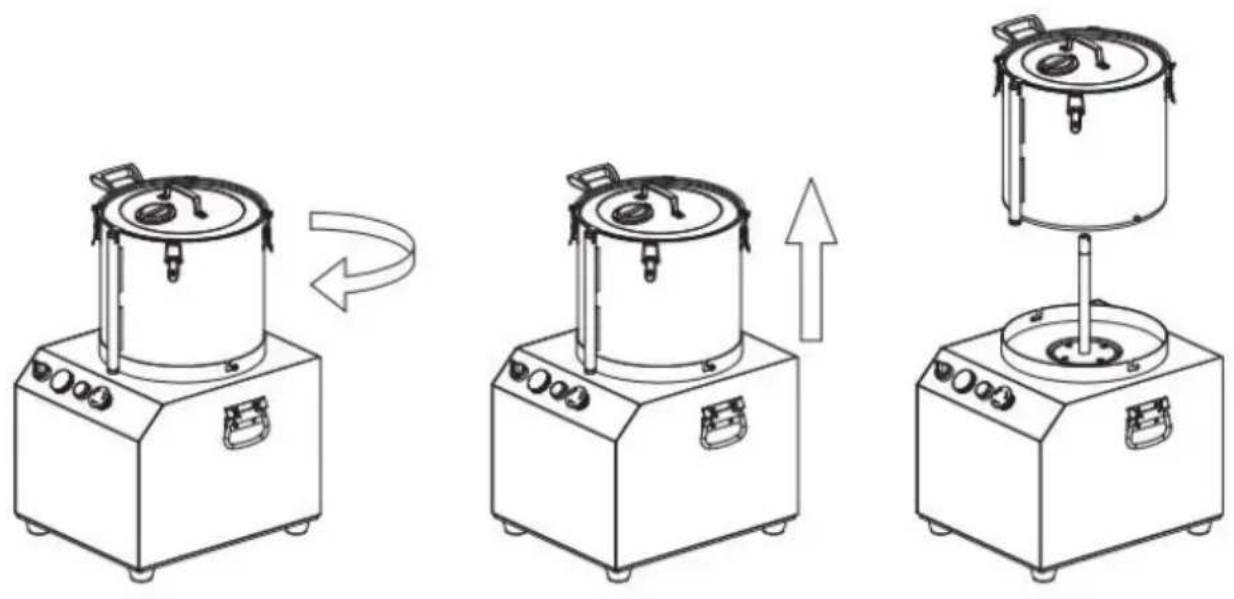
- Hold the handle and press, rotate in a clockwise direction. Can remove the bowl.
- Clean the stainless steel bowl, cutter, and cover, and dry them.
- Install the bowl: position the bowl, then turn it counterclockwise until the handle aligns with the locating point.
- Install the cutter properly and close the cover. The safety lock of the cover must fit well with the handle, and lock the cover securely. If not, the machine cannot start.
- Adjust the red "stop" switch to make it bounce, then set the switch to "on" and press the round switch "on".
Check the running direction of the cutter through the transparent cover. The cutter must run counterclockwise.
- Make sure the machine is running in the correct direction, then open the cover, add the food, and close the cover. (Attention: Make sure the cutter has completely stopped before opening the cover!)
- Turn the knob to "off" to stop cutting. Normally, most food can be chopped into small pieces in 10-20 seconds. If the food is not chopped enough, you can cut it again.
- After finishing, clean all parts that come into contact with food, such as the stainless steel bowl, cutter, and cover. Keep the machine clean.
Cutting time reference for some foods; adjust according to your needs.
| Cutting type | Pork | Garlic | Chili | Pea nut | Tomato |
| Cutting time | 13s | 35s | 15s | 18s | 15s |
Attention: Large ingredients must be cut into small pieces before placing them in the bowl. For example, meat should be cut into pieces of about 0.15 kg each.
CAUTION: DO NOT CLEAN THE MACHINE WITH A WATER JET.
Parts list
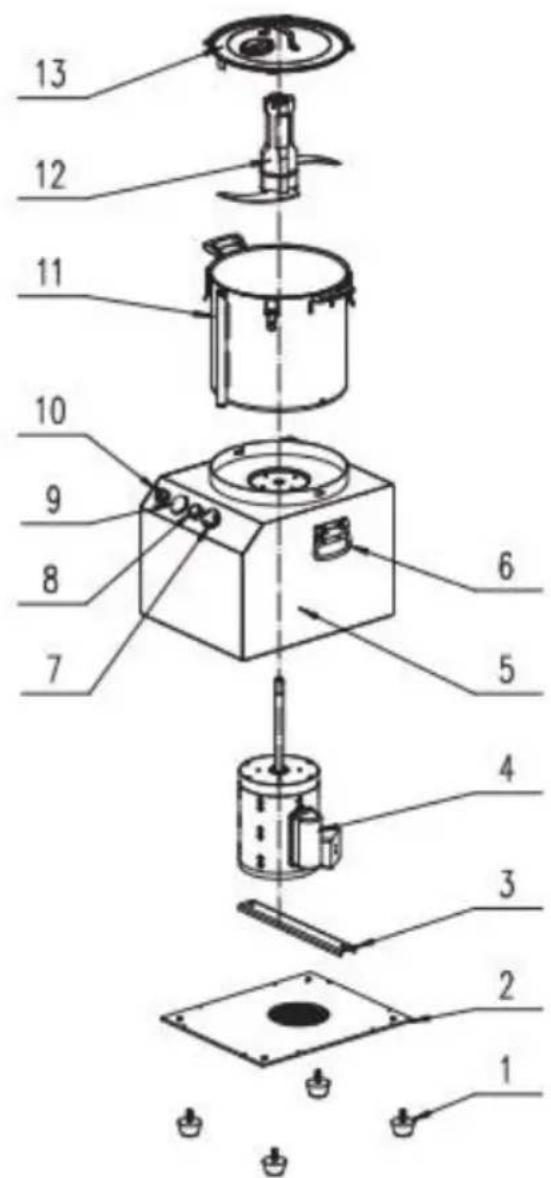
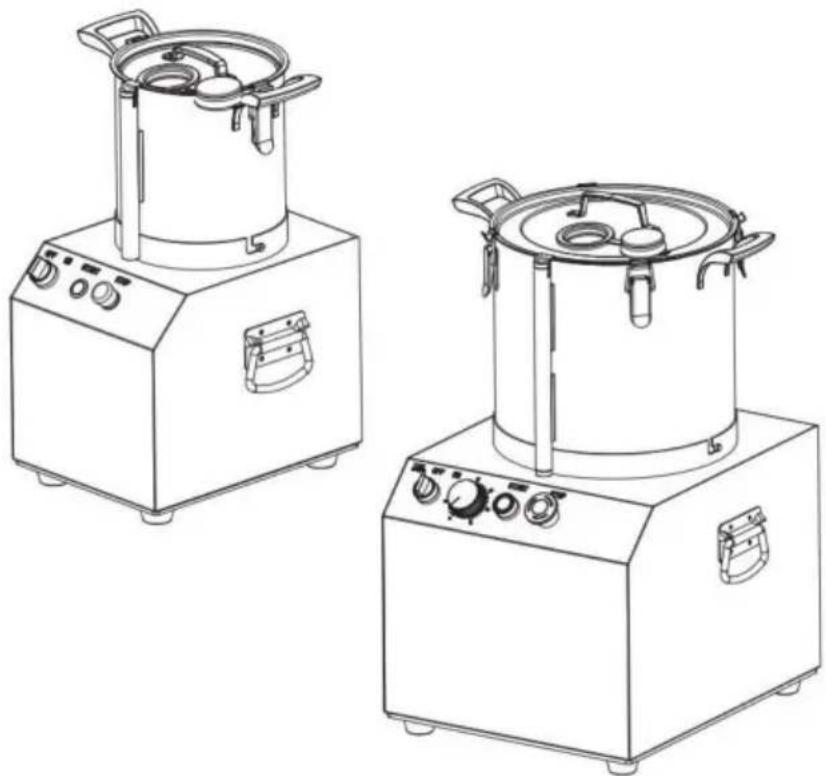
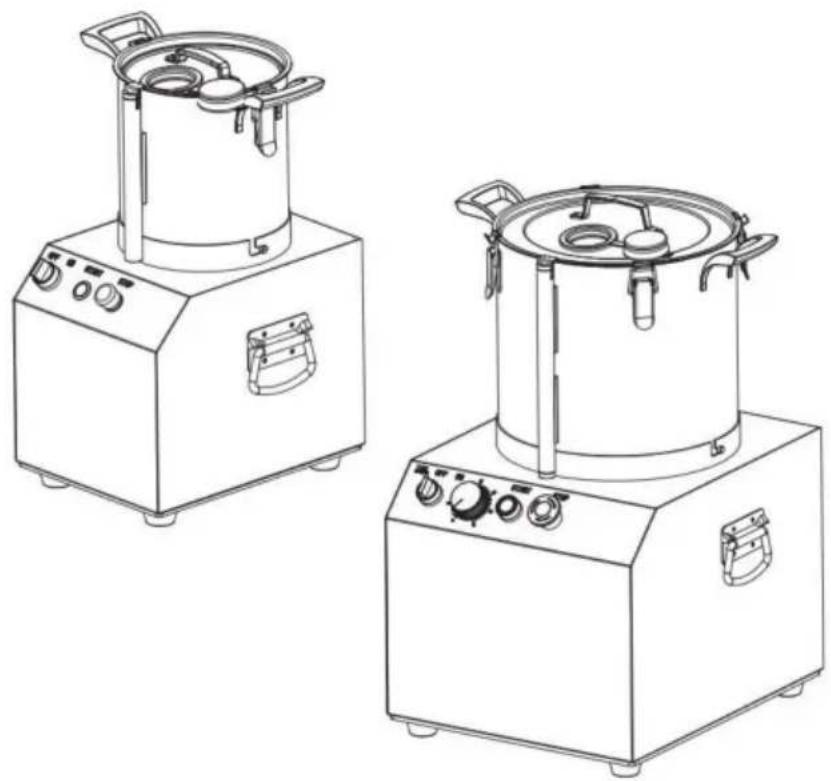
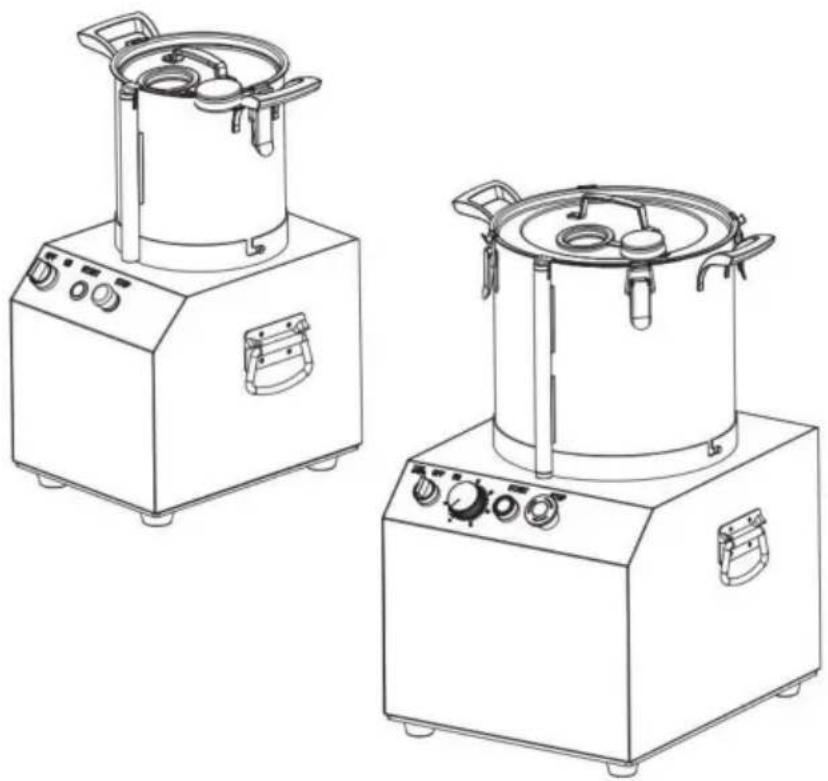
| 1.Feet2.Bottom panel3.Motor bracket4.Motor5.Host6.Host handle7.Emergency stop switch | 8.Start switch9.Timer (only SC15 hvae it)10.Power switch11.Bowl12.Knife set13.Cover |
Disassembly
After chopping the ingredients, grasp the handle of the bowl, turn it clockwise, and lift it up with force.
Attention: Do not remove the blade separately. Keep it in the bowl. Lift the bowl, and the blade will loosen as well. Then you can remove the blade more easily. If you are processing pasty food, you may pour out the food first, then take out the knife. Otherwise, the food may flow out from the middle hole.
bowl. Lift up the bowl, and the blade will also loosen. After that, you can take out the blade more easily. If you process pasty food, you may pour out the food first, then take out the knife. Otherwise, the food will flow out from the middle hole.
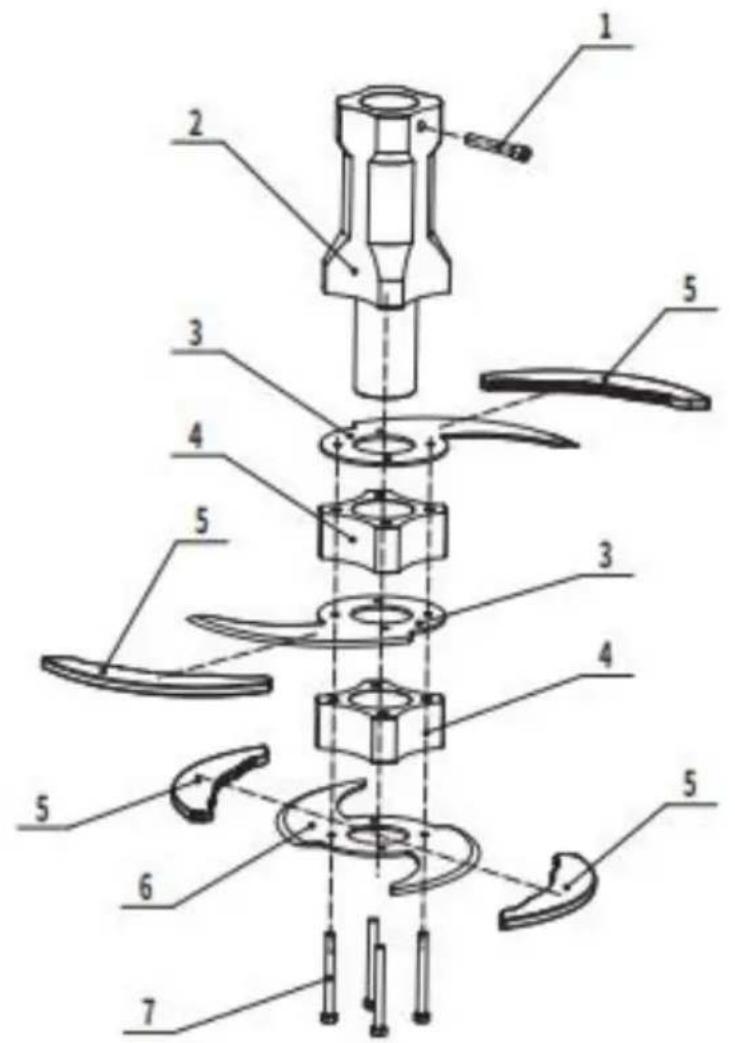
Parts list of blade set
1. Axle pin 2. Aluminum axle 3. Blade 4. Spacer sleeve 5. Sheath 6. Double-edged blade 7. Bolt M5X70
How to replace the blade.
1. Remove 4 pcs Bolts. 2. Remove the original blade. 3. In turn (from top to bottom): double-edged Blade; Spacer sleeve; Blade; Spacer sleeve; Blade. 4. Tighten the Bolt. 5. Remove the Sheath before putting the blade set into the bowl.
Warning!
1. Never put food over 2/3 of the bowl.
Recommended minimal volume is not lower than the blade level. Lack of food leads to
vibration. If food is too big, cut it to a suitable size before feeding.
- The appliance is not allowed to run no-load for more than 30 minutes.
- The over current protection switch belongs to non-automatic reset. After the over current
protection switch is working, you need to press it to reset it.
TROUBLESHOOTING
| Potential Problem | Probable Cause | Solution |
| The machine does not operate after power on | The top cover is lock in place or not | Putin the top cover good |
| The machine stop during use | 1.Voltage is too low2. the over current protection switch is working | 1.Check power supply for compliance with rated voltage2.press the over current protection switch to reset it |
| The machine is unusually vibrating or noisy | 1.The blade not put in place2.The machine not put or stable place3 Voltage is too high4 The ingredients is exceed over the max filling level | 1.Take out all the ingredients, and put blade in place2.Put the machine on stable place3.Check power supply for compliance with rated voltage4.Remove the power plug from he power outlet then take out t extra ingredients |
Manufacturer: Shanghaimuxinmuyeyouxiangongsi
Address: Shuangchenglu 803nong11hao1602A-1609shi, Baoshan District, Shanghai 200000 CN.
Imported to AUS: SIHAO PTY LTD. 1 ROKEVA STREET EASTWOOD NSW 2122 Australia
Imported to USA: Sanven Technology Ltd. Suite 250, 9166 Anaheim Place, Rancho Cucamonga, CA 91730
| UK | REP |
YH CONSULTING LIMITED. C/O YH Consulting Limited Office 147, Centurion House, London Road, Staines-upon-Thames, Surrey, TW18 4AX
| EC | REP |
Technical Support and E-Warranty Certificate www.vevor.com/support
VEVOR®
TOUGH TOOLS, HALF PRICE
MODEL: SC-7304/SC-7306/SC-7310/SC-7315
MODEL: SC-7304/SC-7306/SC-7310/SC-7315
NEED HELP? CONTACT US!
YH CONSULTING LIMITED. C/O YH Consulting Limited Office 147, Centurion House, London Road, Staines-upon-Thames, Surrey, TW18 4AX
| REPRÉSENTANT | DE LA CE |
E-CrossStu GmbH
Mainzer Landstr.69,
MODEL: SC-7304/SC-7306/SC-7310/SC-7315
MODEL: SC-7304/SC-7306/SC-7310/SC-7315
YH CONSULTING LIMITED. C/O YH Consulting Limited Office 147, Centurion House, London Road, Staines-upon-Thames, Surrey, TW18 4AX
electronics www.vevor.com/support
MEAT GRINDER FOR FOOD
MODEL: SC-7304/SC-7306/SC-7310/SC-7315
MODEL: SC-7304/SC-7306/SC-7310/SC-7315
Imported in AUS: SIHAO PTY LTD. 1 ROKEVA STREET EASTWOOD NSW 2122 Australia
Imported in USA: Sanven Technology Ltd. Suite 250, 9166 Anaheim Place, Rancho Cucamonga, CA 91730
YH CONSULTING LIMITED. C/O YH Consulting Limited Office 147, Centurion House, London Road, Staines-upon-Thames, Surrey, TW18 4AX
MODEL: SC-7304/SC-7306/SC-7310/SC-7315
MODEL: SC-7304/SC-7306/SC-7310/SC-7315
www.vevor.com/support
Road, Staines-upon-Thames, Surrey, TW18 4AX
E-CrossStu GmbH
Mainzer Landstr.69,
MODEL: SC-7304/SC-7306/SC-7310/SC-7315
MODEL: SC-7304/SC-7306/SC-7310/SC-7315
NEED HELP? CONTACT US!
YH CONSULTING LIMITED. C/O YH Consulting Limited Office 147, Centurion House, London Road, Staines-upon-Thames, Surrey, TW18 4AX
| Przedstaw ciel UE |
E-CrossStu GmbH
Mainzer Landstr.69,
60329 Frankfurt am Main.
VEVOR®
TOUGH TOOLS, HALF PRICE
MODEL: SC-7304/SC-7306/SC-7310/SC-7315
MODEL: SC-7304/SC-7306/SC-7310/SC-7315
NEED HELP? CONTACT US!
- Aspen 2. Aluminum blade
3. Blade
- Spacer 5.
Blade 6.
YH CONSULTING LIMITED. C/O YH Consulting Limited Office 147, Centurion House, London Road, Staines- upon-Thames, Surrey, TW18 4AX
Warranty certificate www.vevor.com/support
VEVOR®
TOUGH TOOLS, HALF PRICE
www.vevor.com/support
MATCHOPPER
MODEL: SC-7304/SC-7306/SC-7310/SC-7315
MODEL: SC-7304/SC-7306/SC-7310/SC-7315
NEED HELP? CONTACT US!
YH CONSULTING LIMITED. C/O YH Consulting Limited Office 147, Centurion House, London Road, Staines-upon-Thames, Surrey, TW18 4AX
| EC | REP |

- FOOD CHOPPER
- MODEL:SC-7304/SC-7306/SC-7310/SC
- NEED HELP? CONTACT US
- TECHNICAL SUPPORT AND E-WARRANTY CERTIFICATE WWW.VEVOR.COM/SUPPORT
- USE
- PARTS LIST
- DISASSEMBLY
- PARTS LIST OF BLADE SET
- HOW TO REPLACE THE BLADE
- WARNING
- TROUBLESHOOTING
- VEVOR®
- TOUGH TOOLS, HALF PRICE
- MODEL: SC-7304/SC-7306/SC-7310/SC
- MEAT GRINDER FOR FOOD
- MATCHOPPER
Brand : Vevor
Model : SC-7315
Category : Food chopper