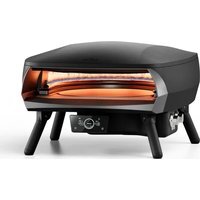
ETNA Rotante Control 16 - Pizza oven Witt - Free user manual and instructions
Find the device manual for free ETNA Rotante Control 16 Witt in PDF.


| Product type | Pizza oven |
| Brand | Witt |
| Model | ETNA Rotante Control 16 |
| Dimensions (L × W × H) | 750 × 650 × 440 mm |
| Net weight / Gross weight | 31.5 kg / 40.1 kg |
| Power supply | 6 AA batteries (1.5 V) or DC 3 V / 1000 mA mains adapter |
| Gas type | Butane / Propane (depending on country, pressure 28-37 mbar or 30/50 mbar) |
| Total thermal power | 9.2 kW (2 burners) |
| Functions | Electronic ignition, pizza stone rotation, touchscreen LCD with style selection and temperature indicators |
| Temperature ranges (styles) | Roman: 300-350 °C; New York: 260-290 °C; Neapolitan: 420-450 °C; Manual: adjustable |
| Maintenance and cleaning | Clean the exterior with mild soapy water; the pizza stone does not tolerate water and must be removed before cleaning |
| Safety | Outdoor use only; do not modify the appliance; perform a leak test before each use; keep children away |
| Spare parts and repairability | Injectors, gas hose, pressure regulator, pizza stone, LCD screen, batteries – contact the dealer for parts |
| Warranty | 2 years (excluding commercial use) |
| PIN code | 2531DM-110 |
Frequently Asked Questions - ETNA Rotante Control 16 Witt
User questions about ETNA Rotante Control 16 Witt
0 question about this device. Answer the ones you know or ask your own.
Ask a new question about this device
Download the instructions for your Pizza oven in PDF format for free! Find your manual ETNA Rotante Control 16 - Witt and take your electronic device back in hand. On this page are published all the documents necessary for the use of your device. ETNA Rotante Control 16 by Witt.
USER MANUAL ETNA Rotante Control 16 Witt
natural_image
Modern olive-green pizza with open lid and digital display (no visible text or symbols)EN: 2-21
FR: 22-41
PT: 42-61
ES: 62-81
IT: 82-101

2531-25

8504-25
TABLE OF CONTENTS
SAFETY INSTRUCTIONS....3
Leak Test 4
Connecting the Gas Cylinder 5
Disconnecting the Gas Cylinder....5
Batteries 6
TECHNICAL INFORMATIONS....7
OUTDOOR INSTALLATION GUIDE 7
ASSEMBLY: 9
US OF THE PIZZA OVEN / IGNITION INSTRUCTIONS 13
USING THE SCREEN GUIDE....14
CLEANING AND MAINTENANCE.... 16
TROUBLESHOOTING 17
SPECIFICATIONS....19
WARRANTY AND SERVICE 20
SAFETY INSTRUCTIONS
To reduce the risk of fire, fire hazards, or other injuries, read these safety instructions carefully and thoroughly before using this appliance.

natural_image
Warning symbol with exclamation mark inside a triangle (no text or numbers)- DO NOT OPERATE THIS APPLIANCE UNTIL YOU HAVE READ THE USER MANUAL
• DO NOT PLACE OBJECTS ON OR AGAINST THIS APPLIANCE - DO NOT STORE CHEMICALS, FLAMMABLE MATERIALS, OR SPRAY CANS NEAR THIS APPLIANCE
• DO NOT USE THIS APPLIANCE INDOORS -
DO NOT ALLOW FATS/OILS, ASH, OR UNBURNT FUEL TO ACCUMULATE IN THE APPLIANCE BETWEEN USES
-
WARNING: Parts of the pizza oven can become extremely hot!
- For outdoor use only. Never use the pizza oven in enclosed or covered spaces.
- Keep children and pets away from the appliance at all times.
- Do not move the appliance while it is in use.
- Turn off the gas supply at the gas cylinder after use.
- Do not modify the appliance.
- Do not alter sealed original parts from the manufacturer.
- Use heat-resistant gloves when handling hot components.
- Do not store the appliance indoors unless the gas cylinder has been disconnected. If the appliance is not in use for an extended period, it should be removed and stored in its original packaging in a dry place.
Note: The gas cylinder should always be stored outdoors in a well-ventilated area. A disconnected gas cylinder must never be stored in a building, garage, or any other enclosed space! Gas cylinders must be stored upright outdoors and out of reach of children.
- CAUTION: Cleaning and maintenance must be performed only when the oven is completely cooled and the gas cylinder is disconnected.
- Never allow clothing or other flammable material to come into contact with or get too close to the burner or any hot surface until the appliance has cooled. The material can ignite and cause serious injury.
- Certain synthetics are highly flammable and should not be worn when using the oven. Loose garments or sleeves should not be worn when using the oven.
- The underside of the oven also reaches high temperatures. Do not place the pizza oven on plastic tables or other combustible surfaces, tablecloths or similar.
- The pizza oven is not intended for use on boats, in motor homes or caravans.
- Do not modify the pizza oven as it may cause personal injury or product damage.
- Unauthorised modifications to the pizza oven will also result in the lapse of the warranty.
- There must be nothing overhanging the pizza oven, such as trees or roofing structures.
LEAK TEST:
- CHECK ALL GAS CONNECTIONS, CONNECTIONS AND JOINS ON THE APPLIANCE BEFORE USE: Although the gas connections of the appliance have been tested for leakage before packing and shipping, a complete test must be performed at the installation site. If at any point you can smell gas, stop using the pizza oven immediately and check the entire system for leaks. Make a solution with a drop of liquid dishwashing detergent and a little water. You will need a spray bottle, brush or cloth to apply the solution to the fittings. Apply the soap solution to all gas fittings. There will be soap bubbles in the places where there is a leak. If there is a leak, turn off the gas supply immediately and tighten the leaking elements. Perform a leak test every time you change the gas tank, or after an extended period of time when the oven has not been in use.
- Make sure that the valve is properly positioned. Make sure the hose is not damaged.
IMPORTANT: if the gas leakage cannot be stopped, turn off the gas supply and contact customer service.
WARNING: NEVER turn on the burners while gas leak checks are carried out.
NOTE: since some test solutions, including soapy water, may cause rust, all connections must be rinsed with water once the leak test is completed.
Gas cylinder connection:
- The gas supply or hose must comply with applicable requirements and must be regularly examined and replaced as necessary. The hose must comply with the EN16436 standard. The regulator must comply with the EN16129 standard.
DANGER: Do not use an adjustable pressure regulator (such as the type used for weed burners). Risk of explosion or combustion.
- The nominal output (gas pressure) should be between 28-37 mbar and 50 mbar in Germany, Austria, and Switzerland.
- Worn or damaged hoses should be replaced. Check that the hose is not squeezed, split or in contact with the pizza oven, excepted at the place where it is connected.
- In some regions, the hose and regulator may not be supplied with the appliance.
- The hose for the appliance should not exceed 1.5 m.
- Connect the gas cylinder to the oven using the hose and regulator. Carefully tighten the nuts, but do not overtighten or twist. Be careful not to get to damage the regulator fittings. Make sure that ALL valves buttons on the oven are on Off-position before opening the gas cylinder.
- The regulator hose must be kept at a distance from sharp objects and heat sources.
- Before replacing the gas cylinder: make sure the gas is turned off before disconnecting the hose and regulator from the bottle (not from the oven itself).
- Replace the flexible hose according to applicable national guidelines.
- Do not use a LPG cylinder that exceeds a maximum width of 310 mm and 570 mm height.
Leak tests: Once the hose and regulator are fitted and secured according to the instructions, the gas can be turned on. Then spray the joints with a water/soap mixture to check for any leaks.
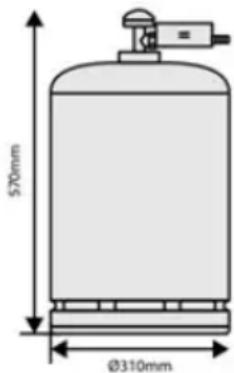
NOTE: Make sure the gas cylinder is fully shielded from the oven.
Gas cylinder disconnection:
- When disconnecting gas cylinder: Make sure the oven on/off button is turned to the OFF position. Make sure the cylinder valve is in the closed position. Disconnect the regulator assembly from the gas cylinder and remove it. Be sure to keep the gas cylinder at least one metre from the oven to avoid risk of ignition.
- Requirements/rules for regulator and hose: the regulator used with your gas burner oven must be CE-approved and comply with applicable requirements and regulations.
Batteries:
- Dispose of batteries responsibly and keep them out of the reach of children in case they swallow them. If a child swallows a battery, contact a doctor immediately!
- Do not mix old batteries with new ones. This can cause batteries to overheat and leak.
• Non-rechargeable batteries should not be placed in a charger. - Do not take apart, squeeze, puncture or damage batteries in any way. This can result in fractures or leaks.
- Maintain the durability of batteries by turning off the appliance and unplugging batteries when the appliance is not used — or expected to be used — for an extended period of time.
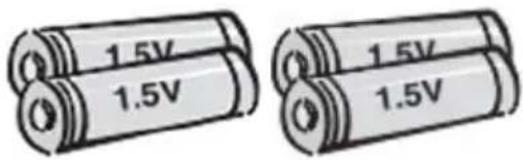
- Use the specific battery type (up to 7 × AA batteries).
- Insert the batteries correctly. Make sure the poles (- and +) of the batteries are turned the right way.
- Remove exhausted batteries from the appliance immediately and dispose of them securely and correctly according to regulations.
TECHNICAL INFORMATION
Please note: Injector size (nozzle marking) is stamped on the sides of the hexagon. (105 = ∅1.05mm injector)
| Model-number | Recipient country | Total heat supply | Burners | Injector/ Size labelling | Categories Gas types |
| 2B | BE, FR, IT, LU, IE, GB, GR, PT, ES, CY, CZ, LT, SK, CH, SI, LV, PL | 9.2kw 2 | 1.47/0.4 I3+(28~30/37) | Butane at (28~30)mbar/ Propane at 37 mbar | |
| LU, NL, DK, FI, SE, CY.CZ, EE, LT, MT, SK, SI.BG, IS, NO, TR, HR, RO, IT, HU, LV | 9.2kw 2 | 1.47/0.4 I 3E/P(30) | Butane, propane and a mixture of these at 30 mbar | ||
| AT, DE, CH, LU, SK | 9.2kw 2 1.26 | /0.35 I 3B/P(50) | Butane, propane and a mixture of these at 50 mbar |
| Product Details Witt ETNA Rotante Control 16” | |
| Dimensions 750 × 650 | × 440 cm |
| Weight NW/GW 31,5 kg | 40,1kg |
PIN CODE: 2531DM-110
OUTDOOR INSTALLATION GUIDE
This appliance must only be used outdoors, above ground level, in open areas with natural ventilation – free from stagnant air – where any potential gas leaks or combustion products can quickly disperse through wind and natural airflow.
Do not use this appliance indoors. Do not use the pizza oven in garages, porches, sheds, or other enclosed spaces. The oven is not intended for installation or use in recreational vehicles (e.g., boats, camper vans) and must not be placed near or under surfaces that are combustible or sensitive to heat. Do not block the airflow or combustion area around the oven housing while in use.
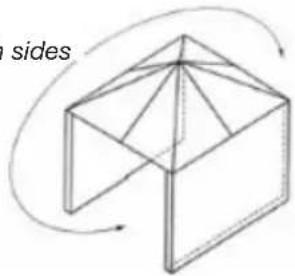
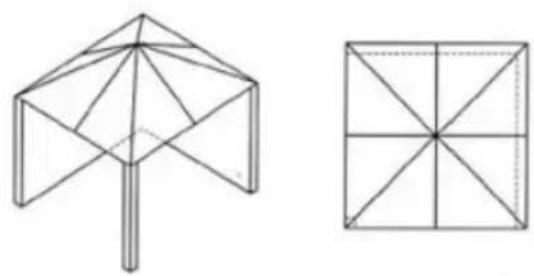
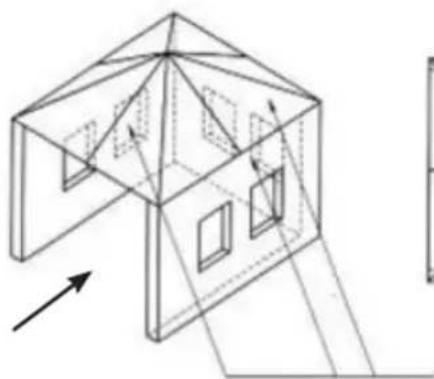
Any enclosure in which the appliance is used must meet one of the following requirements:
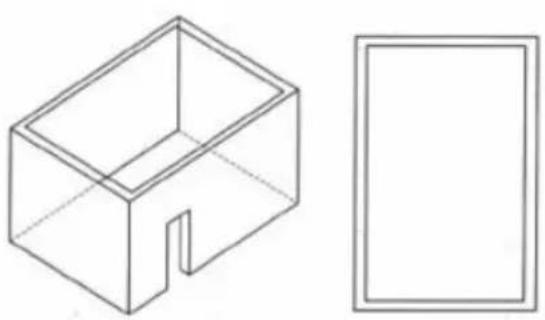
- An enclosure with walls on all sides, with at least one permanent opening at ground level and no overhead cover.
- A partially enclosed space with overhead cover and no more than two walls.
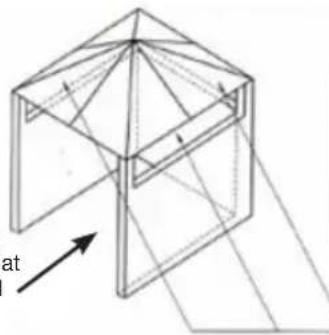
- A partially enclosed space with overhead cover and more than two walls, where the following conditions must be met:
a) At least 25% of the total wall area must be completely open, and
b) At least 30% of the remaining wall area must be open and unobstructed.
On balconies, at least 20% of the total wall area (side, back and front walls) must be and remain open and unobstructed.
natural_image
Two technical line drawings: a 3D wireframe box and a 2D rectangular frame, both without any text or symbols.Open in both sides
natural_image
Isometric line drawing of a 3D geometric structure with no text or symbols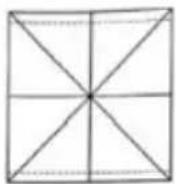
Figure F1 – Outdoor Area – Example 1 Figure F3 – Outdoor Area – Example 3
natural_image
Two geometric diagrams: a simple 3D umbrella-like structure and a square grid with intersecting lines (no text or symbols)Open side makes up at least 25% of the total wall area.
natural_image
Geometric line drawing of a 3D geometric structure with no text or symbols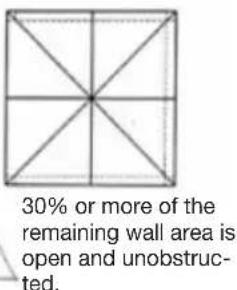
Figure F2 – Outdoor Area – Example 2 Figure F4 – Outdoor Area – Example 4
Open side makes up at least 25% of the total wall area.
natural_image
Isometric line drawing of a house structure with triangular roof and windows, showing structural details and an arrow indicating direction (no text or symbols)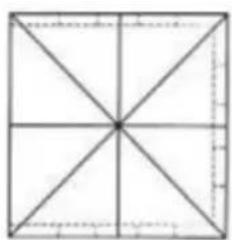
natural_image
Geometric diagram of a square divided into four equal quadrants by diagonals (no text or labels)30% or more of the remaining wall area is open and unobstructed.
ASSEMBLY
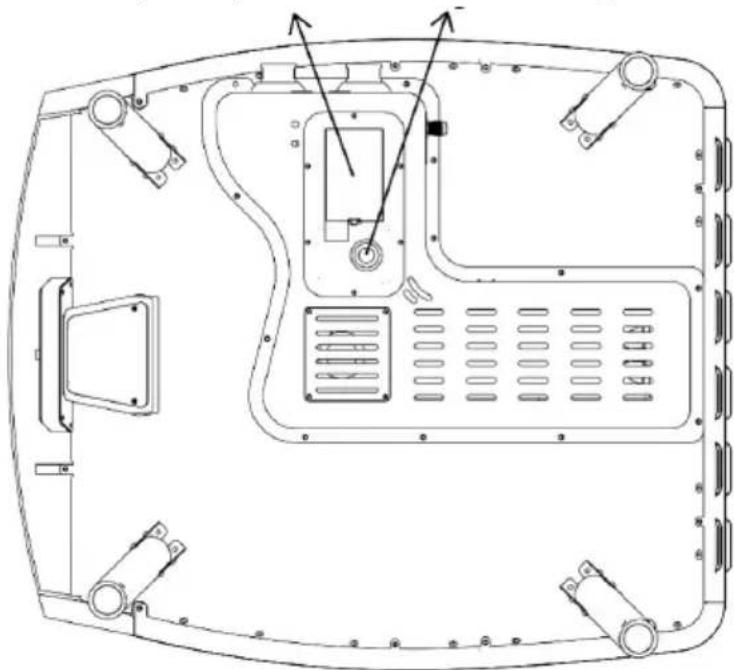
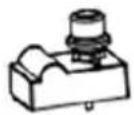
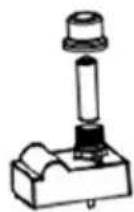
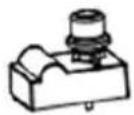
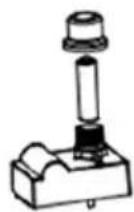
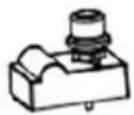
- Unscrew the ignition button cover, insert one new AA battery, and make sure the (+) and (−) terminals are positioned correctly. Reattach the cover.
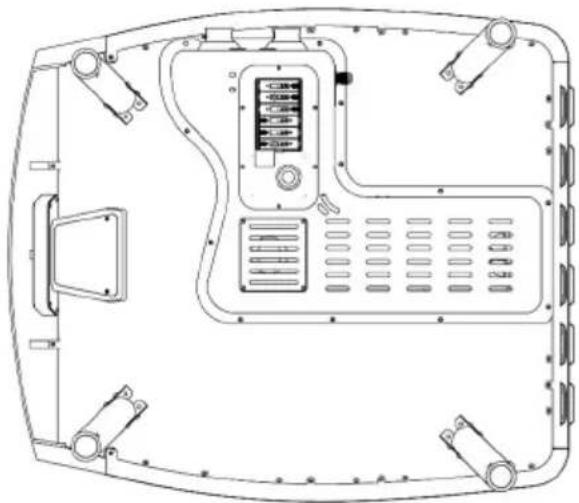
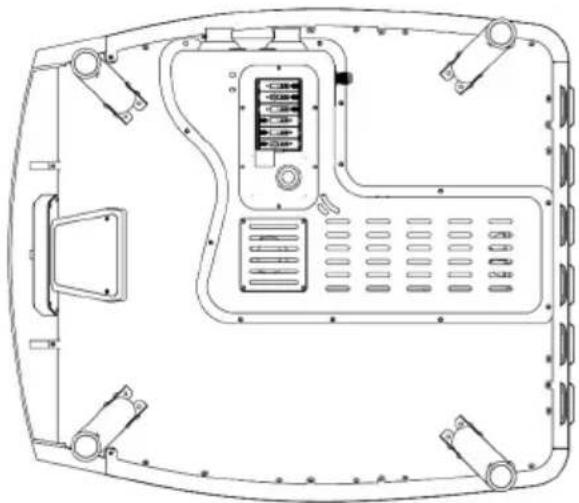
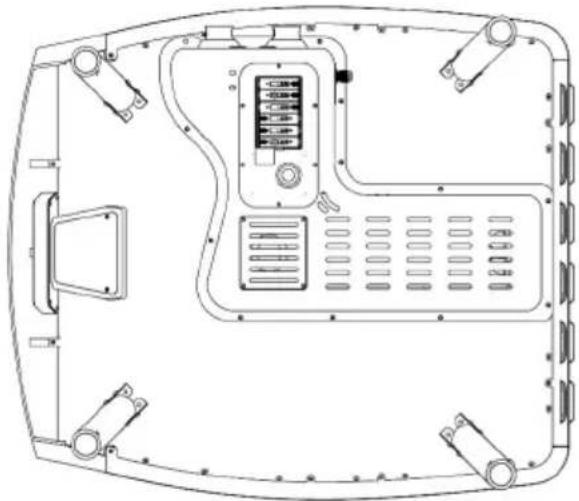
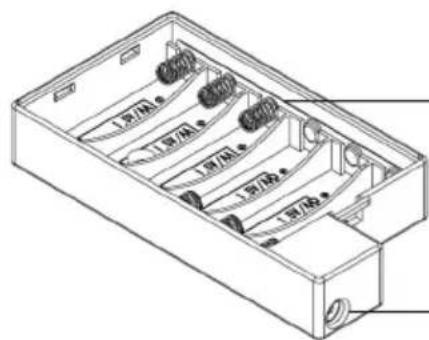
Remove the battery compartment cover. Insert six new "AA" batteries, ensuring that the plus (+) and minus (−) terminals are positioned correctly as indicated.
Reattach the battery compartment cover.
Battery compartment Electronic ignition
natural_image
Technical line drawing of a device casing with internal components and mounting holes (no text or symbols)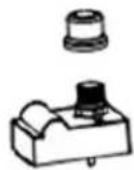
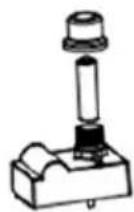
AA-battery / DC1.5V × 1 pc
natural_image
Technical line drawing of a mechanical or electrical enclosure with no visible text, numbers, or symbols.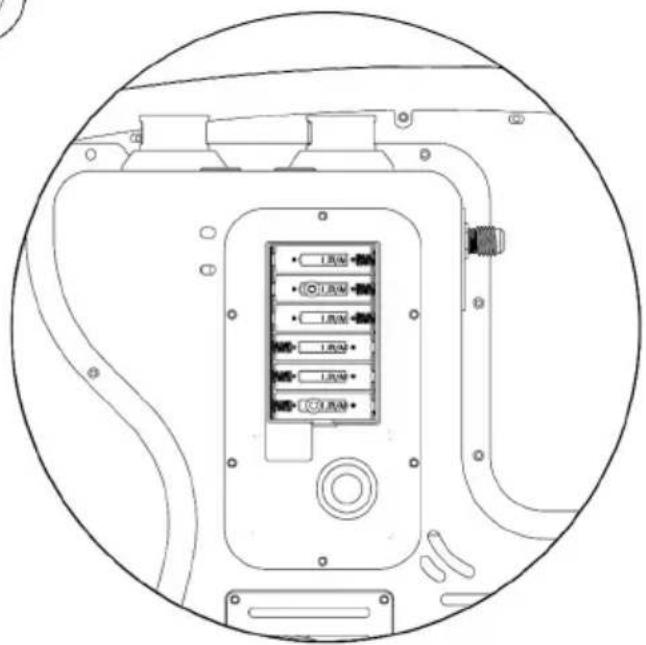
natural_image
Technical line drawing of a device rear panel with labeled buttons and ports (no text or symbols beyond basic labels)
If you prefer to use the included power supply instead, attach it next to the battery compartment and connect it to a power outlet.
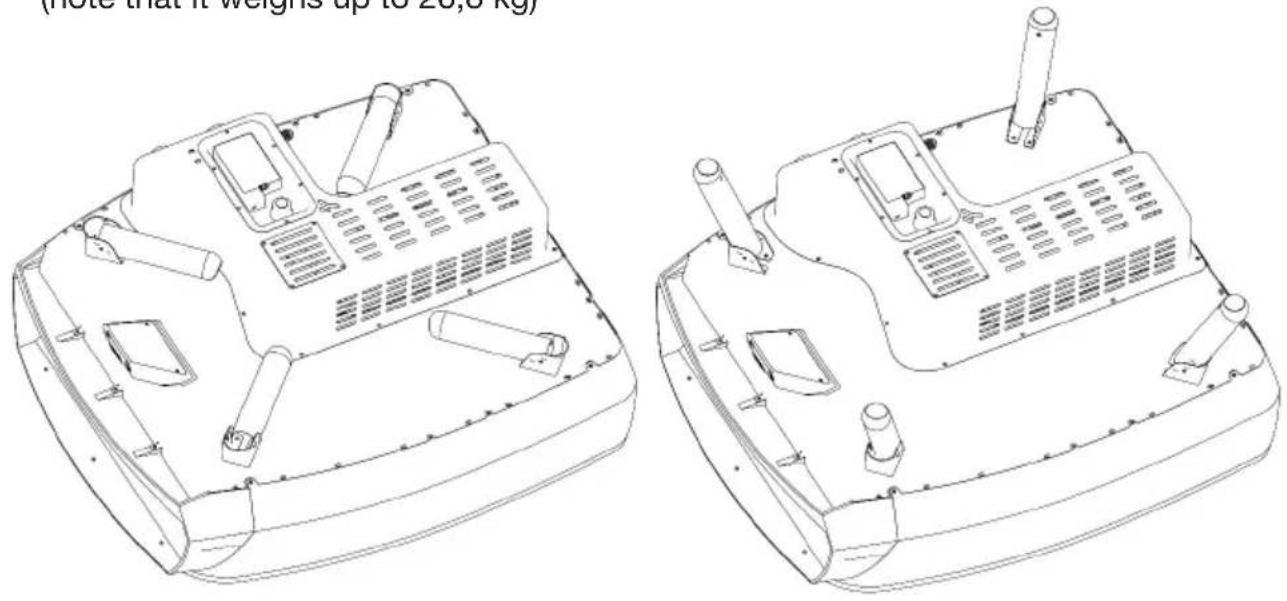
- Unfold the legs completely and then turn over the pizza oven (note that it weighs up to 26,8 kg)
natural_image
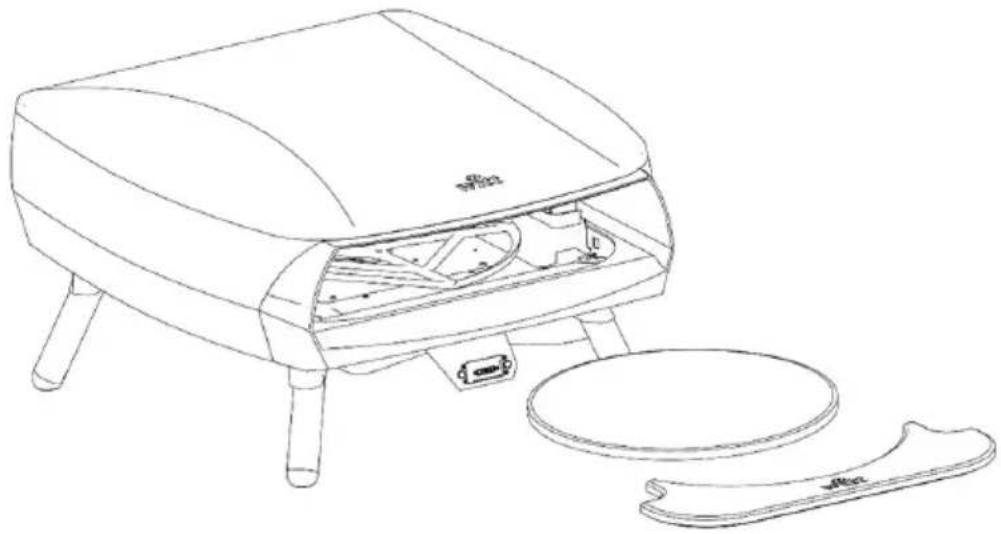
Technical line drawings of two mechanical components with ventilation grilles and mounting brackets (no text or symbols)- Remove the pizza stone from the packaging and place it on the turntable.
natural_image
Line drawing of a portable oven with open lid and base plate (no text or symbols)ON OFF
natural_image
Close-up of three metallic buttons with a glowing blue lens on a dark surface (no text or symbols visible)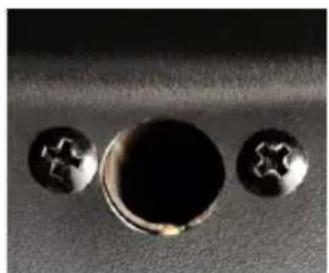
natural_image
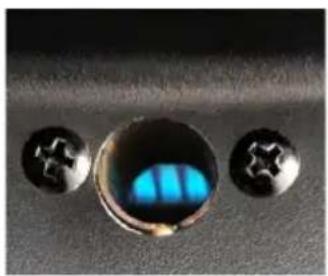
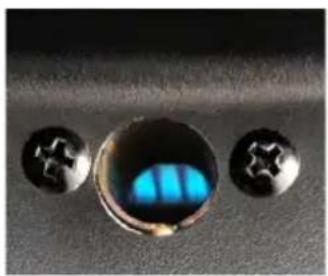
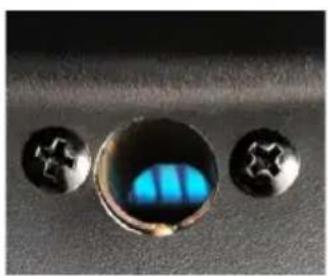
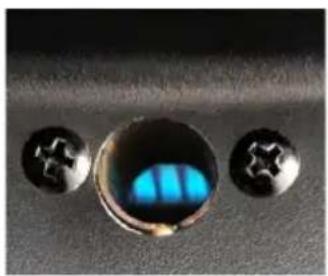
Close-up of three metallic circular components with star-shaped cutouts, placed on a textured surface (no text or symbols visible)Inspection hole for visual inspection of the booster burner flame.
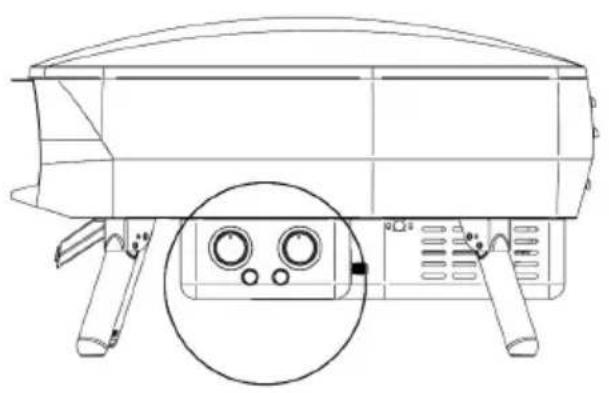
- Make sure the burner knob are in the OFF position before connecting the gas hose.
Note: In some regions, the gas hose may already be connected to the pizza oven.
natural_image
Line drawing of a portable electronic device with control panel and circular dial (no text or symbols)
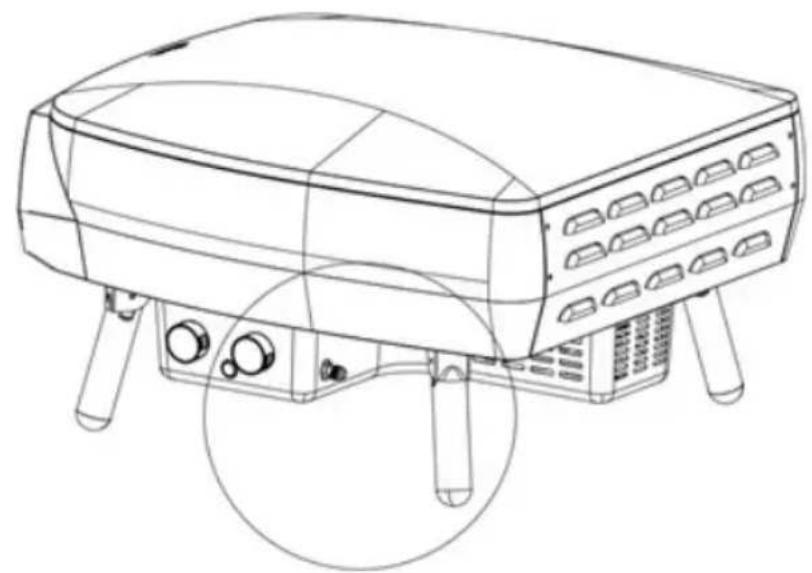
- Connect the gas hose to the pizza oven.
natural_image
Line drawing of a rectangular electronic device with four legs and control knobs, no text or symbols present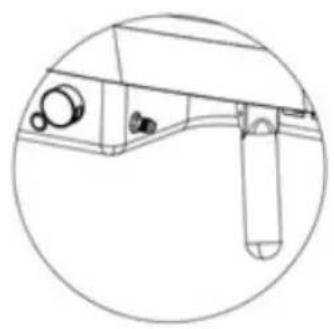
natural_image
Technical line drawing of a mechanical device with no visible text or symbols
natural_image
Line drawing of a portable electronic device with four legs and control buttons (no text or symbols)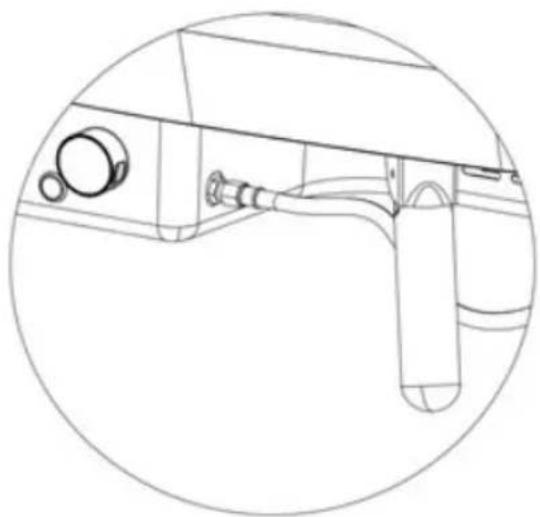
natural_image
Line drawing of a mechanical device with hoses and a cylindrical component, enclosed in a circular border (no text or symbols)- Remove the screen from the packaging and attach it to the screen mount.
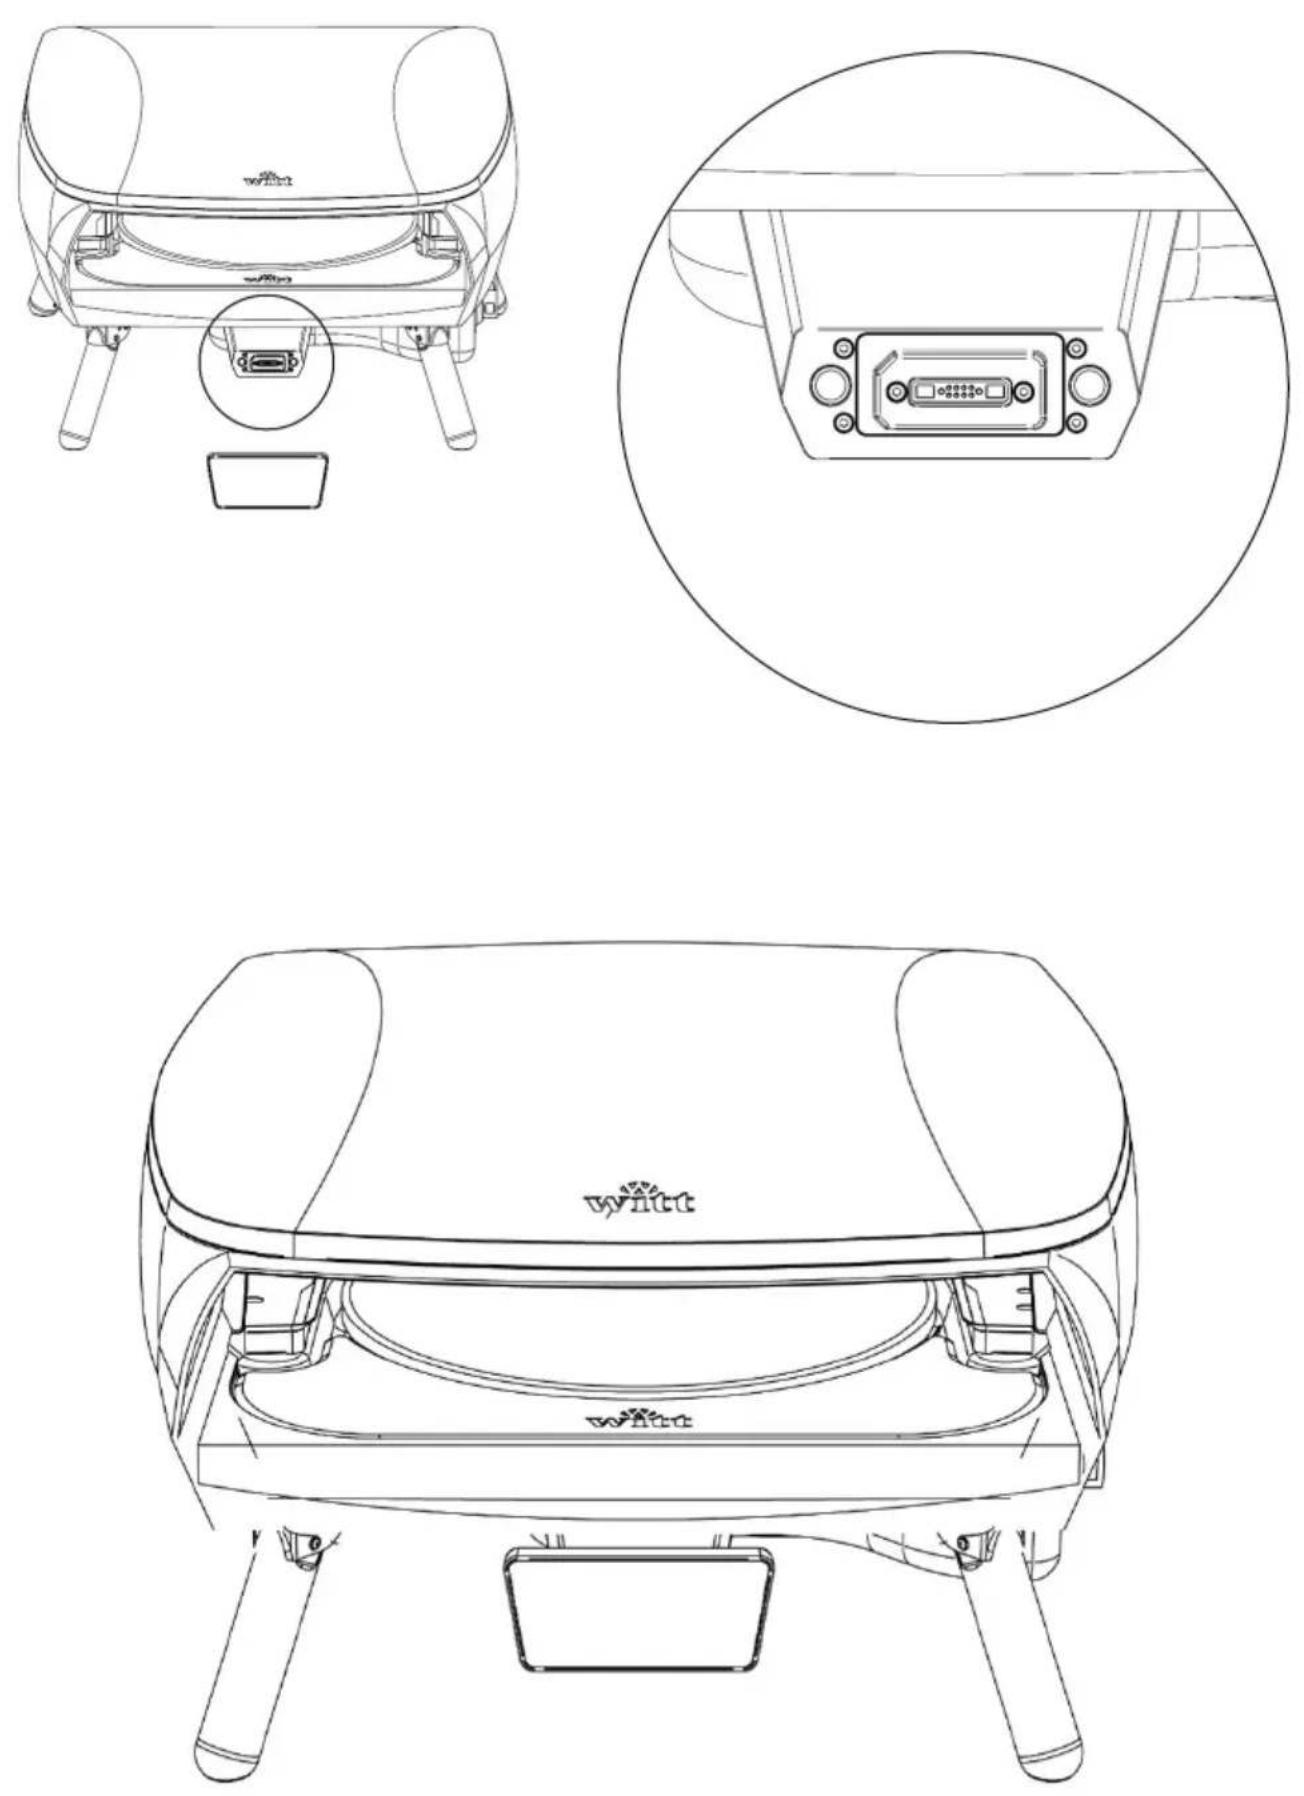
USE OF THE PIZZA OVEN / IGNITION GUIDE
When the regulator is properly connected, the gas can be turned on.
To ignite the burners, press and slowly turn the knob counterclockwise until you hear a click from the electronic ignition. This should take at least 8–10 seconds while gas flows into the burner inside the oven. Keep the knob pressed for another 10 seconds after ignition, then release. You can now set the burner to the desired level. Press the button between the two control knobs to start the rotation of the turntable inside the oven.
If the burner does not ignite, turn the knob to OFF and wait 5 minutes before trying again.
Warning: Do not leave the booster burner on for extended periods without rotating the turntable, as this may damage the pizza stone.
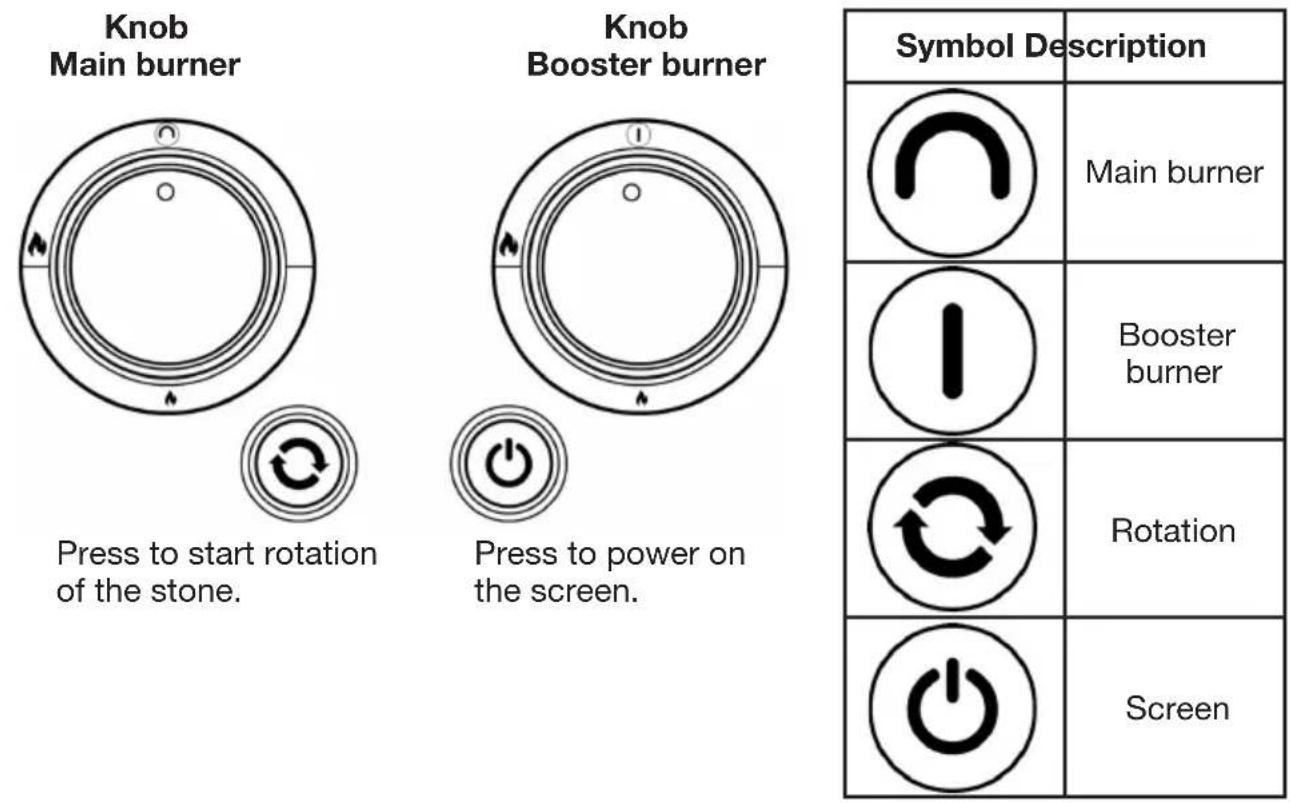
Press to start rotation of the stone.
Press to power on the screen.
| Symbol Description | |
 | Main burner |
 | Booster burner |
 | Rotation |
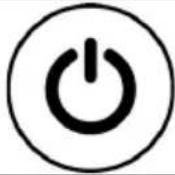 | Screen |
USING THE SCREEN GUIDE
Once the screen is connected to the screen mount and the power is on, the screen operates as follows:
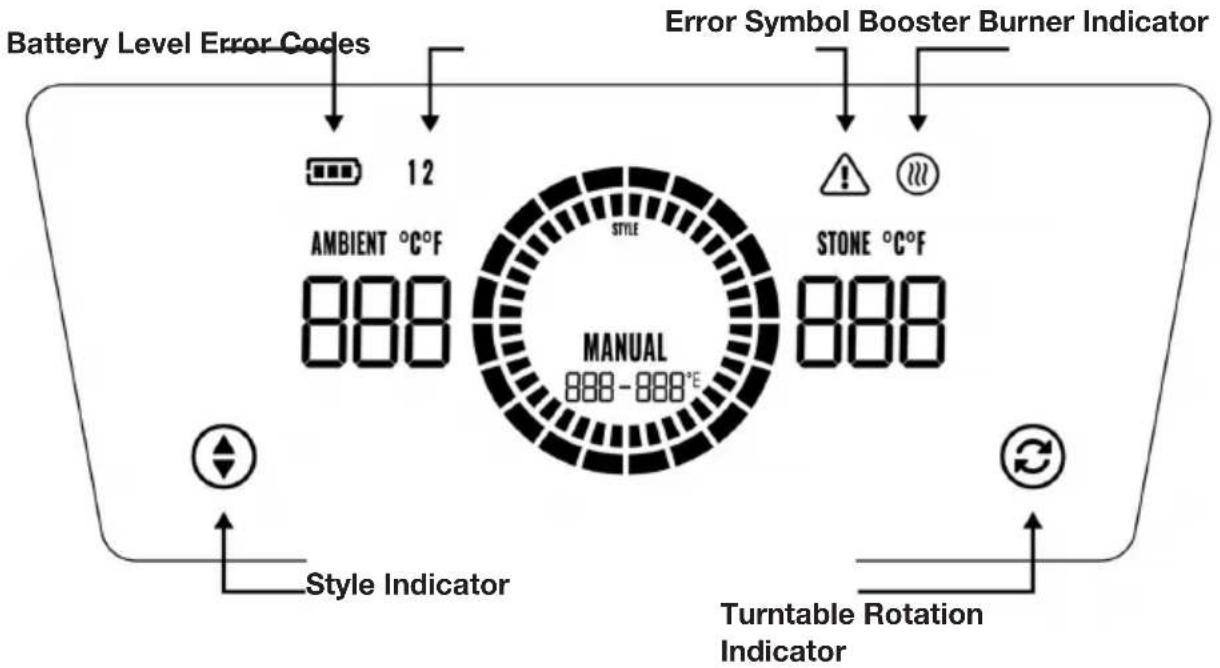
- To start the rotation motor for the pizza stone, press the Turnable Rotation Indicator. (alternatively you may press the secondary rotate button located near the gas control panel)
- To access the style selection menu, press the Style Indicator. This will cycle through the available four pizza styles; Roman, New York, Neapolitan and Manual.
- See "SELECTION MENU" for further details on the style temperatures ranges.
SELECTION MENU:
Temperature ranges for the different pizza styles:
- Roman: 300^ C - 350^ C
• New York: 260 °C - 290 °C - Neapolitan: 420^ C - 450^ C
- Manuel: NO FIXED RANGE
Temperature Indicators:
- The inner ring segments of the screen will begin to increase on the temperature range you’ve selected where, once the temperature has reached the lower range of the style you have selected, the inner segment will begin to illuminate GREEN and make TWO beeps to indicate your pizza is ready to cook. The green segments will continue to increase up to the upper range of the style you have selected.
- Use the main burner gas control to increase or decrease the temperature to remain within the green segments for best results.
- Following this, when the temperature has reached the upper range of the style, the segment will illuminate ORANGE and make THREE beeps, to indicate the temperature has exceeded the range of temperature for your selected style.
- RED segments indicate that your pizza oven has reached the upper maximum limits of the pizza oven's temperature capacity.
Temperature Display:
- The “AMBIENT” temperature refers to the air temperature inside the pizza oven.
- “The “STONE” temperature refers to the temperature of the pizza stone.
- To switch between Celsius and Fahrenheit, press and hold the style selection button for at least 5 seconds. A long beep will confirm the change.
Battery

natural_image
Simple black-and-white battery icon with three vertical bars inside, no text or symbols present.The battery indicator shows the battery level and flashes the last segment when the batteries need to be replaced. (Functionality may be reduced when battery levels are low.)
Exterior:
- Make sure the pizza oven has cooled down and is safe to touch before cleaning the outside.
- Painted parts as well as plastic surfaces can be cleaned with mild soapy water and a clean cloth (do not use scouring or grease removal products or scouring pad).
- It is recommended to first test the detergent on a smaller area of the appliance. NEVER use paint diluters or similar solvents and NEVER pour cold water over warm surfaces.
- Wipe with a cloth.
Inside:
- Make sure the pizza oven has cooled down and is safe to touch before cleaning the inside.
- The pizza stone is not water-resistant and should be removed before cleaning.
Pizza Stone:
- The pizza stone is intended exclusively for use in the Witt pizza oven, it is not intended for use over an open fire.
- The pizza stone is fragile and can break if it is knocked or dropped.
- The pizza stone gets very hot during use and stays warm for a long time after use.
- NEVER cool the stone down with water when the stone is hot as it can crack and break.
- The pizza stone should be stored dry between uses, as it is not resistant to moisture.
Screen
- DO NOT use soapy liquids to clean electrical connections or indicators.
- After using the pizza oven, it is recommended to store the screen indoors (use the supplied carry pouch).
- Wipe the screen glass with a clean cloth.
TROUBLESHOOTING
The burner will not ignite:
| The gas valve is not on. Turn on the valve. | |
| The gas cylinder is empty. Replace the gas cylinder with a new one. | |
| The ignition button doesn’t work. Check the battery. | |
| There is no spark on ignition. Contact the retailer |
The flame of the burner is irregular:
| The flame burns inside the burner (whispering sound). Turn off | the burner and let it cool down. Then try to igniteonce more. |
| The regulator is defective. Contact the retailer. | |
| Injector is partially blocked. Clean the injector with a toothbrush | Don’t drill out and don’tuse wire/steel wire to remove blockages. Contact the retailer. |
Gas leak between joints:
| Connections are loose. Tighten loose connections (do not overtighten) and conduct a pressure leak test using soapy water (see the instructions ‘Leak test’ page 4. |
| The hose is damaged. Replace the hose. (Contact the retailer). |
| The gas valve is faulty. Contact the retailer. |
| Connections/joints are damaged. Contact the retailer. |
The pizza stone does not rotate:
| The pizza stone does not rotate. Make sure that the cable from | the power adapter is connected correctly and that the power is turned on.Make sure that the batteries are inserted correctly into the battery compartment.Check that the batteries are fully charged and replace them if necessary. |
| The pizza stone is damaged. Contact the retailer. | |
| Button/contact or cables are damaged. | Contact the retailer. |
Error codes displayed on the LCD screen:
Error symbol with fault code 1 displayed on the temperature screen:1  | The ambient temperature sensor (located in the main oven chamber) may be faulty.Contact the retailer. |
Error symbol with fault code 2 displayed on the temperature screen:2  | The temperature sensor located beneath the rotating pizza stone may be faulty.Contact the retailer. |
The screen does not display:
| The screen is not turned on. Turn on the screen. | |
| The screen does not turn on. Clean the contact points between | the screen and the screen mount (use a toothbrush and isopropyl alcohol).- Check that the batteries are correctly inserted in the battery compartment.- Check that the batteries are fully charged, and replace them if needed.- Check that the screen and mount have proper contact. |
| The screen is damaged. Contact the retailer. | |
| The screen is defective. Contact the retailer. | |
| Cables/connections are damaged. Contact the retailer. |
The touch indicators on the screen are not responding:
| The rotation and/or pizza style indicators are not responding. | - Clean the contact points between the screen and the screen mount (use a toothbrush and isopropyl alcohol).- Check that the batteries are correctly inserted in the battery compartment.- Check that the batteries are fully charged, and replace them if needed. |
| Indicator/contact is damaged. Contact the retailer. | |
| Cables/connections are damaged. Contact the retailer. |
SPECIFICATIONS
| Product Details Witt ETNA Rotante Control 16” | |
| Dimensions (mm) 750 × 650 × 440 mm | |
| Weight NW/GW 31,5 kg / 40,1kg | |
| Adapter for the turnable/pizza stone | 2,5 rpm |
Power supply:
| Model Specifications Please note: | ||
| EUR | Model: GA-0301000V3V DC (6x AA batteries)Power adaptor:Input: AC 100~240V ~50/60Hz 0.6AOutput: 3.0V 1000mA | With plug round hole which match-up with DC005 / 5.5*2.1 pin |
| UK | Model: GA-0301000Y3V DC (6x AA batteries)Power adaptor:Input: AC 100~240V ~50/60Hz 0.6AOutput: 3.0V 1000mA | With plug round hole which match-up with DC005 / 5.5*2.1 pin |
WARRANTY AND SERVICE
IMPORTANT
The warranty covers materials and labor. When requesting service, contact your retailer and provide the product name and serial number. This information can be found on the nameplate. You may also want to write down the details here in the user manual for easy access. This will make it easier for the service technician/retailer to find the correct spare parts. During the warranty period, your pizza oven will be repaired by an authorized service partner, provided that your pizza oven is delivered to and picked up from a service center, in accordance with the terms and conditions below.
WARRANTY
Two years
THE WARRANTY DOES NOT COVER:
- Faults and damage that are not due to manufacturing or material issues
- Normal, reasonable wear and tear (e.g., heat discolouring of grate/plates).
- Product damage caused by pests.
- If unoriginal spare parts are used.
- If the instructions in the user's manual have not been followed.
- If the device has not been set up/assembled as specified in the instructions
- If non-professionals have installed or repaired the product.
- Rust and tarnish.
TRANSPORT DAMAGE
If the product is damaged during transport and this is only discovered when the retailer delivers the product to the customer, this is exclusively a matter between the customer and the retailer. In cases where customers have transported the product themselves, the supplier shall not be liable for any potential damage during transport. Any damage caused during transport must be reported immediately and no later than 24 hours after the product has been delivered. If not, the customer's claim will be rejected.
COMMERCIAL PURCHASES
Commercial purchases are all purchases of devices that are not intended to be used in private households but instead intended to be used for commercial purposes (in restaurants, cafés, canteens, etc.) or intended to be hired out or otherwise used by multiple users in turn.
There is no warranty offered for commercial purchases, as this product is only intended for regular household use.
EC Declaration of Conformity:
Witt Denmark A/S hereby confirm that the following accessory comply with all permanent and essential requirements as per the EU directive 2016/426. 1935/2004. Witt Denmark A/S Gødstrup Søvej 9, DK-7400 Denmark. Witt US, LLC PO BOX: 1044, 800 State Route 11, Champlain, NY 12919, USA, Witt UK & Ireland Ltd. 4 Tannery House, Tannery Lane, Send, Working, Surrey, GU23 7EF. www.witt.dk
TABLE DES MATIÈRES
CONSIGNES DE SÉCURITÉ 23
TEST D'ÉTANCHÉITÉ....24
RACCORDEMENT DE LA BOUTEILLE DE GAZ 25
DÉCONNEXION DE LA BOUTEILLE DE GAZ 25
PILES 26
INFORMATIONS TECHNIQUES 27
GUIDE D'INSTALLATION A L'EXTERIEUR 27
ASSEMBLAGE 29
UTILISATION DU FOUR A PIZZA / INSTRUCTIONS D'ALLUMAGE....33
UTILISATION DU GUIDE DE L'ÉCRAN....34
NETTOYAGE ET ENTRETIEN 36
DÉPANNAGE 37
CARACTÉRISTIQUES TECHNIQUES.... 39
GARANTIE ET SERVICE....40
CONSIGNES DE SÉCURITÉ
natural_image
Warning symbol with exclamation mark inside a triangle (no text or numbers)natural_image
Simple line drawing of a 3D box and its corresponding rectangular frame (no text or symbols)natural_image
Two geometric line drawings: a triangular prism with internal diagonals and a square grid with intersecting lines (no text or symbols)natural_image
Isometric line drawing of a house structure with triangular roof and windows, showing perspective projection (no text or symbols)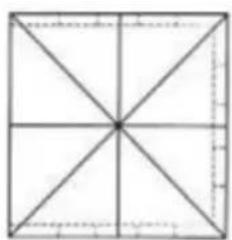
natural_image
Geometric diagram of a square divided into four equal quadrants by diagonals (no text or labels)natural_image
Technical line drawing of a mechanical or electronic component with no visible text, numbers, or symbols.natural_image
Technical line drawing of a mechanical or electronic component with no visible text, numbers, or symbols.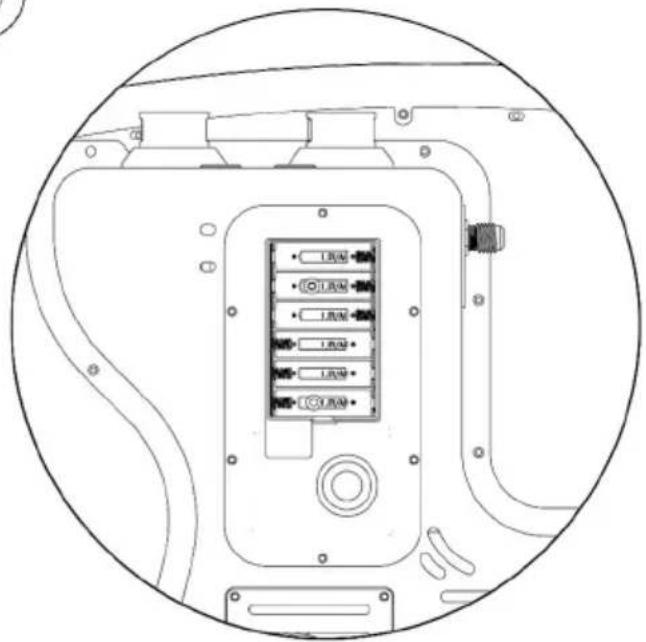
natural_image
Technical line drawing of a device rear panel with labeled buttons and ports (no text or symbols beyond basic labels)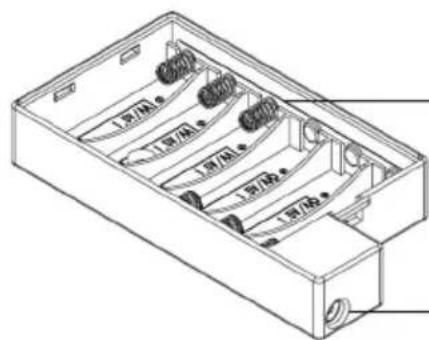
natural_image
Technical line drawings of two identical mechanical components with internal compartments and mounting brackets (no text or symbols)natural_image
Line drawing of a portable stove with open lid and base plate (no text or symbols)ON OFF
natural_image
Close-up of three metallic buttons with a glowing blue lens on a dark surface (no text or symbols visible)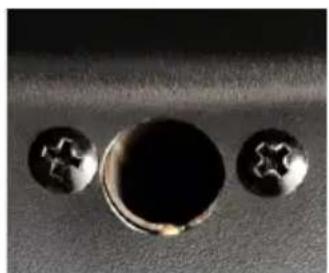
natural_image
Close-up of three metallic circular components with star-shaped cutouts, placed on a textured surface (no text or symbols visible)natural_image
Technical line drawing of a mechanical device with a circular inset showing two control knobs (no text or symbols present)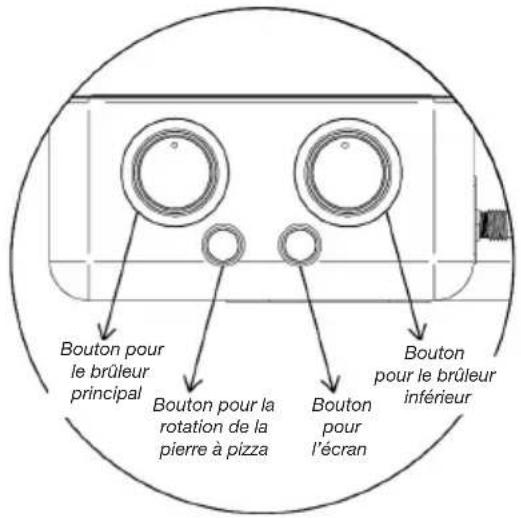
natural_image
Line drawing of a rectangular electronic device with four legs and control knobs, no text or symbols present
natural_image
Technical line drawing of a mechanical device with no visible text or symbols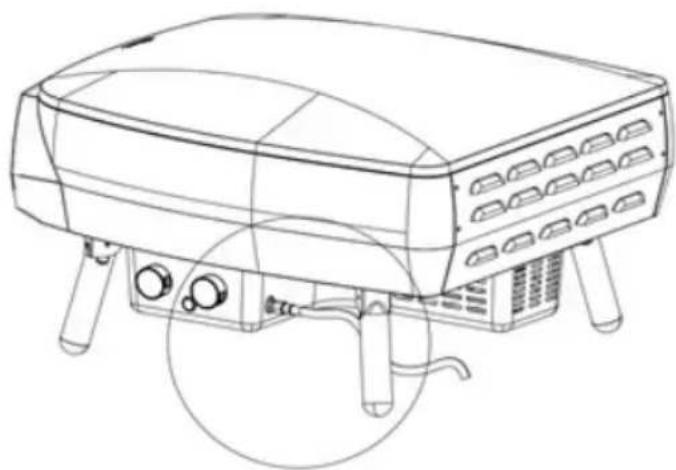
natural_image
Line drawing of a portable electronic device with four legs and control panel (no text or symbols)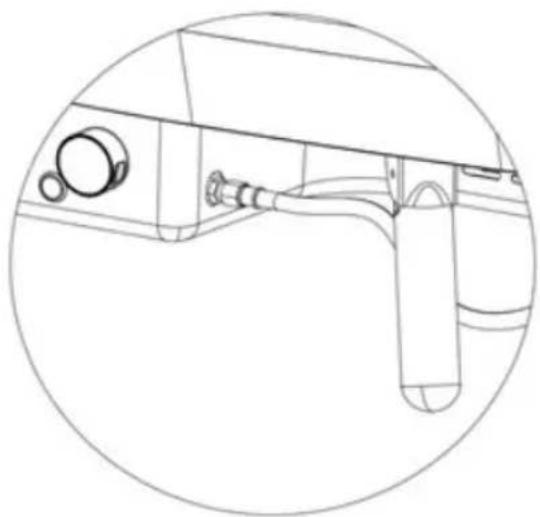
natural_image
Technical line drawing of a mechanical assembly with no visible text or symbolsnatural_image
Diagram of a circular mechanical component with two circular insets showing rotational indicators (no text or symbols)natural_image
Simple black-and-white battery icon with three vertical bars inside, no text or symbols present.Witt UK & Ireland Ltd., 4 Tannery House, Tannery Lane, Send, Woking, Surrey, GU23 7EF. www.witt.dk
ÍNDICE
INSTRUÇÕES DE SEGURANÇA...... 43
Teste de fuga 44
Ligar o cilindro de gás 45
natural_image
Warning symbol with exclamation mark inside a triangle (no text or numbers)- NÃO UTILIZE ESTE APARELHO ANTES DE TER LIDO O MANUAL DO UTILIZADOR
- NÃO COLOQUE ITENS SOBRE OU CONTRA ESTE APARELHO
- NÃO MANTENHA PRODUTOS QUÍMICOS, MATERIAIS INFLAMÁVEIS OU LATAS DE SPRAY PERTO DESTE APARELHO
- NÃO UTILIZE ESTE APARELHO EM ESPAÇOS INTERIORES
- NÃO PERMITA QUE GORDURAS/ÓLEOS, CINZAS OU COMBUSTÍVEL NÃO QUEIMADO SE ACUMULEM NO APARELHO ENTRE OS PERÍODOS DE UTILIZAÇÃO.
CÓDIGO PIN: 2531DM-110
natural_image
Line drawing of a 3D rectangular box with a cutout, alongside a separate empty rectangle (no text or symbols)natural_image
Technical line drawing of a device rear panel with mounting holes and internal compartments (no text or symbols)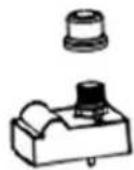
Pilha AA/CC 1,5 V x 1
natural_image
Technical line drawing of a mechanical or electrical enclosure with no visible text, numbers, or symbols.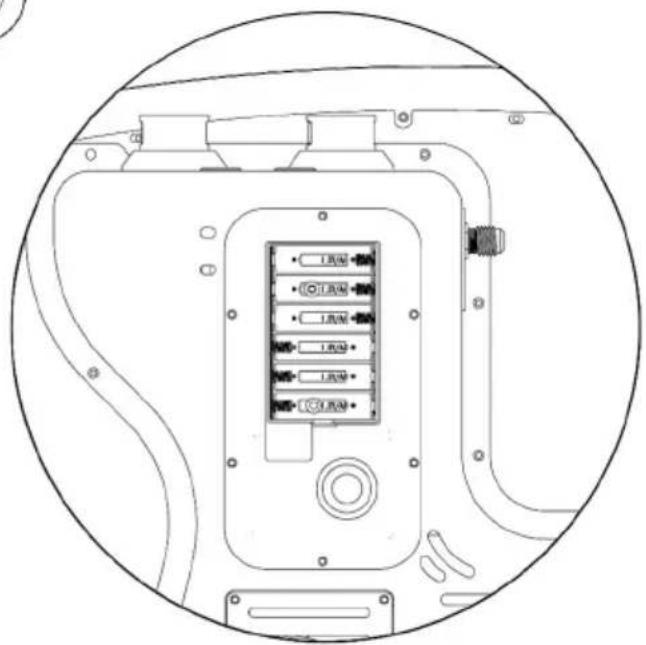
natural_image
Technical line drawing of a device rear panel with labeled buttons and ports (no readable text or symbols)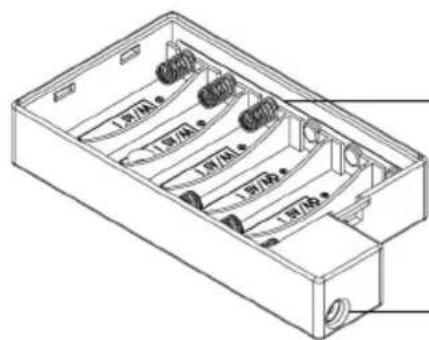
natural_image
Technical line drawings of two mechanical components with visible internal parts and mounting brackets (no text or symbols)natural_image
Line drawing of a portable stove with open lid and base plate (no text or symbols)LIGADO DESLIGADO

natural_image
Close-up of three metallic buttons with a glowing blue lens on a dark surface (no text or symbols visible)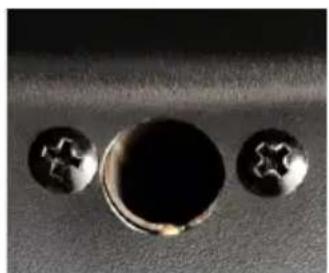
natural_image
Close-up of three metallic circular components with star-shaped cutouts, placed on a textured surface (no text or symbols visible)natural_image
Technical line drawing of a mechanical device with a circular inset showing two control knobs (no text or symbols present)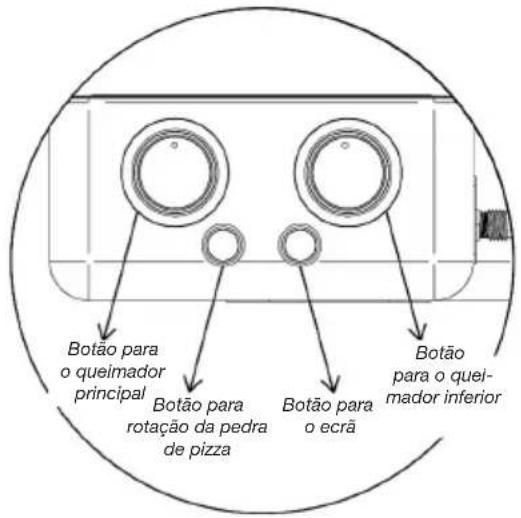
natural_image
Line drawing of a rectangular electronic device with four legs and control knobs, no text or symbols present
natural_image
Technical line drawing of a mechanical device with no visible text or symbols
natural_image
Line drawing of a portable electronic device with four legs and control knobs (no text or symbols)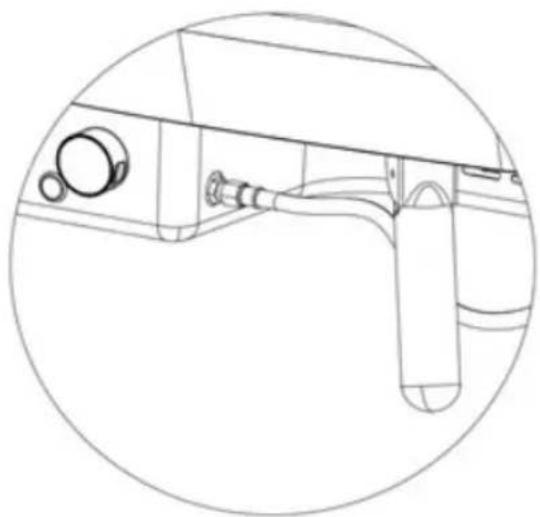
natural_image
Technical line drawing of a mechanical device with no visible text or symbolsnatural_image
Simple black-and-white icon of a battery with three vertical bars inside, no text or symbols present.natural_image
Warning symbol with exclamation mark inside a triangle (no text or numbers)CÓDIGO PIN: 2531DM-110
natural_image
Two technical line drawings: a 3D wireframe box and a 2D rectangular frame, both without any text or symbols.natural_image
Isometric line drawing of a house structure with windows and roof, showing structural details and an arrow indicating direction (no text or symbols)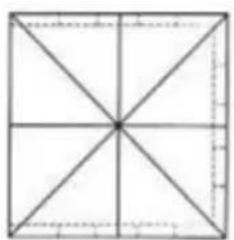
natural_image
Pure geometric diagram of a square divided into four equal triangles by diagonals (no text or symbols)natural_image
Technical line drawing of a mechanical or electronic component with no visible text, numbers, or symbols.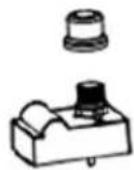
1 × pila AA/CC 1,5 V
natural_image
Technical line drawing of a mechanical or electronic component with no visible text, numbers, or symbols.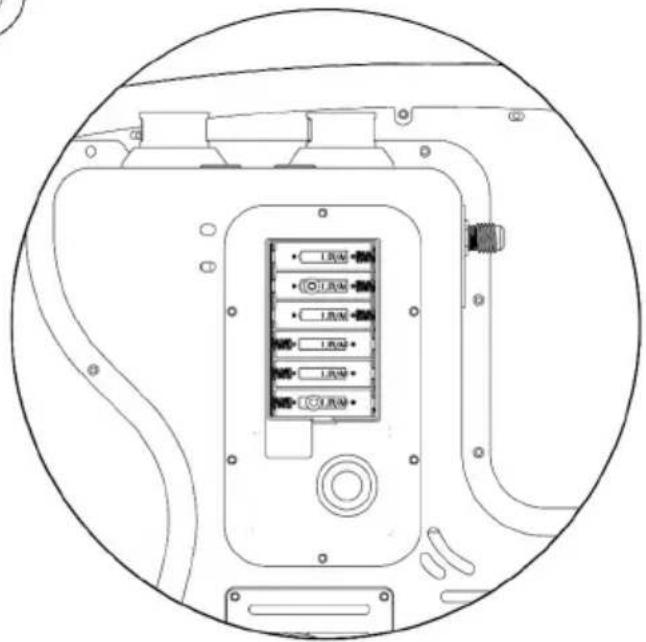
natural_image
Line drawing of a portable oven with open lid and base plate (no text or symbols)ENCENDIDO APAGADO
natural_image
Close-up of three metallic circular components with a glowing blue liquid, mounted on a dark surface (no text or symbols visible)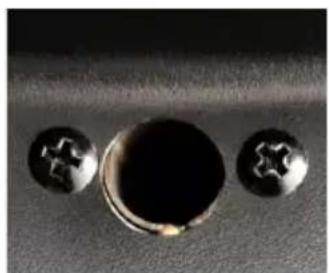
natural_image
Close-up of three metallic circular components with star-shaped cutouts, placed on a textured surface (no text or symbols visible)natural_image
Line drawing of a portable electronic device with control panel and circular dial (no text or symbols)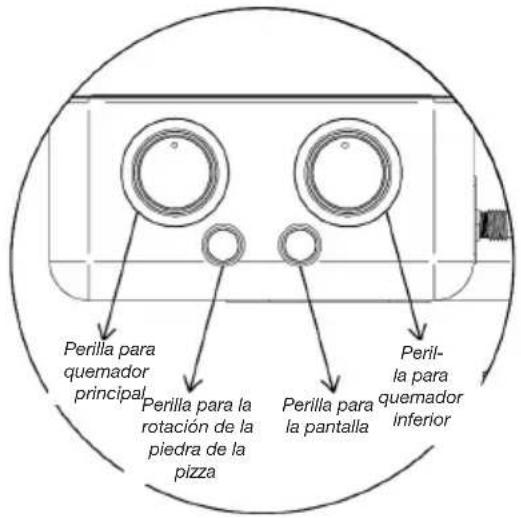
natural_image
Line drawing of a rectangular electronic device with four legs and control knobs, no text or symbols present
natural_image
Technical line drawing of a mechanical device with no visible text or symbols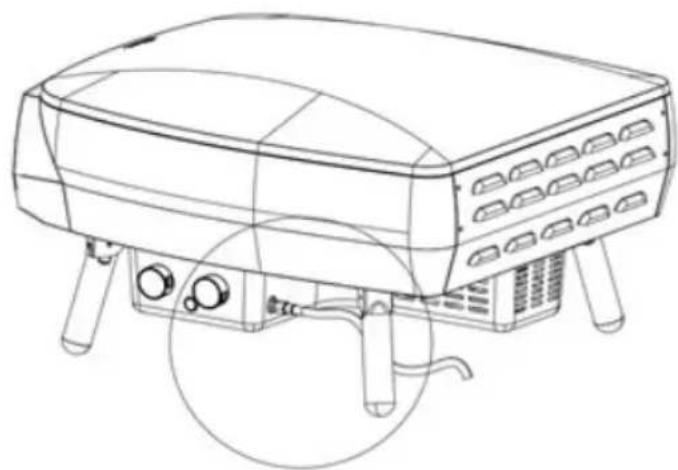
natural_image
Line drawing of a portable electronic device with four legs and control buttons (no text or symbols)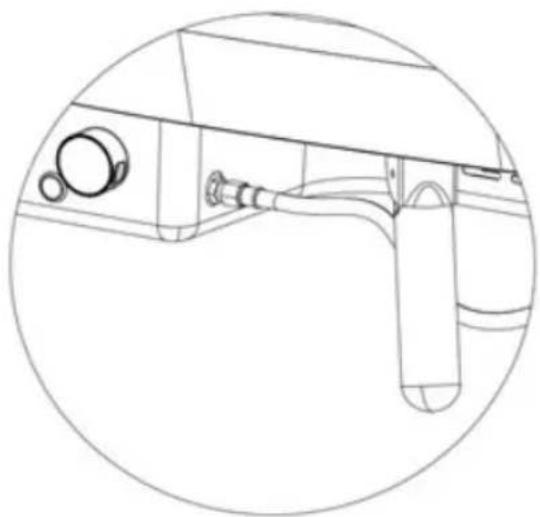
natural_image
Technical line drawing of a mechanical assembly with no visible text or symbolsnatural_image
Simple black-and-white battery icon with three vertical bars inside, no text or symbols present.UTILIZZO DELLA GUIDA SU SCHERMO....94
PULIZIA E MANUTENZIONE....96
natural_image
Warning symbol with exclamation mark inside a triangle (no text or numbers)• NON UTILIZZARE QUESTO APPARECCHIO PRIMA DI AVER LETTO IL MANUALE D'USO
• NON POSIZIONARE OGGETTI SOPRA O CONTRO
L'APPARECCHIO
- NON TENERE PRODOTTI CHIMICI, MATERIALI INFIAMMABILI O BOMBOLETTE SPRAY VICINO ALL'APPARECCHIO
• NON UTILIZZARE L'APPARECCHIO IN AMBIENTI CHIUSI
•NON LASCIARE CHE GRASSI/OLI, CENERE O CARBURANTE INCOMBUSTO SI ACCUMULINO NELL'APPARECCHIO TRA UN UTILIZZO E L'ALTRO
natural_image
Simple line drawing of a 3D box and its corresponding rectangular frame (no text or symbols)natural_image
Two geometric diagrams: a simple 3D umbrella-like structure with triangular roof and a square grid with intersecting lines (no text or symbols)natural_image
Geometric wireframe diagram of a 3D cube with internal triangular planes and projection lines, labeled 'ce' with an arrow (no text or symbols beyond label)natural_image
Isometric line drawing of a house structure with windows and roof, showing structural details and an arrow indicating direction (no text or symbols)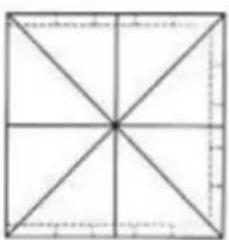
natural_image
Pure geometric diagram of a square divided into four equal triangles by diagonals (no text or symbols)natural_image
Technical line drawing of a mechanical or electronic component with mounting brackets and internal compartments (no text or symbols)natural_image
Technical line drawing of a mechanical or electrical enclosure with no visible text, numbers, or symbols.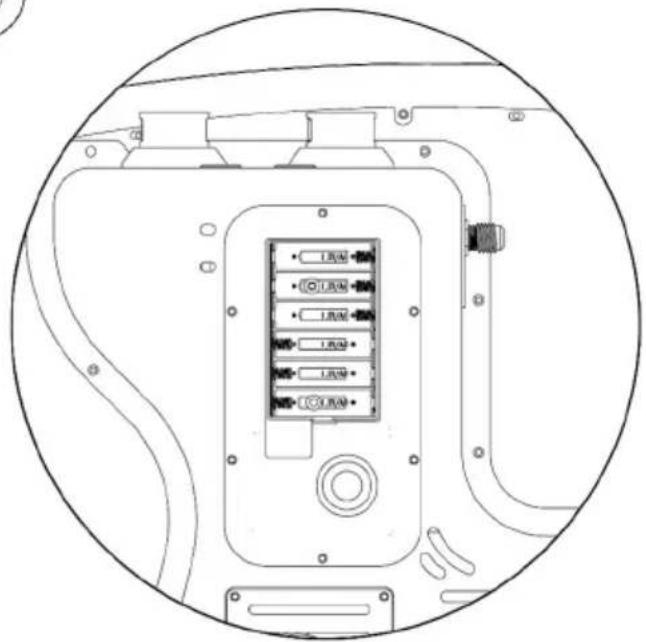
natural_image
Technical line drawing of a device rear panel with labeled buttons and ports (no text or symbols beyond basic labels)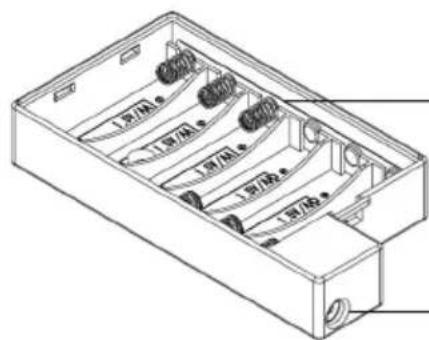
natural_image
Technical line drawings of two mechanical components with ventilation grilles and mounting brackets (no text or symbols)natural_image
Line drawing of a portable oven with open lid and base plate (no text or symbols)ON OFF
natural_image
Close-up of three metallic screwdrivers with a glowing blue liquid in the center (no text or symbols visible)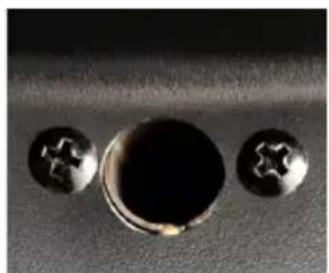
natural_image
Close-up of three metallic circular components with star-shaped cutouts, placed on a textured surface (no text or symbols visible)natural_image
Line drawing of a portable electronic device with control panel and circular dial (no text or symbols)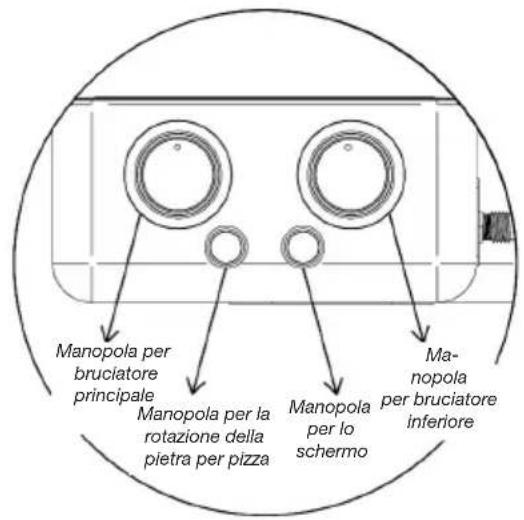
natural_image
Line drawing of a portable electronic device with four legs and control buttons (no text or symbols)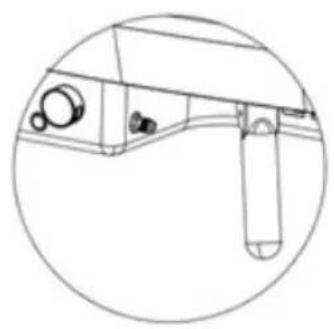
natural_image
Technical line drawing of a mechanical device with no visible text or symbols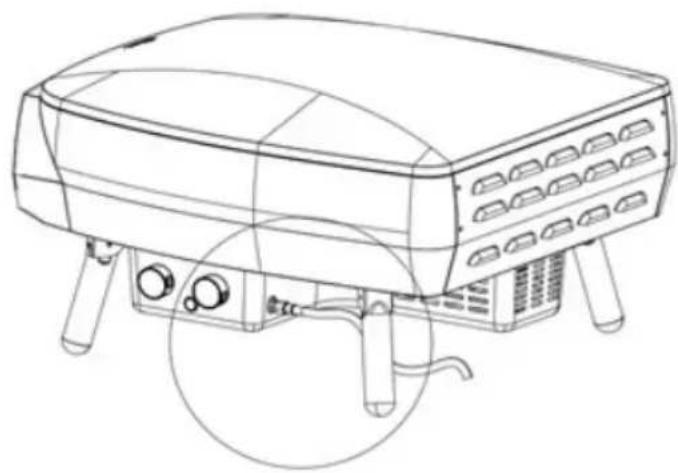
natural_image
Line drawing of a portable electronic device with four legs and control buttons (no text or symbols)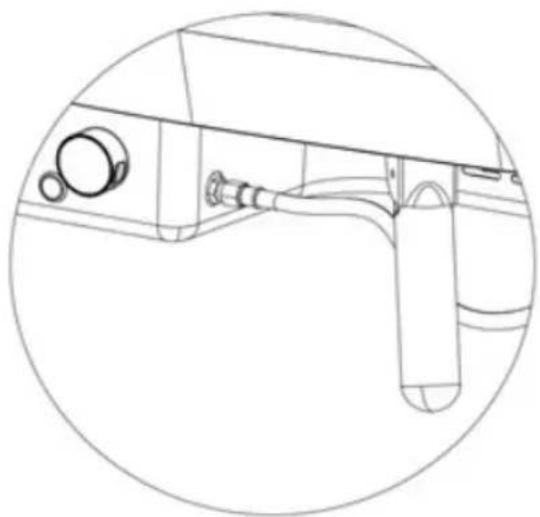
natural_image
Technical line drawing of a mechanical device with no visible text or symbolsnatural_image
Line drawing of a portable electronic device with a close-up inset showing the internal components (no text or symbols)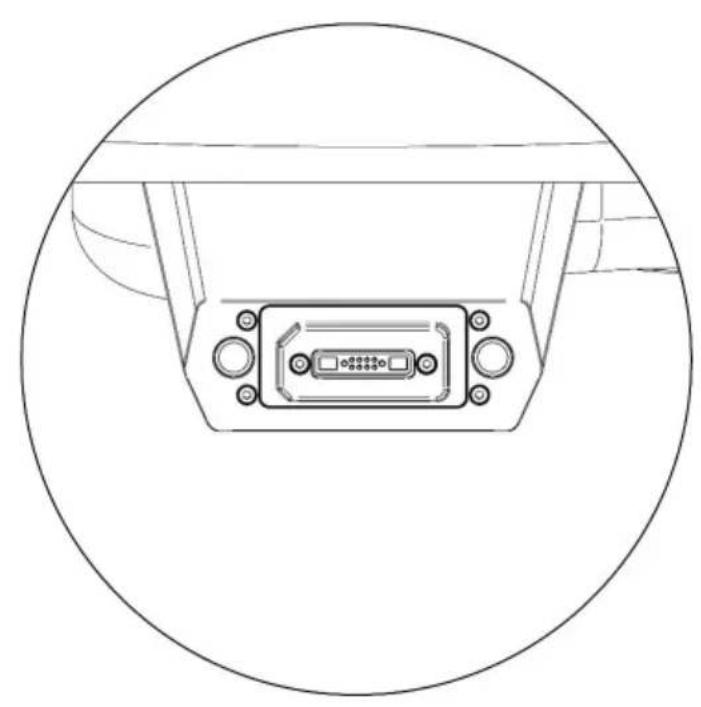
natural_image
Technical line drawing of a mechanical component with a central connector (no text or symbols)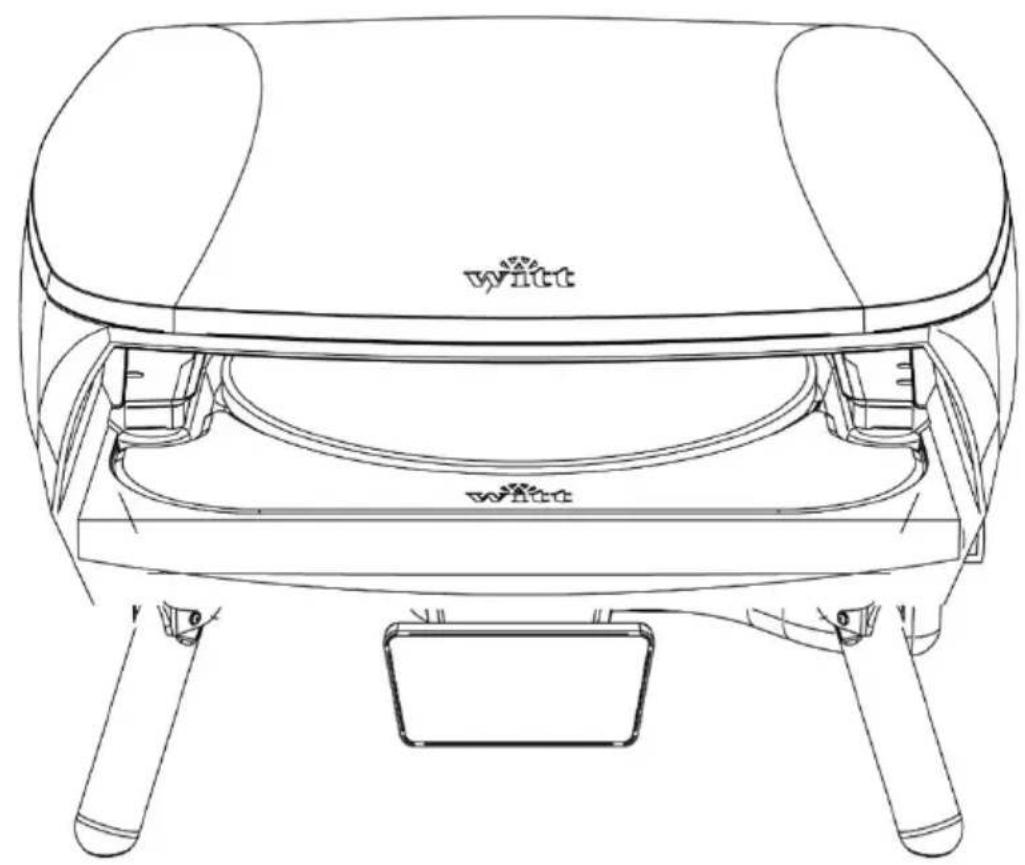
natural_image
Line drawing of a small table lamp with a lid and base, no text or symbols presentUSO DEL FORNO PER PIZZA/GUIDA ALL'ACCENSIONE
natural_image
Diagram of a circular mechanical component with two circular insets showing rotational indicators (no text or symbols)natural_image
Simple black-and-white icon of a battery with three vertical bars inside, no text or symbols present.
- TABLE OF CONTENTS
- SAFETY INSTRUCTIONS
- LEAK TEST:
- Gas cylinder connection:
- Gas cylinder disconnection:
- Batteries:
- TECHNICAL INFORMATION
- OUTDOOR INSTALLATION GUIDE
- ASSEMBLY
- USE OF THE PIZZA OVEN / IGNITION GUIDE
- USING THE SCREEN GUIDE
- SELECTION MENU:
- Temperature Indicators:
- Temperature Display:
- Battery
- Exterior:
- Inside:
- Pizza Stone:
- Screen
- TROUBLESHOOTING
- Error codes displayed on the LCD screen:
- The screen does not display:
- The touch indicators on the screen are not responding:
- SPECIFICATIONS
- WARRANTY AND SERVICE
- IMPORTANT
- WARRANTY
- THE WARRANTY DOES NOT COVER:
- TRANSPORT DAMAGE
- COMMERCIAL PURCHASES
- EC Declaration of Conformity:
- TABLE DES MATIÈRES
- CONSIGNES DE SÉCURITÉ
- ÍNDICE
- LIGADO DESLIGADO
- ENCENDIDO APAGADO
- USO DEL FORNO PER PIZZA/GUIDA ALL'ACCENSIONE
Brand : Witt
Model : ETNA Rotante Control 16
Category : Pizza oven