P10 XL - Deep fryer MEDION - Free user manual and instructions
Find the device manual for free P10 XL MEDION in PDF.

User questions about P10 XL MEDION
0 question about this device. Answer the ones you know or ask your own.
Ask a new question about this device
Download the instructions for your Deep fryer in PDF format for free! Find your manual P10 XL - MEDION and take your electronic device back in hand. On this page are published all the documents necessary for the use of your device. P10 XL by MEDION.
USER MANUAL P10 XL MEDION
natural_image
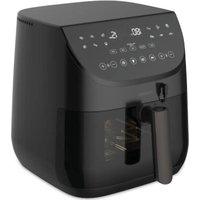
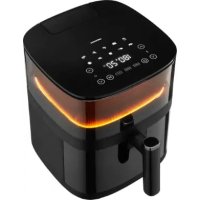
Two electric air fryers shown side by side: a black air fryer with digital display and a white air fryer with control panel (no visible text or symbols)Heißluftfritt euse XL mit 2 Heizelementen Friteuse à air chaud XL avec 2 éléments chauffants Airfryer XL met 2 verwarmingselementen Freidora de aire caliente XL con 2 resistencias Friggitrice ad aria calda XL con 2 elementi riscaldanti Air fryer XL with 2 heating elements
MEDION P10 XL Duo (MD 11750)
Inhaltsverzeichnis
text_image
Exploded diagram of a food air fryer with numbered parts for identificationtext_image
Technical diagram of a portable air fryer with labeled parts 11 and 12, showing internal components and wiring.Abb. 2 - Rückseite
natural_image
Hand holding a cylindrical object with directional arrows indicating rotation or movement (no text or symbols)Abb. 4 – Schütteln

natural_image
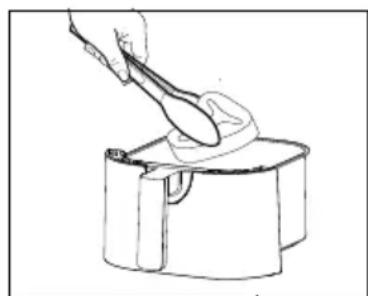
Line drawing of a hand using a spatula to spread food from a container (no text or symbols)text_image
QR code image containing encoded data, no visible human-readable texttext_image
Exploded diagram of a food air fryer with numbered parts for identificationFig. 1 - Face avant
text_image
Diagram of a air fryer with labeled parts 11 and 12, showing internal components and wiring.natural_image
Hand holding a cylindrical object with directional arrows indicating rotation or movement (no text or symbols)Fig. 4 - Secouer
natural_image
Line drawing of a hand using a spoon to lift a cup (no text or symbols)text_image
QR code image containing encoded data, no visible human-readable texttext_image
Exploded diagram of a food air fryer with numbered parts for identificationAfb. 1 - Voorkant
text_image
Diagram of a cooking air fryer with labeled parts 11 and 12, showing internal components and wiring.Afb. 2 - Achterkant
natural_image
Hand holding a cylindrical object with directional arrows indicating rotation or movement (no text or symbols)Afb. 4 - Schudden
natural_image
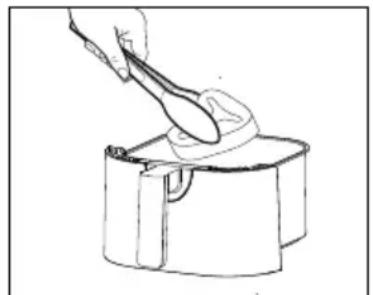
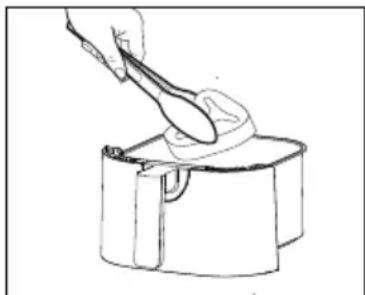
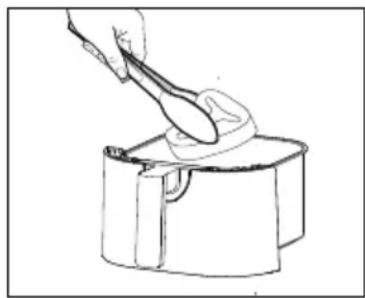
Simple line drawing of a hand using a spoon to press or brush over a container (no text or symbols)9. Airfryer reinigen

WAARSCHUWING!
text_image
QR code image containing encoded data, no visible human-readable texttext_image
Exploded diagram of a food air fryer with numbered parts for identificationFig. 1 - Parte delantera
text_image
Diagram of a air fryer with labeled parts 11 and 12, showing internal components and wiring connections.Fig. 2 - Parte trasera
natural_image
Hand holding a cylindrical object with directional arrows indicating rotation or movement (no text or symbols)Fig. 4 - Agitar
natural_image
Simple line drawing of a hand using a spoon to lift a cylindrical object into a container (no text or symbols)text_image
QR code image containing encoded data, no visible human-readable texttext_image
Exploded diagram of a food air fryer with numbered parts for identificationFig. 1 - Lato anteriore
text_image
Diagram of a air fryer with labeled parts 11 and 12, showing internal components and wiring connections.Fig. 2 - Lato posteriore
natural_image
Hand holding a cylindrical object with directional arrows indicating rotation (no text or symbols)Fig. 4 - Agitare
natural_image
Line drawing of a hand using a spoon to lift a piece of food into a container (no text or symbols)1–7: plastiche/20–22: carta e cartone/80–98: materiali compositi

(Solo per la Francia)
text_image
QR code image containing encoded data, no visible human-readable text- Information about this user manual ....110
1.1. Explanation of symbols ...... 110 FR
-
Proper use ....110
-
Safety instructions ....111-
3.1. Initial operation and use ....113
3.2. Cleaning 114 ES
-
Description of components .... 115
-
Package contents IT 116
-
Preparing the air fryer 117
-
Information regarding preparation 117
-
Operating the air fryer 118
8.1. Setting an automatic programme ....119
8.2. Individually setting cooking time and temperature .....121
8.3. Recommended settings....121
8.4. Interrupting a programme 122
8.5. Ending the programme....122
- Cleaning the air fryer ....123
- Prolonged non-use and transport 124
- Troubleshooting 124
- Technical specifications....126
- EU declaration of conformity....126
- Spare parts ....126
- Disposal....127
- Service information....127
- Legal Notice ....128
1. Information about this user manual

Thank you for choosing our product. We hope you enjoy using this appliance.
Please read the safety instructions and the user manual carefully before using the appliance for the first time. Note the warnings on the appliance and in the user manual.
Always keep the user manual close to hand. If you sell the appliance or give it away, please ensure that you also pass on this user manual. It is an essential component of the product.
1.1. Explanation of symbols
If a block of text is marked with one of the warning symbols listed below, the hazard described in that text must be avoided to prevent the potential consequences described there from occurring.

DANGER!
Warning: risk of fatal injury!

WARNING!
Warning: risk of possible fatal injury and/or serious irreversible injuries!

CAUTION!
Warning: risk of minor and/or moderate injuries!

NOTICE!
Follow these instructions to prevent damage to the appliance!
WARNING!
Warning: risk of electric shock!
CAUTION!
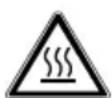
Danger due to hot surfaces!

Notes regarding assembly or operation

Follow the instructions in the user manual!

Symbol for alternating current (AC)

Symbol for indicating materials that come into contact with food
2. Proper use
This appliance is suitable for baking, cooking and grilling food such as vegetables, chips and potato wedges (home made or oven-ready), as well as for the preparation of fish, meat and poultry.
This appliance is designed for use in private households and similar household applications, such as
- in shops, offices and other similar working environments
• in agricultural holdings - by customers in hotels, motels and other accommodation facilities
• in bed-and-breakfast establishments.
The appliance is only intended for private use and not for industrial/commercial use.
Please note that we shall not be liable in cases of improper use:
▶ Do not modify the appliance without our consent and do not use any accessories that we have not approved or supplied.
Comply with all the information in this user manual, especially the safety instructions. Any other use is considered improper and can cause personal injury or property damage.
3. Safety instructions
IMPORTANT SAFETY INSTRUCTIONS – READ CAREFULLY AND KEEP FOR FUTURE REFERENCE!
- Keep the appliance and its accessories out of the reach of children.
■ This appliance may be used by children over the age of 8 and by persons with reduced physical, sensory or mental abilities or by those with limited experience and/or knowledge, provided that they are supervised or have been instructed in the safe use of the appliance and have understood the associated risks.
■ Children must not be allowed to play with the appliance.
■ Cleaning and user maintenance may not be carried out by children unless they are supervised.
■ Children younger than 8 should be kept away from the appliance and the connection cable.
WARNING!
Risk of electric shock/short circuit!
There is a risk of electric shock/short circuit from live parts.
DE
FR
NL
ES
■ Only connect the appliance to a properly installed and easily accessible socket that is close to where you are using the appliance. The local mains voltage must match the voltage stated in the technical specifications for the appliance.
■ The power socket must be easily accessible so that you can unplug the appliance from the mains quickly if necessary.
■ Always hold the plug to pull it out, and never pull the cable.
■ Do not allow the mains cable to come into contact with hot objects or surfaces (e.g. cooker hob).
■ Check the appliance and the mains cable for damage before using the appliance for the first time and after each use.
■ Do not use if the appliance or the mains cable is visibly damaged or if the appliance has been dropped.
■ Contact our Service Centre without delay if the appliance has been damaged during transport.
■ Do not, under any circumstances, make any unauthorised modifications to the appliance or try to open and/or repair a component yourself.
■ Never open the housing or slide objects into the ventilation slots.
■ If there is damage to the mains connection cable on this appliance, it must be replaced by the manufacturer, its customer service department or another suitably qualified person. This is necessary to avoid hazards.
■ Completely unwind the mains cable.
■ Do not kink or crush the mains cable.
■ Unplug the appliance from the socket if:
- when you are cleaning or maintaining the appliance
- when you are assembling or disassembling the appliance
– the appliance is damp or wet
- if you are no longer using the appliance
- when the appliance is un- attended
– during thunderstorms.
■ Do not immerse the appliance in water or other liquids, or hold it under running water or use it in damp environments, as this may result in an electric shock.
■ Do not allow the appliance to come into contact with water or other liquids. Keep the appliance, the mains cable and the mains plug away from wash basins, sinks or similar.
■ Do not place any objects filled with liquid (e.g. vases or drinks) on or near the appliance.
■ Do not operate the appliance on wet surfaces.
■ Never touch the appliance or the mains cable/mains plug with damp or wet hands.
■ Use the appliance indoors only.
■ Do not expose the appliance to extreme conditions. Avoid:
– high humidity or wet conditions
- extremely high or low temperatures
- direct sunlight
- naked flames.
3.1. Initial operation and use
WARNING! Risk of fire!
Hot surfaces pose a risk of fire.
■ To avoid hazards resulting from an unintentional reset of the safety temperature limiter, the appliance must not be supplied via an external contactor such as a timer or connected to an electrical circuit that is regularly switched on and off via a device.
■ Place the appliance on a heat-resistant, dry and level surface.
■ Do not place the appliance on surfaces that can become hot (e.g. on hotplates, naked flames).
■ Ensure that the appliance does not come into contact with any other objects during use. Maintain a distance of at least 10 cm from other objects. Above all, do not set up the appliance near easily flammable materials (curtains, drapes, paper etc.).
■ Do not operate the appliance beneath wall cup-boards or other objects that could hinder the free upwards flow of steam.
■ Do not cover the appliance.
■ Do not place any objects on the appliance.
■ Never leave the appliance unattended while it is in use.
■ Never use the appliance near explosive and/or highly flammable steam.
■ Always place the hot fryer pan on a heat-resistant surface.
■ Do not place foods wrapped in cling film, plastic wrap or other flammable materials into the fryer pan.
■ If the appliance starts to give off dark smoke, pull the mains plug out of the socket immediately. Wait until
the appliance has stopped smoking before removing the fryer pan from the appliance.
In case of fire, disconnect the appliance from the power supply first. Do not use water to extinguish the fire. Use a fire blanket or a suitable fire extinguisher to extinguish the flames.

NOTICE!
Risk of damage!
Chemical additives in furniture coatings may corrode the material of the appliance feet and cause residue on the furniture surface.
■ Place the appliance on a heat-resistant surface if necessary.
3.2. Cleaning
■ Follow the additional instructions for cleaning and clean surfaces that come into contact with food as described in the “9. Cleaning the air fryer” on page 123 section.
4. Description of components
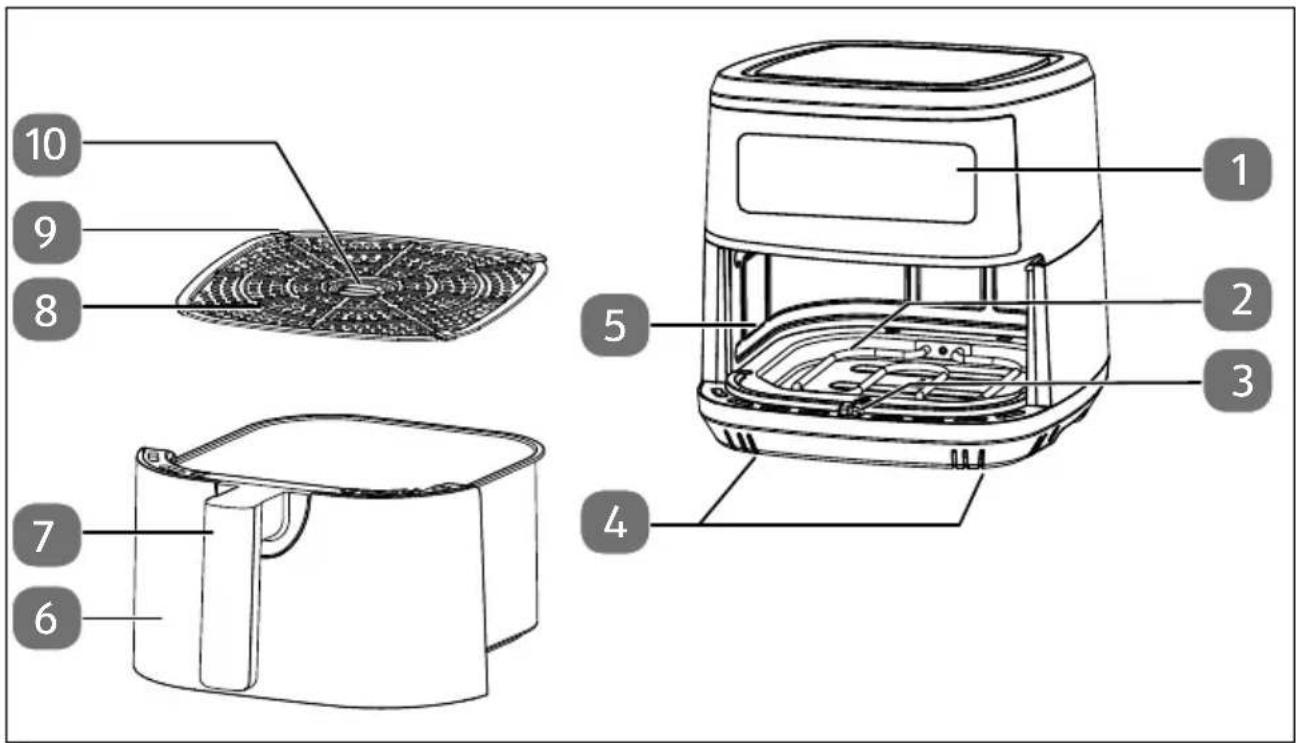
text_image
Exploded diagram of a food air fryer with numbered parts for identificationFig. 1 - Front
- Control elements/display field
- Heating element at the bottom (the heating element at the top is not shown)
- Guide nose/microswitch
- Feet (4x)
- Frying chamber
- Fryer pan
- Fryer pan handle
- Frying insert (trivet)
- Corner pad
- Handle
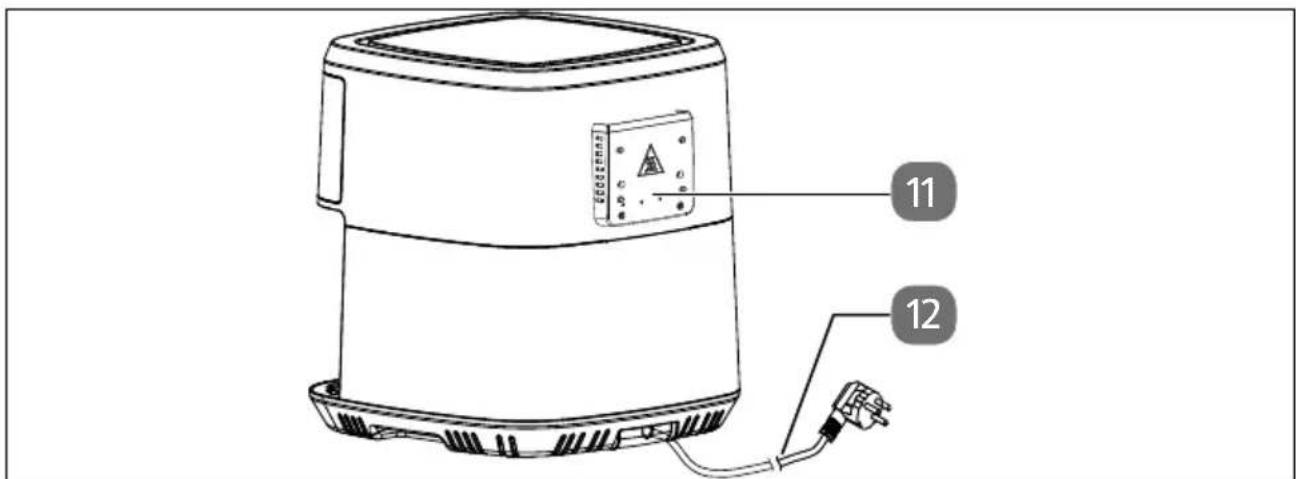
text_image
Diagram of a air fryer with labeled parts 11 and 12, showing internal components and wiring connections.Fig. 2 - Back
- Steam outlet
- Mains cable with mains plug
text_image
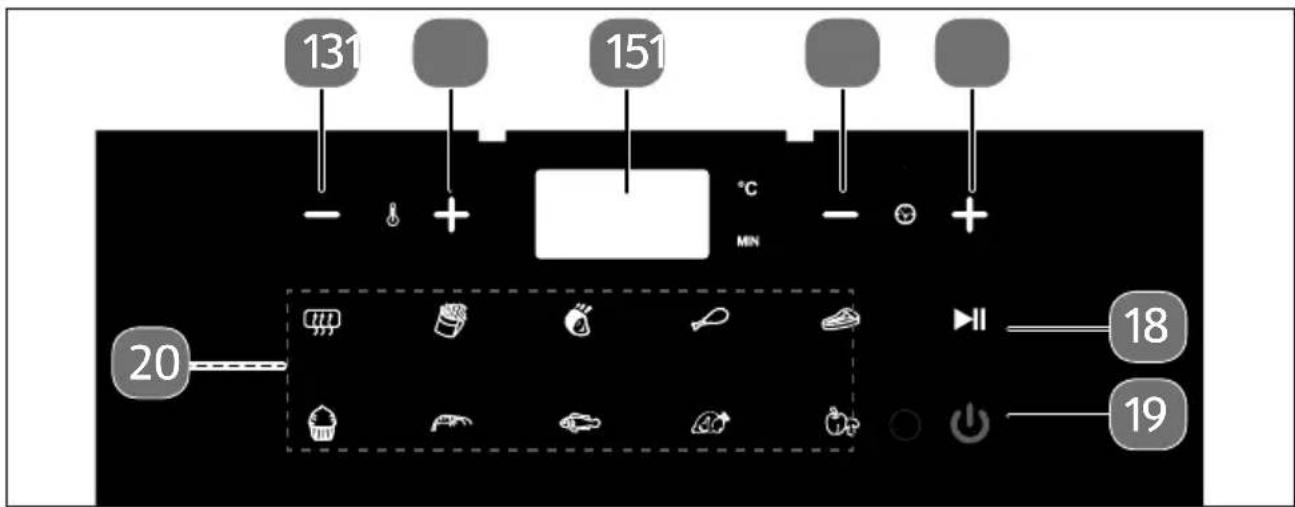
131 151 °C MIN 20 18 19Fig. 3 - Control elements/display field
- Decrease temperature
- Increase temperature
- Display for temperature/cooking time in zone
- Decrease cooking time
- Extend cooking time
- Start/pause the heating process
- On/off button
- Automatic programme selection button
5. Package contents

DANGER!
Risk of injury!
There is a risk of choking and suffocation due to swallowing or inhaling small parts or plastic wrap.
- Keep all packaging materials used (bag, pieces of polystyrene etc.) out of the reach of children.
■ Do not let children play with the packaging material.
▶ Please check the package contents to ensure that all items are included and in perfect condition. If anything is missing or damaged, contact us within 14 days of purchase.
The following items are supplied with your product:
- Air fryer
- Short manual
6. Preparing the air fryer
Remove all packaging, stickers and plastic wrap from the appliance.
Place the appliance on a heat-resistant, dry and level surface.
▶ Pull the fryer pan (5) out of the appliance.
- Rinse the fryer pan and the frying insert (6) with hot water. Dry both parts thoroughly.
▶ Take hold of the frying insert (6) by the hand holes and place it in the fryer pan horizontally on the base of the pan.
▶ Wipe the housing (2) using a damp cloth.
▶ Only connect the air fryer to a properly installed, earthed and fused socket. The local mains voltage must match the voltage stated in the technical specifications for the appliance.
The air fryer emits an acoustic signal; all buttons and symbols light up briefly. The on/off button ⏻ lights up continuously.
i
When using the appliance for the first time, odour or smoke may develop due to residues caused during manufacturing. However, this is not dangerous and will quickly disappear. Allow the appliance to run at its highest temperature setting for approx. 30 minutes before first use.
7. Information regarding preparation
▶ Distribute the food evenly in the fryer pan (6). Only fill the fryer pan up to 75%.
natural_image
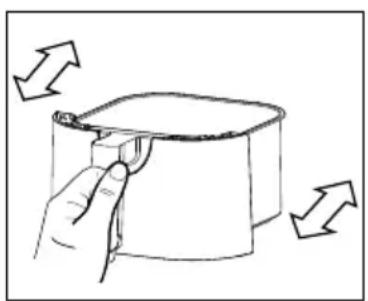
Hand holding a cylindrical object with directional arrows indicating rotation or movement (no text or symbols)Fig. 4 - Shake
natural_image
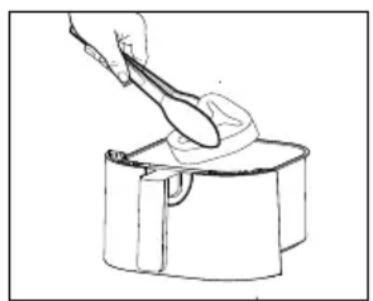
Line drawing of a hand using a spoon to press or brush over a cylindrical container (no text or symbols)Fig. 5 - Turn food
To achieve optimal cooking results, shake the fryer pan (6) (Fig. 4) or turn the food (Fig. 5) during the cooking time, especially when food is overlapping.
▶ Check the food regularly throughout the cooking time to avoid burning the food.
▶ At the end of the cooking time, remove the food immediately to avoid burning the food.
When preparing fresh potatoes or fresh vegetables, use a small amount of cooking oil to make the food more crispy.
▶ Use a cooking temperature 10^ C lower than specified for conventional fan oven dishes.
When preparing ready meals, observe the manufacturer's preparation instructions.
8. Operating the air fryer

WARNING!
Risk of fire!
Cooking oil/fat and other liquids can catch fire as a result of the high temperatures of the hot air.
■ Do not fill the fryer pan with fat or oil as you would with a conventional fryer. Add only the appropriate small amount of cooking oil to the food, depending on the recipe.
■ Do not overfill the fryer pan. Ensure that the food does not touch the heating elements inside the appliance when the appliance is in use. Only fill the fryer pan up to 75%.

WARNING!
Risk of injury!
There is a risk of injury due to burning on hot surfaces.
The touchable surfaces on the appliance and accessories may become hot during operation.
As the ventilation grille on the side of the appliance becomes hot during operation, do not touch the ventilation grille when the appliance is in use in order to prevent burns.
■ During operation, touch the appliance only by the handle and control elements!
■ Do not touch the frying chamber, the fryer pan or the heating elements.
■ Do not move the appliance while it is in use.
■ Do not move the appliance while it is hot, instead allow the appliance to cool down completely first.
Risk of burns from steam escaping when you remove the fryer pan during or after food preparation. Do not position your head directly above the appliance and do not touch the steam.
Place the fryer pan on a heat-resistant surface.
■ The fryer pan becomes extremely hot when the appliance is in use. Do not touch. Use oven gloves.
■ The heating elements remain hot for some time after the appliance is switched off. Make sure that no one touches the frying chamber.

CAUTION!
Risk to health!
Baking, cooking or grilling at excessive temperatures may produce substances harmful to health. Acrylamide, which forms in charred or burnt food residues, can cause cancer.
■ Remove burnt residues from the food.
■ Do not brown the food excessively when baking or grilling.
▶ Use the fryer pan handle (7) to pull the fryer pan (6) out of the appliance.
▶ Fill the fryer pan (6) with the food. For more information on the recommended fill levels, see the tables in section "8.1. Setting an automatic programme" on page 119 and "8.3. Recommended settings" on page 121.
Hold the fryer pan firmly by the fryer pan handle and push it from the front so that it is completely inside the appliance until it clicks into place.
8.1. Sett ing an automatic programme
With the automatic programmes, you can cook certain foods at a preset temperature and cooking time. The following programmes are available:

For optimal cooking results, shake the fryer pan or turn the food several times during cooking as needed.
| Symbol | Automatic programme | Recommended weight (g) | Time (min.) | °C Note | |
 | Preheating - 3 | 180 ▶ Run the programme | without food in the fryer pan (6).▶ After preheating, fill the fryer pan with the food.▶ Press the ▶ button to start the preheat-ing process. Start the appropriate pro-gramme immediately afterwards. | ||
 | Chips 300 18 | 200 ▶ Preheat for 3 minutes | ▶ Shake 3-4x | ||
 | Meat (e.g. chops) | 350-400 | 12 | 200 | ▶ Preheat for 3 minutes▶ Turn 1x |
 | Chicken thighs | 300-350 (2 pieces) | 20 | 200 ▶ | Preheat for 3 minutes▶ Coat with cooking o▶ Turn 1x |
 | Steak (medium) | 200 | 12 | 180 | ▶ Preheat for 3 minutes▶ Turn 1x |
 | Small cakes | 300-400 | 25 | 160 | ▶ Use a baking tin (not included in package contents), approx. 6 muffins▶ Do not tilt/flip |
 | Prawns (fresh or defrosted) | 300 | 8 | 180 | ▶ Preheat for 3 minutes▶ Add 1 tbsp cooking oil▶ Shake 1x |
 | Fish (e.g. salmon fil-let, defrosted) | 300–400 10 | 180 ▶ Preheat for 3 | minutes▸ Coat with cooking oil▸ Turn 1x | |
 | Chicken 700– | 800 30 200 ▶ | Preheat for 3 minutes | ▸ Coat with cooking oil▸ Turn 1x | |
 | Vegetables (e.g. peppers, mushrooms, courgettes, po-tatoes) | 500–600 10 | 160 ▶ Preheat for 3 | minutes▸ Add 2 tbsp cooking oil▸ Cut into 2.5 cm sized pieces▸ Cut pieces of potato into smaller pieces▸ Shake 1x | |
i
After 5 minutes, if no buttons are pressed the appliance switches to standby mode.
Press the on/off button ⏻ to switch on the appliance.
▶ Press the corresponding automatic programme button to set the automatic programme you require.
The temperature and cooking time for the selected programme are shown alternately on the display.
▶ Start the cooking process by pressing the ▶|| button.
During the cooking process, the automatic programme symbol and the ▶ button flashes. Ten acoustic signals sound halfway through the cooking time to remind you to redistribute the food (except for the automatic programme 🤊 and 🌐)
i
You can adjust the cooking time and cooking temperature at any time later (see "8.2. Individually setting cooking time and temperature").
i
To ensure that food is cooked to perfection, preheat the air fryer for at least 3 minutes beforehand with the VORHEIZEN automatic programme.
i
To prevent heat losses, it is recommended that you do not start cooking until the fryer pan (6) is fully inserted.
8.2. Individually setting cooking time and temperature
▶ Press the on/off button to switch on the air fryer.
The default setting is a cooking time of 15 minutes and a temperature of 180^ C.
You can adapt an automatic programme or the default setting specified above to suit your recipe.
▶ Use the (13) and (4) buttons to set the cooking temperature you require in 5°C increments. The display field (1) shows the temperature in °C.
The temperature display flashes three times. The temperature is then saved.
Cooking temperatures of between 50^ C and 200^ C can be set.
▶ Use the (16) and (17) buttons to set the cooking time you require in minute increments. The cooking time is displayed in the display field (1).
It is possible to set a maximum cooking time of 60 minutes.
▶ Start the cooking process by pressing the ▶|| button.
The ▶ button flashes and an acoustic signal sounds. The cooking process starts.
8.3. Recommended sett ings
i
The quantities or numbers of pieces in the table below represent the optimum and maximum quantity.
Refer to the table for the corresponding settings for the respective food. The settings may vary by volume, by the food itself or by your own wishes and taste. Also observe the preparation instructions from the respective food manufacturers.
Larger quantities of food usually require a slightly longer cooking time, smaller quantities, a slightly shorter cooking time.
i
For optimal cooking results, shake the fryer pan or turn the food several times during cooking as needed.
| Food | Optimum weight (g) | Time (min.) | Temp. (°C) | Note |
| Maximum weight (g) | ||||
| Thin-cut frozen chips | 300 18 200 | ▶ Preheat for 3 minutes | ▶ Shake 3–4x | |
| Small cakes | 300 | 15 | 160 | ▶ Use baking tin▶ Do not tilt/flip |
| 400 | ||||
| Chicken thighs | 300 | 25 | 200 | ▶ Preheat for 3 minutes▶ Coat with cooking oil▶ Turn 1x |
| 350 | ||||
| Vegetables (e.g. peppers, mushrooms, courgettes, potatoes) | 500 10 160 | ► Preheat for 3 minutes | ► Add 2 tbsp cooking oil► Cut into 2.5 cm sized pieces► Cut pieces of potato into smaller pieces► Shake 1x | |
| 600 | ||||
i
If you have not preheated the air fryer, leave the food to cook for an extra 3 minutes.
i
The baking tins for baking in the air fryer are not supplied with the appliance.
i
You can remove the fryer pan (6) from the appliance at any time during preparation to check cooking progress. The cooking timer continues to run.
Pulling out the fryer pan frequently results in heat loss. This can make it necessary to extend the cooking time.
8.4. Interrupting a programme
You can interrupt the cooking process to check the cooking progress or to redistribute the food.
▶ Press the ▶ button to interrupt the cooking process.
The ▶ button stops flashing and an acoustic signal sounds.
▶ Pull out the fryer pan (6) to check cooking progress or to redistribute the food.
Place the fryer drawer fully back into the appliance.
Press the ▶ button again to continue the cooking process.
The time then continues automatically.
8.5. Ending the programme
At the end of the cooking time, the heating element (2) switches off and acoustic signals sound. The fan runs for another approx. one minute. The control panel goes out; the on/off button ⏻ remains illuminated.
If you want to cancel the cooking process completely, press the on/off button ⏻ until the appliance switches off.
▶ Pull the mains plug (11) out of the mains socket.
▶ Use the fryer pan handle (7) to pull the fryer pan (6) out of the appliance. Place the fryer pan on a heat-resistant surface.
Remove the food from the fryer pan.
9. Cleaning the air fryer

WARNING!
Risk of electric shock!
There is a risk of electric shock due to live parts.
■ Always disconnect the mains plug before cleaning.
■ Never immerse the appliance in water or other liquids. If the appliance does fall into liquid, under no circumstances should you attempt to touch it. First, unplug from the mains socket.
Do not operate the appliance again under any circumstances. Have the appliance checked by the manufacturer, its customer services department or a similarly qualified person.

WARNING!
Risk of injury!
Hot surfaces pose a risk of injury from burning.
- Allow the appliance to cool down for at least 30 minutes before cleaning. Remove the fryer pan to enable the appliance to cool down more quickly. Place the fryer pan on a heat-resistant surface.

NOTICE!
Possibility of damage to the appliance!
There is a risk of damage to the appliance if it is used improperly.
■ Never use acidic, abrasive or granular, acetic-acid-, soda- or solvent-based cleaning agents. These may damage the appliance surfaces or the printing on it.
■ Do not clean the air fryer in the dishwasher.
▶ Pull the fryer pan (6) out of the appliance. Handle the frying insert (8) by the handle (10) and pull it out of the fryer pan.
Clean the fryer pan (6) and the frying insert (8) using a sponge and a small amount of mild soap solution. Rinse all the parts carefully with clean water and then dry them carefully.
The fryer pan and the frying insert are dishwasher safe. However, we recommend rinsing by hand as described above for more gentle cleaning.
▶ Clean the frying chamber (5) using warm water and a damp sponge.
If the heating elements (2) are dirty, use a washing-up brush. Carefully remove the food residue.
▶ A soft, slightly damp cloth is suitable for cleaning the control panel and outer surfaces of the appliance.
10. Prolonged non-use and transport
If you are not going to use the appliance for an extended period of time, unplug the mains plug (11), clean the appliance and store the appliance in a dry, dust-free and frost-free environment that is not exposed to direct sunlight.
▶ To avoid damaging the product during transport, we recommend that you use the original packaging.
11. Troubleshooting
The product left our warehouse in perfect condition. If you do, however, discover a problem, see if you can solve it by using the solutions offered in the following table. If you do not succeed, contact our customer service team.
| Problem Possible cause Troubleshooting | ||
| The appliance is not working. | The mains plug (11) is not plugged into a mains socket. | ► Only connect the appliance to a properly installed power socket. |
| Incomplete entry. ► Start the | cooking process by pressing the button (see section “8. Operating the air fryer”). | |
| The food is not cooked. | The fill level is too high. ► Only fill the fryer pan (6) up to 75%. | |
| The cooking temperature is too low. | ► Press the button (14) to increase the cooking temperature. | |
| The cooking time is too short. | ► Press the button (17) to extend the cooking time. | |
| The food is not evenly cooked. | The pieces of food are too close together. | ► Many foods need to be shaken/turned several times during the cooking time. |
| ► Fill the fryer pan (6) with small pieces of food. Smaller pieces cook more evenly. | ||
| The fried foods are not crisp enough. | The food is unsuitable for cooking in the air fryer. | ► Use oven-ready or lightly oiled snacks for crispier results. |
| The appliance cannot be closed. | The fryer pan (6) is too full. ► | Only fill the fryer pan (6) up to 75%. |
| White smoke comes out of the appli-ance. | The food is very fatty. | ▸ During preparation, fat from these extremely greasy foods drips onto the base of the fryer pan (6). The fat causes a higher temperature than usual to develop in the fryer pan – this does not impair the appliance or the cooking result. |
| The fryer pan (6) and the frying insert (8) still have fat residues from the previous cooking process. | ▸ Fat residue is burning. Clean the fryer pan (6) and the fry-ing insert (8) after each use. | |
| Fresh chips are not evenly fried. | The chips have not been suf- ficiently soaked. | ▸ Place the chips in cold water for around 30 minutes to remove the starch. Dry the chips using kitchen paper be- fore adding to the fryer pan. |
| The variety of potato is unsuitable. | ||
| Fresh chips do not go crisp. | The potatoes are too moist. ▶ | The crispiness is dependent on the water and starch con- tent of the variety of potato used and the quantity of oil. |
| ▸ Dry the potatoes carefully and cover them with about 1 tablespoon of cooking oil. | ||
| ▸ Cut the potatoes into smaller pieces. | ||
12. Technical specifications
| Supplier's address: MEDION AG | Am Zehnthof 7745307 EssenGERMANY |
| Model identifier: MD 11750 | |
| Power supply: 220–240 V | ~, 50–60 Hz |
| Output: 1800–2150 W | |
| Total capacity (without frying insert): Approx. | 7.26 litres |
| Useful capacity (with frying insert): Approx. 6 | 8 litres |
| Temperature control: 50–200°C | |
| Max. cooking time: 60 minutes | |
| Dimensions (W × H × D),incl. fryer pan handle | 40 × 33 × 33.2 cm |
13. EU declaration of conformity

MEDION AG hereby declares that the product conforms to the following requirements of the European Union:
• EMC Directive 2014/30/EU
• Low Voltage Directive 2014/35/EU
• Ecodesign Directive 2009/125/EC
• RoHS Directive 2011/65/EU
14. Spare parts
- Please visit our MEDIONServiceshop at https://www.medion.com/medionserviceshop to order any spare parts you need.
- You will be able to find out all the details about your specific product while you're there.
15. Disposal
PACKAGING
Your appliance has been packaged to protect it from damage in transit. The packaging is made of materials that can be recycled in an environmentally friendly manner.
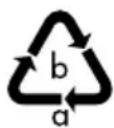
Observe the following labels on the packaging materials regarding waste separation with the abbreviations (a) and numbers (b):
1–7: plastics/20–22: paper and cardboard/80–98: composite materials

(France only)
The “Triman” symbol tells the consumer that the product can be recycled, is covered by an extended system of manufacturer’s responsibility and must be sorted by material type in France.
APPLIANCE
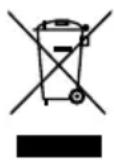
All old appliances marked with the symbol shown must not be disposed of in normal household waste.
In accordance with Directive 2012/19/EU, these appliances must be disposed of correctly at the end of their service life.
This involves separating the materials in the appliance for the purpose of recycling as well as minimising the environmental impact and negative effects on human health.
Take old appliances to a collection point for electrical scrap or a recycling centre.
Contact your local waste disposal company or your local authority for more information on this subject.
16. Service information
Please contact our Customer Service team if your device ever stops working the way you want or expect it to. There are several ways for you to contact us:
- In our Service-Community, you can meet other users, as well as our staff, and you can exchange your experiences and pass on your knowledge there.
You will find our Service-Community at community.medion.com.
• Alternatively, use our contact form at www.medion.com/contact.
- You can also contact our Service team via our hotline or by post.
| Opening times Hotline number UK | |
| Mon – Fri: 08.00 – 20.00Sat – Sun: 10.00 – 16.00 | 0333 3213106 |
| Service address | |
| MEDION Electronics Ltd.120 Faraday Park, Faraday Road, DorcanSwindon SN3 5JF, WiltshireUnited Kingdom | |

text_image
QR code image containing encoded data, no visible human-readable textYou can download this and many other sets of operating instructions from our service portal at www.medionservice.com.
We have stopped providing printed copies of our warranty terms and conditions as part of our commitment to sustainability, but you can access the warranty terms and conditions on our service portal.
You can also scan the QR code on the side of the screen, to download the operating instructions onto your mobile device from the service portal.
17. Legal Notice
Copyright 2024
Date: 26. March 2024
All rights reserved.
These operating instructions are protected by copyright.
Mechanical, electronic and any other forms of reproduction are prohibited without the written permission of the manufacturer.
Copyright is owned by the company:
MEDION AG
Am Zehnthof 77
45307 Essen
Germany
Please note that you cannot use the address above for returns. Please always contact our Customer Service team first.
DE
FR
NL
ES
IT
EN