GUD3C11 - Other computer accessories IOGEAR - Free user manual and instructions
Find the device manual for free GUD3C11 IOGEAR in PDF.


| Brand | IOGEAR |
| Model | GUD3C11 |
| Product Type | USB-C Triple Video Docking Station with 60W Power Delivery |
| Power Supply | 120W AC power adapter included |
| Video Ports | 2 DisplayPort + 1 HDMI |
| Maximum Resolution | 4096x2160 @60Hz (DisplayPort), 3840x2160 @30Hz (HDMI) |
| USB Ports | 2 USB-A 3.0 (1 with BC 1.2 1.5A), 2 USB-A 2.0, 1 USB-C data |
| Audio | 3.5mm microphone jack + 3.5mm headphone jack |
| Ethernet | GbE (Gigabit Ethernet) port |
| Power Delivery | Up to 60W via USB-C host port |
| Package Contents | Docking station, 120W power adapter, 1m USB-C cable, driver CD, quick start guide, warranty card |
| System Requirements | USB-C host with DisplayPort Alt Mode or Thunderbolt 3; Windows 7/8/10, macOS 10.10~10.13.3 |
| Driver | DisplayLink driver required (download recommended from DisplayLink website) |
| Warranty | 1-year limited warranty |
| Compliance | FCC Class B |
| Dimensions | Approximately 20 x 8 x 3 cm (estimated) |
| Weight | Approximately 250 g (estimated) |
| Care and Cleaning | Unplug before cleaning; use a dry soft cloth |
| Safety | Do not expose to moisture; use the provided adapter |
Frequently Asked Questions - GUD3C11 IOGEAR
User questions about GUD3C11 IOGEAR
0 question about this device. Answer the ones you know or ask your own.
Ask a new question about this device
Download the instructions for your Other computer accessories in PDF format for free! Find your manual GUD3C11 - IOGEAR and take your electronic device back in hand. On this page are published all the documents necessary for the use of your device. GUD3C11 by IOGEAR.
USER MANUAL GUD3C11 IOGEAR
USB-C™ Triple Video Docking Station with 60W Power Delivery
Designed in California, USA ©2018 IOGEAR® All rights reserved. ATEN is a registered trademark of ATEN International Co., LTD. All other trademarks are the properties of their respective owners. Reproduction in whole or in part without permission is prohibited. Tested to Comply With FCC and CE Standards. FOR HOME OR OFFICE USE. Mac and the Mac logo are trademarks of Apple Computer, Inc. registered in the U.S. and other countries. Specifications subject to change without notice.
Table of Contents
Package Contents 4
System Requirements 4
Overview 5
Driver Installation 7
Hardware Installation 13
Video Resolution Chart 15
Compliance Information 17
Limited Warranty 18
Contact 18
- USB-C (Thunderbolt 3 compatible) device with DP Alt Mode Support
- USB-C with USB-C mode only up to 2 monitors
- Windows 7/8/8.1/10
- MacOS® X 10.10 ~ 10.13.3 (for 10.13.4 and above, please check DisplayLink (http://www.displaylink.com/downloads/macos) for driver update and notes)
- DisplayLink Driver installation
- Host computer USB-C port must support USB Power Delivery 2.0 and above to be charged
Overview
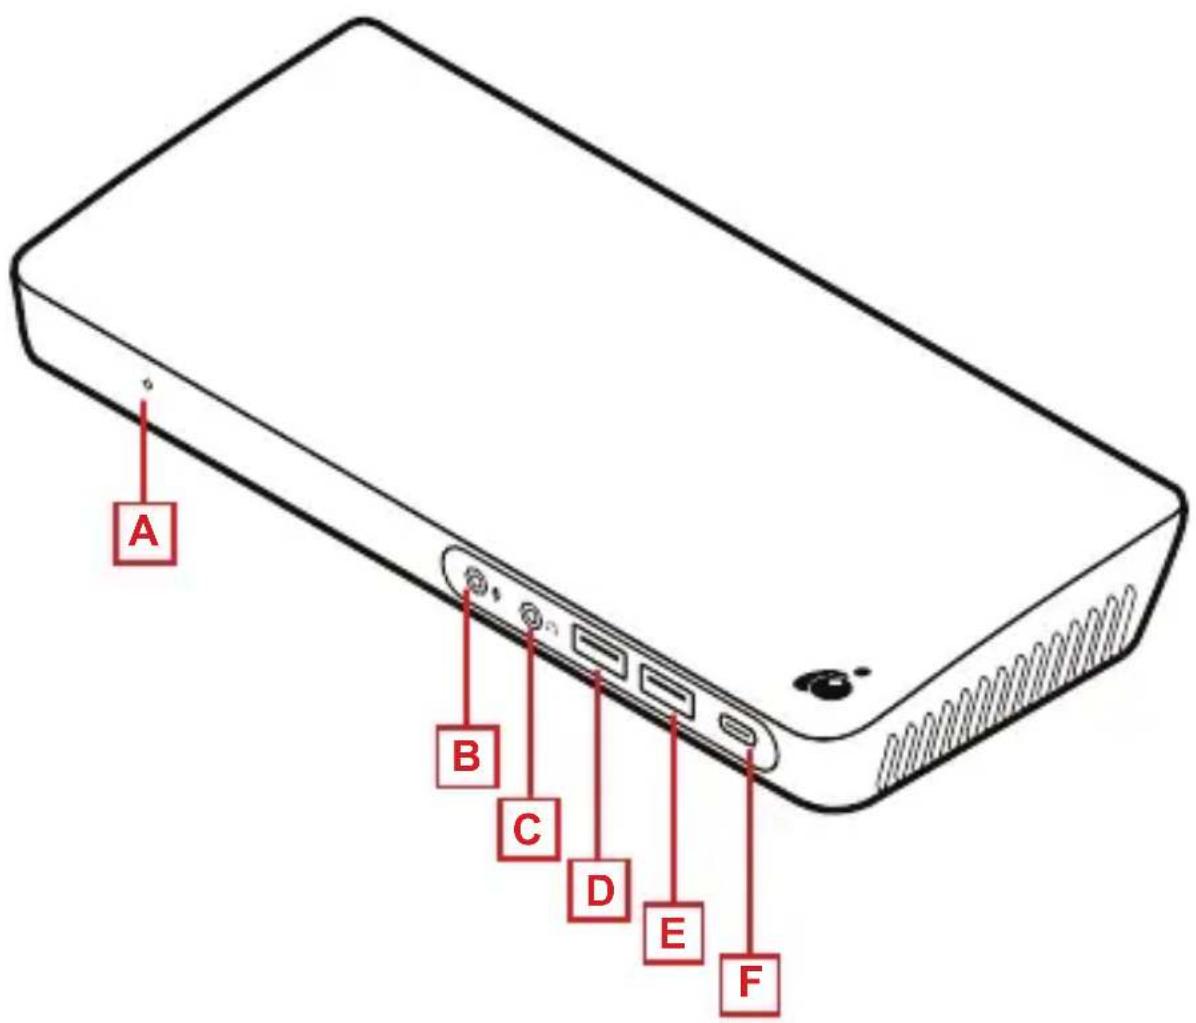
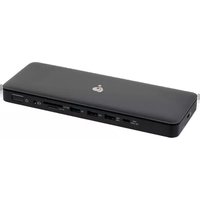
Front
A. Power LED
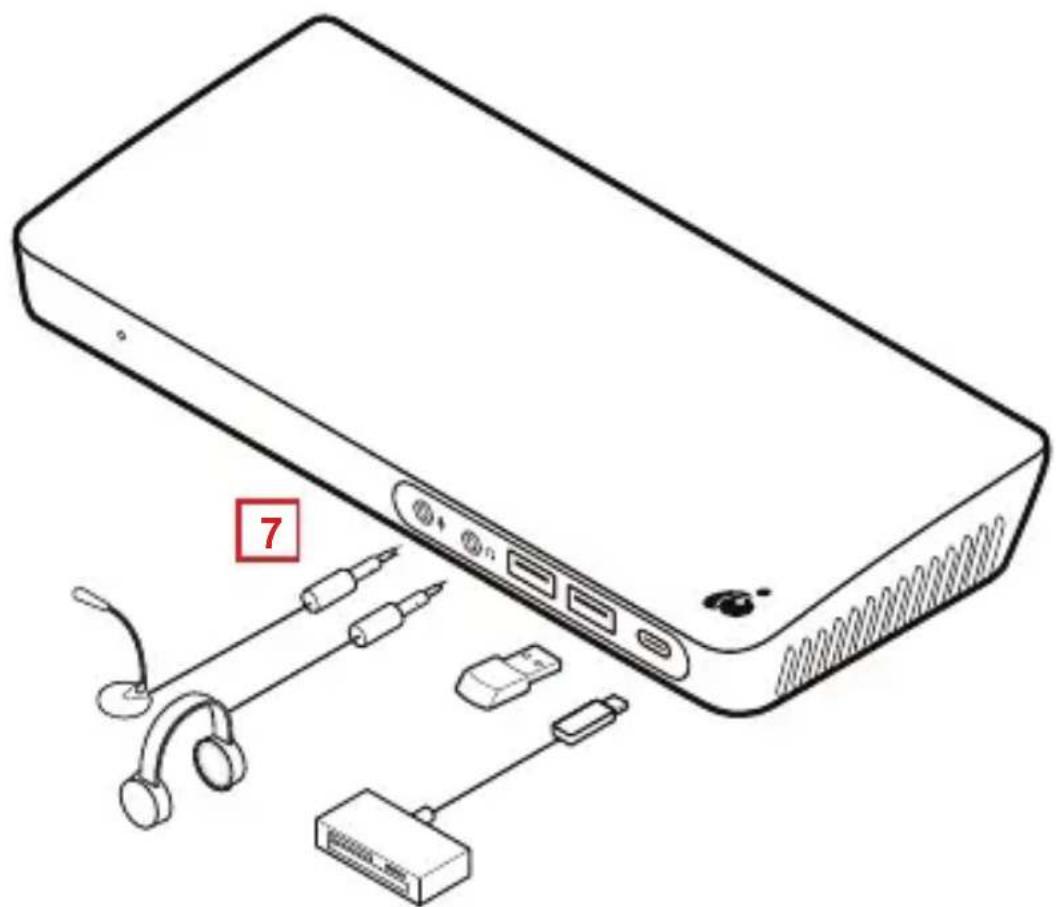
B. 3.5 ~mm microphone input
C. 3.5 ~mm headphone output
D. USB-A 3.0 Port (BC1.2 charging port w/ max 1.5A)
E. USB-A 3.0 Port
F. USB-C (for data transfer only)
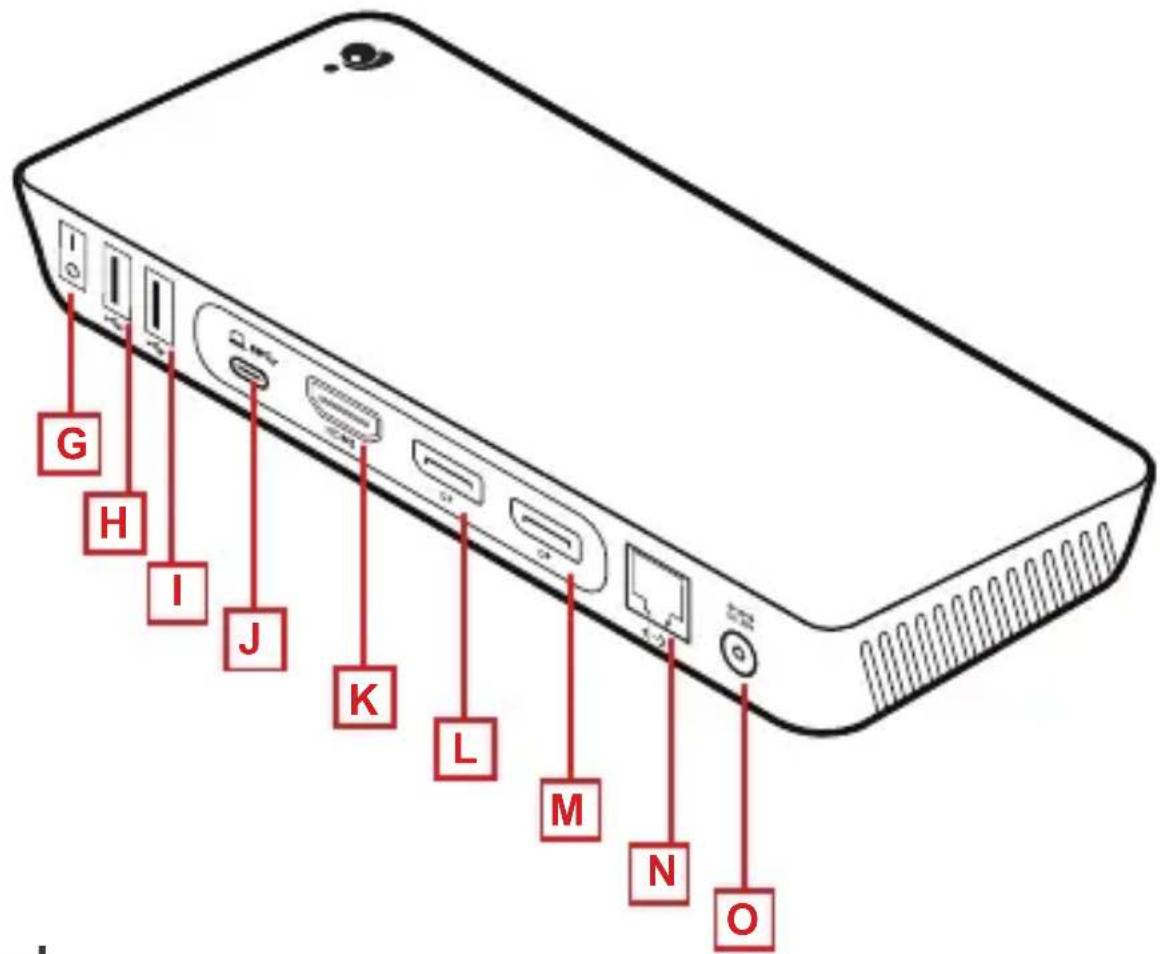
Back
G. GUD3C11 power switch
H. USB-A 2.0 Port
I. USB-A 2.0 Port
J. USB-C port for host computer (Power Delivery pass-through up to 60W to charge)
K. HDMI
L. DisplayPort
M. DisplayPort
N. Gigabit Ethernet Port
O. DC power input
Driver Installation
- Before hardware installation, please download the latest driver to your computer from the DisplayLink support website at www.displaylink.com/support
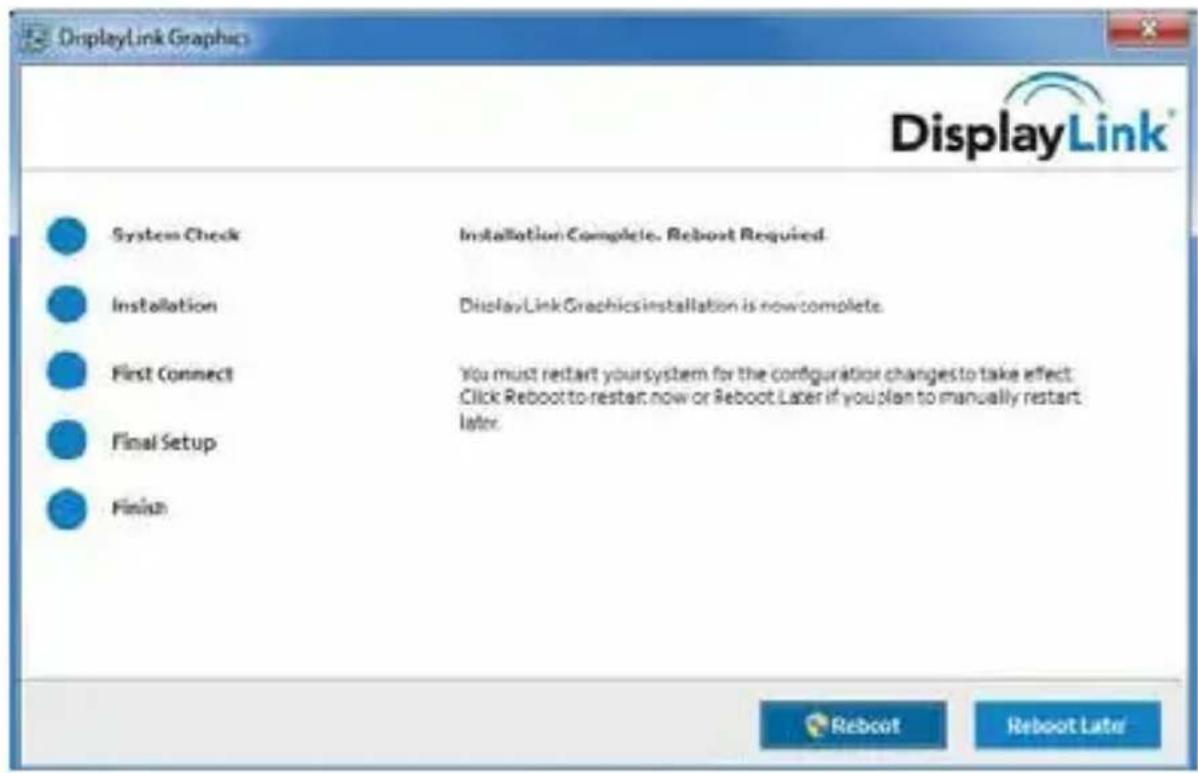
- For Windows OS, run the "DisplayLink USB Graphics Software for Windows 8.4 M0.exe", it will start installing the Displaylink Driver automatically.

Installing device driver software
Click here for status.


For Mac® OS 10.11 ~ 10.13.3, run the "DisplayLink installer 4.1.11.dmg"
For Mac® OS 10.10.5~10.12, run the "DisplayLink Installer 82262.dmg"
3. Follow the screen instructions to complete the installation and restart your computer
(Mac)
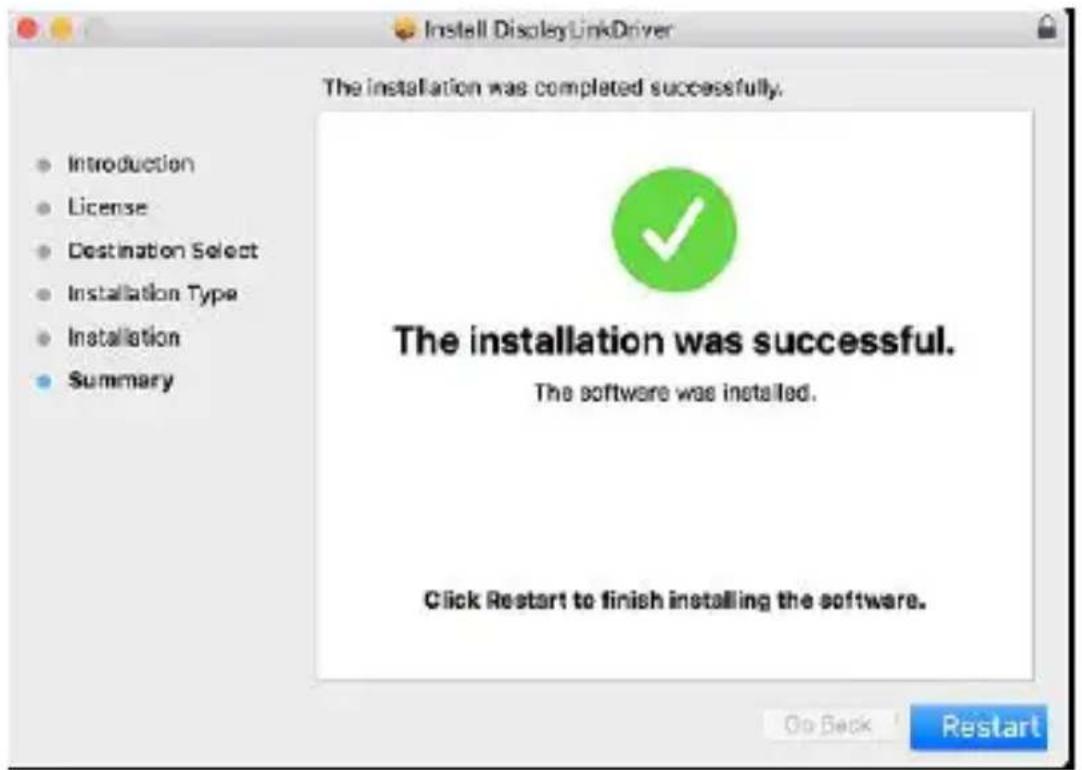
(Windows)
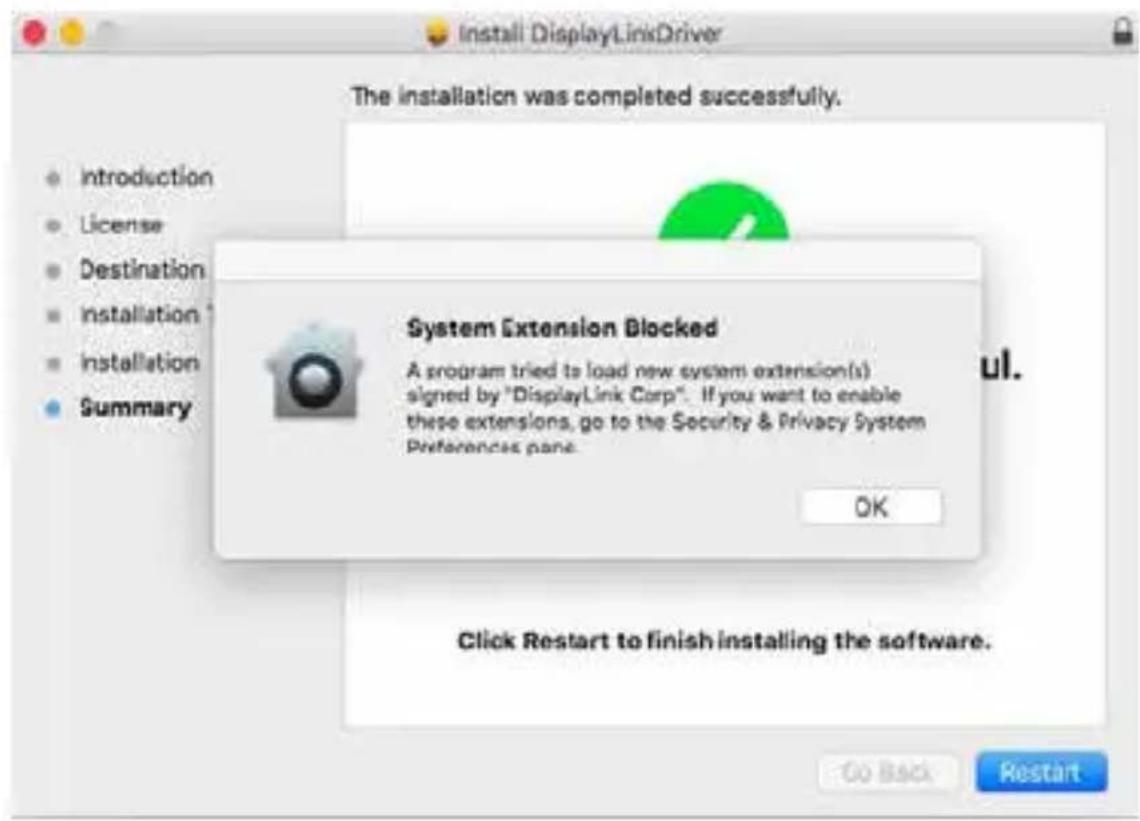
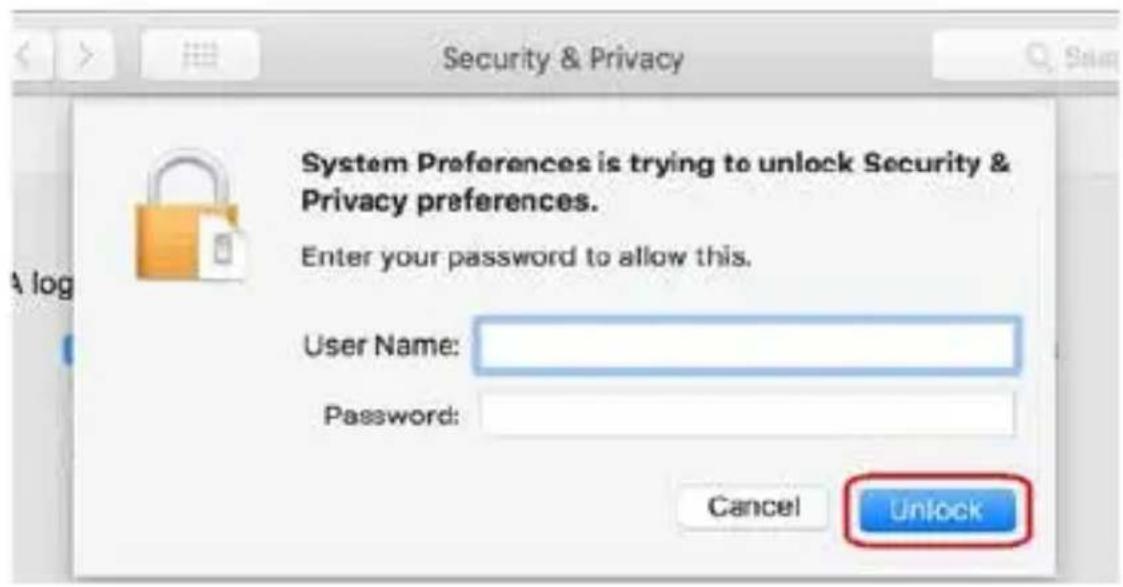
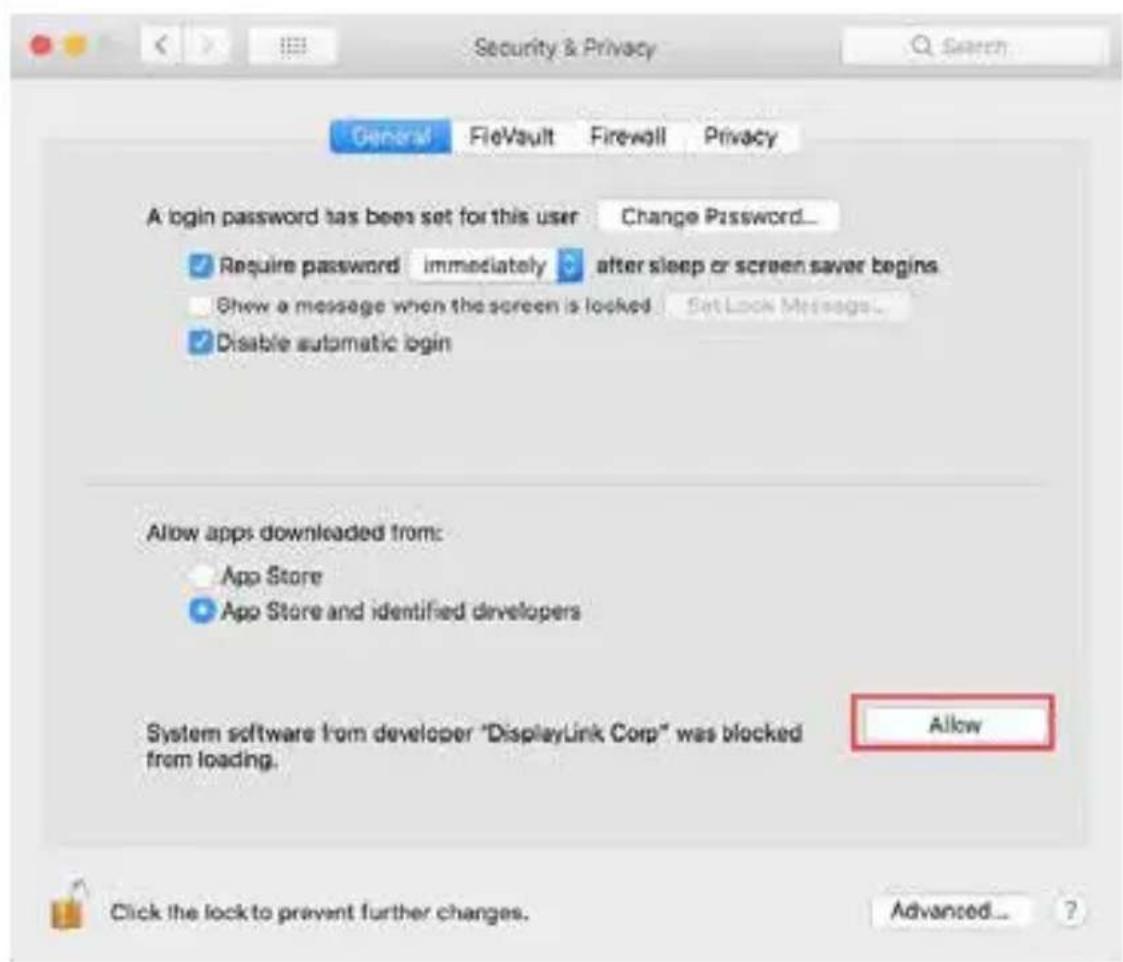
- For Mac® OS High Sierra 10.13.3, at the end of the installation, the operation system should display a "System Extension Linked after installation" warning. Please enable it under Security & Privacy setting.
- For DisplayLink configurations, please refer to Support Document on DisplayLink website
a. How to configure DisplayLink displays on Windows https://support.displaylink.com/knowledgebase/ articles/624597-how-to-configure-displaylink-displays-on-windows
b. How to configure DisplayLink displays on Mac https://support.displaylink.com/knowledgebase/articles/658258-how-toconfigure-displaylink-displays-on-mac-os-x
Hardware Installation
- Plug in the included AC Power Adapter to the appropriate electrical outlet
- Connect the AC power adapter to the DC input on GUD3C11
- Connect the included USB-C cable on GUD3C11 to the USB-C port on the host computer.
- Connect external HDMI monitor to HDMI port on GUD3C11 with a HDMI cable*.
- Connect external DisplayPort monitor to DisplayPort on GUD3C11 with a DisplayPort cable*.
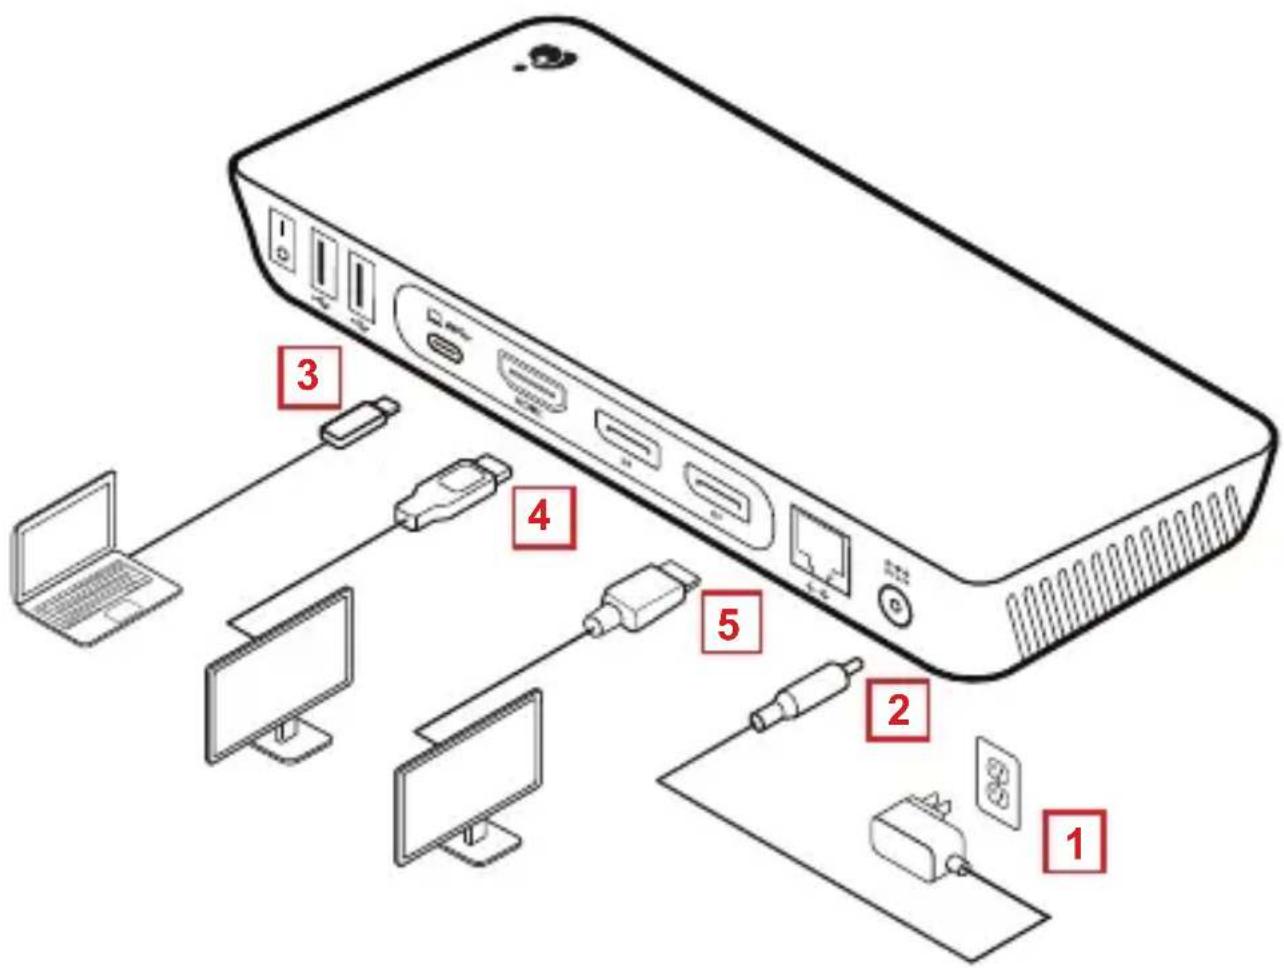
- Monitor screen might flicker intermittently for about 5-10 seconds when connecting to the external monitor due to video sync process.
- Connect external devices to appropriate ports as needed (refer to product overview for ports call out)
*Note: The maximum resolution of 4K is dependent on the source content, capability of the video display, the cable used, and the graphic card capability of the connected host computer.
Video Resolution Chart
For host computer with DisplayPort Alt-Mode:
| # of Video output | DisplayPort1 | DisplayPort2 HDMI | |
| Single Display | 4096x2160 @60Hz | n/a n/a | |
| Single Display n/a | 4096x2160 @60Hz | n/a | |
| Single Display n/a | n/a | 3840x2160 @30Hz | |
| Two concurrent | 3840x2160 @60Hz | 3840x2160 @60Hz | n/a |
| Two concurrent | 4096x2160 @60Hz | n/a | 3840x2160 @30Hz |
| Two concurrent n/a | 4096x2160 @60Hz | 3840x2160 @30Hz | |
| Three concurrent | 3840x2160 @60Hz | 3840x2160 @60Hz | 3840x2160 @30Hz |
For host computer with USB-C mode only:
| # of Video output | DisplayPort1 | DisplayPort2 HDMI | |
| Single Display | 4096x2160 @60Hz | n/a n/a | |
| Single Display n/a | 4096x2160 @60Hz | n/a | |
| Single Display n/a | n/a | 4096x2160 @60Hz | |
| Two concurrent | 3840x2160 @60Hz | 3840x2160 @60Hz | n/a |
| Two concurrent | 3840x2160 @60Hz | n/a | 3840x2160 @30Hz |
| Three concurrent | not support 3 concurrent | not support 3 concurrent | not support 3 concurrent |
Compliance Information
FCC Statement
This equipment has been tested and found to comply with the limits for a Class B digital device, pursuant to Part 15 of the FCC Rules. These limits are designed to provide reasonable protection against harmful interference in a residential setting. This product generates, uses, and can radiate radio frequency energy and, if not installed and used as directed, it may cause harmful interference to radio communications. Although this product complies with the limits for a Class B digital device, there is no guarantee that interference will not occur in a particular installation.
Limited Warranty
This product carries a 1 Year Limited Warranty. For the terms and conditions of this warranty, please go to http://www.iogear.com/support/warranty
Register online at http://www.iogear.com/register
Important Product Information
Product Model
Serial Number
Contact
WE'RE HERE TO HELP YOU! NEED ASSISTANCE SETTING UP THIS PRODUCT?
Make sure you:
- Visit www.iogear.com for more product information
- Visit www.iogear.com/support for live help and product support
www.iogear.com
iogear.custhelp.com
support@iogear.com

Installing device driver software Click here for status.

Windows: https://support.displaylink.com/knowledgebase/articles/624597-how-to-configure-displaylink-displays-on-windows
http://www.iogear.com/support/warranty
- Table of Contents
- Overview
- Front
- Back
- Driver Installation
- Follow the screen instructions to complete the installation and restart your computer
- (Mac)
- (Windows)
- Hardware Installation
- Video Resolution Chart
- For host computer with USB-C mode only:
- Compliance Information
- FCC Statement
- Limited Warranty
- Contact
- WE'RE HERE TO HELP YOU! NEED ASSISTANCE SETTING UP THIS PRODUCT?
Brand : IOGEAR
Model : GUD3C11
Category : Other computer accessories