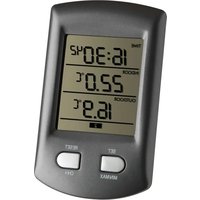
Ratio 30.3034.01 - Thermometer TFA - Free user manual and instructions
Find the device manual for free Ratio 30.3034.01 TFA in PDF.


| Product type | Radio-controlled thermometer |
| Brand | TFA |
| Model | Ratio 30.3034.01 |
| Base station dimensions | 68 x 29 (78) x 113 mm |
| Base station weight | 86 g (device only) |
| Base station power supply | 2 AA 1.5 V batteries (not included) |
| Transmitter dimensions | 36 (46) x 16 (30) x 120 (123) mm |
| Transmitter weight | 33 g (device only) |
| Transmitter power supply | 2 AAA 1.5 V batteries (not included) |
| Indoor temperature range | 0...+60°C (+32...+140°F) |
| Outdoor temperature range | -40...+65°C (-40...+149°F) |
| Measurement accuracy | ±1°C |
| Transmission frequency | 433 MHz |
| Maximum RF power | < 10 mW |
| Range (open field) | 100 m |
| Main functions | Clock, alarm, min/max values, expandable up to 3 transmitters, LCD display, wall mount or freestanding |
| Package contents | Base station, transmitter, instruction manual |
| Care and cleaning | Soft damp cloth, no abrasive solvents; remove batteries if not used for a long time |
| Safety instructions | Keep out of reach of children; do not throw batteries into fire; do not disassemble the device; wear gloves if batteries leak |
| General information | Device complies with EU standards (WEEE, RED); declaration of conformity available at www.tfa-dostmann.de |
Frequently Asked Questions - Ratio 30.3034.01 TFA
User questions about Ratio 30.3034.01 TFA
0 question about this device. Answer the ones you know or ask your own.
Ask a new question about this device
Download the instructions for your Thermometer in PDF format for free! Find your manual Ratio 30.3034.01 - TFA and take your electronic device back in hand. On this page are published all the documents necessary for the use of your device. Ratio 30.3034.01 by TFA.
USER MANUAL Ratio 30.3034.01 TFA
B1: SET/MIN/MAX Taste B2: RESET/CH/+ Taste
Gehäuse
RATIO - Wireless thermometer

Thank you for choosing this instrument from TFA.
1. Before you start using it
- Please make sure to read the instruction manual carefully. This information will help you to familiarise yourself with your new device, to learn all of its functions and parts, to find out important details about its first use, how to operate it and how to get advice in the event of a malfunction.
- Following and respecting the instructions in your manual will prevent damage to your instrument and loss of your statutory rights arising from defects due to incorrect use.
- We shall not be liable for any damage occurring as a result of not following these instructions. Likewise, we take no responsibility for any incorrect readings and for any consequences which may result from them.
- Please take particular note of the safety advice!
- Please keep this instruction manual for future reference.
2. Delivery contents
• Wireless thermometer (basic unit)
• Transmitter (Cat.-Nr. 30.3163)
- Instruction manual
3. Field of operation and all the benefits of your new instrument at a glance
- Outdoor temperature wireless (433 MHz), distance range up to 100 m (free field)
- Expandable up to 3 outdoor transmitters, also for the temperature control of remote rooms, e.g. children's room, wine-cellar
- Indoor temperature
• Maximum and minimum values - Clock with alarm
- For wall mounting or table standing
4. For your safety
- This product is exclusively intended for the field of application described above. It should only be used as described within these instructions.
RATIO - Wireless thermometer

- Unauthorised repairs, modifications or changes to the product are prohibited.

Caution! Risk of injury:
- Keep these instruments and the batteries out of reach of children.
- Batteries must not be thrown into a fire, short-circuited, taken apart or recharged. Risk of explosion!
- Batteries contain harmful acids. Low batteries should be changed as soon as possible to prevent damage caused by leaking.
- Wear chemical-resistant protective gloves and glasses when handling leaking batteries.

Important information on product safety!
- Do not place your product near extreme temperatures, vibrations or shocks.
- Protect it from moisture.
- The outdoor transmitter is protected against splash water, but is not watertight. Choose a shady and dry position for the transmitter.
5. Elements (Fig. 1)
5.1 Receiver (Display unit)
LCD
A1: Clock A2: Indoor temperature
A3: Outdoor temperature A4: Outdoor temperature wave icon
A5: Channel number A6: Alarm symbol
Buttons
B1: SET/MIN/MAX button B2: RESET/CH/+ button
Housing
C1: Wall mount hole C2: Battery compartment
C3: Stand (fold out)
RATIO - Wireless thermometer GB
5.2. Transmitter (Fig. 2)
D1: Wall mount hole D2: Battery compartment
D3: Support for table standing D4: Support for wall mounting
6. Getting started
6.1 Insert batteries
- Open the battery compartment of the display unit and the transmitter (screwed) and place both instruments on a desk with a distance of approximately 1.5 meter. Check that no other electronic devices are close.
- Insert the batteries 2 × 1,5 V AAA into the battery compartment of the transmitter and immediately afterwards 2 × 1,5 V AA in the display unit, observing the correct polarity.
- A brief beep tone will sound and all LCD segments will light up for a short moment.
6.2 Reception of outdoor temperature
- The display unit automatically starts scanning the 433 MHz signal to register the thermo sensor unit after batteries are inserted. 🌐 appears for 3 minutes on the LCD of the display unit.
- Note: DO NOT PRESS ANY KEY during the learning period. If the outdoor temperature is not displayed or if any key is pressed before the outdoor temperature signal is received and when changing batteries you will need to follow the battery installation procedure again. Please wait 10 seconds before inserting the batteries again.
- You can also start the outdoor transmitter search manually later on (for example when the outdoor transmitter is lost or the batteries are changed).
- Press the RESET/CH/+ button for 3 seconds. “---” and 📄 are displayed.
6.3 Manual setting
- Press the SET/MIN/MAX button for 3 seconds.
- The "24Hr" indicator is flashing. Press the RESET/CH/+ button to choose 12 HR or 24 HR system.
- Confirm with the SET/MIN/MAX button.
RATIO - Wireless thermometer GB
- The minute digit is flashing. Press the RESET/CH/+ button to adjust minutes. Confirm with the SET/MIN/MAX button. Set hours in the same way.
- Press the SET/MIN/MAX button again and with the RESET/CH/+ button you can change between °C or °F as temperature unit.
- Confirm with the SET/MIN/MAX button.
- The device will automatically quit the setting mode if no button is pressed for 30 seconds.
- Press and hold the RESET/CH/+ button in the setting mode and you will enter fast mode.
6.4 Alarm setting
- Press the SET/MIN/MAX button in normal mode.
• 12:00 (default) is displayed or the last adjusted alarm time. - Press and hold the SET/MIN/MAX button for three seconds.
- The minute digit is flashing. Press the RESET/CH/+ button to adjust minutes.
- Press the SET/MIN/MAX button again and you can adjust the hours with the RESET/CH/+ button.
- Holding the RESET/CH/+ button, you will enter fast mode.
- Confirm with the SET/MIN/MAX button and the display shows the current adjusted alarm time.
- Press the RESET/CH/+ button and the alarm function is activated.
• The alarm symbol appears on the display. - Press any button to stop the alarm.
7. Maximum/Minimum function
- Press the SET/MIN/MAX button in normal mode.
- The last adjusted alarm time appears on the display.
- Press the SET/MIN/MAX button again to show the minimum ("MIN") values of indoor and outdoor temperature. Press the SET/MIN/MAX button again to show maximum ("MAX") values.
- Press and hold the RESET/CH/+ button for 2 seconds while the maximum or minimum values are displayed to clear the recorded maximum readings.
RATIO - Wireless thermometer

8. Additional transmitters
- If you like to connect additional remote sensors (max. 3), repeat the installation procedure for all extra sensors. The wireless thermometer will number the sensors in the order of set-up automatically.
- If you have installed more than one transmitter, press the RESET/CH/+ button to change between the outdoor transmitters. Display for channel 1 for channel 2 or for channel 3.
9. Positioning of display unit and transmitter
- Choose a shady and dry position for the transmitter. (Direct sunshine falsifies the measurement and continuous humidity strains the electronic components needlessly).
- Place the display unit at the final position. Avoid the vicinity of any interfering field like computer monitors or TV sets and solid metal objects.
- Check the transmission of the signal from the transmitter to the display unit (transmission range 100 m free field, within ferroconcrete rooms, especially with metal parts, the received signal is naturally weakened).
- If necessary choose another position for transmitter and/or display unit.
- Use the bracket stand for mounting or standing when the signal is received successfully.
10. Care and maintenance
- Clean the instruments with a soft damp cloth. Do not use solvents or scouring agents.
- Remove the batteries if you do not use the products for a long period of time.
- Keep the instruments in a dry place.
10.1 Battery replacement
- When the batteries are used up, the low battery indicator appears on the display (RX=base station, TX=transmitter).
- Please note: When the batteries are changed, the contact between transmitter and receiver must be restored – so always insert new batteries into both units or start a manual transmitter search.
RATIO - Wireless thermometer

11. Troubleshooting
Problems Solution
No indication → Ensure batteries polarities are on the basic station correct
→ Change the batteries
No transmitter reception → Start the transmitter search manu- Display "---" ally according to the manual
→ Check batteries of external transmitter (do not use rechargeable batteries!)
→ Restart the transmitter and the display unit according to the manual
→ Choose another place for the transmitter and/or the basic unit
→ Reduce the distance between the transmitter and the basic unit
→ Check if there is any source of interference
Incorrect indication → Change the batteries
12. Waste disposal
This product has been manufactured using high-grade materials and components which can be recycled and reused.

Never dispose of empty batteries and rechargeable batteries in household waste.
As a consumer, you are legally required to take them to your retail store or to appropriate collection sites depending on national or local regulations in order to protect the environment.
The symbols for the heavy metals contained are: Cd=cadmium, Hg=mercury, Pb=lead
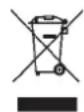
This instrument is labeled in accordance with the EU Waste Electrical and Electronic Equipment Directive (WEEE).
RATIO - Wireless thermometer
GB
Please do not dispose of this instrument in household waste. The user is obligated to take end-of-life devices to a designated collection point for the disposal of electrical and electronic equipment, in order to ensure environmentally-compatible disposal.
13. Specifications
Basic unit:
Measuring range
Indoor temperature: 0...+60°C (+32...+140°F)
Precision: ±1°C
Power consumption: 2 x 1,5 V AA
(Batteries not included)
Dimensions: 68 x 29 (78) x 113 mm
Weight: 86 g (instrument only)
Outdoor transmitter:
Measuring range
Outdoor temperature: -40...+65°C (-40...+149°F)
Precision : ±1°C
Transmission frequency: 433 MHz
Maximum
radio-frequency power: < 10mW
Distance range (free field): 100 m
Power consumption: 2 x 1,5 V AAA
(Batteries not included)
RATIO - Wireless thermometer
GB
Dimensions: 36 (46) x 16 (30) x 120 (123) mm
Weight: 33 g (only instrument)
No part of this manual may be reproduced without written consent of TFA Dostmann. The technical data are correct at the time of going to print and may change without prior notice. The latest technical data and information about your product can be found by entering your product number on our homepage.
EU declaration of conformity
Hereby, TFA Dostmann declares that the radio equipment type 30.3034.10 is in compliance with Directive 2014/53/EU.
The full text of the EU declaration of conformity is available at the following internet address:
www.tfa-dostmann.de
Zum Ottersberg 12, D-97877 Wertheim, Germany 09/16
B1: Touche SET/MIN/MAX B2: Touche RESET/CH/+


- Gehäuse
- RATIO - Wireless thermometer
- Before you start using it
- Delivery contents
- Field of operation and all the benefits of your new instrument at a glance
- For your safety
- Caution! Risk of injury:
- Important information on product safety!
- Elements (Fig. 1)
- Receiver (Display unit)
- RATIO - Wireless thermometer GB
- Transmitter (Fig. 2)
- Getting started
- Insert batteries
- Reception of outdoor temperature
- Manual setting
- Alarm setting
- Maximum/Minimum function
- Additional transmitters
- Positioning of display unit and transmitter
- Care and maintenance
- Battery replacement
- Troubleshooting
- Problems Solution
- Waste disposal
- Specifications
- Outdoor transmitter:
Brand : TFA
Model : Ratio 30.3034.01
Category : Thermometer