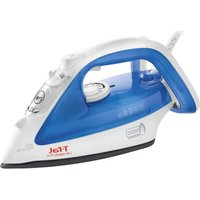
BRIO FV3031 - Iron TEFAL - Free user manual and instructions
Find the device manual for free BRIO FV3031 TEFAL in PDF.

User questions about BRIO FV3031 TEFAL
0 question about this device. Answer the ones you know or ask your own.
Ask a new question about this device
Download the instructions for your Iron in PDF format for free! Find your manual BRIO FV3031 - TEFAL and take your electronic device back in hand. On this page are published all the documents necessary for the use of your device. BRIO FV3031 by TEFAL.
USER MANUAL BRIO FV3031 TEFAL
IMPORTANT SAFETY INSTRUCTIONS
READ ALL INSTRUCTIONS BEFORE USING THE IRON.
When using your flat iron, basic safety precautions should always be followed, including the following:
- Use iron only for its intended use.
- To protect against a risk of electric shock, do not immerse the iron in water or other liquids.
- The iron should always be turned OFF before plugging or unplugging from outlet. Never yank cord to disconnect from outlet; instead, grasp plug and pull to disconnect.
- Do not allow cord to touch hot surfaces. Let iron cool completely before putting away. Loop cord loosely around iron when storing.
- Always disconnect iron from electrical outlet when filling with water or emptying and when not in use.
- Do not operate iron with a damaged cord or if the iron has been dropped or damaged. To avoid the risk of electric shock, do not disassemble the iron. Contact our Consumer Service Department for examination, repair or adjustment. Incorrect reassembly can cause a risk of electric shock when the iron is used.
- Close supervision is necessary for any appliance being used by or near children. Do not leave iron unattended while connected or on an ironing board.
- Burns can occur from touching hot metal parts, hot water or steam. Use caution when you turn a steam iron upside down - there may be hot water in the reservoir.
- To avoid a circuit overload, do not operate another high-wattage appliance on the same circuit
- If an extension cord is absolutely necessary, a 15 ampere cord should be used. Cords rated for less amperage may overheat. Care should be taken to arrange the cord so that it cannot be pulled or tripped over.
SAVE THESE INSTRUCTIONS
For your safety
- This appliance is only for domestic and personal use.
- This appliance complies with the technical rules and standards for safety currently in force (Electromagnetic Compatibility, Low Voltage, Environnement).
- This appliance is not designed to be used by children or other persons unassisted or unsupervised if their physical, sensory or mental capacities prevent them from using the appliance in complete safety. Children should be supervised to ensure that they do not play with the appliance.
- Warning! The voltage of your electrical outlet must correspond to that of the iron (120V). Connecting to the wrong voltage may cause irreversible damage to the iron and will invalidate the guarantee
- If the electrical cord becomes damaged, it must be immediately replaced by an Approved Service Center to avoid any danger.
- The appliance should not be used if it has fallen, if it has obvious damage, if it leaks or has functional anomalies. Never dismantle your appliance: have it inspected by an Approved Service Center to avoid any danger.
- Always unplug your appliance: before filling or rinsing the reservoir, before cleaning it and after each use.
-
Never leave the appliance unattended when it is connected to a power source; if it has not cooled down for approximately 1 hour.
-
Your appliance gives off steam, which may cause burns, especially when you are ironing on a corner of your ironing board. Never direct the steam towards people or animals.
- Your iron should be used and placed on a stable surface. When you put your iron onto its heel or the iron rest, make sure that the surface on which you put it is stable.
- Any inappropriate use or use contrary to these instructions releases the brand from all responsibility and renders the guarantee invalid.
Description
- Spray
- Water filling inlet lid
- Steam control lever
- Anti-scale valve
- Self-Clean button
- Spray button
-
Burst of steam button
-
Auto-off indicator light (depending on model)
- Electric power cord
- Temperature ready light
- Temperature control dial
- Maximum water level indicator
- Soleplate
Before first use
- Before using your iron with steam for the first time, we recommend that you place and keep the iron in a horizontal position for a few moments and press the burst of steam button several times away from your fabric.
- During the first few uses, a harmless odor and smoke may be emitted from the iron. This has no effect on the iron and will disappear quickly.
Please read these instructions carefully and keep them for future reference.
Remove any labels, stickers or hangtags from the body or soleplate of the iron before plugging it in.
What type of water should be used?
If you have very hard water, it is recommended that you mix tap water with purified (bottled) water in the following ratio:
- 50% tap water,
-
50% purified (bottled) water. This will reduce the amount of lime scale build-up in your iron and reduce the amount of times you will need to clean your iron.
-
Your iron has been designed to function with untreated tap water. However, due to the natural minerals found in tap water, it is recommended that you clean the iron once a month using the self cleaning method on page 5.
- Never use any of the following water types as this may cause spitting, brown staining or premature aging of your iron: 100% purified water (bottled water), water from tumble dryers, scented water, softened water, water from refrigerators, water from batteries, water from air conditioners, distilled water, rain water, boiled or filtered water, etc.
- The integrated anti-scale system (depending on model) prolongs the life of the iron and provides a better ironing quality by ensuring a constant flow of steam.
EN
Use
Filling the water tank
- Unplug your iron before filling it and set the steam control lever to (fig.1).

- Open the water tank filling inlet lid (fig.2), place the iron in a horizontal position and fill it with water (fig.3).
Do not exceed the "MAX" fill level as indicated on the water tank of the iron.
- Close the water tank filling inlet lid.
Adjusting the temperature and the steam
- Adjust the temperature (see table below) by turning the temperature control dial to the temperature select position (fig. 4).
- When the iron is plugged in, the temperature control light will remain "on" until the temperature is reached (fig.5 & 6). Once the temperature is reached, it will go "off".
- Adjust the amount of continuous steam output by moving the steam control lever (fig.7). See below table for recommended steam output levels.
| FABRIC | POSITION OF TEMPERATURE BUTTON | STEAM SETTING POSITION |
| LINEN | MAX | |
| COTTON | ●● | |
| Wool | ●● | |
| SILK | ||
| SYNTHETIC (Polyester, Acetate, Acrylic, Polyamid) | ● |
= STEAM ZONE
-
Your iron heats up quickly, therefore, begin ironing with fabrics that are ironed at lower temperatures first, then go on to those requiring a higher temperature.
-
It is normal for the temperature indicator light to turn on and off during ironing.
-
In order to avoid water leaking from the soleplate onto your garment:
-
Set the steam lever to when ironing silk or synthetic fabrics and set it to for wool.
-
Should you need to turn down the temperature, wait until the temperature light comes back on before beginning to iron again.
-
When ironing fabrics with mixed fabrics, set the iron temperature for the most delicate fabric.
-
For delicate fabrics, we recommend testing the fabric first on an inconspicious place for example, inside the hem.
- If you want to iron without steam, set the steam control lever to
Obtaining more steam
In order to achieve the maximum amount of steam, it is recommended that you wait a few seconds after you push the burst of steam button again.
- Press the Burst of Steam button periodically to remove stubborn wrinkles (fig.8).
Spray Function
- The Spray button (fig.9) will release a mist of water onto your fabrics. Use this to remove stubborn wrinkles.
Vertical steam function (depending on model)
Every fifth time you press the button, return the iron to the horizontal position. The steam is very hot. When using the vertical steam function, always iron with the garment on a hanger, never while wearing it.
This is ideal for removing wrinkles in delicate garments, jackets, skirts, curtains, etc.:
- Hang the garment on a hanger and hold the fabric slightly taut with one hand.
- Set the temperature control dial to MAX (fig.4).
- Repeatedly press the Burst of Steam button (fig.8) and continuously move the iron over the fabric (fig.10).
- Hold the iron a few inches from the fabric to avoid burning delicate fabrics.
3-Way automatic shut-off (depending on model)
The iron is equipped with an electronic system that will automatically cut the power source to your iron if it is left vertically on its heel for more than 8 minutes, on its soleplate for more than 30 seconds or on its side for more than 30 seconds.
The auto-off warning light (fig.11) will flash when the iron is in the shut off mode.
- To restart the iron, gently shake the iron until the warning light stops flashing.
When the auto-off light is warning, it is normal for the temperature light to remain off.
Storing your iron
- Set the steam control lever to and unplug the iron.
- Let the soleplate cool completely and empty the water tank. A small amount of water may remain in the water tank.
- Wrap the cord around the heel of the iron and store the iron on its heel (fig.12).
Maintenance and cleaning
Cleaning the anti-scale valve
It is recommended that you clean the anti-scale valve once a month to remove scale build up on the valve.
Clean the anti-scale valve as noted below:
- Unplug your iron and empty the water tank.
- Turn the Anti-Scale valve (fig.13) to remove it.
- Soak the valve in white vinegar or plain lemon juice for 4 hours.
- Rinse the valve under running water and put the anti-scale valve back.
Unplug your iron and let it cool completely before cleaning it. The iron will not function without the anti-scale valve. Never touch the end of the valve!
Cleaning the iron
It is recommended that you clean the iron once a month to slow down scale build up and prolong the life of the iron.
Clean your iron as noted below:
- Unplug the iron, set the steam control lever to and fill the water tank to MAX.
- Place the iron on its heel, set the temperature dial to MAX, plug in the iron and wait for the indicator light to go out.
- Unplug the iron and place it horizontally over a sink.
- Remove the anti-scale valve (fig.13).
- Gently shake the iron over the sink until all of the water (along with impurities) runs out through the soleplate.
- At the end of the operation, put the anti-scale valve back into the iron and allow it to heat for 2 minutes on its heel to dry the soleplate.
Cleaning the soleplate
- Unplug the iron. When the soleplate is slightly warm, wipe it with a soft cloth.
Never use abrasive or aggressive products.
If there is a problem
| PROBLEM POSSIBLE CAUSE SOLUTION | ||
| Water drips from the holes of the soleplate. | The chosen temperature is too low and does not allow for the formation of steam. | Position the temperature control dial in the steam range (from •• to MAX). |
| You are using steam while the iron is not hot enough. | Wait until the temperature light goes out. | |
| You are using the Burst of Steam button too often. | Wait a few seconds before pressing the button again. | |
| There is too much steam. | Move the steam control lever to a lower setting. | |
| You have stored the iron horizontally, without emptying it and without setting it to . | See the section "Storing your iron". | |
| Brown streaks come through the holes of the soleplate and stain the fabric. | You are using chemical descaling agents. | Do not add any descaling agents into the water tank. |
| You are not using the right type of water. | Perform a self-cleaning operation and consult the chapter "What type of water should be used?". | |
| Fabric fibers have accumulated in the holes of the soleplate and are burning. | Perform the self-cleaning operation and clean the soleplate with a damp sponge. Vacuum the holes of the soleplate from time to time. | |
| Your fabric has not been rinsed sufficiently or you have ironed a new garment before washing it. | Make sure that your fabric is rinsed sufficiently so as to remove any deposits of soap or chemical products on new clothes. | |
| The soleplate is dirty or brown and is staining the fabric. | The temperature is set too high. | Clean the soleplate with a damp sponge and lower the temperature. |
| You are using starch. | Clean the soleplate with a damp sponge. Always spray starch onto the reverse side of the fabric to be ironed. | |
| There is little or no steam. | The water tank is empty. | Fill it. |
| The anti-scale valve is dirty. | Clean the anti-scale valve. | |
| Your iron has a build-up of scale. | Clean the anti-scale valve and perform the self-cleaning iron operation. | |
| Your iron has been used dry for too long. | Perform the self-cleaning iron operation. | |
| The soleplate is scratched or damaged. | You have used your iron on an abrasive surface or it has been misused. | The T-fal iron has a Lifetime warranty on the soleplate (valid in USA and CANADA only) . Please contact our consumer service department at 1-800-395-8325. |
| Steam or water comes from the iron as you finish filling the tank. | The steam control lever is not set to the position. | Set the steam control lever to . |
| The water tank is overfilled. | Never exceed the Max level. | |
| The spray button does not spray water. | The water tank is not filled enough. Fill the water tank. | |
For all other problems or questions, please contact our Consumer Service Department at 1-800-395-8325 or visit us at www.t-falusa.com. Or in Canada at 1-800-418-3325 or visit our website at www.t-fal.ca. You may also contact an approved Service Center, please visit our website for their contact information.
PRECAUTIONS IMPORTANTES
LISEZ ENTIEREMENT LE MODE D'EMPLOI AVANT D'UTILISER LE FER.