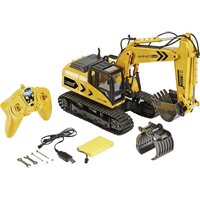
Digger 2.0 - Remote control toy Revell - Free user manual and instructions
Find the device manual for free Digger 2.0 Revell in PDF.


| Brand | Revell |
| Model | Digger 2.0 |
| Product type | Remote-controlled toy |
| Recommended age | From 8 years (adult supervision required) |
| Model power supply | Rechargeable NiMH battery 7.2 V / 400 mAh / 2.88 Wh (included) |
| Remote control power supply | 2 AA 1.5V batteries (not included) |
| Radio control type | 2.4 GHz |
| Main functions | 6-way hydraulic excavator: main arm, boom, bucket, 300° turret rotation, tracks, sound module, lighting, demonstration, command recording |
| Charging time | Approximately 200 minutes |
| Autonomy | Approximately 20 minutes |
| Charger | USB charger (5 V DC, 1000 mA max) included |
| Range | Up to 5 meters (beyond that, move closer) |
| Interchangeable tools | Bucket and grabber included |
| Maintenance and cleaning | Clean with a clean damp cloth; avoid water and direct heat |
| Safety instructions | Not suitable for children under 36 months (small parts). Use indoors/outdoors in dry weather. Keep away from people, animals, roads, water. Adult supervision required. |
| Spare parts and repairability | Use only original Revell Control spare parts |
| Warranty | Compliant with applicable standards and directives (declaration on revell-control.de) |
| Country of origin | Germany (Revell GmbH brand) |
| General information | Website: www.revellutions.de ; www.revell-control.de |
Frequently Asked Questions - Digger 2.0 Revell
User questions about Digger 2.0 Revell
0 question about this device. Answer the ones you know or ask your own.
Ask a new question about this device
Download the instructions for your Remote control toy in PDF format for free! Find your manual Digger 2.0 - Revell and take your electronic device back in hand. On this page are published all the documents necessary for the use of your device. Digger 2.0 by Revell.
USER MANUAL Digger 2.0 Revell
natural_image
Model of a tracked excavator with visible tracks and levers (no text or symbols)24924
Revell
Control
DIGGER 2.0
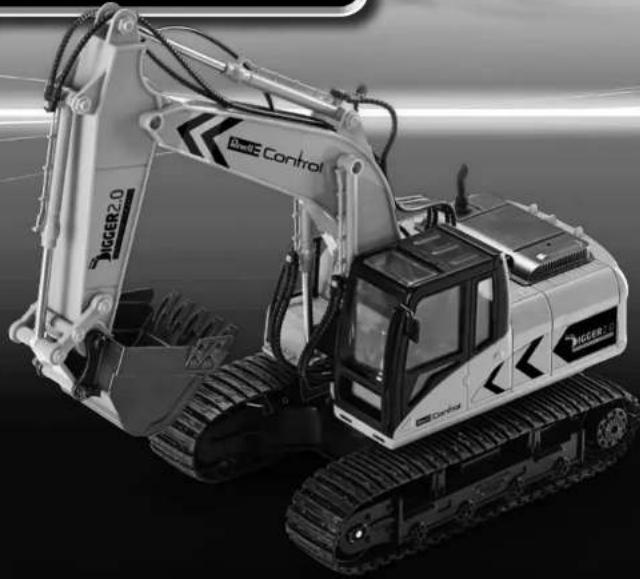
natural_image
Black-and-white photo of a ZIGER 2.0 excavator with visible tracks and components (no text or symbols on the machinery body)USER MANUAL


V 01:15
Inhalt
Table of contents
Contenutol
Modell
Model
Model
Modelo
Modèle
Modello
Akku
Accu
Battery
Batería
Batterie
Batteria
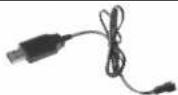
Ladegerät
Lader
Charger
Cargador
Chargeur
Caricabatterie
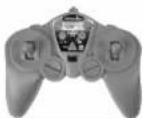
Fernsteuerung
Alstandsbediening
Transmitter
Emisora
Télécommande
Telecomando
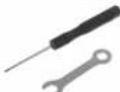
Werkzeug
Gereedschap
100
Implemento
Outil
Attrezzi
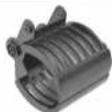
Greiter
Grijper
Grabber
Grapa
Pince
Pinza

Bedienungsanleitung
Operating manual
Mode d'emploi
Handleiding
natural_image
Top-down view of a mechanical component with visible teeth and a labeled feature '1G' (no text or symbols beyond label)2
3
natural_image
Close-up of a mechanical component with a circular feature and mounting holes (no visible text or symbols)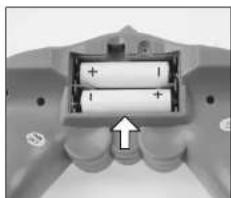
natural_image
Close-up of a mechanical component with two stacked batteries and a white arrow pointing to a specific area (no text or symbols visible)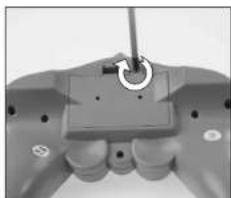
natural_image
Close-up of a mechanical component with a circular feature and mounting holes (no visible text or symbols)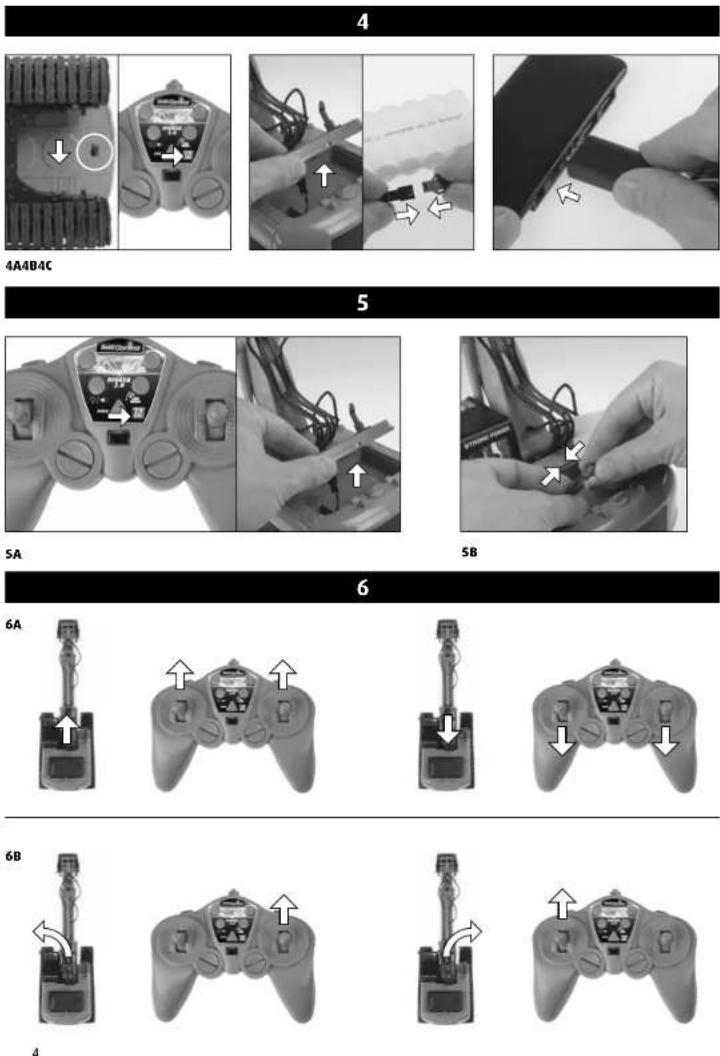
6C6D
6E
6F
6G
natural_image
Mechanical excavator arm with extended blade and bucket (no visible text or symbols)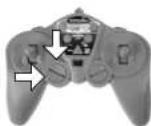
7
7A
70
7E
7F7G
5
24924
Revell
Control
DIGGER 2.0
WICHTIGE MERKMALE

1H Oberer Bolzen (rund)
11 Unterer Bolzen (vierkant)
2 FERNSTEUERUNG
2A Gashebel, links 2H Vorderarm
natural_image
Model of a BigE Control excavator with visible tracks and levers (no text or symbols)24924
Revell
Control
DIGGER 2.0
IMPORTANT FEATURES

Safety instructions:
• Before using for the first
time, make sure that you have read and understood
have read and understood the manual.
- Please keep the manual and packaging as they contain important instructions.
- The user should only operate this model in accordance with the instructions for use in this operating manual.
• This model is suitable for pilots who are at least 8 years of age. Parental supervision is required when driving it.
- Warning! Not suitable for children under 36 months. Small parts. Choking hazard!
- This model is suitable for use indoors and in dry outdoor areas.
- Keep your hands, face and loose clothing away from the model during operation.
- Switch off the transmitter and model when they are not in use.
- Remove the batteries from the transmitter and the model when they are not in use.
• Always maintain visual contact with the model in order to avoid losing control of it. Inattentive and careless use can lead to considerable damage.
- Do not operate the model near people, animals, roads or bodies of water.
- This model is not suitable for people with physical or mental limitations. We recommend that people who are unfamiliar with transmitter models operate the model under the guidance of someone with experience.
- A model should never be operated under the influence of drugs or alcohol. - This vehicle may not be used on public roads!
6-channel excavator with 2.4 GHz transmitter
- Main arm, forearm and bucket can be controlled separately
• high traction track drive
- With sound module
• In general, it must be ensured that the model cannot injure anyone in consideration of potential malfunctions and defects.
- The model may only be repaired or modified with genuine Revell control spare parts. Otherwise, the vehicle can be damaged or pose a danger. In order to prevent risks, always operate the model from a position which provides an easy line of retreat, if necessary.
Transmitter safety instructions:
- Rechargeable batteries must be removed from the transmitter or the model prior to recharging.
- Non-rechargeable batteries may not be charged.
- Rechargeable batteries may only be charged under the supervision of an adult.
• The combination of different types of batteries as well as new and used batteries must be avoided.
• Only recommended batteries or those of an equivalent type may be used. -
We recommend new alkali manganese batteries for the transmitter. Single-use batteries for this transmitter and other electrical devices operated in the home can be replaced with environmentally-friendly rechargeable batteries.
-
Batteries must be inserted according to the correct polarity (+ and -).
- Depleted batteries must be removed from the transmitter.
- The connection terminals may not be short-circuited.
- Remove the batteries from the transmitter and model if they are not to be used for an extended period of time.
Maintenance and care:
- Please only use a clean, damp cloth to wipe down the model.
- Protect the model and batteries from direct sunlight and/or direct heat.
- Never allow the transmitter to come into contact with water, because the electronics can be damaged as a result.
• Technical changes and differences in colour reserved!
Technical data
Rechargeable battery for the model:
Power supply: ---
Rated output: 1x DC 7,2 V / 400 mAh / 2.88 Rechargeable NiMH battery (included)
USB charger:
Power supply: DC 5V via USB port, 500 mA or higher Rated output: 5 V / 1000 mA max.
Batteries for the transmitter:
Power supply: === Batteries: DC 3 V / 2 x 1,5 V "AA" (not supplied)

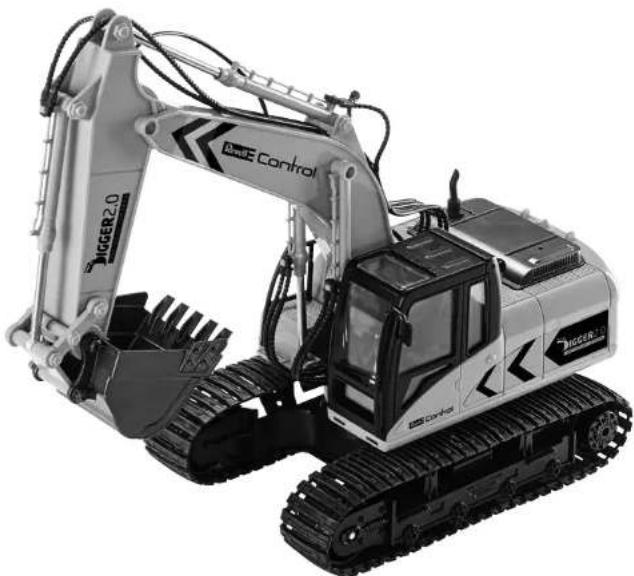
1 VEHICLE
1A Bucket
1B Forearm
1C Main arm
1D Superstructure
1EBattery compartment
1FBatterycom-
partment latch
1G OFF/ON switch
1H Upperbolt
(round)
11Lowerbolt
(square)
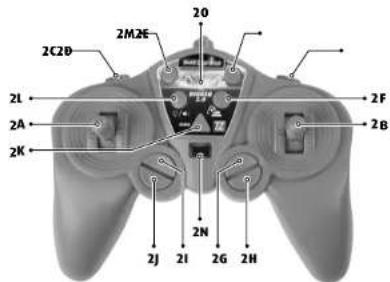
2 TRANSMITTER
2A Left throttle
2B Right throttle
2C Rotate super-
structure
anti-clockwise
2D Rotate super-
structure
clockwise
2E Main arm up
2F Main arm down
2G Forearm up
2H Forearm down
21 Bucket up
2J Bucket down
2K Demo button
2LLight/sound ON/OFF
2M Record button
2N ON/OFF switch
20 Power LED
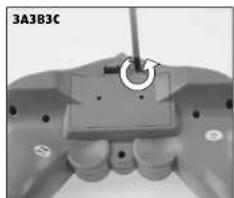
3 INSERTING BATTERIES
3A Unscrew and remove cover
3B Insert 2 x 1.5 V AA batteries and pay attention to the polarity specifications, as indicated in the battery compartment.
3C Close the battery cover and secure with the screw.
4 CHARGING THE MODEL
Attention: The battery and motor must cool down for 15 to 30 minutes before charging and after every use. Otherwise they can be damaged. The charging process must be constantly monitored. Always ensure that the charging process takes place on a fireproof surface in a fire-resistant environment.
1.Switch off the model and transmitter (4A).
2. Open the battery compartment. Remove the battery from the model.
3. Plug the battery into the charging socket of the charger, ensuring correct polarity. The battery must be gently inserted into the charging socket - DO NOT USE FORCE. If the battery is not correctly inserted into the charging socket, the battery may become damaged and, under certain circumstances, cause injury (48).
4. Insert the USB charger in a free USB port; it will illuminate (4C).
5. The charging process is complete when the USB charger light starts blinking
6. Disconnect the battery from the USB charger and disconnect the USB charger from the USB port once charging is complete.
The model can run for approx. 20 minutes after a charge time of approx. 200 minutes. Warning: The battery heats up while charging; this is normal. However, if it becomes hot and/or changes to the surface begin to appear, stop the charging process immediately!
5 START PREPARATION
Always observe the sequence when switching on! When switching off, always switch off the model before the transmitter. Otherwise, a control command can accidentally be triggered and activate the model, which can lead to considerable damage.
- Set the transmitter (2N) ON/OFF switch to "ON" (5A). The power LED (20) on the transmitter blinks.
- Open the battery compartment.
- Insert the battery in the model. Insert the battery cable in the connection socket on the model (5B).
- Then switch the ON/OFF switch on the model (16) to the 'ON' position. Once the Power LED (20) on the transmitter is continuously lit, the model is ready.
Switch off the model:
Then switch the ON/OFF switch on the model (1G) to the 'OFF' position. Remove the battery from the model.
Switch off the transmitter:
Set the ON/OFF switch on the transmitter (20) to the 'OFF' position.
6 VEHICLE CONTROL
The left stick controls the left track; the right stick controls the right track.
6A To drive forwards, carefully push both sticks forward. To drive backwards, carefully push both sticks back.
6B To turn left, carefully push the right stick forward and release the left stick. Operate the controls the other way around to turn right.
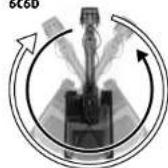
6C To rotate in place, carefully push one stuck forward and the carefully push the other stick back. This works in both directions.
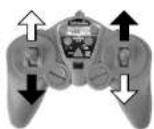
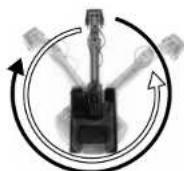
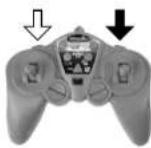
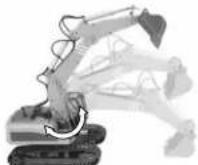
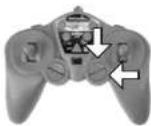
6D With superstructure can be rotated approx. 300° anti-clockwise and clockwise with buttons 2C and 2D.
6E The main arm can be moved up and down with buttons 2E and 2F.
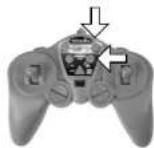
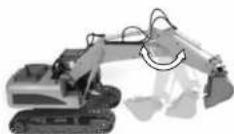
6F The forearm can be moved up and down with buttons 2G and 2H.
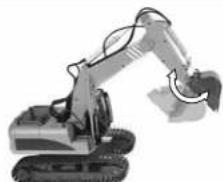
6G The bucket can be moved up and down with buttons 2I and 2J.
Overload safeguard: All functions are equipped with a coupling that activates when there is an excessive load (rattling noise) in order to prevent damage. This also takes place if, for instance, the arm has been moved to the upper or lower limit. When this occurs, stop steering in this direction.
Demo button:
The model demonstrates all of its functions. Stop the demo by pressing the button again or initiating another control command.
Record button:
The model 'remembers' control commands that are issued after this button is pressed instead of executing them immediately. Press the button again to execute the commands. The process is ended with another control command.
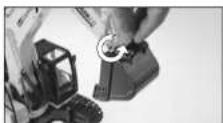
7 TOOL CHANGE
You can replace with bucket with the accompanying grabber.
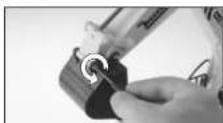
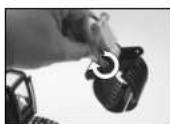
- Unscrew the round bolt (1H) and remove it (7A).
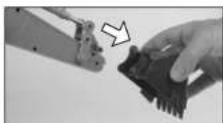
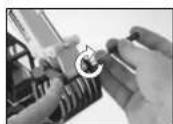
- Unscrew the nut on the square bolt (11) and remove it (7B).
- Remove the bucket (7c)
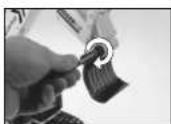
- Screw on the lower section of the grabber. Ensure that the hole for the rectangular bolt (11) remains free (7D).
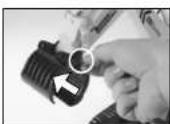
- Fit the upper section of the grab bucket over the lower section and secure it with the square bolt (11) (7E).
- Secure the square bolt (11) with a nut (7F). Warning! Do not over-lighten the nut. Otherwise the grab bucket will not function!
- Re insert the round bolt (1H) and secured it with a nut (7G).
INSTRUCTIONS FOR SAFE DRIVING
GENERAL DRIVING TIPS:
• Always maintain visual contact with the model and do not look at the transmitter!
- On initial driving attempts, there is a general tendency toward excessive movements of the controls. Make sure that you have sufficient room.
After a crash, always release the speed control immediately in order to prevent damage to the electronics.
THE SUITABLE DRIVING ENVIRONMENT:
The location in which the model is driven should fulfil the following criteria:
- It should be a location in which there is as much open area as possible, without disruptive obstacles.
- Make absolutely sure when starting that there are no people or animals in the immediate vicinity.
- Always watch the model so that it does not drive into the operator, other people or animals and injure them.
TROUBLESHOOTING
Problem: The model does not move.
Cause: · The battery is too weak or depleted.
Remedy: · Please charge the battery.
Problem: Transmitter does not work.
Cause: 1. The transmitter is switched off. 2. The batteries were not inserted correctly. 3. The batteries do not have enough power.
Remedy: 1. Repeat the switch-on process as described. 2. Check whether the batteries are inserted correctly. 3. Please replace with new batteries.
Problem: The model cannot be controlled with the transmitter.
Cause: 1. The transmitter is switched off 2. The connection between the transmitter and vehicle has been severed
Remedy: 1. Move the transmitter switch to the "ON" position. 2. When the model is further than 5 metres away, move towards the model
Additional tips and trick can be found online at www.revellutions.de.
SERVICE NOTES
You can find ordering options, the online game and useful information for all Revellutions models at www.revellutions.de.

www.revellutions.de
natural_image
Model of a Nigger2.0 excavator with visible tracks and bucket, no text or symbols present24924
Revell
Control
DIGGER 2.0

INDICATIONS POUR UNE CONDUITE SÛRE
CONSEILS GÉNÉRAUX DE CONDUITE :
INDICATIONS DE SERVICE
natural_image
Model of a Nigger2.0 excavator with visible tracks and levers (no text or symbols on the machinery body)24924
Revell
Control
DIGGER 2.0

natural_image
Model of a heavy excavator with visible tracks and levers (no text or symbols)24924
Revell
Control
DIGGER 2.0

natural_image
Model of a heavy excavator with visible tracks and levers (no text or symbols)24924
Revell
Control
DIGGER 2.0

1H Perno superiore (tondo)
11Pernoinferiore (quadro)
[Non-Text]
2 RADIOCOMANDO
natural_image
Model of a heavy excavator with visible tracks and levers (no text or symbols)
Electrical and electronic waste ordinance:
All batteries should be removed for disposal. Supply lines should only be severed individually. When disposing of batteries, they must be discharged or their capacity must be fully depleted. Cover exposed terminals with adhesive tape in order to prevent short-circuiting. Drop off all batteries and electrically operated devices at the communal collection centres for electrical and electronic waste. Dispose of the remaining parts along with the household rubbish.
Risk from heat development and rotating parts during operation! Adult supervision is required!
Revell GmbH hereby declares that this product conforms with the applicable standards and directives. The Declaration of Conformity can be found at www.revell-control.de.


- DIGGER 2.0
- WICHTIGE MERKMALE
- FERNSTEUERUNG
- IMPORTANT FEATURES
- Safety instructions:
- 6-channel excavator with 2.4 GHz transmitter
- Transmitter safety instructions:
- Maintenance and care:
- Technical data
- Rechargeable battery for the model:
- USB charger:
- Batteries for the transmitter:
- VEHICLE
- TRANSMITTER
- INSERTING BATTERIES
- CHARGING THE MODEL
- START PREPARATION
- Switch off the model:
- Switch off the transmitter:
- VEHICLE CONTROL
- Demo button:
- Record button:
- TOOL CHANGE
- INSTRUCTIONS FOR SAFE DRIVING
- GENERAL DRIVING TIPS:
- THE SUITABLE DRIVING ENVIRONMENT:
- TROUBLESHOOTING
- SERVICE NOTES
- INDICATIONS POUR UNE CONDUITE SÛRE
- CONSEILS GÉNÉRAUX DE CONDUITE :
- INDICATIONS DE SERVICE
- RADIOCOMANDO
- Electrical and electronic waste ordinance:
Brand : Revell
Model : Digger 2.0
Category : Remote control toy