— Microwave Oven — Mode d'emploi PDF")
MW3-AG20PE(BK) - Microwave Oven TOSHIBA - Free user manual and instructions
Find the device manual for free MW3-AG20PE(BK) TOSHIBA in PDF.

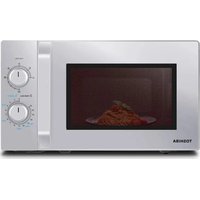
| Product type | Microwave oven with grill |
| Brand | Toshiba |
| Model | MW3-AG20PE(BK) |
| Supply voltage | 230 V ~ 50 Hz |
| Microwave power (input) | 1270 W |
| Microwave power (output) | 800 W |
| Grill power (input) | 1000 W |
| Microwave power levels | 5 (100 %, 80 %, 50 %, 30 %, 10 %) |
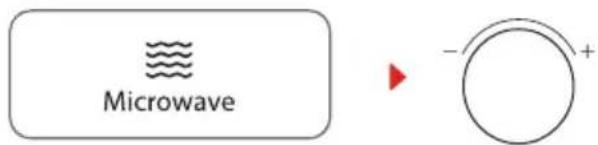
| Control type | Rotary knob and touch keys |
| Display | Digital (24h clock) |
| Turntable | Yes, glass |
| Cooking functions | Microwave, grill, combination (C-1, C-2), defrost (time/weight), auto menu (8 programs), quick cooking |
| Kitchen timer | Yes, up to 95 minutes |
| Child lock | Yes |
| Cavity material | Stainless steel |
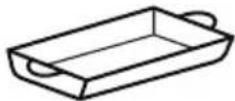
| Supplied accessories | Glass tray, grill, instruction manual |
| Cleaning | Soft damp cloth; do not use steam cleaner |
| Security | Door locks, mandatory grounding |
Frequently Asked Questions - MW3-AG20PE(BK) TOSHIBA
User questions about MW3-AG20PE(BK) TOSHIBA
0 question about this device. Answer the ones you know or ask your own.
Ask a new question about this device
Download the instructions for your Microwave Oven in PDF format for free! Find your manual MW3-AG20PE(BK) - TOSHIBA and take your electronic device back in hand. On this page are published all the documents necessary for the use of your device. MW3-AG20PE(BK) by TOSHIBA.
USER MANUAL MW3-AG20PE(BK) TOSHIBA
Please review this instruction manual before operating.
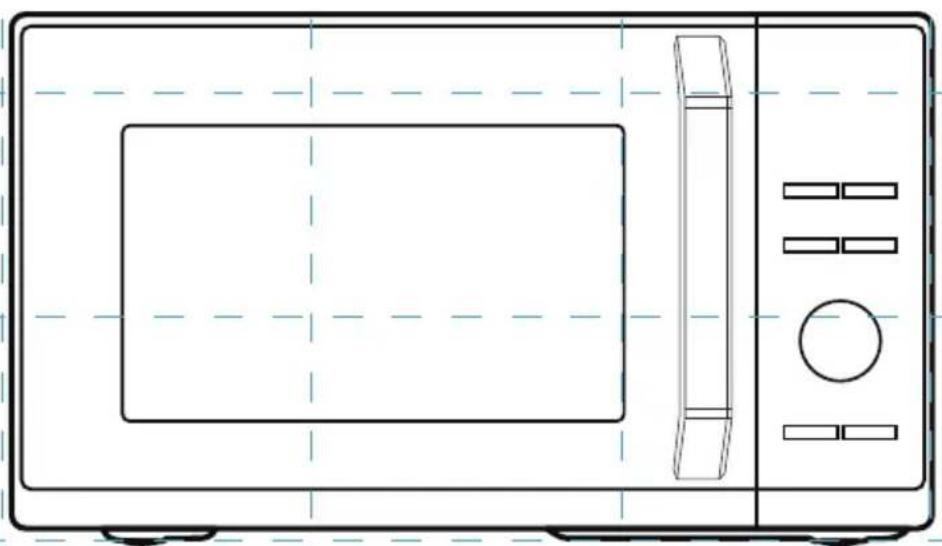
natural_image
Line drawing of a microwave oven with control panel and door (no text or symbols)LANGUAGES
EN English
DE German
IT Italian
FR France
NL Netherlands
SV Sweden
DA Denmark
CONTENTS
PRODUCT SAFETY
Precautions to avoid possible exposure to excessive microwave energy ...... EN-01
Specifications ...... EN-02
Important safety instructions ...... EN-03
To reduce the risk of injury to persons grounding installation ....EN-08
Cleaning...... EN-10
Utensils....EN-11
Materials you can use in microwave oven ....EN-12
Materials can not be used in microwave oven ....EN-14
PRODUCT SETTING
Setting up your oven ....EN-15
INSTRUCTION FOR USE
Before using for the first time....EN-18
Operation......EN-19
Control panel and features ......EN-19
- Setting the clock ...... EN-20
- Setting the kitchen timer ....EN-21
- Microwave cooking...... EN-21
- Grilling cooking ....EN-22
- Combination cooking......EN-23
- Defrost by time ...... EN-24
- Defrost by weight ...... EN-24
- Speedy cooking ...... EN-25
-
Multi-stage cooking ...... EN-25
-
Auto menu ...... EN-26
- Lock function for children ......EN-28
- Inquiring function ......EN-28
CLEANING AND MAINTENANCE
Cleaning ...... EN-29
Trouble shooting....EN-31

BEFORE OPERATING THIS PRODUCT, READ, UNDERSTAND, AND FOLLOW THESE INSTRUCTIONS. BE SURE TO SAVE THIS BOOKLIST FOR FUTURE REFERENCE.
PRODUCT SAFETY
PRECAUTIONS TO AVOID POSSIBLE EXPOSURE TO EXCESSIVE MICROWAVE ENERGY
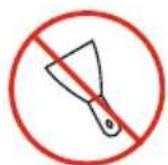
(a). Do not attempt to operate this oven with the door open since this can result in harmful exposure to microwave energy. It is important not to break or tamper with the safety interlocks.
(b). Do not place any object between the oven front face and the door or allow soil or cleaner residue to accumulate on sealing surfaces.
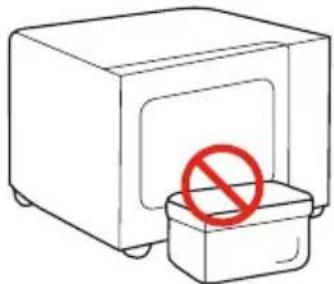
natural_image
Simple line drawing of a microwave oven with a prohibition symbol on the lid (no text or labels)(c). WARNING: If the door or door seals are damaged, the oven must not be operated until it has been repaired by a competent person.
ADDENDUM
If the apparatus is not maintained in a good state of cleanliness, its surface could be degraded and affect the lifespan of the apparatus and lead to a dangerous situation.
SPECIFICATIONS
| MODEL | MW3-AG20PE(BK) |
| RATED VOLTAGE/FREQUENCY | 230 V~ 50 Hz |
| MICROWAVE INPUT | 1270 W |
| MICROWAVE OUTPUT | 800 W |
| GRILL | 1000 W |

All pictures in this manual are for illustrative purposes only; these may be slightly different from the purchased equipment, please refer to the actual product.
IMPORTANT SAFETY INSTRUCTIONS

To reduce the risk of fire, electric shock, injury to persons or exposure to excessive microwave oven energy when using your appliance, follow basic precautions, including the following:
Read and follow the specific: "PRECAUTIONS TO AVOID POSSIBLE EXPOSURE TO EXCESSIVE MICROWAVE ENERGY".
This appliance can be used by children aged from 8 years and above and persons with reduced physical, sensory or mental capabilities or lack of experience and knowledge if they have been given supervision or instruction concerning use of the appliance in a safe way and understand the hazards involved. Children shall not play with the appliance. Cleaning and user maintenance shall not be made by children without supervision.
Keep the appliance and its cord out of reach of children less than 8 years.
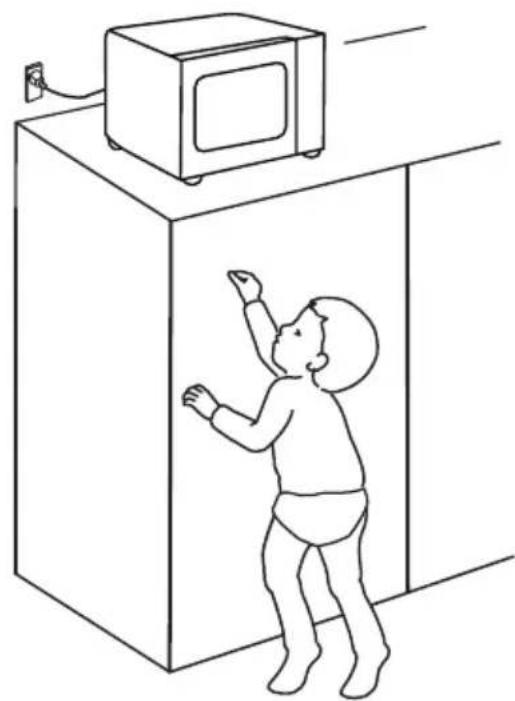
natural_image
Line drawing of a child reaching toward a microwave on a cabinet (no text or symbols)If the supply cord is damaged, it must be replaced by the
IMPORTANT SAFETY INSTRUCTIONS
manufacturer, its service agent or similarly qualified persons in order to avoid a hazard.

WARNING: Ensure that the appliance is switched off before replacing the lamp to avoid the possibility of electric shock.

WARNING: It is hazardous for anyone other than a competent person to carry out any service or repair operation that involves the removal of a cover which gives protection against exposure to microwave energy.

WARNING: Liquids and other foods must not be heated in sealed containers since they are liable to explode.

When heating food in plastic or paper containers, keep an eye on the oven due to the possibility of ignition.

Only use utensils that are suitable for use in microwave ovens.

If smoke is emitted, switch off or unplug the appliance and keep the door closed in order to stifle any flames.

Microwave heating of beverages can result in delayed eruptive boiling, therefore care must be taken when handling the container.

The contents of feeding bottles and baby food jars shall be stirred or shaken and the temperature
IMPORTANT SAFETY INSTRUCTIONS
checked before consumption, in order to avoid burns.

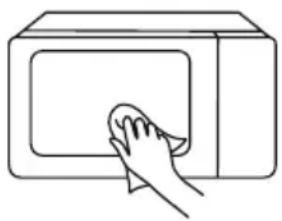
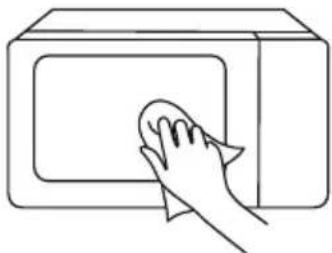
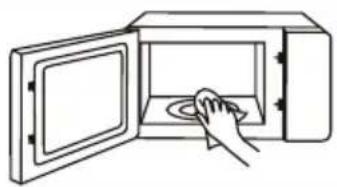
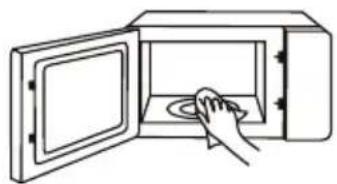
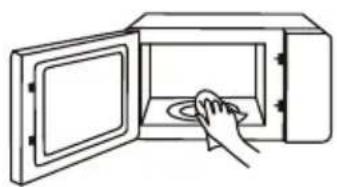
The oven should be cleaned regularly and any food deposits removed. Please keep the waveguide area clean. Use soft damp cloth to clean it up when there is food splash residue on the waveguide area or the cavity. Failure to clean food residue may cause innocuous sparking or some smoke in the microwave cavity, discoloration of the cavity may also occur.
natural_image
Line drawing of a hand cleaning a microwave oven (no text or symbols)
Failure to maintain the oven in a clean condition could lead to deterioration of the surface that could adversely affect the life of the appliance and possibly
result in a hazardous situation.

Only use the temperature probe recommended for this oven. (for ovens provided with a facility to use a temperature-sensing probe.)

The microwave oven must be operated with the decorative door open. (for ovens with a decorative door.)

This appliance is intended to be used in household and similar applications such as:
- staff kitchen areas in shops, offices and other working environments;
- by clients in hotels, motels and other residential type environments;
- farm houses;
- bed and breakfast type environments.
IMPORTANT SAFETY INSTRUCTIONS
The microwave oven is intended for heating food and beverages. Drying of food or clothing and heating of warming pads, slippers, sponges, damp cloth and similar may lead to risk of injury, ignition or fire.
The rear surface of appliances shall be placed against a wall.
The temperature of accessible surfaces may be high when the appliance is operating.
WARNING: When the appliance is operated in the combination mode, children should only use the oven under adult supervision due to the temperatures generated.
The appliance is intended to be used freestanding.
Eggs in their shell and whole hard-boiled eggs should not be heated in microwave ovens since they may explode, even after microwave heating has ended.
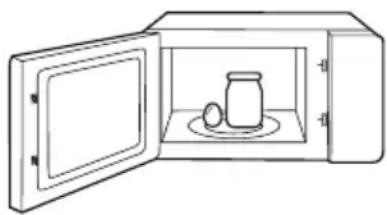
natural_image
Line drawing of a microwave oven with a jar and lid on the lid (no text or symbols)The microwave oven shall not be placed in a cabinet unless it has been tested in a cabinet.
Metallic containers for food and beverages are not allowed during microwave cooking.
The appliance shall not be cleaned with a steam cleaner.
IMPORTANT SAFETY INSTRUCTIONS

The appliances are not intended to be operated by means of an external timer or separate remote-control system.

The appliance must not be installed behind a decorative door in order to avoid overheating. (This is not applicable for appliances with decorative door.)
READ CAREFULLY AND KEEP FOR FUTURE REFERENCE HOUSEHOLD USE ONLY (NOT FOR COMMERCIAL USE)
TO REDUCE THE RISK OF INJURY TO PERSONS GROUNDING INSTALLATION
This appliance must be grounded. In the event of an electrical short circuit, grounding reduces the risk of electric shock by providing an escape wire for the electric current.
This appliance is equipped with a cord having a grounding wire with a grounding plug. The plug must be plugged into an outlet that is properly installed and grounded.
WARNING - Improper use of the grounding can result in a risk of electric shock. Consult a qualified electrician or serviceman if the grounding instructions are not completely understood or if doubt exists as to whether the appliance is properly grounded. If it is necessary to use an extension cord, use only a 3-wire extension cord.

Electric Shock Hazard:
Touching some of the internal components can cause serious personal injury or death. Do not disassemble this appliance.
TO REDUCE THE RISK OF INJURY TO PERSONS GROUNDING INSTALLATION

Electric Shock Hazard:
Improper use of the grounding can result in electric shock. Do not plug into an outlet until appliance is properly installed and grounded.
- A short power-supply cord is provided to reduce the risks resulting from becoming entangled in or tripping over a longer cord.
- If a long cord or extension cord is used:
(1). The marked electrical rating of the cord set or extension cord should be at least as great as the electrical rating of the appliance.
(2). The extension cord must be a grounding-type 3-wire cord.
(3). The longer cord should be arranged so that it will not drape over the counter top or tabletop where it can be pulled on by children or tripped over unintentionally.
CLEANING
Be sure to unplug the appliance from the power supply.
-
Clean the cavity of the oven after using with a slightly damp cloth.
-
Clean the accessories in the usual way in soapy water.
-
The door frame and seal and neighbouring parts must be cleaned carefully with a damp cloth when they are dirty.
-
Do not use harsh abrasive cleaners or sharp metal scrapers to clean the oven door glass since they can scratch the surface, which may result in shattering of the glass.
-
Cleaning Tip---For easier cleaning of the cavity walls that the food cooked can touch: Place half a lemon in a bowl, add 300ml (1/2 pint) water and heat on 100% microwave power for 10 minutes. Wipe the oven clean using a soft, dry cloth.
UTENSILS

Personal Injury Hazard:
It is hazardous for anyone other than a competent person to carry out any service or repair operation that involves the removal of a cover which gives protection against exposure to microwave energy.
See the instructions on "Materials you can use in microwave oven" or "Materials can not be used in microwave oven"
There may be certain non-metallic utensils that are not safe to use for microwaving. If in doubt, you can test the utensil in question following the procedure below.
Utensil Test:
-
Fill a microwave-safe container with 1 cup of cold water (250ml) along with the utensil in question.
-
Cook on maximum power for 1 min.
-
Carefully feel the utensil. If the empty utensil is warm, do not use it for microwave cooking.
-
Do not exceed 1 min cooking time.
natural_image
Line drawing of a microwave oven with a cup inside (no text or symbols)
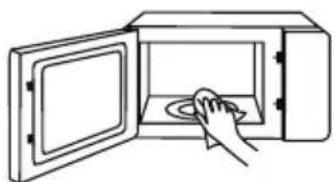
KEEP THE CAVITY AND WAVEGUIDE AREA CLEAN
natural_image
Line drawing of a hand opening a microwave oven with a circular button on the door (no text or symbols)MATERIALS YOU CAN USE IN MICROWAVE OVEN
UTENSILS REMARKS
Browning dish
Follow manufacturer's instructions.
The bottom of browning dish must be at least 3/16 inch (5mm) above the turntable. Incorrect usage may cause the turntable to break.

Dinnerware
Microwave-safe only. Follow manufacturer's instructions. Do not use cracked or chipped dishes.

Glass jars
Always remove lid. Use only to heat food until just warm. Most glass jars are not heat resistant and may break.

Glassware
Heat-resistant oven glassware only. Make sure there is no metallic trim. Do not use cracked or chipped dishes.

Oven cooking bags
Follow manufacturer's instructions. Do not close with metal tie.

Make slits to allow steam to escape.
Paper plates and cups
Use for short-term cooking/warming only. Do not leave oven unattended while cooking.

Paper towels
Use to cover food for reheating and absorbing fat. Use with supervision for a short-term cooking only.

Parchment paper
Use as a cover to prevent splattering or a wrap for steaming.

MATERIALS YOU CAN USE IN MICROWAVE OVEN
UTENSILS REMARKS
Plastic
Microwave-safe only. Follow the manufacturer's instructions. Should be labeled "Microwave Safe". Some plastic containers soften, as the food inside gets hot. "Boiling bags" and tightly closed plastic bags should be slit, pierced or vented as directed by package.

Plastic wrap
Microwave-safe only. Use to cover food during cooking to retain moisture. Do not allow plastic wrap to touch food.

Thermometers
Microwave-safe only (meat and candy thermometers).


Wax paper
Use as a cover to prevent splattering and retain moisture.

MATERIALS CAN NOT BE USED IN MICROWAVE OVEN
UTENSILS REMARKS
Aluminum tray
May cause arcing. Transfer food into microwave-safe dish.

Food carton with metal handle
May cause arcing. Transfer food into microwave-safe dish.

Metal or metal trimmed utensils
Metal shields the food from microwave energy. Metal trim may cause arcing.


Metal twist ties
May cause arcing and could cause a fire in the oven.

Paper bags
May cause a fire in the oven.

Plastic foam
Plastic foam may melt or contaminate the liquid inside when exposed to high temperature.

Wood
Wood will dry out when used in the microwave oven and may split or crack.

PRODUCT SETTING
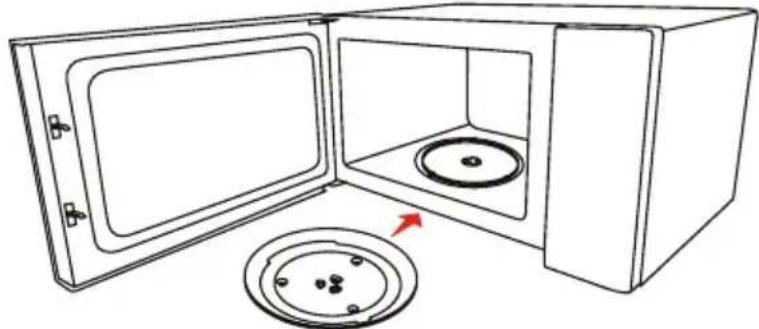
NAMES OF MICROWAVE OVEN PARTS AND ACCESSORIES
Remove the oven and all materials from the carton and oven cavity.
Glass tray
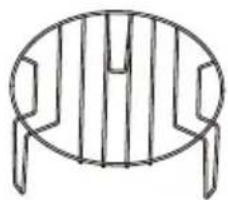
natural_image
Simple line drawing of a circular table with vertical bars and two legs (no text or symbols)Grill Rack( Can not be used in microwave function and must be placed on the glass tray )
Instruction Manual
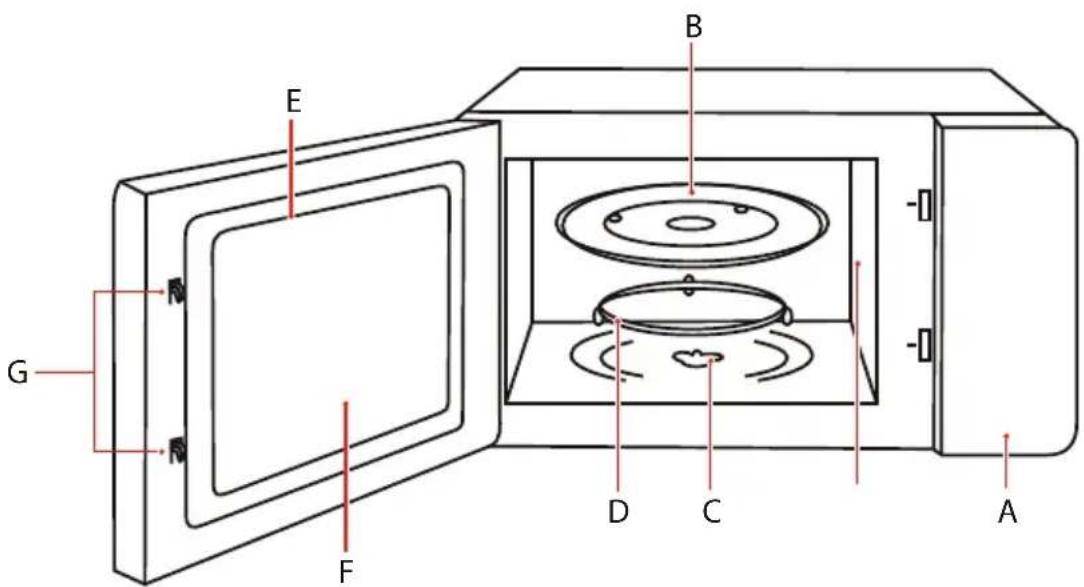
A. Control panel
B. Glass tray
C. Turntable shaft
D. Turntable ring assembly
E. Door assembly
F. Observation window
G. Safety interlock system
H. Waveguide cover

NOTE
In case of any differences between the appliance and the pictures in this manual, the product shall prevail.
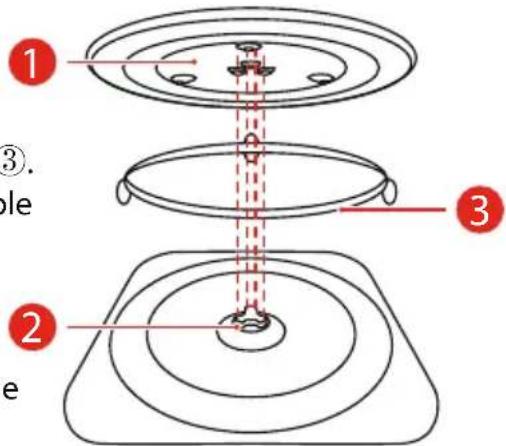
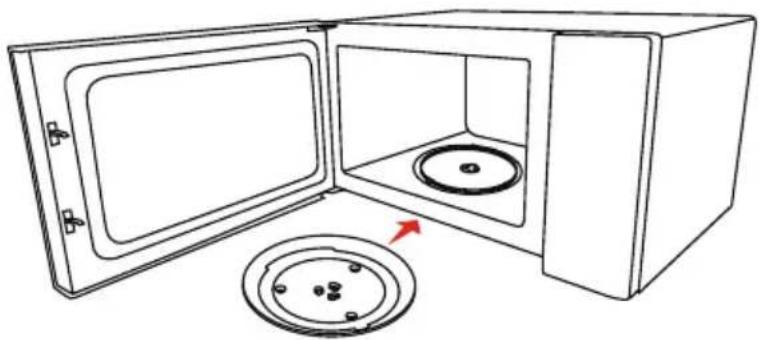
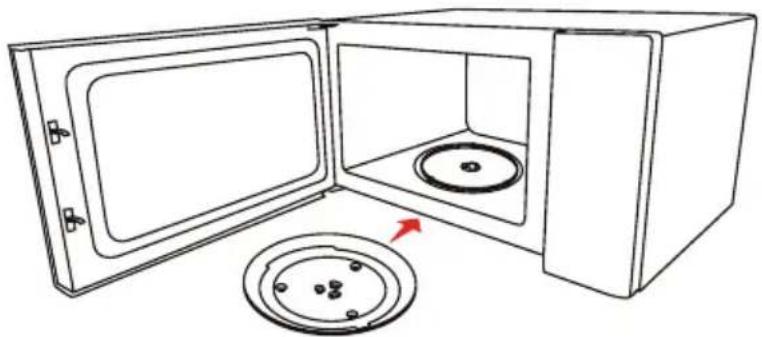
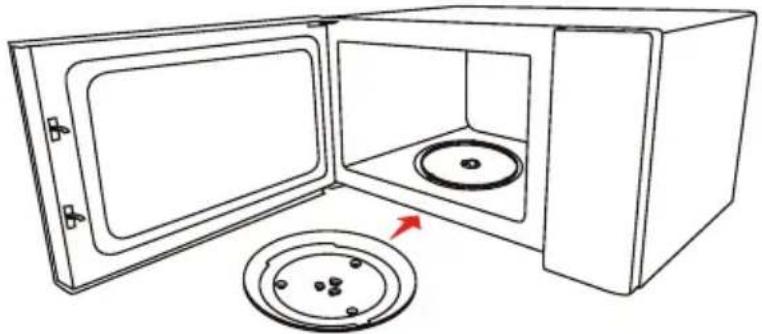
Cleaning the cooking compartment and putting the turntable in place.
For new installations, make sure all packaging and shipping tape has been removed from the turntable shaft.
Before using the appliance to prepare food for the first time, you will need to put the turntable in place correctly. You must clean the cooking compartment and accessories.
How to put the turntable in place:
-
Place the turntable ring assembly③ into the recess in the cooking compartment.
-
Place the glass turntable①on the turntable ring assembly③. Fit the raised, curved lines in the center of the glass turntable bottom between the three spokes of the shaft.
Make sure that the glass turntable①engages in the turntable shaft ② in the center of the cooking compartment floor. The rollers on the shaft should fit inside the turntable bottom ridge.
natural_image
Line drawing of a microwave oven with a lid and an open door, showing internal components (no text or symbols)
- Never use the appliance without the turntable. Make sure that it is properly engaged. The turntable can turn clockwise or anti-clockwise.
- Never place the glass turntable upside down. The glass turntable should never be restricted.
- Both glass turntable and turntable ring assembly must always be used during cooking.
- All food and containers of food are always placed on the glass turntable for cooking.
- Never restrict the movement of the turntable.
- If glass turntable or turntable ring assembly cracks or breaks, contact your nearest authorized service center.
COUNTERTOP INSTALLATION
Remove all packing material and accessories. Examine the oven for any damage such as dents or broken door. Do not install if oven is damaged.
Cabinet: Remove any protective film found on the microwave oven cabinet surface. Do not remove the waveguide cover that is attached to the oven cavity to protect the magnetron.
INSTALLATION
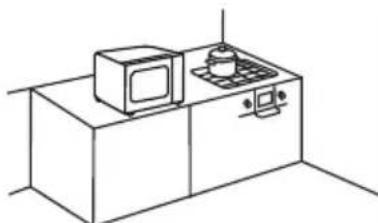
- Select a level surface that provide enough open space for the intake and/or outlet vents.
a. The minimum installation height is 85cm. b. The rear surface of appliance shall be placed against a wall. Leave a minimum clearance of 30cm above the oven. A minimum clearance of 20cm is required between the oven and any adjacent walls.
c. Do not remove the legs from the bottom of the oven.
d. Blocking the intake and/or outlet openings can damage the oven.
e. Place the oven as far away from radios and TV as possible. Operation of microwave oven may cause interference to your radio or TV reception.

SIDE
DISTANCE CM
Top 30cm
Left 20cm
Right 20cm
Behind 0cm
Front Open
- Plug microwave oven into a standard household outlet. Be sure the voltage and the frequency is the same as the voltage and the frequency on the rating label.

NOTE
- Do not install oven over a range cooktop or other heat-producing appliance. If installed near or over a heat source, the oven could be damaged and the warranty would be void.
natural_image
Line drawing of a kitchen setup with a microwave, stove, and monitor (no text or symbols)
The accessible surface may be hot during operation
BEFORE USING FOR THE FIRST TIME
It is normal that the oven may produce unpleasant odors when it is used for the first time.
This section tells you what you need to do before using your microwave to prepare food for the first time. Read the section entitled "PRODUCT SAFETY" beforehand.
Before you can use your new appliance, you will need to put the turntable in place correctly. You must also clean the cooking compartment and accessories.

- Never use the appliance without the turntable.
- Make sure that it is properly engaged. The turntable can turn clockwise or anti-clockwise.
OPERATION
CONTROL PANEL AND FEATURES
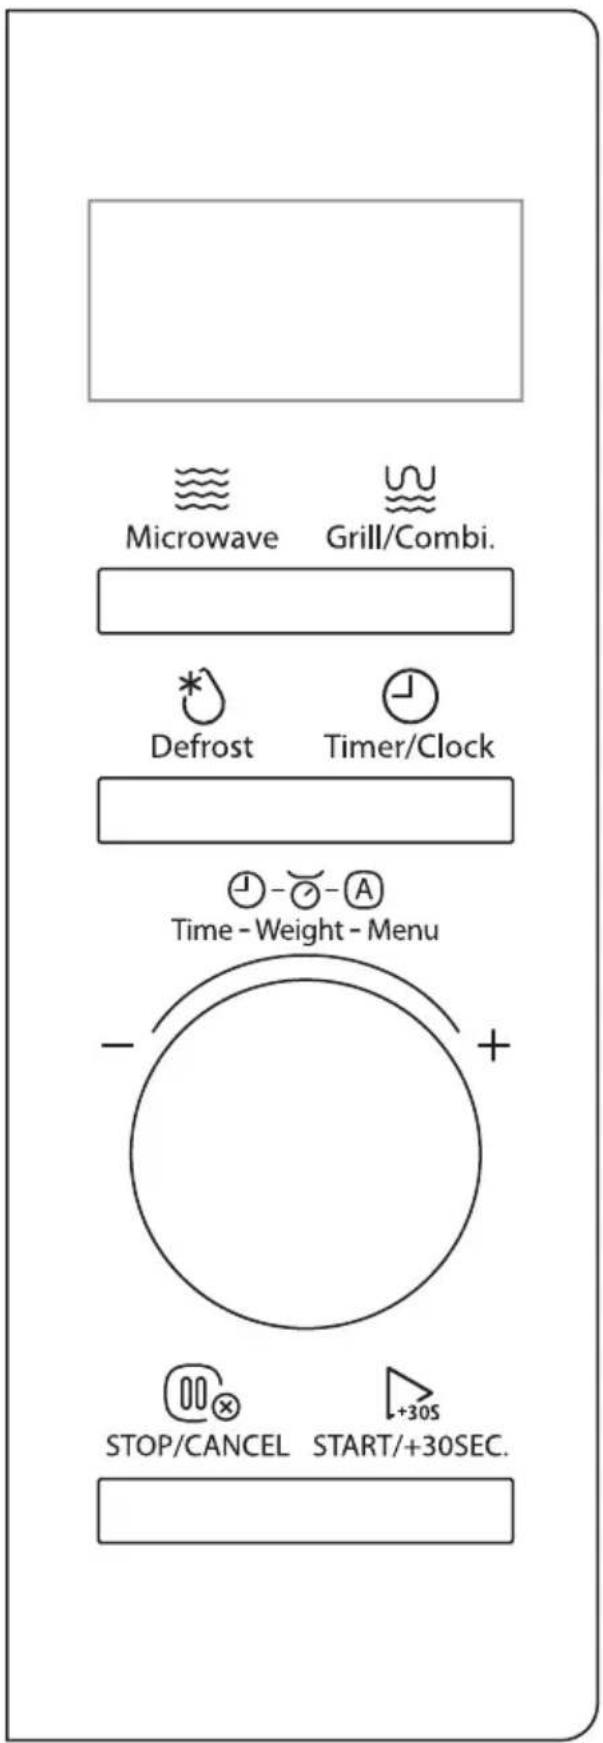
1. SETTING THE CLOCK

Press

twice, "00:00" will display.


Turn the knob to set the hour figures.


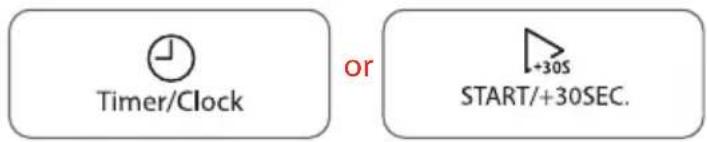

Turn the knob to set the minute figures.


- The clock is a 24-hour display. If the clock is not set, it will not work when powered.
• To reset the clock, please repeat step a to step e.
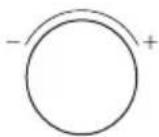
2. SETTING THE KITCHEN TIMER

Press
once, "00:00" will display. Timer/Clock


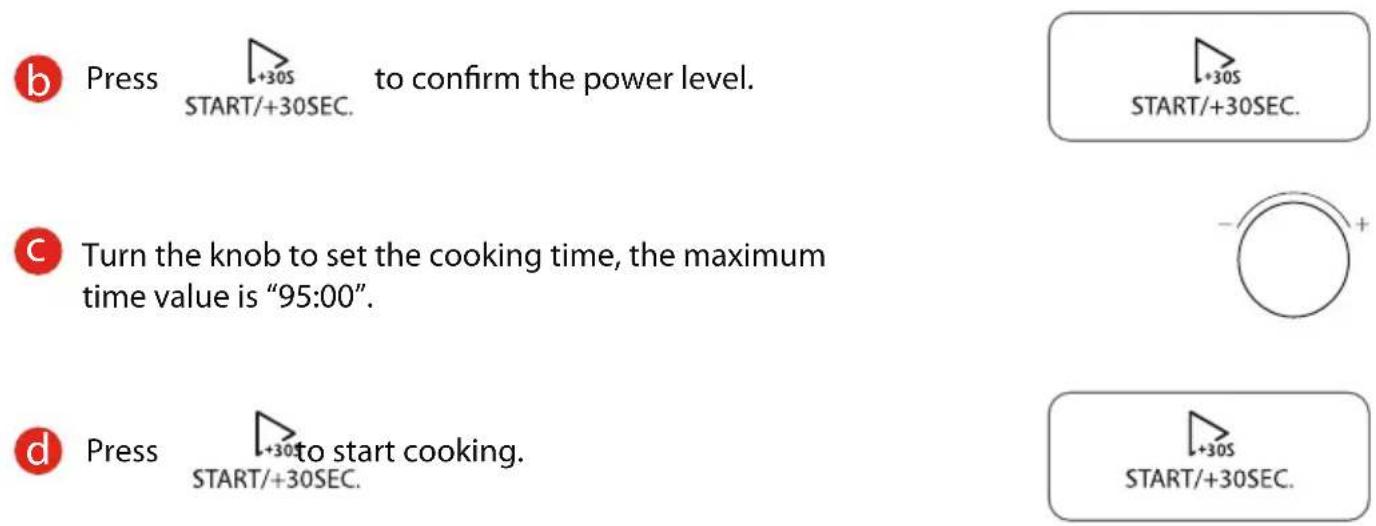
Turn the knob to set the desired time. The maximum time value is "95:00".


Press

to confirm. The timer starts counting down.


• The kitchen timer is a timer.
- Any other program can't be set during the kitchen timer.
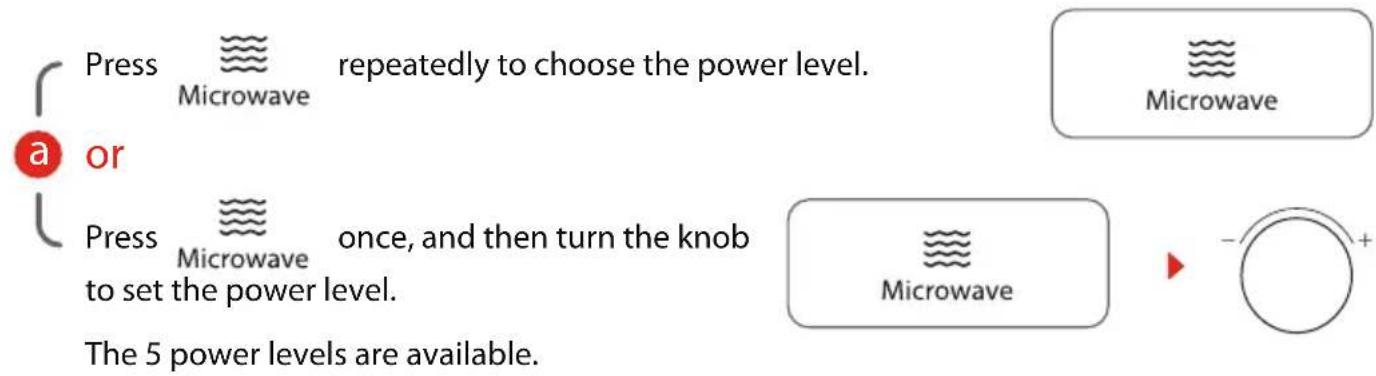
5 power levels are available.
| LEVEL POWER DISPLAY | ||
| 1 | 100% | P100 |
| 2 | 80% | P80 |
| 3 | 50% | P50 |
| 4 | 30% | P30 |
| 5 | 10% | P10 |
flowchart
graph TD
    A["Press"] --> B["Microwave"]
    B --> C["repeatedly to choose the power level."]
    D["Press"] --> E["Microwave"]
    E --> F["once, and then turn the knob to set the power level."]
    G["The 5 power levels are available."] --> H["Microwave"]
    H --> I["-/○+"]
4. GRILLING COOKING


Press
to start cooking.
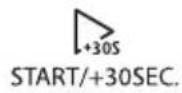
START/+30SEC.

START/+30SEC.

NOTE
- The buzzer will sound to remind you to turn the food over during cooking. If no operation, the oven will continue working.
5. COMBINATION COOKING
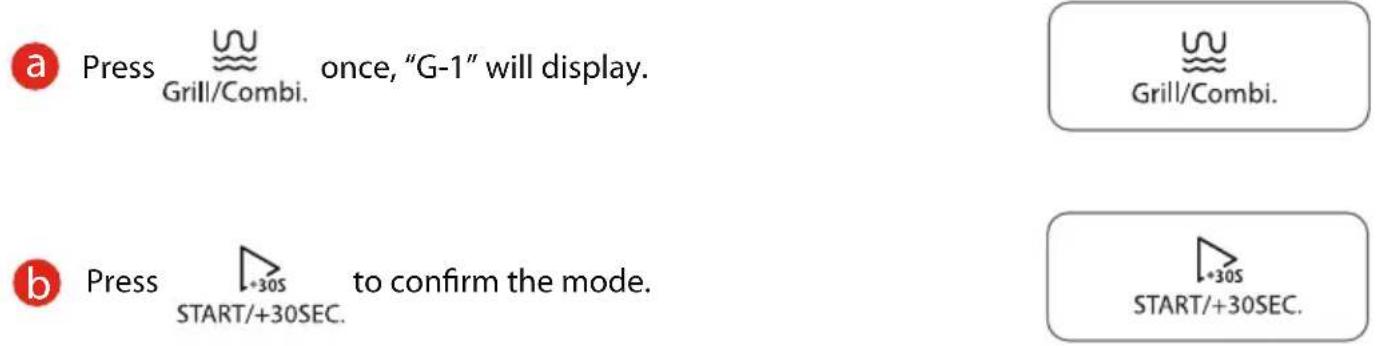
Press Grill/Combi. repeatedly to choose the cooking mode you want. "C-1, C-2" are available.
a or
Press Grill/Combi. once, and then turn the knob to choose the cooking mode.
Grill/Combi.
b Press +30S to confirm the mode. START/+30SEC.
+30S START/+30SEC.
C Turn the knob to set the cooking time, the maximum time value is "95:00".

d Press to start cooking. START/+30SEC.
+30S START/+30SEC.
COMBINATION COOKING CHART
| FUNCTION | DISPLAY | MICROWAVE POWER GRILL POWER |
| Combi. 1 | C-1 55% 45% | |
| Combi. 2 | C-2 | 36% 64% |
6. DEFROST BY TIME
a Press

twice, and then "dEF2" will display.

b Turn the knob to set the desired defrost time, the maximum time value is "95:00".

C Press
to start defrosting. START/+30SEC.

• The buzzer will sound to remind you of turning over the food during defrosting.
If no operation, the oven will continue working.
- The defrost power is P30 and it cannot be changed.
7. DEFROST BY WEIGHT
a Press

once, and then "dEF1" will display.

b Turn the knob to set the weight of the food, the range of weight is 100g to 2000g.

C Press to start defrosting. START/+30SEC.
8. SPEEDY COOKING
a Turn the knob left to set a cooking time at 100% power.
b Continue to turn the knob to adjust the cooking time, the maximum time value is "95:00".
C Press to start cooking. START/+30SEC.
a Press +30S START/+30SEC. to cook food at 100% power level for 30 seconds. Each press on the same key can increase 30 seconds and the maximum time value is "95:00".

START/+30SEC.

START/+30SEC.
9. MULTI-STAGE COOKING
Example: Defrost food for 5 minutes and then cook with 80% microwave power for 7 minutes.
a Press

twice, "dEF2" will display.

Defrost
b Turn the knob to set the desired defrost time to 5 minutes.
C Press

repeatedly until "P80" displays.

Microwave
d Press
to confirm the power level.

START/+30SEC.
e Turn the knob to set the cooking time to 7 minutes.
f Press to start cooking. START/+30SEC.

- Two cooking stages can be set in multi-stage cooking.
- If you set the defrost function, it will work automatically in the first stage.
- The kitchen timer, and auto menu cannot be set as one of the multi-stage.
10. AUTO MENU
a In standby mode, turn the knob right once, and then "A-1" will display.

b Continue to turn the knob to choose the menu you need. The 8 auto menus are available.
C Press _+30S START/+30SEC. to confirm.

START/+30SEC.
d Turn the knob to set the weight of the food.

e Press _+30S START/+30SEC. to start cooking.
+30S START/+30SEC.
AUTO MENU CHART
| MENU DISPLAY | WEIGHT/AMOUNT | POWER LEVEL | |
| A-1 | 200g | 200g | |
| Auto Reheat | 400g | 400g | P100 |
| 600g | 600g | ||
| A-2 | 200g | 200g | |
| Vegetable | 300g | 300g | P100 |
| 400g | 400g | ||
| A-3 | 250g | 250g | |
| Fish | 350g | 350g | P80 |
| 450g | 450g | ||
| A-4 | 250g | 250g | |
| Meat | 350g | 350g | P100 |
| 450g | 450g | ||
| A-5 | 50g (with 450g cold water) | 50g | P80 |
| Pasta | 100g (with 800g cold water) | 100g | |
| A-6 | 200g | 200g | |
| Potato | 400g | 400g | P100 |
| 600g | 600g | ||
| A-7 | 200g | 200g | |
| Frozen Pizza | 400g | 400g | P100/Grill |
| A-8 | 200ml | 200 | P80 |
| Soup | 400ml | 400 |
11. LOCK FUNCTION FOR CHILDREN
You can use this function to prevent children from accidentally turning the oven on.
a To activate the lock:
In standby mode, press and hold STOP/CANCEL for three seconds.
A beep sounds and the locked icon will display.

STOP/CANCEL
b To deactivate the lock:
In the locked state, press and hold 000 for three seconds.
A beep sounds.

STOP/CANCEL
12. INQUIRING FUNCTION
When oven is cooking, press Timer/Clock the current time will display for three seconds in the display.

Timer/Clock
b In the microwave cooking state, press Microwave to inquire about the power level. It will display for three seconds.

Microwave
C In the grilling, and combination cooking state, press Grill/Combi. to inquire about the cooking mode. It will display for three seconds.

Grill/Combi.

CLEANING AND MAINTENANCE
CLEANING
With good care and cleaning, your appliance will retain its appearance and remain fully functioning for a long time to come. We will explain here how you should correctly care for and clean your appliance

- Scratched glass in the appliance door may develop into a crack. Do not use a glass scraper, sharp or abrasive cleaning aids or detergents.
- The surface of the appliance may become damaged if it is not cleaned properly. Microwave energy may escape.
Clean the appliance on a regular basis, and remove any food remnants immediately.
- Do not immerse the appliance in water or clean under a jet of water.
Cleaning agent
To ensure that the different surfaces are not damaged by using the wrong cleaning agent, observe the information in the table. Wash new sponge cloths thoroughly before use.
Do not use:
Harsh or abrasive cleaning agents
Metal or glass scrapers to clean the door panels
Metal or glass scrapers to clean the door seal

Hard scouring pads or sponges

Cleaning agents with a high alcohol content
APPLIANCE FRONT
Hot soapy water:
Clean using a dish cloth and then dry with a soft cloth.
Do not use metal or glass scrapers for cleaning.
natural_image
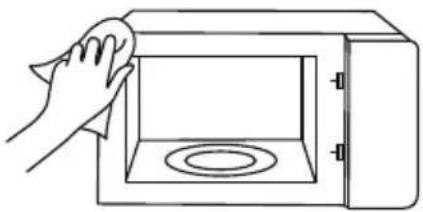
Line drawing of a hand cleaning a microwave oven (no text or symbols)APPLIANCE FRONT WITH STAINLESS STEEL
Hot soapy water:
Clean using a dish cloth and then dry with a soft cloth. Remove splashes and patches of limescale, grease, starch and albumin immediately. Corrosion can form under these patches or splashes. Do not use glass cleaners or metal or glass scrapers for cleaning.
natural_image
Line drawing of a hand cleaning a microwave oven with a circular vent (no text or symbols)COOKING COMPARTMENT MADE OF STAINLESS STEEL
Hot soapy water or vinegar solution:
Clean using a dish cloth and then dry with a soft cloth. Do not use oven spray or any other aggressive oven cleaners or abrasive materials. Scouring pads, rough sponges and pan cleaners are also unsuitable. These items scratch the surface. Allow the interior surfaces to dry completely.

natural_image
Line drawing of a hand cleaning a microwave oven with a circular vent (no text or symbols)RECESS IN THE COOKING COMPARTMENT
Damp cloth:
Water must not be allowed to run into the appliance through the turntable drive. Dry the turntable drive with a cloth.

natural_image
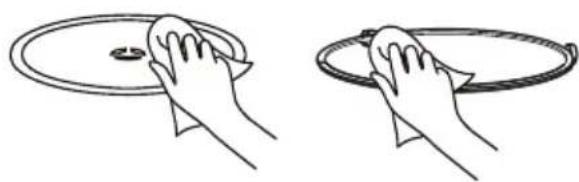
Line drawing of a hand pressing a circular button on a rectangular device (no text or symbols)TURNTABLE AND ROLLER RING
Hot soapy water:
When placing the turntable back into its recess, it must engage properly.
natural_image
Illustration of two hand cleaning a circular object with a cloth (no text or symbols)DOOR PANELS
Glass cleaner:
Clean with a dish cloth. Do not use glass scrapers.
TROUBLE SHOOTING
Check your problem by using the chart below and try the solutions for each problem.
If the microwave oven still does not work properly, contact the nearest authorized service center.
TROUBLE POSSIBLE CAUSE POSSIBLE REMEDY
| Oven will not start | a. Electrical cord for oven is not plugged in.b. Door is open.c. Wrong operation is set. | a. Plug into the outlet.b. Close the door and try again.c. Check instructions |
| Arcing or sparking | a. Materials to be avoided in microwave oven were used.b. The oven is operated when empty.c. Spilled food remains in the cavity. | a. Use microwave-safe cookware only.b. Do not operate with oven empty.c. Clean cavity with soft damp cloth. |
| Unevenly cooked foods | a. Materials to be avoided in microwave oven were used.b. Food is not defrosted completely.c. Cooking time, power level is not suitable.d. Food is not turned or stirred. | a. Use microwave-safe cookware only.b. Completely defrost food.c. Use correct cooking time, power level.d. Turn or stir food. |
| Overcooked foods | Cooking time, power level is not suitable. | Use correct cooking time, power level. |
| Undercooked foods | a. Materials to be avoided in microwave oven were used.b. Food is not defrosted completely.c. Oven ventilation ports are restricted.d. Cooking time, power level is not suitable. | a. Use microwave-safe cookware only.b. Completely defrost food.c. Check to see that oven ventilation ports are not restricted.d. Use correct cooking time, power level |
| Improper defrosting | a. Materials to be avoided in microwave oven were used.b. Cooking time, power level is not suitable.c. Food is not turned or stirred. | a. Use microwave-safe cookware only.b. Use correct cooking time, power level.c. Turn or stir food. |
According to Waste of Electrical and Electronic Equipment (WEEE) directive, WEEE should be separately collected and treated. If at any time in future you need to dispose of this product please do NOT dispose of this product with household waste. Please send this product to WEEE collecting points where available.
#DetailsMatter
BEDIENUNGSANLEITUNG
MIKROWELLENHERD
MW3-AG20PE(BK)
natural_image
Line drawing of a microwave oven with control panel and door (no text or symbols)TOSHIBA
INHALT
PRODUKTSICHERHEIT
natural_image
Simple line drawing of a microwave oven with a prohibition symbol on the lid (no text or labels)natural_image
Line drawing of a child reaching toward a microwave on a cabinet (no text or symbols)natural_image
Simple line drawing of a hand cleaning a microwave oven (no text or symbols)
natural_image
Line drawing of a microwave oven with a jar and lid inside (no text or symbols)
natural_image
Line drawing of a microwave oven with a cup inside (no text or symbols)
natural_image
Line drawing of a hand cleaning a microwave oven with a circular cutter (no text or symbols)MATERIALIEN, DIE SIE IM MIKROWELLEN-HERD VERWENDEN KÖNNEN
natural_image
Simple line drawing of a circular frame with vertical bars and two legs (no text or symbols)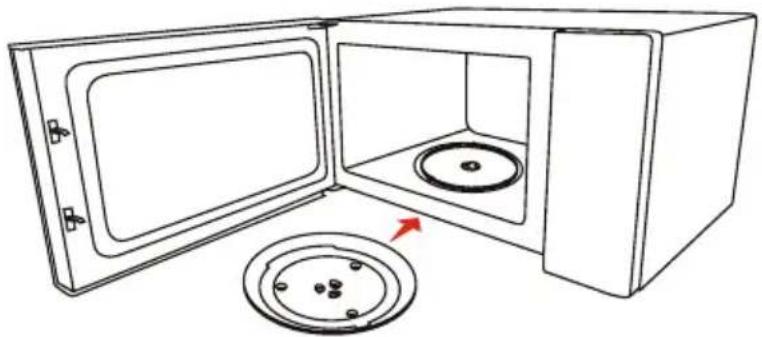
natural_image
Line drawing of a microwave oven with lid and vent, showing open door and interior (no text or symbols)
natural_image
Line drawing of a kitchen setup with a microwave, oven, and cabinet (no text or symbols)
DE-20

chemical
Simple diagram showing a negatively charged ring with plus sign and minus sign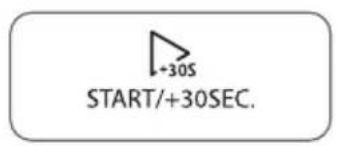
4. GRILLEN


8. SCHNELLES KOCHEN
natural_image
Line drawing of a hand cleaning a microwave oven (no text or symbols)REINIGUNG
GERÄTEFRONTPLATTE
Heiße Seifenlauge:
natural_image
Line drawing of a hand cleaning a microwave oven with a circular vent (no text or symbols)GERÄTEHOHLRAUM
natural_image
Line drawing of a hand cleaning a microwave oven with a circular vent (no text or symbols)natural_image
Line drawing of a hand using a circular tool to clean or restore a device (no text or symbols)DREHTELLER UND ROLLENRING
Heiße Seifenlauge:
natural_image
Illustration of two hands cleaning a circular object with a ring (no text or symbols)TÜRFELDER
Glasreiniger:
natural_image
Line drawing of a microwave oven with control panel and door (no text or symbols)
natural_image
Solid red background with a vertical dashed line dividing it into four equal segments (no text or symbols)INDICE
SICUREZZA DEL PRODOTTO
natural_image
Simple line drawing of a microwave oven with a prohibition symbol on the lid (no text or labels)natural_image
Line drawing of a child reaching toward a microwave on a cabinet (no text or symbols)IMPORTANTI ISTRUZIONI DI SICUREZZA

natural_image
Line drawing of a hand cleaning a microwave oven (no text or symbols)
natural_image
Simple line drawing of an open microwave oven with a jar and lid (no text or symbols)
natural_image
Line drawing of a microwave oven with a cup inside and lid open (no text or symbols)
MANTENERE PULITE LA CAVITÀ E L'AREA DELLA GUIDA D'ONDA
natural_image
Line drawing of a hand cleaning a microwave oven with a circular button (no text or symbols)MATERIALI CHE SI POSSONO USARE NEL FORNO A MICROONDE
natural_image
Simple line drawing of an oval-shaped object with internal vertical bars and two side protrusions (no text or symbols)Cestello Griglia
natural_image
Line drawing of a microwave oven with a lid and an open door, showing no text or symbols.

chemical
Simple diagram showing a negatively charged ring with plus sign and minus sign
4. COTTURA ALLA GRIGLIA

chemical
Simple diagram showing a negatively charged ring with plus sign and minus sign

chemical
Simple diagram showing a negatively charged ring with plus sign and minus sign
8. COTTURA VELOCE
natural_image
Line drawing of a hand cleaning a microwave oven (no text or symbols)PULIZIA
PIASTRA ANTERIORE DELL'APPARECCHIO
natural_image
Line drawing of a hand cleaning a microwave oven with a circular vent (no text or symbols)CAVITÀ DELL'APPARECCHIO
natural_image
Line drawing of a hand cleaning a window with a cloth (no text or symbols)NICCHIA NEL VANO COTTURA
Panno bagnato:
natural_image
Line drawing of a hand pressing a circular object on a rectangular base (no text or symbols)natural_image
Illustration of two hand cleaning a circular object with a cloth (no text or symbols)MANUEL D'INSTRUCTIONS
FOURS À MICRO-ONDES
MW3-AG20PE(BK)
natural_image
Line drawing of a microwave oven with control panel and display unit (no text or symbols)CONTENU
SÉCURITÉ DES PRODUITS
SÉCURITÉ DES PRODUITS
natural_image
Simple line drawing of a microwave oven with a prohibition symbol on the lid (no text or labels)natural_image
Line drawing of a child reaching toward a microwave on a cabinet (no text or symbols)CONSIGNES IMPORTANTES CONCERNANT LA SÉCURITÉ

natural_image
Line drawing of a hand cleaning a microwave oven (no text or symbols)
natural_image
Line drawing of an open microwave oven with a jar and lid (no text or symbols)
natural_image
Line drawing of a microwave oven with a bowl inside (no text or symbols)
GARDEZ LA CAVITÉ ET LA ZONE DE GUIDE D'ONDE PROPRES
natural_image
Line drawing of a hand cleaning a microwave oven with a circular button (no text or symbols)MATÉRIAUX QUE VOUS POUVEZ UTILISER DANS LE FOUR À MICRO-ONDES
USTENSILES REMARQUES
natural_image
Simple line drawing of a circular table with chairs and legs (no text or symbols)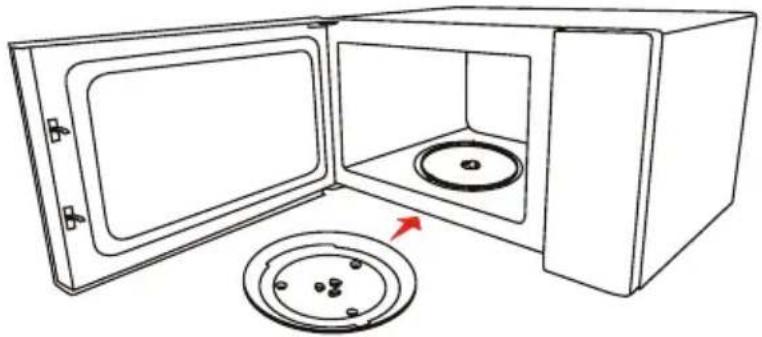
natural_image
Line drawing of a microwave oven with an open lid and circular base (no text or symbols)
natural_image
Line drawing of a kitchen setup with a microwave, stove, and oven (no text or symbols)
FR-20
1. RÉGLAGE DE L'HORLOGE


chemical
Simple diagram showing a negatively charged ring with plus sign and minus sign
chemical
Simple diagram showing a negatively charged ring with plus sign and minus sign
8. CUISSON RAPIDE
Defrost

Microwave
+30S START/+30SEC.
natural_image
Line drawing of a hand cleaning a microwave oven (no text or symbols)NETTOYAGE
PLAQUE AVANT DE L'APPAREIL
natural_image
Line drawing of a hand cleaning a microwave oven with a circular vent (no text or symbols)CAVITÉ DE L'APPAREIL
natural_image
Line drawing of a hand cleaning a microwave oven with a circular vent (no text or symbols)ENCASTREMENT DANS LE COMPARTIMENT DE CUISSON
Chiffon humide :
natural_image
Line drawing of a hand using a circular tool to clean or restore a device (no text or symbols)TABLE TOURNANTE ET BAGUE DE ROULEMENT
natural_image
Illustration of two hand cleaning a circular object with a cloth (no text or symbols)PANNEAU DE PORTE
PROBLÈME CAUSE POSSIBLE SOLUTION POSSIBLE
natural_image
Line drawing of a microwave oven with control panel and door (no text or symbols)Inhoudsopgave
PRODUCTVEILIGHEID
natural_image
Simple line drawing of a microwave oven with a prohibition symbol on the lid (no text or labels)AANVULLING
natural_image
Line drawing of a child reaching toward a microwave on a cabinet (no text or symbols)BELANGRIJKE VEILIGHEIDSINSTRUCTIES

natural_image
Line drawing of a hand cleaning a microwave oven (no text or symbols)
natural_image
Line drawing of an open microwave oven with a jar and lid (no text or symbols)BELANGRIJKE VEILIGHEIDSINSTRUCTIES

natural_image
Line drawing of a microwave oven with a cup inside, showing open lid and side door (no text or symbols) OPMERKING OPMERKING | HOUD DE KOOKRUIMTEEN ZONE RONDOM DEGOLFGELEIDER SCHOON | 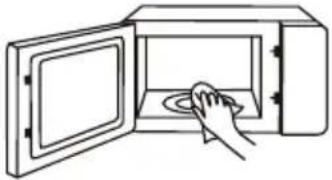 |
MATERIALEN DIE U IN DE MAGNETRON- OVEN KUNT GEBRUIKEN
GEREEDSCHAP OPMERKINGEN
natural_image
Simple line drawing of a circular object with diagonal hatching and two legs (no text or symbols)natural_image
Line drawing of a microwave oven with lid and vent, showing open door and interior (no text or symbols)
natural_image
Line drawing of a kitchen setup with a microwave, oven, and cabinet (no text or symbols)
NL-20
1. DE KLOK INSTELLEN


chemical
Simple diagram showing a negatively charged ring with plus sign and minus sign
4. KOKEN MET DE GRILL
chemical
Simple diagram showing a negatively charged ring with plus sign and minus sign8. SNEL KOKEN

9. KOKEN MET MEERDERE FASEN
natural_image
Line drawing of a hand cleaning a microwave oven (no text or symbols)REINIGING
VOORZIJDE VAN APPARAAT
Heet sopje:
natural_image
Line drawing of a hand cleaning a microwave oven with a circular vent (no text or symbols)RUIMTE IN HET APPARAAT
natural_image
Line drawing of a hand cleaning a microwave oven with a circular vent (no text or symbols)IN DE KOOKRUIMTE
Vochtige doek:
natural_image
Line drawing of a hand cleaning a circular object on a rectangular base (no text or symbols)DRAAIPLATEAU- EN ROLRINGUITSPARING
Heet sopje:
natural_image
Two hand-drawn diagrams showing cleaning or cleaning process: one with a circular object, the other with a ring (no text or symbols)DEURPANEEL
Glasreiniger:
natural_image
Line drawing of a microwave oven with front panel and control buttons (no text or symbols)INNEHÅLL
PRODUKTSÄKERHET
natural_image
Simple line drawing of a microwave oven with a prohibition symbol on the lid (no text or labels)natural_image
Line drawing of a child reaching toward a microwave on a cabinet (no text or symbols)VIKTIGA SÄKERHETSINSTRUKTIONER

natural_image
Line drawing of a hand cleaning a microwave oven (no text or symbols)
natural_image
Line drawing of an open microwave oven with a jar and lid (no text or symbols)
natural_image
Line drawing of a microwave oven with a cup inside (no text or symbols) NOTERA NOTERA | HÅLL HÅLRUMMET OCHVÅGLEDAROMRÅDET RENT | 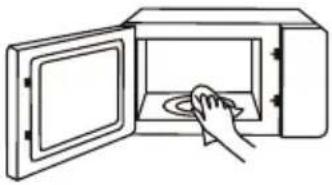 |
MATERIAL SOM DU KAN ANVÄNDA I MIKROVÅGSUGN
REDSKAP ANMÄRKNINGAR
natural_image
Simple line drawing of a circular table with vertical bars and two legs (no text or symbols)A. Kontrollpanel
B. Glasbricka
C. Roterande tallriks axel
D. Tallrikens roterande ring
E. Luckmontering
F. Observationsfönster
G. Säkerhetssystem
H. Vågledarskydd

NOTERA
natural_image
Line drawing of a microwave oven with a lid and vent, showing open door and interior (no text or symbols)
natural_image
Line drawing of a kitchen setup with a microwave, stove, and drawer (no text or symbols)
SV-20
1. STÄLLA IN KLOCKAN


4. GRILLNING


chemical
Simple diagram showing a negatively charged ring with plus sign and minus sign

chemical
Simple diagram showing a negatively charged ring with plus sign and minus sign
8. SNABB TILLLAGNING
natural_image
Line drawing of a hand cleaning a microwave oven (no text or symbols)RENGÖRING
APPARATENS FRAMPLATTA
Varmt tvålvatten:
natural_image
Line drawing of a hand cleaning a microwave oven with a circular vent (no text or symbols)APPARATENS HÅLRUM
natural_image
Line drawing of a hand cleaning a microwave oven with a circular vent (no text or symbols)URTAGET I UGNSUTRYMMET
Fuktig trasa:
natural_image
Line drawing of a hand using a circular tool to clean or restore a device (no text or symbols)TALLRIK OCH ROTERANDE RING
Varmt tvålvatten:
natural_image
Two hand-drawn diagrams showing cleaning or cleaning process (no text or symbols)LUCKPANEL
Glasrengöringsmedel:
natural_image
Line drawing of a microwave oven with control panel and door (no text or symbols)TOSHIBA
INDHOLD
PRODUKTSIKKERHED
Forholdsregler for at undgå mulig eksponering for kraftig mikrobølgeenergi ......DA-01
INDSTILLING AF PRODUKTET
Betjening......DA-20
natural_image
Simple line drawing of a microwave oven with a prohibition symbol on the lid (no text or labels)TILLÆG
natural_image
Line drawing of a child reaching toward a microwave on a cabinet (no text or symbols)VIGTIGE SIKKERHEDSANVISNINGER

natural_image
Line drawing of a hand cleaning a microwave oven (no text or symbols)
natural_image
Line drawing of an open microwave oven with a jar and lid (no text or symbols)
natural_image
Line drawing of a microwave oven with a cup on the lid (no text or symbols)
HOLD RUMMET OG OMRÅDET TIL B∅LGELEDER RENE
natural_image
Line drawing of a hand cleaning a microwave oven with a circular button (no text or symbols)MATERIALER, DU KAN BRUGE I MIKROB∅LGEOVNEN
INDSTILLING AF PRODUKTET
SÅDAN KONFIGURERER DU DIN OVN
NAVNE PÅ MIKROB∅LGEOVENS DELE OG TILBEH∅R
natural_image
Simple line drawing of a circular object with three legs and a shaded top surface (no text or symbols)A. Kontrolpanel
B. Glastallerken
C. Drejetallerkenens aksel
natural_image
Line drawing of a microwave oven with lid and vent, showing open door and interior (no text or symbols)
natural_image
Line drawing of a kitchen setup with a microwave, oven, and stove (no text or symbols)
DA-20
1. INDSTILLING AF URET
b Drej knappen for at indstille timetallet.

Tryk på Timer/Clock eller START/+30SEC. for at bekræfte timetallet.

d Drej knappen for at indstille minuttallet.


Tryk på L+30S START/+30SEC. for at starte tilberedningen.

START/+30SEC.

BEMÄRK
chemical
Simple diagram showing a negatively charged ring with plus sign and minus signTryk på START/+30SEC. for at starte optøningen.

8. HURTIG TILBEREDNING
e Drej knappen for at indstille tilberedningstiden til syv minutter.
Tryk på START/+30SEC. for at starte tilberedningen.