T12 - Vacuum Cleaner Flixxe - Free user manual and instructions
Find the device manual for free T12 Flixxe in PDF.


User questions about T12 Flixxe
0 question about this device. Answer the ones you know or ask your own.
Ask a new question about this device
Download the instructions for your Vacuum Cleaner in PDF format for free! Find your manual T12 - Flixxe and take your electronic device back in hand. On this page are published all the documents necessary for the use of your device. T12 by Flixxe.
USER MANUAL T12 Flixxe
Powerful cordless vacuum cleaner
Bedienungsanleitung
Instruction manual
Mode d'emploi
Manual de uso
Manualed'instruzioni
Handleiding
Manual de instruções
Kullanüm kılıvuzu
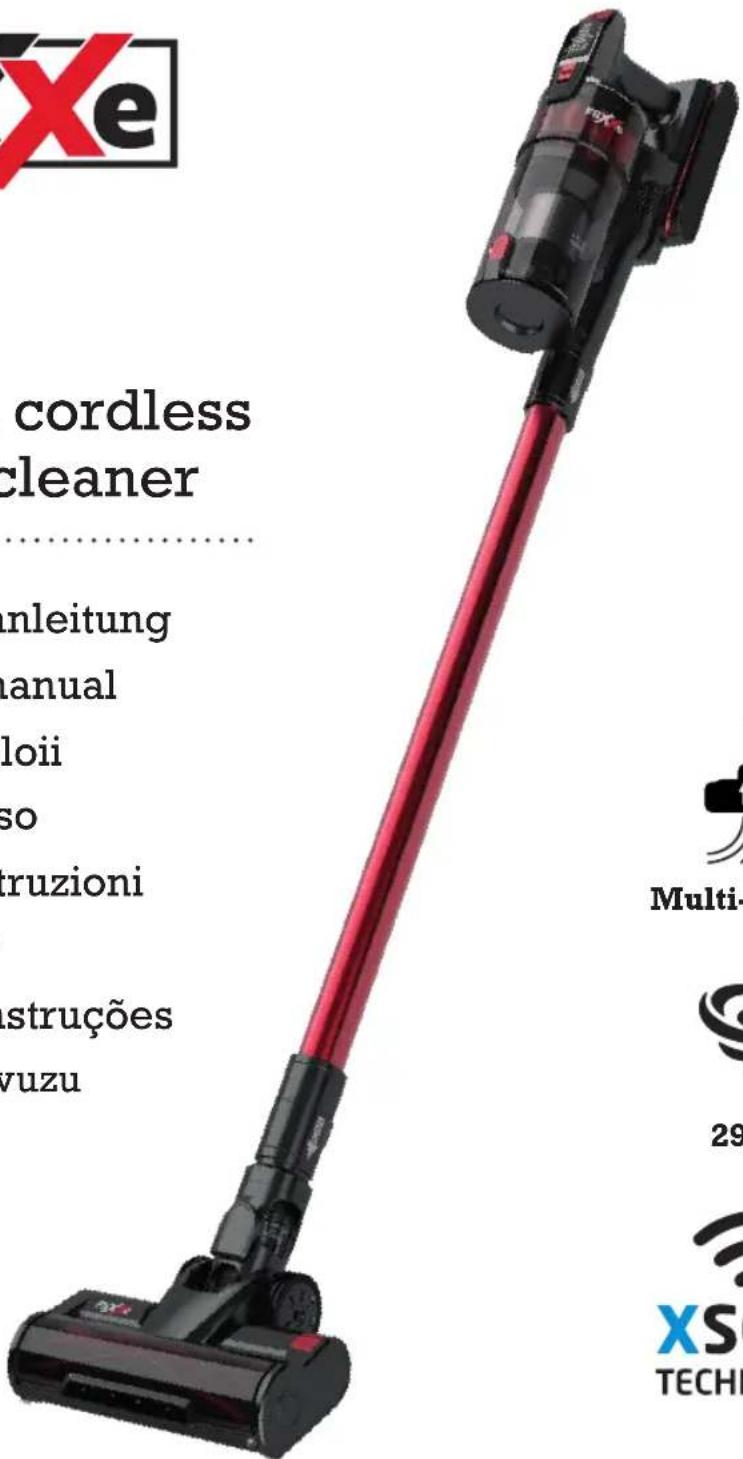
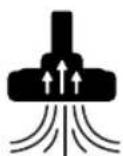
Multi-Cyclone

29 kPa

CONTACT US, WE WILL BE HAPPY TO CAN HELP
If you need help, please contact us, we'll get back within 1 business day.
service@flixxe.de

WHAT'S IN THE BOX
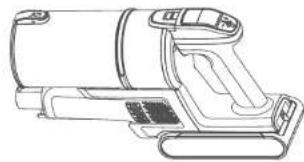
Main Machine
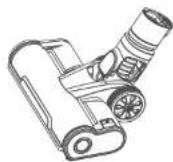
Motorized LED Power Brush
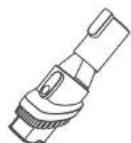
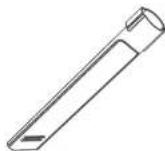
2-in-1 Brush Mini-Power-Brush Crevice Tool
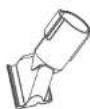

Split Metal Tubes
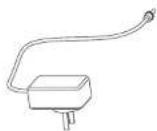
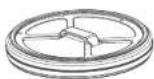
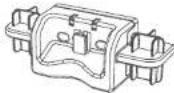
Wall Mount BracketHepaAdapter
B ISASSEMBLYASSEMBLY

OPERATIONSOPERATIONS
C5C1 C7C2
C6C3 C4
D
Clean up the dust cup quite oftenly and hepa filter is suggested to be replaced every 2 month to maintain good performance.
Important safety instructions
Technical data
Overview
Installation
Operation
Maintenance
Troubleshooting
Warranty
GB
IMPORTANT SAFETY INSTRUCTIONS
BEFORE USING THIS APPLIANCE READ ALL INSTRUCTIONS AND CAUTIONARY MARKINGS IN THIS MANUAL AND ON THE APPLIANCE
When using an electrical appliance, basic precautions should always be followed, including the following:
WARNING - These warnings apply to the appliance, and also where applicable, to all tools, accessories, chargers or main adaptors.
- This appliance can be used by children aged from 8 years and above and persons with reduced physical, sensory or reasoning capabilities, or lack of experience and knowledge, only if they have been given supervision or instruction by a responsible person concerning use of the appliance in a safe way and understand the hazards involved. Cleaning and user maintenance shall not be made by children without supervision.
- Do not allow to be used as a toy. Close attention is necessary when used by or near children, pets or plants. Children should be supervised to ensure that they do not play with the appliance.
- Use the appliance only as described in this manual and do not carry out any maintenance other than that described in this manual.
- Suitable for dry locations ONLY. Do not use out doors or on wet surfaces. Do not use in commercial or industrial environment.
- Do not handle any part of the plug or appliance with wet hands.
- Do not use with a damaged cable or plug, if the supply cable is damaged it must be replaced by the approved service agent similarly qualified person in order to avoid a hazard.
- If the device is networking properly, has been hit hard, dropped, damaged, left outdoors, or dropped into water, do not use it and contact the after-sales hotline.
- When service or repair is required, please contact the after-sales hotline. Do not disassemble the device as incorrect reassembly may result in electric shock or fire.
-
Do not stretch the cable or place the cable under strain. Keep the cable away from heated surfaces. Do not close a door on the cable, or pull the cable around sharp edges or corners. Arrange the cable away from traffic areas and where it will not be stepped on or tripped over. Do not run over the cable.
-
Do not unplug by pulling on the cable. To unplug, grasp the plug, not the cable. The use of an extension cable is not recommended.
- Do not use to pick up water.
- Do not use to pick up flammable or combustible liquids, such as petrol, or use in areas where they or their vapours may be present.
- Do not pick up anything that is burning or smok-. ing, such as cigarettes, matches or hot ashes.
- Keep hair, loose clothing, fingers, and all parts of the body away from openings and moving parts. Such as the brush bar. Do not point the hose, wand or tools at your eyes or ears or put them in your mouth.
- Do not put any object into openings. Do not use with any opening blocked, keep free of dust lint, hair, and anything that may reduce airflow.
- Use only Original recommended accessories and replacement parts.
- Do not use without the clear bin and filter in place.
- Unplug when not in use for extended periods and before maintenance or servicing.
- Use extra care when cleaning on stairs.
- Do not install charge or use this appliance outdoors, in a bathroom or within 3 metres (10 feet) of a pool. Do not use on wet surfaces and do not expose to moisture, rain or snow.
- Only use the original "Fixexe" charger to charge this device. Use only original "Fixexe" batteries: other types of batteries may explode, causing personal injury and damage.
- Do not incinerate this appliance even if it is severely damaged. The battery may explode in a fire.
- Always turn OFF the appliance before connecting or disconnecting the motorised brush bar.
- The appliance is only to be used with the power supply unit provided with the appliance.
- READ AND SAVE THESE INSTRUCTIONS. THIS APPLIANCEIS INTENDED FOR HOUSEHOLD US ONLY
Recycling instructions according to the German Battery Act (BattG)

The battery contains materials that are harmful to the environment and must therefore be removed from the appliance before disposal. The appliance must be switched off to remove the battery.
Batteries and accumulators must not be disposed of with household waste. Every consumer is obliged to dispose of all batteries and accumulators, regardless of whether they contain harmful substances or not, at a collection point in their municipality/neighbourhood or at a retailer so that they can be disposed of in an environmentally friendly manner.
Please only dispose of batteries and accumulators in a discharged state.
For this reason, batteries and accumulators are labelled with the symbol shown above.
Recycling instructions according to the WEEE

Old appliances must not be disposed of with household waste. Every consumer is obliged to hand in all appliances that have reached the end of their service life to a collection point in their municipality/neighbourhood or to a retailer so that they can be disposed of properly and in an environmentally friendly manner.
The illustration above shows the waste bin symbol that indicates the separate collection of electrical and electronic equipment (WEEE).
For EU countries:
Information on the EU Declaration of Conformity can be found at www.flixxe.de
Symbols:
| Read the operating instructions | |
| Class II | |
| Short-circuit proof safety isolating transformer | |
| Switch mode power supply | |
| For Indoor use only | |
| Direct current | |
| Alternating current |
TECHNICAL DATA:
| Product FliXXe T12 | |
| Power input 100-24 V | |
| Voltage 29.6 V 2000 mAh Li-Ion | |
| Rated power 500 W | |
| Running time AUTO approx. 45 min. LOW: 60 min; MAX: approx. 20 min. | |
| Charging time 4-5 hours | |
| Dustbin capacity 0.7 L | |
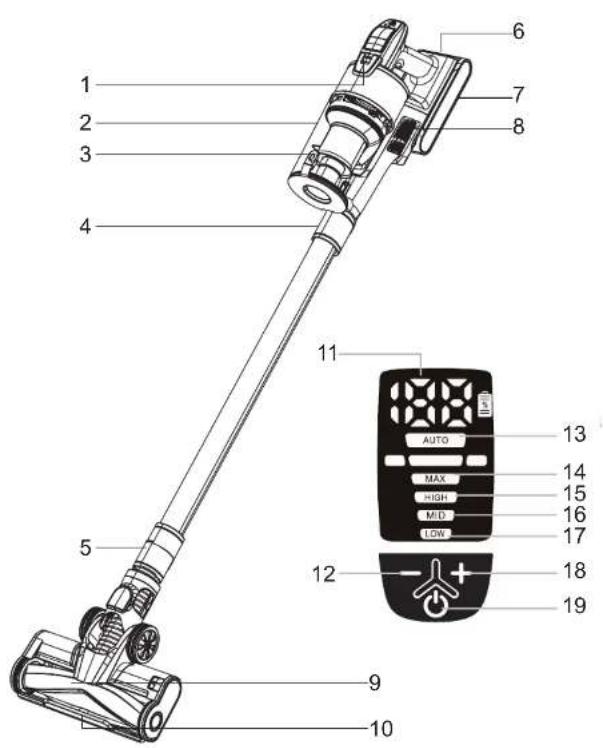
OVERVIEW
Note: Accessories may vary depending on model. If you require additional accessories, please visit www.flixxe.de
- Dust container release button
- Dust container
- Dust container cover buckle
- Tube joint button
- Brush head joint button
- Charging Socket
- Removable battery
- Exhaust grids
- Electrical brush
- LED-light
- Remaining battery display
- Reduce Suction
- Auto indicator
14.Maxindicator - High indicator
- Mid indicator
- Low indicator
- Increase Suction
19.Power Switch
ACCESSIONS
LED-Power-Brush Ideal for both hard floors and carpets. Very effective for agitating dirt embedded in the carpet.
2-In1 Brush Switches between a wide and a soft brush by pressing the release button. The soft brush is most effective on hard-surface furniture while the wide brush is effective for upholstered furniture, curtains, etc.
Mini-Power-Brush For vacuuming upholstered furniture, mattresses, etc. Vacuums pet half and removes ingrained dirt.
Crevice-Tool For corners, nooks, and other hard to reach places such as around car seats, picture frames, and cupboards.
ASSEMBLY
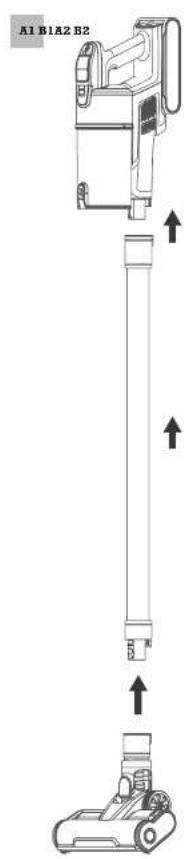
- Insert the tube into the main body
- Connect the brush with tube in the way described in Quick Guide.
Fig.A-1
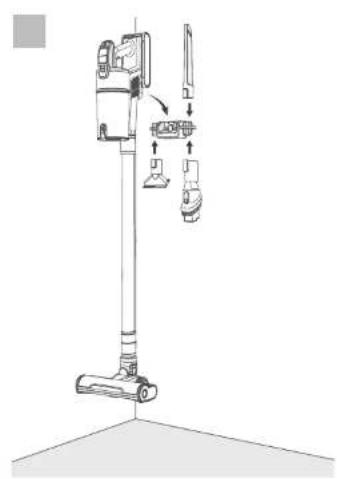
Wall-Mount Dock Installation
- Determine the best wall location for mounting the dock. We recommend placing it 140~cm from the screw to the floor (may need to adjust based on the actual situation) and that the socket can be easily connected with the supplied cable.
- Assemble the bracket using the included screws.
- Then position the accessories in the corresponding positions on the wall mount.
Fig.A-2
WARNING
- Ensure the wall surrounding the mounting area is
free of gas, water pipes, electrical cables and wires.
To avoid the clock falling, ensure it is firmly installed
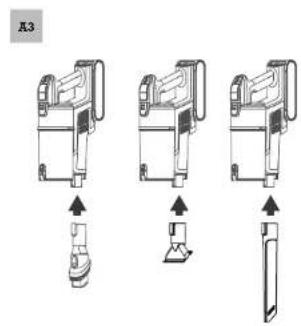
Accessories
- When using the accessories, connect the accessories directly to the main unit.
Fig.A-3
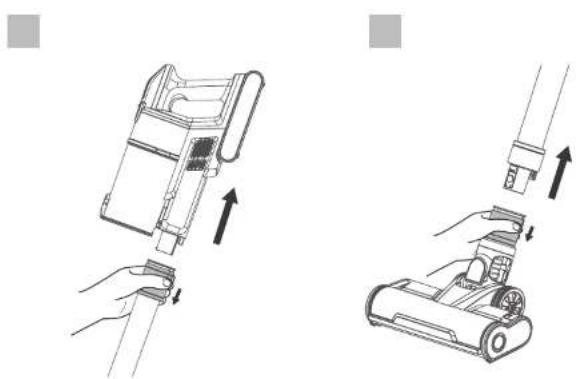
DISASSEMBLY
- To release the tube from the main body, pull the connecting joint in the direction of the arrow and the main body in the opposite direction.
Fig. B-1
- To release the brush from the tube, pull the connecting joint in the direction of the arrow and the tube in the opposite direction.
Fig.B-2
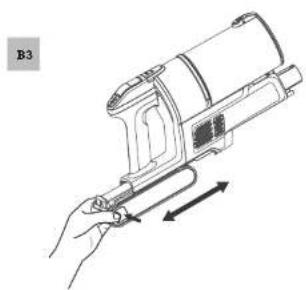
- To release the battery, you must press and hold the button on the battery and pull the battery out of the device.
Fig. B-3
OPERATIONS
Getting ready for use
- Charge the appliance for 4-5 hours before using it for the first time (for more information, charging instructions).
- Select an accessory and attach it to the appliance before use (see "Accessories") We recommend to use the tube with brush.
The battery capacity in % is shown on the display (No. 11)
START OPERATIONS
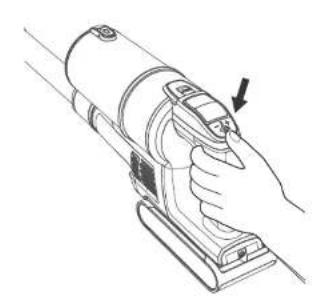
Pull the power switch (No. 19) to activate the suction
Fig.C-1
The appliance will start in AUTO mode by default. After 3 seconds, press the button Increase Suction / Reduce Suction to switch to different modes and the button lights up.
CLEANING MODE SELECTION
AUTO Mode
The cleaner will start in AUTO mode after switch on (No 19). The display "AUTO" (No. 13) will light up. Thanks to the X-Sense technology, the device automatically measures the level of dirt and automatically adjusts the cleaning performance. This mode automatically provides the best cleaning solution. Auto mode can only be activated by switching on the device and cannot be selected via the regulation levels (No. 12 and 18).
FIXXe recommends to use mainly the Auto Mode.
Low-Mode
Low-mode will be activated by switching the increase-suction button (No. 18). In this mode, cleaning takes place at the lowest level and thus achieves the longest battery life. The display 'LOW' (No. 17) will light up.
Attention: The suction power may not be sufficient for thorough cleaning. Then another cleaning mode must be selected.
Mid-Mode
Mid-mode will be activated by switching the increase or decrease suction button (No. 12 / 18). In this mode, cleaning takes place at a mid-level. The display "MID" (No. 16) will light up.
Attention: The suction power may not be sufficient for thorough cleaning. Then another cleaning mode must be selected.
High-Mode
High-mode will be activated by switching the increase or decrease suction button (No. 12/7/18). In this mode, cleaning takes place at a high-level. The display is H^^ (No. 15) will light up.
Max-Mode
Max-mode will be activated by switching the Increase suction button (No 18). In this mode, cleaning takes place at the strongest level. The display "MAX" (No. 14) will light up. At this level, battery consumption is highest and the battery life is therefore lowest.
Operating time
- In AUTO mode, the operating time is approx. 45 minutes and in low-mode approx. 60 minutes. When using MAX power, the running time is approx. 20 minutes.
- The estimated running time data has been determined by a FIIXe laboratory.
Charging time
A full charge cycle takes about 4-5 hours.
The estimated data has been determined by a Flixxe laboratory using ambient temperatures between 4^ and 40^ .
Charging instructions
To charge the appliance plug the plug-in power supply unit into the charging socket (No. 6) of main body.
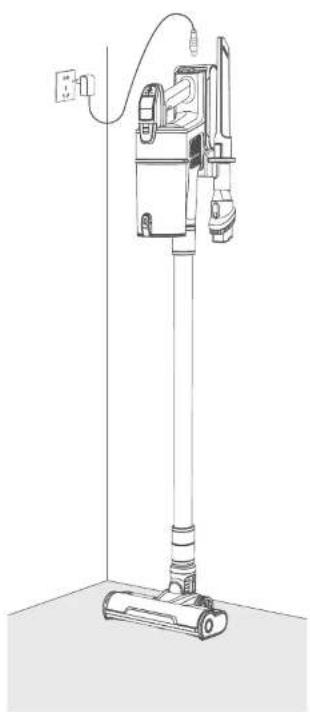
To avoid tripping hazards, place the appliance on the wall mount at charging.
Fig.A-2
WARNING
- Only charge the appliance using the plug-in power supply unit supplied by FliXe.
- If the appliance is not used for a longer period of time, it must be recharged once every three months in order to achieve optimum performance. It may take 4-5 hours to fully charge the battery.
- Store in a dry place. Protect the appliance from sunlight and frost. Recommended temperature range: 4^, 40^ .
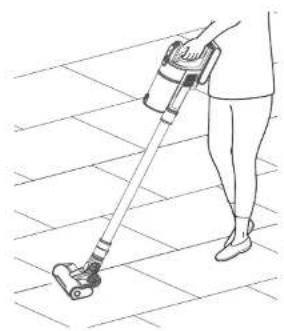
FLOOR CLEANING:
For floor cleaning, F1XXe recommends using the LED power brush in combination with the tube.
Fig.C-2
All common floor coverings (especially carpet, tiles, laminate, parquet, vinyl or comparable coverings) in the household can be cleaned. The device is only designed for dry floor coverings. Wet surfaces cannot be cleaned with the device. It is also not permitted to clean outdoor areas such as terraces or driveways. Incorrect use will void the warranty.
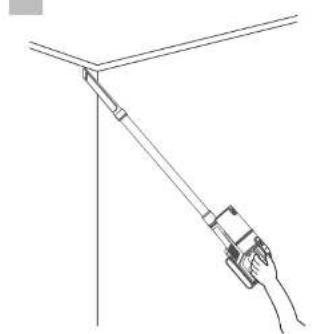
CORNER CLEANING:
For cleaning of corners and edges, FliXXe recommend the crevice nozzle.
The crevicle nozzle can be connected to the tube for cleaning higher places such as ceiling edges.
Fig.C-3
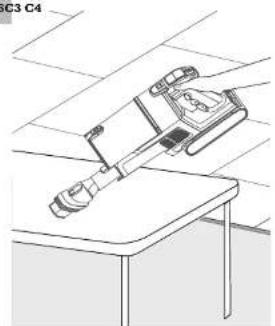
The crevice tool can also be attached directly to the main body to clean closer edges.
Fig. C-4
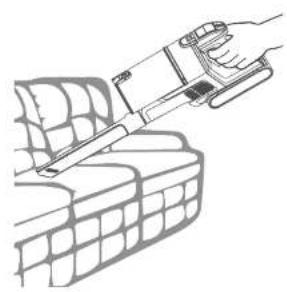
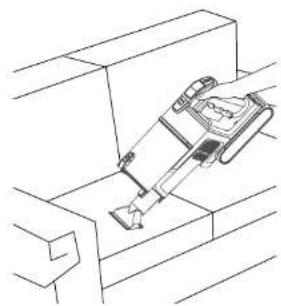
FURNITURE AND MATTRESSES CLEANING
For vacuuming upholstered furniture with ingrained dirt or pet hairs, FIIXXe recommend to use the Mini-Power Brush for a strong cleaning. We also recommend the Mini Power Brush for vacuuming bed mattresses.
Fig.C-5
Furniture with a hard or scratchable surface should be cleaned with the specially designed 2-in-1 brush as soft brush. Switches between a wide and a soft brush by pressing the release button. The wide brush is effective for upholstered furniture, curtains etc.
Fig.C-6
CHARGING THE BATTERY
Connect the adaptor to battery. We recommend to charge, when the main body is on the wall-mount. The battery can be recharged while attached to the main body, or separately.
NOTE: If you need a spare battery, please purchase from FliXe.
Fig.C-7
MAINTENANCE
EMPTYING THE DUSTBIN:
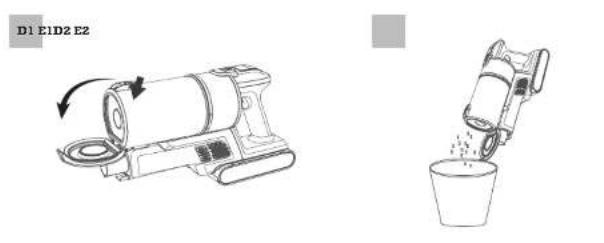
Press the release button on the front side of the dustbin to open. Empty the dust cup latest when dust inside is paralleled with the lower rim of filter case. Otherwise, the suction may be weakened.

Fig. D-1
To ensure smooth disposal, FliXXe recommends holding the dustbin over a trash before opening the dustbin.
Fig. D-2
FILTER CLEANING:
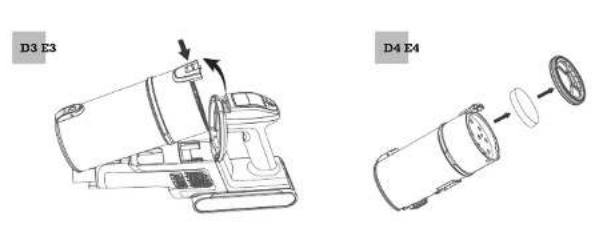
Remove the dustbin from the device holder by pushing the release button forward and removing the container to the top left.
Fig. D-3
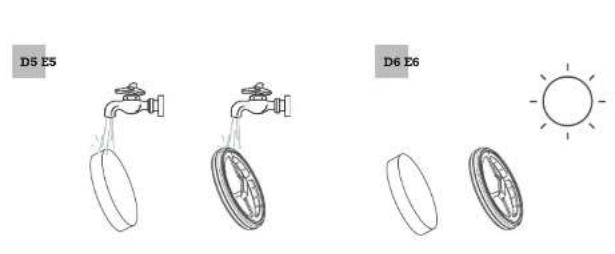
You can remove the Hepa filter and filter spong and clean them under water.
Fig. D-4 / D-5
After washing the HEPA filter and filter sponge, please dry them before use. HEPA-Filter is suggested to be replaced every 2 month to maintain good performance.
Fig. D-6
BRUSH CLEANING:
To clean the electric brush, first remove it from the tube. Press the release button on the left side of the brush (Fig. E1) and slide the cap away (Fig. E2).
Pull out the hard rubber strip (Fig. E3) and clean it deeply with water (Fig. E4).
After washing the rubber strip, please dry them before use. (Fig. E5)
After drying, push the rubber strip back into the holder until it clicks into place. Close the holder again with the cap. (Fig. E6)
TROUBLESHOOTING
| Problem Possible cause Solution | ||
| The appliance does not turn on / no power | Low battery power | Charge the unit to use. The power/battery indicating lights should move |
| No power supply to the adaptor | Ensure that the power socket is working | |
| Auto protection for overhead | Restart after cooling down | |
| Fully charged but run for a few seconds only | Wrong power adaptor is used | Check that you are using the correct adaptor with output 3SVDC 0.5A. |
| Weak suction Filter is clogged by fine dust | Clean filter regularly. Refer to Maintenance section | |
| Machine stop working with suction blockage indicator lit up | Motorised brush is not spinning | Remove hair and foreign object from the brush |
| Remove compressed hair strains from the bean ng. Refer to Maintenance section | ||
| Air passage is clogged by foreign object | Check and remove any foreign object at the floor brush, extension rod, main body air inlet and dirt bin | |
| Abnormal motor sound | Vacuum inlet or filter is clogged | Clear blockage along brush inlet, extension rod and dirt bin, and clean filter |
| Main brush not spinning Brush is stuck | Remove any foreign object that caused the brush to cut off power automatically | |
| If there is no foreign object (it may have dropped off), restart the vacuum | ||
Note: If the troubleshooting guide above does not provide a solution, visit our website www.flixxe.de for further help.
WARRANTY
TWO YEAR WARRANTY
Only applies to purchases from authorised Flixxe GmbH dealers.
- Subject to compliance with the requirements described in this user manual and other conditions described below.
This warranty is subject to the legislation of the country in which the purchase was made. We grant a warranty of two years or a warranty period determined by applicable local laws, whichever is longer.
COVERAGE
- Your Flixxe appliance is guaranteed against material defects and manufacturing faults for a period of two years when used for domestic purposes in accordance with the Flixxe user manual.
Motor accessories and batteries purchased separately are covered by a one year warranty.
This warranty provides, at no additional cost, all labour and parts necessary to ensure that your appliance is in perfect working order during the warranty period.
This warranty is only valid if the appliance is used in the country in which it was sold.
NO COVERAGE
FIIXe is not liable for any costs, damages or repairs incurred as follows:
- Appliances purchased from an unauthorised dealer.
Careless operation or handling, incorrect operation, improper use and/or lack of maintenance or use not in accordance with the Filxxe user manual. - Use of the appliance for anything other than normal household purposes, e.g. for commercial purposes or for hiring out.
- Use of parts that do not comply with the Flicxex user manual.
- Use of other parts and accessories not manufactured or recommended by Fixxe.
External factors that are not related to product quality and use, such as weather conditions, modifications, accidents, power failures, power surges or force majure. - Repairs or modifications carried out by unauthorised persons.
- Blockages or other dangerous materials have not been removed from the appliance.

- Normal wear and tear. Including normal wearing parts such as transparent containers, belt, filter, HEPA, brush and power cord (or where external damage or misuse is detected); carpet or floor damage not in accordance with the manufacturer's specifications.
- Reduction in battery discharge time due to aging or use of the battery.
WARRANTY LIMITATIONS
- All implied warranties with respect to your appliance, including warranties of merchantability or fitness for a particular purpose, are limited to the duration of this warranty.
- The warranty applies only to the original owner and the original battery; transfer is excluded.
This limited warranty gives you specific legal rights. You may also have other rights which vary from region to region. - The warranty may not apply in all cases, depending on factors such as use of the product, where the product was purchased or from whom you purchased the product. Please check the warranty carefully and contact the manufacturer if you have any questions.
WARRANTY SERVICES
Registration:
- We strongly recommend that you register your appliance via email to service@ffixe.de following purchase to enjoy exclusive benefits. To register, please enter the full serial number.
- Your warranty claims are not affected if you do not register your product.
Making a warranty claim:
Please keep your proof of purchase. To make a claim under our limited warranty, you must provide your serial number and the original proof of purchase with the date of purchase and order number.
- All work will be carried out by Filxxe or an authorised service centre.
- Replaced defective parts become the property of Flixxe GmbH.
- A repair under this warranty does not extend the warranty period.
Contact our customer service via
service@flixxe.de