
ECAVE 185-60hob1 - Freezer Essentiel B - Free user manual and instructions
Find the device manual for free ECAVE 185-60hob1 Essentiel B in PDF.

User questions about ECAVE 185-60hob1 Essentiel B
0 question about this device. Answer the ones you know or ask your own.
Ask a new question about this device
Download the instructions for your Freezer in PDF format for free! Find your manual ECAVE 185-60hob1 - Essentiel B and take your electronic device back in hand. On this page are published all the documents necessary for the use of your device. ECAVE 185-60hob1 by Essentiel B.
USER MANUAL ECAVE 185-60hob1 Essentiel B
natural_image
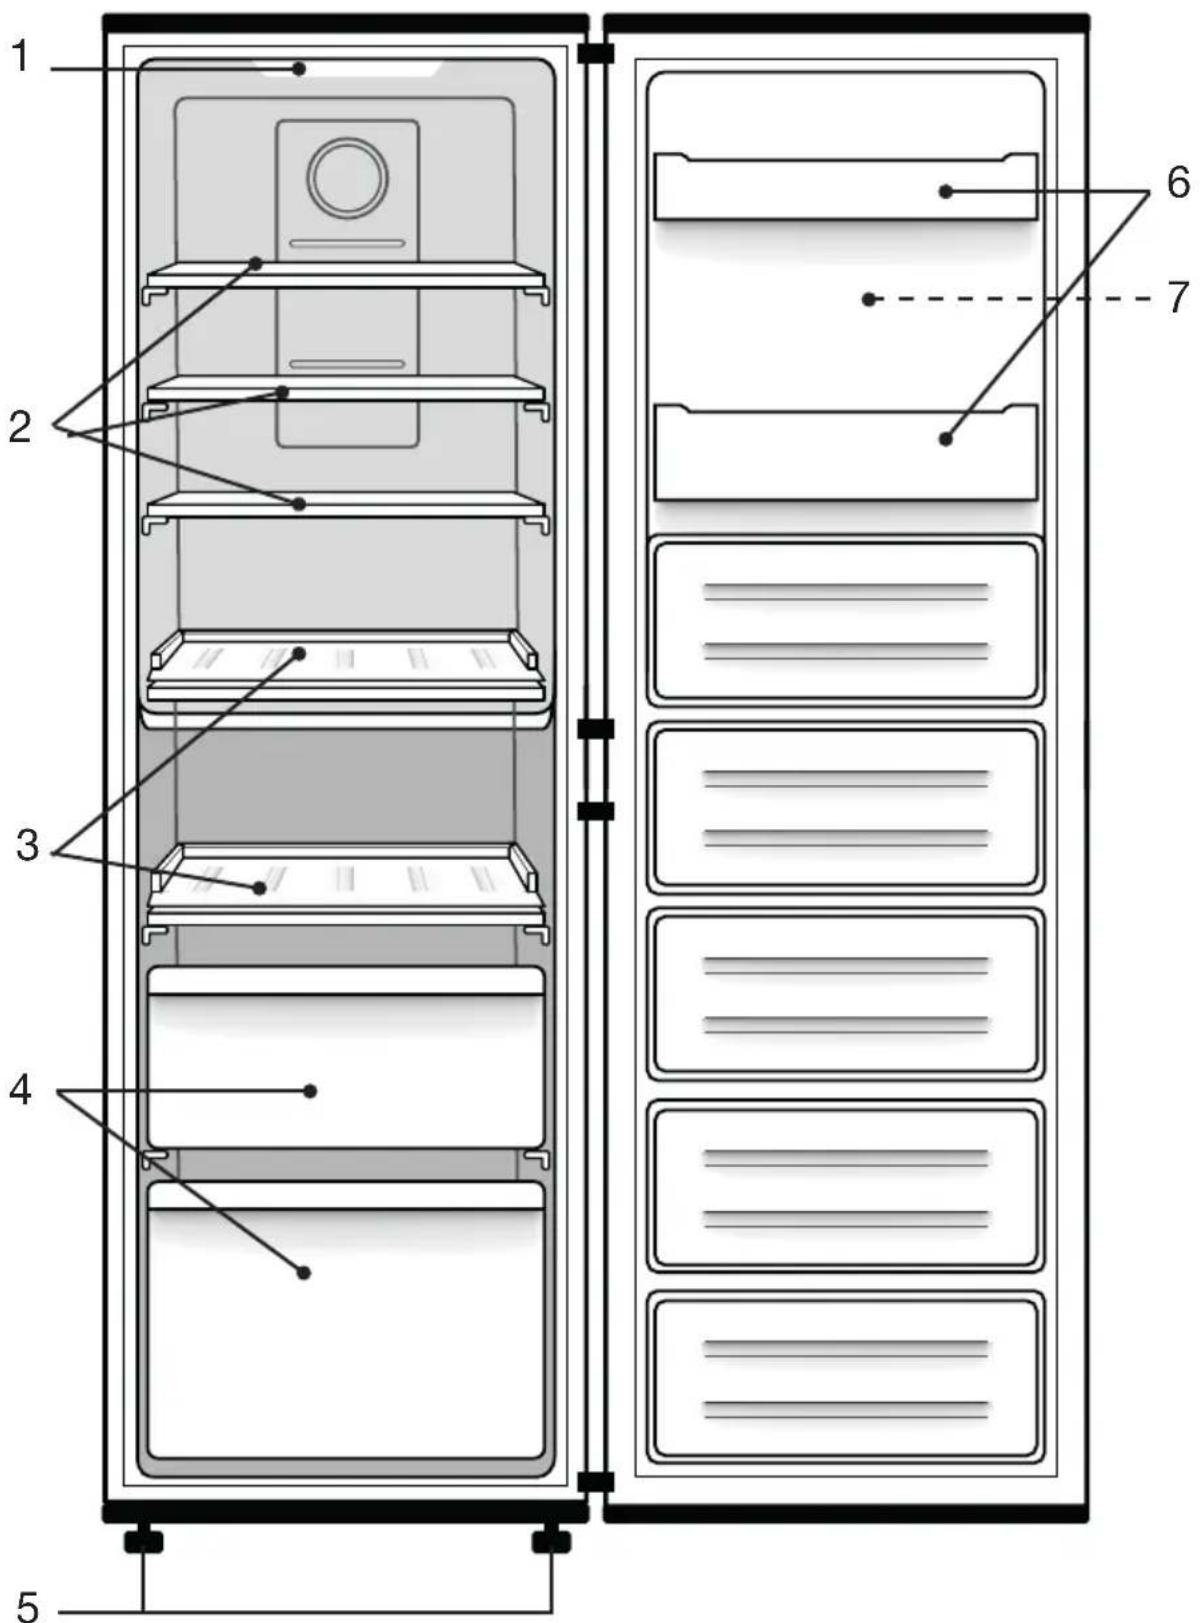
Front view of a white stainless steel refrigerator with a black door and handle (no visible text or symbols)Notice d'utilisation / User guide / Instrucciones de uso / Bedienungsanleitung / Gebruiksaanwijzing
| FR EN ES DE NL | |||||
| 1 | Éclairage LED LED lighting Ledverlichting | LED-Beleuchtung | Luz led | ||
| 2 | Clayettes en verre (x 3) | Glass shelves (x 3) | Bandejas de vidrio (x 3) | Glas-Ablagen (x 3) | Legplanken in glas (x 3) |
| 3 | Étagère en plastique (x 2) | Plastic tray (x 2) | Bandeja de plástico (x 2) | Plastikschale (x 2) | Plastic dienblad (x 2) |
| 4 | Tiroir de rangement (x 2) | Storage drawer (x 2) | Cajón de almacenamiento (x 2) | Ablage-Schublade (x 2) | Opberglade (x 2) |
| 5 | Pieds avant réglables en hauteur | Height-adjustable feet at the front | Verstelbare poten | Höhenvers-tellbare Füße vorne | Patas delanteras de altura ajustable |
| 6 | Balconnets de porte | Door shelves | Estantes de puerta | Türablagen Deurvakken | |
| 7 | Bandeau de commandes (sur la face avant) | Control panel (on the front panel) | Panel de control (en el panel frontal) | Bedienfeld (auf der Vorderseite) | Bedieningspaneel (op het voorpaneel) |
natural_image
Diagram showing a mechanical device with rotating components and an adjacent view of its motion, no text or symbols present.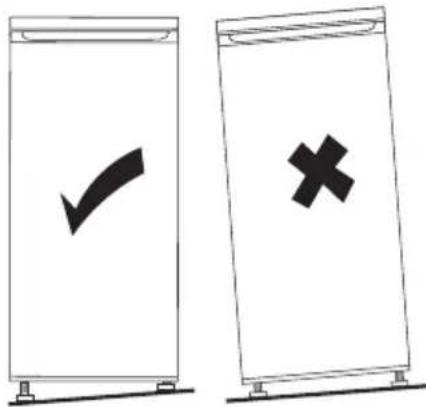
natural_image
Simple line drawing of a circular object with a vertical bar and a central circular element, no text or symbols present.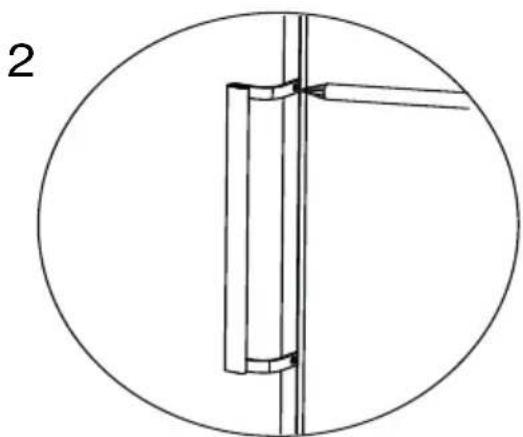
natural_image
Pure mechanical diagram showing a vertical pipe or tube mounted between two vertical rods inside a circle (no text or symbols)natural_image
Illustration of a hand holding a shelf with a tool, no text or symbols presentnatural_image
Technical line drawing of a mechanical component with two upward arrows indicating motion or force (no text or symbols)You have just purchased an Essentiel b branded product, and we thank you for your purchase. We pay particular attention to the RELIABILITY, EASE OF USE and DESIGN of our products.
We hope you will be completely satisfied with your new upright Freezer.
unpacking
- Remove the shipping box.
- Check that the appliance has not been damaged during transport. Do not plug in a damaged appliance under any circumstances! If the appliance is damaged, please contact your retailer.
- Remove all tape and packaging material on the inside and outside of the appliance.
Before first use
- Clean the inside of the appliance with lukewarm water with a little white wine vinegar added to it. Do not use soap or detergent as the odour may linger. After cleaning, completely dry the appliance.
- You can use white spirit to remove any remaining adhesive from the outside of the appliance.
- To clean the appliance, always unplug it, remove the fuses or switch off the circuit breaker.
installation
Installation location
- Place your freezer on a stable, level surface. Your appliance will be heavy when loaded with food: it must, therefore, be placed on a strong, solid floor.
- The appliance must be installed in a dry, well-ventilated room at room temperature (10°C minimum and 43°C maximum).
- The appliance should not be exposed to direct sunlight.
- The appliance must not be exposed to rain.
- The appliance must not be installed next to a radiator, a stove or any other
heat source.
- The appliance's energy consumption and efficient operation are affected by the room temperature.
- The appliance must be installed in such a way that the power point is accessible.
• After installing it, make sure that it is not resting on its power cord.
• Before plugging the appliance
into the mains socket for the first time, please let the appliance rest for two hours if the appliance was transported in the upright position, or 24 hours if the appliance was transported in the horizontal position. This is to allow the refrigerant gas to go back down into the compressor. Failure to comply with this waiting period may damage the compressor.
Climate class
Only install the appliance in a location where the room temperature matches the climate class for which it was designed (see table below).
The climate class is on the rating plate located on the outside of the appliance. The table below shows the correct room temperature for each climate class:
| Climate class Room temperature | |
| SN +10 to +32°C | |
| N +16 to +32°C | |
| ST +16 to +38°C | |
| T +16 to +43°C | |
Your ECAVE 185-60hob1 freezer is rated "SN/N/ST/T". If the room temperature is below or above the rated room temperature, the performance of your freezer may be affected, and your food may spoil.
Sufficient ventilation
Make sure that air can circulate freely around the appliance to ensure that it can work properly (see figure below). Also, make sure you leave enough space for the doors to open (see figure below).


| A | 600 |
| B | 650 |
| C | 1850 |
| D | min=50 |
| E | min=50 |
| F | min=10 |
| G | 835 |
| H | 123 |
| I | 115° |
(Values expressed in mm)
Levelling
For vibration-free operation, the appliance needs to be in a level position. To do this, adjust the adjustable front feet to properly balance the appliance.

natural_image
Diagram showing a mechanical device with rotating components and a separate circular inset illustrating the motion (no text or symbols)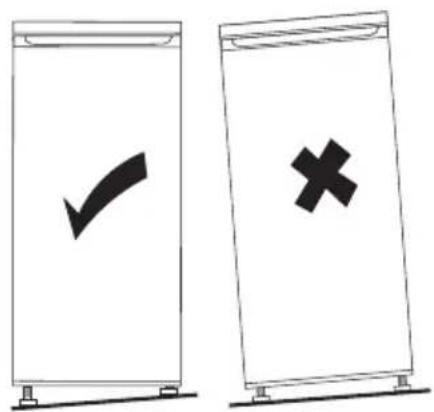
Fitting the door handle
When you receive your freezer, the door handle is not fitted. Please follow the steps below:

- Remove the covers from the screw holes using a flat screwdriver.
- Using a cross-head screwdriver, screw in the 2 screws provided to secure the handle to the door.
Reversing the opening direction of the door
You can change the direction that your freezer door opens, if necessary. To make this change, remove all accessories (drawers, etc.) and then, using a mobile device, scan the QR code below and follow the steps indicated. We recommend that you get help from another person or contact a qualified professional.

Unplug the appliance from the power point when reversing the opening direction of the door.
Note: the wiring for the power supply of the control panel is present on both sides of the door.

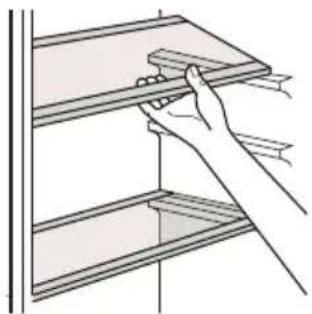
Removables shelves
The walls of the refrigerator are equipped with a series of runners allowing you to position the shelves according to your needs.
natural_image
Line drawing of a hand holding a shelf with a tool, no text or symbols presentPositioning the door shelves
You can remove the door shelves for cleaning. Gradually lift the shelf upwards until it comes free. After cleaning, reposition it in the opposite direction.

natural_image
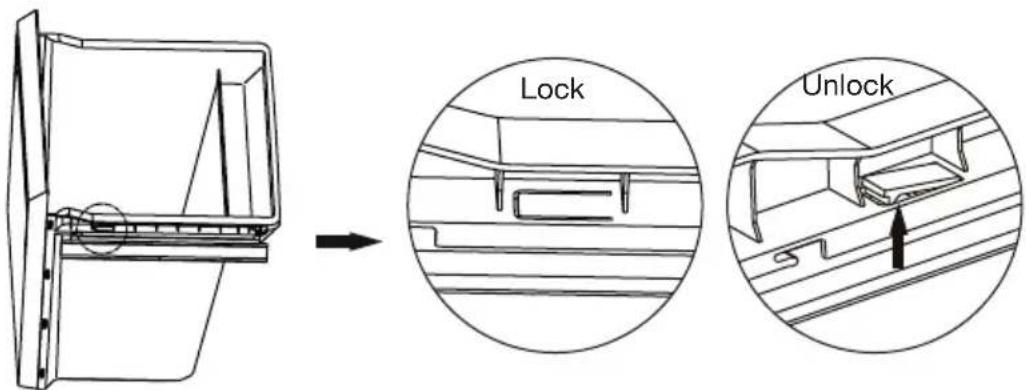
Diagram of a mechanical or architectural component with two upward arrows indicating direction (no text or symbols)Disassemble the bottom drawer
- Pull the lower drawer out to the stop position.
- Pull up the elastic tabs on both sides of the drawer.
- Then pull the lower drawer towards you.
Getting started
- Before plugging the appliance into the mains socket for the first time, please let the appliance rest for two hours to allow the refrigerant gas to stabilise in the compressor. Failure to comply with this waiting period may damage the compressor.
- Plug the appliance into a mains socket.
- Wait at least two hours before placing food in the appliance to ensure that the correct temperature has been reached inside the freezer.
Description and use of the control panel
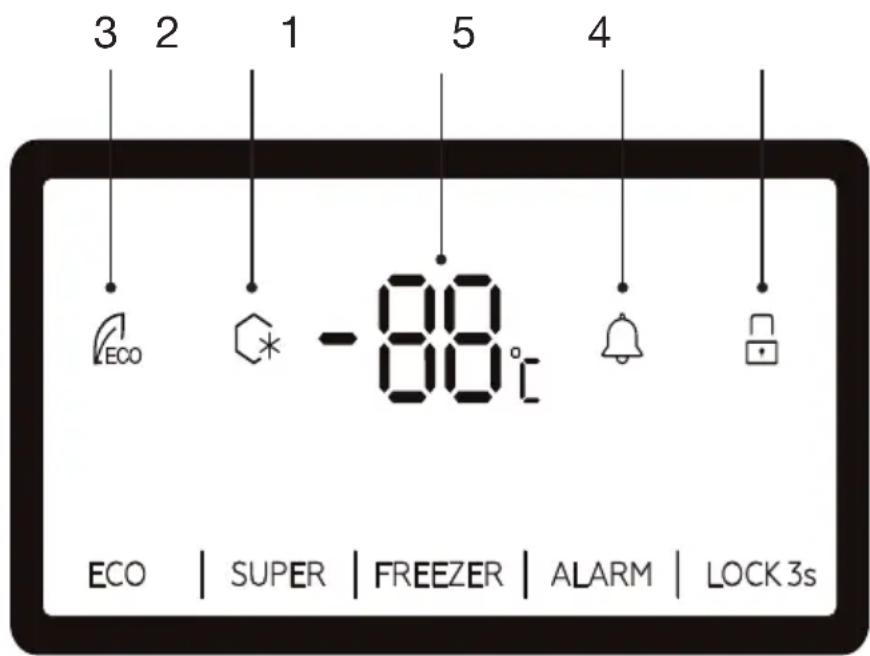
- Set temperature display
- SUPER FREEZING mode icon
- ECO mode icon
- Keys locking/unlocking
- Alarm
1. Setting the temperature
Press the FREEZER button one or more times to set the freezer temperature. You can set the temperature from -14^ to -22^ . Each press of the button decreases the temperature by 1^ . The temperature flashes for 5 seconds on the screen. It is set when the display becomes fixed.
For optimal food preservation, we recommend setting the freezer temperature to -18^ . Setting a high temperature will speed up food wastage. If you wish to change the temperature, follow the instructions below.
2. SUPER FREEZING mode
If you intend to freeze a large amount of fresh produce, select this option just before loading the appliance with this food. This function allows you to quickly lower the freezer temperature.
Press the SUPER button to choose this mode. The SUPER FREEZING mode icon flashes for 5 seconds and becomes fixed when the mode is selected.
In this mode, the temperature is automatically set to -25^ . You cannot change the temperature by pressing the FREEZER button.
To exit this mode, press the SUPER button again.
Note that this mode automatically turns off after 50 hours. When leaving this mode, the device resumes the settings that had been defined before this mode was selected.
NOTE: In SUPER mode, device noise may be slightly higher than normal operation.
3. Alarm
If the appliance door remains open for 90 seconds or if the internal temperature is abnormally high, an acoustic signal sounds. Close the door or briefly press the ALARM button to stop the acoustic signal.
If the temperature is abnormally high, “ht” and the detected temperature are displayed alternately on the screen. The display returns to normal when the temperature returns to normal.
4. ECO mode
When this mode is activated, the appliance adapts the temperature setting to the ambient temperature.
Press the ECO button for 3 seconds to choose this mode. The ECO mode icon flashes for 5 seconds and becomes fixed when the mode is selected. When this mode is activated, the device adapts the temperature setting to the ambient temperature.
| Ambient Temperature (Ta) | T_a ≤ 13°C | 14°C < T_a ≤ 20°C | 21°C < T_a ≤ 27°C | 28°C < T_a ≤ 34°C | T_a >35°C |
| Preset temperature | -18°C -1 | 8°C -18°C -16°C -1 | 5°C |
In ECO mode, you cannot change the temperature by pressing the FREEZER button.
To exit ECO mode, press the ECO button again for 3 seconds.
5. Key lock/unlock
Press the LOCK 3s button for 3 seconds to lock the control buttons.
The locked icon is displayed.
If you press a key, the symbol flashes 3 times to indicate that the keys are locked. No adjustment is possible.
Press the LOCK 3s button for 3 seconds to unlock the control buttons.
The (unlocked) icon is displayed. The keys are functional again.
If you press any button within 25 seconds, the control panel will lock automatically.
Making ice cubes
- Fill an ice cube tray up to three quarters of the way with cold water and place it in the freezer. The ice cubes will be ready in about two hours.
- You can easily remove the ice cubes by slightly twisting the tray or by running tap water over it.
As a reminder: appliance classification
| Type of appliance | Temperatures in the coldest compartment | Storage times |
| No stars Freezer: 0°C Ice cubes | ||
| * Freezer: -6°C Ice cubes | Short-term storage of frozen food: 3 to 4 days (*) | |
| ** Freezer: -12°C Ice cubes | Average frozen food storage time: 1 to 4 weeks (*) | |
| *** Storage compartment: Less than or equal to -18°C | Ice cubesLong-term frozen food storage: 3 months to 12 months | |
| **** Freezer compartment: -18°C to -24°C | Ice cubesLong-term frozen food storage: 3 months to 12 monthsIt is possible to freeze fresh products | |
(*) The storage time depends on the type of food; see the manufacturer's instructions on the food packaging.
- Your appliance is marked with the standard “4-star” logo. You can use this appliance to store frozen food for up to 12 months. You can also use this appliance to freeze fresh food and make ice cubes.
Food storage
Put frozen food in the freezer as quickly as possible, and make sure you:
- Do not store too many items in the storage drawers.
- Allow air to circulate around each item.
- Do not store unpackaged food.
Energy saving tips
Do not leave the door open for a long time because hot air will enter the refrigerator, and the cold air inside will escape, thereby wasting energy. Make sure there are no obstructions preventing the door from closing properly.
Advice for good food hygiene
- Do not place hot dishes in the freezer until they have cooled down, as food that is already frozen could spoil. Place fresh food to be frozen in the top 3 drawers and use the bottom drawer to store already frozen products. Do not mix products which are already frozen with fresh products.
- When you wish to freeze foods (meat, ground meat, fish, etc.), consider dividing items into portions so that they can be eaten all at once.
- Do not refreeze food that has thawed. This presents a risk to your health from food poisoning.
- When you buy frozen foods, make sure they have been properly frozen and that the packaging is not torn.
- When storing frozen food, observe the storage conditions indicated on the packaging. If there are no instructions, the food should be consumed as soon as possible.
- Food must be transported in appropriate packaging to maintain its quality and must be returned to the freezer as soon as possible.
- If the packaging of a frozen food is wet and smelly, the food may have been previously stored in poor conditions. Do not store this food!
- The shelf-life of frozen food changes with room temperature, repeated opening and closing of the door, the temperature setting, type of food and the time between when the food was purchased and when it was placed in the freezer. Always follow the instructions on the packaging and never exceed the use by date.
- WARNING: bottles and cans should not be placed in the freezer. They can burst when the contents freeze, and sodas can even explode! Never store fizzy drinks, juice, beer, sparkling wine, etc. in the freezer.
- WARNING: do not put ice cream or ice in your mouth immediately after taking it out of the freezer. Very cold ice can freeze on your lips or tongue and hurt you.
- WARNING: do not touch frozen foods with wet hands. The ice could stick your hands to the food.
- WARNING: do not use electrical appliances (e.g. electric ice cream makers,
blenders, etc.) in the freezer.
- WARNING: the freezer may not work properly (risk of thawing of the contents or temperature too high) when the appliance is placed at an ambient temperature lower than that for which it is designed for a prolonged period.
cleaning and maintenance
Cleaning
Before cleaning the appliance, always turn it off and unplug it, or remove the fuses or flip the circuit breaker to the off position.
- We recommend that you clean and disinfect your appliance regularly (at least once a year) for better hygiene and food preservation.
- Remove all food from the freezer.
- Clean the inside of the freezer and its accessories with baking soda dissolved in water (1 tablespoon for every 4 litres of water).
- Do not use alcohol, abrasive powders or detergents as they may damage the surfaces.
- Rinse with clear water and then wipe with a soft cloth.
Defrosting
Your ventilated cold appliance will automatically defrost. The defrost water is collected in the evaporation pan located at the bottom of the back of the freezer. The water automatically evaporates from this pan.
troubleshooting guide
Noises when running
The following noises are typical for freezers:
- Clicking: when the compressor starts or stops, there is a clicking sound.
- Whirring: when the compressor is running, you hear it whirring.
- Gurgling/babbling: when refrigerant flows into the narrow tubes, gurgling and babbling can be heard. Even after the compressor stops, these noises continue for a short time.
In case of power failure
- If the power failure does not last very long, there is no risk of your food spoiling. However, do not open the door. The operating autonomy of your appliance is indicated in the product information sheet. This duration is significantly shortened depending on the load of the appliance.
- The appliance will restart with the settings applied before the power failure when the power is restored.
- If the power failure is prolonged, transfer the products to another appliance.
- As soon as you notice that thawing has started, eat the food as quickly as possible.
- Important! Any food that has thawed should not be refrozen.
- In the event of a short-term power failure (less than 5 minutes), in order to protect the compressor, it will not restart immediately after the power is restored.
Fixing a malfunction
A malfunction may be caused by a minor problem that you can solve yourself with the help of the instructions below. Before contacting your retailer's after-sales service centre, check the following:
1) Your appliance doesn't work:
Check:
• That it is properly plugged in;
- That the circuit breaker has not been tripped.
2) The appliance is getting too cold:
- The temperature setting is too low.
3) The appliance does not cool down enough:
- You may have put some hot food or too much food in the unit.
- The door may not be closed properly.
- The door's seals may be damaged.
- The temperature setting may not be properly adjusted.
4) The door is hard to open :
- You may find it hard to open a freezer door that has just been closed. When the door is opened, the cold air that escapes from the unit is replaced with air at room temperature. When this warm air cools, the pressure inside decreases forming a vacuum that makes it difficult to open the door. After a few minutes, the pressure inside the freezer will return to normal, and you can easily open the door.
If the information above does not help you solve your specific problem, do not attempt to perform any repairs on the appliance yourself; Contact your retailer's after-sales department.
IMPORTANT: only service technicians are competent to carry out repairs on this appliance. Non-compliant repairs may be dangerous for the user and are not covered by the warranty.
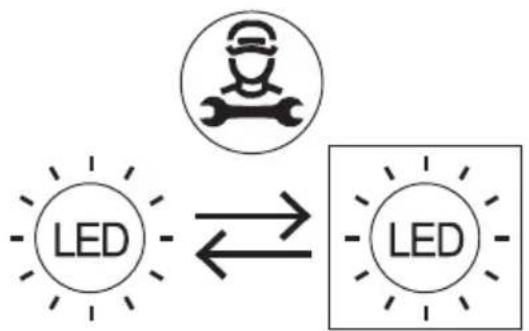
Inside light
The inside of the refrigerator is illuminated by an LED lamp, which is characterised by low energy consumption and a long service life. In the event of an anomaly, please contact the after-sales service for repair, as the lamps can only be replaced by the after-sales service.
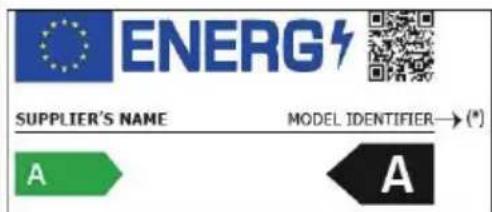
This product contains a light source of energy efficiency class ‘G’.
Light source in this product is replaceable only by qualified engineers.
flowchart
graph LR
    A["LED"] <--> B["Robot Icon"]
    B --> C["LED"]
| i INFORMATION | |
| You can find information on the models as recorded in the product database on the following website by searching for your model ID (*), which can be found on the energy label:https://eprel.ec.europa.eu/ | |
The service life of your appliance is 5 years. During this period, original spare parts will be available to ensure proper operation of the appliance.
Link to the manufacturer's website where the information referred to in point 4 a of the Annex to Commission Regulation (EU) 2019/2019 can be found:
https://www.boulanger.com/info/assistance/
| A | 600 |
| B | 650 |
| C | 1850 |
| D | min=50 |
| E | min=50 |
| F | min=10 |
| G | 835 |
| H | 123 |
| I | 115° |
natural_image
Diagram showing a mechanical device with rotating components and an adjacent view of its motion, no text or symbols present.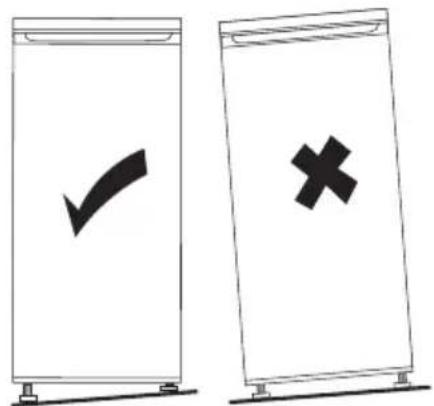
natural_image
Simple circular diagram with a central circle and two vertical lines, no text or symbols present.
natural_image
Pure mechanical assembly diagram showing a vertical pipe or pipe fitting inside a circular frame (no text or symbols)natural_image
Illustration of a hand using a tool to clean or store shelves (no text or symbols visible)natural_image
Technical line drawing of a mechanical component with two upward arrows indicating motion or force (no text or symbols)flowchart
graph TD
    A["LED"] --> B["Robot Icon"]
    B --> C["LED"]

INFORMATION
| A | 600 |
| B | 650 |
| C | 1850 |
| D | min=50 |
| E | min=50 |
| F | min=10 |
| G | 835 |
| H | 123 |
| I | 115° |
natural_image
Diagram showing a mechanical component with rotational arrows and an adjacent circular view of a bracket (no text or symbols)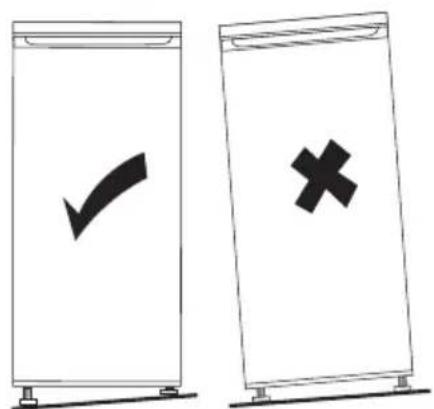
natural_image
Simple circular diagram with a central circle and two vertical lines, no text or symbols present.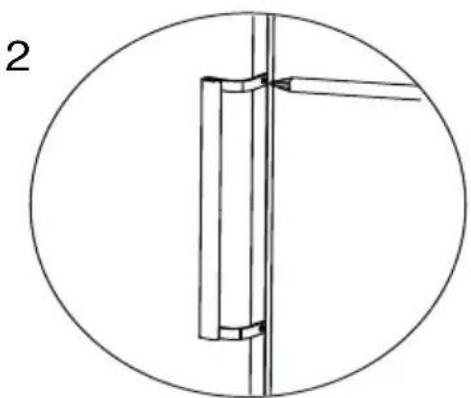
natural_image
Pure mechanical assembly diagram showing a vertical pipe or pipe connection within a circular frame (no text or symbols)natural_image
Line drawing of a hand using a tool to lift or adjust a wooden shelf (no text or symbols)natural_image
Technical line drawing of a mechanical component with two upward arrows indicating motion or force (no text or symbols)https://eprel.ec.europa.eu/
| A | 600 |
| B | 650 |
| C | 1850 |
| D | min=50 |
| E | min=50 |
| F | min=10 |
| G | 835 |
| H | 1323 |
| I | 115° |
natural_image
Diagram showing a mechanical component with rotational arrows and an adjacent view of a cabinet (no text or symbols)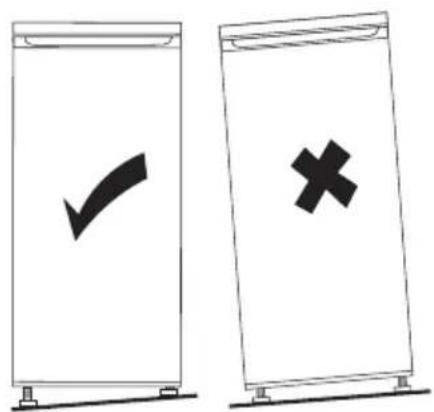
natural_image
Simple circular diagram with a central circle and two vertical lines, no text or symbols present.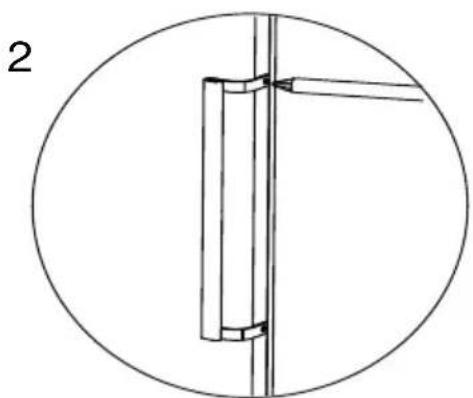
natural_image
Pure mechanical diagram showing a vertical pipe or pipe assembly inside a circle, with no text, numbers, or symbols present.natural_image
Line drawing of a hand holding a shelf with a handle, no text or symbols presentnatural_image
Diagram of a mechanical or architectural component with two upward arrows indicating direction (no text or symbols)flowchart
graph LR
    A["LED"] --> B["Robot Icon"]
    B --> C["LED"]
All information, designs, drawings and pictures in this document are the property of SOURCING & CREATION. SOURCING & CREATION reserves all rights to its brands, designs and information. Any copy and reproduction through any means shall be deemed and considered as counterfeiting.
Protection of the environment
This symbol attached to the product means that it is an appliance whose disposal is subject to the directive on waste from electrical and electronic equipment (WEEE). This appliance may not in any way be treated as household waste and must be subject to a specific type of removal for this type of waste. Recycling and recovery systems are available in your area (waste removal) and by distributors.
By taking your appliance at its end of life to a recycling facility, you will contribute to environmental conservation and prevent any harm to your health.
\* Tested in our laboratories
Warranty valid from the date of purchase (receipt as proof of purchase). This warranty does not cover defects or damage caused by improper set up, incorrect use, or normal wear and tear of this product.
Ref. ECAVE 185-60hob1
SERVICE RELATION CLIENTS /
Customer Relations Department /