
ECHS 2000VH - Heating appliance Essentiel B - Free user manual and instructions
Find the device manual for free ECHS 2000VH Essentiel B in PDF.


| Product type | Ceramic fan heater |
| Brand | Essentiel B |
| Model | ECHS 2000VH |
| Maximum power | 2000 W |
| Minimum power | 1200 W |
| Power supply | 220-240 V ~ 50 Hz |
| Recommended heating area | 15 to 20 m² |
| Temperature range | 5 to 35 °C |
| Operating modes | High intensity, Medium intensity, Eco, Ventilation |
| Timer (auto-off) | 1 to 24 hours |
| Delayed start | 1 to 24 hours |
| Oscillation | Yes, 90° |
| Remote control | Yes (AAA batteries not included) |
| Display | LCD, adjustable auto-off |
| Safety | Thermal (auto shut-off in case of overheating) |
| Filter | Washable and removable |
| Cleaning | Damp cloth, vacuum for grilles |
| Installation positions | Vertical or horizontal |
| Standby consumption | 0.29 W |
| Box contents | 1 heater, 1 remote control, 1 manual |
| Control type | Electronic with daily programmer |
| Nominal thermal power | 2.0 kW |
| Minimum indicative thermal power | 1.2 kW |
| Maximum continuous thermal power | 2.0 kW |
Frequently Asked Questions - ECHS 2000VH Essentiel B
User questions about ECHS 2000VH Essentiel B
0 question about this device. Answer the ones you know or ask your own.
Ask a new question about this device
Download the instructions for your Heating appliance in PDF format for free! Find your manual ECHS 2000VH - Essentiel B and take your electronic device back in hand. On this page are published all the documents necessary for the use of your device. ECHS 2000VH by Essentiel B.
USER MANUAL ECHS 2000VH Essentiel B
Ceramic fan heater ECHS 2000VH
natural_image
Black and white cylindrical device with 'essentiel D' branding on top (no other text or symbols visible)To help you get the best out of your purchase
This product may only be used in well-insulated rooms or occasionally.
natural_image
Line drawing of a remote control panel with buttons and a circular dial (no text or symbols)We thank you for purchasing an essential brand product. We say special attention to the RELIABILITY, EASE OF USE and DESIGN of our products. We hope that, you will be fully satisfied with this heater.
your product
Contents of the box
- 1 ceramic heater
- 1 remote control
- 1 user manual
Appliance description
OVERVIEW

| 1 Front panel 4 Hot air exhaust grille | ||
| 2 [Rear] Carrying handle 5 [Rear] Power switch | ||
| 3 Control panel 6 [Rear] Air intake grille with filter | ||
14 essentiel
your product
CONTROL PANEL AND REMOTE CONTROL
The buttons on the remote control have the same functions as those on the control panel.

natural_image
Line drawing of a remote control with buttons and a circular dial (no text or symbols)| Switching the appliance on/off | |
| Selecting the heating mode | |
| Programming the timer / a delayed start | |
| Increasing the temperature/timer | |
| Decreasing the temperature/timer | |
| Activating/deactivating oscillation |
Technical features
• Power: 2000 W max.
• For an area of 15 to 20 m²
• Supply voltage: 220-240 V\~ 50 Hz
- Adjustable 5 to 35^ C thermostat
• 2 heating powers: 1200 W and 2000 W
- "Eco" and "Ambient air ventilation"
functions
• LCD screen
• 2 positions: vertical and horizontal
- Programmable timer from 1 to 24 hours
• Programmable delayed start from 1h to 24h
- Memory function
• Thermal safety
- Carrying handle
• The remote control works with 2 x 1.5V
LR03/AAA batteries (not included)
essentel
your product
datasheet
| Model reference: | 8003546_CHAUFFAGE SOUFFLANT CERAMIQUE ECHS 2000VH | ||||
| Feature Symbol | Value Unit | Feature Unit | |||
| Thermal power | Type of heat supply, for electric decentralised storage heaters only (select one type only) | ||||
| Rated thermal input | RTI 2.0 | kW Manual thermal load control with integrated thermostat | load | no | |
| Minimum thermal power (indicative) | Pmin 1.2 | kW Manual thermal load control with information received on room and/or outdoor temperature | no | ||
| Maximum continuous thermal power | Imax,c 2.0 | kW Electronic thermal load control with information received on room and/or outdoor temperature | no | ||
| Electricity consumption from auxiliary equipment | Fan-controlled thermal power | no | |||
| In rated thermal input mode | elmax 1.8 | 308 kW Type of thermal power/room temperature control (select one type only) | |||
| In minimum thermal power mode | elmin 1.1 | 103 kW Single-level thermal power control, no room temperature control | no | ||
| In standby mode | eISB 0.29 W | Control with two or more manual levels, no room temperature control | no | ||
| Room temperature control with mechanical thermostat | no | ||||
| Electronic room temperature control | no | ||||
| Electronic room temperature control and daily timer | yes | ||||
| Model reference: | 8003546_CHAUFFAGE SOUFFLANT CERAMIQUE ECHS 2000VH | ||||
| Feature Symbol | Value Unit | Feature Unit | |||
| Electronic room temper-ature control and weekly timer | no | ||||
| Other control options (select one or more options) | |||||
| Room temperature control with presence detector | no | ||||
| Room temperature control with open window detector | no | ||||
| Remote control option | no | ||||
| Adaptive activation control | no | ||||
| Limitation of activation time | no | ||||
| Black globe sensor | no | ||||
| Contact details: | Sourcing&Creation, Avenue de la Motte 59810 Lesquin - FRANCE | ||||
installing the appliance
- Install the appliance on a flat and stable surface.
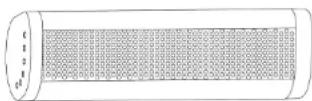
- For optimum operational convenience, you can position the appliance vertically (control panel facing upwards) or horizontally (control panel facing left). In the event of a horizontal installation, make sure the air intake and exhaust grilles are completely clear.

Vertical position Horizontal position
use
Inserting the batteries into the remote control
- Remove the battery compartment cover on the back of the remote control.
- Insert two 1.5V AAA batteries, matching the polarity (+/-).
- Close the cover.

If you do not use the appliance for a while, remove the batteries from the remote control. Do not use old batteries with new batteries or different types of batteries together.
USING THE REMOTE CONTROL
- Point the remote control at the top of the front panel so that the infrared receiver can receive the information transmitted.
• Make sure there are no obstacles between the remote control and the fan.
Connection and standby
- Plug the appliance into an easily accessible wall socket, then set the power switch (0/I) on the back of the appliance to "I" (on).
• A beep sounds and the appliance automatically goes into standby mode.
Switching the appliance on/off
- Press the ⏻ button on the control panel or remote control to switch on the appliance. By default, the appliance starts in "High intensity" mode at a temperature of 35^ C.
- Press this button again to put the appliance on standby.
Selecting the heating mode
When the appliance is switched on, press the ≈button on the control panel or remote control repeatedly until you reach the heating mode of your choice:

High intensity: the appliance runs on full power and the and symbols are displayed on screen. The intensity bar is fully lit. The selected temperature is shown on screen.
Medium intensity: the appliance runs on medium power and the 1 and 2 symbols are displayed on screen. The intensity bar is half lit. The selected temperature is shown on screen.
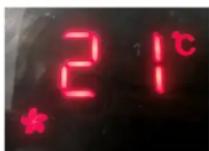
Ventilation: the appliance does not heat and ventilates ambient air. The symbol and the selected temperature are displayed on screen.

Eco: the appliance is running on economical heating power and automatically adjusts the temperature to keep it constant in the room. The symbol, the selected temperature and the word "eco" are displayed on screen.

The power consumption depends on the selected heat position. For improved energy efficiency, select a high heating power first (2000 W), then switch to low power (1200 W) once the desired heat has been reached.
Controlling the temperature
Having selected the "High intensity" or "Medium intensity" or "Eco" mode, press the ▲ and ▼ buttons on the control panel or remote control repeatedly until you reach the desired temperature (between 5 and 35°C). The selected temperature is displayed and the screen flashes for 10 seconds once it has been reached.
The heating function turns on and off automatically to keep the room at the temperature you have selected.
The temperature control does not work in "Ventilation" mode.
Oscillation function
-
When the appliance is switched on, press the √ button on the control panel or remote control to activate the oscillation. The flaps inside the appliance oscillate at a 90° angle and the oscillation symbol appears on screen.
-
Press this button again to deactivate the oscillation. The oscillation symbol goes out. The appliance remains in the position it was in at the time of deactivation.
Programming the timer
The timer allows you to program both an appliance auto-off (e.g. for the appliance to stop automatically at a certain time) or a delayed start (e.g. for the appliance to heat the room before you enter).
PROGRAMMING AN AUTO-OFF
- When the appliance is switched on, press the ⏻ button on the control panel or remote control.
- Press the ▲ and ▼ buttons on the control panel or remote control repeatedly to set the desired operating time (1 to 24 hours). The Symbol and the selected time are displayed on screen during setting.
When setting is complete, the hour countdown begins and the screen shows the temperature again.
- When the time has elapsed, the appliance automatically stops operating and goes into standby mode.
Note: the timer is deactivated if the appliance is switched off using the ⏻ button during the countdown.
PROGRAMMING A DELAYED START
- Switch on the appliance, select a heating mode, temperature and oscillation if desired by referring to the previous sections.
- Switch off the appliance by pressing the button.
- Press the button on the control panel or remote control.
- Press the ▲ and ▼ buttons on the control panel or remote control repeatedly to set the time after which the appliance will start operating (1 to 24 hours). The Symbol and the selected time are displayed on screen during setting.
When setting is complete, the hour countdown begins. - When the time has elapsed, the appliance starts automatically.
MODIFYING OR CANCELLING AN AUTO-OFF AND A DELAYED START
- To change a timer which has already been programmed, press the button, then press the ▲ and ▼buttons repeatedly until you reach the desired time.
- To cancel the current timer, press the ⏻ button, then press the ▲ and ▼ buttons repeatedly until the display shows "0". The screen switches off completely.
Switching the screen on/off
By default, the screen switches off approximately one minute after your settings (except for the symbol which remains on if the appliance is in the heating phase). This avoids, for example, light projections in a room at night. If you want the screen to stay on constantly, proceed as follows:
- Simultaneously press the ▲ and ▼ buttons on the control panel, and hold them down for 3 seconds until a beep sounds. The screen lights up continuously.
- To switch the display off again after you have made your settings, simultaneously press the ▲ and ▼buttons on the control panel for 3 seconds until a beep sounds.
When you have finished
- When you have finished, press the ⏻ button to switch the appliance off. Ventilation continues for 15 seconds to allow the appliance to cool down. The ventilation countdown appears on screen, after which the appliance automatically stops at the end of the countdown.
Note: If you leave the appliance in standby mode, it will operate in accordance with the last settings made when it is restarted. - When the appliance is turned off, set the switch on the back of the appliance to 0 (power off) and unplug the appliance.

• Thermal safety: if the appliance overheats (e.g. if a cloth covers the appliance), it automatically stops working. Uncover it before restarting it.
cleaning and maintenance
IMPORTANT:
- Always unplug the power cord from the power socket and allow the appliance to cool down before cleaning or maintaining it.
- Never immerse the appliance in water or any other liquid.
- Never use abrasive cleaning products on this appliance (alcohol, solvent).
Basic cleaning
- Use a slightly damp cloth to wipe the outside of the heater to remove dust and dirt.
- Use a vacuum cleaner to remove dust from ventilation holes.
- Make sure the heater is dry before unplugging it.
Thorough cleaning
-
Gently pull the release latches at the bottom of the air intake grille on the back of the appliance, then remove the grille.
-
Pull out the black filter behind the grille.
- Soak the filter in clean, clear water for a few minutes, then dry it thoroughly.
- Clean the filter compartment with a soft, dry cloth.
- Put the dry filter back behind the grille.
- Put the air intake grille back on the appliance until it clicks into place.
If the appliance is not going to be used for an extended period
If you do not plan to use the appliance for an extended period:
- Turn off and unplug the appliance.
- Clean the appliance as described in the section above.
- Remove the batteries from the remote control and store them with the appliance in a clean, dry place.
troubleshooting guide
Before contacting your customer service department, please run the rudimentary checks listed below. If you are unable to solve the problem, never attempt to repair the appliance yourself. Please contact your retail store's customer service department.
Troubleshooting
| Problem | Possible cause |
| The appliance is not working. | The plug is disconnected or does not work. Plug the heater into a suitable wall socket.The appliance is turned off. Turn the on/off switch (0/l) to I (on), then press the button.There has been a power outage.The fuse is blown or the circuit breaker has tripped. Replace the fuse or switch on the circuit breaker.The batteries in the remote control are worn out. Replace them. |
| The appliance is vibrating. | The heater is not placed on a flat surface. Always install your appliance on a flat, stable surface. |
| The remote control is not working. | Make sure the remote control is not too far from the appliance.Point the remote control at the infrared sensor on the display screen.Make sure there are no obstacles between the remote control and the infrared sensor.The batteries in the remote control are worn out. Replace them. |
Error codes
| Display | Cause |
| E1 flashing + 10 beeps | The appliance's safety system was triggered by a short circuit.Turn off and unplug the appliance.Please contact your retail store service desk. |
| E2 flashing + 10 beeps |
natural_image
Line drawing of a remote control panel with buttons and a numeric keypad (no text or symbols)natural_image
Line drawing of a remote control with circular dial and directional buttons (no text or symbols)All information, designs, drawings and pictures in this document are the property of SOURCING & CREATION. SOURCING & CREATION reserves all rights to its brands, designs and information. Any copy and reproduction through any means shall be deemed and considered as counterfeiting.
Ceramic fan heater ECHS 2000VH
Protection of the environment
This symbol attached to the product means that it is an appliance whose disposal is subject to the directive on waste from electrical and electronic equipment (WEEE). This appliance may not in any way be treated as household waste and must be subject to a specific type of removal for this type of waste. Recycling and recovery systems are available in your area (waste removal) and by distributors. By taking your appliance at its end of life to a recycling facility, you will contribute to environmental conservation and prevent any harm to your health.
Tested in our laboratories
Warranty valid from the date of purchase (receipt as proof of purchase). This warranty does not cover defects or damage caused by improper set up, incorrect use, or normal wear and tear of this product.
Please behave responsibly towards
the environment. Recycle this product
at the end of its life.
- your product
- Contents of the box
- Technical features
- installing the appliance
- use
- Inserting the batteries into the remote control
- Connection and standby
- Switching the appliance on/off
- Selecting the heating mode
- Controlling the temperature
- Oscillation function
- Programming the timer
- PROGRAMMING A DELAYED START
- Switching the screen on/off
- When you have finished
- IMPORTANT:
- Basic cleaning
- Thorough cleaning
- If the appliance is not going to be used for an extended period
- troubleshooting guide
- Ceramic fan heater ECHS 2000VH
- Protection of the environment
- Tested in our laboratories
Brand : Essentiel B
Model : ECHS 2000VH
Category : Heating appliance