ERSCB-3479b - Heating Essentiel B - Free user manual and instructions
Find the device manual for free ERSCB-3479b Essentiel B in PDF.

| Product type | Fan heater |
| Brand | Essentiel B |
| Model | ERSCB-3479b |
| Reference | 8009158 |
| Weight | 2.1 kg |
| Power supply | 220-240 V ~ 50 Hz |
| Heating power | 1300 W / 2000 W |
| Thermostat | Electronic, adjustable from 5 to 35 °C |
| Display | Digital with display |
| Special functions | Eco mode, Timer (0-12 h), Oscillation, Memory function |
| Recommended area | Up to 20 m² |
| Protection rating | IP21 (bathroom compatible) |
| Safety | Thermal protection, anti-tilt safety |
| Cord length | 1.60 m |
| Seasonal energy efficiency | 91.5 % |
| Filter maintenance | Removable anti-dust filter, washable with clean water |
| Exterior cleaning | Soft damp cloth, no abrasive products |
| Storage | In a clean, dry place after turning off and unplugging |
Frequently Asked Questions - ERSCB-3479b Essentiel B
User questions about ERSCB-3479b Essentiel B
0 question about this device. Answer the ones you know or ask your own.
Ask a new question about this device
Download the instructions for your Heating in PDF format for free! Find your manual ERSCB-3479b - Essentiel B and take your electronic device back in hand. On this page are published all the documents necessary for the use of your device. ERSCB-3479b by Essentiel B.
USER MANUAL ERSCB-3479b Essentiel B
natural_image
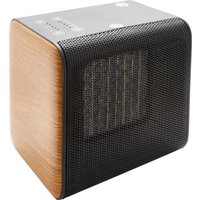
White electric heating power heater with mesh grille and black top (no visible text or symbols)This product may only be used in well-insulated rooms or occasionally.
We thank you for purchasing an Esseniel b brand produce. We pay special attention to the RELIABILITY, EASE OF USE and DESIGN of our products. We hope that you will be fully satisfied with this space heater.
contents
your product 13
Contents of the box 13
Technical features 13
datasheet 14
use 15
Eco function 17
Time function 18
Memory function 18
cleaning and maintenance 19
Filter maintenance 19
your product
Contents of the box
- 1 space heater
- 1 user guide
Technical features
• Supply voltage: 220-240 V
- Mains frequency: 50 Hz
- 2 heating powers: 1300 & 2000 W
- Electronic thermostat
• Digital display
- Eco mode
- Timer
- Single position or oscillating
• Thermal safety
• Tip-over safety feature
- Carrying handle
• Power cord length: 1.60 m
• Weight: 2.1 kg
• Bathroom compatible (IP 21 protection)
• Compatible with 20 m² areas
datasheet
Information requirements for electric local space heaters (UE 2024/1103)
| Contact details Sourcing & CréationAvenue de la Motte 59810 LESQUIN - FRANCEcontact@sc-ub.com | ||||||
| Model(s) identifi er 8009158 Space | Heater Essentiel B ERSCB-3479b | |||||
| Item Symbol Value Unit Item Unit | ||||||
| Heat output | Type of heat output / room temperature control (select one) | |||||
| Nominal heat output | Pnom 2.00 kW | Single stage heat output and no room temperature control | no | |||
| Minimum heat output (indicative) | Pmin 1.30 kW | Two or more manual stages, no room temperature control | no | |||
| Maximum continuous heat output | Rmax,c 2.00 kW | With mechanic thermostat room temperature control | no | |||
| Power consumption | With electronic room temperature control | yes | ||||
| In off mode | Po 0,00 W | Electronic room temperature control plus day timer | no | |||
| In standby mode | Psm 0,25 W | Electronic room temperature control plus week timer | no | |||
| In idle mode | Pidle | 0,25 W | Other control options (multiple selections possible) | |||
| In network standby | Pnsm | N/A | W | Room temperature control, with presence detection | no | |
| Standby mode with display of information or status | no | Room temperature control, with open window detection | no | |||
| Seasonal space heating energy effi clency in active mode | Ns,on | 91,5 | % | Distance control option | no | |
| Adaptive start control | no | |||||
| Working time limitation | yes | |||||
| Black bulb sensor | no | |||||
| Self-learning functionality | no | |||||
| Control accuracy | no | |||||
use
IMPORTANT: before using this device, it is essential that you place it on a flat and stable surface, otherwise the tip-over safety feature will prevent it from operating.
The appliance should not be used if it has been dropped or if there are visible signs of damage.

- Make sure the main switch (6) at the rear of the device is in the Off position, then plug the power cord (5) into the mains socket.

- Set the main switch (6) to the On position: the device beeps twice and the light ⏻ (17) activates on the control panel, indicating the device is in standby.

- Press the on/off button (10): the device beeps once and turns on at low power, represented by the appearance of the light- (18) on the control panel.

When you turn the device on for the first time or after unplugging it and plugging it back in, it turns on at low power, to a temperature of 35^ C.

- Press the oscillation button ⏻ (15) if you want to enable oscillation: the device beeps once and turns back and forth; the light ⏻ (21) appears on the control panel.

- Press the power selection button ⚙ (11) to set the heating power. Each press allows you to switch between
- the lowest heating power: light ⚙ (18) on the control panel;
- the highest heating power: ⚙ light (23) on the control panel.

- Setting the temperature. Press the temperature control button (13) until the light °C (24) appears and the display (19) begins flashing. You then have 5 seconds to set your choice of temperature between 5 and 35°C using the + (14) and - (12) buttons. The temperature is saved automatically after 5 seconds and the display stops flashing.

- The control panel shows the set temperature and not the temperature in the room.
- If you do not press any buttons for 1 minute, the control panel automatically dims to save electricity. As soon as you press a button, the brightness returns to its standard level.
- If you press and hold the + (14) or - (12) button, the numbers will cycle through faster.
- When the desired temperature is reached, the device stops running. It automatically restarts when the temperature in the room drops again.
Important: if oscillation is enabled, both heating and oscillation stop once the setpoint temperature is reached. However, the internal fan continues to run for 60 seconds.
-
When you have finished, press the On/Off button (10): heating and oscillation stop. The internal fan continues to run for 60 seconds to cool the device down. A countdown appears on the control panel. After 60 seconds, the device goes into standby mode, represented by the appearance of the light (17) on the control panel.
-
Switch Off the main switch (6) and unplug the device.
Note: do not switch Off the main switch or unplug the device before it has entered standby mode.

Thermal safety:
In the event of overheating, the safety device automatically activates and the device powers down. Set the main switch to the Off position, unplug the device and leave it to cool. It can then be restarted normally.
Eco function
The Eco function allows the heating power to be set automatically, without your involvement, using a temperature sensor that detects the temperature in the room in order to save energy.

-
While the device is on, press the Eco mode button (16). The light (22) appears on the control panel.
-
The device automatically selects:
-
high heating power if the room temperature is below 18°C;
- low heating power if the room temperature is between 18°C and 25°C;
-
off if the room temperature is above 25°C (it enters standby).
-
To turn off the Eco function, press th Eco mode button (16) again. The most recently selected settings are reactivated.
Note: with the exception of heating power selection, the other features are still available in Eco mode.
Time function
The Timer function is used to set the operating time after which the device will automatically shut down.

-
Press the timer control button ⚠ (13) until the light h (20) appears and the display (19) begins fl ashing. You then have 5 seconds to set your choice of duration between 0 and 12 hours using the + (14) and - (12) buttons.
-
Once the selected duration elapses, the device automatically shuts down and enters standby mode.

The control panel alternates between showing the set temperature and the timer countdown.
Memory function
The device has a memory function that saves the latest settings in the event of a power outage.
This feature does not apply when the main switch (6) is in the Off position or if the device is unplugged.
cleaning and maintenance
IMPORTANT:
- Always unplug the power cord from the mains and allow the device to cool before cleaning or maintenance.
- Never immerse the appliance in water or any other liquid.
For optimal operation, the device requires regular maintenance:
- Wipe the outer surfaces of the device using a soft, slightly damp cloth to remove dust and dirt. Never use abrasive cleaning products on this device (alcohol, solvent, etc.).
- Use a vacuum cleaner to remove dust from the grilles.
- Make sure the device is completely dry before plugging it back in.
- If not used for an extended period, turn off and unplug the device, then store it in a clean dry place.
Filter maintenance
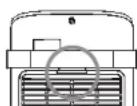
Regular fi Iter maintenance ensures the device will operate optimally. Please follow the steps below:
- Remove the rear protective cover using the provided notches (see image opposite). You can then access the dust filter installed behind the cover.
• Vacuum any dirt on the filter and cover.
- If necessary, you can rinse the cover and filter with clean water.
- After checking that the cover and filter are completely dry, reinstall them on the device;
- position the filter behind the protective cover by sliding it under the retaining notches, then,
- clip the protective cover onto the device. It should fit into the provided notches.
All information, designs, drawings and pictures in this document are the property of SOURCING & CREATION. SOURCING & CREATION reserves all rights to its brands, designs and information. Any copy and reproduction through any means shall be deemed and considered as counterfeiting.
Protection of the environment
This symbol attached to the product means that it is an appliance whose disposal is subject to the directive on waste from electrical and electronic equipment (WEEE). This appliance may not in any way be treated as household waste and must be subject to a specific type of removal for this
type of waste. Recycling and recovery systems are available in your area (waste removal) and by distributors. By taking your appliance at its end of life to a recycling facility, you will contribute to environmental conservation and prevent any harm to your health.

Umweltschutz
\* Tested in our laboratories
Warranty valid from the date of purchase (receipt as proof of purchase). This warranty does not cover defects or damage caused by improper set up, incorrect use, or normal wear and tear of this product.
\* In unseren Labors getestet
SERVICE RELATION CLIENTS / Customer Relations Department / Kundenservice / Klantenafdeling
Avenue de la Motte
CS 80137
59811 Lesquin cedex- FRANCE