
LIFE E10 TF - Fan MEDION - Free user manual and instructions
Find the device manual for free LIFE E10 TF MEDION in PDF.

| Product type | Pedestal fan with rechargeable battery |
| Brand | Medion |
| Model | LIFE E10 TF |
| Dimensions (L × H × D) | Approx. 24 × 33 × 12 cm |
| Weight | Approx. 1.83 kg |
| Power supply | Lithium-polymer battery 3.7 V, 10000 mAh, 37 Wh; charging via USB-C (5 V, min. 2 A) |
| Battery life | Up to 25 hours (depending on speed) |
| Charging time | 10 to 14 hours (depending on adapter) |
| Rotor diameter | 15 cm |
| Fan speeds | 5 adjustable levels |
| Oscillation | Yes, can be enabled/disabled via the device or remote control |
| LED lighting | 3 adjustable brightness levels |
| Timer | 1 to 10 hours, combined with fan function |
| Remote control | Frequency 433.92 MHz, range up to 6 m, CR2032 battery included |
| External charging ports | 1× USB-A (5 V, 2 A max) for devices; 1× USB-C for battery charging and devices |
| Noise level | ≤ 48 dB(A) |
| Operating temperature | +5 °C to +25 °C |
| Storage temperature | 0 °C to +40 °C |
| Maintenance and cleaning | Clean with a soft, slightly damp cloth; do not immerse in water |
| Safety | Do not insert objects into the grill; keep out of reach of children; do not open or repair yourself |
| Spare parts and repairability | The battery and light source can only be replaced by the manufacturer or authorized service center |
| General information | Delivered with fan, remote control, USB cable, and quick start guide; warranty through Medion service |
Frequently Asked Questions - LIFE E10 TF MEDION
User questions about LIFE E10 TF MEDION
0 question about this device. Answer the ones you know or ask your own.
Ask a new question about this device
Download the instructions for your Fan in PDF format for free! Find your manual LIFE E10 TF - MEDION and take your electronic device back in hand. On this page are published all the documents necessary for the use of your device. LIFE E10 TF by MEDION.
USER MANUAL LIFE E10 TF MEDION
natural_image
Modern minster fan with teal blades and digital display, next to a handheld remote control unit (no visible text or symbols on main device)Camping Ventilator mit Akku Ventilateur de camping avec batt erie Campingventilator met batt erij Ventilatore da campeggio con batt eria Ventilador de camping con batería Camping fan with batt ery
MEDION LIFE E10 TF (MD 12065)
Inhaltsverzeichnis
DE
▶ Retirez tous les emballages.

AVERTISSEMENT!
Risque de blessure!
Cd = cadmium, Hg = mercure, Pb = plomb.
Cd = cadmium, Hg = kwikzilver, Pb = lood.
MEDION Service Center
ENAME, S.A
- Information about this user manual .... 109
1.1. Explanation of symbols ......109
FR - Proper use 10
- Safety instructions ...... N10
3.1. Restricted group of people ....109
3.2. Installation location 18S
3.3. Noise emissions 111
3.4. Product-specific hazards....111 IT
3.5. Ambient temperature .....111
3.6. In the event of faults ..... 112
3.7. Handling the rechargeable batteries....112
3.8. Handling the remote control battery 113 - Package contents 114
- Appliance overview 11
- Charging the fan 118
- Getting started 119
7.1. Inserting the battery in the remote control....119
7.2. Switching on/off 119
7.3. Switching the fan on or off 120
7.4. Switching the lighting on or off....120
7.5. Switching oscillation on or off....121
7.6. Setting up timer....121
7.7. Connecting the remote control manually....121 - Charging external devices 121
- Troubleshooting 122
- Cleaning....122
- Prolonged non-use and transport 123
- Technical specifications....123
- EU declaration of conformity....124
- Disposal....124
- Service information....125
- Legal Notice....126
1. Information about this user manual
Thank you for choosing our product. We hope you enjoy using this appliance.
Please read the safety instructions and the user manual carefully before using the appliance for the first time. Note the warnings on the appliance and in the user manual.
Always keep the user manual close to hand. If you sell the appliance or give it away, please ensure that you also pass on this user manual. It is an essential component of the product.
1.1. Explanation of symbols
If a block of text is marked with one of the warning symbols listed below, the hazard described in that text must be avoided to prevent the potential consequences described there from occurring.
DANGER!
Warning: risk of fatal injury!
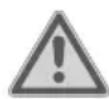
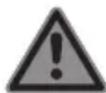
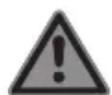
WARNING!
Warning: risk of possible fatal injury and/or serious irreversible injuries!

NOTICE!
Follow these instructions to prevent damage to the appliance!

More detailed information about using the appliance!

Follow the instructions in the user manual!
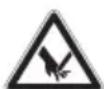
WARNING!
Warning: risk of sharp edges!
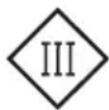
Symbol for protection class III
2. Proper use
This appliance is used to circulate air in closed, private indoor spaces.
- The appliance is only intended for private use and not for industrial/commercial use.
Please note that we shall not be liable in cases of improper use:
- Do not modify the appliance without our consent and do not use any auxiliary equipment that we have not approved or supplied.
▶ Only use replacement parts or accessories that we have supplied or approved.
Do not use the appliance in potentially explosive atmospheres. This includes petrol stations, fuel storage areas and areas where solvents are processed. This appliance must also not be used in areas with particle-laden air (for example, flour or wood dust).
▶ Comply with all the information in this user manual, especially the safety instructions. Any other use is considered improper and can cause personal injury or property damage.
3. Safety instructions
3.1. Restricted group of people
WARNING!
Risk of injury!
There is a risk of injury to children and persons with limited physical, sensory or mental abilities (for example, partially disabled people or older peo-
ple with limited physical and mental abilities) or to those without experience and knowledge (such as older children).
- Keep the appliance and its accessories out of the reach of children.
This appliance can be used by children of 8 years and older, and by people with reduced physical, sensory or mental capacity, or with a lack of experience and/or knowledge, but only with proper supervision, or if they have been told how to use the appliance safely, and have understood the risks involved if they use it improperly.
■ Children must not be allowed to play with the appliance.
■ Cleaning and user maintenance must not be carried out by children.
■ Children do not recognise the dangers that can arise when handling electrical appliances. Please be particularly careful while using the appliance if there are children nearby.
- Keep all packaging materials used (bags, pieces of polystyrene etc.) out of reach of children.
■ Do not allow children to play with the packaging material.
3.2. Installation location
DANGER!
Risk of electric shock!
There is a risk of electric shock due to live parts.
■ Do not place containers that are filled with liquid, e.g. vases, on or near the appliance. Such containers may tip over and the liquid may impair the electrical safety of the appliance.
■ Protect the appliance from moisture, dripping and splashing water.
■ Do not place open flames such as lit candles on or near the appliance.
■ Do not place any objects on the cables as otherwise they may be damaged.
■ To prevent the fan from falling, only install and operate it and its components on a sturdy, level, vibration-free surface.
■ Do not use the appliance in potentially explosive atmospheres. This includes petrol stations, fuel storage areas and areas where solvents are processed. This appliance must also not be used in areas with particle-laden air (for example flour or wood dust).
■ Do not expose the appliance to extreme conditions. Avoid:
– high humidity or wet conditions
- extremely high or low temperatures
- direct sunlight
- naked flames
3.3. Noise emissions
The sound pressure level of the fan is less than 48 dB(A).
3.4. Product-specific hazards
■ The fan may only be used when fully assembled!
■ Do not put your fingers or other objects through the guard grille.
■ Caution with long hair: It may be sucked in by the air flow!
■ Make sure that no fabrics such as curtains or similar
are hanging or lying near the appliance which could get caught in the appliance.
DE
FR
NL
ES
IT
EN
■ Do not operate the appliance on uneven surfaces or near steps. Avoid tipping the appliance (e.g. due to edges on the floor) during use.
■ Check all screw/plug connections at regular intervals!
■ Tighten up loose screws and correct the hold of the plug connections.
3.5. Ambient temperature
■ The device can be operated at an ambient temperature of +5°C to +25°C.
■ When switched off, the appliance can be stored at temperatures of between 0^ C and +40^ C.
■ Never use the appliance anywhere that is damp or wet.
DANGER!
Risk of electric shock!
Major changes in temperature or fluctuations in humidity can cause moisture to build up within the appliance due to condensation – this can cause an electrical short circuit.
■ After transporting the appliance, wait until it has
reached ambient temperature before switching it on. ing the USB cable provided.
Please note the following:
3.6. In the event of faults
■ Check the appliance and its accessories for possible damage before each use.
■ Do not use the appliance
USB cable if they are damaged, generate smoke or emit unusual operating noises. In this case, disconnect the power supply immediately.
■ Never try to open and/or repair an appliance component yourself. There is a risk of electric shock.
■ The light source contained in this light may only be replaced by the manufacturer, its customer service or a similarly qualified person. In the event of a fault, contact our Service Centre.
3.7. Handling the rechargeable batteries
The appliance is fitted with an integrated rechargeable lithium polymer high-performance battery, which you can charge via the USB connection on an external charging adapter us-
WARNING! Risk of injury!
There is a risk of explosion if rechargeable batteries are hanøled incorrectly.
■ Do not throw the appliance into a fire, and do not short-circuit it or dismantle it.
■ The appliance should not be left unattended while it is being charged.
■ The rechargeable battery is an integral component of the appliance, which means users cannot replace it themselves.
■ Do not cover the appliance while the battery is being charged.
■ The battery may only be charged in a dry environment.
■ Do not charge the battery for longer than 24 hours.
■ Avoid charging the battery in a hot environment. The maximum charging temperature is 35^ C.
■ Charge the battery regularly and as fully as possible. Do not leave the battery discharged for a long period of time.
■ Use a SELV charging adapter with an output current of 5 V DC for charging.
3.8. Handling the remote control battery
The remote control is bat- tery-operated. Please note the following:
■ Avoid contact with battery acid. If battery acid comes into contact with skin, eyes or mucous membranes, rinse the affected areas with plenty of clean water and consult a doctor as soon as possible.
- Keep new and used batteries out of the reach of children.
■ Stop using the remote control if you cannot close the battery compartment securely, and keep it well away from children.
■ Only replace batteries with those of the same or an equivalent type.
■ Never try to recharge non-rechargeable batteries. Risk of explosion!
■ Never expose the batteries to excessive heat (such as di- NL
-rect sunlight, fire or similar).
■ Store batteries in a cool place. Strong direct heat can damage batteries. Do not expose the appliance to sources of intense heat.
■ Never short-circuit batteries.
■ Remove leaking batteries
from the appliance immediately. Clean the contacts before inserting new batteries. Battery acid can cause chemical burns!
■ Always remove flat batteries from the appliance.
■ If the appliance is not going to be used for long periods, remove the batteries.
■ Before inserting the batteries, check that the contacts in the appliance and on the batteries are clean and, if necessary, clean them.
■ Always use new batteries of the same type. Never use old and new batteries together.
■ Pay attention to the polarity (+/-) when inserting the batteries.
4. Package contents

DANGER!
Risk of choking and suffocation!
There is a risk of choking and suffocation due to swallowing or inhaling small parts or plastic wrap.
- Keep the plastic packaging out of the reach of children.
▶ Remove the product from the packaging and remove all packaging material.
▶ Please check the package contents to ensure that all items are included. If anything is missing, please contact us within 14 days of purchase.
The following items are supplied with your product:
- Fan
- Remote control (incl. battery type CR2032)
- USB charging cable
- Short manual
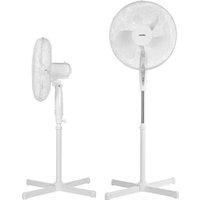
5. Appliance overview
Fig. 1 - Front view
- Guard grille
- Rotor
- Removable carry handle
- LED lighting
- 🙏 button: Switch lighting on/off and set it
- 📄 button: Switch oscillation on/off
- Ⓞ button: Set timer function
- Ⓗ button: Switch the fan on/off and set it
- Display
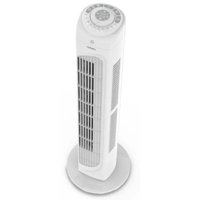
Fig. 2 - Side & rear view
- Button for releasing the carry handle (on both sides)
- Hooks for hanging (on the underside)
- USB Type-C port for charging the internal battery and external devices
- USB Type-A port for charging external devices
- Remote control (in the storage compartment)
Fig. 3 - Remote control
- Switch the fan on or off
- ⏻ Switch the appliance on or off
- Ⓛ Switch the timer function on or off
-
- and - button: Set the fan, lighting and timer functions
- Switch oscillation on or off
- 🖱️ Switch the lighting on or off
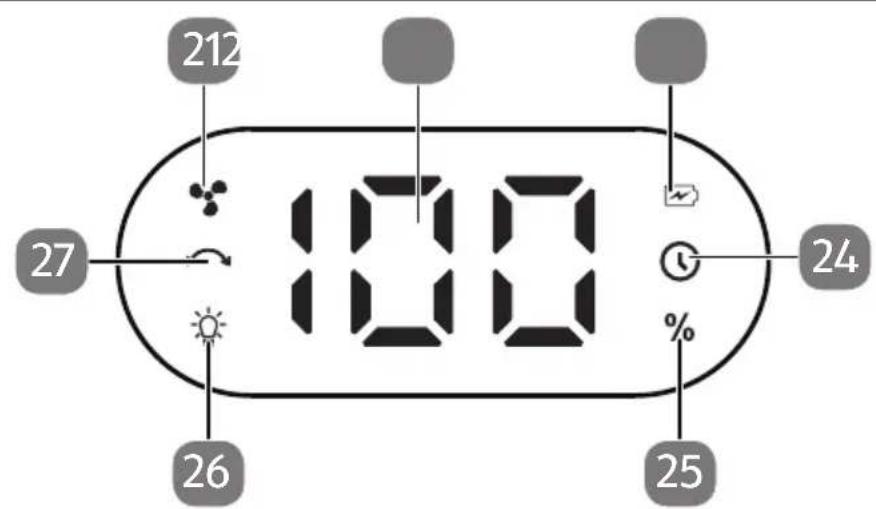
Fig. 4 - Display
- Fan mode display
- Numerical display for various functions
- Charge display
- Timer mode display
- Charge level display
- Lighting display
- Oscillation display
6. Charging the fan
The fan is powered by the integrated rechargeable lithium polymer battery.
Connect the fan to a USB power supply unit with an output current of at least 2 A or more to the USB-C port using the USB cable provided.
As soon as the fan is connected to a power source, the built-in rechargeable battery begins charging automatically.
During the charging process, the charge display flashes and the percentage value for the charge level appears on the display.
The charge display goes out as soon as the built-in battery is fully charged.
▶ Once the battery is fully charged, remove the USB cable.

It is recommended to use a 5 V/3 A power supply unit to speed up the charging time of the integrated rechargeable battery. Power supply units with less power extend the charging time considerably. Information on charging times can be found in the chapter "12. Technical specifications" on page 123.

NOTICE!
Possible material damage!
Risk of damage to the appliance due to improper use of the appliance.
■ Do not use a standard USB 2.0 or USB 3.0 port, such as on a PC or notebook, to charge the appliance. Only use external USB power supply units with an output current of 2 A or more.
7. Getting started
▶ Remove all packaging materials.

WARNING!
Risk of injury!
Risk of cuts due to rotating rotor blades.
■ Do not put your fingers or other objects through the guard grille.

The fan can operate in full both on the appliance and using the remote control.
We describe control using the remote control below. If there are deviations in operation, these are specified accordingly.
7.1. Inserting the battery in the remote control
The remote control contains a CR2032 3V lithium battery.

When you use the remote control for the first time, pull out the transparent strip marked "Remove before use" without opening the battery compartment.
Replace the battery if the appliance fails to react to commands from the remote control properly. Then follow these steps:
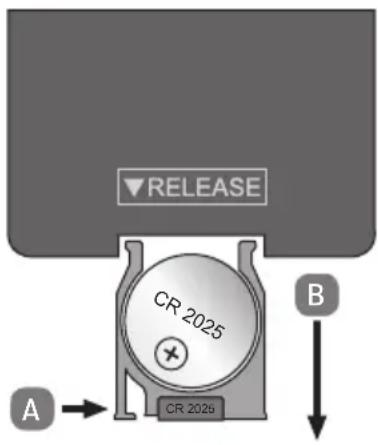
▶ Loosen the locking screw with a Phillips screwdriver.
▶ Press the locking tab (A) as shown in the adjacent diagram and pull the battery holder out of the remote control with the battery (B).
▶ Dispose of the old battery in accordance with legal requirements.
Place a new CR2032-type 3 V battery in the holder, with the positive pole pointing upward. Make sure that the battery polarity is correct.
▶ Push the battery holder complete with battery back into the remote control as far as it will go.
7.2. Switching on/off
▶ Press the ⏻ button on the remote control to switch on the fan.
An acoustic signal sounds and the display shows On.
▶ Press one of the function buttons to switch on the fan or the lighting.

If no further input is made or no further functions are called up within approx. 30 seconds of switching on, the fan switches off automatically.
▶ Press the button again to switch off the appliance.
A long acoustic signal sounds and the display goes out.

You can control the functions directly on the appliance; they do not need to be switched on or off separately.
7.3. Switching the fan on or off
▶ After switching on, press the ⚙ button on the remote control to switch on the fan function.
▶ Press the + or - buttons to select the speed. There are 5 speed settings to choose from.
Press the button on the remote control to switch off the fan function. The fan remains switched on and can be switched on again within approx. 30 seconds using the button on the remote control.

Switch on the fan function on the appliance using the button.
Press the ⏻ button repeatedly to change the speed setting or switch the fan off.
7.4. Switching the lighting on or off
▶ After switching on, press the 🎨 button on the remote control to switch on the lighting.
▶ Press the + or - buttons to select the brightness settings. There are 3 brightness settings to choose from.
Press the button on the remote control to switch off the lighting.
The fan remains switched on and you can switch the lighting on again within approx. 30 seconds using the button on the remote control.

Switch on the lighting on the appliance using the 📣 button.
Press the ⚙️ button repeatedly to change the brightness settings or switch off the lighting.
7.5. Switching oscillation on or off
▶ After switching on the fan function, press the 📋 button on the remote control or the 🔊 button on the appliance to switch the oscillation on or off.

It is possible to switch on the oscillation on the appliance and switch it off again using the remote control or vice versa.
The timer function is only available in combination with the fan function.
▶ Switch on the appliance and activate the fan function with the desired setting.
Press the button on the remote control to switch the timer on.
Press the + or - buttons to select the desired timer duration. You can choose between one and 10 hours.
Press the button on the remote control again to switch off the timer.

Switch on the timer on the appliance using the button.
Press the Ⓞ button repeatedly to select the timer duration.
7.7. Connecting the remote control manually
If the remote control does not automatically connect to the fan or disconnects due to a fault, the remote control can be reconnected manually.
▶ Press and hold the button on the appliance until PA is shown on the display.
▶ Press and hold the ⏻ and + buttons on the remote control until Or is shown on the display.
8. Charging external devices
External USB devices can be charged using the USB port on the back of the device.
▶ To do this, connect the external device to the USB port on the back using a USB cable.
9. Troubleshooting
If the appliance stops working properly, please refer to the troubleshooting table shown below to see if you can resolve the problem yourself.
Never attempt to repair the appliance yourself. If a repair is necessary, please contact our Service Centre or a suitable authorised repair workshop.
| Problem Possible cause Troubleshooting | ||
| The appliance is not working. | The rechargeable battery is too weak or flat | Connect the appliance using a power supply unit and fully charge the battery. |
| The appliance does not work even after being connected to an external power source. | Contact our Service Centre. | |
| The remote control does not function. | The connection between the remote control and the appliance is interrupted. | Reconnect the remote control (see “7.7. Connecting the remote control manually” on page 121) |
10. Cleaning

WARNING!
Risk of electric shock!
There is a risk of electric shock due to live parts.
■ The appliance must not be immersed in water or other liquids, or held under running water, because this could cause an electric shock.
■ Disconnect the appliance from the USB power supply unit before cleaning.
■ Make sure that no liquids enter the appliance.

NOTICE!
Damage to the appliance!
The improper use of cleaning agents on the fan may damage the surfaces.
■ Never use acidic, abrasive or granular, acetic-acid-, soda- or solvent-based cleaning agents. These may damage the appliance surfaces or the printing on it.
▶ Clean the housing only with a soft, slightly damp cloth.
▶ To remove stubborn dirt, moisten the cloth with a mild soap solution.
Dry the housing carefully before switching on the appliance.
11. Prolonged non-use and transport
When you are not using the appliance for a prolonged period of time, store the appliance in a dry, dust-free and frost-free environment that is not exposed to direct sunlight.
To avoid damaging the product during transport, we recommend that you use the original packaging.
12. Technical specifications
| Fan | |
| Power supply 5.0 V | --- |
| Power consumption during charging | 20 W |
| Ports USB Type-A port for charging | external devices |
| USB Type-C port for charging the internal rechargeable battery and external devices | |
| USB output power 5 V | --- 2 A (max.) |
| Dimensions Approx. 24 × 12 × 33 cm | |
| Rotor diameter 15 cm | |
| Weight Approx. 1.83 kg | |
| Operating volume 48 dB(A) | |
| Rechargeable battery | |
| Type | 3.7 V, 10000 mAh, lithium polymer, 37 Wh |
| Charging time | 10–14 hours (depending on the charging current used and the ambient temperature) |
| Operating duration | Up to 25 hours* |
| Remote control | |
| Frequency | 433.92 MHz |
| Max. transmission power | ≤ 10 dBm |
| Battery 3 V CR2032 | |
| Range | Up to 6 metres (without obstacles) |
13. EU declaration of conformity

MEDION AG hereby declares that the radio equipment type MD 12065 complies with the Directive 2014/53/EU [(RE Directive), as well as the Directive 2009/125/EC (ecodesign Directive) and the Directive 2011/65/EU (RoHS Directive)].
The complete EU declaration of conformity is available at:
www.medion.com/conformity.
14. Disposal
PACKAGING
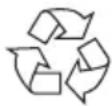
Your appliance has been packaged to protect it from damage in transit. The packaging is made of materials that can be recycled in an environmentally friendly manner.
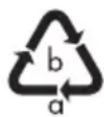
Observe the following packaging material label regarding waste separation with the abbreviations (a) and numbers (b):
1–7: plastics/20–22: paper and cardboard/80–98: composite materials

(Only for France)
The “Triman” symbol tells the consumer that the product can be recycled, is covered by an extended system of manufacturer’s responsibility and must be sorted by material type in France.
APPLIANCE
All old appliances marked with the symbol shown must not be disposed of in normal household waste.
In accordance with Directive 2012/19/EU, the appliance must be properly disposed of at the end of its service life.
This involves separating the materials in the appliance for the purpose of recycling as well as minimising the environmental impact and negative effects on human health.
Take old appliances to an electrical scrap collection point or a recycling centre.
Contact your local waste disposal company or your local authority for more information on this subject.
BATTERIES
Batteries that carry the symbol illustrated must not be disposed of in ordinary household waste.
In accordance with Regulation 2023/1542, batteries must be disposed of properly at the end of their service life.
They may contain toxic heavy metals and are subject to hazardous waste treatment.
The chemical symbols of the heavy metals are as follows:
Cd = cadmium, Hg = mercury, Pb = lead.
You are legally obliged to return old batteries and rechargeable batteries after use. Therefore, please return used batteries and rechargeable batteries free of charge to a retailer or a municipal collection point.
Batteries and rechargeable batteries may contain substances that are harmful to human health and the environment. The negative effects can only be avoided if old batteries and rechargeable batteries are collected and recycled separately.
Take particular care when handling batteries and rechargeable batteries containing lithium, as there is an increased risk of fire if they are used incorrectly. Tape the poles to prevent an external short circuit.
Use batteries with a long service life or rechargeable batteries to reduce the generation of waste from old batteries.
Follow the storage instructions and avoid completely discharging and recharging the battery to extend its service life.
In addition, batteries or electrical and electronic devices with batteries or rechargeable batteries must not be left in public areas in order to avoid littering. Check options for reusing batteries instead of disposing of them, for example by repairing the battery.
15. Service information
Please contact our Customer Service team if your device ever stops working the way you want or expect it to. There are several ways for you to contact us:
- In our Service-Community, you can meet other users, as well as our staff, and you can exchange your experiences and pass on your knowledge there.
You will find our Service-Community at community.medion.com.
• Alternatively, use our contact form at www.medion.com/contact.
- You can also contact our Service team via our hotline or by post.
| Opening times Hotline number UK | |
| Mon – Fri: 08.00 – 20.00Sat – Sun: 10.00 – 16.00 | ➌ 0333 3213106 |
Service address
MEDION Electronics Ltd. 120 Faraday Park, Faraday Road, Dorcan Swindon SN3 5JF, Wiltshire United Kingdom

You can download this and many other sets of operating instructions from our service portal at www.medionservice.com.
We have stopped providing printed copies of our warranty terms and conditions as part of our commitment to sustainability, but you can access the warranty terms and conditions on our service portal.
You can also scan the QR code on the side of the screen, to download the operating instructions onto your mobile device from the service portal.
16. Legal Notice
Copyright 2025
Date: 03. April 2025
All rights reserved.
These operating instructions are protected by copyright.
Mechanical, electronic and any other forms of reproduction are prohibited without the written permission of the manufacturer.
Copyright is owned by the company:
MEDION AG
Am Zehnthof 77
45307 Essen
Germany
Please note that you cannot use the address above for returns. Please always contact our Customer Service team first.
DE
FR
NL
ES
IT
EN
- Inhaltsverzeichnis
- AVERTISSEMENT!
- Risque de blessure!
- Information about this user manual
- Explanation of symbols
- DANGER!
- WARNING!
- NOTICE!
- Proper use
- Safety instructions
- Restricted group of people
- Risk of injury!
- Installation location
- Risk of electric shock!
- Noise emissions
- Product-specific hazards
- Ambient temperature
- In the event of faults
- Handling the rechargeable batteries
- WARNING! Risk of injury!
- Handling the remote control battery
- Package contents
- Risk of choking and suffocation!
- Appliance overview
- Charging the fan
- Possible material damage!
- Getting started
- Inserting the battery in the remote control
- Switching on/off
- Switching the fan on or off
- Switching the lighting on or off
- Switching oscillation on or off
- Connecting the remote control manually
- Charging external devices
- Troubleshooting
- Cleaning
- Damage to the appliance!
- Prolonged non-use and transport
- Technical specifications
- EU declaration of conformity
- Disposal
- PACKAGING
- APPLIANCE
- BATTERIES
- Service information
- Service address
- Legal Notice
Brand : MEDION
Model : LIFE E10 TF
Category : Fan