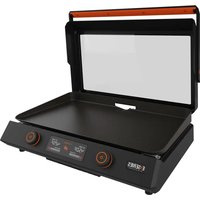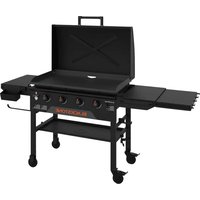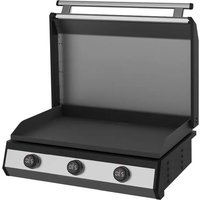
8010 - Grill plate Blackstone - Free user manual and instructions
Find the device manual for free 8010 Blackstone in PDF.


User questions about 8010 Blackstone
0 question about this device. Answer the ones you know or ask your own.
Ask a new question about this device
Download the instructions for your Grill plate in PDF format for free! Find your manual 8010 - Blackstone and take your electronic device back in hand. On this page are published all the documents necessary for the use of your device. 8010 by Blackstone.
USER MANUAL 8010 Blackstone
text_image
BLACKSTONEOWNER'S MANUAL
30" ELECTRIC GRIDDLE DROP-IN WITH HOOD
TABLE OF CONTENTS
IMPORTANT SAFETY INFORMATION ....02
ACTIVATE YOUR WARRANTY 03
ASSEMBLY GUIDE 04
USING YOUR BLACKSTONE 06
TROUBLESHOOTING....10
IMPORTANT:
This instruction manual contains important information necessary for the proper assembly and safe use of the appliance.
Read and follow all warnings and instructions before assembling and using the appliance.
Follow all warnings and instructions when using the appliance.
Keep this manual for future reference.
Installer/Assembler: Leave these instructions with the consumer.

For the latest version of this manual, scan this code or visit BlackstoneProducts.com/support
SAFETY ALERT KEY
! DANGER
Indicates a hazardous situation that, if not avoided, will result in death or serious injury.
CAUTION
Indicates a hazardous situation that, if not avoided, could result in minor or moderate injury.
WARNING
Indicates a hazardous situation that, if not avoided, could result in death or serious injury.
NOTICE
Indicates information considered important, but not hazard-related (e.g. messages related to property damage).
IMPORTANT SAFETY INFORMATION
DANGER
- NEVER operate this appliance unattended.
- NEVER attempt to service or repair your griddle while connected.
- DO NOT connect or energize this appliance until all installation instructions are read and followed. Damage to the appliance will result if these instructions are not followed.
WARNING
- Disconnect this unit before cleaning or any service work is performed on this griddle unit.
- This appliance is for outdoor use only.
IMPORTANT SAFEGUARDS
- Read all instructions before use.
- Proper Installation - Be sure your appliance is properly installed and grounded by a qualified technician.
- DO NOT touch hot surfaces. Use handles or knobs.
- DO NOT leave children alone- Children should not be left alone or unattended in area where appliance is in use. They should never be allowed to sit or stand on any part of the appliance.
- DO NOT use your appliance for warming or heating the room.
- DO NOT use appliance for other than intended use.
- Close supervision is necessary when any appliance is used by or near children.
- Wear Proper Apparel - Loose-fitting or hanging garments should never be worn while using the appliance.
- User Servicing - DO NOT repair or replace any part of the appliance unless specifically recommended in the manual. All other servicing should be referred to a qualified technician.
- DO NOT place on or near a hot gas or electric burner, or in a heated oven.
- Storage in or on Appliance - Flammable materials should not be stored in an oven or near surface units.
- Extreme caution must be used when moving an appliance containing hot oil or other hot liquids.
- Disconnect from the outlet when not in use and before cleaning. Allow to cool before putting on or taking off parts.
- DO NOT use water on grease fires - Smother fire or flame or use dry chemical or foam-type extinguisher.
- DO NOT TOUCH SURFACE UNITS OR AREAS NEAR UNITS - Surface units may be hot even though they are dark in color. Areas near surface units may become hot enough to cause burns. During and after use, DO NOT touch, or let clothing or other flammable materials contact surface units or areas near units until they have had sufficient time to cool. Among these areas are the griddle plate and the hood.
- ⚠ CAUTION: DO NOT store items of interest to children in cabinets above a range or on the backguard of a range – children climbing on the range to reach items could be seriously injured.
SAVE THESE INSTRUCTIONS
ACTIVATE YOUR WARRANTY
WARRANTY OVERVIEW
The North Atlantic Imports, LLC 1-Year Warranty covers replacement parts up to one year after the date of purchase.
The North Atlantic Imports, LLC 90-Day Warranty covers labor costs for defective parts up to ninety days after the date of purchase.
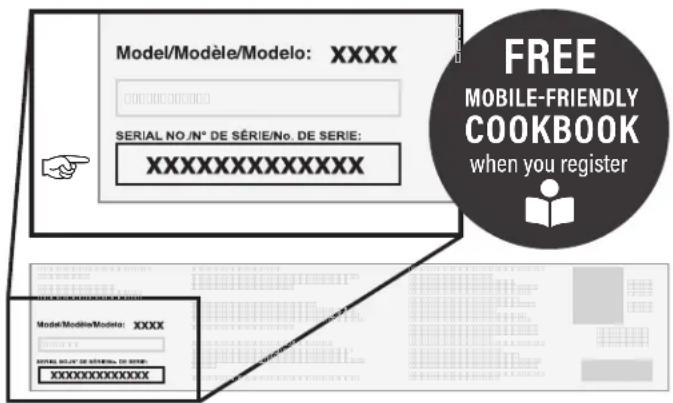
TO ENABLE THIS WARRANTY, YOU WILL NEED TO PROVIDE:
Your appliance's Serial Number
text_image
Model/Modèle/Modelo: XXXX SERIAL NO./N° DE SÉRIE/No. DE SERIE: XXXXXXXXXXXXXX FREE MOBILE-FRIENDLY COOKBOOK when you register Model/Modèle/Modelo: XXXX XXXXXXXXXXXXXXThe Serial Number can be found on your appliance's Manufacturer Label.
(The Manufacturer Label is a large silver sticker found on the body of your appliance.)

Register your appliance at BlackstoneProducts.com/register
ONE YEAR WARRANTY
North Atlantic Imports, LLC warrants this product against defects in materials and workmanship for a period of one (1) year from the original date of purchase under normal use. To the extent any such defects occur, North Atlantic Imports, LLC, in its discretion, will provide the appropriate replacement part(s) at no charge.
In no event shall North Atlantic Imports, LLC be liable for consequential, indirect or incidental damages resulting from the installation, use or failure of the product.
This warranty DOES NOT cover:
- Inspection costs or labor for replacement of any defective part(s);
- Cosmetic defects which DO NOT affect product performance or integrity;
- Normal wear and tear;
- Damage due to vandalism; acts of nature, including but not limited to wind, storms, hail, floods;
- Improper assembly, installation, or use;
- Discoloration or fading of the finish as a result of exposure to chemicals, spills, pool or salt water;
- Corrosion / rust.
This product has been designed for safety and quality. Any modifications made to the original product could compromise its structural integrity or function and could lead to product failure or personal injury. As such, modifying this product voids all warranties.
This product is warranted for RESIDENTIAL USE ONLY, and is not for commercial, contract or other non-residential purposes. North Atlantic Imports, LLC disclaims all other representations and warranties of any kind, express or implied.
The warranty applies to the original purchaser and is non-transferable. It does not apply to purchases of display models, or when the product is sold on clearance or "as is". To activate your warranty, register your product at www.BlackstoneProducts.com/register.
North Atlantic Imports, LLC makes no warranty whatsoever in respect to accessories or parts not supplied with it. This warranty shall apply only within the boundaries of the United States of America and Canada. This warranty gives the original purchaser specific rights, and the original purchaser may also have other rights, which vary from state to state.
This warranty is the exclusive warranty of North Atlantic Imports, LLC and is in lieu of all other warranties expressed or implied. North Atlantic Imports, LLC reserves the right to change or modify this warranty at any time.
90 DAY WARRANTY
North Atlantic Imports, LLC, in its discretion, will cover labor costs for replacement of any defective part(s) for a period of ninety (90) days from the original date of purchase under normal use.
The purchaser must produce proof of maintenance by a certified electrician. Any maintenance by a non-certified individual will void the warranty.
ASSEMBLY GUIDE
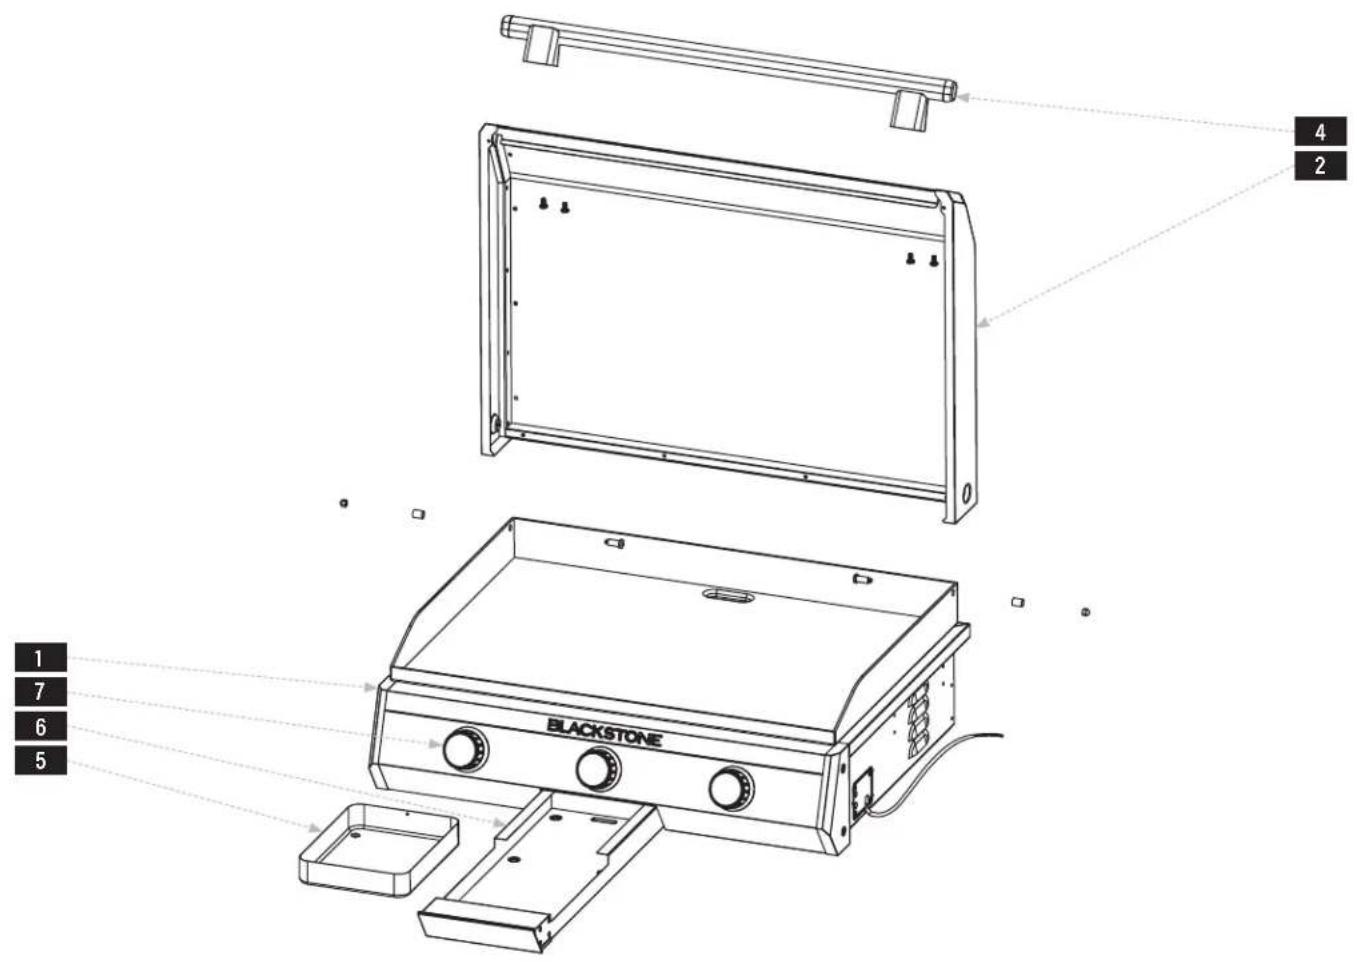
EXPLODED VIEW
text_image
BLACKSTONE 1 7 6 5 4 2PARTS LIST
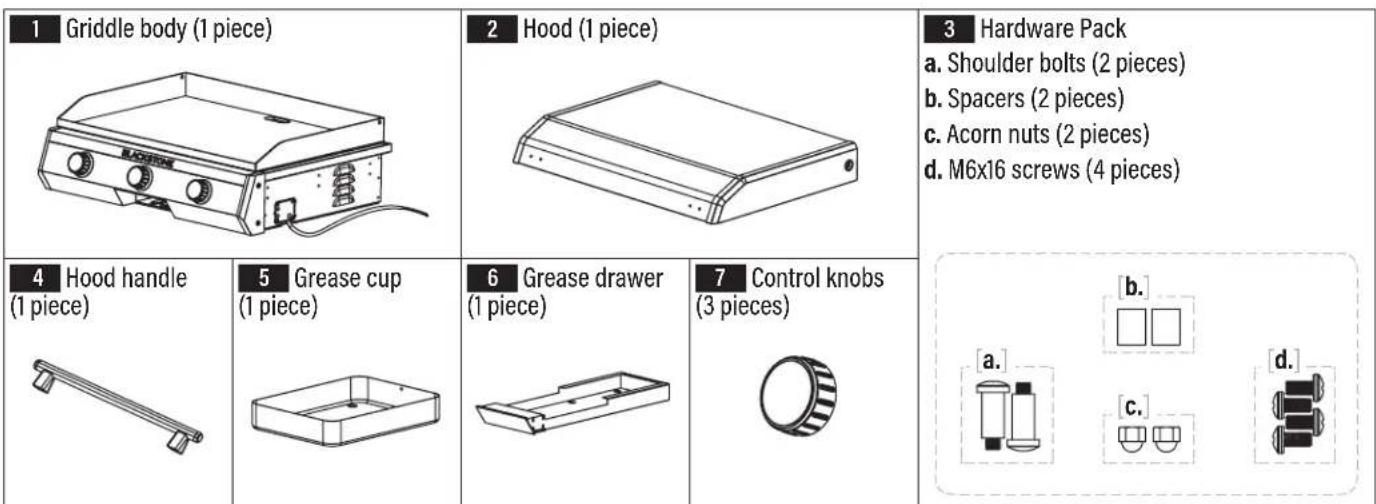
text_image
1 Griddle body (1 piece) 2 Hood (1 piece) 3 Hardware Pack a. Shoulder bolts (2 pieces) b. Spacers (2 pieces) c. Acorn nuts (2 pieces) d. M6x16 screws (4 pieces) 4 Hood handle (1 piece) 5 Grease cup (1 piece) 6 Grease drawer (1 piece) 7 Control knobs (3 pieces) b. a. c. d.ASSeMBIY INSTRUCTIoNS
Find a large, clean area to assemble your appliance.
Remove all packing material before assembling.
CAUTION
Sharp edges. Wear gloves while assembling.
STEP 01 Use four (4) M6x16 screws [d.] to attach the hood handle to the front of the hood.
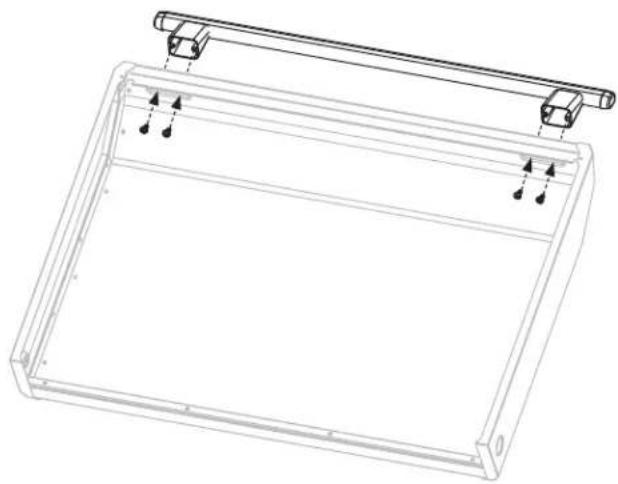
natural_image
Technical line drawing of a rectangular frame with mounting brackets and a diagonal rail (no text or symbols)STEP 02 Use two (2) shoulder bolts [a.], two (2) spacers [b.], and two (2) acrorn nuts [c.] to attach the hood to the griddle top.
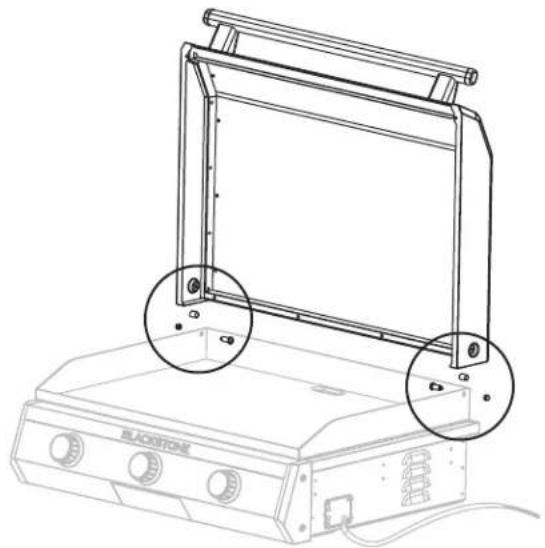
natural_image
Line drawing of a blackstone electronic device with two wheels mounted on top (no text or symbols)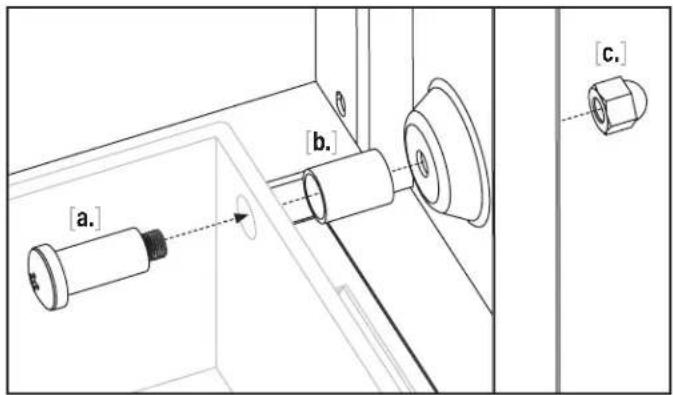
text_image
[a.] [b.] [c.]STEP 03 Proceed to USING YOUR BLACKSTONE.
| NOTICE |
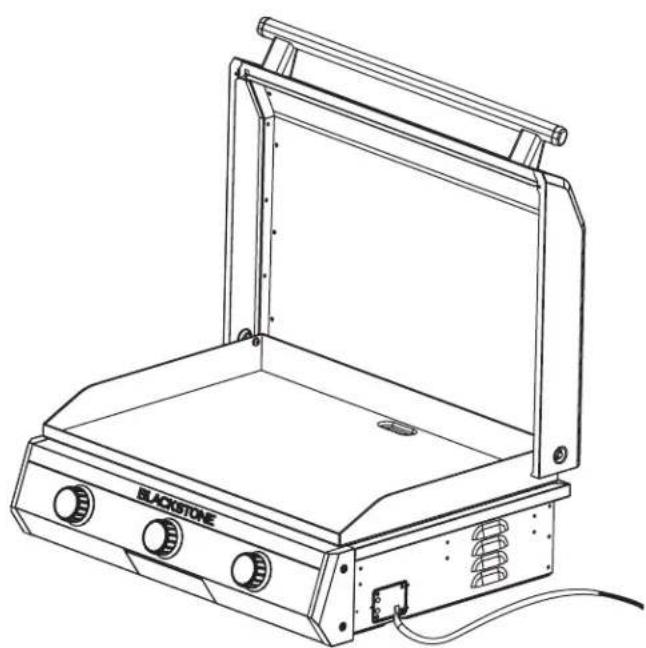
| DO NOT operate with hood closed. |
natural_image
Line drawing of a blackstone electrical stove with control panel and ventilation slots (no text or symbols)USING YOUR BLACKSTONE
INSTALLATION INSTRUCTIONS
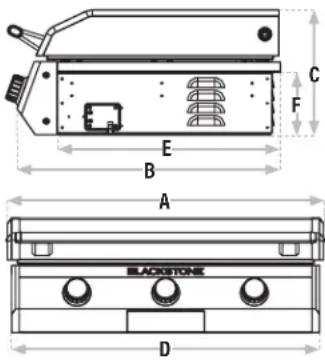
DIMENSIONS
WARNING
Licensed electrician required for installation and connecting the wirings.
text_image
C F E B A BLACKSTONE DGRIDDLE BODY DIMENSIONS
A: Width = 32 ¼ in (819.15mm)
B: Depth = 24 3/4 in (629mm)
C: Height = 11 3/4 in (298mm)
BURN BOX DIMENSIONS
D: Width = 31 38 in (797mm)
E: Depth = 21 in (533mm)
F: Height = 5 7/8 in (149mm)
WARNING
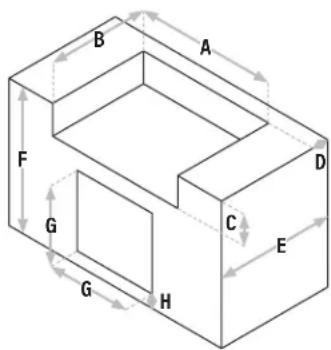
- This cabinet or built-in enclosure must be able to support at least 250lbs (113kg) without any issues.
- Enclosures must be built of fire-resistant materials.
text_image
A B F G H C D E GCAVITY DIMENSIONS
A: Min Width = 30 38 in (770mm)
Max Width = 30 58 in (778mm)
B: Min Depth = 20 % in (518mm)
Max Depth = 20 % in (525mm)
C: Height = 6 18 in (156mm)
D: Min Distance from back = 3 38 in (86mm)
CABINET DIMENSIONS
E: Depth = 23 34 in (604mm)
F: Height = 35 in (889mm)
DOOR DIMENSIONS
G: Width and height = 8 14 in (464mm)
H: Distance from floor = 4 in (102mm)
DO NOT operate this appliance any closer than 3 in (76mm) from the sides and back of the appliance to combustible materials.
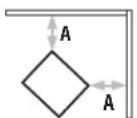
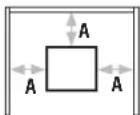
A: 3 in (76mm)
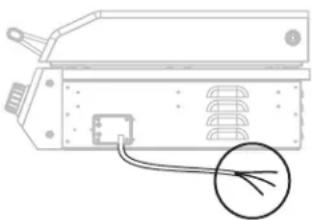
CONNECTING THE WIRES
WARNING
Licensed electrician required for installation and connecting to the electric outlet.
WARNING
This appliance is not fused. Protect the circuit with properly sized fuses or circuit breaker.
WARNING
An electrical disconnect must be installed readily accessible to the operator of the appliance.
WARNING
This appliance must be electrically grounded.
natural_image
Technical line drawing of a device housing with a cable and a circular component (no text or symbols)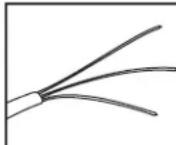
Ground (green)
L1 (black)
L2 (white)
ELECTRIC REQUIREMENTS
240V 5400W
IGNITION INSTRUCTIONS
TO TURN THE GRIDDLE ON:
STEP 01 Wake up the appliance:
Turn or press any control knob to enter STANDBY MODE.
Turn to set temp.
STEP 02 Press control knob to PREHEAT.
Note: If temperature is changed to lower than current temperature, PREHEAT light won't flash.
STEP 03 Ready for COOKING when:
PREHEAT light turns OFF. Buzzer beeps three times.
Note: Press the knob to stop heating and return to STANDBY MODE.
TO TURN THE GRIDDLE OFF:
STEP 01 Press and hold any control knob to enter SLEEP MODE.

STANDBY MODE
Default temperature setting is 600°F (315°C).
Temperature light is WHITE, and the flame light is orange.
Temperature range is 120°F - 600°F (50°C -315°C)

PREHEAT
"PREHEAT" light starts to flash until the temperature reaches the set temperature.

COOKING
Temperature light is ORANGE during the heating mode.

SLEEP MODE
Appliance will also enter sleep mode when none of the 3 heating zones is in operation, AND the unit has been left idle for 30 minutes.
COOKING ON YOUR BLACKSTONE
DANGER
Flammable items can spontaneously combust if placed near the appliance. DO NOT place flammable items such as aerosol containers, oily or greasy towels near the cooking surface.
CAUTION
This appliance will be hot during and after use. Use long-handled utensils and oven mitts/ protective gloves when handling potentially hot parts to protect against burns and splatters.
NOTICE
DO NOT store any items within 3 in (8 cm) of the cooking surface while in use.
VIDEO RECIPES
Find recipes and cooking tips at:
BlackstoneProducts.com/blogs/recipes
youtube.com/c/BlackstoneGriddles
@blackstoneproducts
natural_image
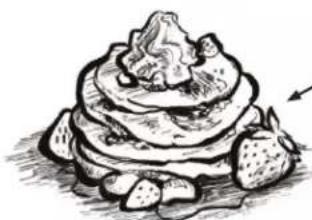
Sketch-style illustration of a layered dessert with strawberries and toppings (no text or symbols)STRAWBERRIES AND CREAM
PANCAKES
Breakfast
OKLAHOMA FRIED ONION
BURGER
Lunch
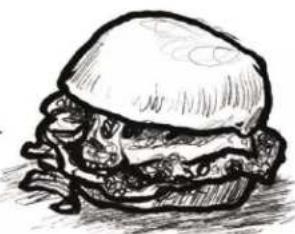
natural_image
Sketch of a hamburger with visible bun, buns, and toppings (no text or symbols)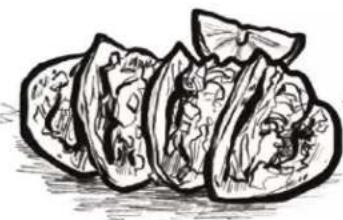
natural_image
Sketch-style illustration of sliced walnuts, showing whole and cross-section (no text or symbols)TACOS BORRACHOS Dinner
GRIDDLE SEASONING INSTRUCTIONS
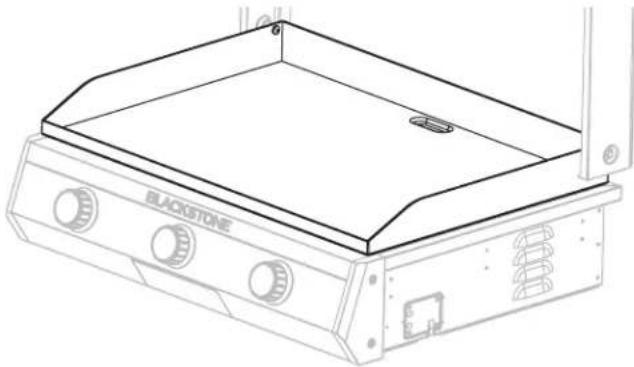
natural_image
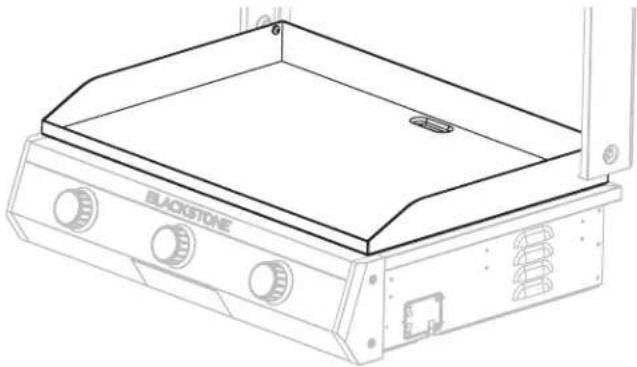
Line drawing of a blackstone electrical enclosure with three control knobs and a central mounting bracket (no text or symbols)WASHING YOUR GRIDDLE TOP BEFORE FIRST USE
NOTICE
Soap will ruin a seasoned griddle. This is the only time you should use soap on the griddle cooking surface.
STEP 01 Wash the griddle cooking surface with hot, soapy water.
STEP 02 Rinse and dry completely.

VIDEO TUTORIAL
How to Season a New Blackstone Griddle youtube.com/watch?v=VspmDVnj2pl&t=3s
STEP 01 Wipe any debris off griddle top.
STEP 02 Set your griddle to high heat until your griddle top changes color. (\~10 min)
STEP 03 Use tongs to hold a paper towel or cotton cloth and spread 2-3 tablespoons of your seasoning oil across the entire griddle top. When seasoning your griddle top, remember to use a thin and even layer of oil—the thinner the layer of oil, the easier it will be to burn it off.
STEP 04 The griddle top is ready for another layer of oil when it stops smoking. Repeat STEP 03 3-4 times, or until the griddle surface is black.
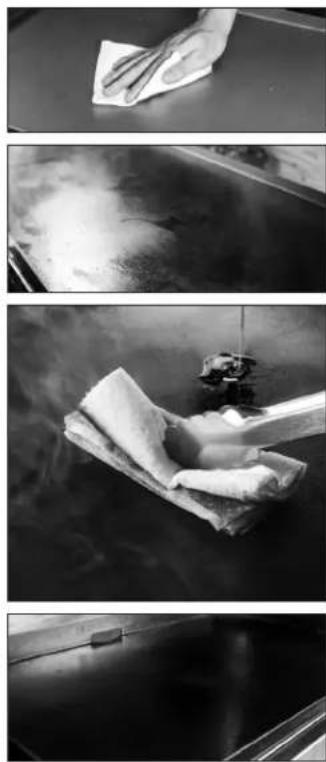
WHAT OIL IS BEST TO USE?
- Blackstone Seasoning and Cast Iron Conditioner.
- Any plant-based cooking oil.
- Rendered animal fat with no additives.

text_image
BLACKSTONE GRIDDLE SEASONING & CAST IRON CONDITIONERSEASONING TROUBLESHOOTING
THERE IS A BROWNISH RESIDUE ON THE GRIDDLE SURFACE:
POSSIBLE CAUSES SOLUTION
- Too much oil was used.
- You turned off the heat too soon.
STEP 01 Turn your griddle on high and let it heat for 10-15 minutes.
STEP 02 Scrape off as much of the thickened and partially cooked oil as you can.
STEP 03 Re-season with a very thin layer of oil.
THE EDGES OF THE GRIDDLE SURFACE ARE NOT BLACK:
After using your griddle for multiple cooks, the seasoning will even out and improve.
PREVENTING RUST
Use your griddle frequently. Every time you cook, you are adding to the seasoning, which makes rust less likely.
NOTICE
If you live in a humid or coastal climate, your griddle may require more frequent seasonings between uses.
If rust appears on the griddle surface, rub it off with steel wool, low grit sandpaper or the Blackstone Pumice Stone and re-season the surface.

VIDEO TUTORIAL
Recovering your Blackstone Griddle Top youtube.com/watch?v=thPE2IgnSil
CLEANING YOUR GRIDDLE TOP
Clean griddle top after each use, while still warm.
- DO NOT use soap on the griddle top. This will destroy the griddle's seasoning.

VIDEO TUTORIAL
How to Clean your Blackstone Griddle
youtube.com/watch?v=-ledu9z6NPY
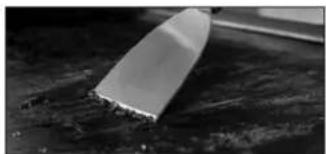
STEP 01 Push loose food debris into the grease cup with spatula or straight metal scraper.
STEP 02 Wipe down griddle top with paper towel.
STEP 03 Apply a few tablespoons of water to the griddle surface, then scrape the water and debris into the grease cup.
(For stuck-on food residue, use a bit of coarse salt.)
STEP 04 Wipe again with a paper towel and dry completely.
STEP 05 Apply thin coat of cooking oil to maintain seasoning and protect the griddle top.
natural_image
Close-up of a white, elongated object resting on a dark surface (no visible text or symbols)
natural_image
Hand cleaning a white cloth on a dark surface (no text or symbols visible)
natural_image
Hand pouring liquid from a bottle into a container (no visible text or symbols)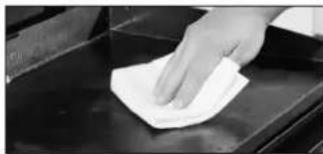
natural_image
Hand cleaning a surface with a white cloth (no text or symbols visible)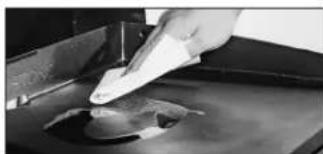
natural_image
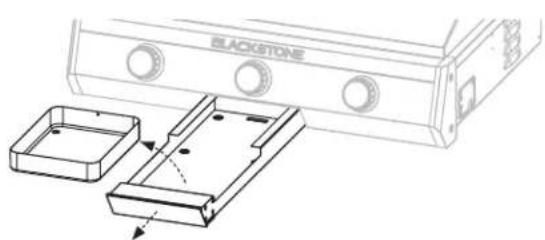
Close-up of a hand using a tool to apply material on a dark surface (no visible text or symbols)EMPTY YOUR GREASE CUP
The grease cup must be removed and emptied after each use.
CAUTION
Grease cup will be hot during and after use. DO NOT remove the grease cup until the griddle has completely cooled.
natural_image
Technical line drawing of a blackstone device with mounting holes and internal compartments (no text or symbols)CLEANING YOUR APPLIANCE
WARNING
Grease build up can cause a fire. Clean any part of the appliance that gets hot and experiences grease build up after each use.
CAUTION
All cleaning and maintenance should be carried out when the appliance is cool and everything is turned OFF.
- DO NOT use abrasive pad on areas with graphics.
- If a bristle brush is used to clean any of the cooking surfaces, ensure no loose bristles remain on cooking surfaces prior to cooking.
APPLIANCE BODY:
Wash with warm soapy water and immediately wipe dry with a non-abrasive cloth. (DO NOT allow cleaning agents to rest on any porous surface for a prolonged amount of time.)
NOTICE
DO NOT use Citrisol, abrasive cleaners, or a concentrated cleaner on the appliance. This may result in damage to and failure of parts.
TROUBLESHOOTING
ELECTRIC DROP-IN GRIDDLE TROUBLESHOOTING
GRIDDLE WILL NOT HEAT:
POSSIBLE CAUSES SOLUTION
Circuit breaker OFF or tripped. Reset circuit breaker.
ONE SECTION DOES NOT HEAT:
POSSIBLE CAUSES SOLUTION
| Temperature control knob not set to desired temperature. | Press and turn control knob to set temperature. |
| Damaged internal component. | Contact a licensed electrician for repairs. |
GRIDDLE DRIPS GREASE:
POSSIBLE CAUSES SOLUTION
| Grease drawer full or not installed. | Empty grease cup.Place the grease cup back in grease drawer.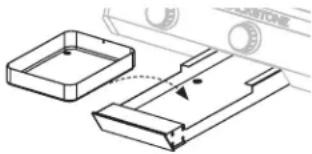 |
| Damaged internal component. | Contact a licensed electrician for repairs. |
Note: There are no user servicable components inside the griddle. In all cases of damage and malfunction, contact a licensed electrician for repairs. Maintenance by a non-licensed electrician will void all warranties.
CUSTOMER SUPPORT
Visit us online at BlackstoneProducts.com/support for assistance concerning appliance use, replacement parts, or your warranty.
CUSTOMER SUPPORT HOURS:

Monday - Friday
7:00 am - 5:00 pm (Mountain Time)
This page intentionally left blank
BLACKSTONE®
This product may be covered by one or more issued U.S. and/or international patents and may include patent applications pending. For more information, please visit: BlackstoneProducts.com/patents
DISTRIBUTED BY NORTH ATLANTIC IMPORTS, LLC 1073 W 1700 N LOGAN, UT 84321 USA | BLACKSTONE IS A REGISTERED TRADEMARK OF NORTH ATLANTIC IMPORTS, LLC
text_image
BLACKSTONEMANUEL DU PROPRIÉTAIRE
PLAQUE CHAUFFANTE ÉLECTRIQUE DE 30 PO DROP-IN AVEC CAPUCHE
TABLE DES MATIÈRES
INFORMATIONS DE SÉCURITÉ IMPORTANTES .....02
ACTIVEZ VOTRE GARANTIE....03
GUIDE D'ASSEMBLAGE....04
UTILISATION DE VOTRE BLACKSTONE 06
DÉPANNAGE....10
IMPORTANT:
BlackstoneProducts.com/support
CLÉ D'ALERTE DE SÉCURITÉ
! DANGER
natural_image
Technical line drawing of a rectangular frame with mounting brackets and a diagonal rail (no text or symbols)natural_image
Line drawing of a device with two wheels mounted on a base labeled 'BLADSTONE', showing no text or symbols beyond the label.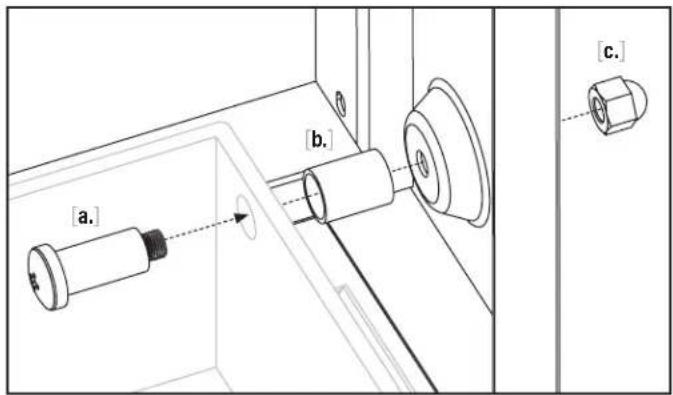
text_image
[a.] [b.] [c.]natural_image
Line drawing of a blackstone electrical stove with control panel and wiring (no text or symbols)UTILISATION DE VOTRE BLACKSTONE
INSTRUCTIONS D'INSTALLATION
DIMENSIONS
AVERTISSEMENT
text_image
A BLACKSTONE DDIMENSIONS DU CORPS DE LA PLAQUE CHAUFFANTE
A: Largeur = 32 ¼ po (819,15 mm)
B: Profondeur = 24 3/4 po (629 mm)
C: Hauteur = 11 3/4 po (298 mm)
DIMENSIONS DE LA BOÎTE DE COMBUSTION
D: Largeur = 31 % po (797 mm)
E: Profondeur = 21 po (533 mm)
F: Hauteur = 5 7/8 po (149 mm)
AVERTISSEMENT
text_image
A B F G H C E DDIMENSIONS DE LA CAVITÉ
A: Largeur minimale = 30 % po (770 mm)
Largeur maximale = 30 % po (778 mm)
B: Profondeur minimale = 20 % po (518 mm)
Profondeur maximale = 20 % po (525 mm)
C: Hauteur = 6 1/8 po (156 mm)
D: Distance minimale du dos = 3 % po
(86 mm)
DIMENSIONS DE L'ARMOIRE
E: Profondeur = 23 ^3/4 po (604 mm)
F: Hauteur = 35 po (889 mm)
DIMENSIONS DE LA PORTE
natural_image
Technical line drawing of a device rear panel with a cable and circular component (no text or symbols)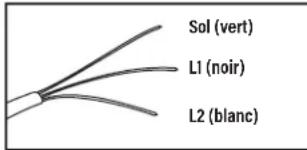
text_image
Sol (vert) L1 (noir) L2 (blanc)EXIGENCES ÉLECTRIQUES
240V 5400W
INSTRUCTIONS D'ALLUMAGE
POUR ALLUMER LA PLAQUE CHAUFFANTE:
BlackstoneProducts.com/blogs/recipes
youtube.com/c/BlackstoneGriddles
@blackstoneproducts
natural_image
Sketch-style illustration of a layered dessert with toppings and strawberries (no text or symbols)natural_image
Sketch of a hamburger with visible bun, fork, and bun (no text or symbols)
natural_image
Black-and-white line drawing of sliced vegetables, possibly tomatoes or lettuce, with no text or symbols present.TACOS BORRACHOS Dîner
INSTRUCTIONS D'ASSAISONNEMENT POUR PLAQUE CHAUFFANTE

natural_image
Line drawing of a blackstone electrical enclosure with three buttons and a central mounting bracket (no text or symbols)LAVER LE DESSUS DE VOTRE PLANCHA AVANT LA PREMIÈRE UTILISATION
AVIS
youtube.com/watch?v=VspmDVnj2pl&t=3s
natural_image
Grayscale abstract image with indistinct shapes and textures, no visible text or symbols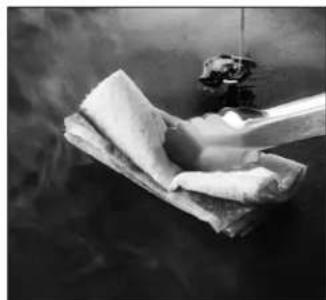
natural_image
Black-and-white photo of a hand holding a cloth over a sheet of paper, with smoke rising in the background (no text or symbols visible)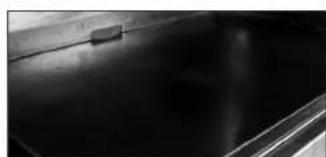
natural_image
Close-up of a dark, reflective surface with a small rectangular object on top (no text or symbols visible)QUELLE HUILE EST PRÉFÉRABLE D'UTILISER?
CAUSES POSSIBLES LA SOLUTION
natural_image
Close-up of a metallic tool tip on a dark surface (no text or symbols visible)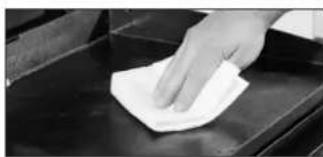
natural_image
Hand cleaning a white cloth on a dark surface (no text or symbols visible)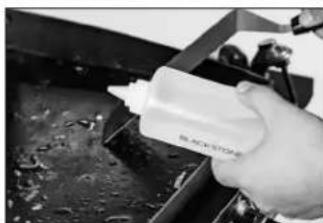
natural_image
Hand pouring liquid from a bottle into a container (no visible text or symbols)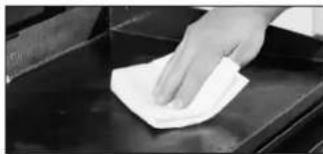
natural_image
Hand cleaning a white cloth on a dark surface (no text or symbols visible)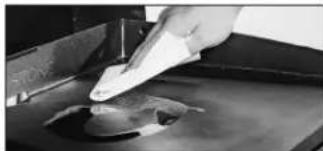
natural_image
Close-up of a hand using a tool to apply material on a dark surface (no visible text or symbols)VIDEZ VOTRE GODET À GRAISSE
natural_image
Technical line drawing of a blackstone device with mounting brackets and internal components (no text or symbols)NETTOYAGE DE VOTRE APPAREIL
AVERTISSEMENT
CAUSES POSSIBLES LA SOLUTION
CAUSES POSSIBLES LA SOLUTION
CAUSES POSSIBLES LA SOLUTION
natural_image
Technical line drawing of a mechanical component with no visible text or symbolstext_image
BLACKSTONEMANUAL DEL PROPIETARIO
PLANCHA ELÉCTRICA DE 30" DROP-IN CON CAPUCHA
TABLA DE CONTENIDO
INFORMACION DE SEGURIDAD IMPORTANTE....02
ACTIVA TU GARANTÍA 03
GUÍA DE MONTAJE....04
USANDO SU BLACKSTONE 06
natural_image
Technical line drawing of a rectangular frame with mounting brackets and a diagonal rail support (no text or symbols)natural_image
Line drawing of a portable electronic device with wheels and control panel (no text or symbols)
text_image
[a.] [b.] [c.]PASO 03 Continúe con USANDO SU BLACKSTONE.
natural_image
Line drawing of a blackstone electrical stove with three fans and a side panel (no text or symbols)USANDO SU BLACKSTONE
text_image
C F E B A BLACKSTONE DDIMENSIONES DEL CUERPO DE LA PLANCHA
A: Ancho = 32 ¼ pulg. (819,15 mm)
B: Profundidad = 24 3/4 pulg. (629 mm)
C: Altura = 11 3/4 pulg. (298 mm)
text_image
A B F G H C D E GDIMENSIONES DE LA CAVIDAD
natural_image
Technical line drawing of an electronic device with a cable and connector (no text or symbols)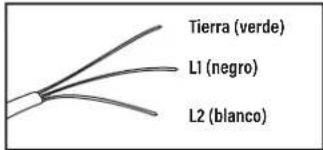
text_image
Tierra (verde) L1 (negro) L2 (blanco)COCINAR EN TU BLACKSTONE
▲ PELIGRO
BlackstoneProducts.com/blogs/recipes
youtube.com/c/BlackstoneGriddles
@blackstoneproducts

text_image
TORTITAS DE FRESAS Y CREMA Desayuno HAMBURGUESA DE CEBOLLA FRITA DE OKLAHOMA Almuerzo TACOS BORRACHOS CenaINSTRUCCIONES PARA SAZONAR LA PLANCHA
natural_image
Line drawing of a blackstone electrical enclosure with three buttons and a central mounting bracket (no text or symbols)youtube.com/watch?v=VspmDVnj2pl&t=3s
natural_image
Grayscale abstract image with indistinct shapes and textures, no visible text or symbols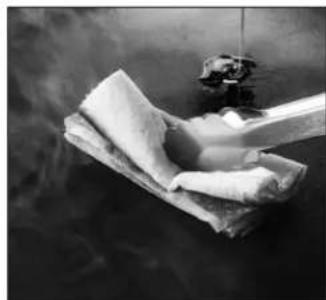
natural_image
Black-and-white photo of a hand holding a cloth over a sheet of paper, with smoke rising in the background (no text or symbols visible)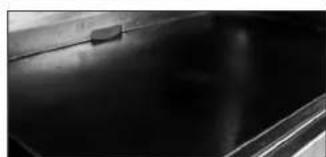
natural_image
Close-up of a dark, reflective surface with a small rectangular object on top (no text or symbols visible)natural_image
Close-up of a white, elongated object resting on a dark surface (no visible text or symbols)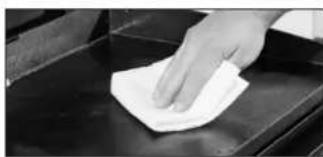
natural_image
Hand cleaning a surface with a white cloth (no text or symbols visible)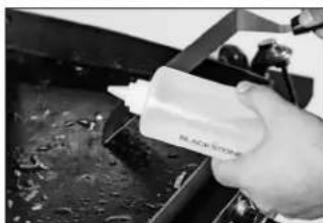
natural_image
Hand pouring liquid into a container with a bottle (no visible text or symbols)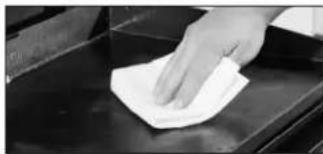
natural_image
Hand cleaning a white cloth on a dark surface (no text or symbols visible)