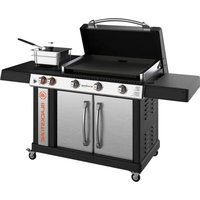
8001 - Grill plate Blackstone - Free user manual and instructions
Find the device manual for free 8001 Blackstone in PDF.

User questions about 8001 Blackstone
0 question about this device. Answer the ones you know or ask your own.
Ask a new question about this device
Download the instructions for your Grill plate in PDF format for free! Find your manual 8001 - Blackstone and take your electronic device back in hand. On this page are published all the documents necessary for the use of your device. 8001 by Blackstone.
USER MANUAL 8001 Blackstone
CONFORMS TO UL 1026 (6TH ED) AND
UL 1083 (6TH ED)
Please reference blackstoneproducts.com/support for the latest version of this manual, and to follow along with assembly videos.
WARNING
INSTALLER/ASSEMBLER:
Leave these instructions with consumer.
CONSUMER: Retain this manual for future reference.
WARNING
This instruction manual contains important information necessary for the proper assembly and safe use of the appliance.
WARNING
Read all warnings and instructions before assembling the appliance.
Follow all warnings and instructions while using the appliance.
WARNING
Accessible parts may be very hot. Keep children and pets away from appliance at all times.
This appliance is not intended for use by children.
Close supervision is necessary when any appliance is used by or near children.
WARNING
This appliance is not intended for and should never be used as a heater.
Do not use for purposes other than intended.
Do not modify this appliance.
DANGER
Never place any items within 3 in (8 cm) of the cooking surface while in use. This area can become very hot and potentially damage any accessory objects placed too close.
IMPORTANT SAFEGUARDS
When using electrical appliances, basic safety precautions should always be followed including the following:
- Read all instructions.
- Do not touch hot surfaces. Use handles or knobs.
- To protect against electrical shock do not immerse cord, plugs, or appliance in water or other liquid.
- Close supervision is necessary when any appliance is used by or near children.
- Unplug from outlet when not in use and before cleaning. Allow to cool before putting on or taking off parts.
- Do not operate any appliance with a damaged cord or plug or after the appliance malfunctions or has been damaged in any manner. Return appliance to the nearest authorized service facility for examination, repair, or adjustment.
- The use of accessory attachments not recommended by the appliance manufacturer may cause injuries.
- For Household use only.
SAVE THESE INSTRUCTIONS
For extension cords:
a. A short power-supply cord is provided to reduce the risk resulting from becoming entangled in or tripping over a longer cord.
b. Longer power-supply cords or extension cords are available and may be used if care is exercised in their use.
c. If a longer power-supply cord or extension cord is used:
- The marked electrical rating of the cord set or extension cord should be at least as great as the electrical rating of the appliance;
- The cord should be arranged so that it will not drape over the countertop or tabletop where it can be pulled on by children or tripped over unintentionally; and
- The cord set or extension cord should be a grounding-type 3-wire cord.
d. Outdoor extension cords should be used with outdoor use products and are surface marked with the suffix letter "W" and with a tag stating "Suitable for use with outdoor appliances."
e. The connection to an Extension cord should be kept dry and off the ground.
f. Store products indoors when not in use - out of the reach of children.
g. Do not clean this product with a water spray or the like.
WARNING
This product can expose you to chemicals including Di(2-Ethylhexyl) Phthalate (DEHP), which is known to the State of California to cause cancer and birth defects or other reproductive harm, and Diisononyl Phthalate(DINP), which is known to the State of California to cause cancer. For more information, go to www.P65Warnings.ca.gov.
This appliance is safety certified for use in the United States and/or Canada only. Do not modify for use in any other location. Modification will result in a safety hazard and void warranty.
TABLE OF CONTENTS
It is the consumer's responsibility to see that the unit is properly assembled, installed, and maintained. Failure to follow the instructions in this manual could result in bodily injury and/or property damage.
CONTENTS
- REGISTER YOUR PRODUCT 01
- FOR YOUR SAFETY 02
Section 01. Food Safety . 02
Section 02. Electric Griddle Safety 03
- ASSEMBLY GUIDE 04
- IGNITION | ELECTRIC 07
- RECIPES. 08
- WARRANTY.. 11
SAFETY ALERT KEY
Read and follow all the notices throughout the manual.
DANGER
Indicates an imminently hazardous situation which, if not avoided, may result in death or serious injury.
WARNING
Indicates the possibility of serious bodily injury if the instructions are not followed.
CAUTION
Indicates a potentially hazardous situation which, if not avoided, may result in minor or moderate injury.
REGISTER YOUR PRODUCT
Registration allows our Customer Service Representatives to quickly provide assistance with your Blackstone product if needed.
The North Atlantic Imports LLC 1-Year Warranty covers replacement parts up to one year after the date of purchase. (Please reference the Warranty chapter for more information.) To enable this warranty, you will need to provide:
Proof of Purchase/ Receipt/ Order Details
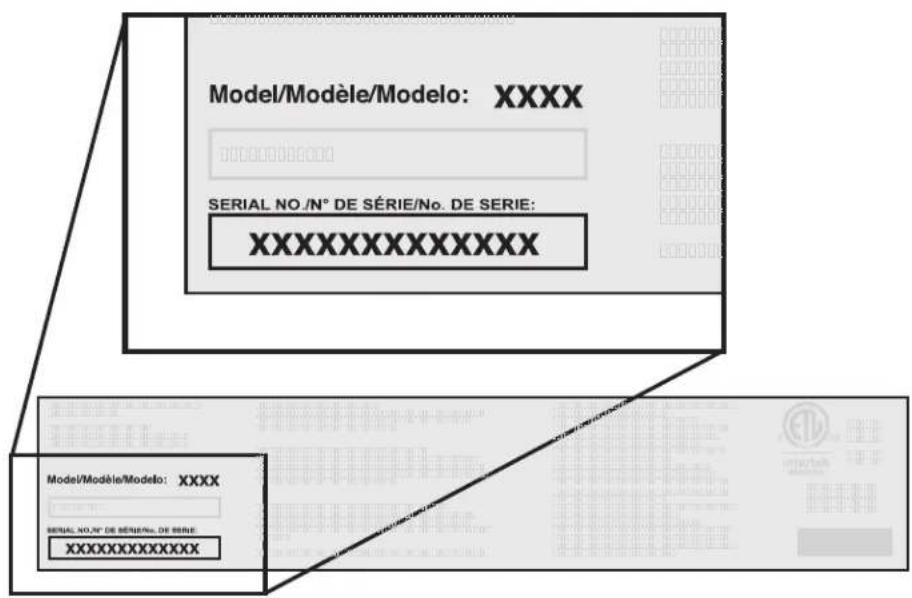
- Your Blackstone product's Serial Number
- Your Blackstone product's Model Number
Your Blackstone product's Serial and Model numbers can be found on your griddle's Origin Label. (The Origin Label is a large silver sticker found on the body of your appliance.)
OUR CUSTOMER
SERVICE STAFF IS
HERE TO HELP YOU!
Register your Blackstone product at
blackstoneproducts.com/ register
and visit us online at
blackstoneproducts.com/support

We are pleased to help you with any questions concerning appliance use, replacement parts, or your warranty.
Customer Service Hours:

Monday-Friday
7:00 am - 5:00 pm (MST)
Model Number
Serial Number
Date Purchased
DANGER
Never operate this appliance unattended.
WARNING
NEVER partially cook meat or poultry to finish cooking later. Cook food completely to destroy harmful bacteria.
WARNING
The use of alcohol, prescription or non-prescription drugs may impair the consumer's ability to properly assemble or safely operate the appliance.
CAUTION
For residential and household use only. DO NOT use for commercial cooking.
CAUTION
Use long-handled cooking utensils and oven mitts to protect against burns and splatters.
CAUTION
- Do not place any empty cooking or frying vessels on the cooking surface while in operation.
- Use caution when placing anything in cooking vessel while the appliance is in operation.
FOR YOUR SAFETY
Before proceeding, make certain that you understand the FOR YOUR SAFETY section of this manual. Hazardous fire or explosion may result if instructions are ignored.
Section 01
FOOD SAFETY
Food safety is an important part of enjoying the outdoor cooking experience. To keep food safe from harmful bacteria, follow these four basic steps:
CLEAN: Wash hands, utensils, and surfaces with hot soapy water before and after handling raw meat and poultry.
SEPARATE: Separate raw meats and poultry from ready-to eat foods to avoid cross contamination. Use clean platter and utensils when removing cooked foods from appliance.
COOK: Cook meat and poultry thoroughly to kill bacteria. Use thermometer to ensure proper internal food temperatures.
CHILL: Refrigerate prepared foods and leftovers promptly.
For more information visit
foodsafety.gov or Canadian
Partnership for Consumer Food
Safety Education online at
befoodsafe.ca
HOW TO TELL IF MEAT IS COOKED THOROUGHLY
Meat and poultry cooked with this appliance often browns very fast on the outside.
Use a meat thermometer to be sure food has reached a safe internal temperature and cut into food to check for visual signs of doneness.
When reheating takeout foods or fully cooked meats like hot dogs, cook to 165^(74^) , or until steaming hot.
MEAT COOKING TEMPERATURES
Poultry
165^ For 74^
Juices should run clear and flesh should not be pink.
Beef or Poultry Hamburger
160^ For 71^
Juices should not be pink and flesh should be brown in the middle.
Beef, Veal, & Lamb
Steaks/Chops
145°For 63^
Beef, Veal, & Lamb Roasts
145^63^
ALL cuts of Pork
160^71^
Juices should not be pink.
Section 02
ELECTRIC GRIDDLE SAFETY
SAFETY TIPS
- Use long-handled, non-metal utensils and oven mitts to protect against burns and splatters.
- Do not allow the electric components to come in contact with water.
- Wash griddle surface before initial use.
TURNING GRIDDLE OFF
- When not in use, turn OFF the appliance by pressing and holding the control knob button until the temperature image disappears and unplug the unit.
PROTECTING THE NON-STICK SURFACE
- Do not cut directly on the griddle surface.
Only use plastic, rubber, wood, and/or nylon cooking utensils on the cooking surface. - Avoid using anything that may scratch the surface, including metal scouring pads and abrasive cleaners.
- Do not leave water on the griddle surface for more than two hours.
- Do not wash the griddle top in the dishwasher.
FOR DAILY CLEANING:
STEP 01 Be sure that grease cup is in place.
STEP 02 Wipe off surface with a moist, soapy cloth or paper towel.
STEP 03 Wash off soap and dry.
FOR DEEP CLEANING:
STEP 01 Be sure that grease cup is in place.
STEP 02 Turn heat to low.
STEP 03 While wearing rubber gloves, use one (1) tablespoon of dishwashing detergent per one (1) cup of hot water, and wipe down the griddle surface with a cloth or non-metal cleaning pad.
STEP 04 Turn off griddle, and once cool, wipe off surface with a moist, soapy cloth or paper towel.
STEP 05 Wash off soap and dry.
DANGER
- The power cord must be electrically grounded in accordance with local codes or, in the absence of local codes, with the National Electrical Code, ANSI/ NFPA 70, or the Canadian Electrical Code, CSA C22.1.
- Keep the electrical supply cord and the fuel supply hose away from any heated surface(s).
- Use only a Ground Fault Interrupter (GFI) protected circuit.
- Never remove the grounding plug or use with an adapter of 2 prongs.
- Use only extension cords with a 3 prong grounding plug, rated for the power of the equipment, and approved for outdoor use with a W-A marking.
WARNING
The supply cord should be regularly examined for signs of damage, and the appliance is not to be used if the cord is damaged.
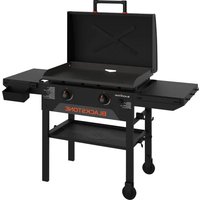
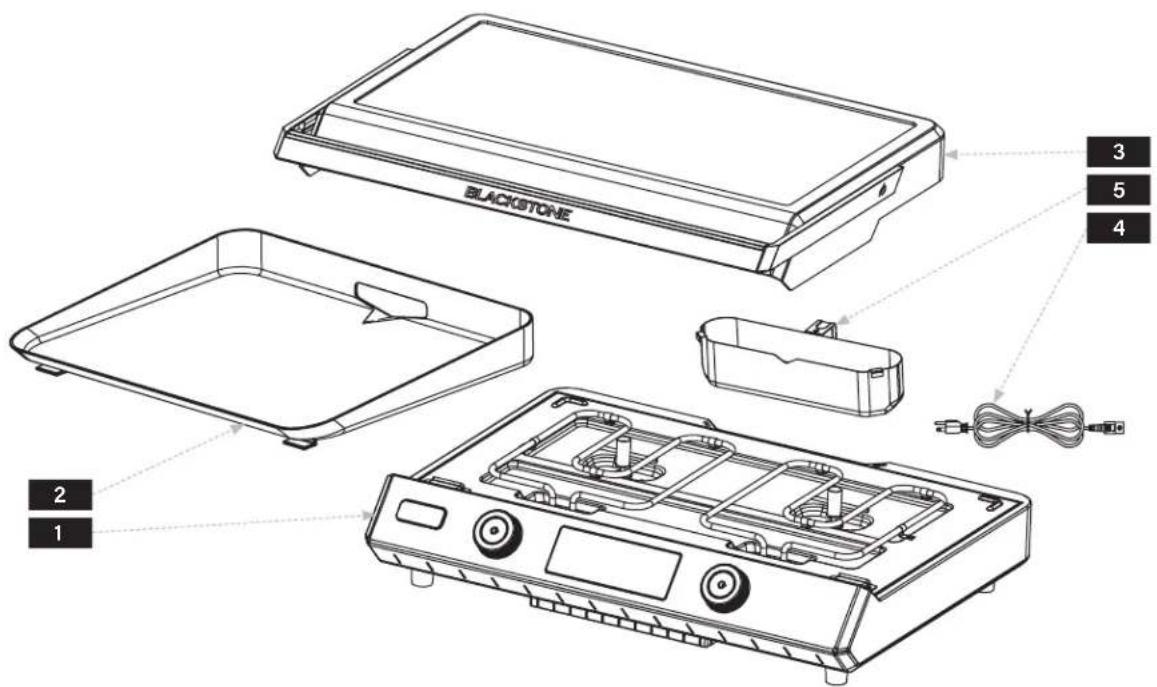
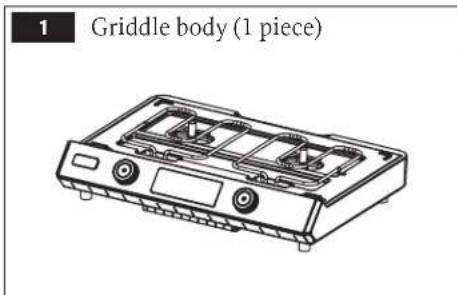
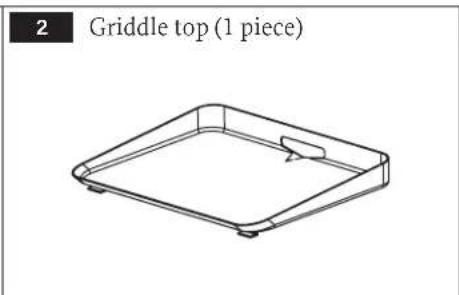
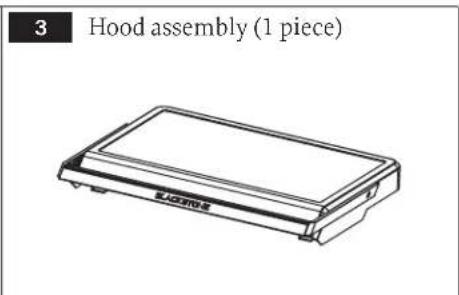
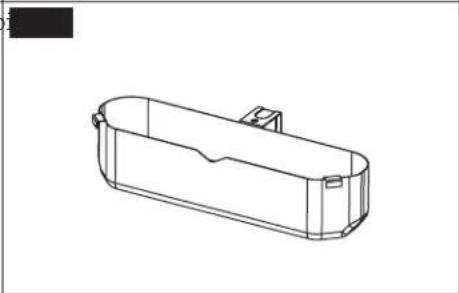
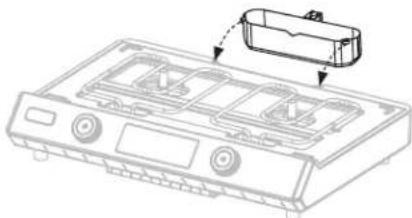
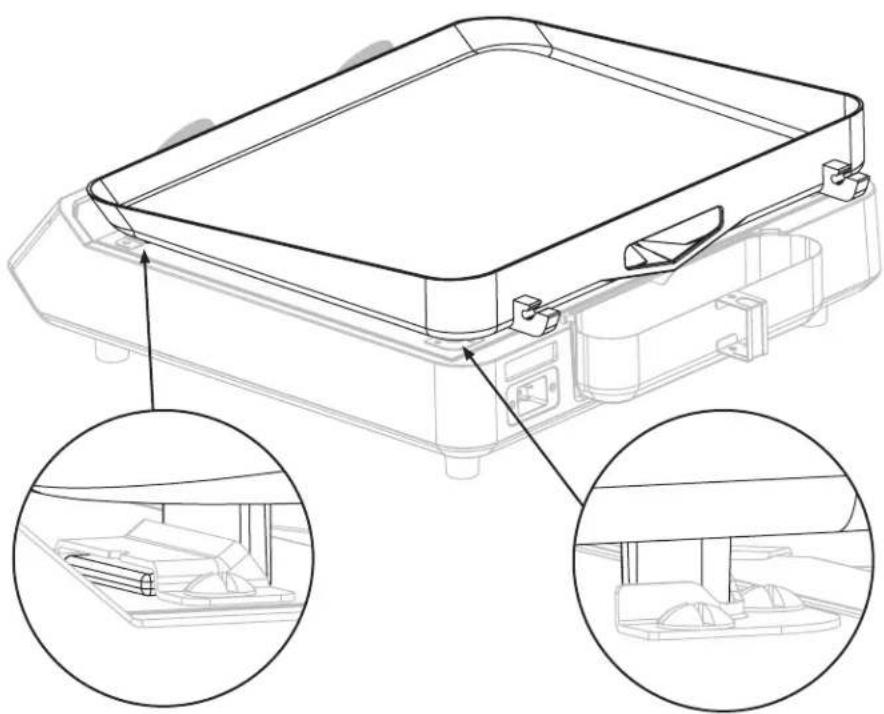
ASSEMBLY GUIDE
EXPLODED VIEW & ILLUSTRATED PARTS LIST

ELECTRIC REQUIREMENTS: 120V 60Hz 13.5A
ASSEMBLY INSTRUCTIONS
Please read all instructions thoroughly before proceeding. Make sure all the plastic packing material is removed before assembling.
Find a large, clean area to assemble your unit. Please refer to the parts list and assembly diagrams as necessary.
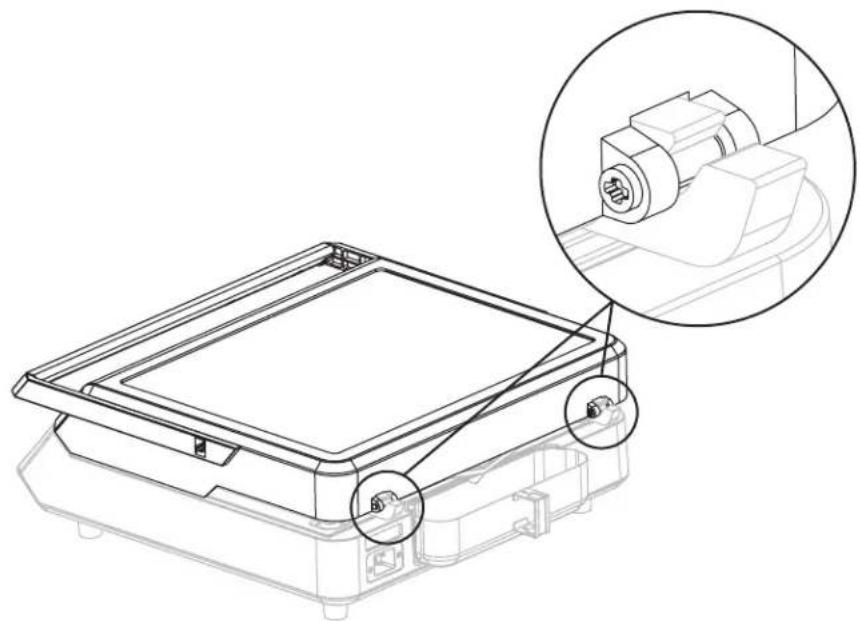
STEP 01 Before installing the griddle top on the griddle body, remove the warning label on the griddle body.
STEP 02 Hang the grease cup in the slots on the back of the griddle body.
STEP 03 Place the griddle top on the griddle body. Slide the griddle top forward so that the front feet lock into the front brackets, and the back feet rest against the back brackets.
WARNING
The manufacturer has made every effort to eliminate any sharp edges. However, you should handle all components with care to avoid accidental injury.
Some parts may contain sharp edges, especially as noted in these instructions. Wear protective gloves if necessary.
WARNING
This appliance will be hot during and after use. While cooking, place unit on heat-resistant and flame-resistant surfaces to avoid damage and injury.
WARNING
Do not leave the hood closed for more than 10 minutes while cooking.
STEP 04 Place the hood on the griddle top. Insert the hood hinges into the griddle top brackets.
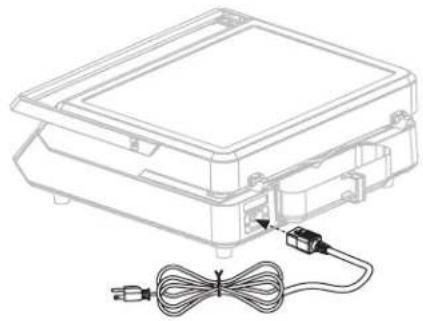
STEP05 Insert the power cord plug into the socket on the griddle body.
ASSEMBLY VIDEOS
View Product Assembly and Technical Support videos online at blackstoneproducts.com/support and on YouTube @BlackstoneGriddles

STEP 06 Enjoy cooking on your Blackstone!
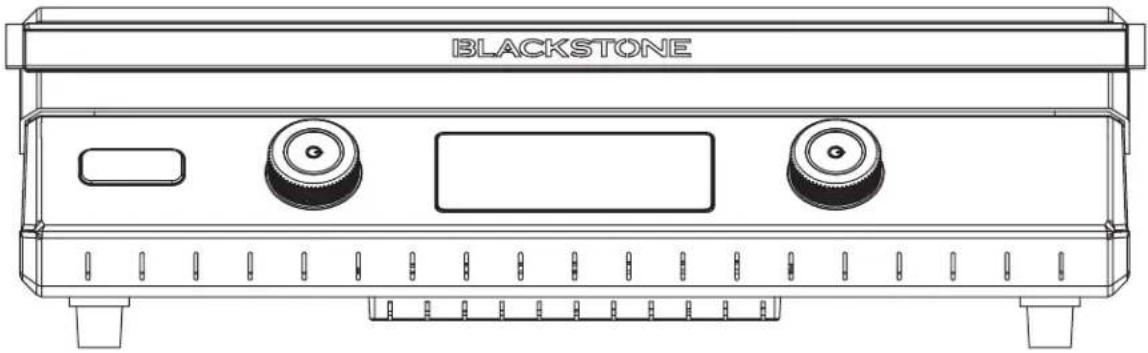
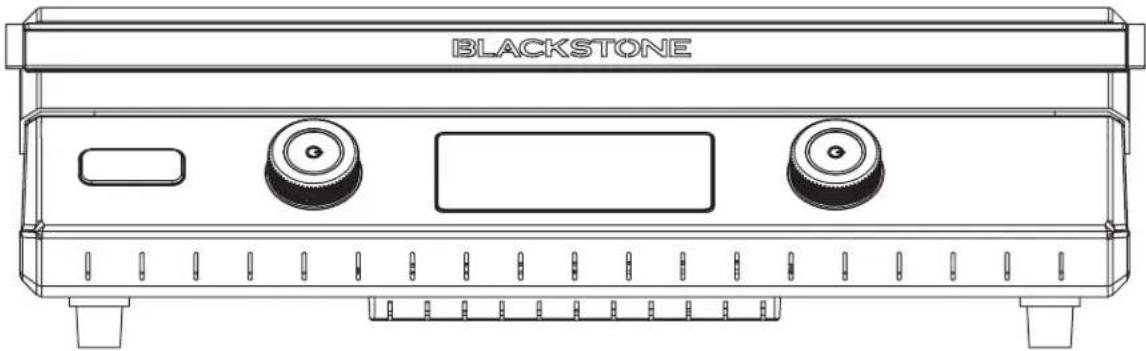
IGNITION | ELECTRIC
For proper ignition and operation of the griddle follow the steps below.
STEP01
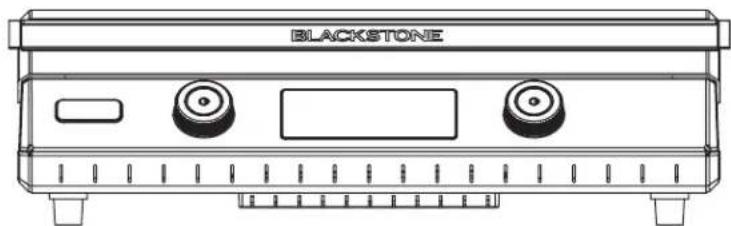
Press the control knob button to turn the griddle on.
Turn the control knob until the Set Temp displays the desired temperature.
3 Press the control knob to set the temperature.
STEP02
When the Zone Temp dash indicators reach the orange area, the griddle has reached the set temperature.

To turn the griddle OFF:
STEP01
Press and hold the control knob button until the temperature image disappears to turn the griddle off.
STEP02
Do not store the unit until the Hot Surface indicator has turned off.
PLEASE NOTE: For best results, allow griddle to heat for 5 minutes before use.
RECIPES FOR LUNCH & DINNER
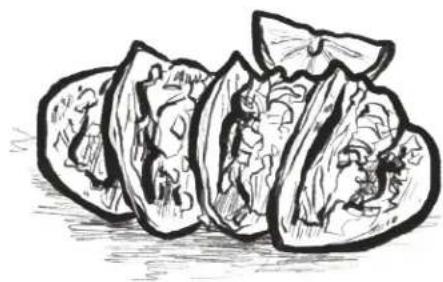
TACOS BORRACHOS
Serves 4 | 2-4 hours
Ingredients
12 oz of blond beer
2 lb of sirloin steak
- 1 bunch cilantro (finely chopped)
1/4 white onion (finely chopped)
1/4 tablespoons of black pepper
4 garlic cloves (chopped in big chunks)
1/4 cup of vegetable oil
24 tortillas (small, 4.5" tortillas)
Salt (to taste)
STEP 01 Season the sirloin steaks with salt and black pepper, making sure that you rub the salt and pepper well into the steaks.
STEP 02 Slice the steak into small pieces.
STEP 03 In a plastic bag, place the steak pieces, onions, garlic, and cilantro. Mix all ingredients together.
STEP 04 Once all ingredients are mixed, add little by little the content of the bottle of beer (cold or room temperature) into the plastic bag.
STEP 05 Take the air out of the plastic bag and let the meat marinade in the refrigerator between 2 and 4 hours.
STEP 06 When the meat is ready, drain the beer and place the meat on a plate.
STEP 07 Pre-heat the Blackstone griddle at medium heat for five minutes. Then, add vegetable oil to the surface and let it get to temperature for thirty seconds. Add your previously marinated steak to the Blackstone griddle.
STEP 08 Cook the steak for about three minutes or until the steak is thoroughly cooked, and place in a bowl.
STEP 09 Spread all remaining steak juices in the griddle, and place the tortillas on top until the tortillas are cooked (the tortillas change color slightly and they become malleable), turning the tortillas from time to time.
STEP 10 To make the tacos, place one tortilla on top of the other (two tortillas together). With a spoon place the steak on top of the tortillas and garnish with white finely chopped onion and cilantro. You can also add your favorite salsa as well.
RECIPES FOR BREAKFAST
STRAWBERRY AND CREAM PANCAKES
Recipe by Danielle Zechmann
STEP 01 Separate egg and whisk egg white until stiff peaks form. Set aside.
STEP 02 Make your cream cheese filling. Whisk together cream cheese, sugar, and lemon juice. Then, turn to low speed and add in whipped cream. Set aside.
Cream Cheese Filling
8 oz cream cheese, room temperature
- 3 tbsp sugar
- 2 tbsp lemon juice
2/3 cup whipping cream
STEP 03 Get your strawberry syrup started. In a sauce pan add chopped strawberries, sugar, lemon juice and simmer on the griddle top or side burner until juices have slightly thickened. (About 20-25 mins.)
Strawberry Syrup
- 1 pint of strawberries cut into chunks (frozen is okay)
1/4 cup sugar - 2 tbsp lemon juice
STEP 04 In a mixing bowl, combine all dry pancake ingredients.
STEP 05 In a separate bowl, mix egg yolk, milk, lemon juice, ricotta, butter, and vanilla.
STEP 06 Slowly add dry ingredients and mix until combined.
STEP 07 Gently fold the egg whites and strawberry bits into the pancake mix.
STEP 08 Preheat Griddle to medium. Melt a tablespoon of butter on griddle and spread around. Pour 1/4 cup of pancake mix onto griddle and let cook until bubbles start to form and edges are slightly browned. About 3-4 minutes. Flip and cook another 3 minutes.
STEP 09 Once all of your pancakes are cooked, grab a plate and start layering your pancakes. Begin with a pancake, then spread some of the cream cheese filling, and top with the strawberry syrup.

Serves 6 | 45 min.
Pancake Ingredients
- 1 egg, separated
1/2 cup milk
1/3 cup ricotta cheese - 2 tbsp melted butter
- 1 tsp pure vanilla extract
- 2 tsp lemon juice
- 5 strawberries chopped into bits (frozen is okay)
DRYINGREDIENTS
2/3 cup all purpose flour
2 tsp baking powder
- 1 tbsp sugar
- a pinch of salt
VIDEO RECIPIES:
Find more inspiration and recipes at

blackstoneproducts.com/ blogs/receptions

youtube.com/c/ BlackstoneGriddles


@blackstoneproducts

Serves 4 | 7 min.
Ingredients
1/2 lb of 80/20 ground beef
1 Vidalia (or sweet) onion (sliced paper thin)
- 4 slices American cheese
1/4 cup of dill pickle chips
Salt
RECIPES FOR LUNCH & DINNER
OKLAHOMAFRIEDONIONBURGER
STEP 01 Pre-heat your Blackstone to high heat.
STEP 02 Make four (4) 2 oz loosely packed meatballs with the ground beef and place on the hot griddle. Add a pinch of salt over each and using your Blackstone Burger Press, smash them very thin.
STEP 03 Add 2-3 ounces of thinly sliced onion over each patty.
STEP 04 Cook for 60-90 seconds and flip so that the onions are under the patty. Add 1 slice of American cheese to each patty and then place the top bun over the cheese and then the bottom bun on top of the top bun. Cook for another 60 seconds.
STEP 05 To plate, remove the bottom bun from the top and set on plate. Use your spatula to lift the burger with top bun and add to the bottom bun.
STEP 06 Serve hot with a few dill pickle chips.
VIDEO RECIPES:
Find more inspiration and recipes at

blackstoneproducts.com/ blogs/receptions

youtube.com/c/ BlackstoneGriddles


@blackstoneproducts
NORTH ATLANTIC IMPORTS LLC 1-YEAR WARRANTY
North Atlantic Imports, the manufacturer, will warranty for one year from purchase all parts, workmanship, and finishes. It will be the manufacturer's option as to whether to repair or replace any of the above items. All warranties are limited to the original purchaser only. This warranty does not cover any liability on the part of North Atlantic Imports, its agents or employees, for any indirect or consequential damages for breach of warranty. The purchaser must follow the manufacturer's usage instructions.
Under no circumstances is the manufacturer responsible for damages from the failure to operate the cooking station properly. It is the responsibility of the purchaser to establish the warranty period by verifying the original purchase date with original sales receipt.
For more detailed explanation of the warranty, read below:
North Atlantic Imports LLC warrants to the owner that the product covered by this agreement is free from defects in material and workmanship under normal use and service for which it was intended if, but only if, it has been operated in accordance with North Atlantic Imports LLC instructions exclusively for domestic use, and not for private or public club, institutional or commercial purposes.
North Atlantic Imports LLC's obligation under this warranty is limited to replacing or repairing, free of charge, any part or parts that may prove, to the satisfaction of North Atlantic Imports LLC, to be defective under normal home use and service within the following stated periods of time from the date of purchase; for one year from purchase, all parts, finish, and workmanship. Should any failure to conform to this warranty become apparent during applicable warranty periods stated above, the original purchaser must notify North Atlantic Imports LLC of breach of warranty within the applicable warranty period.
North Atlantic Imports LLC shall upon notice and compliance by the original purchaser with such instructions, correct such nonconformity by repair or replacement of the defective part or parts.
Correction in the manner provided above shall constitute a fulfillment of all obligations of North Atlantic Imports LLC with respect to the quality of the product.
North Atlantic Imports LLC does not warrant this equipment to meet the requirement of any safety code of any state, municipality or other jurisdiction, and the original purchaser assumes all risk and liability whatsoever resulting from the use thereof, whether used in accordance with North Atlantic Imports LLC instructions or otherwise.
This warranty does not cover and is intended to exclude any liability on the part of North Atlantic its agents, servants or employees whether under this warranty or implied by law for any indirect or consequential damages for breach on any warranty. The purchaser must
establish all applicable warranty periods pursuant to this warranty by verifying the original purchase date by producing the dated sales receipt. This warranty shall not apply to this product or any other part thereof which has been subject to accident, negligence, alteration, abuse, or misuse or which has been repaired or altered without North Atlantic written consent, outside of North Atlantic Imports LLC factory. The full manufacturer warranty is not valid for griddles purchased from unlicensed, third-party resellers, purchased at a discount due to missing or damaged parts, or purchased as a floor model; at the discretion of North Atlantic Imports.
North Atlantic Imports LLC makes no warranty whatsoever in respect to accessories or parts not supplied with it. This warranty shall apply only within the boundaries of the United States of America. This warranty gives the original purchaser specific rights, and the original purchaser may also have other rights, which vary from state to state.
MANUEL D'UTILISATION
Modèle 8001
PLAQUE CHAUFFANTE ÉLECTRIQUE DE 22 PO

CONFORME A UL 1026 (6TH ED) ET UL 1083 (6TH ED)
blackstoneproducts.com/support

GARANTIE D'UN AN DE NORTH ATLANTIC IMPORTS LLC
Para Obtener mas informacion, visite foodsafety.gov o Canadian Partnership for Consumer Food Safety Education en linea en befoodsafe.ca
CÓMOCDECIR SI LA
CARNE ESTÁ ASADA
COMPLETAMENTE