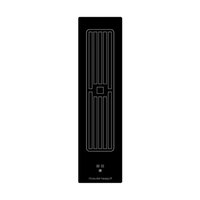
VKM1820.0SR - Cooker Küppersbusch - Free user manual and instructions
Find the device manual for free VKM1820.0SR Küppersbusch in PDF.


| Product type | Built-in cooktop extractor fan |
| Brand | Küppersbusch |
| Model | VKM1820.0SR |
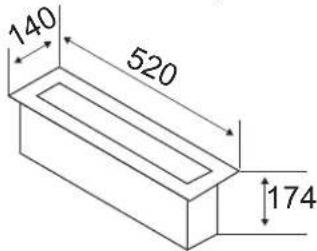
| Dimensions (H x W x D) | 174 x 140 x 520 mm |
| Power consumption | 0.168 kW |
| Number of power levels | 4 levels + intensive (P) |
| Timer shut-off | Yes, adjustable from 10 to 60 minutes in 5-minute increments |
| Automatic timer shut-off | Yes, 15 minutes after 15 minutes of operation at level 1 |
| Grease filter cleaning indicator | Yes, after 10 hours of operation (FC) |
| Charcoal filter replacement indicator | Yes, after 150 hours of operation (CC) |
| Extraction mode | External exhaust or air recirculation |
| Nominal diameter of exhaust duct | 150 mm minimum |
| Filter type | Metal grease filter (cleanable), activated charcoal filter (replaceable) |
| Grease filter cleaning | In dishwasher or by hand, at least once a month |
| Charcoal filter replacement | Every 5 to 24 months depending on usage |
| Safety | Do not use without grease filter, hot surfaces, automatic shut-off for drying |
| Electrical connection | Via 6-pin connector with cooktop |
| Installation | Next to the cooktop, by a qualified professional |
| Repair index | Filters accessible, spare parts available (filters, connectors) |
Frequently Asked Questions - VKM1820.0SR Küppersbusch
User questions about VKM1820.0SR Küppersbusch
0 question about this device. Answer the ones you know or ask your own.
Ask a new question about this device
Download the instructions for your Cooker in PDF format for free! Find your manual VKM1820.0SR - Küppersbusch and take your electronic device back in hand. On this page are published all the documents necessary for the use of your device. VKM1820.0SR by Küppersbusch.
USER MANUAL VKM1820.0SR Küppersbusch
Please read the users an installation instructions carefully before installation of the appliance and before starting to use.
1.1 For your information.. 14
1.2 Intended use 14
2 Safety Instructions andWarnings 15
2.1 For connection and operation 15
2.2 For persons 15
2.3 Explanation for symbols and indications 16
3 Appliance description 17
4 Using the fan 18
4.3.1 Switching the fan on and off 18
4.3.2 Fan time lag 18
4.3.3 Notes on the after run time 19
4.3.4 Display: Clean the grease filters 19
4.3.5 Display: Replace the charcoal filter 19
4.3.6 Turn off the carbon filter operating hours counter during the operation of the air exhaust ....19
5 Cleaning and care 20
6 Extraction air system assembly 21
6.1 6-pole fan plug connector 22
6.2 Hob fan installation 22
7 Technical data 23
8 Decommissioning and disposal of the appliance .23
8.1 Switching the appliance off completely 23
8.2 Disposing of the packaging 23
8.3 Disposing of old appliances 23
1 General
1.1 For your information...
Please keep this manual in a safe place and pass it on to new owners for their information and safety.
1.2 Intended use
The fan has been designed for installation next to a suitable hob. It is electronically connected to the hob.
Only fans and hobs approved by Kuppersbusch may be installed together.
2 Safety Instructions andWarnings
2.1 For connection and operation
- The appliances are constructed in accordance with the relevant safety regulations.
- Connecting the appliances to the mains and repairing and servicing the appliances may only be carried out by a qualified electrician according to currently-valid safety regulations. For your own safety, do not allow anyone other than a qualified service technician to install, service or repair the product.
- If the mains supply cable of this appliance is damaged, it must be replaced by the manufacturer, the Customer Service of the manufacturer or by another qualified person to avoid danger.
- The appliance may not be operated with an external timer or an external telecontrol system.
- Make sure there are no items (e.g. cleaning cloths) right next to the hob extractor. They could be sucked in by the air current. Liquids and small items must always be kept away from the appliance.
- Do not operate the appliance without grease fi lter.
- Filter with too much fat deposits causes fire hazard!
- Constant supervision is essential when deep-frying; fl ambéing is not permitted.
- A suffcient supply of inlet air must be provided when operating wood, coal, gas or oil heaters requiring a chimney. The permissible negative pressure which results from the hood in the location of the heaters requiring a chimney may not exceed 4 Pa (0.04 mbar) as this results in a risk of poisoning.
Vapour also emits moisture into the air in the kitchen during the cooking process. - Only a little moisture is removed from the
vapours in the convection air mode. This is why a sufficient supply of fresh air must always be provided, e.g. by opening the window or using domestic ventilation systems.
- Always make sure that the indoor climate is normal and comfortable (45 - 60% humidity).
- Switch the hob extractor down to a lower setting for around 20 minutes or activate the automatic delayed stop function every time the hob extractor is used in the convection air mode.
2.2 For persons
- These appliances may be used by children aged 8 years and over and by persons with physical, sensory or mental impairments or by persons who lack experience and/or know how, provided they are supervised or have been instructed in the safe use of the appliance and have understood the risks relating to the appliance. Children may not play with the appliance. Cleaning and maintenance by the user may only be carried out by children when they are supervised.
2.3 Explanation for symbols and indications
The appliance was produced according to state of the art technology. Machines nevertheless give rise to risks which cannot be constructively avoided.
In order to guarantee sufficient safety for the use, safety instructions are also given. These instructions are marked by way of the highlighted texts which follow.
Suffi cient safety in operation will only be guaranteed when these instructions are observed.
The designated text passages have different meanings:

DANGER
Note indicating an imminent threat which may result in death or very serious injury.

CAUTION
Note indicating a potentially dangerous situation which may result in death or very serious injury.

IMPORTANT
Note indicating a dangerous situation which may result in minor injury or damage to the appliance.

NOTE
Note to be observed in order to make handling the appliance easier.
The following danger symbols are used at some points:
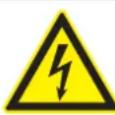
WARNING OF ELECTRICAL ENERGY RISK OF FATAL INJURY!
Live components have been installed near this symbol. Covers bearing this sign may only be removed by a certifi ed skilled electrician.
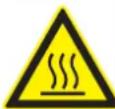
CAUTION! HOT SURFACES!
This symbol has been applied to surfaces which get hot. There is a risk of serious burning or scalding.
The surfaces may also be hot after the appliance has been switched off.

OBSERVE REGULATIONS FOR HANDLING ELECTROSTATICALLY SENSITIVE COMPONENTS AND MODULES (ESDS).
Electrostatically endangered components and modules are located behind covers bearing the adjacent symbol. Never touch plug connections, strip conductors or component pins. Only qualified staff members who are familiar with ESDs are authorised to carry out any technical intervention work.
3 Appliance description
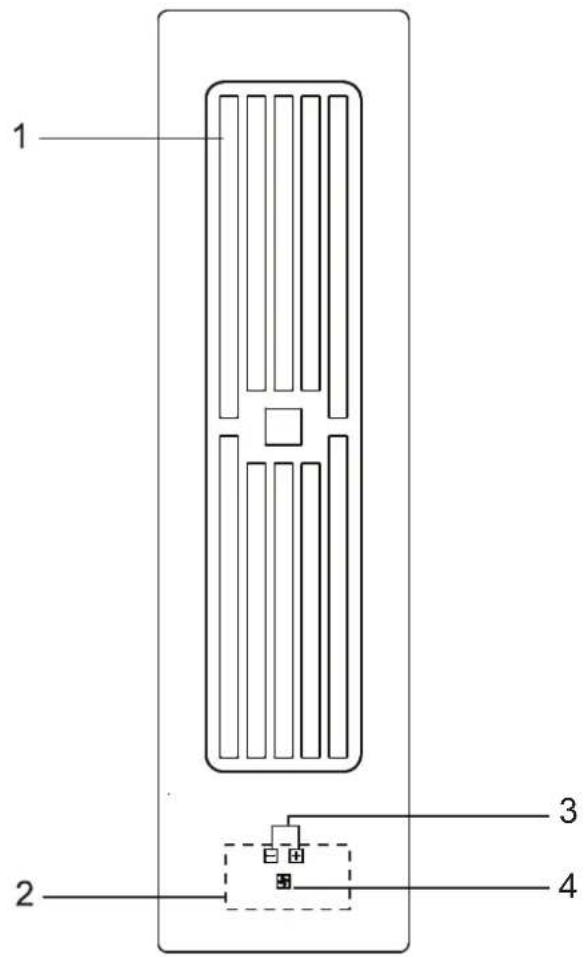
The decorative design may deviate from the illustrations.
- Fan
- Fan control
- Plus key / Minus key fan
- ON/OFF key fan
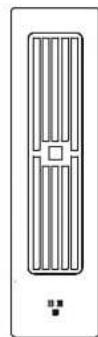
- 0
- - 43t > 1
P -
0
-
9
59
3.
4 Using the fan
Important:
Do not put the cover onto the hob!
Risk of burning!
4.3.1 Switching the fan on and off
- Press the fan ON/OFF key (approx. 1 s.)
- You will then be able to select a power setting, 1,2,3 or 4, by using the Plus -er Minus key . The symbol for the fan will light up.
The intensive power setting P operates for 10 minutes, after which the power level is automatically reduced to power setting 4.
- Press the fan Minus key until 0 is shown or press the ON/Off key of the fan in order to switch fan off.
Hint
In order to ensure that extraction functions well with tall cooking pots (e.g. pots used for cooking asparagus), you can place a wooden spoon under the lid of the pot.
4.3.2 Fan time lag
The fan time lag is used after cooker in order to remove cooking odours. The fiiter is also dried in the fan.
- Press simultaneously the fan Plus key and Minus key. The fan time lag of 10 minutes will be activated. The fan symbol and the decimal point blink.
- Pressing the Plus key will raise the time in 5-minutes steps.
Pressing the Minus key will lower the time in 5-minutes steps.
- Pressing simultaneously again the Plus- and Minus key will start the settings; the display will go off. The remaining after run time and set fan speed is displayed for a short time every 30 seconds.
Changing the fan time lag
- Press simultaneously the fan Plus key and Minus key, - in order to change the time.
Cutting off the an time lag
Press the ON/Off key of the fan
Please note: If the ventilation system has been in operation for at least 15 minutes, an automatic delay of 15 minutes at level 1 runs to dry out the system.
Disable automatic after-run
- Turning on the control via the ON/OFF key on the fan
- Press the ON/OFF key on the fan for approximately 3 seconds until displayed. The automatic fan is permanently disabled.
- Turning on the control via the ON/OFF key on the fan
- Press the ON/OFF key on the fan for approximately 3 seconds until is displayed. The automatic fan run is permanently activated.
4.3.3 Notes on the after run time
The fan motor should continue operating for another 10-20 minutes every time the hob has been used for cooking.
When the fan is switched off after having been in operation for at least 15 minutes, an automatic time lag at a low setting will follow for around 15 minutes.
This guarantees optimal functioning and the removal of remaining cooking steam.
When using a recirculating air filter, please always allow for a stop delay time of 10 - 60 minutes in order to optimally remove cooking odours.
When the fan is switched on again, in rare cases the odour molecules present in the fi liter may be combined with steam so that they are detected again. These remaining odours will disappear when the fan continues to operate.
Important
When the convection air mode is in operation, ventilation must be suffi cients in order for the air humidity to be removed.
4.3.4 Display: Clean the grease fi Iters
After 10 hours of operation the display for fi iter cleaning appears. The grease fi iter must be cleaned, otherwise there is a risk of fire.
To continue to use the ventilation, confirm the display with the Minus key
If the grease fi iter has been cleaned, you can delete the display by pressing the Minus key and the ON/OFF key on the fan at the same time for at least 3 seconds. The counter for the display starts again at 0 hours.
4.3.5 Display: Replace the charcoal fi iter[
After 150 hours of operation the display for Carbon Cleaning appears [The charcoal filter needs to be replaced.
To continue to use the ventilation, confirm the display using the Plus key to +
If the carbon filter has been replaced, you can delete the display by pressing the Plus key and the ON/OFF key on the fan at the same time for at least 3 seconds. The counter for the display starts again at 0 hours.
4.3.6 Turn off the carbon filter operating hours counter during the operation of the air exhaust
During the operation of the air exhaust, the operating hours counter for the carbon filter must be turned off.
To do this, the control panel must first be turned on using the ON/OFF key of the fan and there may not be any messages displayed.
Then simultaneously press the Plus key and the ON/OFF key of the fan for 3 seconds.
The display will show (carbon off) and the operating hours counter for the charcoal filter is turned off.
To turn the operating hours counter back on, repeat the operation.
The display will show (carbon off) and the operating hours counter for the charcoal filter is turned off.
5 Cleaning and care
Cleaning the metal grease fi iters
Clean the metal grease fi tters in the dishwasher or in mild soapy water at least once a month or in the event of excessive grease deposits and/or intensive use.
To remove the filter, lift up the fan cover and lift the U-shaped stainless steel ventilation plate in the suction intake opening upwards to remove it from the fan. Now remove the fiiter. To do so, press the lock in the recessed handle downwards and remove the fiiter.
The filter can be rinsed in a dishwasher. Stand the filter upright in the dishwasher. Please use only rinse aid that is suitable for use with aluminium in order to avoid damaging and discolouring the fi iters.
Never rinse right next to glasses or light-coloured porcelain.
Do not operate the fan without grease fi Iters!
After rinsing the filter, dry it and replace it in the fan. Please make sure that the recessed handle is visible after you have replaced the fi liter. If possible, wipe the easily accessible inside of the fan with a cloth dampened with detergent every time you replace a fi liter, while at the same time paying attention to protruding parts in the inside of the fan.
Fan cleaning and care
The fan is best cleaned every time you clean the fi iters.
Condensation water may collect under the fiiter after water has boiled rapidly with the lid of the pot removed. This is quite normal. The water should, however, be removed and the inside of the extraction housing cleaned.
The ventilation openings in the cover ensure that residual moisture resulting from cooking and cleaning can escape if necessary when the fan is not in operation and the cover is on.
Please clean the fi Iter and the inside of the fan if unpleasant remaining odours escape.
The fan is best cleaned with a soft damp cloth and mild soapy water.
Service
The filter must remain accessible. Replace the charcoal filter mats of a charcoal filter every 5 to 24 months.
6 Extraction air system assembly
The hob and the fan can be connected with a fl exible hose or a fl at duct.
The exhaust air components for on these two options are supplied with the hob and are fitted into each other according to the illustration. Shorten the flat duct with a fine saw if necessary.
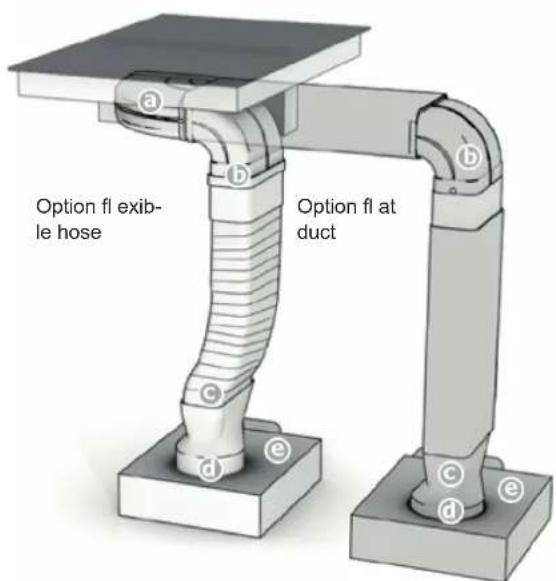
On point c
The fl exible connection piece is used for a worktop thickness of 600~mm . Please make sure that installation is as taut and crease-free as possible by shortening excess material.
On point f
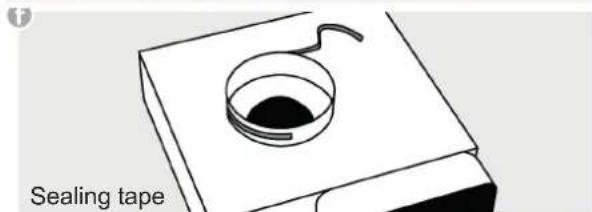
Apply sealing tape to the plinth fan connecting pieces (f) before attaching the adapter piece (d) to the plinth fan (e).
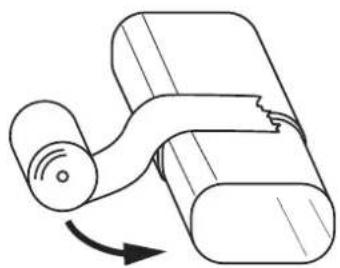
Important:
The components must all be firmly fastened as shown with the adhesive tape enclosed after they have been attached.
Exhaust air duct components
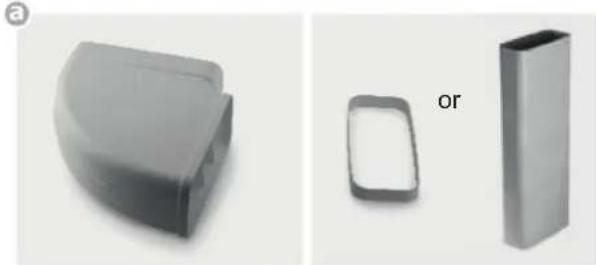
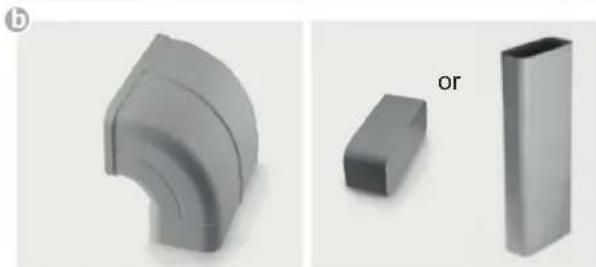
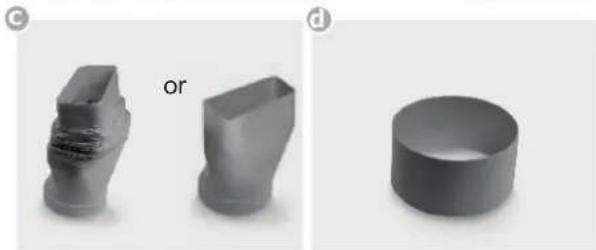
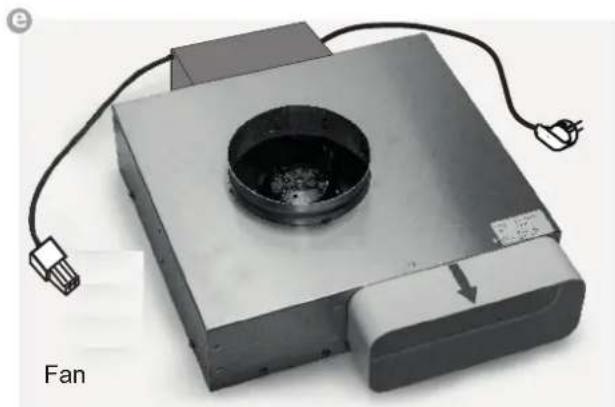
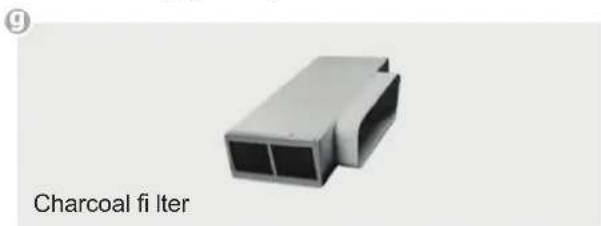
Plinth fi Iter (optional):
6.1 6-pole fan plug connector

DANGER
Risk of electric shocks
The fan plug connection must be made before the mains connection!
The appliance must be cut off from the electricity supply before the plug retainer is opened again. The appliance may only be connected to the mains once the plug connection has been made.
The hob may only be switched on when the fan mating connector has been attached and the plug retainer closed.
Procedure
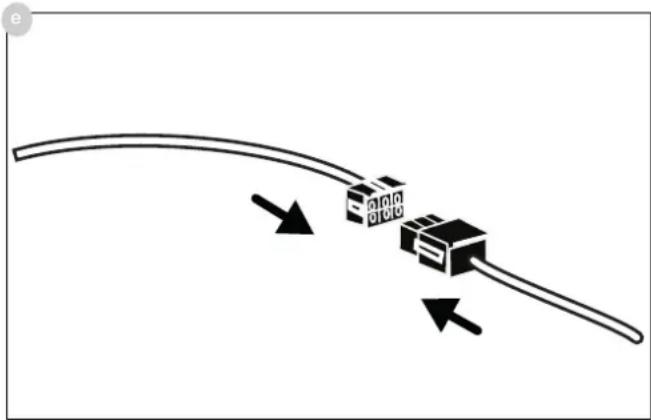
Connect the two 6-pole plus for the fan connection.
Open the plug retainer on the 6-pole plug (fan) of the hob and attach the 6-pole fan mating connector (e) until it is securely engaged.
6.2 Hob fan installation
- The product may only be connected by a qualified fitter according to applicable local regulations. The same applies for the extraction air connections. The fitter is responsible for proper functioning at the installation site.
- On installation, observe the relevant national building regulations and the regulations of the electricity suppliers.
- The hob fan can be operated in the extraction air and recirculation air mode.
- Lead the outgoing air outside through a ventilation shaft intended for this purpose or through the wall of the building.
- Outgoing air may not be led into a smoke or exhaust gas flue which is in operation. Contact the district master chimney sweep if you are in any doubt.
- A suffcient supply of inlet air must be provided if a wood, coal, gas or oil heater requiring a chimney is operated in the environment of the hob fan, since an insufficient supply of air results in a risk of poisoning. The safe operation of the hob extractor is guaranteed when the negative pressure resulting from the hob extractor does not exceed 0.04 mbar (4 Pa) and a sufficient supply of inlet air can flow into the room.
- Exhaust air pipes must comply with fire class B 1 DIN 4102.
- Please make sure that the minimum nominal width of the appliance connecting pieces is not reduced.
- A system recommended for the airflow and compatible with the hob extractor should always be used.
- The nominal width of the recirculation air pipe should not be less than 150mm .
- Exhaust air pipes should be as short as possible. They should not have a 90-degree angle; instead they should have soft bends and no reductions in their cross-section.
- Never use pipes with a diameter of less than 150~mm . No bends/angles may be laid 50~cm before the fan module.
- Always insert a straight piece of approx. 50~cm between two angles/bends.
- The cross-section of wall vents and the cut-out in the base panel should should at least correspond to the exhaust air pipe. The outflow opening must be at least 500~cm^2 . Reduce the height of the skirting boards or make corresponding openings.
- When installing the appliance make sure that the convection air unit is still accessible when the kitchen has been completely installed.
- If necessary levelling feet for the kitchen units must be moved.

PLEASE NOTE
When the convection air mode is in operation, ventilation must be sufficient in order for the air humidity to be removed.
7 Technical data
| Dimensions height/ width/ depth ...mm 174 x 140 x 520 | |
| Fan ....................kW 0.168 |
8 Decommissioning and disposal of the appliance
8.1 Switching the appliance off completely
The appliance is to be put out of operation when its useful life has finally come to an end.
- Disconnect the safety fuse for the domestic wiring system in order to prevent a risk of electric shocks.
- Ensure the environmentally friendly disposal of the hob once it has been removed.
8.2 Disposing of the packaging
Please ensure the environmentally-friendly disposal of the packaging that came with your appliance. Recycling the packaging material saves on resources and cuts down on waste.
8.3 Disposing of old appliances
The symbol on the product or on its packaging indicates that this product may not be treated as household waste. Instead it must be handed over to the applicable collection point for the recycling of electrical and electronic equipment.
By ensuring that this product is disposed of correctly you will help to protect the environment and human health, which could otherwise be harmed through the inappropriate disposal of this product. For more detailed information about recycling this product, please contact your local city office, your household waste disposal service or the shop where you purchased the product.
Sommaire
1 Généralités 24

- General
- For your information...
- Intended use
- Safety Instructions andWarnings
- For connection and operation
- For persons
- Explanation for symbols and indications
- DANGER
- CAUTION
- IMPORTANT
- NOTE
- WARNING OF ELECTRICAL ENERGY RISK OF FATAL INJURY!
- CAUTION! HOT SURFACES!
- OBSERVE REGULATIONS FOR HANDLING ELECTROSTATICALLY SENSITIVE COMPONENTS AND MODULES (ESDS).
- Appliance description
- Using the fan
- Switching the fan on and off
- Hint
- Fan time lag
- Changing the fan time lag
- Cutting off the an time lag
- Disable automatic after-run
- Notes on the after run time
- Display: Clean the grease fi Iters
- Display: Replace the charcoal fi iter[
- Turn off the carbon filter operating hours counter during the operation of the air exhaust
- Cleaning and care
- Cleaning the metal grease fi iters
- Do not operate the fan without grease fi Iters!
- Service
- Extraction air system assembly
- On point c
- On point f
- Important:
- Exhaust air duct components
- 6-pole fan plug connector
- Risk of electric shocks
- Procedure
- Hob fan installation
- PLEASE NOTE
- Decommissioning and disposal of the appliance
- Switching the appliance off completely
- Disposing of the packaging
- Disposing of old appliances
- Sommaire
Brand : Küppersbusch
Model : VKM1820.0SR
Category : Cooker