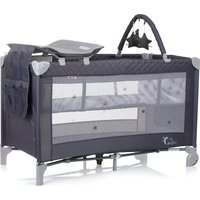
Luna - Travel cot Chipolino - Free user manual and instructions
Find the device manual for free Luna Chipolino in PDF.


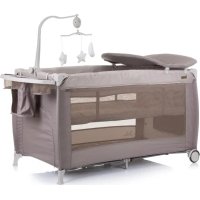
| Product Type | Travel cot (umbrella bed) |
| Brand | Chipolino |
| Model | Luna |
| Target users | Newborns up to approximately 3 years (max 15 kg) |
| Maximum child weight (bed) | 15 kg |
| Maximum child weight (changing mat) | 11 kg (up to 12 months) |
| Recommended mattress dimensions | Minimum 60 x 120 cm |
| Minimum interior height (low position) | 500 mm |
| Minimum interior height (high position) | 200 mm |
| Mattress thickness | Suitable to meet interior heights |
| Height levels | 2 levels (low and high) |
| Main materials | Polyester fabric, metal tubes, plastic |
| Main functions | Foldable travel cot, integrated changing mat, play arch, transport wheels, storage bag |
| Folding | Manual mechanism with side unlocking |
| Care and cleaning | Soft damp cloth, mild detergent; do not use abrasive products, ammonia, bleach, or alcohol |
| Safety | Check locks before use; do not leave unsupervised; keep away from heat sources and cords |
| Spare parts | Use only original spare parts approved by the manufacturer |
| Warranty | Refer to manufacturer for warranty conditions |
Frequently Asked Questions - Luna Chipolino
User questions about Luna Chipolino
0 question about this device. Answer the ones you know or ask your own.
Ask a new question about this device
Download the instructions for your Travel cot in PDF format for free! Find your manual Luna - Chipolino and take your electronic device back in hand. On this page are published all the documents necessary for the use of your device. Luna by Chipolino.
USER MANUAL Luna Chipolino
IMPORTANT, RETAIN FOR FUTURE REFERENCE: READ CAREFULLY
ПРЕНОСИМА КОШАРА / FOLDING COT / ÖSSZECSUKHATÓ BÖLCSŐ / COT PLEGABLE / COT PIEGHEVOLE / ALTENDER COTF / CHARIOT PLIANT / POLJSKI KREVET / ПТУΛΩΤΟ KOYTI / GAIOLA DOBRÁVEL / OPVOUWBAAR KINDERBED / SKLÁDACÍ POSTÝLKA / ٢٠١٤٣٥٢٥ ١٥٦٥٣٣٣
„LUNA”
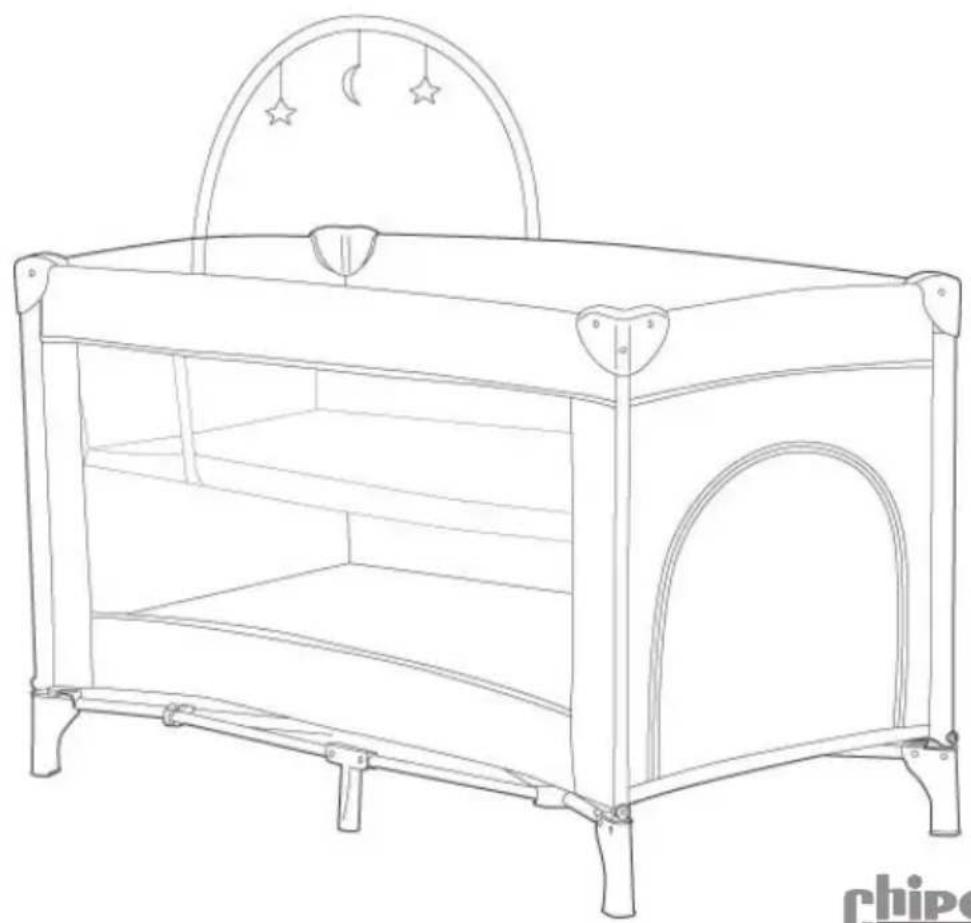
natural_image
Line drawing of a baby crib with star and crescent moon ornaments (no text or symbols)ChipoliNo
продуктов номер / item number / cikkszám/ número de artículo / codice articolo / artikelnummer / numéro d'article / broj proizvoda / αριθμός προϊόντος / numărul produsului / número de produto / productnummer / číslo produktu / 3πππππππ π π π π π π π π π π π π π π π π π π π π π π π π π π π π π π π π π π π π π π π π π π π π π π π π π π π π π π π π π π π π π π π π π π π π π π π π π π π π π π π π π π π π π π π π π π π π π π π π π π π ππ
KOSILU25xxx
ФИГУРИ / FIGURES / ÁBRÁK / CIFRAS / FIGURE / FIGUREN / LES FIGURES /
FIGURE / ΦΙΓΟΥΡΕΣ / FIGURILE / FIGURAS / FIGUREN / OBRÁZKY / uznaymugon
natural_image
Black-and-white photo of a wooden basket with a curved handle and hanging items, labeled with number 9 (no text or symbols on the main subject)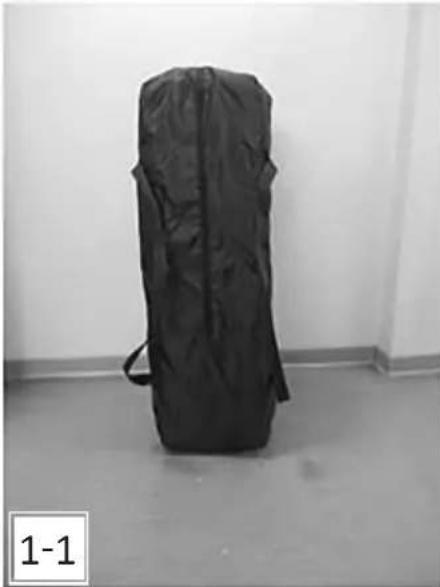
natural_image
Black fabric bag with straps placed on a plain floor, labeled '1-1' in corner (no other text or symbols)
natural_image
Black-and-white photo of a dark rectangular device with white arrows pointing to its side, placed on a plain floor (no text or symbols visible)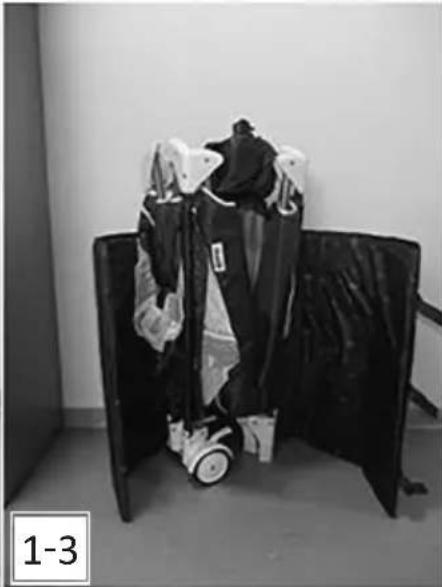
natural_image
Black-and-white photo of a person wearing a black and white outfit, standing beside a dark rectangular frame (no visible text or symbols)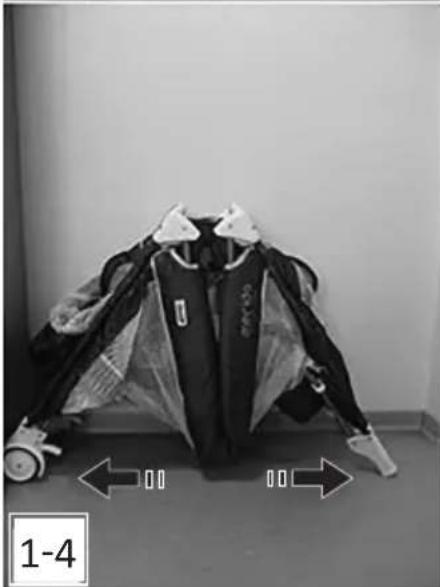
natural_image
Black-and-white photo of a jacket with visible side stripes and two directional arrows, labeled '1-4' (no text or symbols on the jacket itself)
natural_image
Black-and-white photo of a person wearing a suit with a transparent tarp, viewed from above (no text or symbols visible)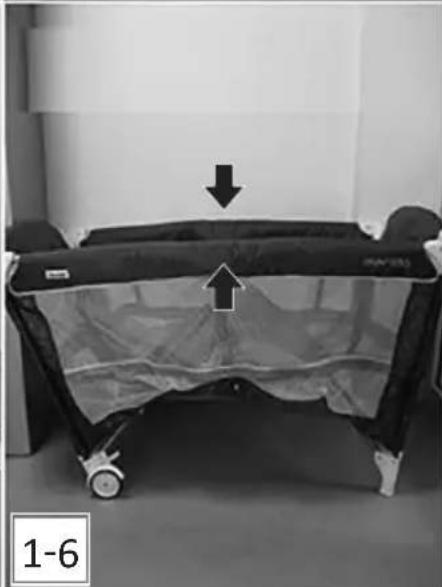
natural_image
Black baby crib with a white seat and black frame, showing a downward arrow and label '1-6' (no text or symbols on the main subject)ФИГУРИ / FIGURES / ÁBRÁK / CIFRAS / FIGURE / FIGUREN / LES FIGURES / FIGURE / ФІГОYPEΣ / FIGURILE / FIGURAS / FIGUREN / OBRÁZKY / ۲۰۹۶۲۱۵۱۵۱
natural_image
Close-up of a hand holding a small object, partially covered by dark fabric or carpet (no visible text or symbols)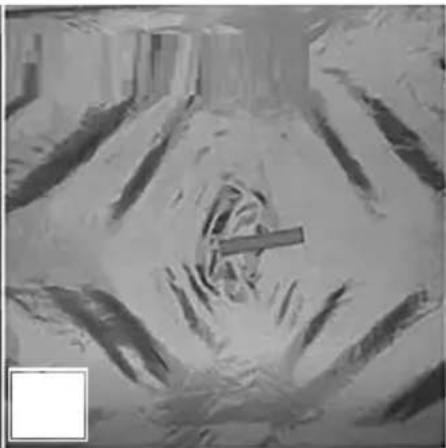
natural_image
Close-up of a textured surface with a central dark object and faint linear patterns (no visible text or symbols)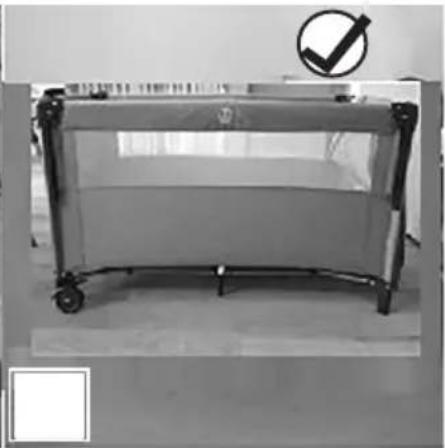
natural_image
Exterior view of a modern office building (no signage)
natural_image
Interior view of a room with patterned bedding and numbered callouts (2 and 2-1), no readable text or symbols beyond labels.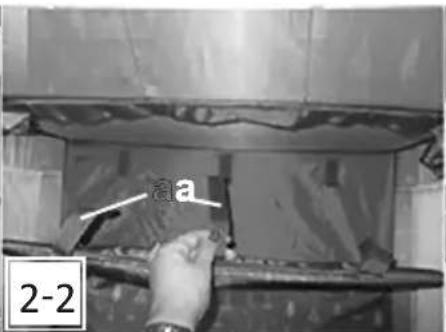
natural_image
Close-up of a textured surface with a metallic tool and mesh grille, no visible text or symbols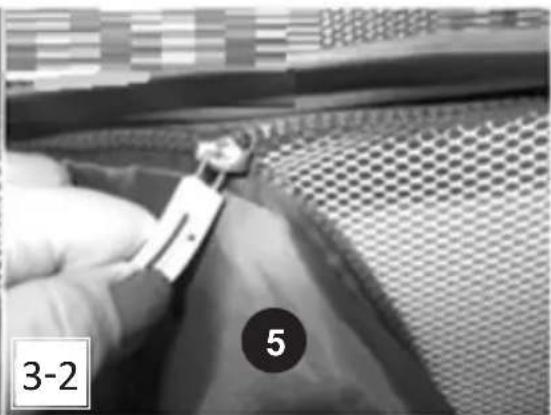
natural_image
Close-up of a gloved hand holding a tool over a mesh fabric, with number 5 and label 3-2 visible (no readable text or symbols)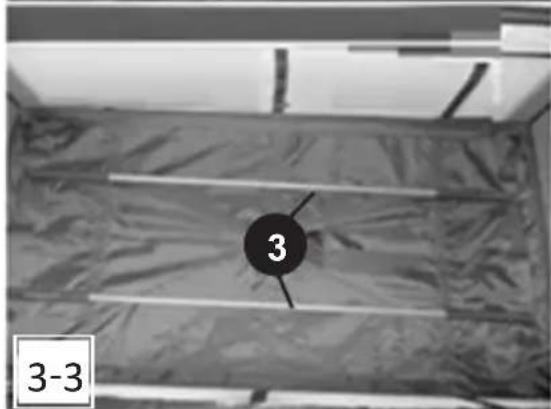

natural_image
Interior view of a dormitory room with patterned bedding and numbered circular marker (no text or symbols on bedding)ФИГУРИ / FIGURES / ÁBRÁK / CIFRAS / FIGURE / FIGUREN / LES FIGURES / FIGURE / ФІГОYPEΣ / FIGURILE / FIGURAS / FIGUREN / OBRÁZKY / ๑๒๐๏๖๘๖๖
ФИГУРИ / FIGURES / ÁBRÁK / CIFRAS / FIGURE / FIGUREN / LES FIGURES / FIGURE / ФІГОYPEΣ / FIGURILE / FIGURAS / FIGUREN / OBRÁZKY / ๑๒๐๏๖๘๖๖
natural_image
Medical illustration showing a surgical procedure with an arrow indicating direction and a labeled section '5' (no text or symbols on the diagram itself)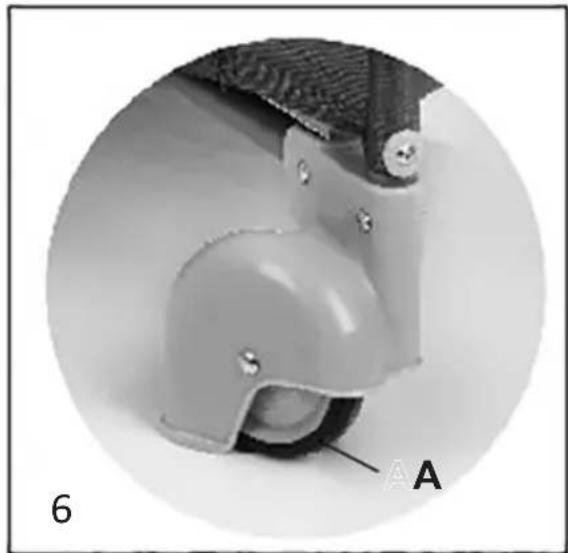
natural_image
Close-up of a mechanical component with labeled section A, showing internal structure and mounting holes (no readable text or symbols beyond label)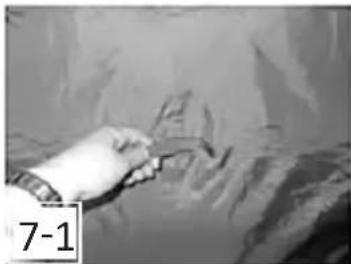
natural_image
Hand holding scissors over a textured surface, no visible text or symbols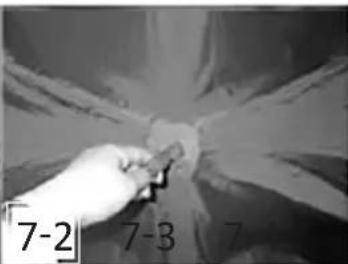
natural_image
Black-and-white photo of a hand holding a small object, with no visible text or symbols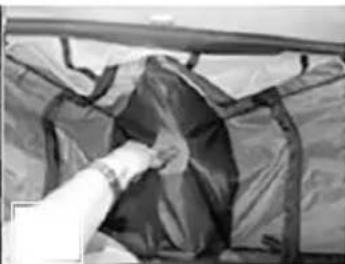
natural_image
Close-up of a hand holding a dark fabric bag, partially enclosed by a metal frame (no visible text or symbols)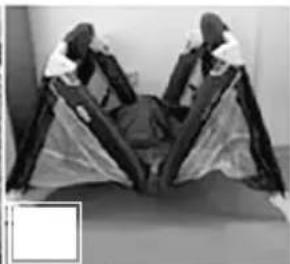
natural_image
Two individuals in a tent-like arrangement, one seated and one standing, with no visible text or symbols.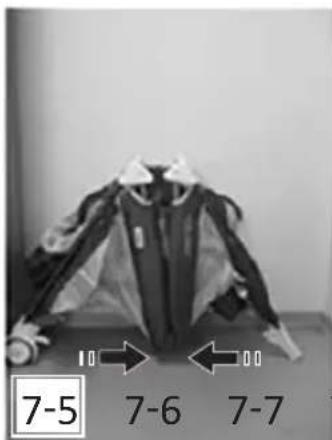
natural_image
Black-and-white photo of a person sitting on a chair with clothing, viewed from above (no visible text or symbols)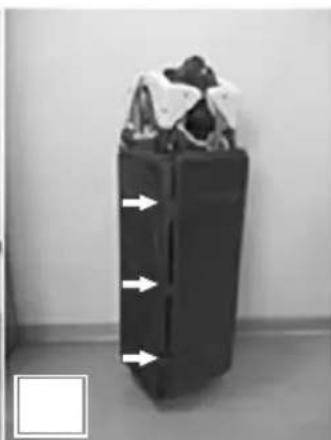
natural_image
Black mechanical device with white arrows pointing to internal components (no visible text or symbols)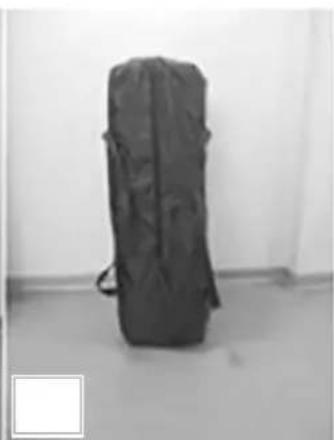
natural_image
Black-and-white photo of a large bag with straps, placed on a plain floor (no text or symbols visible)TO ASSURE SAFE USAGE OF THIS PRODUCT
FOLLOW ALL WARNINGS, INSTRUCTIONS AND
RECOMMENDATIONS GIVEN IN THIS USER MANUAL!
WARNINGS!
✿ WARNING! NEVER LEAVE YOUR CHILD UNATTENDED!
✿ WARNING! BE AWARE OF THE RISK OF OPEN FIRE AND OTHER SOURCES OF STRONG HEAT, SUCH AS ELECTRIC BAR, FIRES, GAS FIRES, ETC. IN THE NEAR VICINITY OF THE COT!
WARNING! DO NOT USE THE COT IF ANY PART IS BROKEN, TORN OR MISSING AND USE ONLY SPARE PARTS APPROVED BY THE MANUFACTURER. THE MANUFACTURER ACCEPTS NO RESPONSIBILITY FOR SAFETY IN THE EVENT THAT SPARE PARTS OTHER THAN THOSE ORIGINAL TO THE APPROVED TYPE OR RECOMMENDED BY THE MANUFACTURER ARE USED.
✿ WARNING! DO NOT LEAVE ANYTHING IN THE COT OR PLACE THE COT CLOSE TO ANOTHER PRODUCT, WHICH COULD PROVIDE A FOOTHOLD OR PRESENT A DANGER OF SUFFOCATION OR STRANGULATION, E.G. STRINGS, BLIND/CURTAIN CORDS.
✿ WARNING! DO NOT USE MORE THAN ONE MATTRESS IN THE COT! OBSERVE THE MARKINGS FOR THE PERMISSIBLE LEVEL OF THE MATTRESS!
✿ WARNING! THE THICKNESS OF THE MATTRESS MUST BE SUCH THAT THE INTERNAL HEIGHT (FROM THE TOP SURFACE OF THE MATTRESS TO THE TOP EDGES OF THE SIDES AND HEADBOARD OF THE COT) IS AT LEAST 500 MM AT THE LOWEST POSITION ON THE BASE OF THE COT, AND AT LEAST 200 MM AT THE HIGHEST POSITION ON THE BASE OF THE COT (SEE PRODUCT MARKINGS).
✿ WARNING! THE MINIMUM SIZE OF THE LENGTH AND WIDTH OF THE MATTRESS USED IN THE COT MUST BE SUCH THAT THE INTERNAL SPACE BETWEEN THE MATTRESS AND THE SIDES, OR BETWEEN THE HEADBOARDS, DOES NOT EXCEED 30 MM!
✿ WARNING! USE THE CHANGING MAT FOR A CHILD UP TO 12 MONTHS OLD AND WEIGHING UP TO 11 KG.
Use a mattress with minimum dimensions OF 60x120 cm.
DO NOT use the cot and/or changing mat for more than one child at a time!
DO NOT use the cot for a child who may climb or hang on it as they may tip it over, fall and injure themselves!
✿ ALWAYS check that the locking mechanisms are fully engaged before use. Only then the cot IS ready for use.
Use the second level of the cot for children who can NOT sit up unaided and who cannot roll over or push themselves up with their hands and knees! Use the lowest level of the cot as soon as your child is old enough to sit up unaided!
DO NOT use the toy arch when your child can sit up unaided, roll over and/or push themselves up with their hands and knees!
All fixings must always be tightened. These fasteners should be checked regularly and tightened as necessary.
Use the cot for a child weighing no more than 15 kg.
Only an adult should assemble, unfold and fold the product!
Only place the cot on a flat and level surface!
✿ ONLY USE THE WHEELS TO MOVE THE COT!
Do not allow children under 3 years of age to be present before you have fully assembled the product to avoid access to small and disassembled parts!
- Keep plastic packaging away from children to avoid the risk of suffocation!
ASSEMBLY AND FUNCTIONS
The cot is designed for newborn babies and toddlers weighing no more than 15 kg.
The changing mat is designed for a child up to 12 months old and weighing up to 11 kg.
The product is delivered by the manufacturer partially assembled. No tools are required to complete assembly.
✿ WARNING! Follow exactly the instructions and sequence for assembly and use from the text and illustrations enclosed in the instructions.
✿ WARNING! CHECK THE SECURITY OF THE FIXING AFTER EACH OPERATION
✿ WARNING! The fixing of a position is in most cases accompanied by a clicking sound.
✿ WARNING! Keep your hands from pinching when performing individual operations!
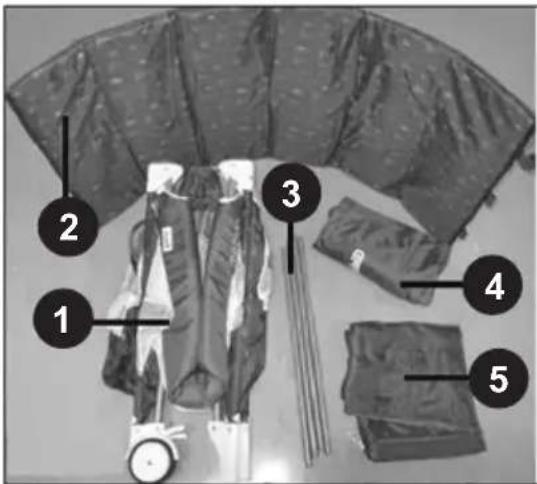
MAIN PARTS
- Folding cot;
- Cot level pad;
- Tubes for mounting the second level (4 pcs.);
- Carrying and storage bag;
- Base of the second level;
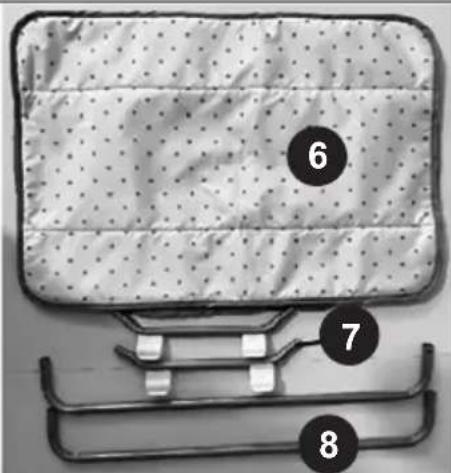
- Changing mat for the child;
- Short tubes with clips for the changing mat (2 pcs.);
- Long tubes for the changing mat (2 pcs.);
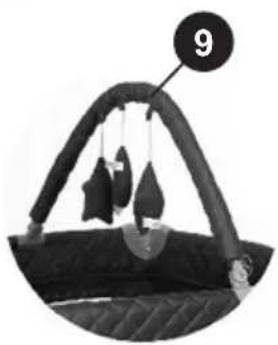
- Arch with toys.
1. UNFOLDING THE COT
1-1, 1-2, 1-3 - Remove the cot from the carrying bag, peel off the velcro strips and remove and remove the level pad;
1-4 - Unfold the cot as shown in the figure;
1-5 - Fix the short sides (snap/click);
1-6 - Fix the long sides (snap/click);
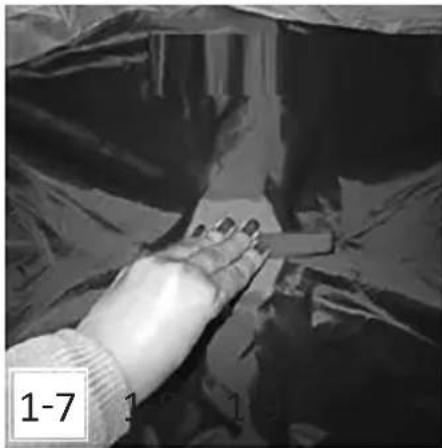
1-7 and 1-8 - Press down the center of the cot;
1-9 - The cot is unfolded.
IMPORTANT! Make sure the cot is fixed in the unfolded position!
2. FIRST (LOW) LEVEL OF THE COT
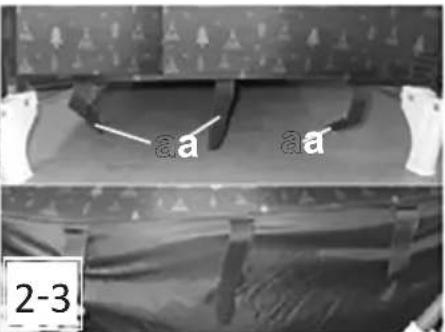
2-1 - Insert the pad (2);
2-2 - Pass the Velcro strips through the holes and fix them to the bottom of the cot.
3. SECOND LEVEL OF THE COT
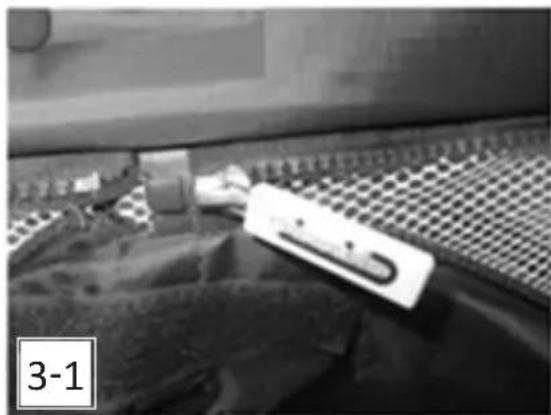
3-1 and 3-2 - Fasten the zipper of the second level (5) around the sides of the cot;
3-3 - Insert the tubes for the second level (3) and connect them two by two;
3-4 - Insert the pad (2).
4. CHANGING MAT
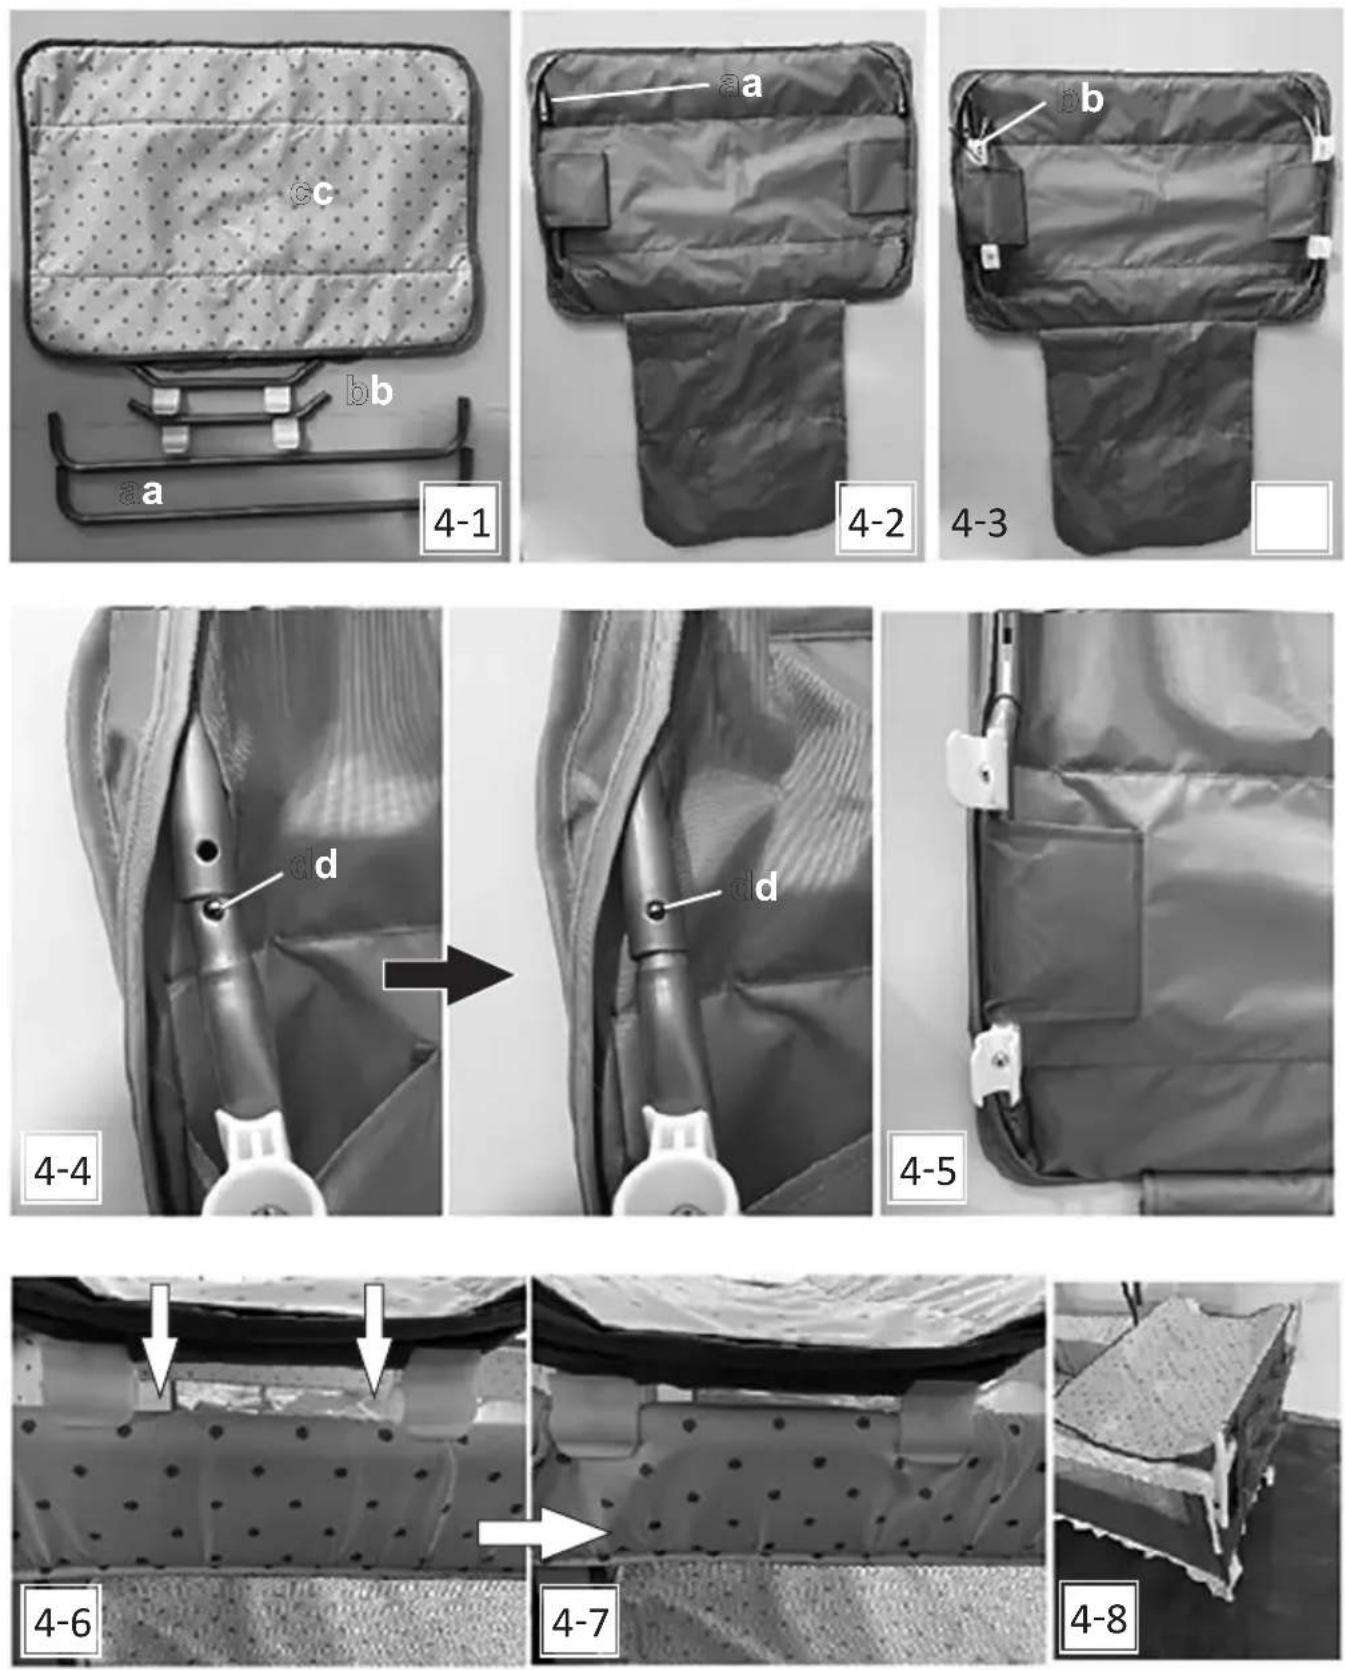
4-1, 4-2, 4-3 - Thread the long (a) and short (b) tubes through the corresponding holes of the damask (c);
4-4 - Press the pin (d) and insert the tubes into each other until the pin (d) shows through the hole;
4-5 - Assembled mat;
4-6 and 4-7 - Place the mat on the cot and press firmly until it locks;
4-8 - Assembled changing mat.
5. ARCH WITH TOYS
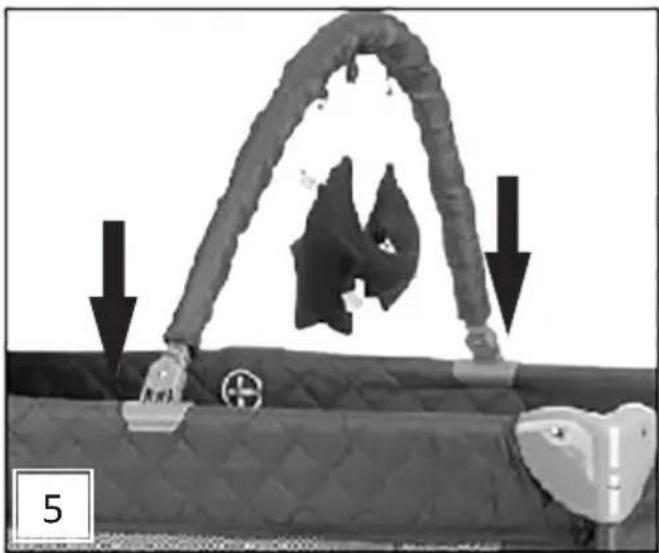
Place the toy arch on the cot and press firmly until it locks onto both sides of the cot.
6. WHEELS
To use wheels to move the cot, you must tilt it in the direction of the wheels.
7. FOLDING AND PACKING
IMPORTANT! Before folding the cot, remove the arch, changing mat, mattress, second level, and any other additional accessories.
7-1, 7-2, 7-3 - Pull up the center of the cot;
7-4 and 7-5 - Release the buttons on each side (under the upholstery) and fold the sides.
IMPORTANT! Do not apply unnecessary force if the sides do not fold the first time to avoid damaging them! Repeat the steps again.
7-6 - Place the level pad around the folded cot;
7-7 - Glue the Velcro strips;
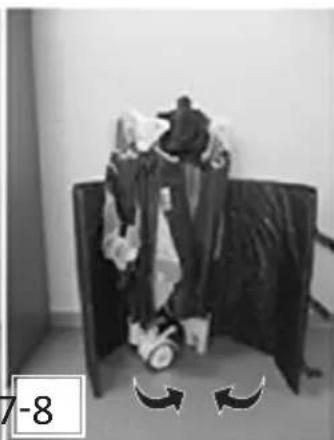
7-8 - Place the cot in the carrying bag and fasten the zipper.
PREVENTIVE MAINTENANCE INSTRUCTIONS
Do not exert strong pressure on the adjustment and folding mechanisms to avoid damaging or breaking them.
- Clean the upholstery, soiled plastic or metal parts of the product with a soft cotton cloth or sponge moistened with water or mild detergent.
Do not clean with harsh detergents containing abrasive particles, ammonia, bleach or alcohol.
✿ After cleaning, always dry the basket and adjacent parts and allow them to dry before storing. Mold may appear on them if you store them damp.
- Store the product in a clean and dry place.
Do not expose to the direct effects of the environment - sun, rain, humidity, or sudden temperature changes!
In case of problems related to normal operation, refer to authorized service centers for consultation or repair
2. A FIATAL ELSÓ (ALACSONY) SZINTJE
7-7 - Colar as tiras de velcro;
7-8 - Colocar a cama no saco de transporte e apertar o fecho de correr.
3. assembly of assembly
3-1 3-2 - 3-2 - 3-2 (5)
3-3 - ḥσωγοι δησμγδον δγμής χρβλυσησι (3) ως ωσυχυσθασησον ηυνδον μή-μήσε;
3-4 - หะกงิน หะกง bin (2).
4. assembly30000000000000
- IMPORTANT, RETAIN FOR FUTURE REFERENCE: READ CAREFULLY
- WARNINGS!
- ASSEMBLY AND FUNCTIONS
- MAIN PARTS
- UNFOLDING THE COT
- FIRST (LOW) LEVEL OF THE COT
- SECOND LEVEL OF THE COT
- CHANGING MAT
- ARCH WITH TOYS
- WHEELS
- FOLDING AND PACKING
- PREVENTIVE MAINTENANCE INSTRUCTIONS
- A FIATAL ELSÓ (ALACSONY) SZINTJE
- assembly of assembly
- assembly30000000000000
Brand : Chipolino
Model : Luna
Category : Travel cot