Vacuum Smoothie Blender KB181D11 - Blender KRUPS - Free user manual and instructions
Find the device manual for free Vacuum Smoothie Blender KB181D11 KRUPS in PDF.

| Product Type | Blender with vacuum technology |
| Brand | Krups |
| Model | KB181D11 |
| Technology | NutriKeep (vacuum to preserve nutrients) |
| Main Functions | Blend, Pulse ice crush, Vacuum, Vacuum blend |
| Maximum Capacity | 600 ml |
| Bottle Material | Plastic (BPA free) |
| Automatic Programs | Mix (1 min), Vacuum (50 s), Vacuum blend (1 min 50 s) |
| Crushed Ice Function | Yes (Pulse ice crush) |
| Safety Locking System | The appliance only operates if the bottle is correctly assembled and positioned |
| Motor Protection | Automatic shutdown in case of overload; minimum 10 min rest |
| Cleaning the Blade Holder | Dishwasher (top rack, ECO cycle) or running water |
| Cleaning the Bottle | Dishwasher (top rack) or warm soapy water |
| Cleaning the Motor Block | Damp cloth; never immerse |
| Included Spare Parts | Plastic bottle (B2), vacuum bottle (B3), blade holder (B1), cap (C2), lower cover (C1) |
| Recommended Use | Smoothies, drinks, crushed ice; do not use for hot liquids, puree, dough, eggs |
| Power Supply | Electrical; mains plug (compatible voltage) |
Frequently Asked Questions - Vacuum Smoothie Blender KB181D11 KRUPS
User questions about Vacuum Smoothie Blender KB181D11 KRUPS
0 question about this device. Answer the ones you know or ask your own.
Ask a new question about this device
Download the instructions for your Blender in PDF format for free! Find your manual Vacuum Smoothie Blender KB181D11 - KRUPS and take your electronic device back in hand. On this page are published all the documents necessary for the use of your device. Vacuum Smoothie Blender KB181D11 by KRUPS.
USER MANUAL Vacuum Smoothie Blender KB181D11 KRUPS
natural_image
Exterior view of a Krups blender with clear glass and black casing (no text or symbols on the device itself)www.krups.com
C
D
natural_image
Simple line drawing of a plug with a circular head and arrow indicating upward motion (no text or symbols)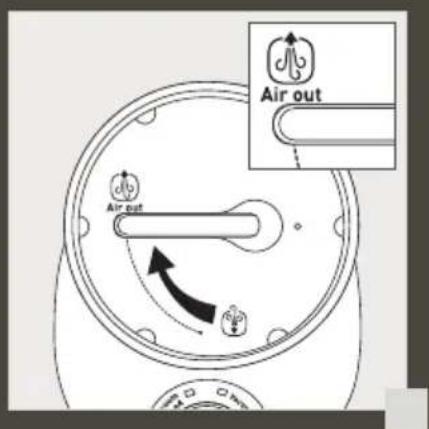

natural_image
Diagram of a blender with liquid and lid, showing internal components and directional arrows (no text or symbols)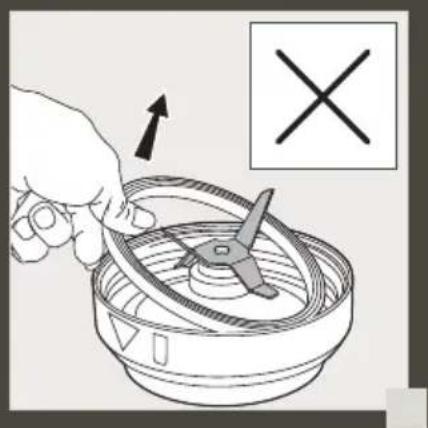
natural_image
Illustration of a hand holding a kitchen spatula inside a steamer basket, with a cross symbol indicating selection (no text or labels present)DESCRIPTION
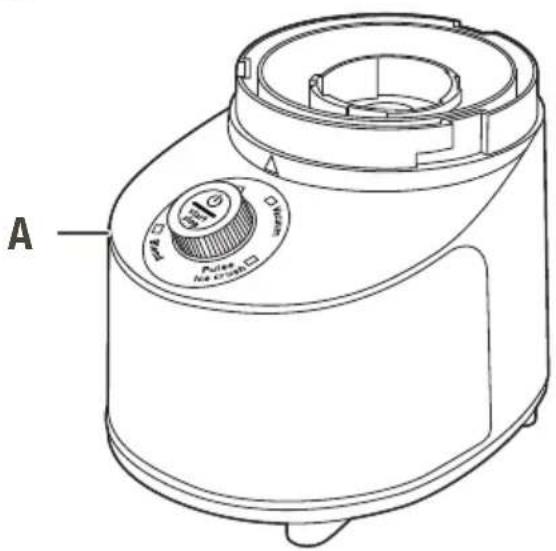
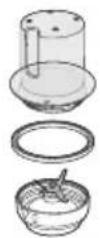
A Bloc moteur
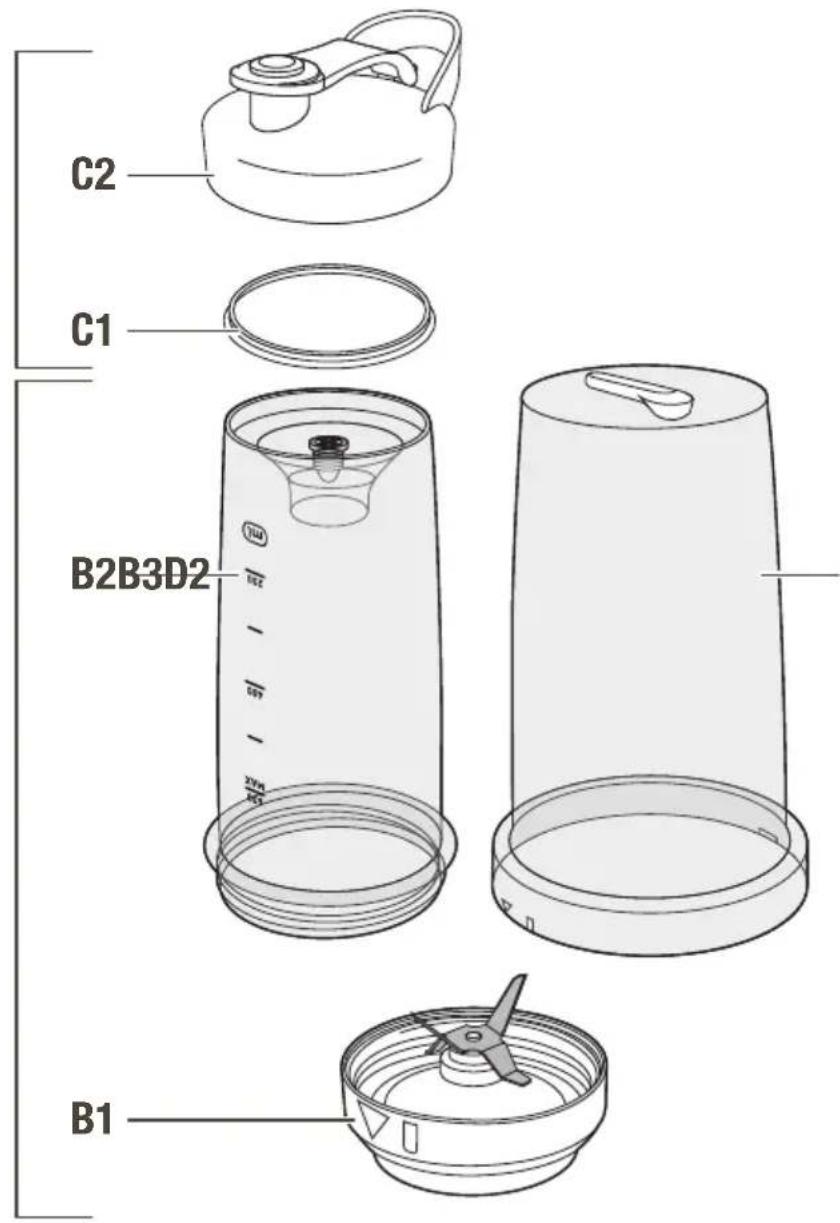
C Bottle accessories
C1 Bottom lid
C2 Top
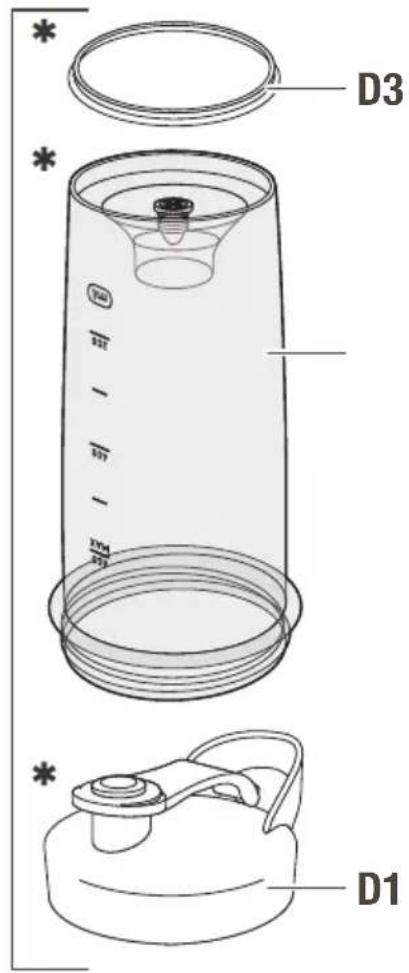
D Additional bottle accessories (depending on model)
D1 Bottom lid
D2 Top
D3 Bottom lid
WARNING
The safety instructions are part of the device. Read these instructions carefully before using your new appliance for the first time. Keep them in an accessible place so that you can refer to them later.
SAFETY LOCK SYSTEM
The appliance will not work if the bottles (B1 + B2 + B3) are not correctly assembled and positioned on the motor unit (A).
BEFORE USING FOR THE FIRST TIME
Before first use, wash all the parts: the bottles (B) and bottle accessories (C + D*) with hot water and detergent, but do not wash the motor unit (A).
WARNING: The blades are extremely sharp. Handle them with care when using, cleaning and emptying the containers.
Warning: To ensure optimal effectiveness of NutriKeep technology, never remove the gasket from the blade holder. If you remove it, you may damage the gasket and impair the proper operation of your appliance.
To ensure perfect cleaning results, wash the blade holder in the dishwasher or rinse it under running water with a sponge.
Remove all of the packaging before using the appliance.
USING YOUR APPLIANCE
■ Set the motor unit (A) on a flat and stable surface.
■ Add the ingredients to the blender bottle (B2). The maximum level of 600 ml (refer to the gauge on the bottle) must not be exceeded. For best results, we recommend first filling the bottle with liquid ingredients, then with the fresh or frozen ingredients (cut the ingredients into a maximum of 2 cm pieces). Do not fill the bottle excessively.
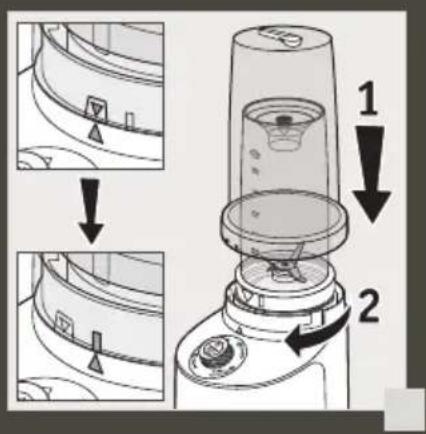
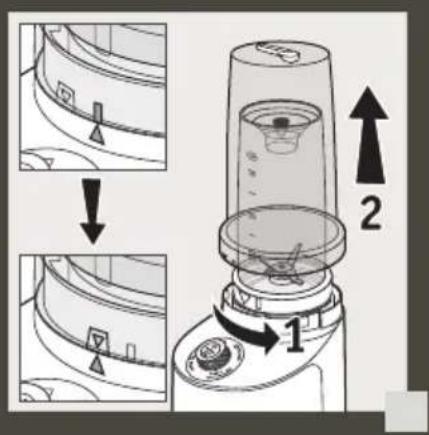
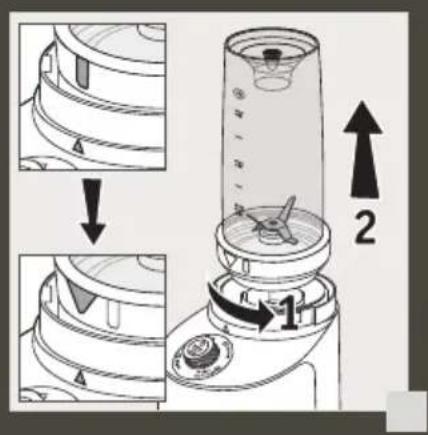
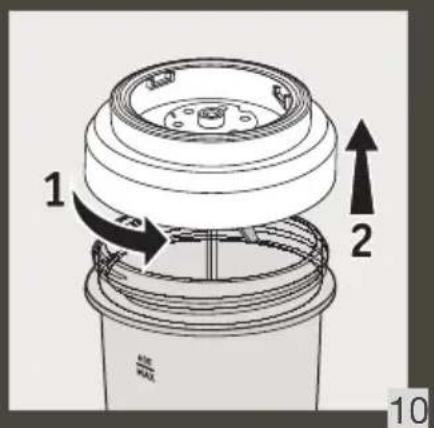
■ Screw the blade firmly (B1) onto the opening of the blender bottle (B2) (Image 1). Then place the bottle with the blade on the motor unit, aligning the arrow on the outside of the blade with the arrow on the edge of the motor unit (Image 2). Then place the vacuum bottle on the motor unit, aligning the arrow on the outside of the blade with the arrow on the edge of the motor unit.
■ Turn on the device. Select a blending function using the selection button:
-Blend: 1-minute automatic blending program.
-Pulse ice crush: Crushed ice function. It starts each time the "Start Stop" button is pressed and stops when the button is released.
–Vacuum: 50-second automatic program that removes the air in the blender bottle.
–Vacuum blend: 1 minute 50 second automatic program that combines the vacuum and blend functions.
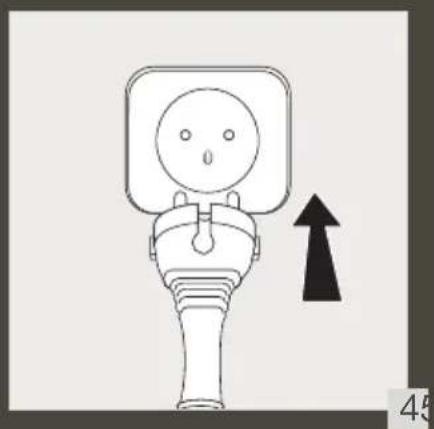
A light appears beside the selected program. Press the central "Start Stop" button to start the program. Warning: for the programs with the "air out" function, the selector must be placed above the vacuum bottle (B3) on the "Air out" icon before starting the program (image 5).
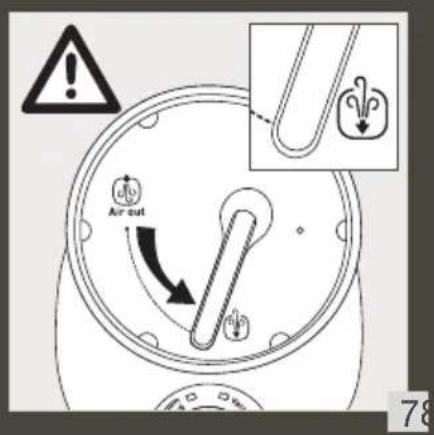
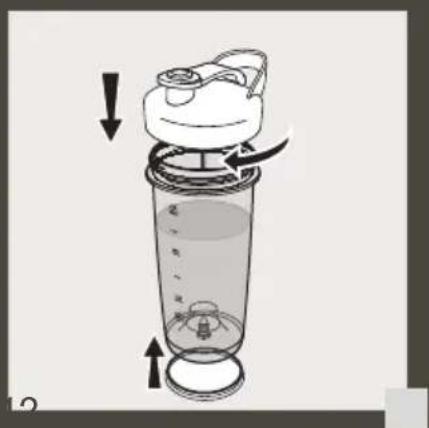
■ When you have finished blending, unlock the vacuum bottle then the blender bottle from the motor unit (Image 8 and 9). Warning: for the programs with the "air out" function, the selector must be placed above the vacuum bottle (B3) on the icon (image 6) before unlocking the bottles from the motor unit. (image 7) Turn the blender bottle upside down so that the blade (B1) is at the top and unscrew it from the bottle (B2) (Image 10). Then position the top on it and screw it in place (C1 + C2). Then position the bottom lid beneath the bottle (Image 11). You can then drink directly from the blender bottle or take it with you.
■ This appliance is not suitable for blending potatoes, cream, egg whites, dough, etc.
■ The appliance must not be used with hot liquids.
If the motor stops during use, unplug the appliance and remove the bottle (B) from the motor unit (A). Leave the appliance to rest for at least 10 minutes before reusing.
RECIPES
 | |||
* | 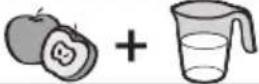 130 g 270 g 130 g 270 g |  Vacuum Blend Vacuum Blend | 1 min 50 |
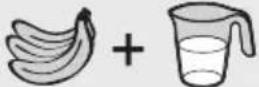 130 g 270 g 130 g 270 g |  Vacuum Blend Vacuum Blend | 1 min 50 | |
* |  80 g 80 g |  Pulse Pulse | 5 secs |
CLEANING YOUR APPLIANCE
■ Unplug the appliance and remove the bottle (B).
■ Handle it with care, as the blades are sharp.
■ Immediately after use, rinse the bottle (B2) and blade (B1) under running water, and the removable parts with hot water and a little detergent.
■ To aid cleaning, the blade (B2) can be unscrewed from the bottle (B2). The bottle (B2), the blade (B1) and the top (C2) can be washed on the top rack of the dishwasher on the "ECO" program.
■ Clean the motor unit (A) with a damp cloth then dry it carefully. Never submerge the motor unit (A) in water or any other liquid.
■ Warning: To ensure optimal effectiveness of NutriKeep technology, never remove the gasket from the blade holder. If you remove it, you may damage the gasket and impair the proper operation of your appliance.
■ To ensure perfect cleaning results, wash the blade holder in the dishwasher or rinse it under running water with a sponge.
WHAT TO DO IF YOUR APPLIANCE DOES NOT WORK
| PROBLEMS CAUSE SOLUTIONS | ||
| The appliance does not work. | It is not plugged in. Plug the appliance in using a plug with the same voltage. | |
| The bottle (B) is not correctly assembled or positioned on the motor unit (A). | Check that the bottle is correctly assembled; dismantle and assemble again Fig.1 and Fig.2 and check that it is far down enough on the motor unit. | |
| Maintain pressure on the blender bottle assembly (B) during operation Fig.3. | ||
| Excessive vibration. The appliance is not on a flat, stable surface. | Put the appliance on a flat stable surface. | |
| Volume of ingredients is too high. | ||
| Error in assembling the accessories. | ||
| Leak from the bottle Incorrect positioning of the seal on the blade unit (B1). | Make sure that the seal is correctly positioned, the lips of the seal should be visible and it should not be buckled Handle the blade units (B1) with care because the blades are sharp. To ensure optimal effectiveness of NutriKeep technology, never remove the gasket from the blade holder. If you remove it, you may damage the gasket and impair the proper operation of your appliance. | |
| The blade unit (B1) is insufficiently or incorrectly locked on the bottle (B2). | ||
| The blade does not rotate easily. | Pieces of food are too big or too hard. | Reduce the size or quantity of the ingredients processed. |
| Add liquid to the bottle without exceeding the maximum level. | ||
Is your appliance still not working?
Contact customer service (see contact details in the separate booklet).
BESCHREIBUNG
A Motorblock
B Behälter
B1 Lama
B2 Recipiente in plastica
B3 Involucro Vacuum