
MD 12041 - Microwave Oven MEDION - Free user manual and instructions
Find the device manual for free MD 12041 MEDION in PDF.

| Product type | Microwave oven |
| Brand | Medion |
| Model | MD 12041 |
| Dimensions (W x H x D) | Approx. 49.5 x 30.0 x 43.0 cm |
| Net weight | Approx. 15.75 kg |
| Power supply | 230 V~, 50 Hz |
| Microwave power | 900 W (nominal output) |
| Grill power | 1500 W |
| Hot air power | 2100 W |
| Cooking functions | Microwave, Grill (3 levels), Hot air (140-230°C), Combined (5 modes), Defrost (weight/time), Automatic programs (11), Fry programs (12) |
| Number of automatic programs | 11 (A-1 to A-11) |
| Number of fry programs | 12 (F-1 to F-12) |
| Supplied accessories | Turntable (Ø 29 cm), Wire rack, Drive shaft, Quick start guide |
| Safety | Button lock, child lock, automatic shut-off, door safety |
| Cleaning | Cooking compartment and turntable washable with soapy water, do not use steam cleaners |
| Spare parts | Available at medionserviceshop.com |
| Protection class | I |
| Power plug | Safety power outlet (permanently accessible) |
| Standby consumption | 0.8 W |
| Microwave frequency | 2450 MHz |
Frequently Asked Questions - MD 12041 MEDION
User questions about MD 12041 MEDION
0 question about this device. Answer the ones you know or ask your own.
Ask a new question about this device
Download the instructions for your Microwave Oven in PDF format for free! Find your manual MD 12041 - MEDION and take your electronic device back in hand. On this page are published all the documents necessary for the use of your device. MD 12041 by MEDION.
USER MANUAL MD 12041 MEDION
natural_image
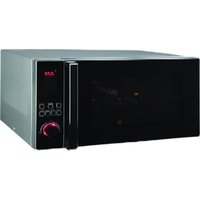
Black microwave oven with digital display and control buttons (no visible text or symbols on main body)4-in-1-Mikrowelle 25 L Micro-ondes 4 en 1 25 l 4-in-1 magnetron 25 l Microondas 4 en 1 de 25 l Microonde 4 in 1 da 25 l microwave 4-in-1 25 L MEDION MD 12041
Inhaltsverzeichnis
natural_image
Two technical diagrams showing circular components with internal features, labeled 13 and 14 (no text or symbols on the diagrams themselves)Abb. 2 - Zubehör
natural_image
Technical diagram showing two circular components with internal features, labeled 13 and 14 (no text or symbols on the diagrams themselves)Fig. 2 - Accessoires
▶ Appuyez sur Confirm/ Start/+30s.
▶ Appuyez sur Confirm/ Start/+30s.
▶ Appuyez sur Confirm/ Start/+30s.
▶ Appuyez sur Confirm/ Start/+30s.
11.2.1. Préchauff age
▶ Appuyez sur Confirm/ Start/+30s.
▶ Appuyez sur Confirm/ Start/+30s.
■ WAARSCHUWING! Neem
■ WAARSCHUWING! Behal-
WAARSCHUWING! Brandgevaar!
DE
FR
NL
natural_image
Two technical diagrams showing circular components with internal features, labeled 13 and 14 (no text or symbols on the diagrams themselves)Afb. 2 - Accessoires
Druk op Confirm/ Start/+30s.
▶ Druk op Confirm/ Start/+30s.
▶ Druk op Confirm/ Start/+30s.
▶ Druk op Confirm/ Start/+30s.
natural_image
Two technical diagrams showing circular components with internal features, labeled 13 and 14 (no text or symbols on the diagrams themselves)Fig. 2 - Accesorios
-
Plato giratorio de metal
-
Rejilla del grill
▶ Pulse Confirm/ Start/+30s.
▶ Pulse Confirm/ Start/+30s.
▶ Pulse Confirm/ Start/+30s.
11.2.1. Precalentar
▶ Pulse Confirm/ Start/+30s.
▶ Pulse el botón Confirm/ Start/+30s.
natural_image
Technical drawing of two circular components with internal features, labeled 13 and 14 (no text or symbols on the diagrams themselves)Fig. 2 - Accessori
▶ Premere Confirm/ Start/+30s.
▶ Premere Confirm/ Start/+30s.
▶ Premere Confirm/ Start/+30s.
▶ Premere Confirm/ Start/+30s.
▶ Premere Confirm/ Start/+30s.
▶ Premere Confirm/ Start/+30s.
▶ Premere Confirm/ Start/+30s.
Confirm/ Start/+30s.
▶ Premere Confirm/ Start/+30s.
Confirm/ Start/+30s.
1–7: plastiche/20–22: carta e cartone/80–98: materiali compositi

(Solo per la Francia)
- Information about this user manual .... 149
1.1. Explanation of symbols .....149
FR
- Proper use
149
- Safety instructions ....
N150
3.1. Setting up and connecting the microwave ....150
ES
3.2. Avoiding risk of fire....152
IT
3.3. Safety instructions relating specifically to the use of microwaves ..... 153
3.4. Safety instructions on the heating of liquids 154
- Package contents ....
155
- Appliance overview
155
- Cooking in the microwave ....157
6.1. Size and shape of microwave-safe containers 157
6.2. Microwave-suitable materials....158
- Before using the appliance for the first time....158
7.1. Setting up the appliance....158
7.2. Cleaning the appliance for the first time....159
7.3. Heating up the empty appliance....159
7.4. Inserting turntable plate 159
- Making settings 160
8.1. Switching beeps on/off ....160
8.2. Setting the time ....160
8.3. Setting the cooking timer (countdown) 160
8.4. Button lock....161
- Cooking in microwave mode 161
9.1. Quick start 162
9.2. End of the cooking process....162
9.3. Interrupting a programme 162
- Defrosting food....162
10.1. Automatic defrosting by weight 162
10.2. Defrosting by time....163
- Grill/convection/combination mode 163
11.1. Using the grill function 163
11.2. Using convection mode....164
11.3. Using combination mode 164
-
Automatic programme sequence ....165
-
Using automatic programmes....165
-
Using the deep-frying programme (convection)....167
-
Energy-saving tips ....167
-
Cleaning and maintenance ....168
-
Prolonged non-use and transport 168
-
Troubleshooting 169
- Technical specifications ....169
- EU declaration of conformity 170
- Spare parts 170
- Disposal 170
- Service information 171
- Legal Notice 171
1. Information about this user manual

Thank you for choosing our product. We hope you enjoy using this appliance.
Please read the safety instructions and the user manual carefully before using the appliance for the first time. Note the warnings on the appliance and in the user manual.
Always keep the user manual close to hand. If you sell the appliance or give it away, please ensure that you also pass on this user manual. It is an essential component of the product.
1.1. Explanation of symbols
If a block of text is marked with one of the warning symbols listed below, the hazard described in that text must be avoided to prevent the potential consequences described there from occurring.

DANGER!
Warning: risk of fatal injury!

WARNING!
Warning: risk of possible fatal injury and/or serious irreversible injuries!

CAUTION!
Warning: risk of minor and/or moderate injuries!

NOTICE!
Follow these instructions to prevent damage to the appliance!
CAUTION!
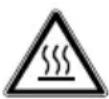
Danger due to hot surfaces!

This symbol provides useful additional information for assembling or operating the appliance.

Follow the instructions in the user manual!

Symbol for alternating current (AC)
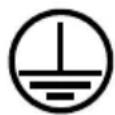
Protective earthing symbol (for protection class I)

The item numbers after the respective appliance components in the text refer to the illustration in section "5. Appliance overview" on page 155.
2. Proper use
The microwave may only be used for heating up suitable food in suitable cooking containers and dishes.
This appliance is designed for use in private households and similar household applications, such as
- in kitchens for staff in retail outlets, offices and other commercial areas
• on agricultural estates - by customers in hotels, motels and other accommodation facilities
- in bed-and-breakfast establishments.
The manufacturer accepts no liability for damages if the appliance is used for commercial purposes or for any purpose other than the purpose specified above.
▶ Please note that we shall not be liable in cases of improper use.
▶ Comply with all the information in this user manual, especially the safety instructions. Any other use is considered improper and can cause personal injury or property damage.
3. Safety instructions
IMPORTANT SAFETY INSTRUCTIONS – READ CAREFULLY AND KEEP FOR FUTURE REFERENCE!
- Keep the appliance and its accessories out of the reach of children.
■ This appliance may be used by children over the age of 8 and by persons with reduced physical, sensory or mental abilities or by those with limited experience and/or knowledge, provided that they are supervised or have been instructed in the safe use of the appliance and have understood the associated risks.
■ Children must not be allowed to play with the appliance.
■ Cleaning and user maintenance may not be carried out by children unless they are supervised.
■ Children younger than 8 must be kept away from the appliance and the mains cable.
3.1. Sett ing up and connecting the microwave
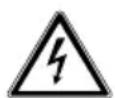
WARNING! Risk of electric shock!
There is a risk of electric shock due to live parts.
■ Before using the appliance for the first time and after each use, check the microwave and the mains cable for damage.
■ Do not use the microwave if you notice that it, or the mains cable, is damaged.
■ Make sure that the mains cable is not damaged and does not run underneath the microwave or over hot surfaces or sharp edges.
■ Completely unwind the mains cable.
■ Do not kink or crush the mains cable.
■ Contact our Service team without delay if the appliance has been damaged during transport.
■ Only connect the microwave to a properly installed, earthed and fused socket. The mains voltage must match the technical specifications for the appliance.
■ The socket must be freely accessible so that you can unplug the microwave from the mains quickly if necessary.

WARNING! Risk of injury!
There is a risk of injury as a result of microwave radiation. Microwave radiation may leak outside if the appliance is damaged. Damage to the mains cable may cause an electric shock.
■ WARNING! If the housing, covers, microwave door, door seals or the door lock of the microwave are damaged, do not use the microwave under any circumstances. Immediately remove the plug from the earthed mains socket in this case. Do not use the microwave again until it has been repaired by a person trained for this purpose.
■ WARNING! It is dangerous for untrained persons to carry out repair or maintenance work which requires the removal of a cover which is in place to prevent the escape of microwave radiation.
■ Do not, under any circum- stances, make any unauthor- ised modifications to the microwave or try to open a component and/or repair it yourself. The microwave oven and mains cable must exclusively be repaired by a professional workshop or contact the Service Centre in order to avoid any hazards. DE FR NL ES IT EN
- Do not remove any of the microwave’s internal covers or the inner coating of the viewing window as this may lead to microwave radiation leakage.
■ Only use replacement parts or accessories that we have supplied or approved.
■ Do not use the microwave in humid environments as this may cause an electric shock.
■ Do not immerse the microwave in water or other liquids and do not hold the microwave under running water.
■ Protect the microwave from water in droplet and spray form. Do not let the appliance come into contact with water or other liquids. Keep the appliance, the mains
cable and the mains plug away from wash basins, sinks or similar. If liquid ever penetrates the appliance, immediately disconnect the plug from the earthed mains socket. Have the appliance checked by a qualified specialist workshop.
■ Pull the mains plug out of the socket
- when you are cleaning or maintaining the appli- ance
- when you are assembling or disassembling the appliance
– the appliance is damp or wet - if you are no longer using the appliance
- when the appliance is un-
attended
– during thunderstorms.
■ Do not touch the appliance or the mains cable with wet hands.
3.2. Avoiding risk of fire

WARNING!
Risk of explosion!
Mixtures of water and oil can ignite or even explode.
■ Do not heat water mixed with oil or fat in the microwave.
■ Do not defrost frozen fat or oil in the microwave.

WARNING!
Risk of fire!
There is a risk of fire due to improper use of the appliance
■ Do not cover or block any openings on the appliance.
■ Never leave the appliance unattended while it is in use.
■ Do not operate the microwave with an external timer or separate, remote control system.
- Keep an eye on the microwave when heating up or cooking food in combustible materials like plastic or paper containers.
■ The appliance may only be used for heating up suitable food in suitable containers and dishes.
■ Do not dry combustible objects in the appliance (no food or clothing, heat pads, slippers, sponges, moist cleaning cloths, etc.). This may lead to injuries, ignition or fire.
■ Do not prepare any food containing alcohol in the appliance.
■ Do not use the appliance for frying or to heat up oil.
■ If smoke is emitted, switch off the appliance or unplug the plug and keep the microwave door closed to suffocate any flames.
■ Always use standard popcorn packaging that is designed for making popcorn in a microwave.
■ Never exceed the cooking times specified by the manufacturer.
■ Do not store any food or other objects in the microwave.
3.3. Safety instructions relating specifically to the use of microwaves
■ WARNING! Do not heat up
food or liquids in sealed or tightly closed containers! These can explode in the appliance and cause injuries on opening. Remove the lids from containers which close, such as feeding bottles for babies.
■ Food prepared in the micro-wave may heat up unevenly. Check the temperature of FR
food before eating. When preparing baby food and bottles, always stir the food or shake the bottle before checking the temperature in order to avoid burns.
■ Do not heat eggs in their shells or prepare whole hard-boiled eggs in the microwave as they may explode while cooking and even after removal from the microwave. Eggs may only be cooked in microwave dishes designed specifically for this purpose.
■ Prick or score food with a tough skin, e.g. tomatoes, sausages, aubergines, etc. before cooking in order to prevent it from bursting.
■ Hot steam will escape when you open cooking containers (e.g. popcorn bags, food storage containers). Always hold the opening away from your body as you open the container.
■ Hot steam will escape when you open the microwave door. Do not stand too close.
■ The surfaces of the microwave, the accessory parts, as well as the dishes will become very hot during the cooking process. Use oven gloves. Allow parts to cool down before cleaning.
3.4. Safety instructions on the heating of liquids

CAUTION! Risk of injury!
There is a risk of burns.
■ WARNING! When warming up liquids in the microwave, so-called “delayed boiling” can occur, i.e. the liquid has reached boiling temperature without beginning to bubble as boiling liquids normally do. Movements, such as those occurring when removing the liquid from the microwave, can then cause a sudden reaction, causing boiling liquid to spurt out, which is why caution is required when handling the container.
■ Do not use tall, narrow containers.
■ Place a glass rod or ceramic rod in the container when heating liquids in order to prevent delayed boiling. Wait a few moments after heating the liquid then take hold of the container carefully and stir the liquid before you take it out of the oven.
4. Package contents

DANGER!
Risk of injury!
There is a risk of choking and suffocation due to swallowing or inhaling small parts or plastic wrap.
- Keep all packaging materials used (bag, pieces of polystyrene etc.) out of the reach of children.
■ Do not allow children to play with the packaging material.

NOTICE!
Possible material damage!
Possibility of damage to the appliance due to improper handling
■ The mica waveguide cover in the cooking compartment is not part of the packaging and must not be removed!
Remove the product from the packaging and remove all packaging material.
▶ Check the package contents to ensure that all items are included. If anything is missing, please contact our Service Centre within 14 days of purchase.
Before each use, check the microwave oven for any damage. Contact our Service team in the event of any damage.
The following items are supplied with your product:
- Microwave
- Turntable plate
- Drive shaft
- Grill rack
- Short manual
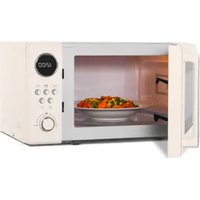
5. Appliance overview
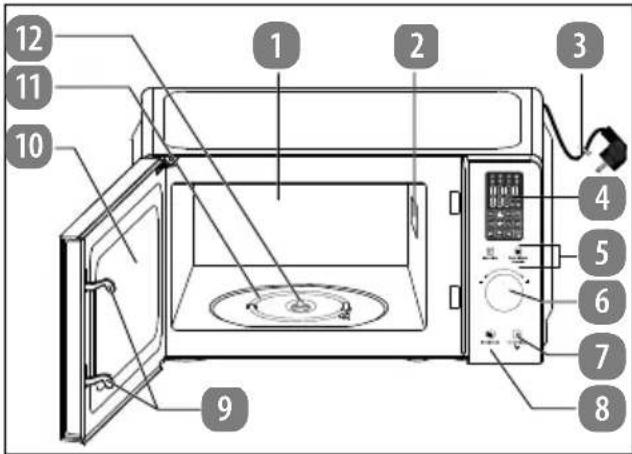
Fig. 1 - Front view with door open
- Cooking compartment
- Magnetron mica waveguide cover (DO NOT REMOVE!)
- Mains cable with mains plug
- Display panel
- Operating buttons
- Dial/confirmation button
- Stop/Clear button: interrupt operation/delete input Long button press: switch on the key lock
- Door release button
- Door lock
- Microwave door with viewing window
- Heating element
- Drive shaft
natural_image
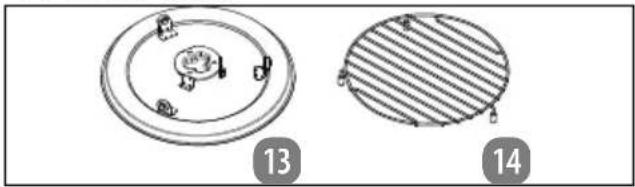
Two technical diagrams showing circular components with internal features, labeled 13 and 14 (no text or symbols on the diagrams themselves)Fig. 2 - Accessories
-
Metal turntable plate
-
Grill rack
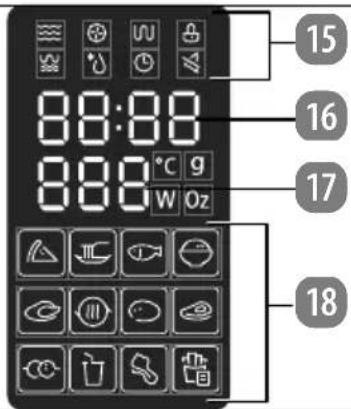
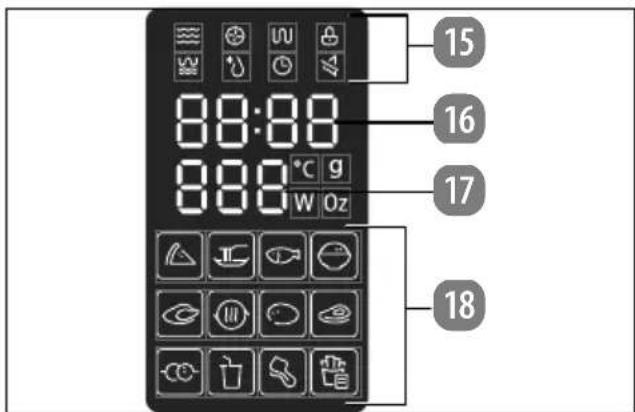
Fig. 3 - Display field
- Mode operating light
- Cooking time display
- Weight/portion display
- Automatic programmes operating lights
| Controls/mode Display Function | ||
| Microwave |  | Set the microwave power |
| Grill |  | Select grill function G-1, G-2 or G-3 |
| Combination mode | or 📋, 🐎 🐎 🐎 | Select combination function C-1, C-2, C-3, C-4 or C-5 |
| Convection |  | Select the convection function |
| Defrost |  | Defrosting by time d-2 |
| Defrosting by weight d-1 | ||
| Auto Menu |  | Select automatic programme |
| Auto Menu On/Off 3s |  | Long button press: switch off beeps |
 Function Function | Setting mode | |
| Press repeatedly: set the time (see “8.2. Setting the time” on page 160) | ||
 | Long button press: set the cooking timer (see “8.3. Setting the cooking timer (countdown)” on page 160) | |
| STOP/Clear | Interrupt operation/delete input | |
 | Long button press:switch on the key lock | |
| Confirm/Start/+30s | Press: confirm input, start programme, quick start | |
| - + | Turn: select/set auto programmes, enter cooking time | |
6. Cooking in the microwave

NOTICE!
Possible material damage!
The use of unsuitable materials can cause damage to the appliance or the material itself.
■ Exclusively use the accessories supplied or accessories which are described as suitable in this user manual.
■ Do not use dishes with metal trimmings or metal dishes as this may lead to sparks that may damage the appliance and/or the dishes.
As soon as you notice sparks or flashes, press the Stop/Clear button and pull out the mains plug. Check whether there are any metal objects in or on the food or dish.
■ Do not use crystal or lead crystal glass. It can shatter, and coloured glass may become discoloured.
■ Do not use materials that are not heat-proof. They may warp or may even catch fire.
■ Use dishes suitable for microwave ovens. Look for markings such as "microwave-safe" or "For the microwave" when purchasing dishes.
▶ In order to correctly arrange the food to be cooked, place the thickest pieces on the outside.
▶ Note the exact cooking or heating times.
▶ Choose the shortest available cooking or heating time and extend it if necessary.
▶ Cover food during cooking or heating with a microwave-safe cover. Covering the food helps avoid splashes; furthermore, the food is more evenly cooked.
▶ Foods such as chicken pieces or hamburgers should be turned once when cooking in the microwave oven in order to speed up cooking. Larger pieces such as joints or roasting chickens must be turned at least once.
It is also important to reposition food, e.g. if cooking meatballs: After half of the cooking time has expired, the food should be repositioned from top to bottom and from the inside to the outside.
▶ After heating, stir the food if possible to ensure even temperatures; otherwise, let the food stand for a short time.
6.1. Size and shape of microwave-safe containers
Flat, broad containers are better than narrow, tall ones. "Flat" foods can be cooked more evenly.
Round or oval containers are more suitable than angular ones. There is a danger of local overheating in the corners.
6.2. Microwave-suitable materials
Use the following utensils in the microwave:
- Browning dishes
- Crockery
• Glass containers without a lid - Oven-safe glassware
- Oven-safe cooking bags
- Paper bags and cups (only for brief warming up)
- Paper towel (only for covering foods and for soaking up grease)
- Microwave-safe plastic containers
• Microwave-safe plastic packaging
• Microwave-safe thermometer - Wax paper (only for covering foods)
Always note the manufacturer's instructions.
7. Before using the appliance for the first time
7.1. Setting up the appliance
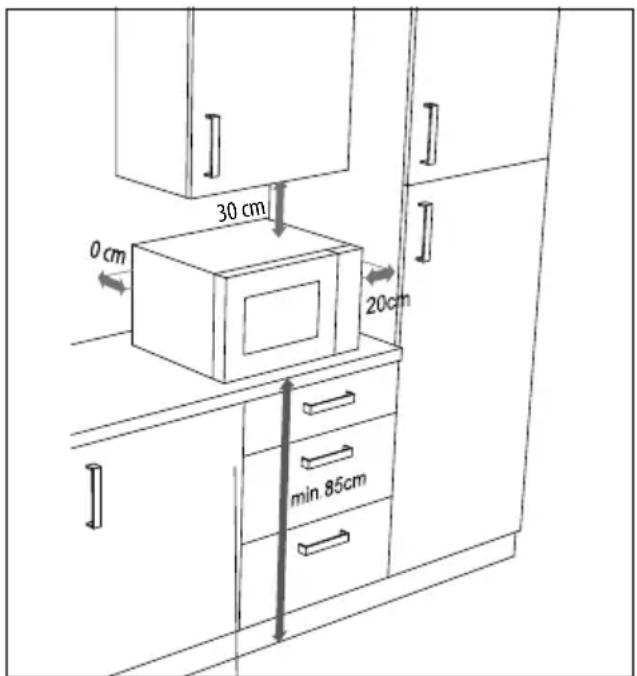
Fig. 4 – Appliance clearance

WARNING!
Risk of fire!
There is a risk of fire if the appliance is set up incorrectly.
The distances shown must be maintained to ensure adequate ventilation (see
Fig. 4). The spacer at the back of the appliance must touch the wall. It ensures that the correct clearance is maintained when positioning the microwave.
■ Do not remove the feet.
■ The microwave is designed as a free-standing appliance. Do not operate the microwave in fitted cabinets or a cupboard.

NOTICE!
Possible material damage!
There is a risk of damage to the appliance if installed incorrectly.
■ Place the microwave on a level, stable surface which is able to carry the weight of the appliance as well as the maximum weight of the food which will be cooked in it.
■ Use the appliance indoors only.
■ Do not place the microwave:
- near sources of heat or naked flames
- near radios or televisions
– in the immediate vicinity of inflammable materials
– in a location prone to wetness or high humidity
– in a location with extremely high or low temperatures or in direct sunlight.
Chemical additives in furniture coatings may corrode the material of the appliance feet and cause residue on the furniture surface.
■ Place the appliance on a heat-resistant mat if necessary.
Connect the microwave to a convenient and easily accessible, earthed mains socket.
7.2. Cleaning the appliance for the first time
▶ Press the button to open the microwave door.
To remove the dust residue from the packaging and any other possible residues from the manufacturing process, wipe out the cooking compartment and the inner side of the viewing window with a slightly damp, soft cloth before using the appliance for the first time. Ensure that no liquids penetrate the microwave and dry the surfaces completely afterwards.
Clean the turntable plate and the drive coupling star in warm water with a little washing up liquid before drying off these parts completely.
7.3. Heating up the empty appliance
Before using the microwave, the appliance must be heated up so that residues left over from production can evaporate. To do this, switch on the appliance in hot air mode without food or accessories inside as described below:
▶ Open the door and remove any packaging or accessory parts from the cooking compartment.
Close the door.
▶ Press the F button. P100 is displayed in the display field.
▶ Press the F button repeatedly until you see 140 °C in the display field.
▶ Press Confirm/ Start/+30s.
▶ Turn the Confirm/ Start/+30s dial to set the cooking temperature to 230 °C.
▶ Press Confirm/ Start/+30s.
▶ Turn the Confirm/ Start/+30s dial to set the cooking time of 5 minutes.
▶ Press the Confirm/ Start/+30s button to start the programme.

During this initial heating period you may notice faint odours. These smells are not dangerous and will disappear after a short time. Ensure adequate ventilation, e.g. by opening a window.
The appliance switches off automatically after 5 minutes. Wait until it has completely cooled down.
▶ Pull the mains plug out of the mains socket and then clean the appliance once again using a damp cloth from inside and dry the microwave carefully.
7.4. Inserting turntable plate
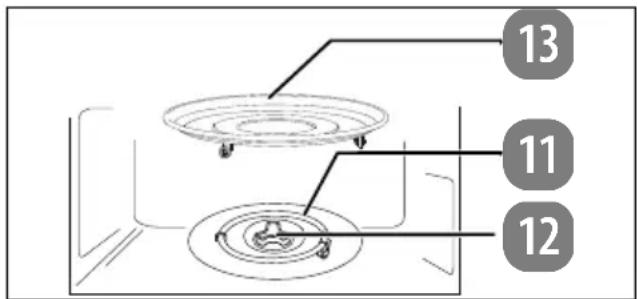
Fig. 5 – Inserting turntable plate
▶ Do not use the microwave without properly installing the turntable plate.
▶ Check that the drive shaft is correctly inserted in the recess in the base of the cooking compartment.
Then place the turntable plate in the centre of the drive shaft (see Fig. 5) so that the bars of the turntable plate lie in the recesses on the drive shaft.
8. Making sett ings

DANGER!
Risk of injury!
There is a risk of injury from electric shock or microwave radiation
Microwave radiation may leak outside if the appliance is damaged. Damage to the mains cable may cause an electric shock.
If the housing, covers, door or the door catch of the microwave are damaged, do not use the microwave under any circumstances. Immediately remove the plug from the earthed mains socket in this case.
■ If you discover any damage, do not use the microwave. Instead, please contact the Service Centre.

NOTICE!
Possible material damage!
Possibility of damage to the appliance due to improper handling
■ The microwave has been designed for household use and may not be used outside.
■ Do not operate the appliance without the turntable plate and never operate it without food in the cooking compartment.
■ Do not move the appliance when it is in use.
8.1. Switching beeps on/off
Every time a button is pressed, a beep tone sounds to confirm the button press.
▶ Press and hold the Auto Menu button for approx. 3 seconds to switch off the beeps.
The ≈ symbol is shown on the display.
▶ To switch the beeps back on, press and hold the Auto Menu button again for approx. 3 seconds.
8.2. Setting the time
When the microwave is switched on for the first time or the power supply has been interrupted, the display shows 00:00 and the time must be set.
▶ Press the button. P100 is displayed in the display field.
▶ Press the button repeatedly until 00:00 appears in the display field.
▶ Press Confirm/ Start/+30s.
▶ Turn the Confirm/ Start/+30s dial until the correct hour is shown in the display field.
▶ Press Confirm/ Start/+30s to confirm the setting.
▶ Turn the Confirm/ Start/+30s dial until the correct minute is shown on the display.
▶ Press Confirm/ Start/+30s to confirm the setting.
8.3. Sett ing the cooking timer (countdown)
The appliance can emit a tone after a set time has elapsed. You can use this function as an egg timer, for example.
▶ Press and hold the button for approx. 3 seconds until 00:00 and the 🔊 symbol appear in the display field.
▶ Turn the Confirm/ Start/+30s dial to desired duration until the beep tone is set.
The maximum duration that can be set is 95 minutes.
▶ Press Confirm/ Start/+30s to confirm the setting.
The beep tone sounds after the set duration has elapsed.

The function is not available while a cooking programme is in progress.
8.4. Butt on lock
▶ Press and hold the Stop/Clear button for approx. 3 seconds until the 🔊 symbol is displayed. The microwave buttons and dial are now locked.
▶ To deactivate the button lock, press and hold the Stop/Clear button again for approx. 3 seconds.

The function is not available while a cooking programme is in progress.
9. Cooking in microwave mode

CAUTION!
Risk of injury!
As the food or containers may be very hot, there is a risk of scalding.
■ Always use a protective cloth or heat-proof oven gloves when removing food from the cooking compartment.

When the appliance is in use, condensation may form on the inner walls and microwave door. This is normal when cooking and does not indicate a malfunction. If condensation forms, wipe it off with a soft cloth.
Prepare the food:
Poultry, pork, minced meat and all types of fish are suitable for preparing in the microwave. In contrast, beef and game meats quickly become tough in the microwave and are therefore not suitable. When preparing vegetables, meat and fish, cut the food into as evenly sized pieces as possible and cover it when cooking.
▶ Press the door open button to open the microwave door.
Place the food in a microwave-safe container in the centre of the turntable plate.
▶ Close the microwave door until you hear it click into place.
▶ Press the button. P100 is displayed in the display field.
▶ Press Confirm/ Start/+30s.
▶ Select the power level with the Confirm/NL Start/+30s dial.
There are 10 power levels available: P10 (low) to P100 (full power).
DE
FR
ES
IT
EN
| Cooking level | Output (in watts) | Examples of use | |
| P10 Low 90 Keeping warm, thawing ice cream | |||
| P20 180 | |||
| P30 De-frost | 270 | Defrosting, melting butter | |
| P40 | 360 | ||
| P50 | Medium | 450 | Slow cooking, cooking fish, soups |
| P60 | 540 | ||
| P70 | 630 | ||
| P80 | Medium high | 720 | Cooking rice, minced meat dishes, chicken |
| P90 | 810 | ||
| P100 | High | 900 | Fast heating, heating drinks, boiling water, cooking vegetables |
▶ Press Confirm/ Start/+30s to confirm the setting.
▶ Turn the Confirm/ Start/+30s dial to set the desired cooking time in the following time intervals. The longest cooking time is 95 minutes.
| From 0 sec. to 1 min. | in 5-second increments |
| From 1 to 5 min. in | 10-second increments |
| From 5 to 10 min. in | 30-second increments |
| From 10 to 30 min. | in 1-minute increments |
| From 30 min. in 5-minute increments | |
▶ Press the Confirm/ Start/+30s button. The cooking process starts.
9.1. Quick start
▶ Press the Confirm/ Start/+30s button without first setting a power level.
The cooking programme starts at the highest energy level (900 watts) in microwave mode.
To increase the cooking time, quickly press the Confirm/ Start/+30s button several times:
Press 1 x: 0:30 minutes;
Press 2 x: 1:00 minutes;
Press 3 x: 1:30 minutes;
Press 4 x: 2:00 minutes
etc. up to a maximum of 95 minutes.
The cooking programme starts automatically after the last press of the button.

Another quick start method is as follows:
In standby mode, turn the Confirm/Start/+30s dial to the left to set the cooking time.
▶ Press Confirm/ Start/+30s to start the cooking process.

In the microwave, convection, grill, combination and defrost by time modes, you can extend the cooking time as described above by pressing the Confirm/Start/+30s button. This function is not available in the automatic programmes.
9.2. End of the cooking process
At the end of each cooking process, beeps will sound and the time is displayed on the display again. The cooking process is finished.
9.3. Interrupting a programme
If you want to turn or stir the food, for instance midway through the cooking process, it is often necessary to interrupt the programme.
▶ Open the door or press the Stop/Clear button to interrupt the programme. The remaining cooking time is still shown on the display field.
▶ After you have closed the door again, press the Confirm/ Start/+30s button to continue the cooking process.
▶ Press the Stop/Clear button twice to cancel the programme prematurely.
10. Defrosting food

If possible, turn the food over halfway through the elapsed time or stir it to optimise defrosting (see "9.3. Interrupting a programme" on page 162). An acoustic signal reminds you to do so.
If the frozen food has still not been defrosted once the time has elapsed, start the appliance again at level P30 for several minutes to defrost the frozen food completely.
10.1. Automatic defrosting by weight
The defrosting time and power level are set automatically once you have entered the weight of the food to be defrosted. The scale for the weight of the frozen product ranges from 100 g to 2000 g.
▶ Press the button. P100 is displayed in the display field.
Press the button repeatedly until d-1 and the * symbol appear in the display field.
▶ Press Confirm/ Start/+30s.
▶ Turn the Confirm/ Start/+30s dial to set the weight in grams.
▶ Press the Confirm/ Start/+30s button to start defrosting.
10.2.Defrostingbytime
▶ Press the button. P100 is displayed in the display field.
Press the button repeatedly until d-2 and the * symbol appear in the display field.
▶ Press Confirm/ Start/+30s.
▶ Turn the Confirm/ Start/+30s dial to set the time you want (up to max. 95:00 minutes).
▶ Press the Confirm/ Start/+30s button to start defrosting.
11. Grill/convection/ combination mode

CAUTION!
Risk of injury!
As the food or containers may be very hot, there is a risk of scalding. The turntable plate will also become very hot after a cooking process with the grill/convection!
■ Always use a protective cloth or heat-proof oven gloves when removing food from the cooking compartment.

NOTICE!
Risk of damage to property!
There is a risk that overheating will damage the appliance.
- Observe the minimum clearances between the appliance and the wall and do not cover the ventilation vents under any circumstances.

WARNING!
Risk of fire!
There is a risk of fire due to improper use of the appliance.
■ For programmes that activate the grill/convection function, do not use covers or non-heat-resistant dishes under any circumstances, as they may melt or catch fire!
■ The appliance may only be used for heating up appropriate food in suitable containers and dishes. Do not use baking paper in grill or combination mode.
11.1. Using the grill function
The grill function is suitable for thin slices of meat, steaks, minced meat, kebabs, sausages or chicken pieces. It is also suitable for grilled cheese sandwiches and other au gratin dishes.
You can use the grill rack provided in grill mode, as long as the food is suitable for this.
Place the grill rack on the turntable plate.
▶ Press the button. P100 is displayed in the display field.
▶ Press the button repeatedly until the desired grilling level G-1, G-2 or G-3 is shown in the display field.
▶ Press Confirm/ Start/+30s.
▶ Turn the Confirm/ Start/+30s dial to set the cooking time (up to max. 95:00 minutes).
▶ Press the Confirm/ Start/+30s button to start the programme.

A beep tone will sound after half the time has elapsed. If necessary, open the door and turn the food to optimise cooking (see "9.3. Interrupting a programme" on page 162).
■ Press the Confirm/ Start/+30s button again to continue the programme.
11.2. Using convection mode
In convection mode, hot air circulates in the interior. Convection is particularly recommended for the preparation of casseroles or crispy foods.
▶ Press the button. P100 is displayed in the display field.
Press the button repeatedly until you see 140°C in the display field.
▶ Press Confirm/ Start/+30s.
▶ Turn the Confirm/ Start/+30s dial to set the cooking temperature (140 to 230 °C).
▶ Press Confirm/ Start/+30s.
11.2.1. Preheating
▶ Press Confirm/ Start/+30s again to preheat the appliance.
Once the set temperature has been reached, an acoustic signal sounds.
Place the food in a heat-resistant dish in the centre of the turntable plate.
▶ Close the door.

If you do not wish to preheat the appliance, please proceed directly to the next step.
▶ Turn the Confirm/ Start/+30s dial to set the cooking time (up to max. 95:00 minutes).
▶ Press the Confirm/ Start/+30s button to start the programme.
11.3. Using combination mode
In combination mode, the operating modes, i.e. microwave, convection and grill, are performed in a specific cycle.
▶ Press the button. P100 is displayed in the display field.
▶ Press the button repeatedly until C-1, C-2, C-3, C-4 or C-5 appears in the display field.
▶ Press Confirm/ Start/+30s.
| Readout on Display | Mode | |||
| Microwave | Grill Top heat | Grill Bottom heat | Convection | |
| C-1** | ||||
| C-2** | ||||
| C-3*** | ||||
| C-4*** | ||||
| C-5** | ||||

Do not use the grill rack when the microwave is switched on.
For programme C-1 to C-4
▶ Turn the Confirm/ Start/+30s dial to set the cooking time (up to max. 95:00 minutes).
▶ Press the Confirm/ Start/+30s button to start the programme.
For programme C-5
▶ Turn the Confirm/ Start/+30s dial to set the cooking temperature (140 to 230 °C).
▶ Press Confirm/ Start/+30s.
▶ Turn the Confirm/ Start/+30s dial to set the cooking time (up to max. 95:00 minutes).
▶ Press the Confirm/ Start/+30s button to start the programme.
12. Automatic programme sequence
The appliance can carry out two cooking programmes consecutively which run automatically.
Set each cooking programme as described but only press the Confirm/ Start/+30s button when the last cooking programme has been set.
Example:
You want to defrost a dish using the defrost programme, then start the grill programme.
▶ Set the defrost programme as described at Page 162 without pressing the Confirm/Start/+30s button in the last step at the end.
▶ Then set the grilling programme as described at Page 163.
▶ Press the Confirm/ Start/+30s button to start the programme.
13. Using automatic programmes
With the automatic programme, it is not necessary to enter the cooking time and energy level. The microwave automatically determines the values depending on the food and weight entered.
▶ Press the Auto Menu button.
▶ Turn the Confirm/ Start/+30s dial to select an automatic programme.
The programme number (e.g. "A-1" for automatic programme 1) for the cooking programme and the symbol are shown in the display field.
▶ Select an automatic programme A-1 to A-11.
▶ Press the Confirm/ Start/+30s button to confirm the setting.
Now select the desired weight or number of servings. To do this, turn the Confirm/Start/+30s dial.
The weight/amount is shown on the display field.
Press the Confirm/ Start/+30s button to start the programme. If the food is not fully cooked through, cook it for a few minutes more with the microwave, convection or grill programme. Additional cooking with the grill function also increases the degree of browning of the food.

Note that the size, shape and types of food also determine the cooking result.
The following table shows an overview of the automatic programmes with the adjustable portion sizes.
| Programme | Weight | Display | Power level |
| A-01Frozen pizza | 200 g | 200 | Grill + convection 230°C |
| 300 g | 300 | ||
| 400 g | 400 | ||
| A-02Noodles | 50 g (+ 450 ml water) | 50 g | P80 |
| 100 g (+ 800 ml water) | 100 | ||
| 150 g (+ 1200 ml water) | 150 | ||
A-03Fish | 150 g | 150 | P80 |
| 250 g | 250 | ||
| 350 g | 350 | ||
| 450 g | 450 | ||
| 650 g | 650 | ||
A-04Rice | 200 g | 200 | P100 + P50 |
| 400 g | 400 | ||
| 600 g | 600 | ||
A-05Chicken | 500 g | 500 | C-5 + con-vection 220°C |
| 750 g | 750 | ||
| 1000 g | 1000 | ||
| 1200 g | 1200 | ||
A-06Warm-ing up | 150 g | 150 | P100 |
| 250 g | 250 | ||
| 350 g | 350 | ||
| 450 g | 450 | ||
| 600 g | 600 | ||
A-07Pota-toes | 1 | 1 | P100 |
| 2 | 2 | ||
| 3 | 3 |


14. Using the deep-frying programme (convection)
The deep-frying programmes are particularly suitable for preparing frozen dishes, which are listed in the following table.
| Programme | Recommended weight in g | Display |
| Frozen chips 300 | F-1 | |
| Frozen potato wedges | 450 | F-2 |
| Frozen chicken nuggets | 350 | F-3 |
| Frozen cheese sticks | 300 | F-4 |
| Frozen squid 300 | F-5 | |
| Frozen onion rings | 300 | F-6 |
| Frozen prawns, breaded | 250 | F-7 |
| Frozen chicken schnitzel | 400 | F-8 |
| Frozen vegetable schnitzel | 360 | F-9 |
| Grilled fresh fish fillets | 300 | F-10 |
| Frozen chicken wings | 500 | F-11 |
| Frozen chicken thighs | 550 | F-12 |
▶ Press the Auto Menu button repeatedly until F-1 appears in the display field.
▶ Turn the Confirm/ Start/+30s dial to the right or press the Auto Menu button repeatedly to select a deep-frying programme (F-1 to F-12).
▶ Press the Confirm/ Start/+30s button. The recommended weight for the food is displayed flashing.
▶ Press the Confirm/ Start/+30s button again to start the programme.
If the food is not fully cooked through, cook it for a few minutes more. Extend the cooking time by pressing the Confirm/ Start/+30s button (see also "9.1. Quick start" on page 162).

Note that the size, shape and types of food also determine the cooking result.
15. Energy-saving tips
▶ Choose the shortest available cooking time and extend it as required.
▶ Cook small portions at a time. When cooking large quantities of food, it may be more energy-efficient to use a cooker/oven.
▶ Distribute the food evenly in a microwave-safe or heat-resistant cooking dish (depending on the mode) and stir and/or turn the food halfway through the cooking time.
16. Cleaning and maintenance

DANGER!
Risk of electric shock!
There is a risk of electric shock due to live parts.
■ Switch the microwave off and disconnect the plug from the mains socket before cleaning.

NOTICE!
Possibility of damage to the appliance!
There is a risk of damage to the appliance if it is used improperly.
■ Never use cleaning sprays, acidic, abrasive or granular, acetic-acid-, soda- or solvent-based cleaning agents. These may damage the appliance surfaces or the printing on it.
■ Do not use steam cleaners.
■ Do not clean the heating element with steel wool or metallic pot cleaners, as this can lead to an unintentional short circuit.
Failure to clean the appliance properly can damage the surfaces, which can in turn reduce the service life of the appliance and may lead to hazardous situations.
Therefore, clean the microwave regularly and remove all food residues.
- Keep the cooking area clean. Wipe away splashes or spilled liquids that stick to the inner walls of the microwave with a damp cloth. If the cooking area is very dirty, wipe it with a damp cloth and a mild cleaning solution.
The external surfaces should be cleaned with a damp cloth. To prevent damage to the microwave's internal operating parts, prevent water from penetrating into the ventilation openings.
▶ Clean the microwave door with viewing window and the door lock carefully with a mild soap solution. Take great care not to damage these parts.
▶ Water may condense on the external surfaces if used in high humidity. If water condenses on the internal or external surfaces, wipe it off with a soft cloth.
The turntable plate must be removed occasionally for cleaning. Rinse the turntable plate in warm water with a mild soap solution. Then dry the turntable plate thoroughly with a soft cloth.
▶ Clean the control panel with a soft, damp cloth. Prevent moisture from penetrating.
When you clean the control panel, leave the microwave door open to prevent the appliance from being switched on accidentally.
Remove the drive shaft. Wipe the drive shaft using a damp cloth.
▶ Replace the drive shaft and the turntable plate after cleaning (see "7.4. Inserting turntable plate" on page 159).
- Rinse the grill rack in warm water with a mild soap solution. Allow some time for stubborn dirt to soak.
Lingering odours in the microwave can be removed by placing a glass of water with the juice and rind of a lemon into a deep container that is suitable for microwave use and heating for 5 minutes. Subsequently thoroughly wipe the appliance and dry it with a soft cloth.
▶ If you have to replace the light in the microwave, please contact a qualified specialist workshop or our Service Centre.
17. Prolonged non-use and transport
▶ If you do not plan to use the microwave for a long period of time, disconnect the mains plug and store the microwave in a dry, clean and dust-free place.
▶ To avoid damage during transport, we recommend that you use the original packaging.
18. Troubleshooting
| Problem | Possible cause | Solution |
| The appliance cannot be started. | The mains plug is not inserted. | Insert the mains plug into the socket. |
| The mains socket is faulty. | Check the mains socket by connecting another appliance. | |
| The appliance does not heat up. | The appliance door is not closed. | Close the appliance door. |
| The lighting does not work. | The bulb is defective. | Contact our Service Centre. |
| Door opener fault | Grab the bottom right of the door and open the door by hand. |

Microwave interferes with TV/radio reception
Radio and television reception may be disrupted by the operation of a microwave. This does not constitute a defect.
Lighting dimmed
When cooking at low power, the light in the cooking cabinet may dim. This is normal and does not constitute a malfunction.
The microwave was accidentally started without any food in it.
Do not operate the appliance without food in it. This is very dangerous.
19. Technical specifi cations
| Distributor: | MEDION AGAm Zehnthof 7745307 EssenGERMANY |
| Model identifier: MD | 12041 |
| Rated voltage: 230 V~, 50 Hz | |
| Nominal input power, microwave: | 1450 W |
| Rated power output, microwave: | 900 W |
| Microwave frequency: | 2450 MHz |
| Rated power, grill: 1500 W | |
| Rated power, convection: | 2100 W |
| Protection class: I | |
| Housing dimensions (W x H x D): | Approx.49.5 x 30.0 x 43.0 cm |
| Net weight: Approx. | 15.75 kg |
| Diameter of turntable plate: | Approx. 29 cm |
| Power consumptionProduct information on power consumption and the maximum time until the respective energy-saving mode is reached. | |
| Standby mode 0.8 W | |
| Maximum time until energy-saving mode is reached | 20 minutes |
20. EU declaration of conformity
CE MEDION AG hereby declares that the product conforms to the following European requirements:
• EMC Directive 2014/30/EU
• Low Voltage Directive 2014/35/EU
• Ecodesign Directive 2009/125/EC
• RoHS Directive 2011/65/EU.
This product meets the requirements of European standard EN55011. The product is classed as standard-compliant as a group 2, class B appliance. Group 2 means that the appliance intentionally generates high-frequency energy in the form of electromagnetic rays for the heat-treatment of foodstuffs. Class B means that the appliance is suitable for domestic use.
21. Spare parts
Please visit our MEDIONServiceshop at https://www.medion.com/
medionserviceshop to order any spare parts you need.
You will be able to find out all the details about your specific product while you're there.
22. Disposal
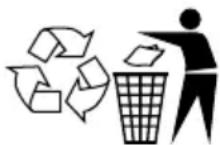
PACKAGING
Your appliance has been packaged to protect it from damage during transport.
The packaging is made of materials that can be disposed of in an environmentally friendly manner and recycled properly.

Observe the following packaging material label regarding waste separation with the abbreviations (a) and numbers (b):
1–7: plastics/20–22: paper and cardboard/80–98: composite materials

(Only for France)
The “Triman” symbol tells the consumer that the product can be recycled, is covered by an extended system of manufacturer’s responsibility and must be sorted by material type in France.

(Only for Spain)
This symbol indicates disposal according to the type of packaging material used (blue = paper and cardboard; yellow = plastic, metal, composite packaging; green = glass).
Use the disposal options offered to you where you are.
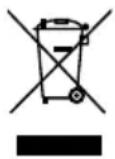
APPLIANCE
Old appliances that carry the symbol illustrated may not be disposed of in ordinary household waste.
In accordance with Directive 2012/19/EU, the appliance must be disposed of correctly at the end of its service life.
This involves separating the materials in the appliance for the purpose of recycling as well as minimising the environmental impact and negative effects on human health.
Take old appliances to an electrical scrap collection point or a recycling centre.
Contact your local waste disposal company or your local authority for more information on this subject.
23. Service information
Please contact our Customer Service team if your device ever stops working the way you want or expect it to. There are several ways for you to contact us:
- In our Service-Community, you can meet other users, as well as our staff, and you can exchange your experiences and pass on your knowledge there.
You will find our Service-Community at community.medion.com.
• Alternatively, use our contact form at www.medion.com/contact. - You can also contact our Service team via our hotline or by post.
| Opening times | Hotline number UK |
| Mon – Fri: 08.00 – 20.00Sat – Sun: 10.00 – 16.00 | 0333 3213106 |
| Service address | |
| MEDION Electronics Ltd.120 Faraday Park, Faraday Road,DorcanSwindon SN3 5JF, WiltshireUnited Kingdom | |

You can download this and many other sets of operating instructions from our service portal at www.medionservice.com.
We have stopped providing printed copies of our warranty terms and conditions as part of our commitment to sustainability, but you can access the warranty terms and conditions on our service portal.
You can also scan the QR code on the side of the screen, to download the operating instructions onto your mobile device from the service portal.
24. Legal Notice
Copyright 2024
Date: 12. December 2024
All rights reserved.
These operating instructions are protected by copyright.
Mechanical, electronic and any other forms of reproduction are prohibited without the written permission of the manufacturer.
Copyright is owned by the company:
MEDION AG
Am Zehnthof 77
45307 Essen
Germany
Please note that you cannot use the address above for returns. Please always contact our Customer Service team first.

- Inhaltsverzeichnis
- Préchauff age
- ■ WAARSCHUWING! Neem
- ■ WAARSCHUWING! Behal-
- WAARSCHUWING! Brandgevaar!
- Precalentar
- Confirm/ Start/+30s.
- Information about this user manual
- Explanation of symbols
- DANGER!
- WARNING!
- CAUTION!
- NOTICE!
- Proper use
- Safety instructions
- Sett ing up and connecting the microwave
- WARNING! Risk of electric shock!
- WARNING! Risk of injury!
- Avoiding risk of fire
- Risk of explosion!
- Risk of fire!
- Safety instructions relating specifically to the use of microwaves
- Safety instructions on the heating of liquids
- CAUTION! Risk of injury!
- Package contents
- Risk of injury!
- Possible material damage!
- Appliance overview
- Cooking in the microwave
- Size and shape of microwave-safe containers
- Microwave-suitable materials
- Before using the appliance for the first time
- Setting up the appliance
- Cleaning the appliance for the first time
- Heating up the empty appliance
- Inserting turntable plate
- Making sett ings
- Switching beeps on/off
- Setting the time
- Sett ing the cooking timer (countdown)
- Butt on lock
- Cooking in microwave mode
- Quick start
- End of the cooking process
- Interrupting a programme
- Defrosting food
- Automatic defrosting by weight
- 10.2.Defrostingbytime
- Grill/convection/ combination mode
- Risk of damage to property!
- Using the grill function
- Using convection mode
- Preheating
- Using combination mode
- For programme C-1 to C-4
- For programme C-5
- Automatic programme sequence
- Example:
- Using automatic programmes
- Using the deep-frying programme (convection)
- Energy-saving tips
- Cleaning and maintenance
- Risk of electric shock!
- Possibility of damage to the appliance!
- Prolonged non-use and transport
- Troubleshooting
- Microwave interferes with TV/radio reception
- Lighting dimmed
- The microwave was accidentally started without any food in it.
- Technical specifi cations
- EU declaration of conformity
- Spare parts
- Disposal
- PACKAGING
- APPLIANCE
- Service information
- Legal Notice
Brand : MEDION
Model : MD 12041
Category : Microwave Oven