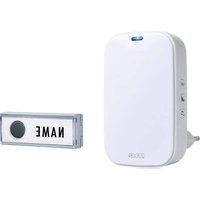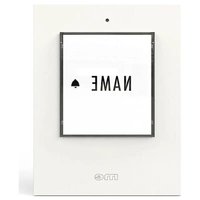
KTF-1 - Doorbells m-e - Free user manual and instructions
Find the device manual for free KTF-1 m-e in PDF.


User questions about KTF-1 m-e
0 question about this device. Answer the ones you know or ask your own.
Ask a new question about this device
Download the instructions for your Doorbells in PDF format for free! Find your manual KTF-1 - m-e and take your electronic device back in hand. On this page are published all the documents necessary for the use of your device. KTF-1 by m-e.
USER MANUAL KTF-1 m-e
Thank you for purchasing this doorbell button. Please read the user manual carefully and keep it for future reference. This doorbell button is designed for wired doorbell systems and provides a potential-free switching contact for each family.
When connected to a power supply, the nameplate illumination automatically turns on in darkness and off in brightness.
PACKAGE CONTENTS
KTF-1
1-family wireless doorbell button Mounting materials Operation and installation manual
KTF-2
2-family wireless doorbell button Mounting materials Operation and installation manual
KTF-3
3-family wireless doorbell button Mounting materials Operation and installation manual
LEGEND
1 = Doorbell button (KTF-3 is illustrated)
2 = Brightness sensor
3 = Nameplate(s)
4 = Housing screws
5 = Mounting holes
6 = Doorbell button on the circuit board
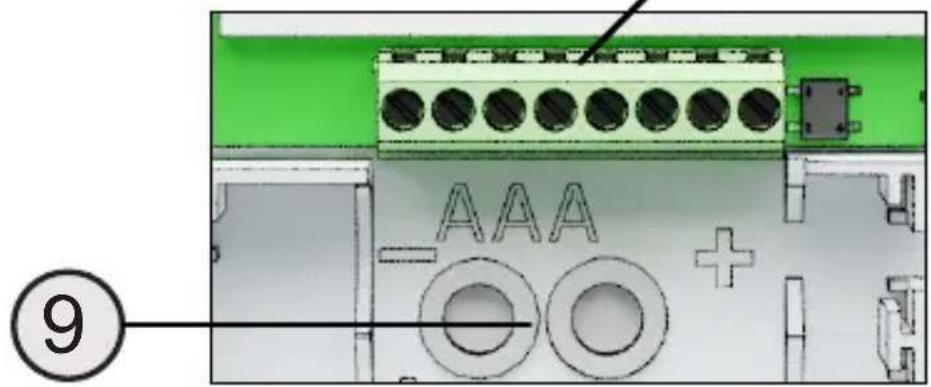
7 = Connection terminals
8 = Nameplate illumination
9 = Cable entry
INSTALLATION

Note: The installation location should be as flat as possible to avoid warping the housing during installation. If an external power supply is used, the connection wires should be centrally located in the lower third behind the doorbell button.
Opening the Housing
Open the doorbell button by unscrewing the housing screws (4) with a suitable screwdriver (Torx T10) and then carefully lifting the front housing. Be careful not to let the nameplate(s) fall out. Place the front housing and the silicone seal with the nameplate(s) aside to avoid damage during further installation.
Mounting
You can use the rear housing as a drilling template. Align it at the installation location using a spirit level and mark the drill holes with a suitable pen. Drill holes at the marked locations in the wall using a 6mm masonry drill bit and insert one of the supplied dowels into each hole.

Note: If you are not mounting the doorbell button on a stone wall, use appropriate alternative mounting materials (not included).
Thread the connection cable from the back through the cable entry points (9) into the housing. Use the supplied screws to attach the rear housing to the wall.
Closing the Housing
Place the silicone seal with the nameplate(s) in the front housing and assemble both onto the mounted rear housing. Screw both housing parts together with the housing screws.
CONNECTION
This doorbell button provides a potential-free contact for each family to connect a door chime. On the following pages, you will find example connection diagrams for the respective models.
Example connection diagrams for KTF-1 (chime with battery):

Example connection diagrams for KTF-1 (chime with power supply):
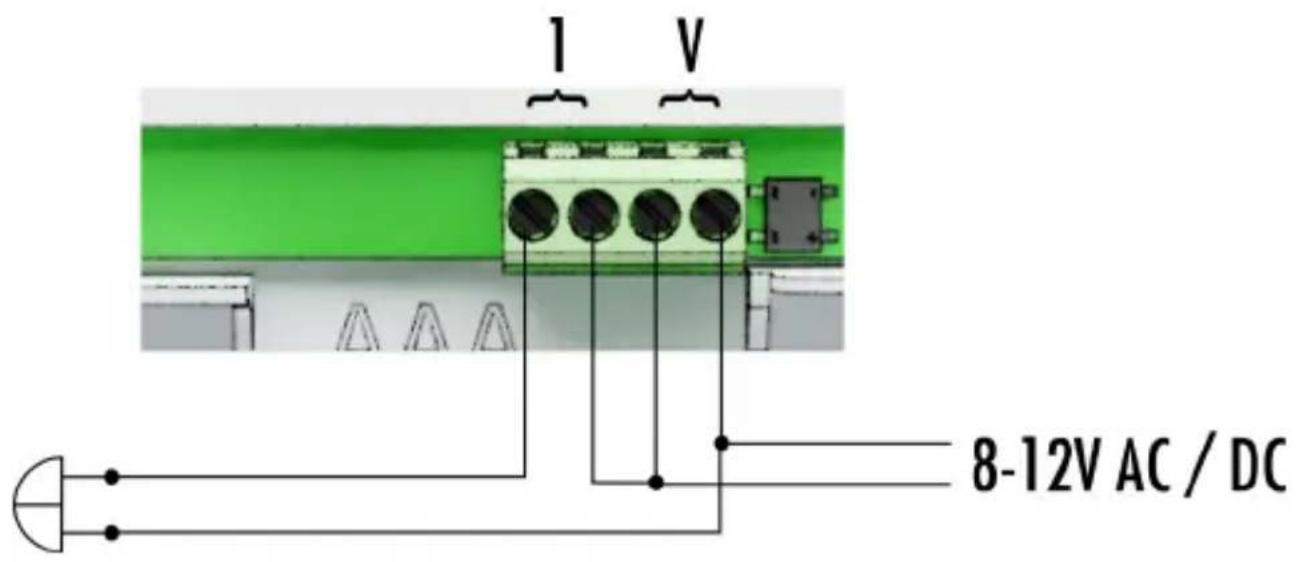
Example connection diagrams for KTF-2 (chime with battery):
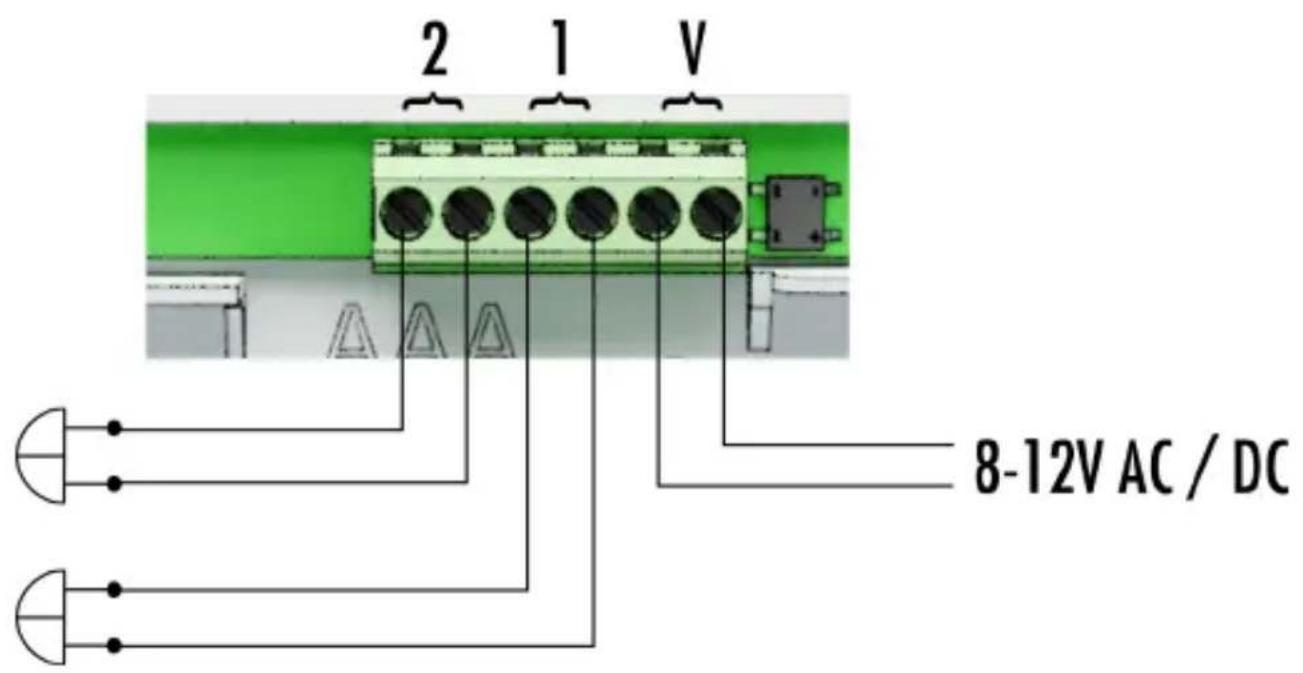
Example connection diagrams for KTF-2 (chime with power supply):
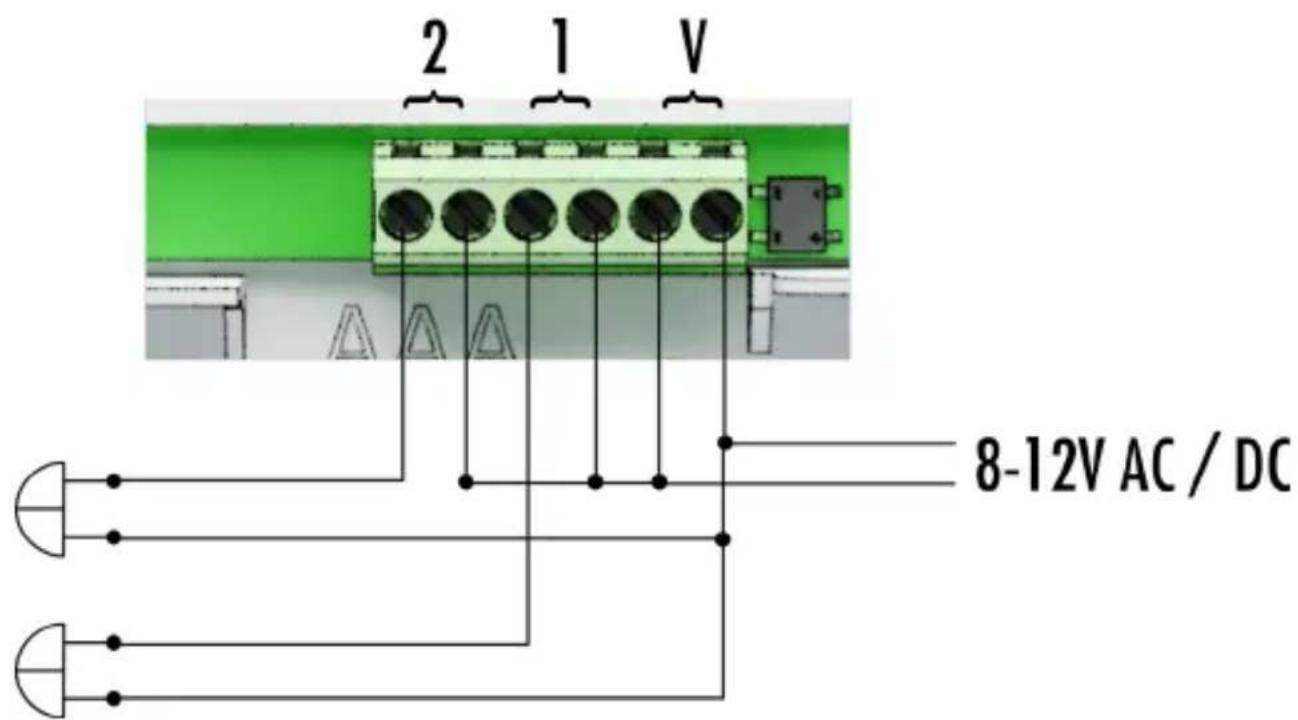
Example connection diagrams for KTF-3 (chime with battery):
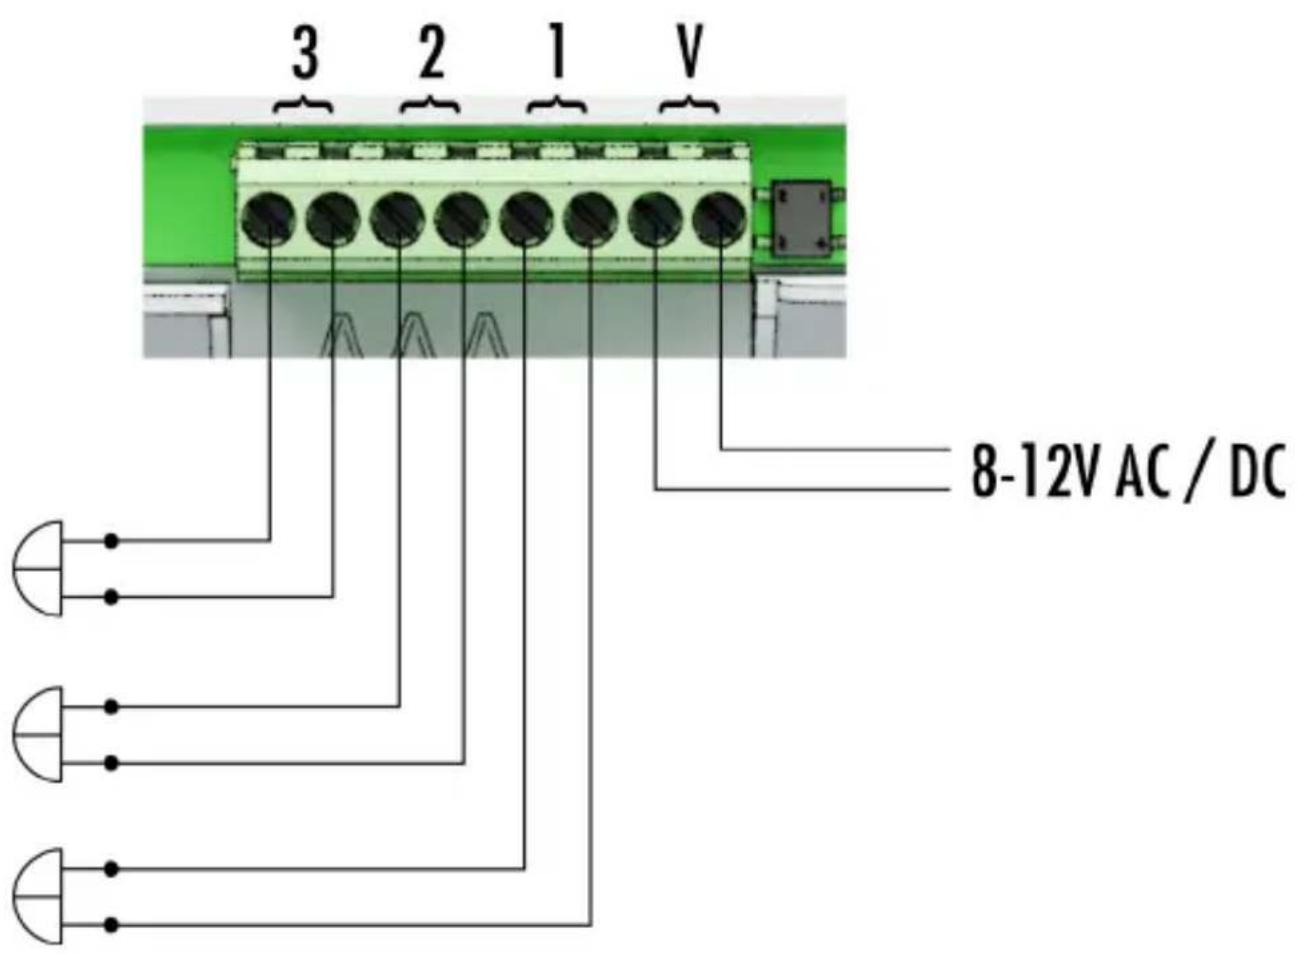
Example connection diagrams for KTF-3 (chime with power supply):
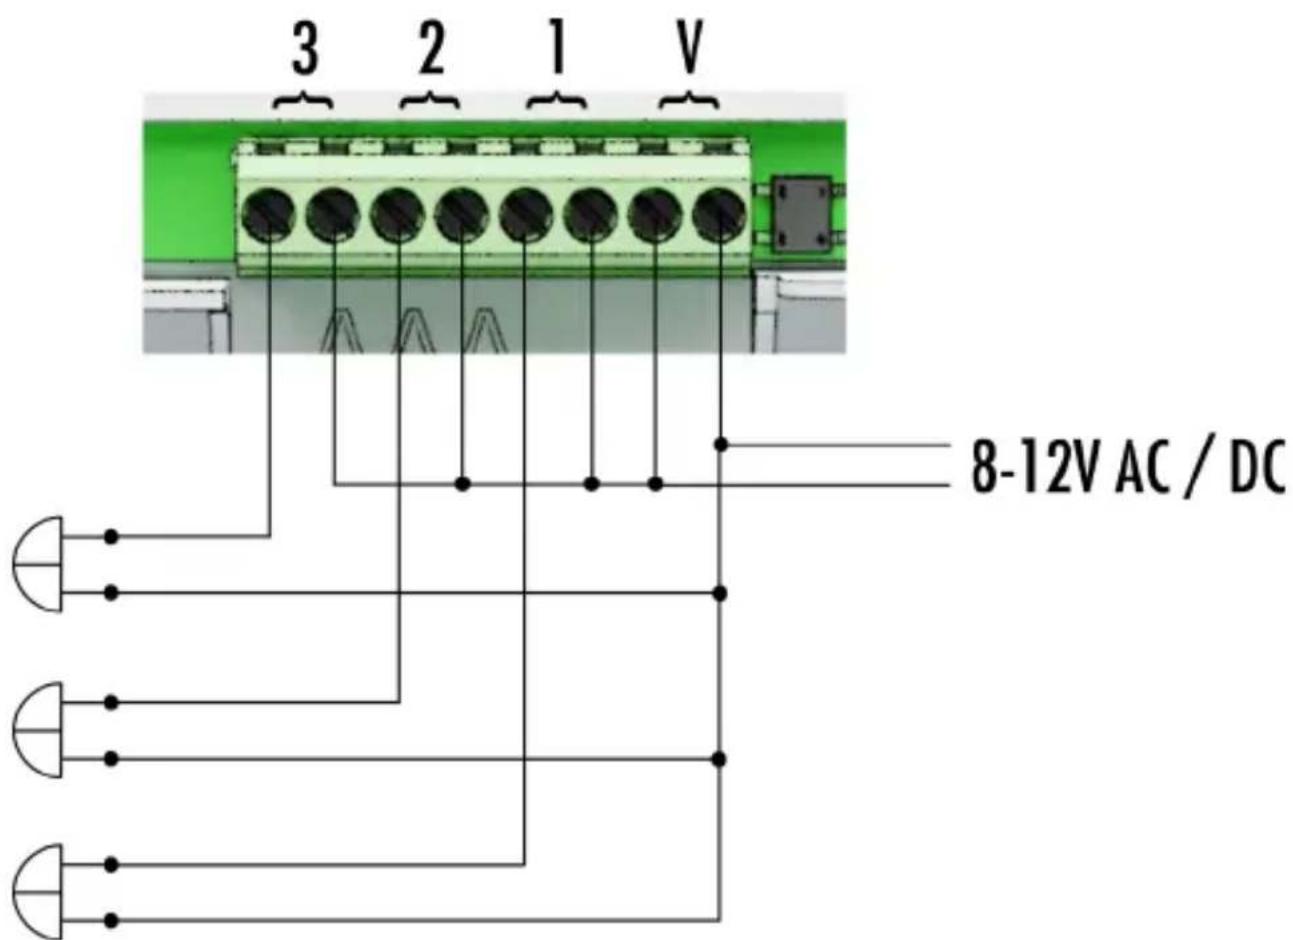
NAMEPLATE ILLUMINATION
This doorbell button is equipped with automatic nameplate illumination, which turns on in darkness and turns off in brightness.

Note: If no power supply is connected, the doorbell button can still be used, only the nameplate illumination will be non-functional.
REPLACING THE LABELLING FIELD
The labelling field can be easily replaced. As shown in Fig. 1, carefully position a suitable flathead screwdriver at the side of the nameplate and gently pry it forward without damaging the housing. Underneath is the labelling field, which can now be easily replaced.
DIMENSIONS FOR THE LABELLING FIELD
- KTF-1: 52mm x 57mm
- KTF-2: 52mm x 27mm (2x)
·KTF-3:52mm×17mm(3x)
TECHNICAL DATA
- Operating voltage: 8-12V AC or DC
- Power consumption: <1W
- Contact load capacity: max. 1A
Protection class: IP44
Temperature range: -20^ to +55^
NOTES
Under the influence of strong static, electric, or high-frequency fields (discharges, mobile or cell phones, radio systems, microwaves), malfunctions may occur.
Cleaning and Maintenance
The surface of the housing can be cleaned with a soft cloth moistened with soapy water. Do not use abrasive cleaners or chemicals.
SAFETY INSTRUCTIONS
We do not assume liability for property or personal damage caused by improper handling or failure to observe safety instructions. In such cases, any warranty claim is void!
For safety and approval reasons (CE), unauthorized modification and/or alteration of the product is not allowed.
Do not leave packaging materials lying around; plastic films/bags, Styrofoam parts, etc., could become hazardous toys for children.
Consult a professional if you have doubts about the operation, safety, or connection of the device.
Handle the product with care - it can be damaged by impacts, blows, or falls from even a low height.
WARRANTY INFORMATION
For a period of 2 years from the date of purchase, we guarantee that this product is free from defects in materials and workmanship. This applies only if the device is used in a normal manner and regularly maintained. The obligations of this warranty are limited to the repair or replacement of any part of the device and apply only on the condition that no unauthorized changes or attempted repairs have been made. Your legal rights as a customer are not affected in any way by this warranty.
Please note!
There is no warranty claim in the following cases, among others:
- Operating errors
- Interference from other radio systems (e.g., mobile phone operation)
- External interventions/effects
- Mechanical damage
- Moisture damage
- No warranty proof (purchase receipt)
The warranty claim is void for damage caused by not following this user manual. We do not assume liability for consequential damages! We do not assume liability for property or personal damage caused by improper handling or failure to observe safety instructions. In such cases, any warranty claim is void!
LIMITATION OF LIABILITY
The manufacturer is not liable for the loss or damage of any kind, including incidental or consequential damages, directly or indirectly resulting from the malfunction of this product.
This instruction manual is a publication of m-e GmbH modern-electronics
An den Kolonaten 37
The user manual corresponds to the technical status at the time of printing. Changes in technology and equipment are reserved.
KTF-1
KTF-2
KTF-3
FRANÇAIS
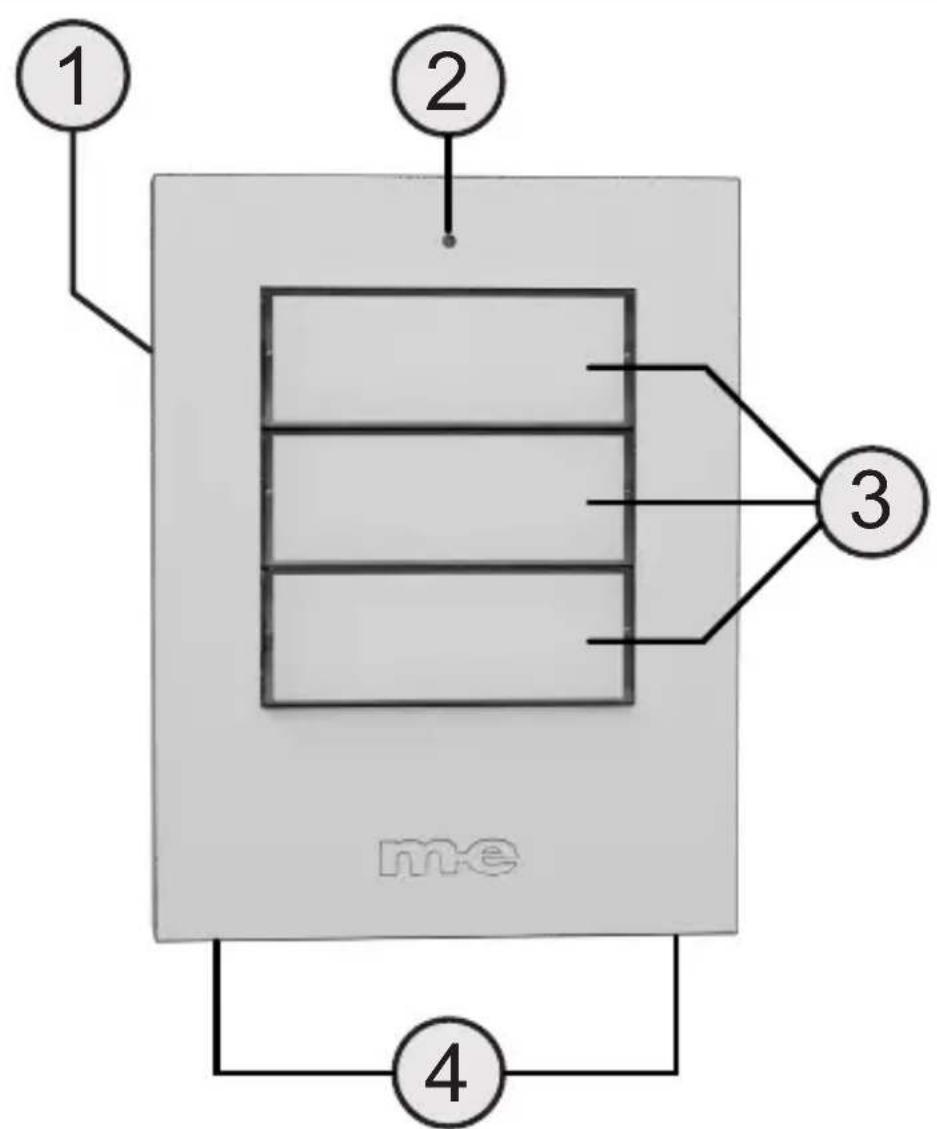
Fig.1
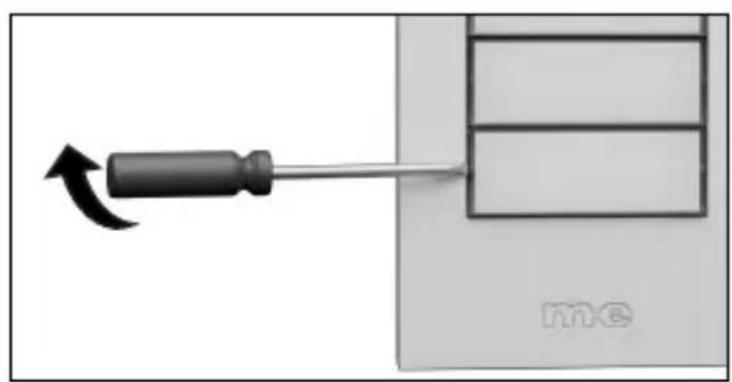
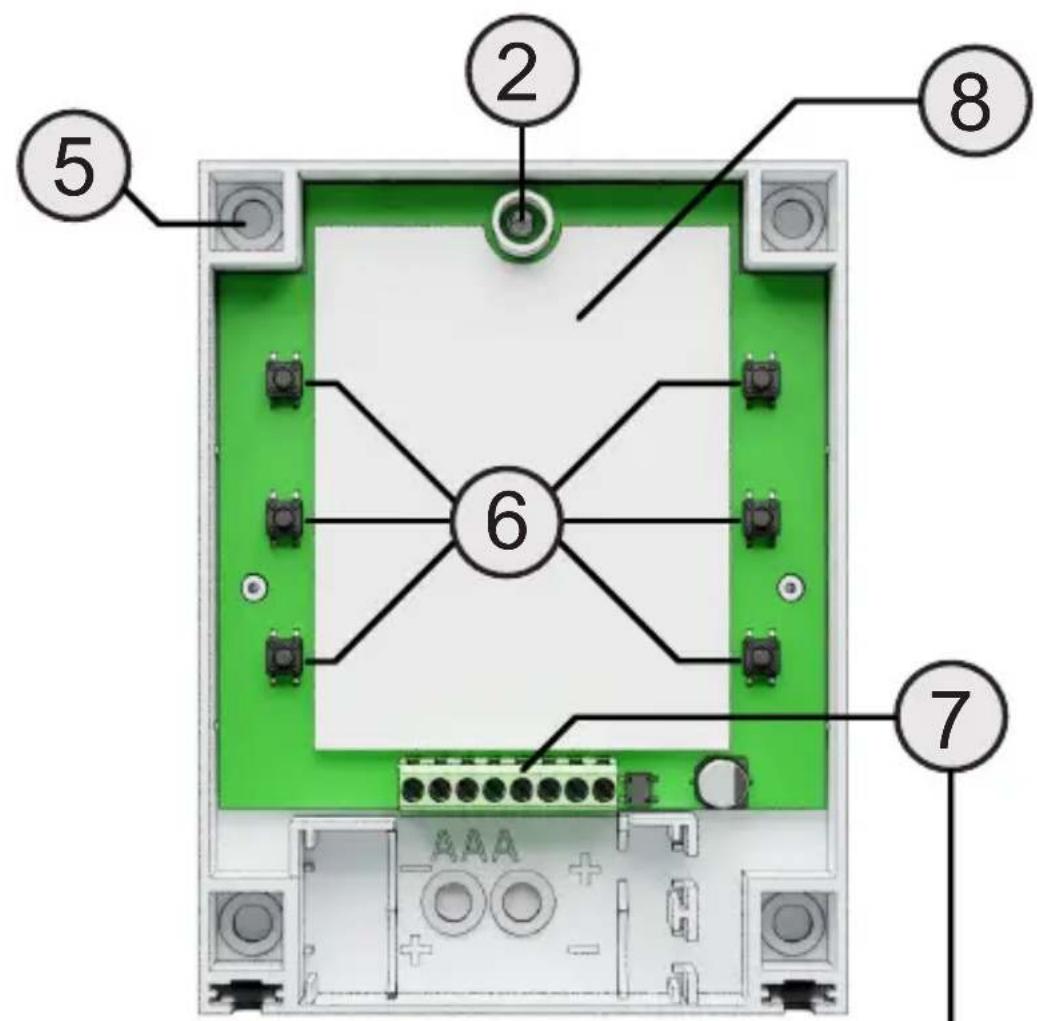
Fig.2
INFORMATIONS SUR LA GARANTIE
KTF-1 (1-gezinsvariant)
KTF-2 (2-gezinsvariant)
KTF-3 (3-gezinsvariant)