GARA904XIG - Wardrobe Gladiator - Free user manual and instructions
Find the device manual for free GARA904XIG Gladiator in PDF.

User questions about GARA904XIG Gladiator
0 question about this device. Answer the ones you know or ask your own.
Ask a new question about this device
Download the instructions for your Wardrobe in PDF format for free! Find your manual GARA904XIG - Gladiator and take your electronic device back in hand. On this page are published all the documents necessary for the use of your device. GARA904XIG by Gladiator.
USER MANUAL GARA904XIG Gladiator
Assembly Instructions
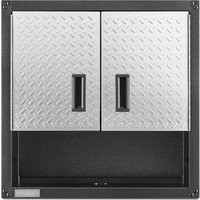
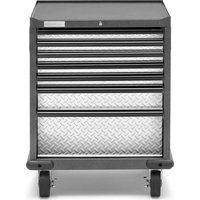
Models
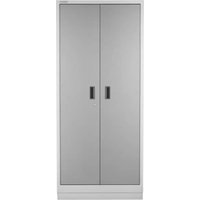
GARA904XIG - Hammered Granite
GARS484TEG - Hammered Granite
GARS604TEG - Hammered Granite
GARS774XEG - Hammered Granite
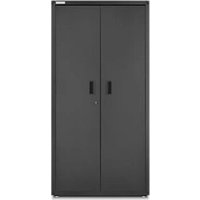
GARS484TKW - Hammered White
GARS604TKW - Hammered White
Modèles
GARA904XIG - Ardoise martelée
GARS484TEG - Ardoise martelée
GARS604TEG - Ardoise martelée
Shelving Use Requirements......5
Unpack 5
Assemble & Complete 5
WARRANTY......8
SÉCURITÉ DE L'ÉTAGÈRE MÉTALLIQUE
POUR CHARGES LOURDES....9
DIMENSIONS 9
PIÈCES 10
INSTRUCTIONS D'INSTALLATION
www.gladiatorgarageworks.com
www.gladiatorgarageworks.ca
HEAVY DUTY METAL RACK SHELVING SAFETY
Your safety and the safety of others are very important.
We have provided many important safety messages in this manual and on your appliance. Always read and obey all safety messages.

This is the safety alert symbol.
This symbol alerts you to potential hazards that can kill or hurt you and others.
All safety messages will follow the safety alert symbol and either the word "DANGER" or "WARNING."
These words mean:
DANGER
You can be killed or seriously injured if you don't immediately follow instructions.
WARNING
You can be killed or seriously injured if you don't follow instructions.
All safety messages will tell you what the potential hazard is, tell you how to reduce the chance of injury, and tell you what can happen if the instructions are not followed.
This storage rack unit must be placed on a level surface.
NOTES:
■ Do not stand or climb on the unit.
■ Do not overload.
■ Evenly distribute the weight on each shelf, and keep the heaviest loads on the bottom shelf.
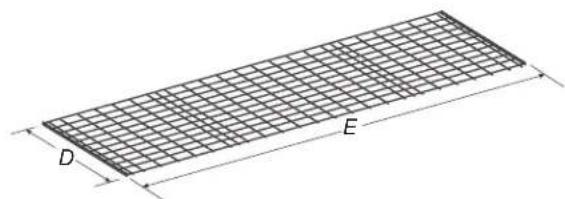
DIMENSIONS
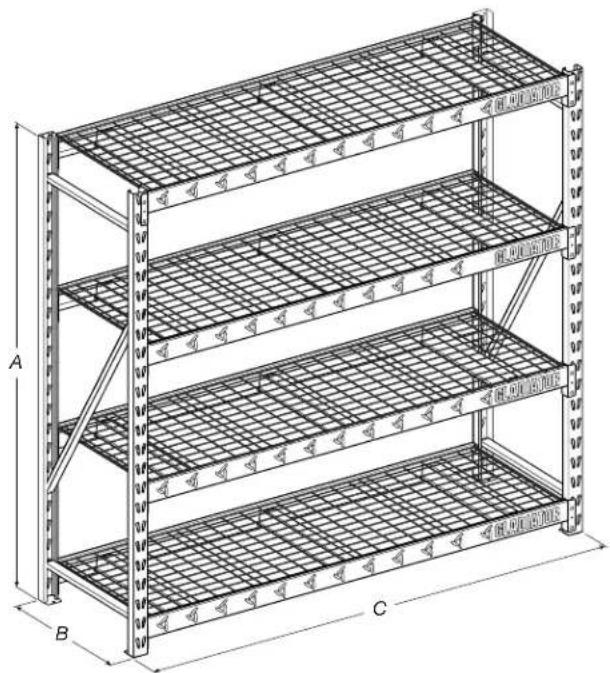
text_image
A B C| GARA904XIG | GARS774XEG GARS604TEG GARS484TEG | |||
| A | 90" (229 cm) 72" | (183 cm) 72" (183 cm) | (183 cm) 72" (183 cm) | |
| B | 24" (61 cm) 24" (61 cm) | 18" (46 cm) | 18" (46 cm) | |
| C | 90" (229 cm) | 77" (196 cm) | 60" (152 cm) | 48" (122 cm) |
| D | 22" (56 cm) 22" (56 cm) | 16" (41 cm) | 16" (41 cm) | |
| E | 84 12 " (215 cm) | 72" (183 cm) | 55" (139 cm) | 43" (108 cm) |
text_image
D EPARTS
text_image
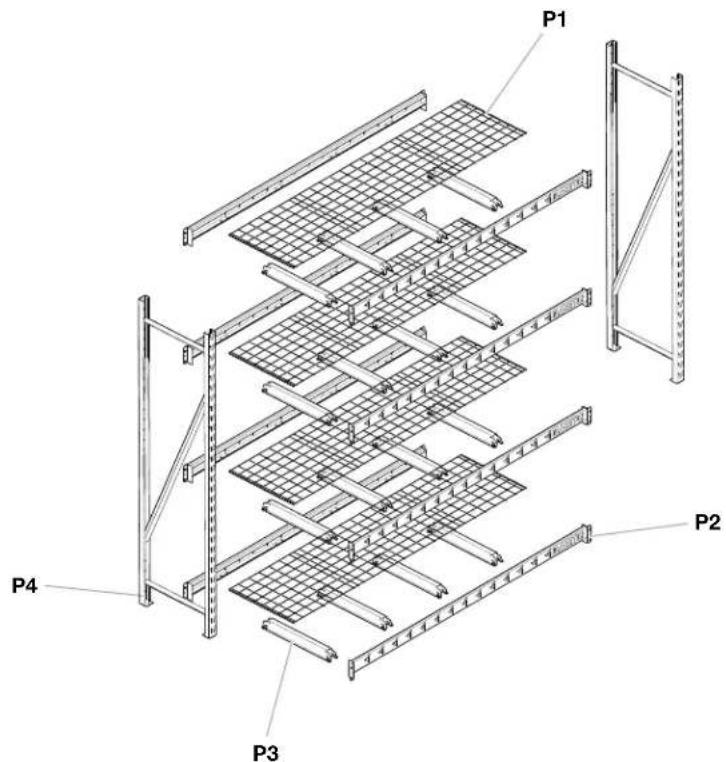
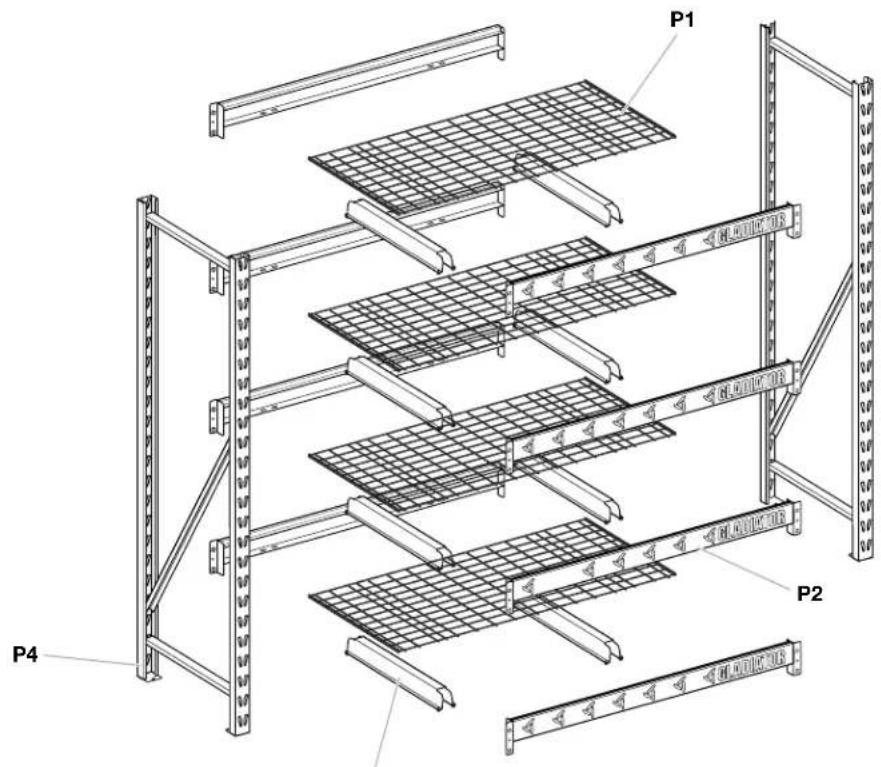
P1 P2 P3 P490" (229 cm) Wide Rack Shelving
text_image
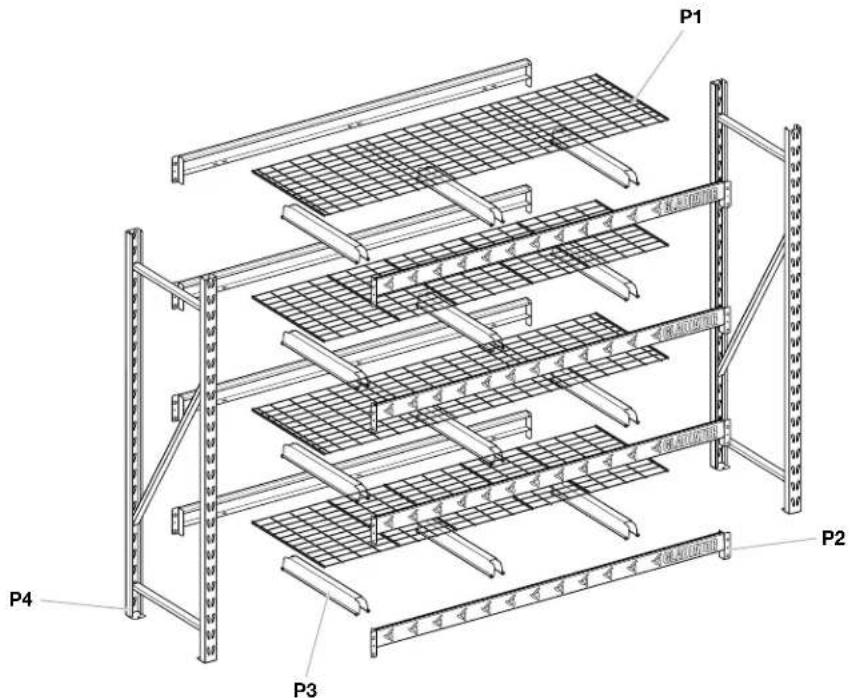
P1 P2 P3 P477" (196 cm) Wide Rack Shelving
P1. Wire shelves (4)
P2. Support beams (8)-4 in front, 4 in back
P3. Tie channel supports (quantity varies by size)
P4. Welded-end frame assemblies (2)
text_image
P1 P2 P4P3 60" (152 cm) Wide Rack Shelving

text_image
P1 GLNDOTR P2 P4P3 48" (122 cm) Wide Rack Shelving
P1. Wire shelves (4)
P2. Support beams (8)—4 in front, 4 in back
P3. Tie channel supports (quantity varies by size)
P4. Welded-end frame assemblies (2)
HEAVY DUTY METAL RACK SHELVING INSTALLATION INSTRUCTIONS
Shelving Use Requirements
All rack shelf sizes: maximum weight limit is 2,000 lbs (907 kg) for each shelf, not to exceed 8,000 lbs (3,628 kg) for the entire shelving unit.
Unpack
WARNING
Excessive Weight Hazard
Use two or more people to move and assemble shelving.
Failure to do so can result in back or other injury.
NOTE: Use two people to assemble shelving and to move it.
- Remove and verify the contents. See the "Parts" section to sort out all of the parts.
- Dispose of/recycle all packaging materials.
Assemble & Complete
■ No tools or hardware required.
IMPORTANT:
■ Use two people to assemble shelving and to move it.
■ Determine shelf spacing before assembly.
NOTE: It is recommended to space the shelves equally from top to bottom of the shelving unit and build it from the bottom up. See the "End Frames/Support Beams" illustration.
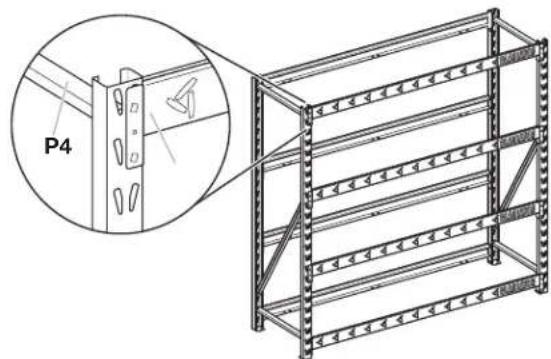
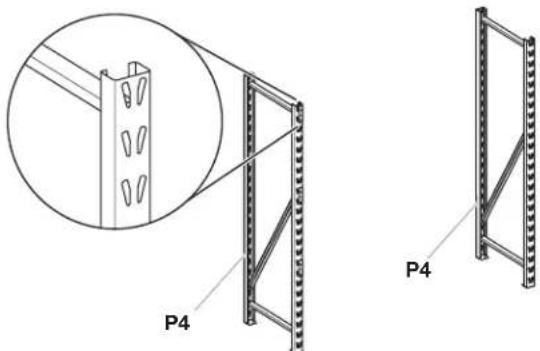
■ Prior to assembly, refer to the sticker located on the bottom of one of the welded-end frame assemblies (P4) and record model and serial numbers on the included warranty page. There are many benefits of registering the product. Find out more and register the product online at www.gladiatorgarageworks.com.
In Canada, contact your Whirlpool Canada LP designated service company or call 1-800-807-6777.
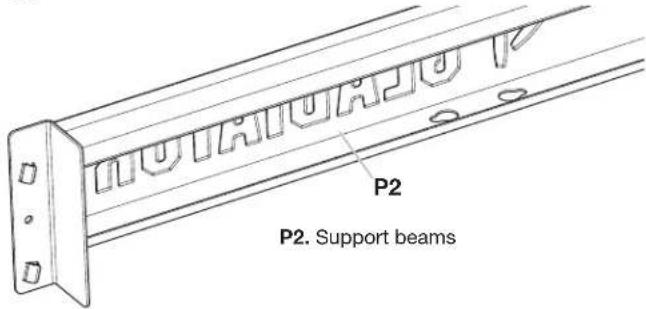
Support Beam Orientation
text_image
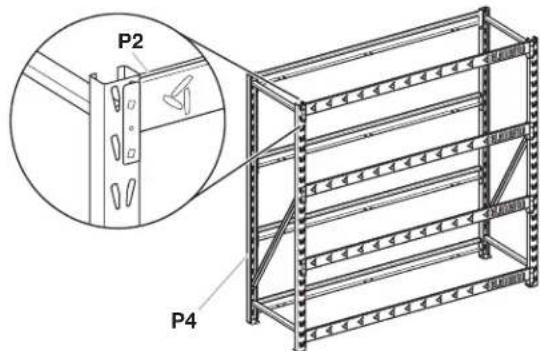
P2 P2. Support beamsEnd Frames/Support Beams
natural_image
Technical line drawing of a multi-tiered metal shelving unit with a magnified inset showing detail (no text or symbols)P2. Support beams (8)-4 in front, 4 in back
P4. Welded-end frame assemblies (2)
NOTES:
It is recommended to put the first shelf in slots 1 and 2 from the bottom, the second shelf in slots 8 and 9 from the bottom, the third shelf in slots 9 and 10 from the top, and the fourth shelf in slots 1 and 2 from the top. Keep two of the shelves on the bottom half of the shelving rack.
■ The tie channel supports (P3) provide load support and structural integrity.
■ All tie channel supports (P3) must be assembled as shown in the “Tie Channel Support Assembly” illustration.
- Assemble end frame
natural_image
Technical diagram of a metal shelving unit with two views labeled P4, showing structural details (no text or symbols beyond labels)Position the two welded-end frames (P4) vertical with the foot end of each frame at ground level and profile slots facing forward.
- Align support beams
text_image
P2 P4At the desired shelf location, align both of the support beam (P2) end tabs with the inside triangular frame slots on the welded frame (P4).
- Assemble tie channel supports
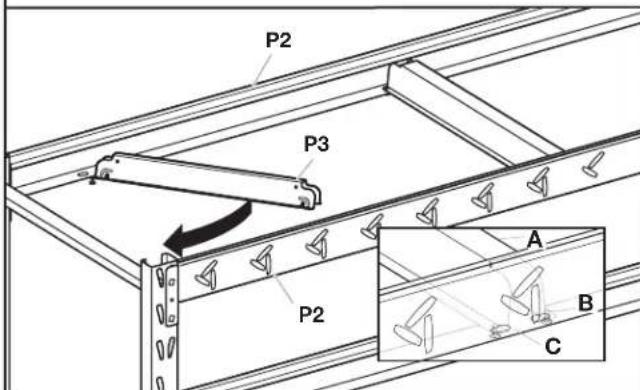
text_image
P2 P3 P2 A B CRotate the tie channel support (P3) into the front and back support beam (P2), aligning the tie channel rivet heads with the matching large diameter hole of the support beam keyhole. This shelving unit is equipped with one, two, or three tie channel supports (P3) for each shelf, depending on the size of the shelf unit.
NOTE: The tie channel supports (P3) provide load support and structural integrity. All tie channel supports (P3) must be assembled as shown.
- Insert rivet into keyhole
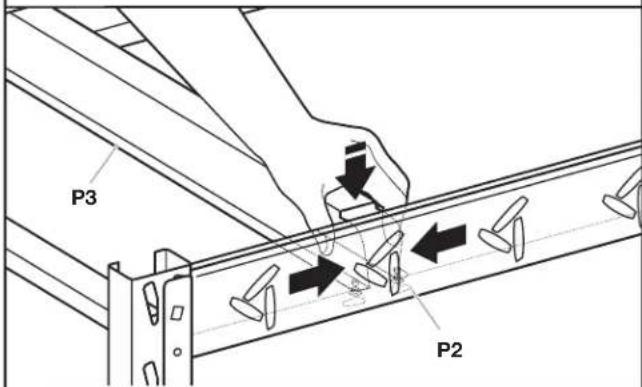
text_image
P3 P2To insert the rivet head on the other side of the tie channel support (P3), apply pressure to both sides of the tie channel support (P3), squeezing the sides toward each other. Insert the rivet head into the matching larger hole of the support beam keyhole on the front and back support beam (P2). Release pressure.
- Check the rivets
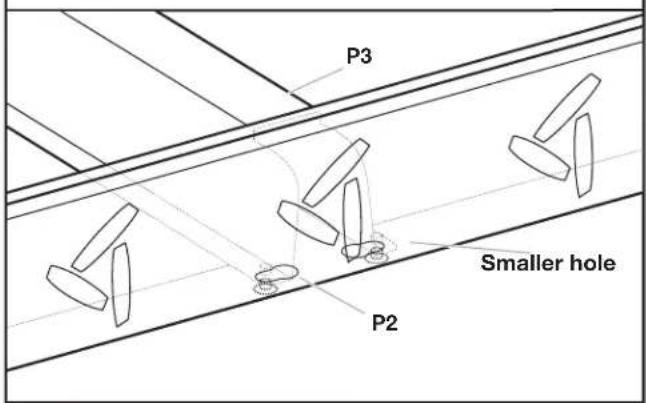
text_image
P3 Smaller hole P2Check that the rivets are held behind the smaller hole of the support beam keyholes. Repeat steps 4 and 5 for each tie channel support.
- Check all beams and tie channels

text_image
P3 P2Verify that all support beams (P2) and tie channel supports (P3) are properly assembled and firmly seated into the top and bottom post slots.
- Add wire shelves
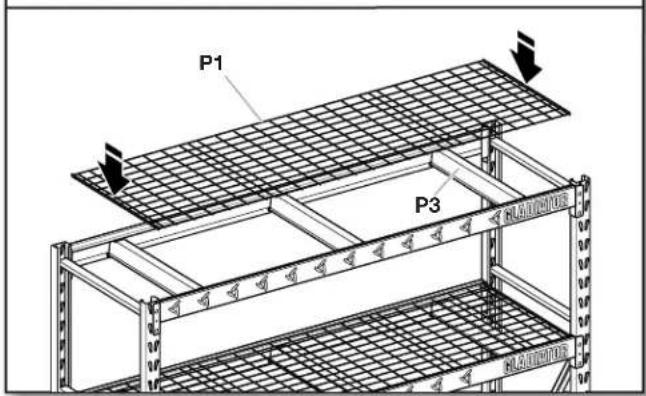
text_image
P1 P3 NLRADICATOR NLRADICATORPlace the wire shelf (P1) on top of the tie channel supports (P3) for each shelf. Make sure that the long rods of wire shelves are at the bottom.
- Move shelving
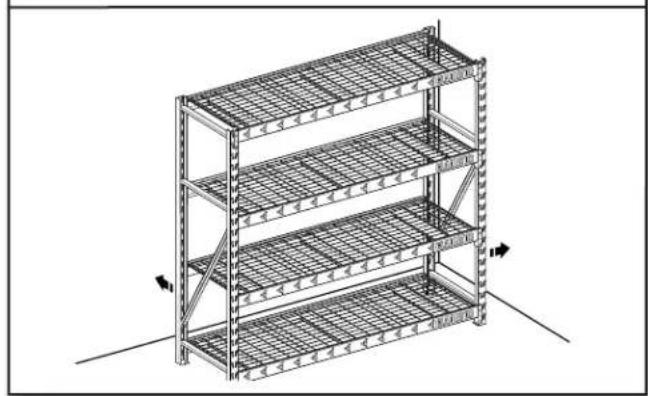
natural_image
3D wireframe diagram of a multi-tiered storage shelf with no text or symbolsUse two or more people to move the rack shelving to its final location.
- Configure shelving
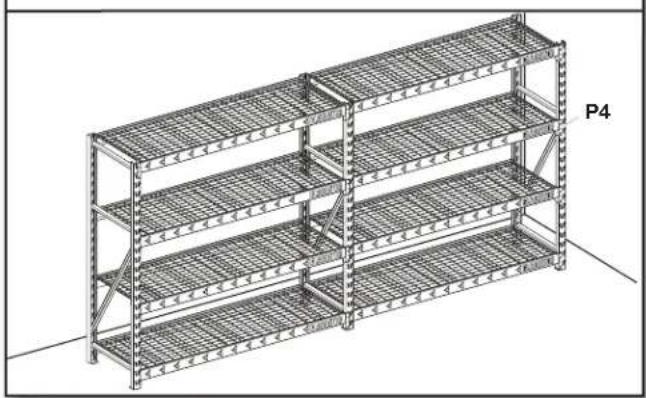
natural_image
3D rendering of a multi-tiered metal shelving unit with visible supports and metal brackets (no text or symbols)Two or more racks of the same height and depth can be connected by sharing the same welded-end frame (P4) between them.
NOTE: Ensure there are at least two shelves per rack between each set of welded-end frames (P4).
WARRANTY
For warranty information:
In the U.S.A. call 1-866-342-4089 or visit our website at
www.gladiatorgarageworks.com
In Canada call 1-800-807-6777 or visit our website at
www.gladiatorgarageworks.ca
SÉCURITÉ DES ÉTAGÈRES MÉTALLIQUES POUR CHARGES LOURDES
text_image
P1 P3 CLUATOR CLUATORnatural_image
3D wireframe diagram of a multi-tiered warehouse shelf with no text or symbolsnatural_image
3D wireframe diagram of a multi-level metal shelving unit with labeled section P4 (no text or symbols beyond label)www.gladiatorgarageworks.com
www.gladiatorgarageworks.ca
www.gladiatorgarageworks.com.
natural_image
3D wireframe diagram of a multi-tiered metal shelving unit with no text or symbolsnatural_image
3D rendering of a multi-tiered metal shelving unit with visible structural supports and no text or symbolswww.gladiatorgarageworks.com
www.gladiatorgarageworks.ca