HHF23T - Automatic faucet FRANKE - Free user manual and instructions
Find the device manual for free HHF23T FRANKE in PDF.

User questions about HHF23T FRANKE
0 question about this device. Answer the ones you know or ask your own.
Ask a new question about this device
Download the instructions for your Automatic faucet in PDF format for free! Find your manual HHF23T - FRANKE and take your electronic device back in hand. On this page are published all the documents necessary for the use of your device. HHF23T by FRANKE.
USER MANUAL HHF23T FRANKE
Hands Free Faucet HHF23T
Installation and Operating Instructions
natural_image
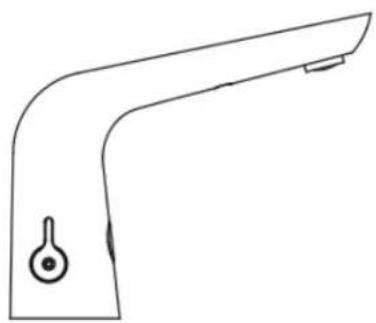
Line drawing of a kitchen faucet handle with a knob (no text or symbols)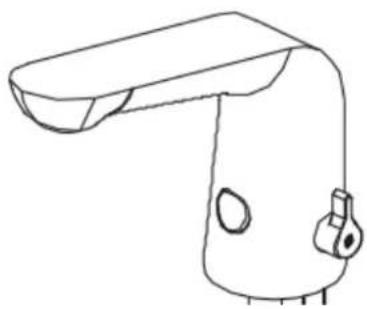
natural_image
Line drawing of a handheld device with a curved handle and two circular ports (no text or symbols)1. Safety First
These instructions relate to the use of the Franke Hands Free Faucets only, any external or 'add-on' parts will be supplied with separate instructions.
Appropriate personal protective equipment must be worn when installing, calibrating and commissioning this product.
It is recommended that the electrical part of the installation be carried out by a qualified electrician in accordance with the latest electrical regulations. It is also recommended that any plumbing is carried out by a qualified plumber.
This is an electronic device which must be installed correctly to perform correctly.
If the faucet is used by persons (including children) with reduced physical, sensory or mental capabilities, or lack of experience and knowledge, they must be given adequate supervision or instruction concerning use of the faucet by a person responsible for their safety. Children should be supervised to ensure that they do not play with the faucet.


IMPORTANT: Please read these instructions carefully and follow each stage in order!
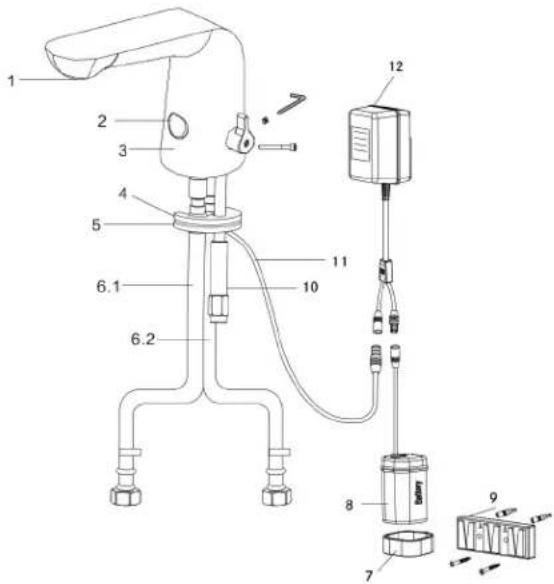
- Parts List
text_image
Technical diagram of a laboratory apparatus with numbered components and labeled parts- Aerator
- Sensor
- Faucet body
- Rubber washer
-
Brass washer
6.1 Cold water inlet
6.2. Hot water inlet -
Battery box clip
- Battery box (4 x AA)
- Mounting plate
- Installation nut
- Power cable
- Transformer
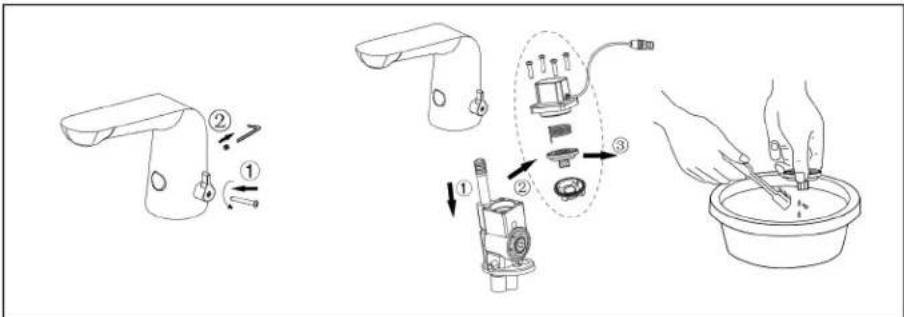
3. Installation Guide
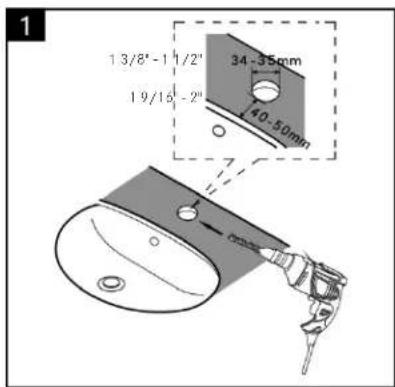
text_image
1 13/8'-1 1/2" 19/16 -2" 34-35mm 40-50mm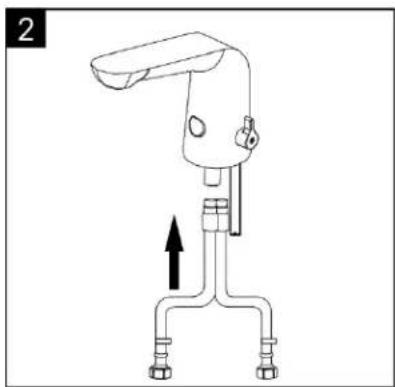
natural_image
Line drawing of a mechanical device with two connectors and a lever, no text or symbols present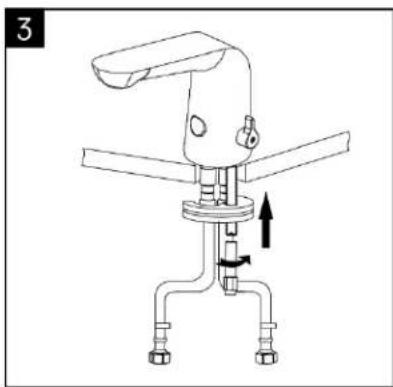
natural_image
Technical line drawing of a mechanical device with no visible text or symbols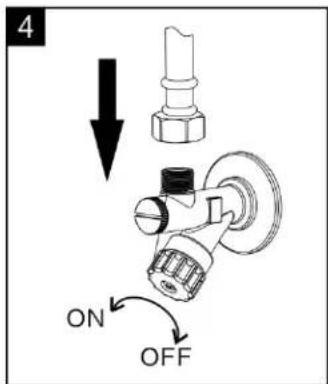
text_image
4 ON OFF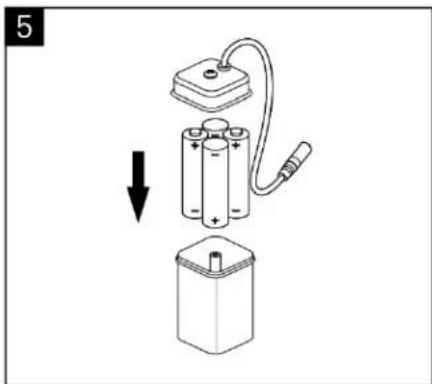
natural_image
Diagram of a battery assembly with an open circuit and a downward arrow indicating a process (no text or symbols present)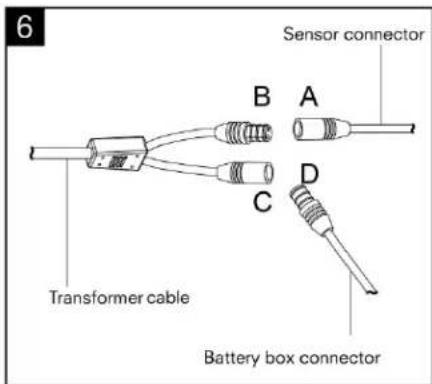
text_image
6 Sensor connector B A C D Transformer cable Battery box connector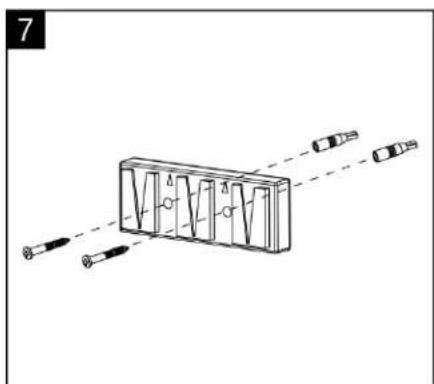
natural_image
Diagram of a mechanical or optical device with multiple lenses and a central rectangular block, no visible text or symbols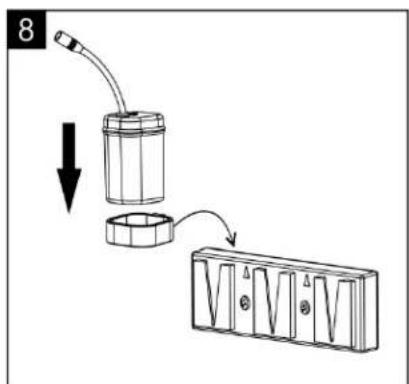
text_image
8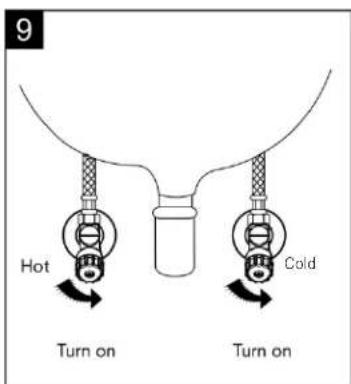
text_image
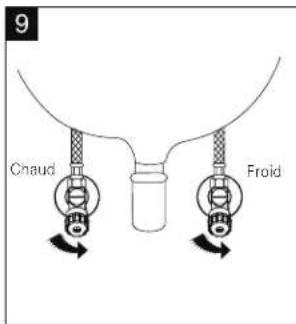
9 Hot Turn on Cold Turn onSetting Sensor Range
Once faucet is installed, disconnect the sensor from the power (Fig. 6, A-B for 30 seconds). Reconnect it until the sensor light is flashing. Place a hand in front of the sensor at a distance where you want the water flow to trigger.
Hold hand in place until the light stops flashing. You have now set the sensor.
If you find the sensor range has changed after use, reset the sensor distance as above.
4. Troubleshooting
| DESCRIPTION CAUSE RESOLUTION | ||
| No water out | Battery is dead Change the battery | |
| Water supply cut off Check supply lines | ||
| Dirt in the filter Clean the filter | ||
| Water pressure too low Increase water pressure | ||
| Water will not turn off Dirt on the sensor window Clean the sensor | ||
| Too little water flow | Water supply is turned down Adjust water supply | |
| Filter is dirty Clean the filter | ||
| Water pressure is too low Raise the pressure | ||
| Too much water flow Water pressure is too high Adjust pressure | ||
| The indicator light is not on | Battery is dead Change the battery | |
| Poor connection of battery or power supply | Change batteries | |
5. General Cleaning
Use only soap, water and a soft cloth for cleaning. Clean sensor lens with non-abrasive materials only.
Cleaning the Solenoid Valve
text_image
Diagram illustrating a hairdryer tool procedure with labeled steps and componentsWarranty & Support
Warranty
The faucet has a one year warranty, however it is expected that the faucet will operate efficiently for many years.
Support
For technical support please visit our technical pages on our website at www.franke-commercial.com or contact us directly. Our customer service team will be pleased to help you.
Head Office
Franke Kindred Canada Limited
1000 Franke Kindred Road
Midland, ON L4R 4K9
Canada
www.franke-commercial.com
IN CANADA:
email: commercial-info.ca@franke.com
telephone: 1-855-446-5663
IN USA:
email: commercial-info.us@franke.com
telephone: 1-855-526-0503
Robinets sans contact
natural_image
Line drawing of a kitchen faucet handle with a knob (no text or symbols)
natural_image
Line drawing of a handheld device with a curved handle and mounting bracket (no text or symbols)text_image
Technical diagram of a laboratory apparatus with numbered components and labeled partstext_image
1 34 - 35mm 10 - 50mm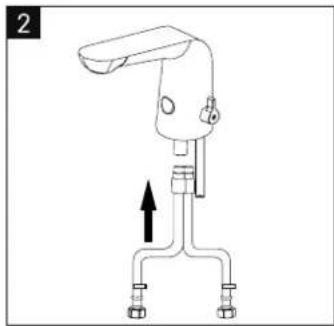
natural_image
Line drawing of a mechanical device with a lever and three arms, showing an upward arrow (no text or symbols)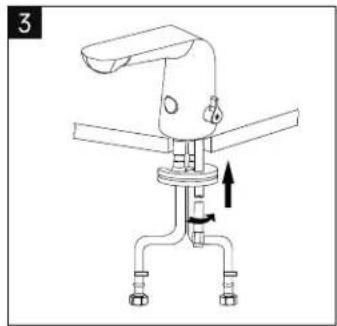
natural_image
Technical line drawing of a mechanical device with no visible text or symbols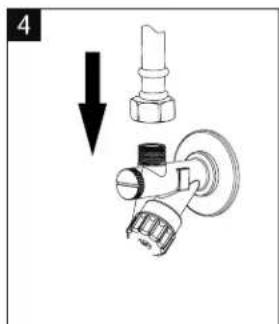
text_image
4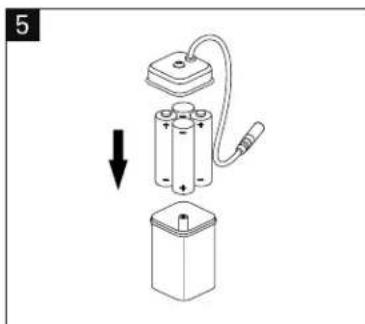
natural_image
Diagram of a battery assembly with an open circuit and a downward arrow indicating action (no text or symbols)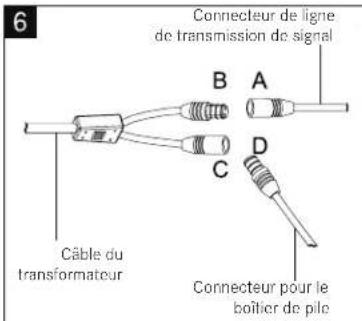
natural_image
Diagram of a rectangular object with internal vertical lines and directional arrows, no text or symbols present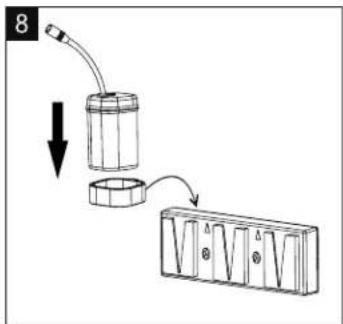
text_image
8