CVH 2 Premium - Vacuum Cleaner Kärcher - Free user manual and instructions
Find the device manual for free CVH 2 Premium Kärcher in PDF.

| Product type | Cordless stick vacuum |
| Brand | Kärcher |
| Model | CVH 2 Premium |
| Dimensions (L x W x H) | 330 x 76 x 76 mm |
| Weight without accessories | 0.55 kg |
| Power supply | Battery Li-ion 7.2 V, 2000 mAh |
| Charging time | Approximately 3 to 4 hours |
| Runtime in normal operation | Up to 20 minutes |
| Rated power | 70 W |
| Maximum suction | 10 kPa |
| Dust container capacity | 0.15 L |
| Filtration | Washable HEPA 12 filter (do not wash with water) |
| Noise level | 75 dB(A) |
| Suction modes | Full speed and energy saving |
| Included accessories | Crevice nozzle, upholstery brush, charging storage tray |
| Filter maintenance | Clean the HEPA filter by tapping; wash the steel filter and container under running water |
| Safety | Do not use on people, animals, wet or flammable materials |
| Warranty | According to country conditions, contact the distributor |
| Intended use | Private household use, indoors |
Frequently Asked Questions - CVH 2 Premium Kärcher
User questions about CVH 2 Premium Kärcher
0 question about this device. Answer the ones you know or ask your own.
Ask a new question about this device
Download the instructions for your Vacuum Cleaner in PDF format for free! Find your manual CVH 2 Premium - Kärcher and take your electronic device back in hand. On this page are published all the documents necessary for the use of your device. CVH 2 Premium by Kärcher.
USER MANUAL CVH 2 Premium Kärcher
natural_image
Yellow and black electric shaver device (no visible text or symbols)
natural_image
Exterior view of a Kürcher brand hair dryer (no visible text or symbols on body)Deutsch 5
English 9
Français 13
Italiano 17
Nederlands 21
Español 25
Português 29
Dansk 33
Norsk 37
Svenska 41
Suomi 45
Ελληνικά 49
Türkçe 53
Русский 57
Magyar 62
Čeština 66
Slovenščina 70
Polski 74
Românește 78
Slovenčina 82
Hrvatski 86
Srpski 90
Български 94
Eesti 98
Latviešu 102
Lietuviškai 106
Українська 110
中文 114
Қазақша 117
العربية 125

natural_image
Illustration of an open book with a black arrow indicating rotation (no text or symbols)A
natural_image
Close-up of a white cylindrical device with a black cable extending from its side, labeled 'B' in the corner (no text or symbols on the device itself)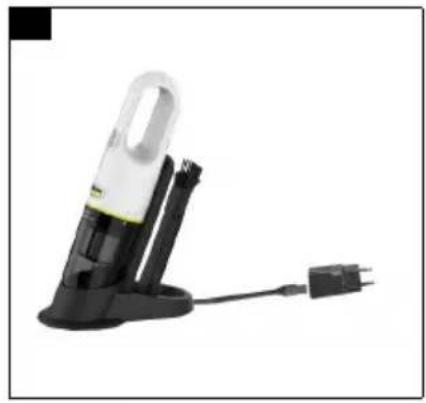
natural_image
Black and white photo of a handheld device with a handle and connector, no visible text or symbols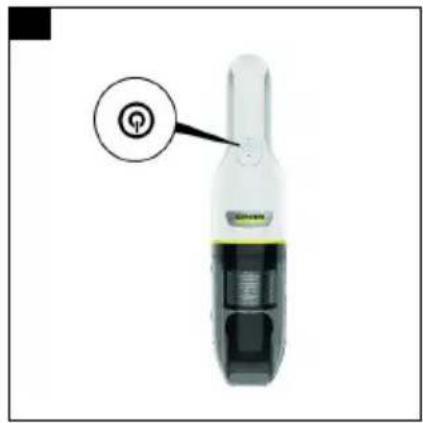
natural_image
Close-up of a handheld electronic device with black and white body, showing internal components and a black connector (no text or symbols visible)
natural_image
Two views of a black mechanical component with labeled parts (1 and 2), no text or symbols present.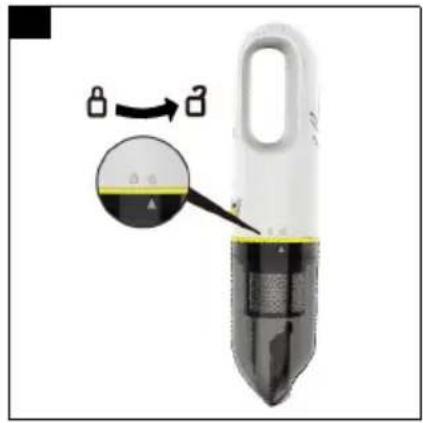
natural_image
Close-up of a white handheld device with a black handle and a magnified inset showing a small circular detail (no text or symbols visible)
natural_image
Diagram showing a mechanical component with arrows indicating motion, alongside three views of a cylindrical component (no text or symbols)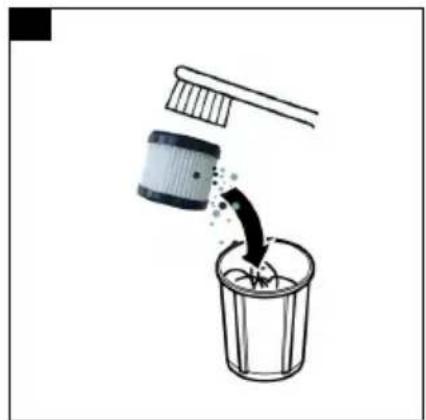
natural_image
Illustration of a toothbrush pouring liquid into a trash bin (no text or symbols)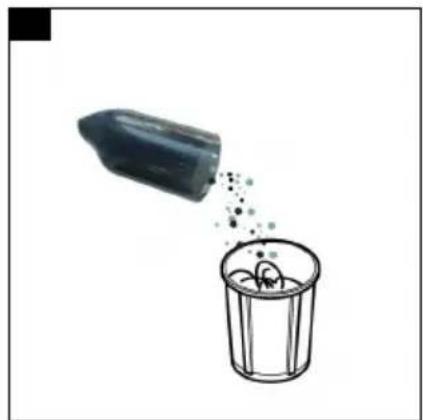
natural_image
Illustration of a plastic container with particles being poured into it (no text or symbols)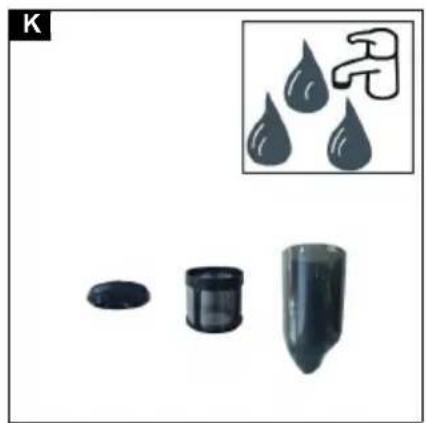
natural_image
Three black plastic components and a small inset image showing droplets with Chinese character '无' (no text or symbols on main objects)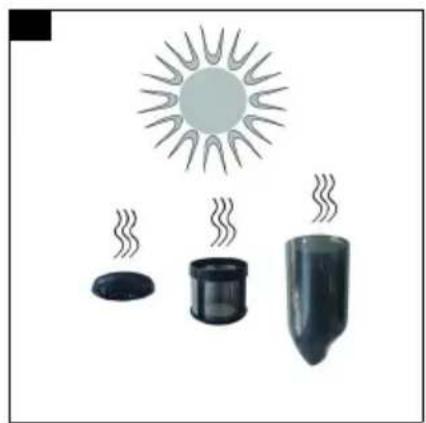
natural_image
Illustration of a sun shining over three cooking pots (no text or symbols)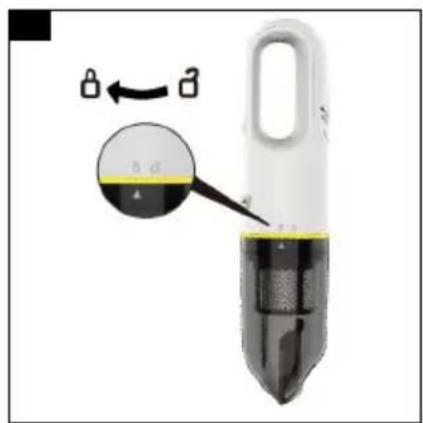
Inhalt
Environmental protection 9
Accessories and spare parts...... 9
Scope of delivery 9
Overview of the unit 9
Operation 10
Warranty.... 10
Transportation.... 11
Storage 11
Care and maintenance.... 11
Troubleshooting guide.... 11
Technical data 12
General notes


Read these original operating instructions and the enclosed safety instructions before using the device for the first time. Proceed accordingly.
Keep both books for future reference or for future owners.
Intended use
This universal vacuum cleaner is intended for private use at home and not for commercial purposes. The manufacturer is not liable for any damage that may occur on account of improper use or incorrect operation. Use the universal vacuum cleaner only with:
- Original filters
- Original spare parts, accessories and special accessories.
The universal vacuum cleaner is not suitable for:
- Vacuuming off human beings or animals.
- Vacuuming up:
– Small living creatures (e.g. flies, spiders, etc.).
- Substances that are harmful for health, have sharp edges or are hot or glowing.
- Moist or liquid substances.
– Easily flammable or explosive substances and gases.
⚠ WARNING
Children must not play with this appliance.
Environmental protection

The packing materials can be recy- cled. Please dispose of packaging in ordance with the environmental regula- .

Electrical and electronic appliances contain valuable, recyclable materials and often components such as batter-rechargeable batteries or oil, which - if called or disposed of incorrectly - can be a potential threat to human health and environment. However, these compounds are required for the correct operation the appliance. Appliances marked by this tool are not allowed to be disposed of either with the household rubbish.
Notes on the content materials (REACH)
Current information on content materials can be found at: www.kaercher.com/REACH
Accessories and spare parts
Only use original accessories and original spare parts. They ensure that the appliance will run fault-free and safely.
Information on accessories and spare parts can be found at www.kaercher.com.
Scope of delivery
The scope of delivery for the appliance is shown on the packaging. Check the contents for completeness when unpacking. If any accessories are missing or in the event of any shipping damage, please notify your dealer.
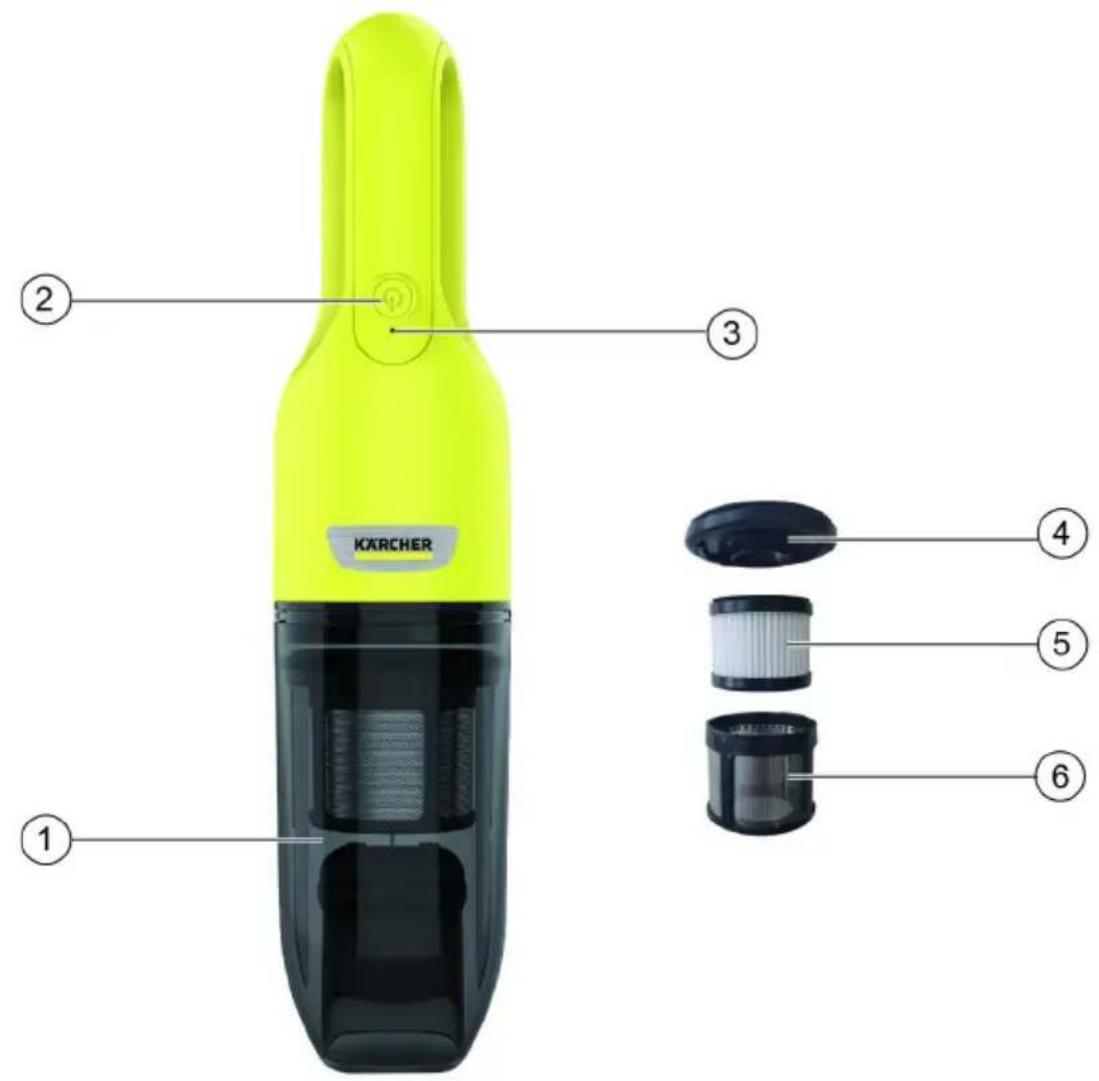
Overview of the unit
Illustration A
① Dust container
②ON/OFF button
③Battery indicator
④Filter cover
⑤HEPA filter
⑥ Steel net filter
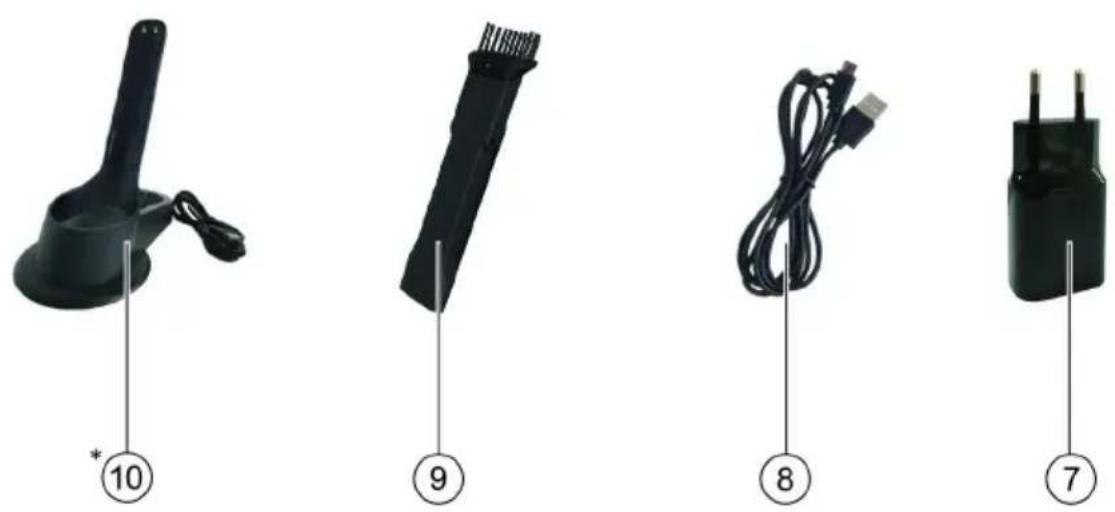
⑦Charger
⑧Power cable
⑨ Crevice nozzle
⑩*Charging storage dock
* CVH 2 Premium only
Charger
⚠ WARNING
- Only charge the appliance using the original charger enclosed or with a charger approved by KÄRCHER.
Use the following adapter:
- Appliance type
CVH 2: 1.198-401.0
CVH 2 Premium: 1.198-421.0
9.769-743.0
Operation
Note
- The appliance cannot be turned on without the HEPA filter or the dust container. Ensure the HEPA filter and the dust container are properly positioned in the appliance before using the appliance.
- Press the ON/OFF button to start vacuuming up dust / dirt.
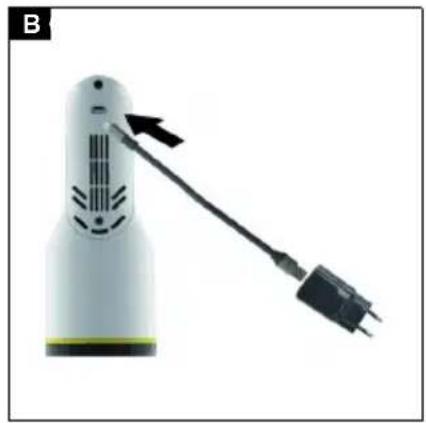
Charging
Note
- The appliance does not work during the charging process.
- The charging time is approx. 3 - 4 hours.
- The appliance must be fully charged before first use.
CVH 2
- Insert the connector of the charger into the charging interface.
Illustration B
- Connect the power plug of the charger to the power supply.
- When the charging process is complete, unplug the power plug from the power supply.
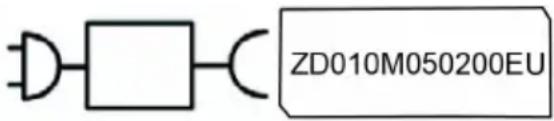
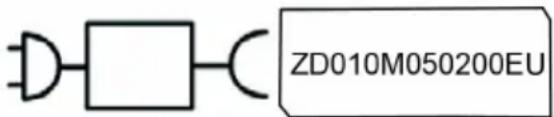
CVH 2 Premium
- Connect the power plug of the charger to the power supply.
- Insert the appliance into the charging storage dock.
Illustration C
- When the charging process is complete, unplug the power plug of the charging storage dock from the power supply.
Operation
- Press the ON/OFF button to start vacuuming up dust / dirt.
- 2 suction modes are available with full speed and energy saving modes.(CVH 2 Premium) only.
Illustration D
Indicator
The table below describes the meanings of the LED indicators on the appliance:
| Indicators | Status / Color | Description |
| Battery indicator charging | Flashing (red) | Charging |
| Always on (blue) | The battery power is full. | |
| Battery indicator discharging | Flashing (red) | The battery power is low. |
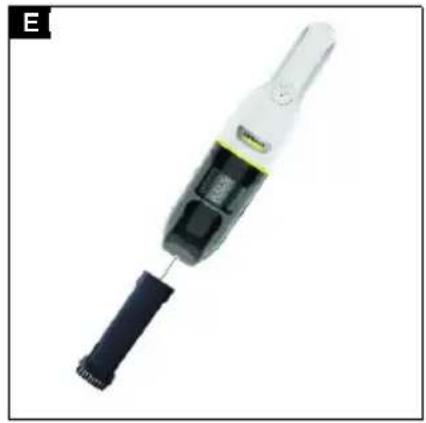
Standard accessories
- Attach the nozzle to clean upholstered furniture, mattresses, laced curtains, etc.
Illustration E
Illustration F
①This is used for cleaning delicate objects with care, e.g. bookcases, handicrafts, etc.
②This is used for cleaning joints, grooves between doors and windows, tiny slits, etc.
Warranty
The warranty conditions issued by our relevant sales company apply in all countries. We shall remedy possible malfunctions on your appliance within the warranty period free of cost, provided that a material or manufacturing defect is the cause. In a warranty case, please contact your dealer (with the purchase receipt) or the next authorised customer service site.
(See overleaf for the address)
Transportation
The battery has been tested in accordance with the relevant rules for international transport and can be transported / shipped.
Storage
Note
- Store the appliance in a dry room.
- Consider the weight of the appliance when storing it.
- Insert the appliance into the storage dock.
- Put the crevice nozzle and the upholster brush into accessory storage.
Care and maintenance
Note
- Use the appliance only when all filters and the dust container are installed.
- Defective filters and filters that can no longer be cleaned must be replaced.
Before doing any work on the appliance: - Switch off the appliance.
- Unplug the power supply from the power outlet.
Cleaning the filter set and the dust container
ATTENTION
Incorrect cleaning of the HEPA filter
Damage to the HEPA filter
Do not wash the HEPA filter.
Do not clean the HEPA filter in a washing machine.
Do not dry the HEPA filter with a hair dryer. The HEPA filter ensures clean exhaust air.
- Clean the HEPA filter if it is visibly dirty.
- Replace the HEPA filter if it is visibly damaged.
-
We recommend replacing the HEPA filter every 6 months based on your use of the device.
-
Unlock the dust container.
Illustration G
- Unplug the filter set from the dust container. Turn the filter cover counterclockwise. Remove the filter cover, unplug the HEPA filter from the steel filter.
Illustration H
- Clean the HEPA filter, and carefully empty / knock the dirt out of the HEPA filter.
Illustration I
- Empty the dust container, and rub down inside using a cloth.
Illustration J
- Clean the filter cover, steel filter and dust container under running water.
Illustration K
- Allow the filter cover, steel filter and dust container to dry completely.
Illustration L
- Insert the filter set into the dust container, and turn the dust container clockwise to latch into place.
Illustration M
Troubleshooting guide
Malfunctions often have simple causes that you can remedy yourself using the following overview. When in doubt, or in the case of malfunctions not mentioned here, please contact your authorised Customer Service.
| Fault Possible cause | Remedy | |
| The appliance does not run. | Battery is nearly empty. 1. Charge the battery. | |
| The appliance is in danger of overheating. | 1. Check whether the dust container is clogged.2. Clean the dust container.3. Switch the appliance on again. | |
| Fault Possible cause | Remedy | |
| Suction capacity decreases. / Abnormal sound or operating noise which becomes louder. | Dust container is full. HEPA filter set is clogged. | 1. Check the dust container. 2. Check and clean the filter. |
Technical data
| CVH 2 CVH 2 Premium | |||
| Electrical connection | |||
| Power frequency Hz 50 - 60 50 - 60 | |||
| Mains voltage V 100 - 240 100 - 240 | |||
| Voltage of charger V 5 5 | |||
| Working voltage of the battery | V 7.2 | 7.2 | |
| Charging time when the battery is completely discharged | min | 180 ~ 240 | 180 ~ 240 |
| Battery capacity | mAh | 2000 | 2000 |
| Battery type | Li-ion | Li-ion | |
| Protection class | II II | ||
| Rated power | W | 70 | 70 |
| Device performance data | |||
| Dust container capacity | I | 0.15 | 0.15 |
| Vacuum (min.) | kPa | 5 10 | |
| Operating time when battery is fully charged in normal operation | min | ≤10 | ≤20 |
| HEPA-Filter | HEPA 12 | HEPA 12 | |
| Sound power level L_wA | dB(A) | 78 | 75 |
| Dimensions and weights | |||
| Weight (without accessories) | kg | 0.65 | 0.55 |
| Length | mm | 330 | 330 |
| Width | mm | 76 | 76 |
| Height | mm | 76 | 76 |
Subject to technical modifications.
Contenu
www.kaercher.com/REACH
CVH 2 Premium: 1.198–421.0
9.769–743.0
Эксплуатация
Примечание
Üldised juhised.... 98
Sihtotstarve 98
Keskkonnakaitse 98
natural_image
Black silhouette of a hand giving a thumbs-up gesture (no text or symbols)THANK YOU!
MERCI! DANKE! iGRACIAS!

Register your product and benefit from many advantages.
www.kaercher.com/welcome


Rate your product and tell us your opinion.
natural_image
Icon showing a gear and wrench symbol (no text or labels)www.kaercher.com/dealersearch
Alfred Kärcher SE & Co. KG
Alfred-Kärcher-Str. 28-40
71364 Winnenden (Germany)
Tel.: +49 7195 14-0
Fax: +49 7195 14-2212