Quad Air 24097 - Drone Revell - Free user manual and instructions
Find the device manual for free Quad Air 24097 Revell in PDF.


User questions about Quad Air 24097 Revell
0 question about this device. Answer the ones you know or ask your own.
Ask a new question about this device
Download the instructions for your Drone in PDF format for free! Find your manual Quad Air 24097 - Revell and take your electronic device back in hand. On this page are published all the documents necessary for the use of your device. Quad Air 24097 by Revell.
USER MANUAL Quad Air 24097 Revell
Electrical and electronic waste ordinance. After the end of use, remove all batteries and separately dispose of all electrically operated devices at the communal collection centres for electrical and electronic waste. Dispose of the remaining parts with household waste. Thank you for your cooperation!
Never touch the running rotor! Do not fly near people, animals, bodies of water or power lines - adult supervision is required.
Revell GmbH & Co. KG hereby declares that this product conforms with the basic requirements and the additional applicable provisions of Directive 1999/5/EC. The Declaration of Conformity can be found at www.revell-control.de.
natural_image
Close-up of hands assembling or adjusting a mechanical component with a tool (no visible text or symbols)383C
8
8A8B8C9D
24097
.Revell
Control
QUADROCOPTER
QUAD AIR
WICHTIGE MERKMALE
Quadrocopter:
• 4 propellers with 4 motors for complex flight manoeuvres
- Looping function (for experienced people only!)
Safety instructions:
- Attention! This quadrocopter is not a toy. It is a complex aircraft which can cause personal injury and properly damage when handled improperly. The pilot is solely responsible for ensuring risk-free operation!
- Due to its design, this quadrocopter achieves extremely high flying speeds and needs time to slow down again! Plan your flight accordingly!
• This entire manual must be read and understood prior to commissioning!
• This quadrocopter is suitable for use indoors and for use outdoors with still air. Flying in wind is only recommended for experienced pilots!
• This quadrocopter is suitable for pilots who are at least 15 years of age. The supervision of adults is required when flying. - Keep your hands, face, hair and loose clothing away from the rotors.
- Switch off the remote control and quadrocopter when they are not in use.
- Remove the batteries from the remote control when it is not in use.
• Always maintain visual contact with the quadrocopter in order to avoid losing control of it.
• We recommend alkali manganese batteries for the remote control. Single use batteries for this remote control can be replaced with environmentally-friendly rechargeable batteries.
• As soon as the remote control no longer functions reliably, new batteries should be inserted. - Please keep this operating manual safe for later use.
- rechargeable LiPo battery (Lithium Polymer battery) - for indoors and outdoors
• The user should only operate this quadrocopter in accordance with the instructions for use in this operating manual.
- Do not fly the quadrocopter near people, animals, bodies of water or power lines.
• The charging unit for the LiPo battery is specially designed for the charging of the quadrocopter battery. The charging unit may only be used to charge the quadrocopter battery, not other batteries.
- Never allow the quadrocopter to come into contact with water, because the electronics can be damaged as a result.
- Always watch the aircraft, so that it does not fly into the pilot, other people or animals and injure them.
- In general, it must be ensured that the aircraft cannot injure anyone in consideration of potential malfunctions and defects.
• This quadrocopter is not suitable for people with physical or mental limitations. We recommend that persons who are unfamiliar with model quadrocopters commission the vehicle under the instruction of an experienced pilot.
Maintenance and care:
- Please only use a clean, damp cloth to wipe off the quadrocopter. - Protect the quadrocopter and batteries from direct sunlight and/or direct heat.
Remote control battery safety instructions:
• Non-rechargeable batteries may not be charged.
- Rechargeable batteries must be removed from the remote control prior to recharging.
- Rechargeable batteries may only be charged under the supervision of an adult.
• Combinations of batteries of different types or new and used batteries may not be used.
- Only the recommended batteries or those of an equivalent type may be used.
- Batteries must be inserted with the correct polarity (+ and -).
- Depleted batteries must be removed from the remote control.
• The connection terminals may not be short-circuited. Please remove the batteries from the remote control if it will not be used for an extended period of time.
The quadrocopter is equipped with a rechargeable lithium polymer battery. Please observe the following safety instructions:
- Never throw LiPo batteries into a fire or store in hot places.
- Only use the supplied charging unit to charge the battery. The use of a different charging unit can lead to the permanent damage of the battery and nearby parts, as well as physical injury!
- Never use a charging unit for NiCd/NiMH batteries!
- Always ensure that the charging process takes place on a fireproof surface in a fire-resistant environment.
- Do not leave the battery unsupervised during the charging and discharging process.
- Never disassemble or alter the battery contacts. Do not damage or puncture the batteries. There is a risk of explosion!
• The LiPo battery must be kept out of reach of children.
- When disposing of batteries, they must be discharged or the capacity must be fully depleted. Cover exposed terminals with adhesive tape in order to prevent short-circuiting!
Safety instructions:
- The product may never be structurally modified, otherwise it can be damaged or pose a danger.
• In order to prevent risks, never operate the aircraft when you are sitting on the ground or on a chair. Operate the aircraft from a position which provides an easy line of retreat, if necessary.
• Always switch off the aircraft and the remote control after use. Otherwise, an unintended start command can take place.
Required batteries for the quadrocopter:
Power supply:= Rated output: DC 3.7 V / 1.7 Wh batteries: 1 x 3.7 V rechargeable LiPo battery (interchangeable) Capacity: 500 mAh
Battery requirement for the remote control:
Power supply:== DC 9 V
Batteries: 6 x 1.5 V "AA" (not included)
1 QUADROCOPTER
1A Arms
1B Landing feet
1C Red propeller (front)
1D Black propeller (rear)
1E Battery
1F Connecting cable
1G Battery cable
2 REMOTE CONTROL
2A Power LED
2B Button for the control sensitivity
2C Thrust trim
2D Control for thrust and yaw
2E Yaw trim
2F Display
2G Control switch
2H Control for nick and roll
21 Nick trim
21 Roll Trim
2K Function indicator
2L Thrust trim indicator
2MYawtrim indicator
2N Channel
20 Sensitivity indicator
2P Roll trim indicator
20 Nick Trim indicator
2R Mode indicator
2S Battery status of the
transmitter
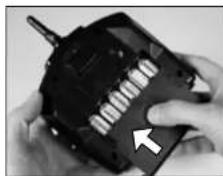
3 INSERTING BATTERIES (REMOTE CONTROL)
3A To open the battery compartment, slide the cover down.
3B Insert 6 x 1.5 V AA batteries and pay attention to the polarity specifications, as indicated in the battery compartment.
3C Slide the cover up and close.
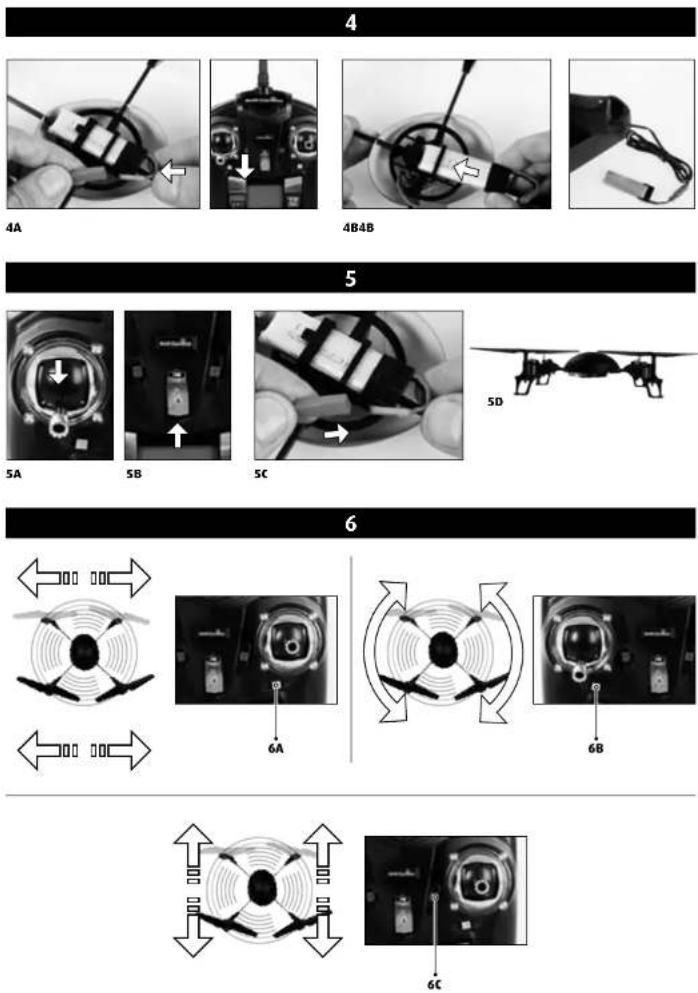
4 CHARGING THE QUADROCOPTER
Attention: The battery and motor must cool down for around 15 to 30 minutes before charging and after every flight. Otherwise they can be damaged. The charging process must be constantly monitored. Always ensure that the charging process takes place on a fireproof surface in a fire-resistant environment.
- Unplug the quadrocopter from the battery and switch off the remote control (4A).
- Remove the battery from the battery compartment (do not hold by the cable!) (4B)
- Plug the charger into a mains socket and connect the battery to the charger (4C). The IFD on the charger lights up red.
- The charging process lasts approx. 60-70 minutes and must be continuously monitored. As soon as the charging process is complete, the LED lights up green.
- Disconnect the battery from the charging unit and disconnect the charging unit from the outlet after the charging is completed.
After a charge time of 60-70 minutes the quadrocopter can fly for approx. 10 minutes.
Warning notice: The LiPo battery can become warmer during charging. If it should become hot and/or changes to the surface begin to appear, immediately discontinue the charging process!
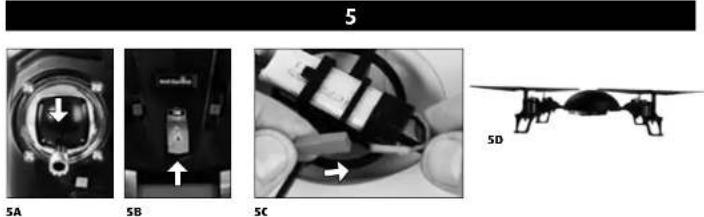
5 START PREPARATION
The thrust control (the left control on the remote control) must point down before switching on (5A). Then set the control switch of the remote control to the "ON" position; the Power LED (5B) lights up and the transmitter starts beeping after 8-10 seconds.
Connect the battery cable with the connecting cable (5C). The LED on the quadrocopter now starts flashing red. Place the quadrocopter on the ground so that the tail points toward you (5D). The quadrocopter needs around 5-10 seconds to initialise the gyro and to establish the connection to the remote control. As soon as the LED on the quadrocopter lights up red permanently, the connection to the transmitter has been established. Attention! Always place your quadrocopter on an even horizontal surface - the control electronics aligns its neutral position to the subsurface!
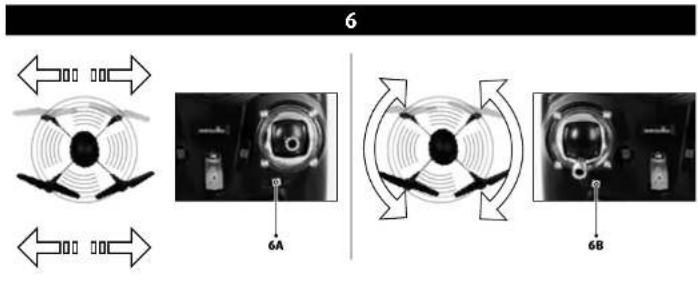
6 TRIM ADJUSTMENT OF THE CONTROL
the correct trim is a basic requirement for fault-free flying behaviour of the quadrocopter. The adjustment is easy, but requires some patience and feel. Please observe the following instructions precisely: Carefully move the thrust control up and raise the quadrocopter approximately 0.5 to 1 metre in altitude.
6A If the quadrocopter moves by itself slowly or quickly to the left or right ... press the roll trim gradually in the opposite direction until the trim indicator in the display is in the centre (20).
6B If the quadrocopter moves by itself slowly or quickly around its own axis ... press the yaw trim in the opposite direction until the trim indicator in the display is in the centre (2N).
6C If the quadrocopter moves by itself slowly or quickly forwards or backwards ... press the nick trim gradually downwards until the trim indicator in the display is in the centre (2R). If the quadrocopter moves backwards, press the nick trim gradually upwards until the trim indicator in the display is in the centre (2R).
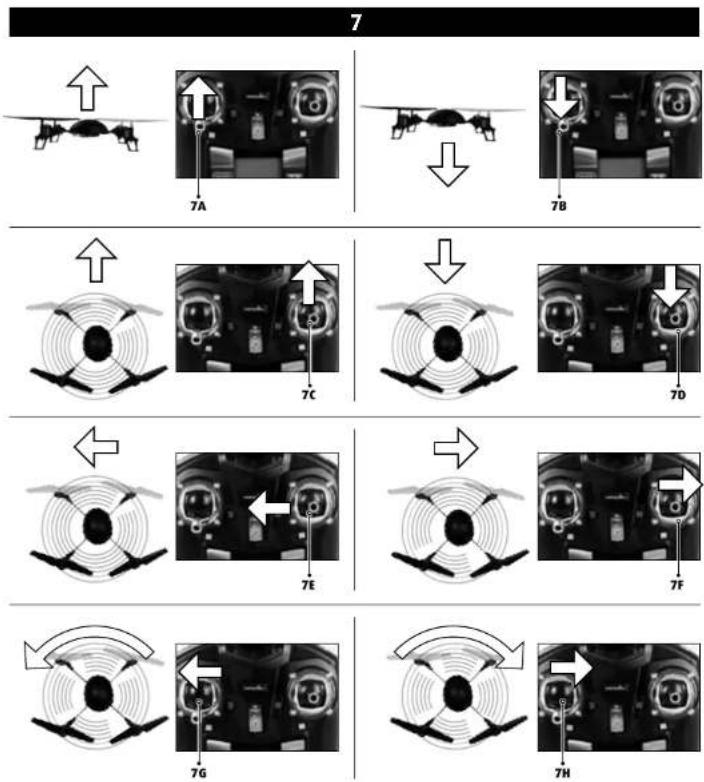
7 FLIGHT CONTROL
Note: Only minimal corrections of the controls are necessary for a smooth flying behaviour of the quadrocopter! The direction information applies if the quadrocopter is viewed from behind. If the quadrocopter is flying towards the pilot, it must be moved in the opposite direction.
Setting the control: The button 2B can be used to set the sensitivity of the control in four stages (20%, 40%, 60% and 100%) (2B). When the remote control is switched on, the sensitivity is reset to 20%. Only switch to a higher level when you have mastered the previous one!
7A In order to start or gain altitude, carefully move the thrust / yaw control forward.
7B Move the thrust / yaw control back for landing or to fly lower.
7C To fly forward, carefully move the nick / roll control forward.
7D To fly backward, pull the nick / roll control back carefully.
7E To fly left, carefully move the nick / roll control to the left.
7F To fly right, carefully move the nick / roll control to the right.
7G To turn the quadrocopter around to the left, move the thrust / yaw control to the left.
7H To turn the quadrocopter around to the right, move the thrust / yaw control to the right.
71 Looping and rolling - for experienced pilots only! Once you have mastered your quadrocopter, you can try your hand at the stunt flying function. Set the sensitivity of the control to 100% (2B/20) and ensure that you have enough space in all directions (at least 10 m). Also comply with the safety height - fly at a height of at least 5 m, as your quadrocpter loses height when rolling over and has to be caught and corrected afterwards.
Now rise to the safety height and press the nick/roll control powerfully in the desired direction. The quadrocopter rolls in the relevant direction. Be ready to catch it, as the altitude, direction and speed after the roll depend largely on the wind and previous flight movements.
INSTRUCTIONS FOR SAFE FLYING
GENERAL FLYING TIPS:
• Always place the quadrocopter on a level surface. An inclined surface can, under certain circumstances, have a negative impact on the starting behaviour of the quadrocopter.
• Always move the controls slowly and with a gentle touch.
• Always maintain visual contact with the quadrocopter and do not look at the remote control!
- Move the thrust control down again, some what as soon as the quadrocopter lifts off from the ground. To maintain the flying altitude, adapt the setting of the thrust control.
- If the quadrocopter lowers, move the thrust control slightly upward again.
- If the quadrocopter climbs, move the thrust control down slightly.
- In order to fly along a curve, it often suffices to tap the directional control very slightly in the respective direction. On initial flight attempts, there is a general tendency toward excessive movements of the quadrocpter controls. Always move the controls slowly and carefully. Never move them last or jerk them.
- Beginners should only attempt to master the thrust control after the trim adjustment. The quadrocopter does not necessarily have to fly straight at the beginning - initially, it is more important to maintain a constant height of approximately one metre above the ground by repeatedly tapping the thrust control. Only then should the pilot practice steering the quadrocopter left and right.
THE SUITABLE FLYING ENVIRONMENT:
The location in which the quadrocopter is flown should fulfil the following criteria:
- It should be an indoor location with still air.
Insolar as possible, there should be no air condition systems, heaters, etc., which could cause airflow. - The room should be at least 10 metres long, six metres wide and three metres high. For slunt flying, we recommend flying outdoors or in a large hall with at least 10 m in each direction.
- There should be no disruptive objects in the room (lans, lamps, etc.).
- When starting, make absolutely sure that all persons and animals - including the pilot - are at least 1-2 metres away from the aircraft before the flight begins.
ATTENTION!
Liability insurance has been mandatory since 2005 for flying model aircraft and helicopters outdoors. Contact your private liability insurer and make sure that your new and earlier models are included in the insurance coverage. Request confirmation in writing and keep it in a safe place. Alternatively, the DMFV offers a trial membership free of charge online at www.dmfv.aero, which includes insurance.
SERVICE NOTES
Go to www.revell-control.de for ordering information and tips on replacing spare parts, plus other useful information on all Revell Control models.

8 CHANGING THE PROPELLERS
If the rotor blades of the quadrocopter are damaged and you must replace them, proceed as follows:
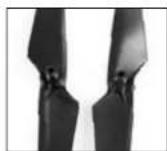
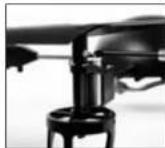
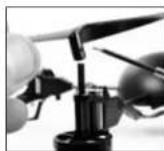
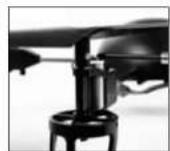
8A Prior to installation, make sure that you do not mix up the propellers. The quadrocopter has 4 different propellers, which differ in colour and markings on the bottom:
- Front right: Red, marking A - Front left: Red, marking B
- Rear right: Black, marking B - Rear left: Black, marking A
8B The propellers are secured to their shafts with a screw. Unscrew this screw and you can then remove the propeller.
8C Position the new propeller on the shaft (note the marking and colour!) and screw the fixing screw carefully into the propeller again. Ensure that the screw reaches into the hole in the shaft.
8D Replacing the arms
If an aim on the quadrocopter breaks and has to be replaced, proceed as follows. Warning! there are two different arms, which can be told apart by the colours of the cables on the motors: Red-blue is for front right and rear right, black-white is for front left and rear left.
TROUBLESHOOTING
Problem: The propellers do not move.
Cause: · The ON/OFF switch is in the "OFF" position. · The battery is too weak or depleted.
Remedy: · Set the ON/OFF switch to the "ON" position. · Charge the battery.
Problem: The quadrocopter stops and descends during flight for no apparent reason.
Cause: · The battery is too weak.
Remedy: · Charge the battery.
Problem: The quadrocopter cannot be controlled with the remote control.
Cause: · The ON/OFF switch is in the "OFF" position.
- The batteries were not inserted correctly. - The batteries do not have enough power
- Check the indicator at the top right of the display.
Remedy: · Set the ON/OFF switch to the "ON" position.
- Check whether the batteries are inserted correctly. - Insert new batteries
Problem: The quadrocopter only turns on its vertical axis or rolls over when started
Cause: Incorrect arrangement of the propellers or arms
Remedy: Install the propellers and arms as outlined in the manual
Additional tips and tricks can be found online at www.revell-control.de.
24097
Revell
Control
QUADROCOPTER
QUAD AIR