X-Plorer Serie 75 S+ RR8595 - Robot vacuum ROWENTA - Free user manual and instructions
Find the device manual for free X-Plorer Serie 75 S+ RR8595 ROWENTA in PDF.

| Brand | Rowenta |
| Model | X-Plorer Serie 75 S+ RR8595 |
| Product type | Robot vacuum with mopping function and automatic emptying station |
| Navigation technology | LiDAR and infrared sensors |
| Main features | Vacuuming, mopping (cloth), automatic emptying, scheduled cleaning via app |
| Power supply | Lithium-ion battery, mains adapter, charging/emptying station |
| Full charge time | Approximately 4 to 5 hours |
| Connectivity | Wi-Fi 2.4 GHz, free mobile app "X-plorer Series 75&95" |
| Water tank | 2-in-1 dustbin and water tank, capacity not specified |
| Included mop pads | Standard (gray/white), scrubbing (blue/white), microfiber (green/white) - depending on model |
| Automatic emptying station | Yes, with Hygiène+ dust bag (fill indicator) |
| Recommended maintenance | Weekly cleaning of sensors, brushes and station; emptying dustbin after each use; washing mop pad after each use |
| Parts replacement | Filter: every 6 months; side brush: every 6 months; dust bag: when full |
| Safety | Anti-drop sensors, bumper, anti-collision strip |
| Wi-Fi compatibility | 2.4 GHz router, 802.11 b/g/n (not 5 GHz) |
Frequently Asked Questions - X-Plorer Serie 75 S+ RR8595 ROWENTA
User questions about X-Plorer Serie 75 S+ RR8595 ROWENTA
0 question about this device. Answer the ones you know or ask your own.
Ask a new question about this device
Download the instructions for your Robot vacuum in PDF format for free! Find your manual X-Plorer Serie 75 S+ RR8595 - ROWENTA and take your electronic device back in hand. On this page are published all the documents necessary for the use of your device. X-Plorer Serie 75 S+ RR8595 by ROWENTA.
USER MANUAL X-Plorer Serie 75 S+ RR8595 ROWENTA
natural_image
Black robotic vacuum cleaner with a smartphone displaying app icons (no readable text or symbols)
natural_image
Product photo of a black robotic vacuum cleaner with a smartphone displaying it, alongside a Alexa logo and 'Olt Google' branding (no text on main subject)X-plorer Serie 75 S and Serie 75 S+
Rowenta®
Please read carefully the «Safety and use instructions» booklet before first use
For more information
www.rowenta.com

flowchart
graph TD
    A["1. Main features & installation"] --> B["2. Connection with the free app"]
    B --> C["3. Restrictions & recommendations for use"]
    C --> D["4. Maintenance"]
    D --> E["5. Robot's end of life"]
    E --> F["6. Problems & solutions"]
    F --> G["7. Straight line test"]
X-plorer Serie 75 S and Serie 75 S+
natural_image
3D rendering of a robotic vacuum cleaner with internal components and close-up views (no text or symbols)
natural_image
Illustration of various household appliances and accessories including a washing machine, plug, cable, and display panel (no text or symbols present)*depending on model


natural_image
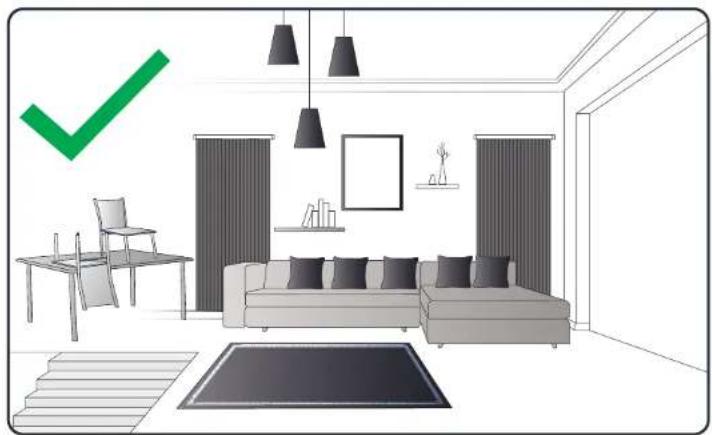
Interior layout of a modern living room with sofa, chairs, and wall-mounted furniture (no text or symbols)Your room may encounter some difficulties on carpets with fringes, too thick, with long piles, too light (ex: bath room carpet)
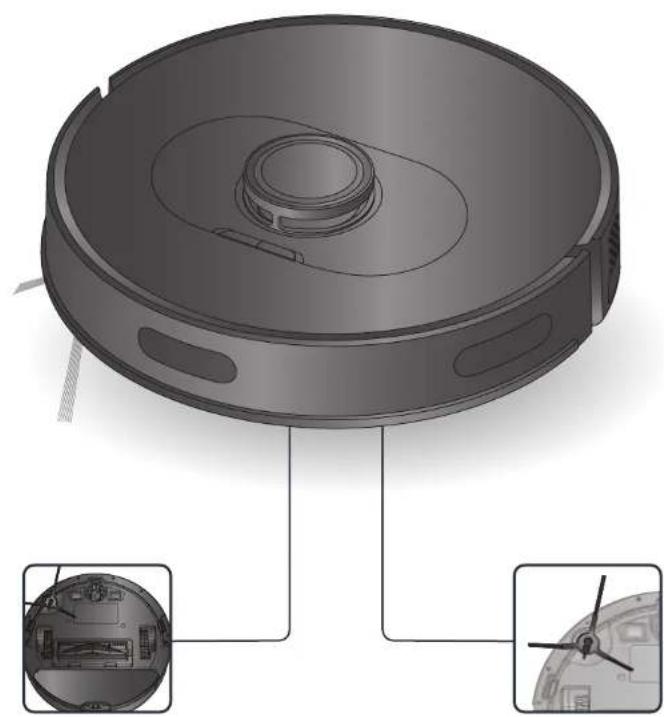
1.

- Infrared sensor
- LiDAR
- Bumper
- Power / Start / Pause
- Recharge
- Anti-collision strip
- Mop cloth assembly
- Central brush cover
- Central brush
-
Wheel
-
Battery
- Side brush
- Anti-drop sensor
- Front wheel
- Charging plots
- Dust bin and water tank release button
17 On/off button
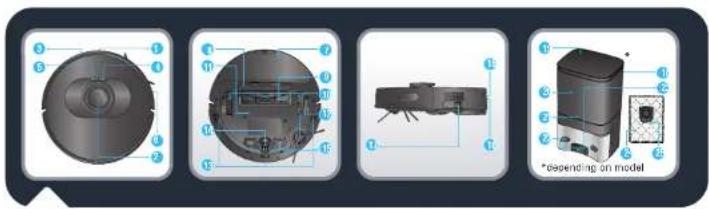
*depending on model -
Auto Empty Station*
-
Upper cover
- Dust bag chamber
- Indicator
- Charging plots
- Suction inlet
- Hygiene + dust bag
- Hygiene + dust bag handle
- 2-in-1 dust bin and water tank*
-
Dust bin and water tank separation button
-
Dust bin opening
- Filter opening
- Filter
1.


- Water inlet cap
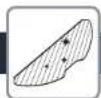
- Washable standard mop (grey and white)
-
Washable scrubbing mop for hard stains (blue and white)*
-
Washable microfiber mop to capture fine dust without water (green and white)*
- Docking station*

natural_image
Three-step diagram showing a device with a mouse and hand interacting with the next two (no text or symbols)X-plorer Serie 75 S only: Remove the bottom cover of the docking station and connect the adapter. Pay attention to arranging adapter connection wire to avoid being wound during sweep. Put the bottom cover back.
1.
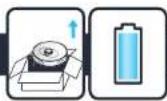
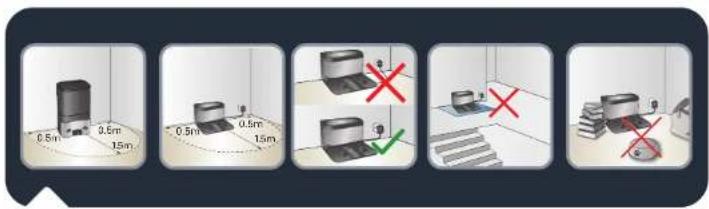
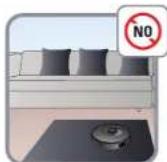
X-plorer Serie 75 S and S+: To place the docking station or Auto Empty Station against the wall, make sure there is an empty area of 0.5 m on the side and 1.5 m in the front of the station. Do not install the station near stairs. The cable must be tight. Always place the station on hard floor. Do not place the station on carpet.
EN
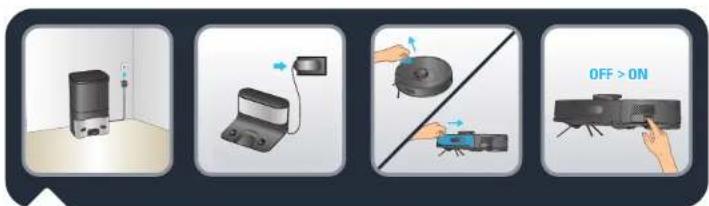
X-plorer Serie 75 S and S+: Connect the power cord plug to the main socket. The docking station lights when the robot is not plugged in. Remove the protective strip on the bumper to ensure proper operation of the device.
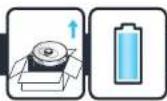
X-plorer Serie 75 S and S+: Remove the protective strips and film on the product. Take the robot, install the side brush by pressing it gently to fix the side brush on the device and turn the power switch ON.
1.


natural_image
Illustration of three hands holding different devices: a remote control unit, a smart air purifier, and a power switch (no text or symbols present)X-plorer Serie 75 S only: Place the robot on the docking station. The charging plots under the robot must touch those on the docking station. Please fully charge the robot before using it for the first time. The robot is fully charged when the white indicators on the robot are normally set on (4-5 hours). When the robot is correctly plugged, the docking station light will switch off.
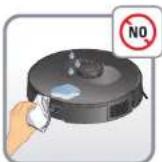
X-plorer Serie 75 S+ only: Place the robot in front of the Auto Empty Station. Press the HOME button on the robot. The robot will automatically dock to the Auto Empty Station. Do not manually place the robot against the Auto Empty Station. After the robot is correctly connected to the station, the Auto Empty Station will automatically start dust collection for 20 seconds. Please note that the time between two adjacent suctions on the Auto Empty Station is over 5 minutes. Please fully charge the robot before using it for the first time. The robot is fully charged when the white indicators on the robot are normally set on (4-5 hours).

natural_image
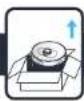
3D rendered mechanical parts including a cylindrical housing and a cabinet, shown in two views (no text or symbols)X-plorer Serie 75 S and S+: In order to extend the battery lifespan, always keep the robot charging on the docking station while not using it. When not using the robot for a long time, please fully charge the battery, switch OFF the robot and store it in a cool dry place.
1.
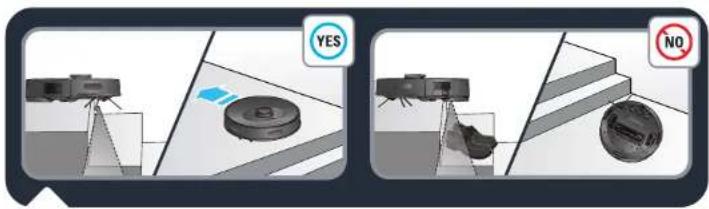
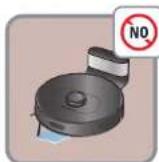
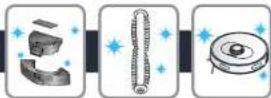
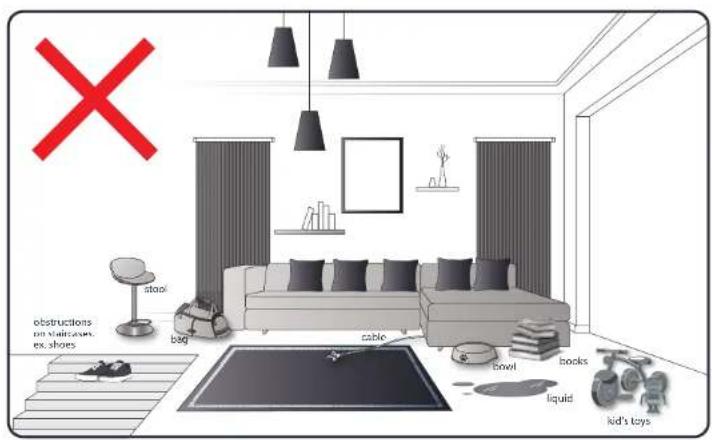
X-plorer Serie 75 S and S+: The robot has drop sensors to detect stairs and gaps. The robot will change direction when detecting them. In order to correctly detect the floor level difference, make sure there is no object (bag, shoes ...) on the floor next to gaps, stairs or on the stair's steps. The robot near stairs without object ☑The robot near stairs with shoes, bags or other objects ☑the robot will not properly detect the stairs and therefore fall).

"X-plorer Serie 75 S and S+: Press the power button on the top of the robot to start automatic cleaning or use the "X-plorer Series 75&95" application (see section 2). Press again the power button to pause / resume cleaning.
Press the home button to end cleaning, the robot will return to the station. The robot automatically goes back to the station if the cleaning is completed or if the battery is low, to recharge itself. The robot will automatically resume to complete the remaining cleaning work."

X-plorer Serie 75 S and S+: To fully benefit all the possibilities of your robot, download the free app "X-plorer Series 75&95" (you can flash the QR code above to find it on AppStore or Google Play) on your smartphone. Just follow the instructions in the application to enjoy the robot.

natural_image
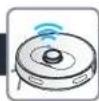
3D rendering of a robotic vacuum cleaner with control buttons and a small sensor (no text or symbols visible)X-plorer Serie 75 S and S+: When the white indicator on the top of the robot is flashing slowly, the device is waiting for connection. When the white indicator is normally set on, the device is connected.
3a.

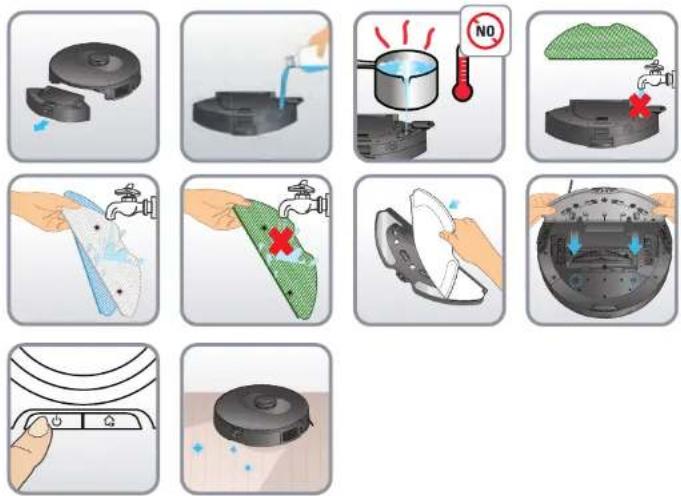

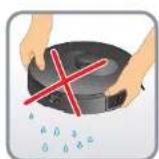
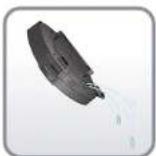
Do not add cleaning agents in the water tank.
3b.


3d.


3c.


natural_image
Three technical illustrations of a mechanical device with circular components and mounting holes, shown in 3D views (no text or symbols)X-plorer Serie 75 S and S+: Wipe robot sensors (in front, sides and bottom of the robot) and the charging plots (back and bottom of the robot) with a clean,
soft and dry cloth once a week.
X-plorer Serie 75 S only: Wipe the window of the docking station once a week.
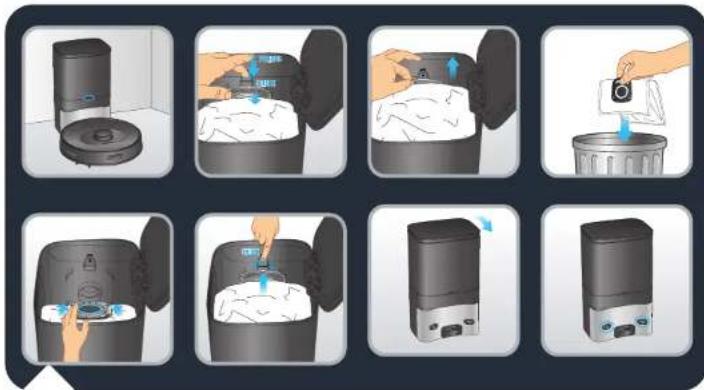
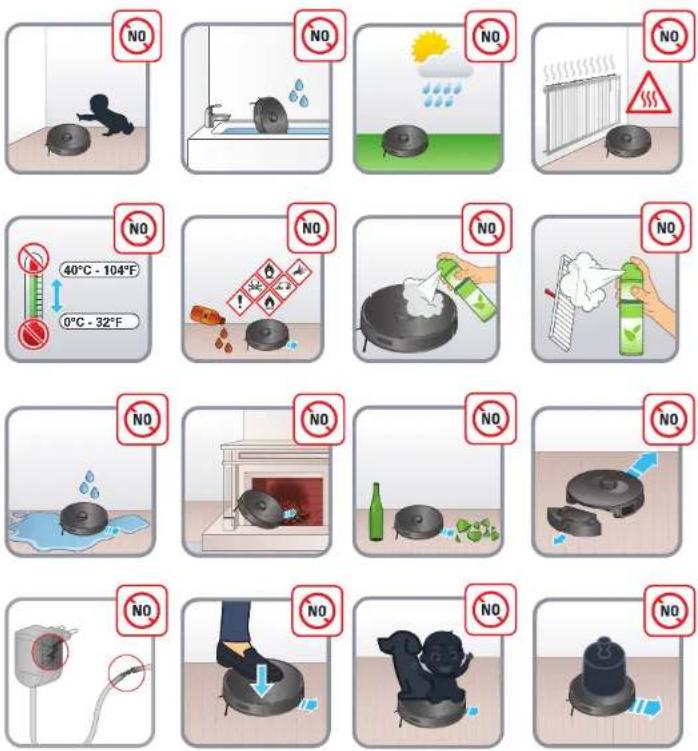
X-plorer Serie 75 S+ only: When the dust bag is full, the indicator of the Auto Empty Station is flashing in red. Please replace the dust bag. Open the upper cover. Pull up the dust bag handle and take out the dust bag. The indicator is normally on in red when the dust bag is not in place. Throw away the used dust bag. Install a new dust bag, make sure that the dust bag is correctly installed in place. Close the upper cover. The indicator is on in white when the station is in standby. The indicator is off when the robot is correctly connected to the station or the station is sleeping. If the indicator is flashing in red after replacing the dust bag, or if dust collection stops after a short period of time, the status is abnormal. Unplug the power plug, reverse the Auto Empty Station, and check whether the dust channel is blocked by foreign objects. If the dust channel is blocked by objects, unscrew the 6 screws of the transparent plastic cover of dust channel to remove it. Remove foreign objects. Replace the transparent cover.
X-plorer Serie 75 S+ only: Clean the Auto Empty Station and the charging sensor head with a clean, soft and dry cloth. It is recommended to clean them once a week.
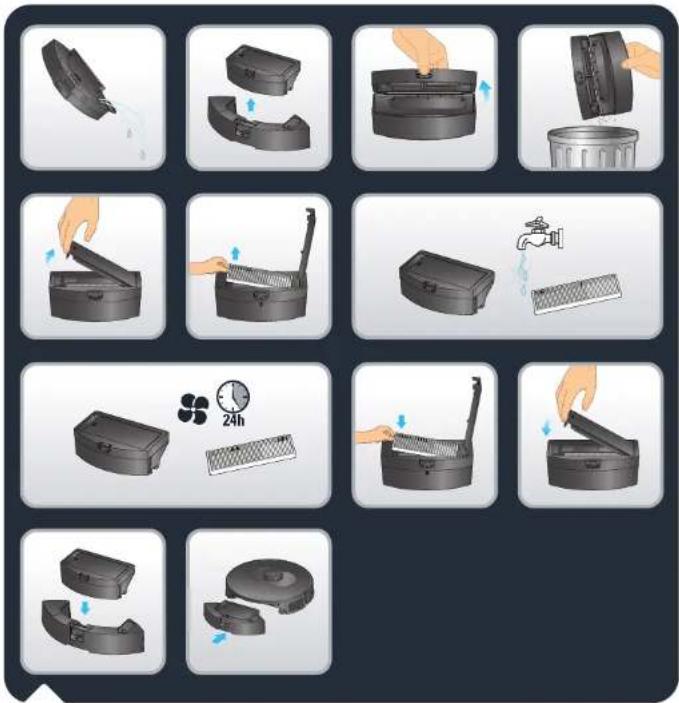
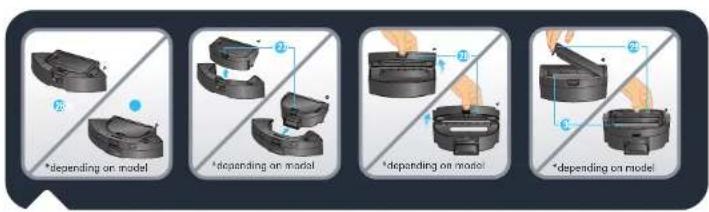
X-plorer Serie 75 S only: To clean the 2-in-1 dust bin and water tank, press and hold its release button and pull it outwards.
Press the dust bin and water tank separation button to vertically lift the dust bin and separate it from the water tank.
Empty the water tank after each use.
Open the dust bin and empty it, gently tap the dust bin to knock off dirt.
Open the filter cover to take out the filter and gently tap it over a garbage bin to knock off dust. You can also wash the dust bin and the filter under water. Let them out to dry for 24 hours. Put the filter back to its original place. Reinstall the dust bin into the water tank, and then install the 2-in-1 dust bin and water tank back to the robot.

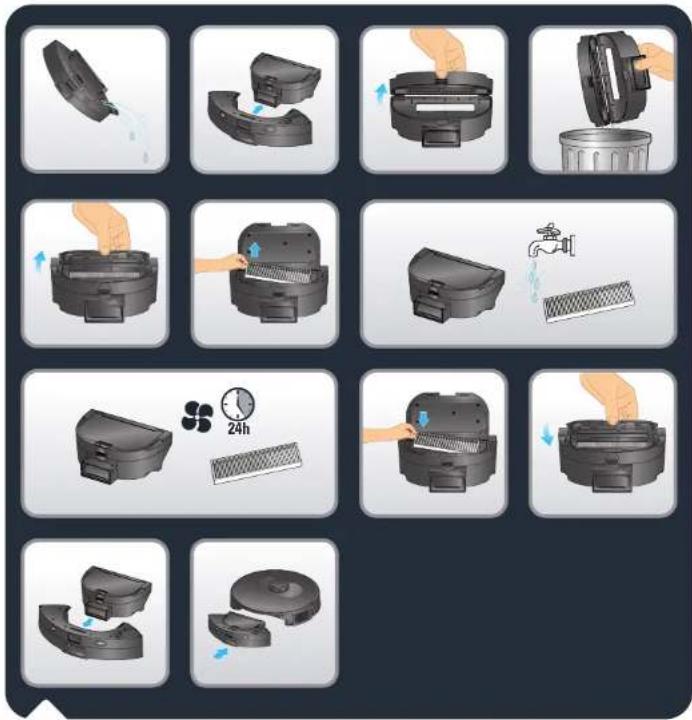
X-plorer Serie 75 S+ only: To clean the 2-in-1 dust bin and water tank, press and hold its release button and pull it outwards.
Horizontally slide the dust bin to separate it from the water tank.
Empty the water tank after each use.
Open the dust bin and empty it, gently tap the dust bin to knock off dirt.
Open the filter cover to take out the filter and gently tap it over a garbage bin to knock off dust. You can also wash the dust bin and the filter under water. Let them out to dry for 24 hours. Put the filter back to its original place. Reinstall the dust bin into the water tank, and then install the 2-in-1 dust bin and water tank back to the robot.
EN
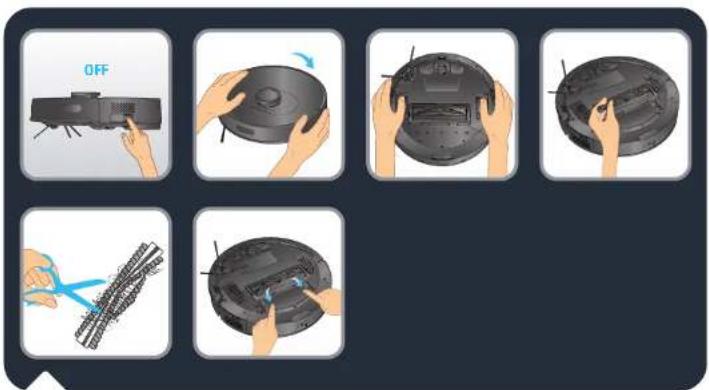
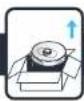
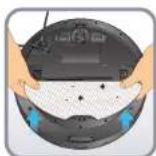
X-plorer Serie 75 S and S+: To clean the central brush, turn OFF the robot and turn the robot upside down. Press down the lockers to take out the cover. Take out the central brush upwards. Clean the central brush by cutting off the hair wound before replacing it back in the robot. Clean the central brush once a week.

natural_image
Two circular objects with arrows pointing to them, one gray and one black, against a dark background (no text or symbols)X-plorer Serie 75 S and S+: To clean the side brush, remove it by unclipping it. Remove the hair wound before replacing it back on the robot. Clean the side brush once a month.
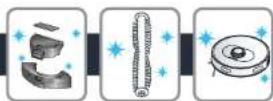

X-plorer Serie 75 S and S+: Replace the side brush every 6 months. Throw away the old brush and replace it with a new one. Clip the new side brush on the robot.

natural_image
Two-step diagram showing a device with a handle and blue arrow indicating direction (no text or symbols)X-plorer Serie 75 S and S+: To clean the wheels, clean the front, left and right wheels once a month. The wheel shaft may be entangled by hair, cloth strips, etc. Clean them once a month.

X-plorer Serie 75 S and S+: Every 6 months replace the filter with a new one to maintain optimal performance.
4.
| Component Clearing the component Replacing the component | ||
| Dust bin After each use Not applicable | ||
| Water tank After each use Not applicable | ||
| Filter Once a week Twice a year | ||
| Central brush Once a week If required | ||
| Sensors Once a week Not applicable | ||
| Wheels Once a month Not applicable | ||
| Side brush Once a month Twice a year | ||
| Docking station* | Once a week Not applicable | |
| Auto Empty Station* | Once a week Not applicable | |
| Hygiene + dust bag* | Not applicable | When full |
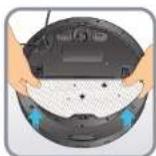
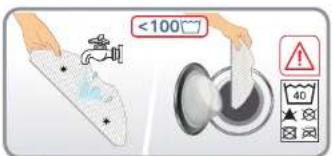
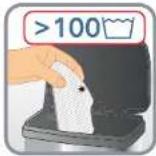
| Mops | After each use Twice a year | |
*depending on model
5.


Before disposing of the device, remove the battery and dispose of it in accordance with local laws and local arrangements. If you have any questions, please contact your product dealer who can tell you what to do.

6.

| FAULT SOLUTION | |
| Cannot start the robot | Make sure the robot is connected to power supply.Make sure the battery is fully charged.Make sure the switch on the robot is turned ON. |
| The robot suddenly stops working | Check whether the robot is stuck or blocked by obstacles.Check wether the battery is too low.If the problem persists, please switch OFF the robot, wait for 3 seconds, and switch ON to restart it.The appliance may be overheating :- stop the appliance and leave cool for at least 1 hour.If it overheats on repeated occasions, contact the Approved Services Center. |
| Cannot charge the robot | Make sure the station is properly connected or contact an Approved Services Center to change the charger.Check whether the indicator on the robot is flashing during charging.Wipe dust off charging plates with dry cloth. |
| The charger is getting hot | This is perfectly normal. The robot can remain permanently connected to the station without any risk. |
| The robot cannot return to the station | Clear the station of objects within 0.5 m on the left and right sides and within 1.5 m ahead.Make sure that the robot starts cleaning from the station without abnormal movement.When the robot is near the station, it can return faster. But if the station is located far away, the robot will need more time to return. Please wait during its return.Clean the charging plates. |
| The cleaning schedule is not executed | Make sure the robot has been powered on.Set the time and schedule the time for automatic cleaning in the app.Make sure the appointment time has been set correctly.Check wether the battery level is too low to start cleaning.The robot will not start any scheduled cleaning when a task is being performed. |
| Suction whistling | Check the suction inlet for any obstruction.Empty the dust bin.Clean the filter.Check wether the filter is wet due to water or other liquids on the floor. Let the filter dry naturally thoroughly before use.Check wether the dust bin and water tank are properly installed.The intake head is clogged:- Remove the brush and clean it. |
| The central brush does not rotate | Clean the central brush.Check wether the central brush and the brush cover are correctly installed. |
| Abnormal action or sweep route of the robot | Carefully clean the sensors with dry cloth.Switch OFF the robot, wait for 3 seconds and switch ON to restart the robot. |
| No water released during mapping | Make sure there is enough water in the water tank.Check wether the mop module is correctly installed.Check whether the water outlet is blocked. |
| The robot cannot connect to your Wi-Fi network | Ensure that your Wi-Fi router supports 2.4GHz and 802.11 b/g/n bands as this equipment does not support 5GHz bands. |
6.

The light indicator of the auto empty station (X-Plorer Serie 75 S+ only) is still red after replacement of a new dust bag
- Please unplug the station before any manipulation. Violent disassembly is prohibited. Do not use blunt object.
- If the light indicator of the station is still red after the dust bag is replaced with a new one, please pull out the power plug. Reverse the station. With a screwdriver, remove the 5 screws that hold the cover of the dust channel. Remove the cover of the dust channel. Check whether there are foreign matters blocking the dust channel. If the dust channel is blocked, please remove the foreign matters with your fingers or with a bottle brush. After cleaning the dust channel, please put the cover back and the 5 screws back. Then, reverse the station and replug the power plug, place the robot in front of the station and press the button "Home" on the robot. The robot will automatically go back to the station and start a dust collection during 20 seconds. The light indicator is white.
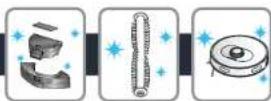
• See pictograms below.
7.

Straight line test
For measuring dust collection performance in accordance with IEC 62885-7, testers can activate the straight line test by using the remote control feature in the application menu. Press the POWER button three times to start BOOST mode (maximum power).
Rowenta®
natural_image
3D rendering of a robotic vacuum cleaner with internal components and close-up insets (no text or symbols)
natural_image
Illustration of various household appliances and accessories including a smart water heater, battery pack, and camera module (no text or symbols present)*selon le modèle

natural_image
Interior layout of a modern living room with sofa, chairs, and wall-mounted furniture (no text or symbols)natural_image
Three-step diagram showing a device with a mouse, hand pointing to the screen, and a separate view of a device (no text or symbols present)natural_image
3D rendered image showing a mechanical component and a cabinet (no text or symbols visible)natural_image
Illustration showing a hand holding a device with a lock and a small house symbol, next to a circular dial (no text or symbols present)natural_image
3D rendering of a robotic vacuum cleaner with control buttons and a small sensor (no text or symbols visible)
natural_image
Three 3D CAD renderings of a mechanical component with mounting holes and internal features (no text or symbols visible)natural_image
Two circular objects with arrows pointing to them, one gray and one black, against a dark background (no text or symbols)natural_image
Two-step diagram showing a device with a handle and blue arrow indicating direction (no text or symbols)natural_image
3D rendering of a circular robotic vacuum cleaner with internal components and close-up insets (no text or symbols)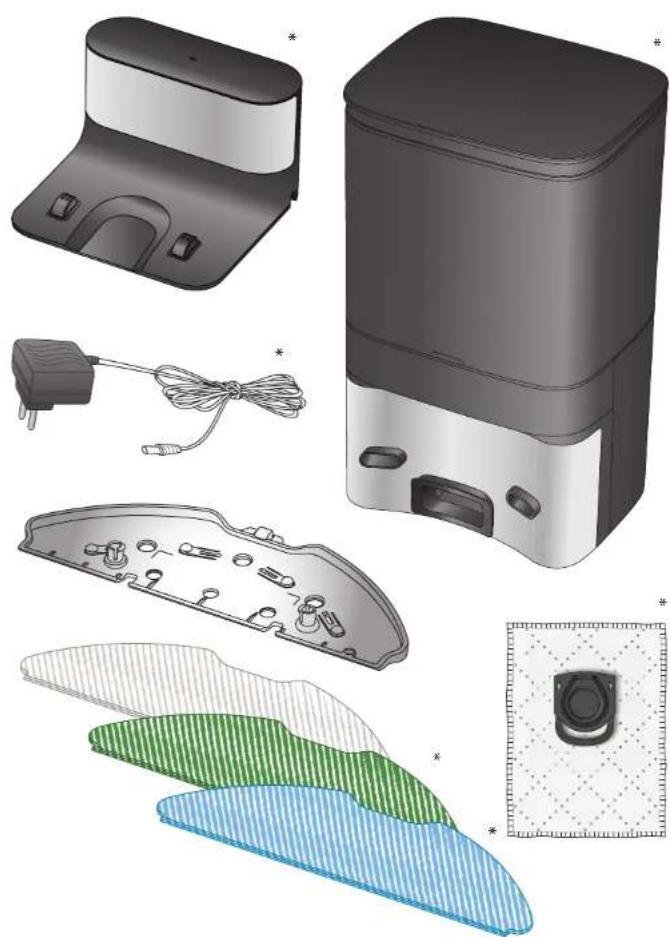
natural_image
Illustration of various household appliances and accessories including a smart water heater, battery pack, and camera module (no text or symbols present)*Según el modelo


natural_image
Interior layout diagram of a modern living room with sofa, chairs, and wall-mounted furniture (no text or symbols)natural_image
Three-step diagram showing a device with a mouse and hand interacting with the next two (no text or symbols)natural_image
Illustration showing three steps of a device control panel: adding a remote to a controller, adjusting a device with a power button (no text or symbols present)natural_image
3D rendered mechanical parts including a cylindrical component and a cabinet-like structure (no text or symbols visible)natural_image
Illustration showing a hand holding a device with control buttons and a small house symbol, next to a circular dial (no text or symbols present)natural_image
3D rendering of a robotic vacuum cleaner with control buttons and a small sensor (no text or symbols visible)natural_image
Three technical illustrations of a mechanical device with circular components and mounting holes, shown in 3D views (no text or symbols)natural_image
Two circular objects with arrows pointing to them, one gray and one black, against a dark background (no text or symbols)natural_image
Two-step diagram showing a device with a handle and blue arrow indicating direction (no text or symbols)natural_image
3D rendering of a circular robotic vacuum cleaner with internal components and close-up insets (no text or symbols)
natural_image
Illustration of various household appliances and accessories including a smart air purifier, battery pack, and camera module (no text or symbols present)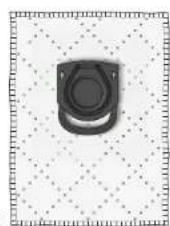

natural_image
Interior layout diagram of a modern living room with sofa, chairs, and wall-mounted furniture (no text or symbols)natural_image
Three-step diagram showing a device with a mouse and hand interacting with the next two (no text or symbols)natural_image
Illustration of three-step device manipulation process: adding a remote control, adjusting a smart air conditioner, and adjusting a power switch (no text or symbols)natural_image
3D rendered mechanical components including a cylindrical housing and a cabinet, shown in two views (no text or symbols)natural_image
Illustration showing a hand holding a device with control buttons and a small house symbol, next to a circular dial (no text or symbols present)natural_image
3D rendering of a robotic vacuum cleaner with control buttons and a small sensor (no text or symbols visible)natural_image
Three technical illustrations of a mechanical device with circular components and mounting holes, shown in 3D views (no text or symbols)natural_image
Two circular objects with arrows pointing to them, one gray and one black, against a dark background (no text or symbols)natural_image
Two-step diagram showing a device with a handle and blue arrow indicating direction (no text or symbols)natural_image
3D rendering of a circular robotic vacuum cleaner with internal components and external close-ups (no text or symbols)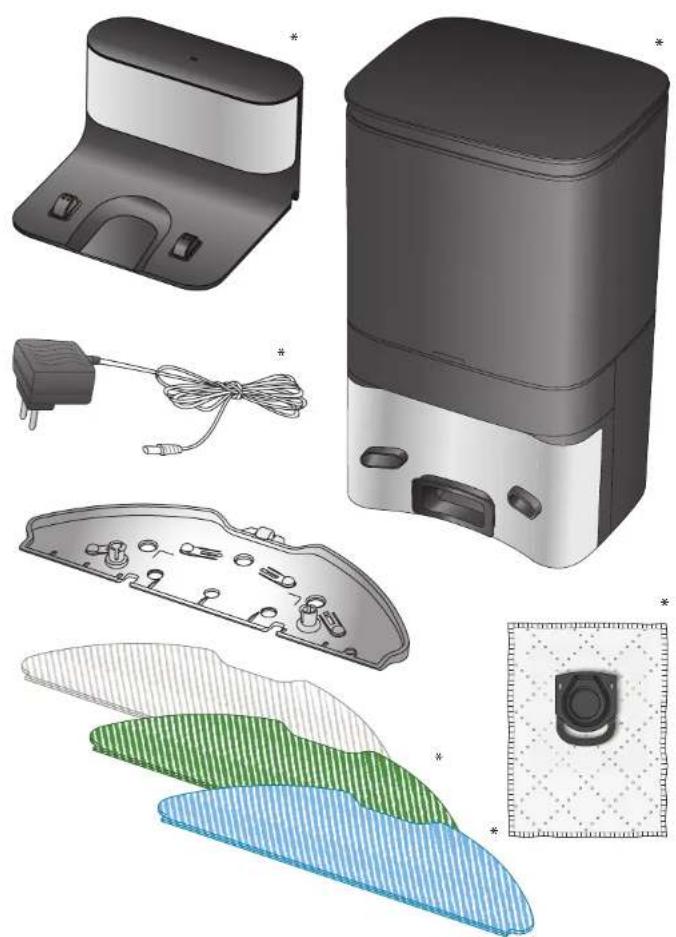
natural_image
Illustration of various household appliances including a smart air conditioner unit, battery pack, and display screens (no text or symbols)
*je nach Modell