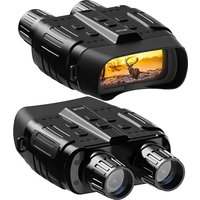
B1 Maverick - Binoculars Rexing - Free user manual and instructions
Find the device manual for free B1 Maverick Rexing in PDF.


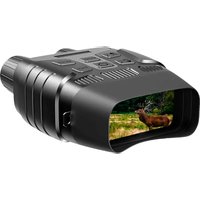
| Product Type | Digital Night Vision Binoculars |
| Brand | Rexing |
| Model | B1 Maverick |
| Dimensions | Approximately 196 × 146 × 59 mm |
| Weight | Approximately 576 g (without batteries) |
| Power Supply | 6 AA 1.5V batteries |
| Lens | F 1.2, f=25 mm, FOV 10°, diameter 24 mm |
| Internal Display | TFT 2.3 inches (960×240) HD |
| Night Vision Distance (Total Darkness) | 200 to 300 m |
| Night Vision Distance (Low Light) | 3 m to infinity |
| Infrared Light | 3 W, 850 nm, 7 brightness levels |
| Photo Resolution | 1 MP (1280×960) / VGA (640×480) |
| Video Resolution | 960P (1280×960) at 30 FPS / VGA (640×480) at 30 FPS |
| Digital Zoom | 4x |
| Storage | TF card up to 32 GB (not included) |
| Ports | Mini USB 2.0, TF card slot |
| Operating Temperature | -20°C to 60°C |
| Storage Temperature | -30°C to 70°C |
| Modes | Photo, Video, Playback |
| Focus | Manual (lens rotation) |
| Maintenance and Cleaning | Clean the lenses with a soft, dry cloth. Store in a cool, dry place. |
| Safety | Do not look directly at the sun or intense light sources. Use batteries of the same type and avoid mixing new and used batteries. |
| Spare Parts and Repairability | Batteries and memory cards are replaceable. For any other repairs, contact Rexing customer service. |
| General Information | Manual available in multiple languages. 30-day return period. |
Frequently Asked Questions - B1 Maverick Rexing
User questions about B1 Maverick Rexing
0 question about this device. Answer the ones you know or ask your own.
Ask a new question about this device
Download the instructions for your Binoculars in PDF format for free! Find your manual B1 Maverick - Rexing and take your electronic device back in hand. On this page are published all the documents necessary for the use of your device. B1 Maverick by Rexing.
USER MANUAL B1 Maverick Rexing
natural_image
Abstract geometric pattern with white parallelograms on a solid blue background, no text or symbols present.TABLE OF CONTENTS
ENGLISH 5
JAPANESE (日本語) 17
FRENCH (FRANGAIS) 29
Thank you for choosing REXING! We hope you love your new product as much as we do.
If you need assistance, or have any suggestions to improve it, please contact us. You can reach us via
Always a surprise in Rexing. Check us out here.
https://www.facebook.com/rexingusa/ https://www.instagram.com/rexingdashcam/ https://www.rexingusa.com/support/registration/ https://www.rexingusa.com/support/product-support/
Rexing
Facebook Instagram Site



Product Support

Product Overview
Product Overview
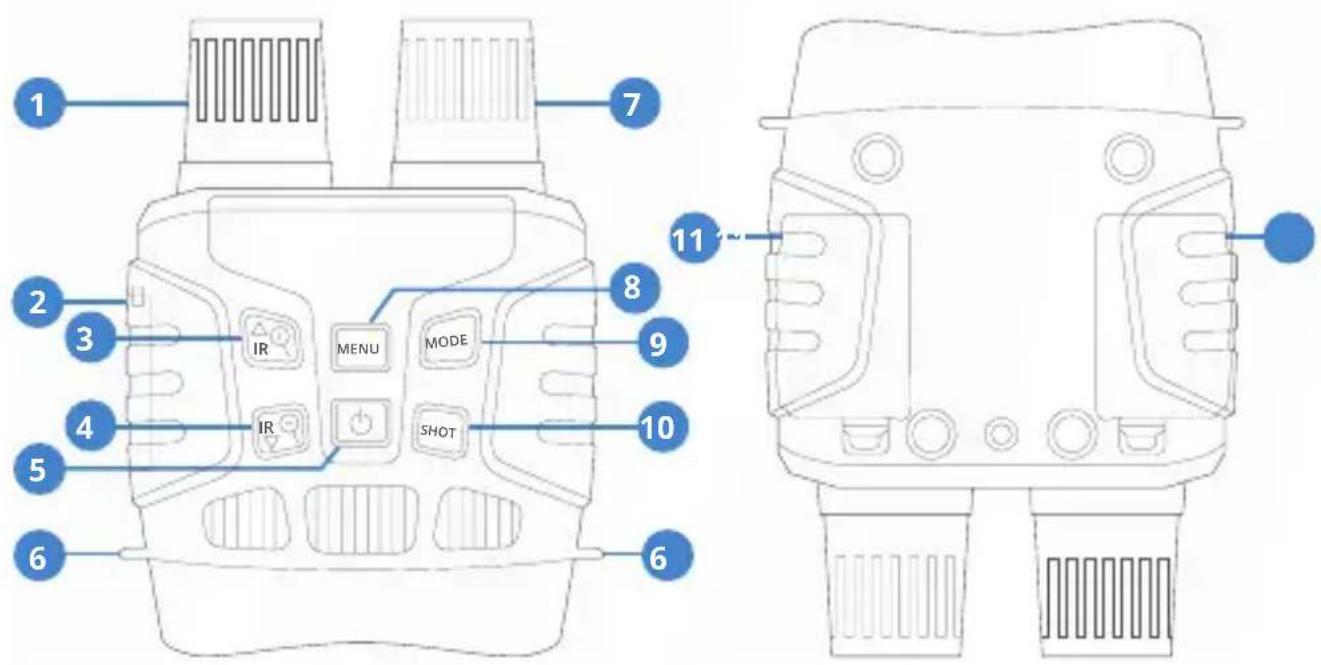
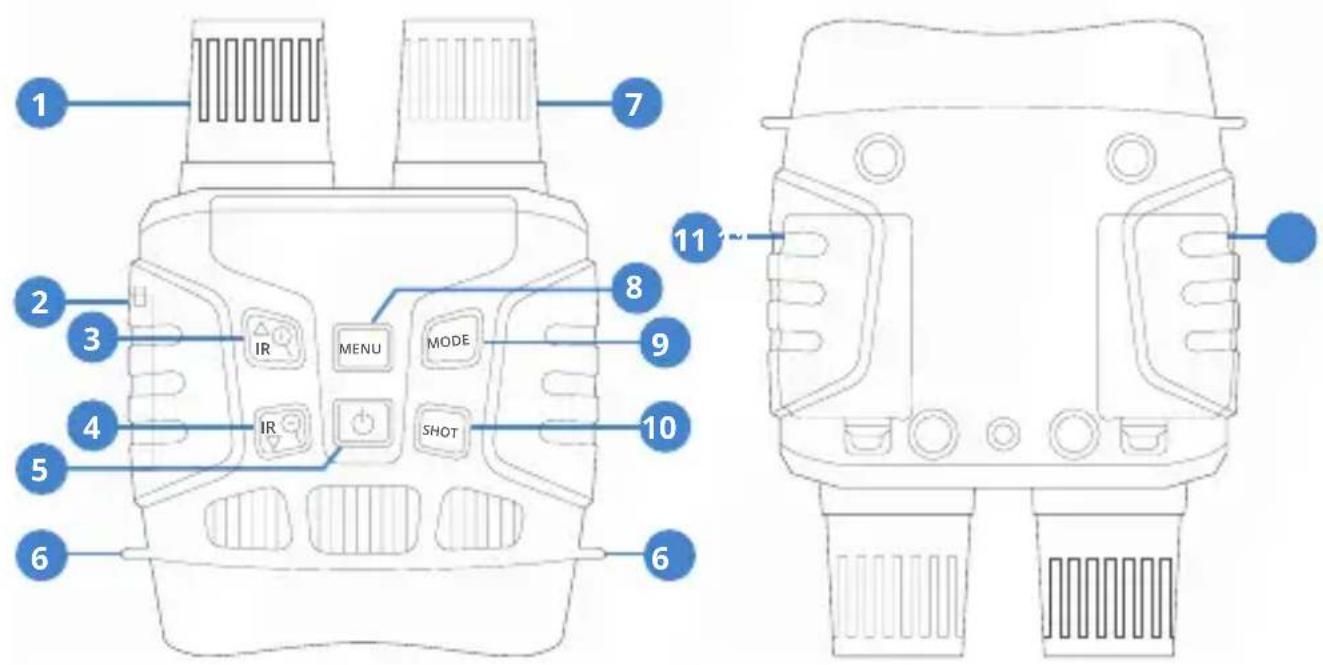
01 Lens with Manual Focus
02 USB Port/Micro SD Card Slot Cover
03 IR Up/Zoom in/Up Button
04 IR Down/Zoom Out/Down Button
05 Power Button
06 Strap Hole
07 IR LEDs
08 Menu Button
09 Mode Button
10 Shot Button
11 Battery Cover
Specification
| IMAGE RESOLUTION | 1M(1280x960)/VGA(640x480) |
| VIDEO RESOLUTION | 960P(1280x960@30FPS)/VGA(640x480@30FPS) |
| APERTURE | F 1.2 f=25mm |
| LENS ANGLE | FOV=10°, diameter is 24mm |
| DISPLAY SCREEN | Inner screen 2.31"(960*240) TFT; Outer screen 98*48mm |
| DIGITAL ZOOM | 4X |
| STORAGE MEDIA | Micro SD card, up to 32GB |
| VIEWING DISTANCE IN ALL DARK | 200M-300M |
| VIEWING DISTANCE IN WEAK LIGHT | 3M~infinity |
| IR LIGHT | 3W, 850nm, Strong IR spotlight, 7-level IR Adjustment |
| USB Port Mini-USB 2.0 | |
| POWER SUPPLY 9V, 6xAA | |
| OPERATING TEMPERATURE | -20°C to 60 °C |
| STORAGE TEMPERATURE | -30°C to 70°C |
| DIMENSION | Approx.196*146*59mm |
| WEIGHT | Approx. 576g |
Operating the Camera
Installation
Power Supply
Batteries Installation
Please install batteries into the device before using.
1 Open the battery cover on the back of device.
2 Insert 6xAA batteries into the battery compartment. Make sure the polarity is correct.
3 Close the battery cover.
Note:
- NEVER INSTALL DIFFERENT TYPES OF BATTERIES or NEW AND OLD BATTERIES in the product at the same time.
- Anytime you load or unload batteries, make sure that the camera is OFF. If using external power source, do not remove internal batteries.
Inserting Memory Card
1 Please prepare a Micro SD card(up to 32GB) in advance.
2 Open the card slot cover, you will see the card slot.
3 Insert the Micro SD card into the slot. Make sure the direction is right. Never insert the card forcibly.
4 Format the Micro SD card, this can improve the battery life and shutter speed.
5 To remove the card from the memory card slot of the device, press the edge of the memory card in gently, the card will pop out. Then remove the card.
Note:
- Be sure the camera's power is switched OFF before inserting or removing SD cards or batteries.
- Camera will not operate without an SD memory card installed.
Basic Operations
Turn On And Turn Off
Keep pressing the power button for 3 seconds to turn on the device. Keep pressing the power button for 3 seconds again can turn off the device.
Changing The Modes
The night version has 3 different modes: photo mode, video mode and playback mode. Press the Mode button can change mode.

Photo Mode
For taking still photos

Video Mode
For recording video

Playback Mode
For playing the recording files
Taking Still Photos
1 Turn on the device, the default is photo mode. If not, press the Mode button to switch to photo mode.
2 Zooming: Keep pressing the 🔒 or 🔒 button to zoom in or zoom out the image, the value of magnification level appears on the LCD screen.
3 Take a still photo. View your subject via the LCD screen. Press the Shot button to take a photo.
Basic Operations
Recording Video
1 Turn on the device, press the Mode button to switch to video mode.
2 Zooming:
Keep pressing the 🔒 or 🔒 button to zoom in or zoom out the image. The value of magnification level appears on the LCD screen.
3 Start to record video.
View your subject via the LCD screen.
Press the Shot button to start to record. The record duration will be shown on the LCD screen.
4 Finish recording.
Press the Shot button again to stop recording.
The device will stop recording automatically once capacity of the memory card is full.
Note
- About the manual focus: On the left lens, marked "far" and "near". If the observation distance is far, please rotate the lens to left. If the distance is near, rotate the lens to right. Users can repeatedly adjust the optimal focal length according to the actual observation distance.
- There is no sound in the video files. Because the observation distance is far, the sound cannot be transmitted.
- In photo/video mode, if you have to view the darkness environment, please short press IR UP button to activate the IR LEDs, the image will change to black and white. The IR LEDs have seven levels, short press IR UP button to up the level, short press IR DOWN button to down the level. (If the battery voltage is not enough, the IR LEDs level will down automatically. IR level can up to 7 level when the battery power is full. If only left half power, the level just can up to 5. If only left 25% power, the level just can up to 3. If the battery power is lower than 25% , IR LEDs can not be activated.)
Settings in Photo and Video Mode
Press Menu button in photo or video mode, can change the settings.
| MENU | Function |
| PHOTO RESOLUTION | Set the photo resolution. Options: [1M 1280x960]/[VGA 640x480] |
| VIDEO SIZE | Set the video resolution. Options:[960 1280x960]/[640 640x480] |
| NIGHT VISION SENSITIVITY | Choose the night vision sensitivity. Options:[Low]/[Middle]/[High]. |
| POWER FREQUENCY | Set the light source frequency to match frequency of electricity supply in local region to prevent interference. Options:[50Hz]/[60Hz]. |
| POWER SAVE | Set the time to shut down the device for power saving if the device is idle. Options:[3min]/[5min]/[10min]/[OFF]. |
Settings in Photo and Video Mode
| DATE&TIME | Set the date and time of device. |
| DATE STAMP | Add the date stamp on the photo or video files.Options: [Off]/[Date]/[Date&Time]. |
| LANGUAGE | Set OSD (on-screen) language.Options:[English]/[Simplified Chinese/[Traditional Chinese]/[French]/[Dutch]/[Spanish]/[Italian]/[Portuguese]/[German]/[Russian]/[Japanese]/[Korean]. |
| FORMAT | Format your TF card. Format TF card will delete all files including the protected files. Please copy the important files before confirm.Options:[Yes]/[No]. |
| RESET | Restore the setup to factory default settings.Options:[Yes]/[No]. |
| FW VERSION INFORMATION | User can see the firmware version. |
Playback
Playback Playback Menu List
1 Turn on the device, press the Mode button to switch to playback mode.
2 Press Up/Down button to view photos and video files.
3 Playback the video
Press the Shot button to start playing the video files.
Press the Shot button again to have a pause.
Press Menu button to stop the current video playing. Press Menu button in playback mode, the screen will display the playback menu. Press Up/Down button to scan lock or delete. And press Shot button to select one to enter the submenu.
Set the time period that the camera should wait before reacting to subsequent activation of the main sensor after the initial recording. During the selected interval, the camera will not record any images or videos. This prevents the memory card from being filled up with too many recordings of the same event. You can select between 5-60 seconds or 1-60 minutes.
| MENU Function | |
| LOCK | Lock or unlock the current one file or all files in memory card.Options:[Lock/Unlock onel]/[Lock All]/[Unlock All] |
| DELETE | Delete the current one file or delete all files in memory card.Options:[One]/[All] |
Download files to PC
There are two ways to download files from the device to a computer:
- By inserting the memory card into a card reader.
- By connecting the device to a computer using the supplied USB cable.
Using a Card Reader
1 Eject the memory card from the device and insert it into a card reader. Then connect the card reader to a computer.
2 Open [My Computer] or [Windows Explorer] and doubleclick the removable disk icon that represents the memory card.
3 Copy images from the card into a directory of your choice on the computer's hard disk.
Connecting the Device to a PC through the USB Cable
1 Turn on the night vision. Connect it to a computer through the supplied USB cable.
2 When connecting to the computer, it will appears "MSDC" on the screen.
3 Open [My Computer] or [Windows Explorer].
4 A"Removable Disk" appears in the drive list.
Double-click the "Removable Disk" icon to view its contents. Files stored on the camera are located in the folder named "DCIM".
Copy the photos or files to your computer

natural_image
Abstract geometric pattern with blue parallelograms on white background (no text or symbols)製品の概要
製品の概要
natural_image
Abstract geometric pattern with blue parallelograms on white background (no text or symbols)natural_image
Abstract geometric pattern with blue parallelograms on white background (no text or symbols)natural_image
Abstract geometric pattern with blue parallelograms on white background (no text or symbols)natural_image
Abstract geometric pattern of blue rectangles on white background (no text or symbols)This equipment has been tested and found to comply with the limits for a Class B digital device, pursuant to part 15 of the FCC Rules. These limits are designed to provide reasonable protection against harmful interference in a residential installation. This equipment generates uses and can radiate radio frequency energy and, if not installed and used in accordance with the instructions, may cause harmful interference to radio communications. However, there is no guarantee that interference will not occur in a particular installation, If this equipment does cause harmful interference to radioed television reception, which can be determined by turning the equipment off and on, the user is encouraged to try to correct the interference by one or more of the following measures:
Reorient or relocate the receiving antenna.
Increase the separation between the equipment and receiver.
Connect the equipment into an outlet on a circuit different from that to which the receiver is connected.
Consult the dealer or an experienced radio/TV technician for help.

natural_image
Four empty rectangular shapes arranged in a scattered pattern on a white background (no text or symbols)Warranty And Disclaimers
Warranty Disclaimers
Up to 18 MONTHS LIMITED WARRANTY
Your product is warranted to be free of defects in materials and workmanship for 1 year after the date of purchase. This warranty does not cover damages caused by misuse, improper handling and installation. Register your B1 at RexingUSA.com to extend the warranty. In the event warranty service is needed, please contact Rexing at care@rexingusa.com
We hare no representations or warranties, either expressed or implied, by or concerning any content of these written materials or software, or for damages resulting from the use of the information contained therein.
We reserve the right to alter the features and contents of this publication, hardware or software without obligation or advance notice.
Warranty does not extend to any accessories used with the camera.
We are not responsible if you use the trail camera for illegal purposes.
We shall not be obligated to perform preventative maintenance, installation, reinstallation, or maintenance. The illustrations in this manual are for instructional purposes only and may not represent actual product exactly.

natural_image
Abstract geometric pattern with white parallelograms on a solid blue background, no text or symbols present.REXING®
www.rexingusa.com
New York office address:
131 West 33rd St 11C, New York, NY 10001
Connecticut office address:
264 Quarry Rd unit d, Milford, CT 06460
- TABLE OF CONTENTS
- Product Overview
- Operating the Camera
- Installation
- Power Supply
- Batteries Installation
- Note:
- Inserting Memory Card
- Basic Operations
- Turn On And Turn Off
- Changing The Modes
- Photo Mode
- Video Mode
- Playback Mode
- Taking Still Photos
- Recording Video
- Note
- Settings in Photo and Video Mode
- Playback
- Playback Playback Menu List
- Download files to PC
- There are two ways to download files from the device to a computer:
- Using a Card Reader
- Connecting the Device to a PC through the USB Cable
- 製品の概要
- Warranty And Disclaimers
- Warranty Disclaimers
- Up to 18 MONTHS LIMITED WARRANTY
Brand : Rexing
Model : B1 Maverick
Category : Binoculars