NVS1 - Binoculars Rexing - Free user manual and instructions
Find the device manual for free NVS1 Rexing in PDF.


| Product Type | Night Vision Scope / Binoculars |
| Brand | Rexing |
| Model | NVS1 |
| Magnification | 5X eyepiece, adjustable diopter |
| Objective Lens | f=16mm, F1.2 aperture, FOV 16° |
| Display | 1.3" TFT LCD, 240x240 pixels |
| Digital Zoom | 4X |
| Infrared Illuminator | 5W, 850nm, adjustable focus |
| Night Vision Range | Up to 400 meters |
| Photo Resolution | 1.3M (1280x960) / VGA (640x480) |
| Video Resolution | 960P (1280x960@30fps) / VGA (640x480@30fps) |
| Storage | MicroSD up to 32GB (Class 10 recommended) |
| Connectivity | Micro USB 2.0, Wi-Fi for app control (Digital Aim) |
| Power Source (Device) | Rechargeable 18350 battery, 3.7V, 1000mAh |
| Power Source (IR Light) | Rechargeable 18650 battery, 3.7V, 2600mAh |
| Operating Temperature | -4°F to 140°F (-20°C to 60°C) |
| Dimensions | 6.7 x 4.8 x 2 inches (170 x 122 x 51 mm) |
| Red Dot Sight | Integrated red dot aiming light |
| Reticle | Cross line, adjustable on/off |
| Languages | English, Simplified Chinese, Traditional Chinese, Japanese |
| Auto Power Off | 1 min / 3 min / 5 min / 10 min / OFF |
| Date Stamp | Supported on photos and videos |
| Cleaning | Dry cloth only; soft lint-free cloth for lenses |
| Safety | Do not look at IR light directly; avoid flammable items; use specified batteries |
| Warranty | 12 months (extendable to 18 months with registration) |
Frequently Asked Questions - NVS1 Rexing
User questions about NVS1 Rexing
0 question about this device. Answer the ones you know or ask your own.
Ask a new question about this device
Download the instructions for your Binoculars in PDF format for free! Find your manual NVS1 - Rexing and take your electronic device back in hand. On this page are published all the documents necessary for the use of your device. NVS1 by Rexing.
USER MANUAL NVS1 Rexing
The information in this manual is subject to change without notice.
Rexing All Rights Reserved
www.rexingusa.com
Overview
Thank you for choosing REXING!
We hope you love your new products as much as we do. If you need assistance, or have any suggestions to improve it, please contact us.

care@rexingusa.com

(877) 740-8004
Our support team will respond you as soon as possible.
Always a surprise in Rexing.
Check us out here.
- https://www.facebook.com/rexingusa/
- https://www.instagram.com/rexingdashcam/
- https://www.rexingusa.com/support/registration/

Facebook Instagram Site Product Support

Warning
- Don't look at the IR infrared light directly, or it will damage your eyes.
- Massive power will be gathered when the infrared light is turned on. Don't aim at flammable items at a close range, otherwise it may cause fire. Please turn the infrared light off to reduce battery energy consumption.
- Please use a rechargeable battery with a rated voltage of 3.7V.
- Attempts to disassemble or repair the device without authorization will void the warranty. Please contact with Rexing customer service team in time if there is any needs.
What's in the box?
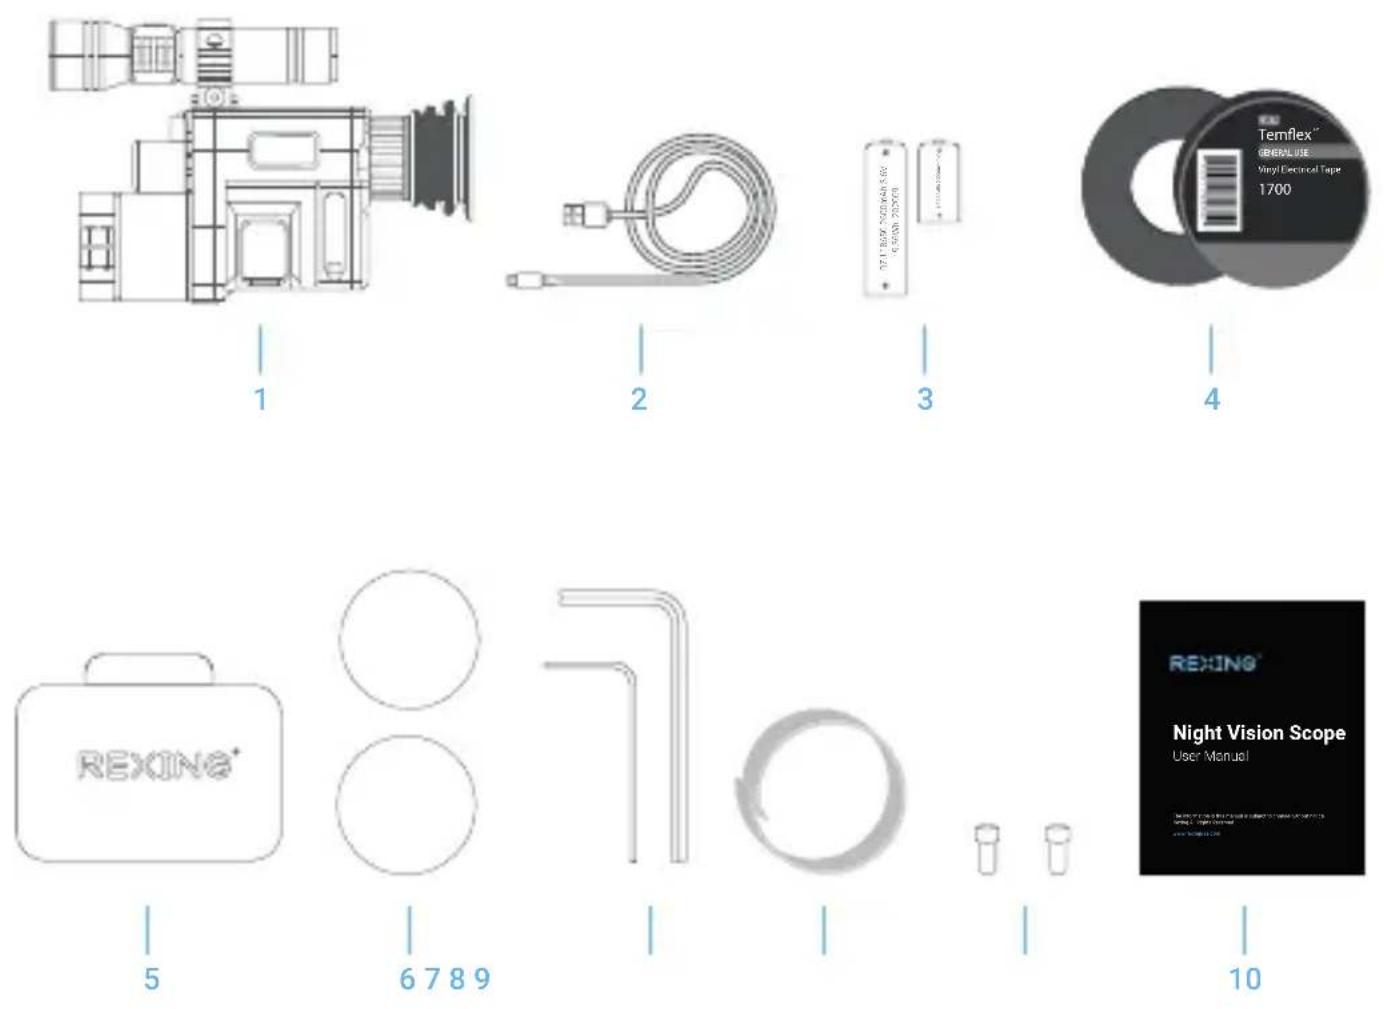
- Night Vision Scope
- USB to Mini-USB Cable
- 18650 Lithium Battery
- Tape X 1
- Case
- O-Ring X 2
- L-Shape Hex Key
- Gasket X 1
- Screws x 2
- User Manual
Product Overview
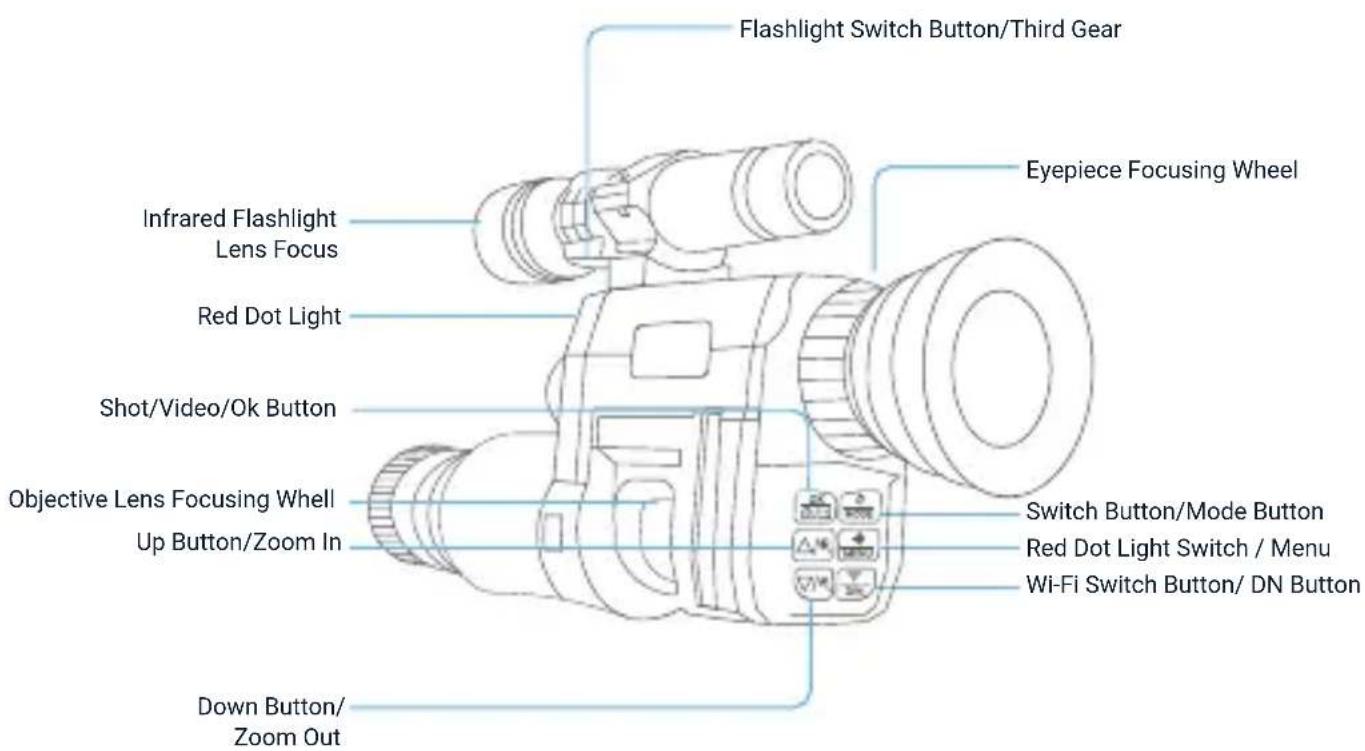
Specifications
| 1M(1280x960), VGA (640x480)Photo Resolution | |
| 960P (1280x960@30FPS), VGA (640x480@30FPS)Video Resolution | |
| F1.2 large aperture, f=16mm, FOV16°Lens | |
| 5X eyepiece magnification and adjustable refractiveEyepiece | |
| Inner screen is 1.3" 240*240 HD TFT LCDDisplay Screen | |
| 4XDigital Zoom | |
| Red dot light | 5W distance of exposure at night is up to 400 meters, to assist the gun in finding prey |
| Auto off | 3 min/ 5 min/ 10 min/OFF |
| Date Stamps | Support to set date and time. Date and time stamp on photo and video files. |
| 12 languages are optionalLanguage | |
| Micro SD card, up to 32GBStorage Media | |
| USB Port | Micro USB 2.0 Computer download |
| 3.7V, 1000MAH 18350 Lithium batteryPower Source | |
| Infrared flashlight | 5W 850 infrared lamp, which can adjust the focusing Angle and irradiation distance, 3.7V, 2600MAH 18650 lithium battery. |
| Operation Temperature | -4°F to 140°F |
| Storage Temperature | -22°F to 158°F |
| 6.7"x4.8"x2"Dimensions |
Install Batteries
Unscrew the battery cover and use an 18350 lithium-ion rechargeable battery with a rated voltage of 3.7V, and install it with the positive electrode facing inward to ensure that the battery cover is tightened.
Insert/Remove a Memory Card
- Please prepare a Class 10 Micro SD card up to 32GB, sold separately in advance.
- Open the card slot cover.
- Insert the Micro SD card into the slot. Make sure the direction is right. Never insert the card forcibly.
- Format the Micro SD card, this can improve the compatibility of Micro SD card.
- To remove the card from the memory card slot of the device, press the edge of the memory card in gently, the card will popped out. Then remove the card.
Note:
The device will prompt "Please insert SD card" if the Micro SD card is not installed.
Adjustments
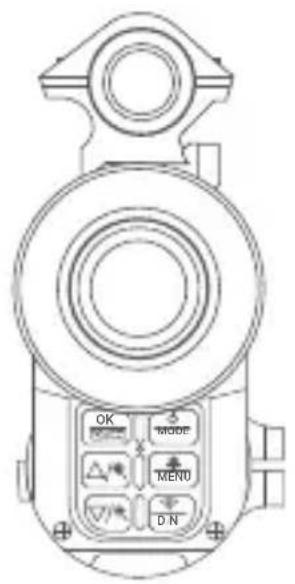
A simple test can be taken to check the functions of the device after the installation of battery. First, rotate and adjust the eyepiece diopter adjustment ring until you see the four-character icon on the screen (there's no need to see a clear image), then rotate the objective lens adjustment ring until you can see your target clearly.
Second, switch between different modes and test the red dot aiming positioning light and the flashlight with the IR light.
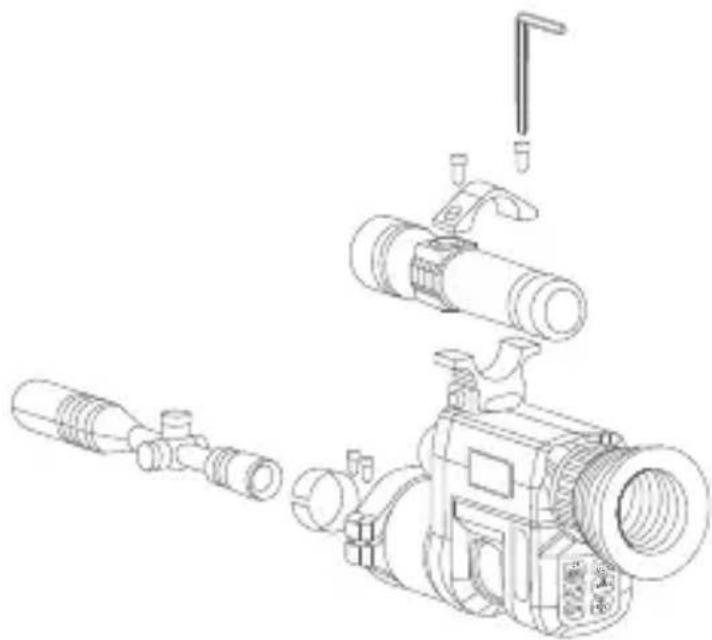
Match with Rifle Gun Scope Sight
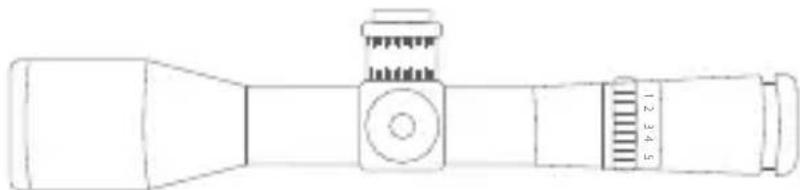
The external interface of the riflescope in the market is of different sizes. Considering the universality of the market, this product is equipped with a thick ring and a electrical insulating tape so that the external interface size of the universal riflescope is 39-45mm.
natural_image
Technical line drawing of a precision optical device with no visible text or symbolsYou can use a hexagonal wrench to tighten the screws. The operation is simple and easy to use.
natural_image
Line drawing of a video camera assembly with multiple lenses and adjustment knobs (no text or labels)Basic Operations
Turn On or Turn Off
Long press the button 📄 for 3 seconds to turn on the night vision function. Long press the power button 📄 again for 3 seconds to turn off the night vision function.
Changing the Modes
The night version has 3 different modes: photo mode, video mode and playback mode. Press the Mode button 📁 MODE can change mode.

Photo Mode
For taking still photos.

Video Mode
For recording video.

Playback Mode
For playing the recorded files.
Taking Pictures
- Turn on the device, the default is video mode. Press the Mode button 📄 to switch to photo mode.
2. Zooming:
Pressing the ▲ or ▼ button to zoom in or zoom out the image, the value of magnification level will appear on the LCD screen.
3. Taking Photos
• View your subject via the LCD screen.
- Adjust the focus by turning the focus wheel until the screen display is the clearest.
- For night or insufficient light use, short press the button 📄 to switch to infrared black and white mode. Long press the on/off button of the flashlight to turn on the infrared light, at this time, you can get the view on the screen. When you short press the flashlight, you can switch button to turn from weak to bright and then to strong light. Stretch or pull back the flashlight lens to adjust the brightness and range of the infrared light for viewing.
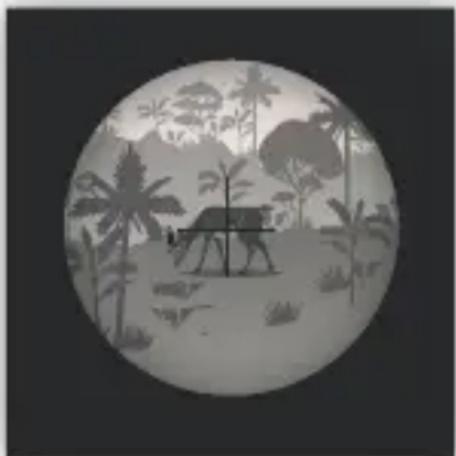
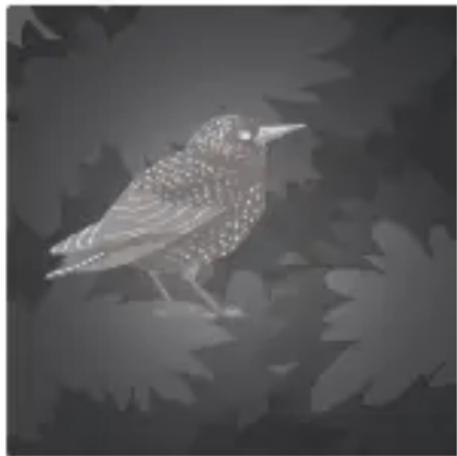
- Short press the menu button 📁, you can select the cross line to turn off the "cross line". By default, turn on the "cross line" to aim prey as shown in the below picture. (If you have an external rifle scope, you can adjust the up, down, left, and right knobs of the rifle scope so that the rifle scope overlaps with the device's cross line, and then turn off the device's cross line).
natural_image
Circular grayscale illustration of a beach scene with palm trees and a small vehicle (no text or symbols)- Long press the menu button MENU of the device to turn on the infrared auxiliary aiming red dot indicator (as shown in the right picture).
natural_image
Illustration of a bird perched on a branch surrounded by leafy leaves (no text or symbols)- Press the button OK to take photos
Recording Video
- Turn on the device, the default is Video mode. If not, press the Mode button to switch to Video mode.
2. Zooming:
Keep pressing the ▲ or ▼ button to zoom in or zoom out the image, the value of magnification level appears on the LCD screen.
3. Start Recording:
• View your subject via the LCD screen.
- Adjust the focus by turning the focus wheel until the screen display is the clearest.
- For night or insufficient light use, short press the button D_N to switch to infrared black and white mode. Long press the on/off button of the flashlight to turn on the infrared light, at this time, you can get the view on the screen. When you short press the flashlight, you can switch button to turn from weak to bright and then to strong light. Stretch or pull back the flashlight lens to adjust the brightness and range of the infrared light for viewing.
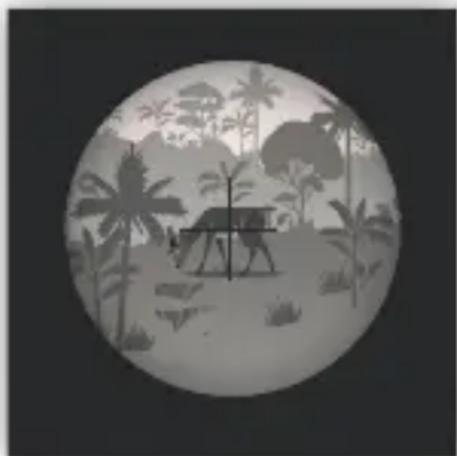
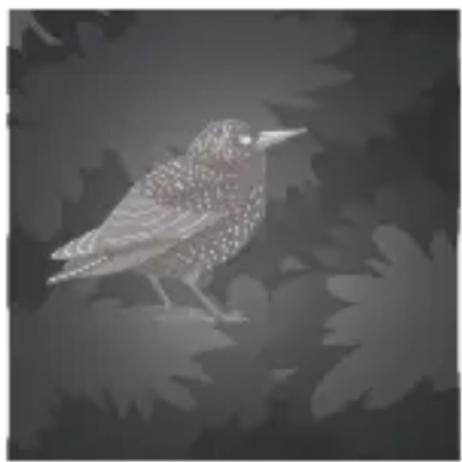
- Short press the menu button 📁, you can select the cross line to turn off the "cross line". By default, turn on the "cross line" to aim prey as shown in the below picture.(If you have an external rifle scope, you can adjust the up, down, left, and right knobs of the rifle scope so that the rifle scope overlaps with the device's cross line, and then turn off the device's cross line).
natural_image
Circular grayscale illustration of a tropical beach scene with palm trees, a small tent, and distant houses (no text or symbols)- Long press the menu button 📁 of the device to turn on the infrared auxiliary aiming red dot indicator (as shown in the right picture).
natural_image
Illustration of a bird perched on a leafy background (no text or symbols)- Press the button OK to record
4. Finish recording
- Press the button OK again to stop recording.
- The device will stop recording automatically once capacity of the memory card is full.
Settings in Photo and Video Mode
Press the menu button 🖱️ in photo or video mode, can change the settings.
FunctionMenu
| Set the photo resolution. Options: [1.3M]/[VGA]Photo Resolution | |
| Set the resolution. Options: [960]/[VGA].Resolution | |
| Choose the night sensitivity. Options: [Low]/[Middle]/[High].Night Sensitivity | |
| Choose the Display mode. Options: [Full]/[Normal].Display Mode | |
| Options: [ON]/[OFF].Cross Line | |
| Language Setting | Set OSD (on-screen) language. Options: [English]/[Simplified Chinese] / [Traditional Chinese] / [Japanese]. |
| Date and Time | Set the date and time of device. |
| Auto Power-Off | Options: [1min]/[3 min]/ [5 min]/ [10min] / [OFF]. |
| Options: [50Hz]/[60Hz] Frequency | |
| Options: [YES]/[NO]Date Label | |
| Format | Format your Micro SD card. Format Micro SD card will delete all files including the protected files. Please copy the important files before confirming. Options: [Yes]/[No]. |
| Options: [Yes]/[No].Restore Factory | |
| Wi-Fi Password | 9 digit password can be set Password consists of uppercase and lowercase letters and numbers. |
| Version | 20201030 V001 |
Playback
- Turn on the device, press the Mode button ☐ to switch to playback mode.
- Press Up/Down button to view photos and video files.
-
Playback the video:
-
Press the button OK to start playing the video files.
- Press the button OK again to have a pause.
- Press Menu button → to stop the current video playing. In playback mode, press the menu button to display the playback menu. Press the up/down keys to select "Delete Current", "Delete All", "Lock Current", "All Lock", "Unlock Current", "Unlock All". Press the shutter button to select an item to enter the option interface.
Playback Menu List
FunctionMenu
| Delete the current file. Options: [Yes]/[NO]]Delete This | |
| Delete all files in memory card. Options: [Yes]/[NO] Delete All | |
| Lock the current file. Options: [Yes]/[NO]Lock This | |
| Lock all files in memory card. Options: [Yes]/[NO]Lock All | |
| Unlock the current file. Options:[Yes]/[NO]Unlock This | |
| Unlock All | Unlock all files in memory card. Options: [Yes]/[NO] |
Remote Control by Mobile App/Wi-Fi Connecting
Digital Aim
This device can be remotely operated almost full functions via tablets and smartphones. Before performing remote control of this device, an APP named "Digital Aim" should be downloaded from "Apple App Store" or from "Google Play Store" and installed to your tablet and/or smartphone.
Connect of Camera and Tablet/ Smartphone via Wi-Fi
- Long press the Mode Button MODE to turn on the device.
- Press Wi-Fi button to enter Wi-Fi mode (Wi-Fi icon is displayed on LCD screen).
- Open the Wi-Fi connection interface on your smartphone, find account "NV_xxxxxxxxxxxxx", enter initial password "123456789" to connect the Wi-Fi.
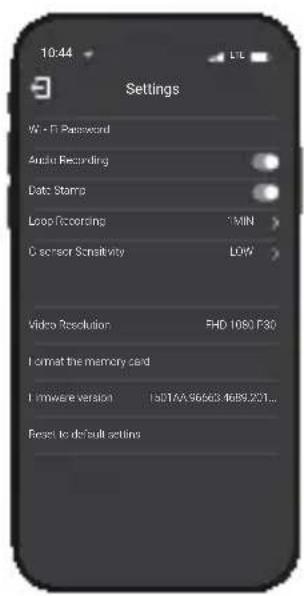
- After the Wi-Fi connection is successful, return to the main interface of the phone, find the APP with the "Digital Aim" icon and click to enter the APP interface. You can do functional operation in the App. Such as View images in real time, settings, videos, photos, pictures, video files, view, download, delete, etc.
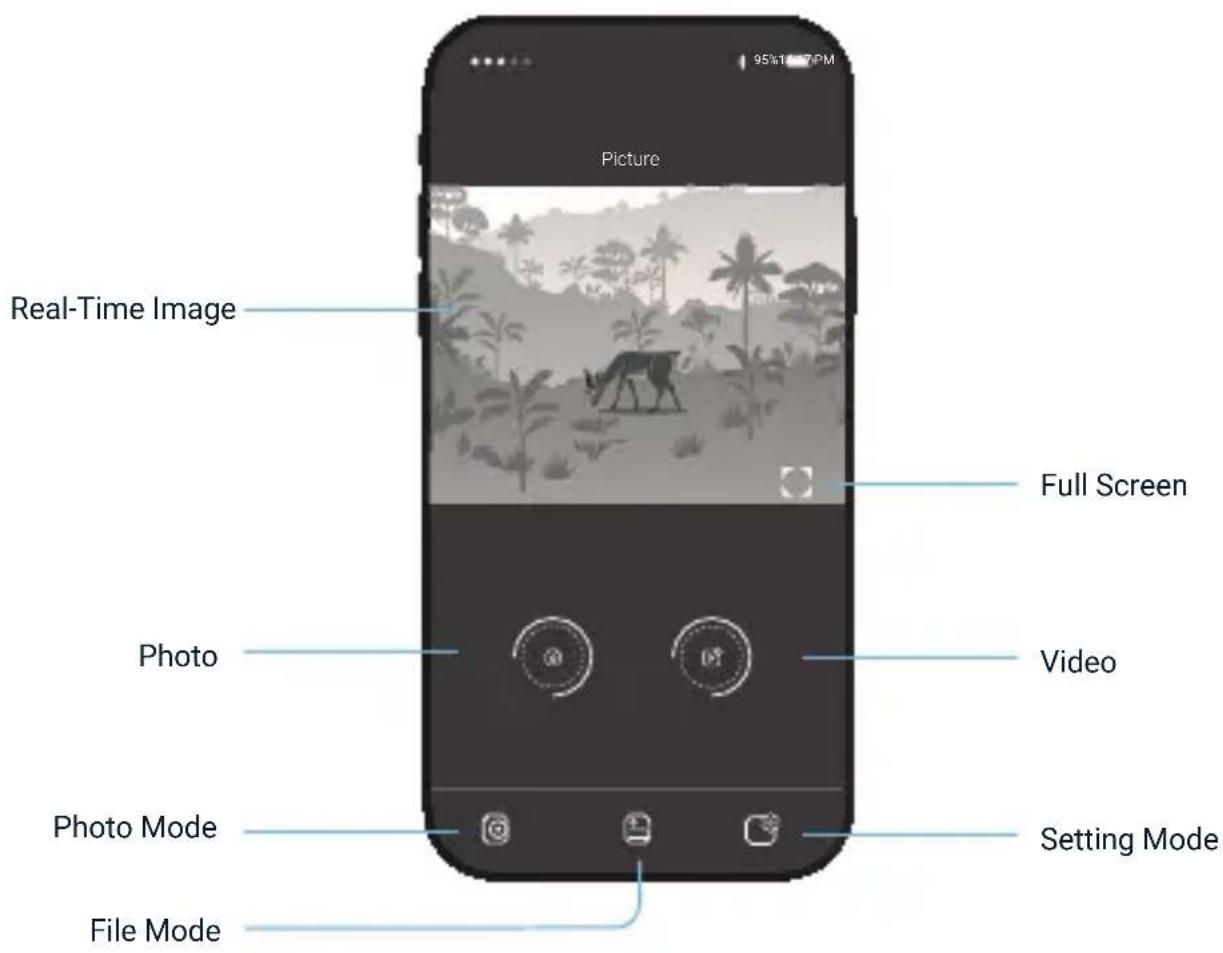
Photo Mode
a. View the current real-time image;
b. Click the Video button to record in real time. Click again to stop recording; Click the photo button to switch to the photo mode and click again to take a real-time photo;
File Mode
a. You can view and play remote photos and video files in the Micro SD card of the device. Click the "√" button in the upper right corner to select, download and delete all files;
b. To view and play the local photos and video files that have been downloaded to the mobile phone, click the "√" button in the upper right corner to select all the files, download and delete them;
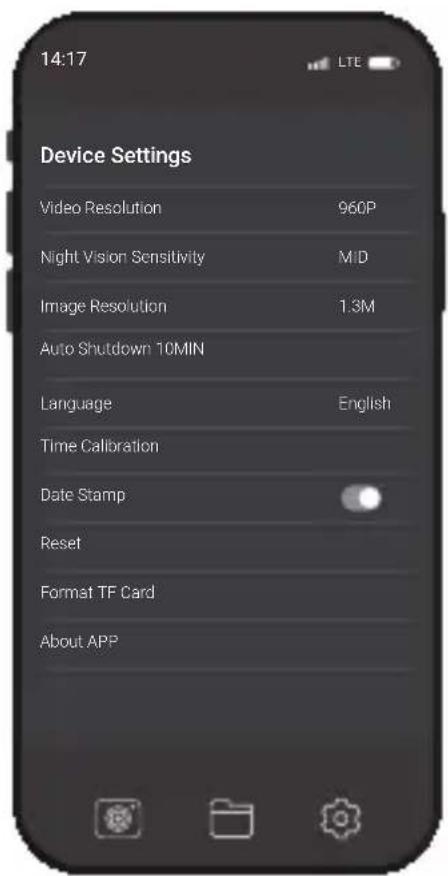
Setting Mode
a. The time of the product can be calibrated with one click;
b. Can set the menu parameters in the product remotely;
c. After setting finished in APP, press DN button to exit the Wi-Fi mode.
Download files to PC
Photos and videos not only can be downloaded directly to smartphones and tablets through the APP, but also can download files from the device to a computer as below:
- By inserting the memory card into a card reader.
- By connecting the device to a computer using the supplied USB cable.
Using a Card Reader
- Eject the memory card from the device and insert it into a card reader. Then connect the card reader to a computer.
- Open [My Computer] or [Windows Explorer] and double-click the removable disk icon that represents the memory card.
- Copy images from the card into a directory of your choice on the computer's hard disk.
Connecting the Device to a PC through the USB Cable
- Turn on the night vision. Connect it to a computer through the supplied USB cable.
- When connecting to the computer, it will appear "MSDC" on the screen.
- Open [My Computer] or [Windows Explorer]. A "Removable Disk" appears in the drive list. Double-click the "Removable Disk" icon to view its contents. Files stored on the camera are located in the folder named "DCIM".
- Copy the photos or files to your computer.
Notes on Cleaning
- Only use a dry cloth to clean the exterior of the device.
• To avoid damaging the electronics, do not use any cleaning fluid. - Clean the eyepieces and/or lenses only with a soft, lint-free cloth, (e.g. microfiber cloth).
- To avoid scratching the lenses, use only gentle pressure with the cleaning cloth.
- Protect the device from dust and moisture. Store it in a bag or box.
- Remove the batteries from the device if it is not used for a longer time.
Warranty & Support
Warranty
The Rexing Night Vision Scope comes with a full 12-month warranty. If you register your product on our official site (https://www.rexingusa.com/support/registration), you can extend the warranty to 18 months.
Support
If you have any questions regarding your product, please do not hesitate to contact us at care@rexingusa.com, or call us at (877) 740-8004. Queries are typically answered within 12-24 hours.
Your opinion matters
Rexing is firmly committed to always improving our products, services, and user experience. If you have any thoughts on how we can do even better, we welcome your constructive feedback and suggestions.
Connect with us today at care@rexingusa.com
Thank you for choosing Rexing!
FCC ID: 2AWNU-NV3XXX
This device complies with part 15 of the FCC Rules. Operation is subject to the following two conditions: (1) This device may not cause harmful interference, and (2) this device must accept any interference received, including interference that may cause undesired operation.
Changes or modifications not expressly approved by the party responsible for compliance could void the user's authority to operate this equipment.
REXING®



MADE IN CHINA
- Overview
- Thank you for choosing REXING!
- Check us out here.
- Warning
- What's in the box?
- Product Overview
- Install Batteries
- Insert/Remove a Memory Card
- Note:
- Adjustments
- Match with Rifle Gun Scope Sight
- Basic Operations
- Turn On or Turn Off
- Changing the Modes
- Photo Mode
- Video Mode
- Playback Mode
- Taking Pictures
- Zooming:
- Taking Photos
- Recording Video
- Start Recording:
- Finish recording
- Settings in Photo and Video Mode
- Playback
- Remote Control by Mobile App/Wi-Fi Connecting
- Connect of Camera and Tablet/ Smartphone via Wi-Fi
- File Mode
- Setting Mode
- Download files to PC
- Using a Card Reader
- Connecting the Device to a PC through the USB Cable
- Notes on Cleaning
- Warranty & Support
- Warranty
- Support
- Your opinion matters
- FCC ID: 2AWNU-NV3XXX
Brand : Rexing
Model : NVS1
Category : Binoculars