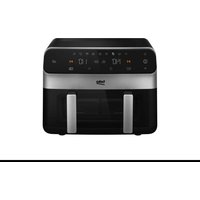
USER MANUAL FRL6488 BEKO
FRL 6488
EN - DE - FR - ES - RO - IT - PL - SR - HR - SQ - SL - BG - AR
CONTENTS
ENGLISH 03-19
DEUTSCH 20-40
FRANÇAIS 41-57
ESPAÑOL 58-76
ROMÂNĂ 77-97
ITALIANO 98-116
POLSKI 117-135
СРБИН 136-152
HRVATSKI 153-169
SHQIPTARE 170-186
SLOVENŠČINA 187-203
БЪЛГАРСКИ 204-222
Please read this guide first!
Dear Customer,
Thank you for choosing a Beko product. We want you to get the most out of this appliance which has been manufactured with state of the art technology. Please make sure you read and understand this guide and supplementary documentation fully before use and keep it as a reference. If you give the appliance to someone else, give them this user manual as well. Observe all warnings and information in this guide and follow the instructions.
Keep in mind that this user guide may apply to several product models. The guide clearly indicates any variations of different models.
Symbols and their meanings
The following symbols are used throughout this guide:

Important information and useful tips regarding the usage of the device.

WARNING: Warnings regarding hazardous situations related to life and property safety.

Food-grade appliance.
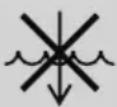
Do not immerse the appliance, the power cord or the plug in water or in any other liquids.

WARNING: Warning about hot surfaces.
1 Important safety and environmental instructions
This section contains safety instructions to prevent hazards that can result in injury or property damage.
Failure to follow these instructions will void any warranty.
1.1 General safety
• This appliance complies with international safety standards. • This appliance is intended for use at home and in applications such as;
- In the staff kitchens of stores, offices, and other working environments;
- In farmhouses;
- By customers in hotels, motels, or other accommodation facilities;
- In bed and breakfast type locations.
- This appliance cannot be used by children between the ages of 0-8. The appliance can only be used by children at and above the age of 8 under supervision. This appliance may be used by people who have limited physical, auditory, or mental skills, or lack of experience and knowledge, if they are provided with supervision
or information about the safe use and hazards encountered.
- Cleaning and user maintenance should not be carried out by children unless they are over 8 years of age and under supervision.
• Even if they are under supervision, do not allow children to play with the appliance.
- Keep the appliance and its power cord out of the reach of children under the age of 8.
- Position the handles of the cooking appliances (if any) so that hot liquids do not spill and place them securely.
- Make sure that the voltage indicated on the appliance is the same as the mains voltage in your home.
- Use the appliance with an earthed plug.
- Do not use the appliance with an extension cord.
- Do not place your appliance on or near heat sources such as ovens and stoves.
• To avoid damage to the power cord, prevent it from being pinched, crimped or rubbed against sharp edges.
- Do not unplug the appliance
1 Important safety and environmental instructions
by pulling on the cord.
- Do not immerse the appliance or its power cord in water.
- Do not leave the appliance unattended while it is plugged in.
- Do not disassemble the appliance.
- Use only original parts or parts recommended by the manufacturer.
- Unplug the appliance before cleaning and dry all parts completely after cleaning.
- Clean the appliance in accordance with the instructions in the Cleaning and Maintenance section.
- Do not put large pieces of food in the appliance as it may cause a fire.
- Do not touch the plug of the appliance while your hands are damp or wet.
- Do not use the appliance in humid environments.
- Do not move the appliance while it is in use and the oil inside is hot.
- Do not use the appliance in or near explosive or flammable environments and substances.
• To avoid the risk of burns, do not touch hot surfaces. - Let the appliance cool down in a safe place out of the reach of children. - Do not block the air inlet and air outlet openings while the appliance is operating. - Do not lean over while the appliance is in use. Hot air rises from the appliance during use! - The appliance becomes hot during use. To avoid the risk of burns, do not touch hot surfaces. - Make sure that the room is adequately ventilated during use. - In case of fire, unplug the appliance. - Do not pour water on the appliance, as it may cause electric shock hazard. - Do not operate the appliance with an external timer or a separate remote control system. - Only use metal kitchenware with insulated handles with the appliance. - Do not put anything on the appliance while it is operating or hot.
1 Important safety and environmental instructions
- To disconnect, turn the timer dial and temperature dial to the off position. Then unplug the appliance.
- If you keep the packaging materials, keep them out of the reach of children.
- If the power cord is damaged, it must be replaced by the manufacturer, its service agent or similarly qualified persons to avoid potential hazards.
1.2 Compliance with the WEEE Directive and Disposing of the Waste Product:
This product complies with EU WEEE Directive (2012/19/EU). This product bears a classification symbol for waste electrical and electronic equipment (WEEE).
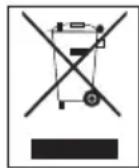
This symbol indicates that this product shall not be disposed with other household wastes at the end of its service life. Used device must be returned to official collection point for recycling of electrical and electronic devices. To find these collection systems please contact to your local authorities or retailer where the product was purchased. Each household performs important role in recovering and recycling of old appliance. Appropriate disposal of used appliance helps prevent potential negative consequences for the environment and human health.
1.3 Compliance with RoHS Directive
The product you have purchased complies with EU RoHS Directive (2011/65/EU). It does not contain harmful and prohibited materials specified in the Directive.

Packaging materials of the product are manufactured from recyclable materials in accordance with our National Environment Regulations. Do not dispose of the packaging materials together with the domestic or other wastes. Take them to the packaging material collection points designated by the local authorities.
1.5 Important points for saving energy
Comply with the times recommended by the manual while using the appliance. Unplug the appliance after each use.
2 Your Less Oil Cooker
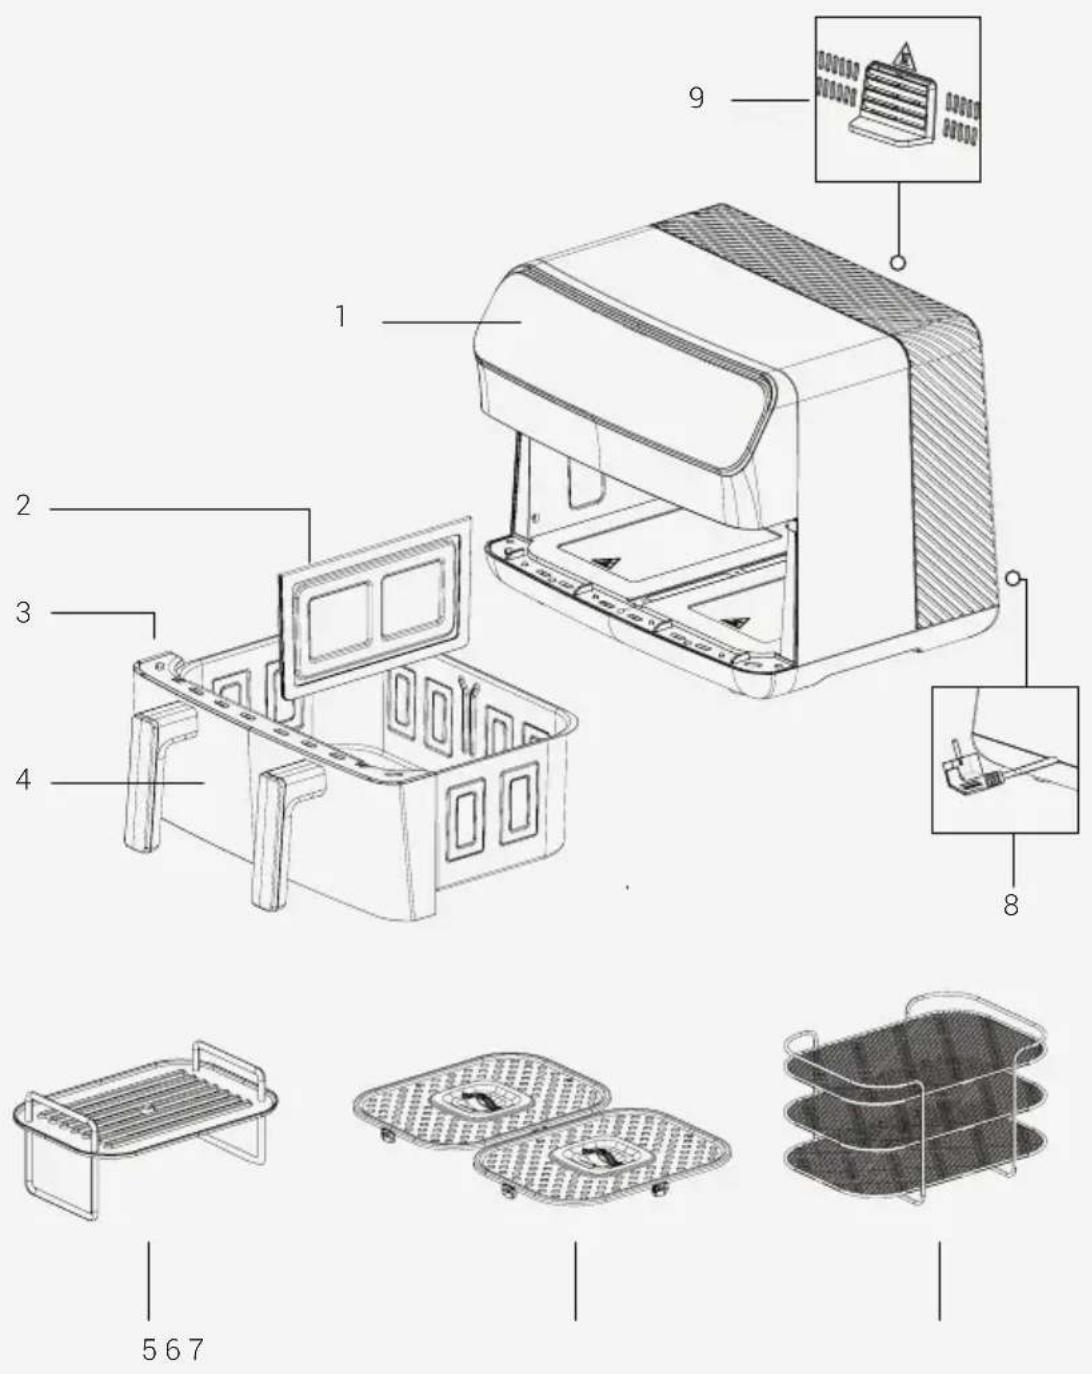
Signs on the appliance and values specified in the documents provided with the product have been obtained under laboratory conditions in accordance with the relevant standards. The values may vary depending on the use of the appliance and ambient conditions. Power values have been tested at a voltage of 230 V.
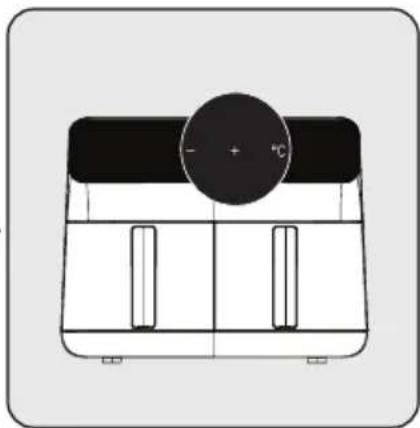
- Digital control panel
- Chamber separator
- Removable cooking chamber
- Cooking monitoring window
- Grill accessories
- Cooking rack
- Dryer
- Power cable
- Air outlet
Technical data
| Power supply | 220-240 V ~ 50-60 Hz |
| Power consumption | 2000-2400W (1200W + 1200W) |
| Chamber Capacity | 9,5 Liters (4,75 L + 4,75 L) |
3 Operation
3.1 Intended use
The appliance is intended for home use only and is not suitable for professional use.

When you use the appliance for the first time, there may be a slight emission of smoke. This is normal.
3.2 Preparing the appliance for use
- Use the appliance in an upright position on a stable, level, clean, dry and non-slip surface.
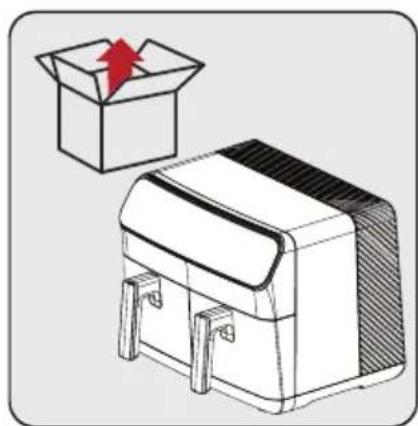
Before using the appliance for the first time, remove the packaging material and place the appliance on a flat, clean work surface.

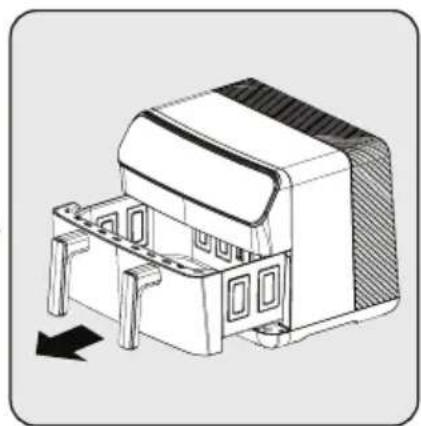
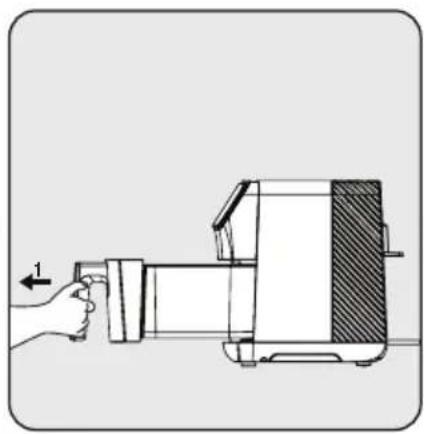
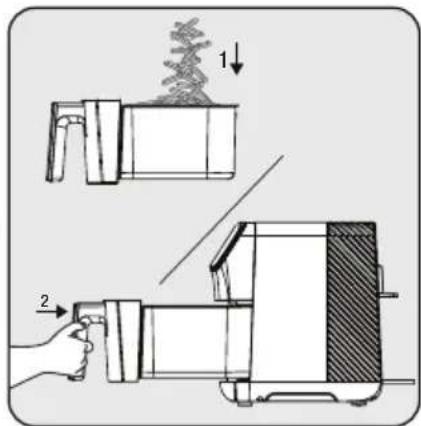
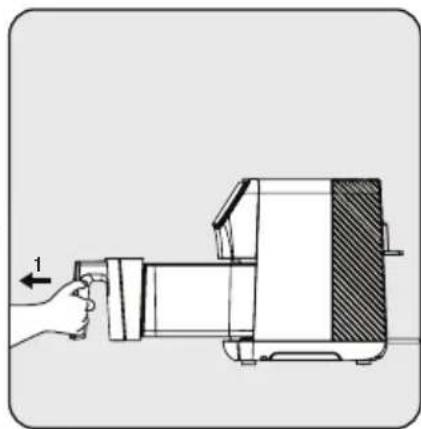
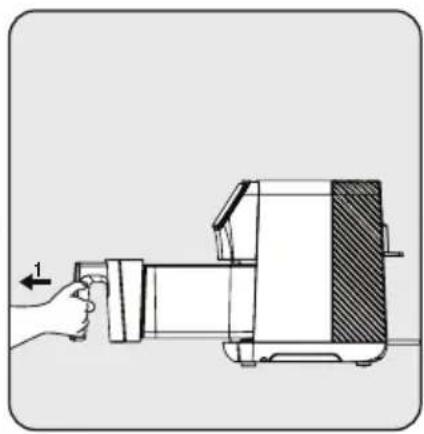
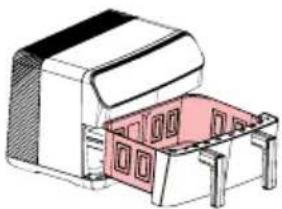
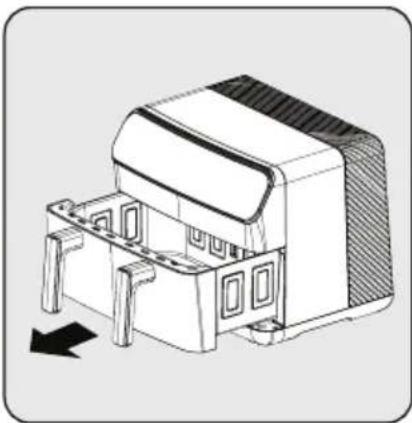
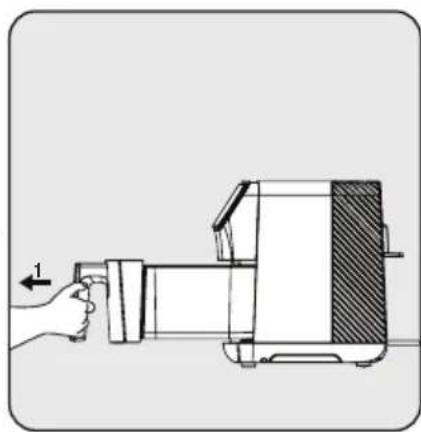
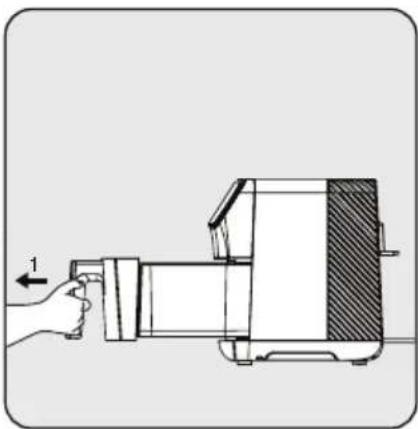
To access the removable cooking tray, firmly grip the handles and then pull the chambers out of their slots.

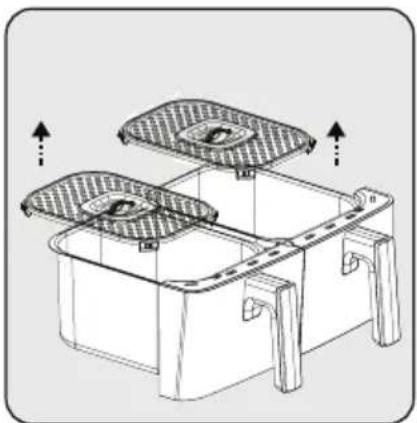
Remove the cooking accessories from the cooking chamber.
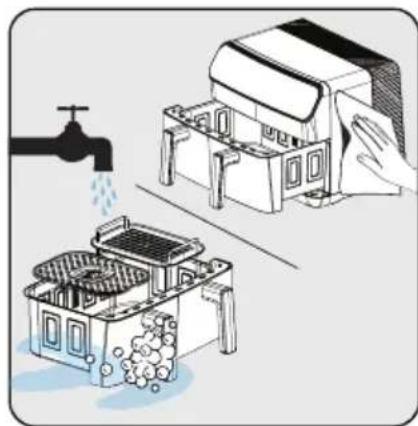
Clean the detachable cooking trays and cooking accessories using warm soapy water. Then dry the outside of the appliance and the parts you washed completely.

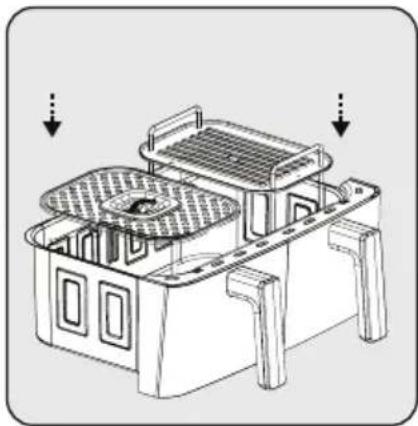
Place the accessories that you want to use into the cooking tray.

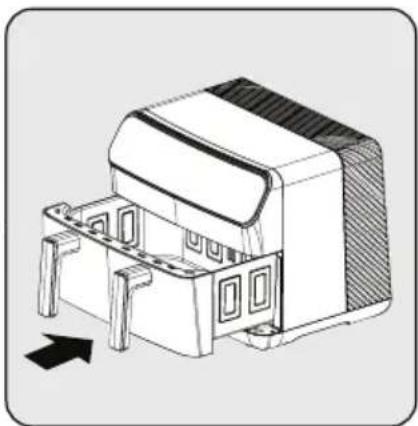
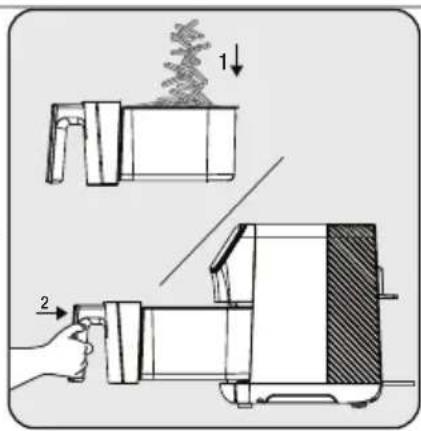
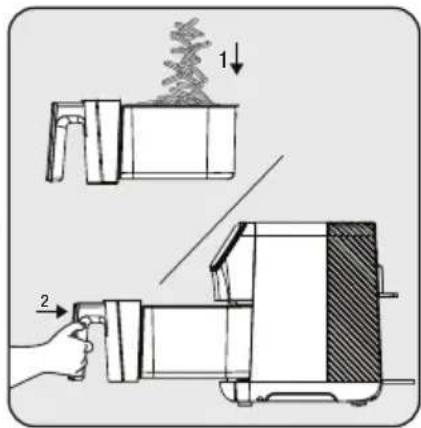
Once all components are cleaned, connect the cooking tray and the accessory to the appliance. The appliance is ready for use.

For first time use, set the appliance to "M" mode, set it to the highest temperature and let it run for 10 minutes without adding any ingredients.
3 Operation
3.3 Control panel and LED display:
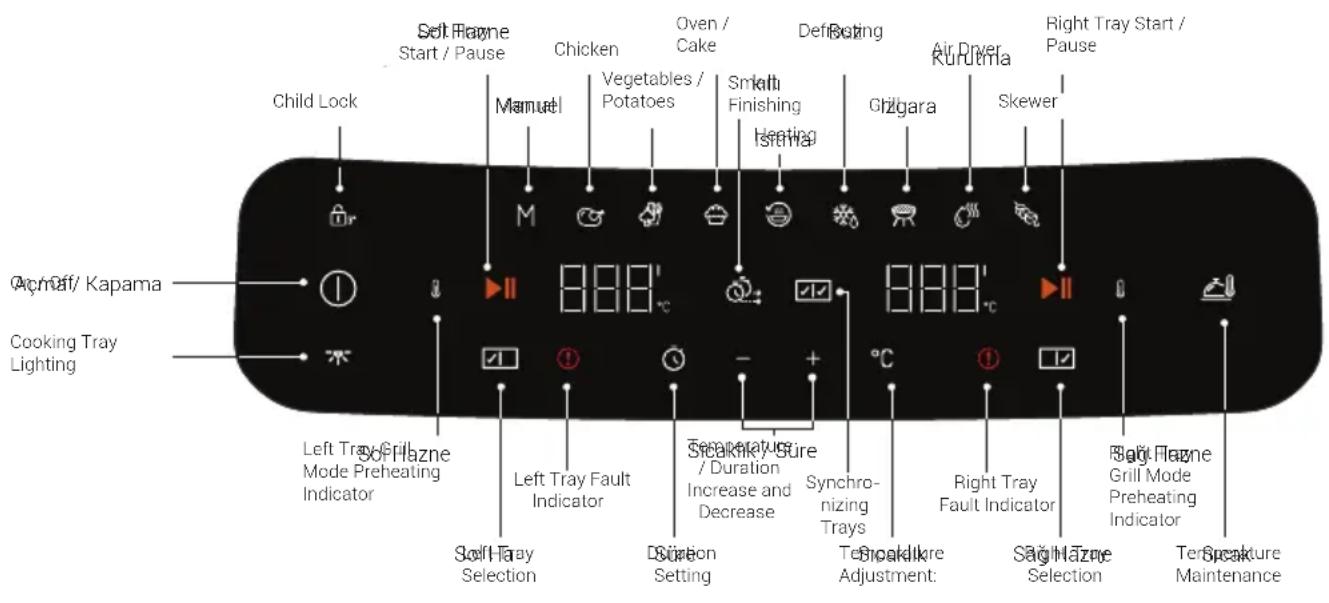
| M | Manual | Created for general use. The manual program allows you to prepare your food outside the set programs. |
 | Chicken | This program is specially designed for poultry. You can also cook seafood using this program. |
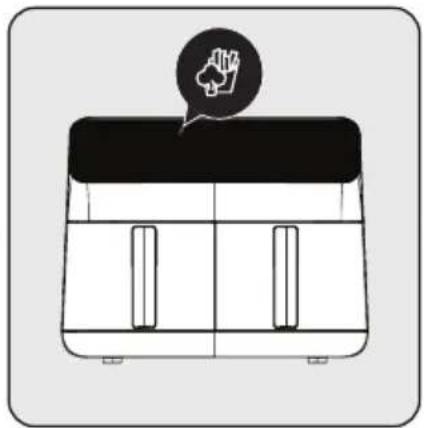
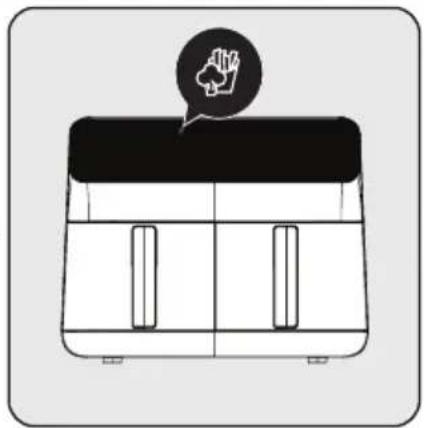
 | Vegetables | This program is specially designed for vegetables. You can use this program to fry potatoes and all kinds of vegetables. |
 | Oven/Cake | This program is specially designed for baked goods such as cakes and bread. |
 | Heating | This program is specially designed for reheating. |
 | Defrosting | This program is specially designed program for defrosting. |
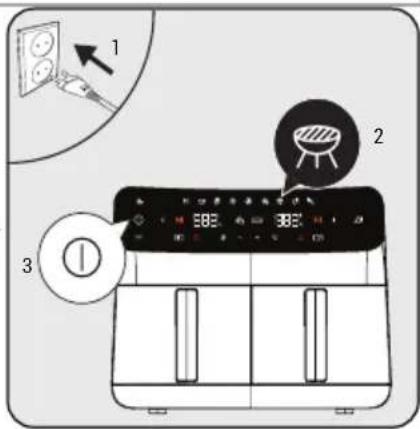
 | Grill | This program is specially designed for grilling. It is used together with the grill accessories. Provides high performance in red meat and fish. (In the grill mode there is a "preheating" option. When you start the program, 'preheating' starts first and the grill accessory must be in the chamber during this process. When the "preheating" is completed, the appliance will warn you to add the food.) |
 | Skewer | You can utilize this program specifically tailored for recipes like chicken skewers or kebabs. |
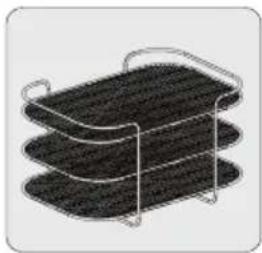
 | Air Dryer | Specially designed program for drying food. It is used together with the drying accessories. |
3 Operation
3.4 Warnings before first use

- When the appliance is in operation, and the removable cooking tray is pulled out, hot steam will be released from the air outlet and the top of the basket. Therefore, be cautious to avoid burning yourself with the hot steam.
- When using the cooking trays at high temperatures, be careful to avoid direct contact.

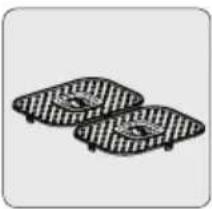
The best browning and cooking is usually achieved on the cooking rack. It is recommended to use the cooking rack for all recipes and roasts, unless the use of another accessory is recommended.
3.5 Operation

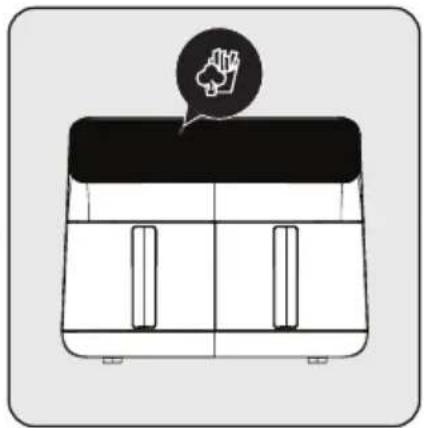
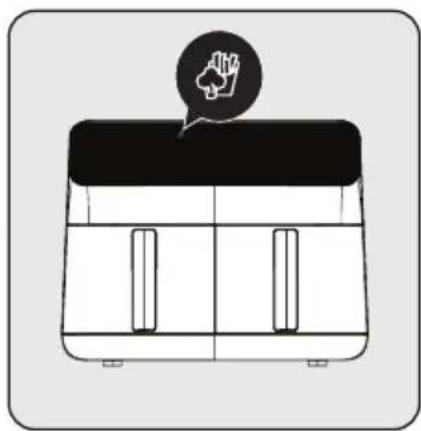
- While the device is plugged in or cooking, pressing and holding the lock symbol for 3 seconds activates the device's child lock, and the lock symbol lights up in red.
- If the child lock is active, other buttons on the screen will not work. Press and hold the lock symbol for 3 seconds to turn off the child lock.
3.5.1 Chamber separator attachment installed (both cooking trays are being used)
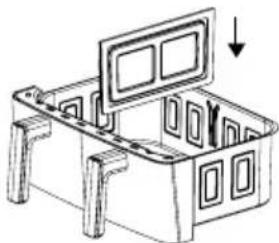
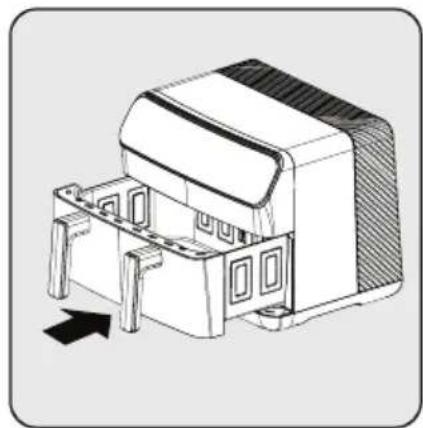
Remove the cooking tray and place it on a flat surface. Insert the chamber separator attachment into the slots on the cooking tray. Next, attach the cooking tray to the appliance and follow the steps outlined in the "3.5.3 Selecting and starting a program" section.
3.5.2 Chamber separator attachment is not installed.
Remove the cooking tray and place it on a flat surface. Remove the chamber separator attachment from its place. Next, attach the cooking tray to the appliance and follow the steps outlined in the "3.5.3 Selecting and starting a program" section.
3.5.3 Selecting and starting a program

If you want to switch to another program after starting the appliance, press and hold the "Start/Stop" key or the "Select Tray" key for 3 seconds. Then select the desired program by selecting the tray again.

- The display shows the automatically set temperatures and times according to the selected cooking functions. You can change these temperatures and times as desired.
- To cancel the cooking process, press and hold the "Start/Stop" key or the "Select chamber" key for 3 seconds. The cooking program you have selected will be cancelled.
3 Operation
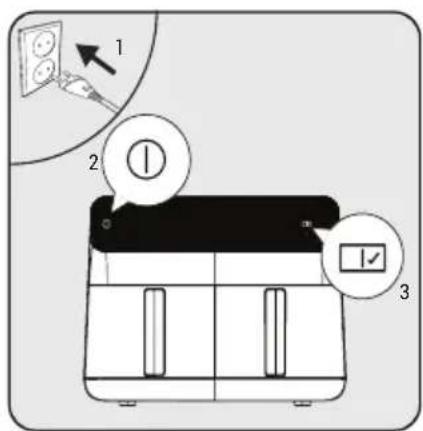
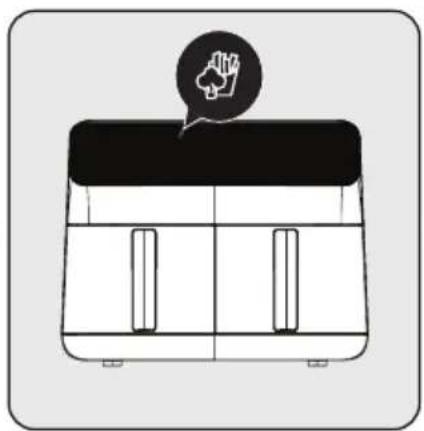
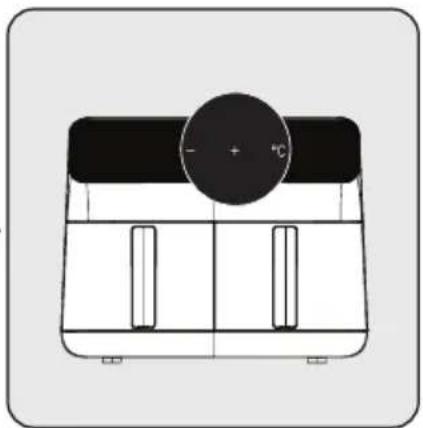
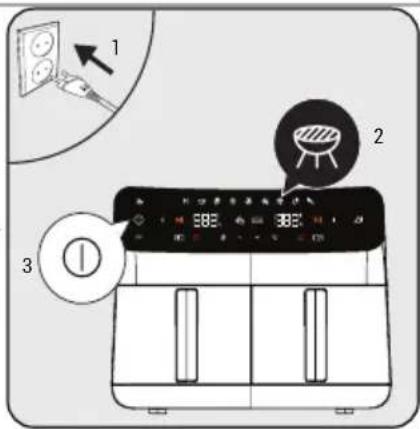
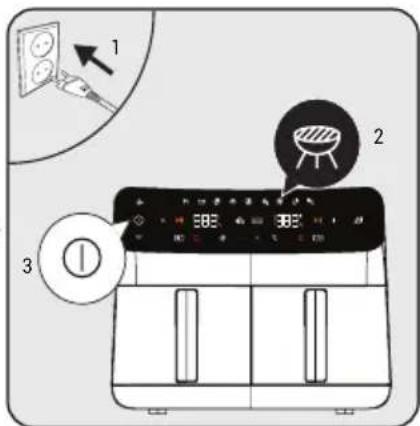
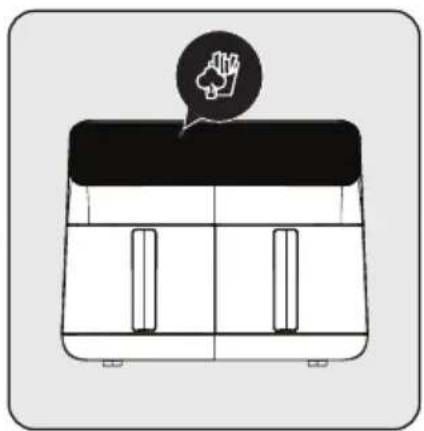
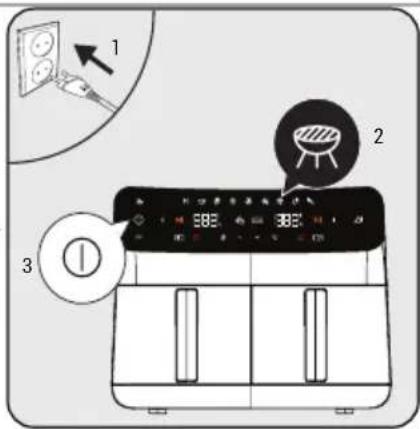
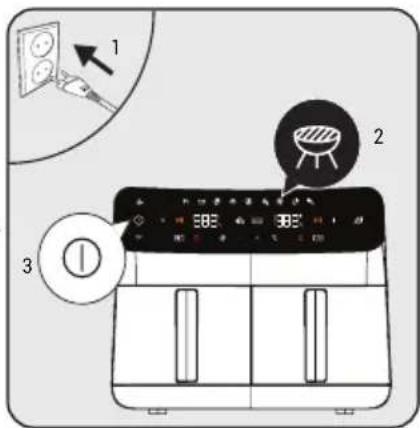
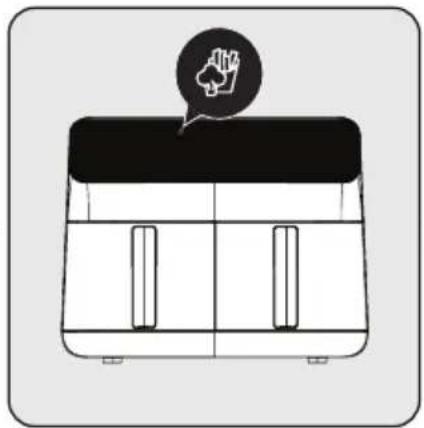
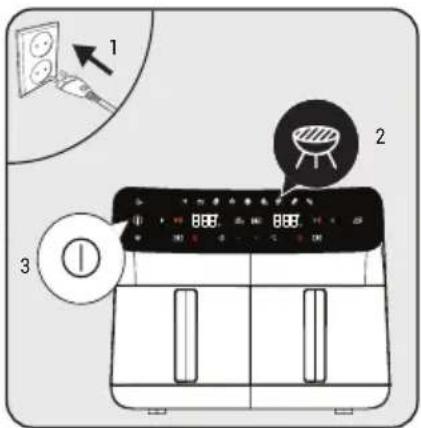
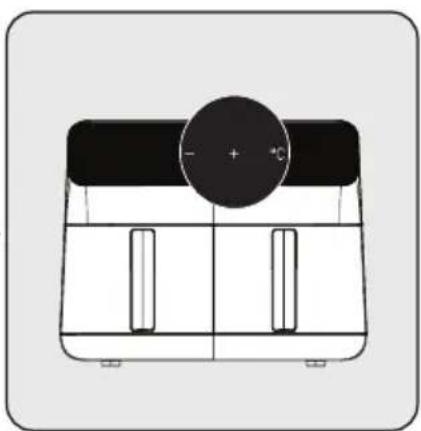
Plug in the appliance and press the on/off button. After the tray lights come on, select the desired tray. If the chamber separator is not installed, the appliance will automatically indicate the entire chamber as selected. After selecting the tray, select the desired program from the Programs menu according to what you wish to cook.
After selecting the desired program, the selected program will light up in bright light. If you want to change the program, you can select one of the dimly lit programs.
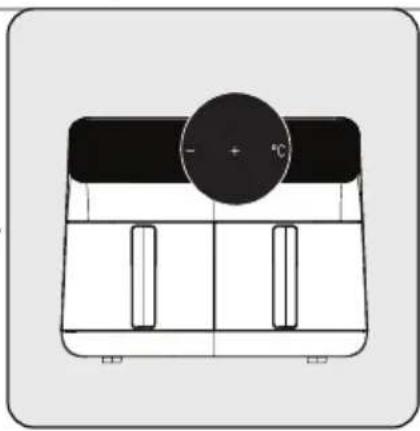
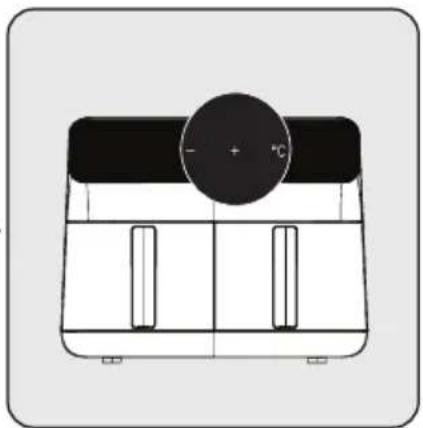
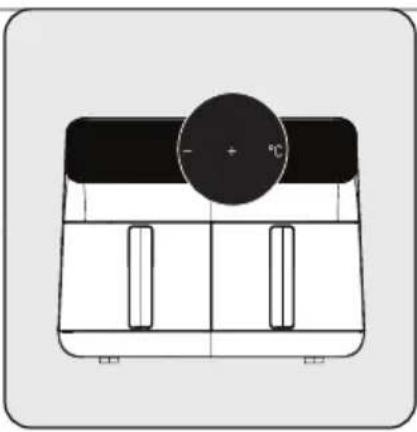
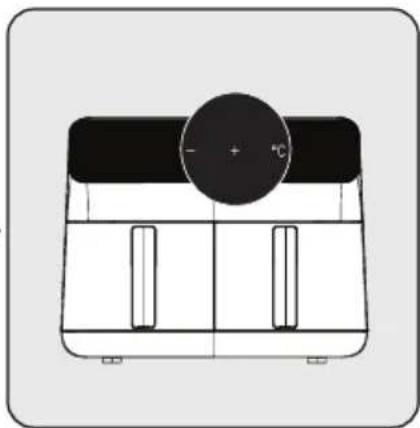
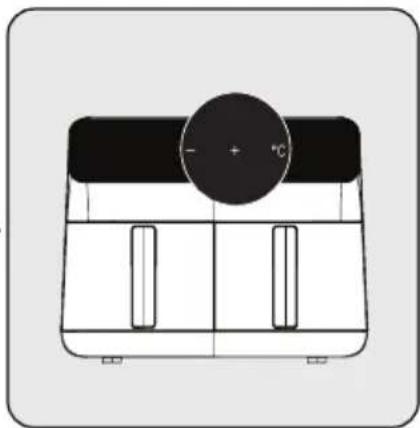
After selecting the program, you can set the temperature and cooking time by pressing the temperature and time icons.
Start the cooking process by pressing the start icon. When wishing to cook in the other chamber,
repeat the process by selecting a tray.
3.5.4 Temperature and time setting
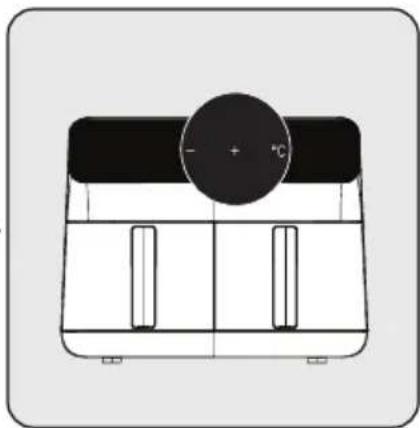
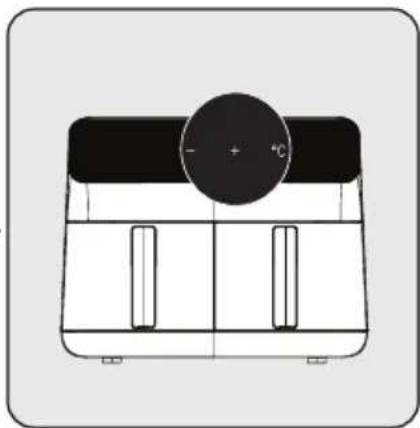
Press the ° or ' ' buttons to set the temperature or time. The " " symbol
is activated. Set the temperature and time to the desired value using the "symbol."

- The silicone of the cooking accessories is made of high temperature resistant food grade material. It prevents scratching of the chamber coating. Therefore, make sure that it does not come off during cooking.
- When pulling out the cooking tray, be careful of the hot steam inside and do not touch it with your hands as it is extremely hot.
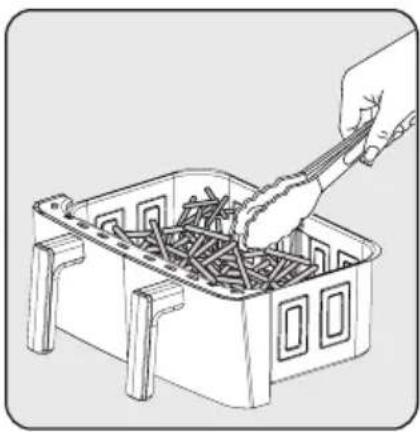
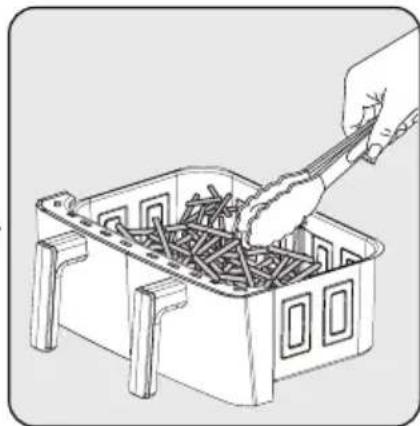
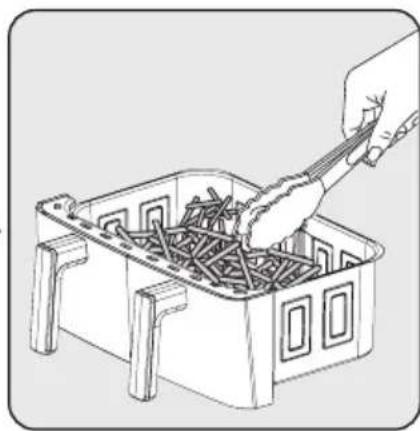
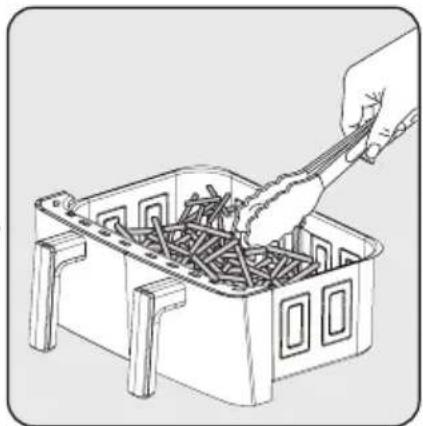
- When removing cooked food, use a tool (tongs, etc.) that will not damage the inner surface of the appliance.
3.5.5 Function settings
3.5.5.1 Smart finishing
The 'Smart Finish' function allows you to start and finish 2 different foods simultaneously at different temperatures, cooking times and cooking modes. Make sure to install the chamber separator attachment to utilize the smart finishing function.
- Prepare the cooking settings for the left tray of the appliance as described in section 3.5.1.
- Then select the right tray and adjust the cooking settings.
- Select the 'Smart Finishing' function on the appliance.
- Start the cooking process by pressing one of the start buttons. The appliance will start the cooking process to finish both trays simultaneously.
3 Operation

To select the "Smart Finish" function, the cooking process must not have started in either tray. If cooking has already started in at least one tray, the "Smart Finish" function cannot be selected.
3.5.5.2 Keeping warm
The 'Keep Warm' feature allows you to keep your food warm when it is finished cooking.
- Prepare the desired tray for cooking as described in 3.5.1. Then press the 'Start' button to start cooking.
- Once cooking has started, press the 'Keep Warm' icon. (You can also press the 'Keep warm' icon before you start cooking.)
- After the cooking process is complete, the appliance will maintain the temperature of your food.

- The keep warm function will remain active for approximately 60 minutes.
- You can also select the "Keep warm" function before starting the cooking process.
3.5.5.3 Tray Matching
With the synchronize cooking function, you can easily match the trays when you cook the same food in both trays. In order to make use of the tray matching function, ensure that the chamber separator attachment is installed.
- Prepare the left or right tray of the appliance as described in 3.5.1.
- Then select the right chamber of the appliance and press the "Synchronize cooking" icon.
- All temperatures and operating times are synchronized in both trays.
- If you press the "Start" icon, you can perform the same cooking process in two separate trays.

After activating the "Synchronize cooking" function, all changes you make in one tray are transferred to the other.
3.6 Cooking

Before placing your food into the cooking chamber, mix it with a small amount of oil using a measuring spoon. Alternatively, you can achieve better results by brushing oil onto your food.

Do not touch the removable cooking trays when they are hot, except for the handles.
3 Operation
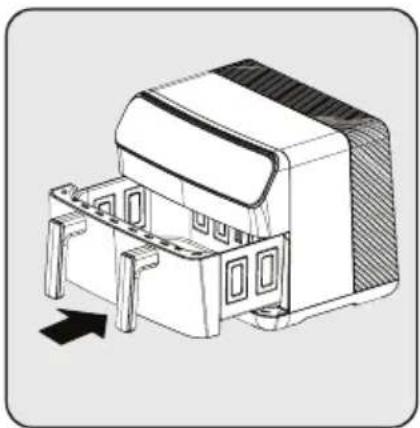
Remove the cooking tray and place it on a flat, clean surface. Place the matching accessories for your dish in the cooking tray. See 3.7 for detailed information about accessories. See 3.5 for detailed information about the chamber's double and single use.
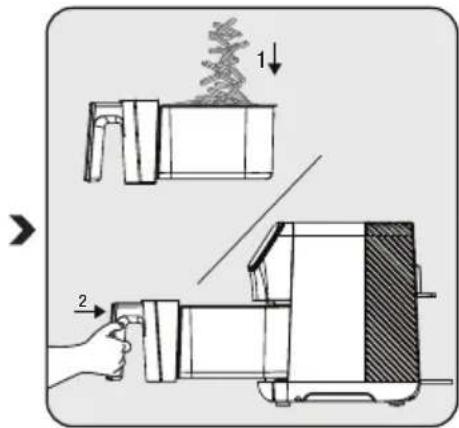
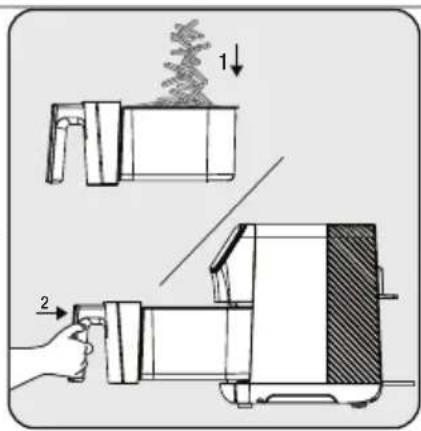
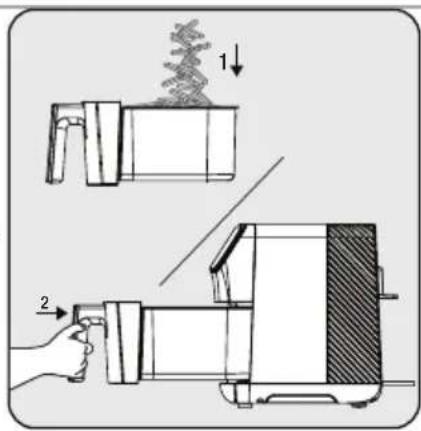
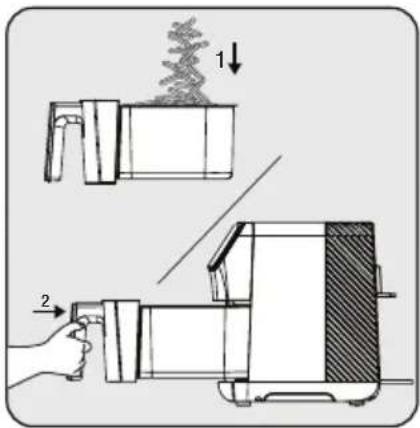
Place the food in the cooking tray. Then insert the chamber into the appliance and ensure it is securely in place.
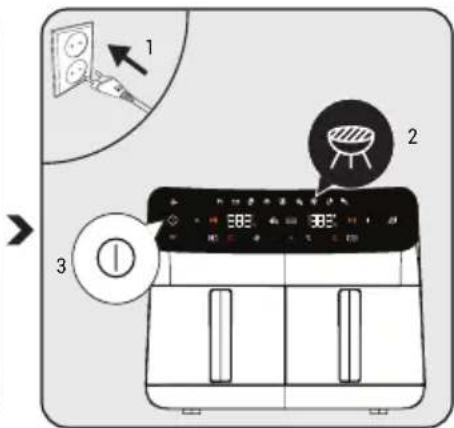
Plug your appliance in and select the desired cooking program. Then start the cooking process.
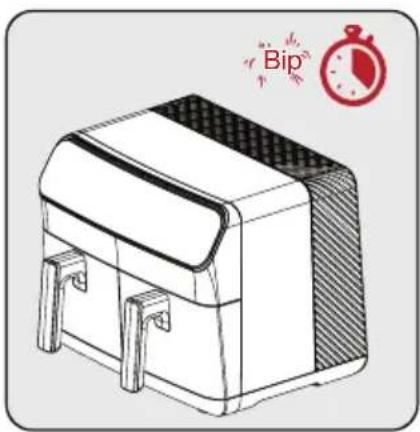
When the selected cooking time elapses, a warning tone will sound and the appliance will automatically stop cooking.
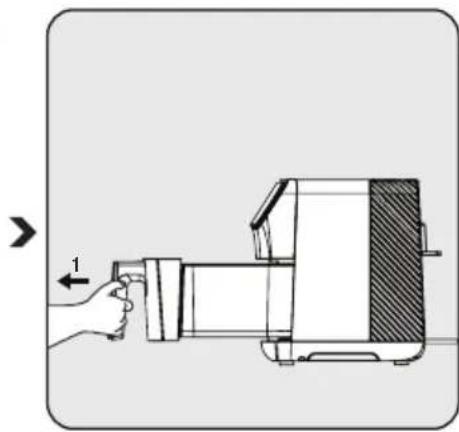
Remove the tray and check if the food is fully cooked. If it requires additional cooking time, you can prolong the cooking time a little bit more.
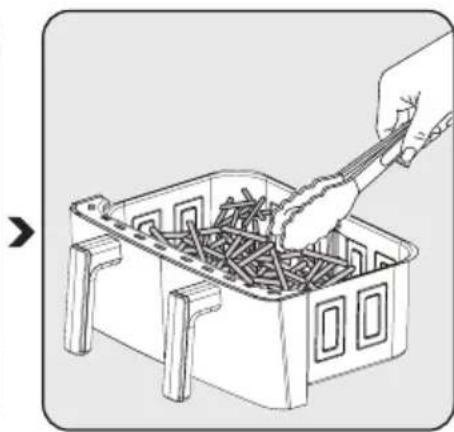
When the process is complete, transfer the cooked food to a bowl or plate.
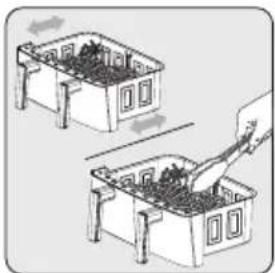
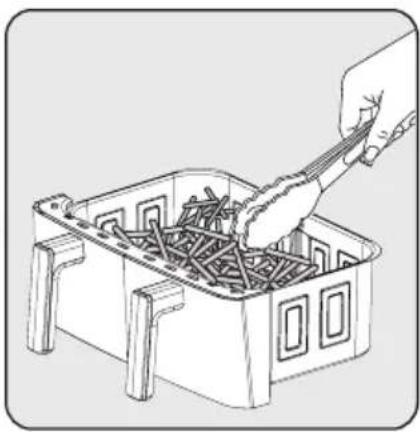
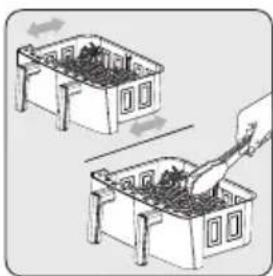
• To ensure even cooking, carefully remove and shake the cooking tray midway through the cooking process, or use tongs to turn the cooking food so as not to scratch the tray. - Do this procedure more often if you are doing a long cooking cycle or if you want crispier results.
3 Operation

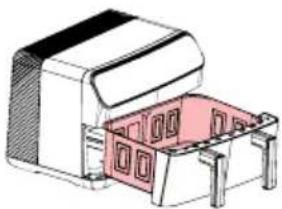
Avoid contact of the cooking basket with the outer surface of the appliance, since surface of the cooking tray (3) will be hot during and after cooking.

- Let the food rest for 5 to 10 seconds before removing it from the removable cooking chamber (3).
- Use tongs to remove coarse or soft food from the cooking tray without damaging the inner surface of the appliance.
- When one batch is ready, the appliance is immediately ready for another batch.

- Note that the appliance can become very hot during the turning process.
- Do not place the product on your worktop in such a way that it blocks the air outlet channels.
- Do not place any other product on the appliance.
3.7 Accessories

For best results, it is recommended to use the accessories.
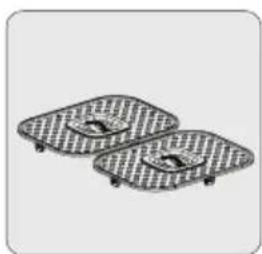
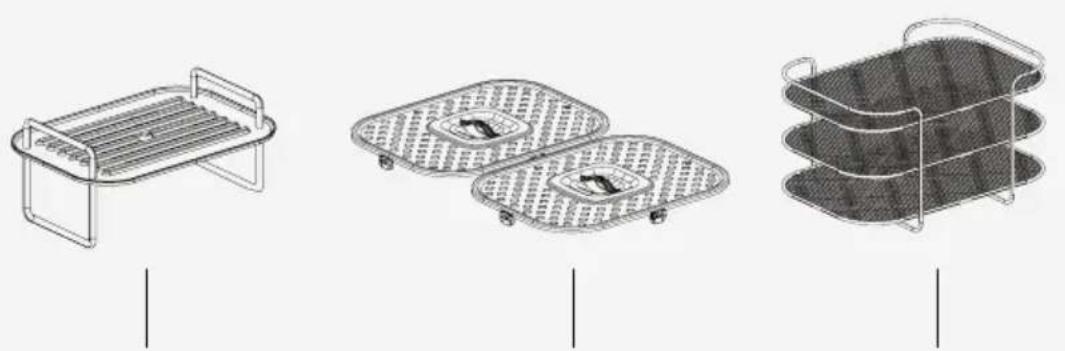
Cooking Rack
The best browning and cooking is usually achieved on the cooking rack. It is recommended to use the cooking rack for all recipes and roasts, unless the use of another accessory is recommended.
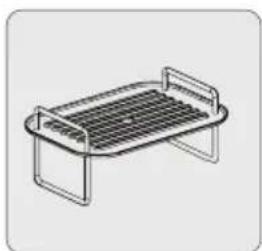
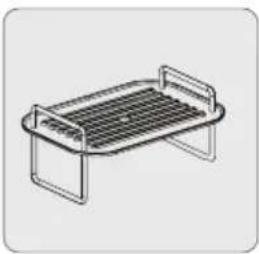
Grill Accessories
It is an accessory specially created for you to get the best results on your grills. It helps you get better cooking results for red meat and fish. It is recommended to use the grill mode with the Grill Accessory.
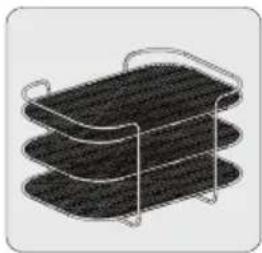
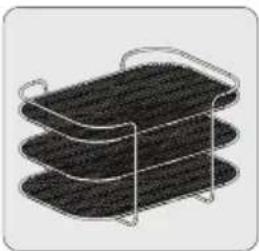
Dryer
It helps you to dry all kinds of vegetables and fruits with its perforated and multi-layer structure for the best results. Drying mode is recommended to be used with the Dryer accessory.
4 Cooking time
The default temperature and time settings of the appliance's programs are set automatically.
The following table provides an overview of cooking times for various foods. Cooking times depend on the thickness, brand, and consistency of the food. The recommended times and quantities should be considered approximate.
| Program Food Temperature Duration | | |
| Chicken | Drumstick (4 pieces) 180°C 24 - 30 min | | |
| Chicken Breast (2 * 200 gr) 180°C 24 - 30 min | | |
| Wing (8 pieces) 180 degrees 180°C 22 - 26 min | | |
| Vegetables | Fresh potato 200 g 200°C 20 - 25 min | | |
| Fresh potato 500 g 200°C 24 - 30 min | | |
| Frozen potato 500 g 200°C 20 - 27 min | | |
| Frozen potato 1000 gr 200°C 42 - 48 min | | |
| Potato - Carrot Cubes Side Dish (250-500 grams) 190°C 15 - 20 min | | |
| Onion Ring 190°C 10 - 15 min | | |
| Zucchini and Eggplant (cut into rings - 1 piece) 180°C 20 - 25 min | | |
| Oven/cake | Muffins (4-6 pieces) 160°C 15 - 19 min | | |
| Defrosting | Minced meat, chicken, meatballs, etc. | 35-50°C | 15 - 30 min |
| Grill | Rib eye Steak (2 slices, 200-250 grams) | 200°C 12 - 18 min | |
| Sirloin Steak (2 slices, 200-250 grams) | 200°C 8 - 12 min | |
| Eggplant, zucchini, peppers, mushrooms | 190°C 8 - 15 min | |
| Meatball (4-8 pieces) | 200°C 6 - 10 min | |
| Salmon (2 fillet slices) 200°C 7 - 12 min | | |
| Jumbo Shrimp (12-16 pieces) | 200°C 10 - 14 min | |
| Sea Bass (1 whole or 2 fillets) | 200°C 11 - 18 min | |
| Chops (3-4 pieces, 350-450 grams) | 200°C | 5 - 8 min |
| Skewer | Chicken skewers | 200°C 10 - 14 min | |
| Meat skewers | 200°C 11 - 15 min | |
| Air Dryer | Tomato (2-3 mm thick) 55°C | 7 - 9 hours | |
| Apple (2-3 mm thick) | 55°C | 7 - 8 hours |
| Banana (2-3 mm thick) | 60°C | 7 - 9 hours |
| Eggplant (2-3 mm thick) | 55°C | 7 - 8 hours |
| Mushroom (3-4 mm thick) | 60°C | 6 - 8 hours |
| Pineapple (4-5 mm thick) | 60°C | 6 - 8 hours |
5 Cleaning and care
5.1 Cleaning

Never use gasoline, solvents, abrasive cleaners, metal objects, or hard brushes to clean the appliance.
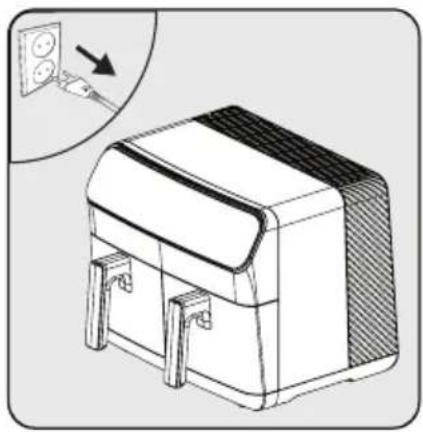
Switch off the appliance and disconnect it from the power supply.

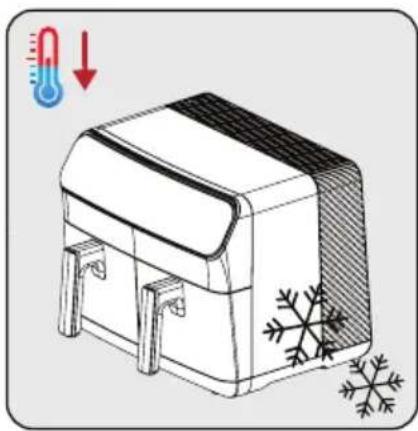
Allow the appliance to cool down completely.

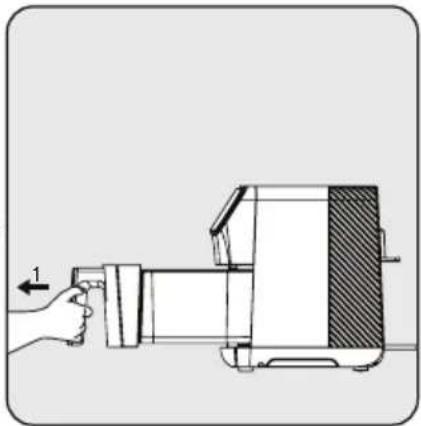
Remove the removable cooking basket (5) from the drawer.

Remove the cooking trays from the appliance to allow it to cool down more quickly.
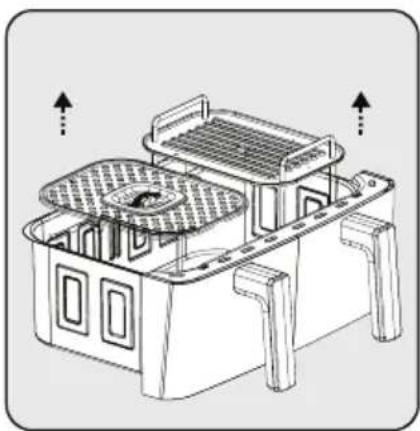
Remove the cooking accessory inside the cooking tray.

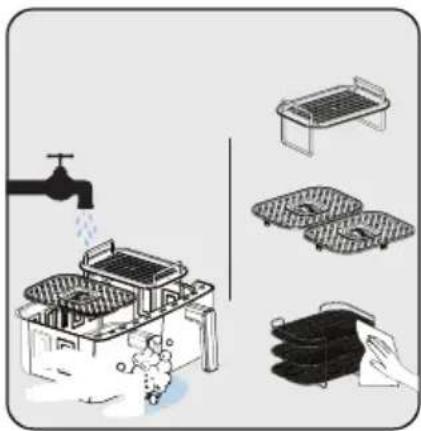
You can wash the cooking tray and the cooking accessories in warm soapy water or in the dishwasher.

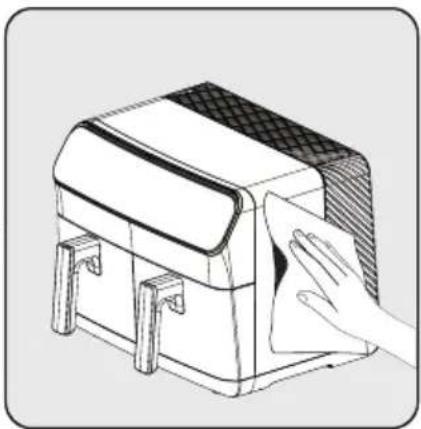
Clean the outside of the appliance with a damp cloth. Dry the outside of the appliance completely.

Always keep the bottom of the cooking chamber clean to avoid the accumulation of foreign objects.
5 Cleaning and care
5.2 Storage
- If you do not intend to use the appliance for a longer period of time, store it carefully.
- Unplug the appliance and let it cool down before putting it away.
- Store the appliance in a cool and dry place.
- Keep the appliance and the cable out of the reach of children.
5.3 Transportation and handling
- Transport the appliance in its original packaging during handling and transport. The packaging protects the appliance from physical damage.
- Do not place heavy objects on the appliance or its packaging. The appliance may get damaged.
- If the appliance is dropped, it may stop working or permanent damage may occur.
6 Troubleshooting
| The problem Cause Solution | |
| 1 | Product does not work | Power outages | Check the power supply and make sure there is power |
| No power or poor contact at the power outlet |
| The power supply voltage of the product |
| 2 | The food is insufficiently cooked/ burnt | The cooking time is not correct | Combine recipes and your personal experience to adjust preparation and timing |
| 3 | Smoke during first use | Anti-rust grease on the heater of the product | When using for the first time, set the temperature to maximum and preheat for 10-15 minutes to remove the anti-rust oil on the heater of the product |
| 4 | Strange smell | Cooking tray, tray drawer, Foreign body on the heater | Remove the foreign object |
| 5 | The display shows E1 and the product does not work any more | The left cooking tray sensor is open circuit. | Send to service for repair |
| 6 | The display shows E2 and the product no longer works | The left cooking tray sensor is short-circuited. |
| 7 | The display shows E3 and the product has stopped working | The right cooking tray sensor is open circuit. |
| 8 | The screen shows E4 and the product has stopped working | The right cooking tray sensor is short-circuited |
| 9 | The screen shows E7 and the product has stopped working | Problem with the power PCB (Connection problem) |
| 10 | The screen shows E8 and the product has stopped working | Problem with the power PCB (Connection problem) |

Grill grate
Grill accessory
Dryer
Dear customer,
Cooking grid
Dryer
Cooking rack
Dryer

Cooking grid
Dryer
Cooking grid
Dryer

Baking rack
Grill accessories
Dryer
The markings on the device and the values specified in the documents accompanying the product were obtained under laboratory conditions in accordance with relevant standards. Values may vary depending on the use of the device and environmental conditions. Power values were tested at a voltage of 230 V.
Before first use of the appliance, remove the packaging material and place the device on a flat, clean work surface.

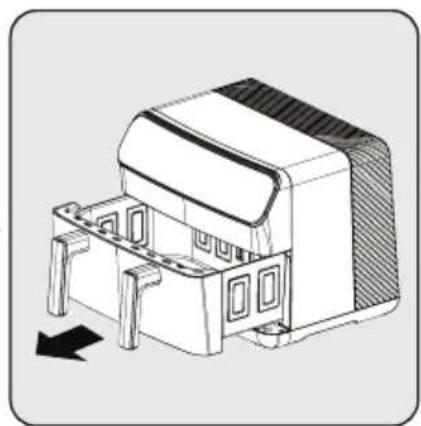
To access the removable cooking tray, firmly grasp the handles, then pull the chambers out through their openings.

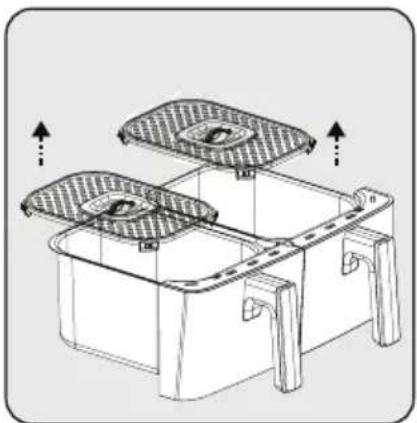
Remove the cooking tray and place it on a flat surface. Insert the compartment divider accessory into the openings on the cooking tray. Then, attach the cooking tray to the device and follow the steps in section “3.5.3 Selecting and starting a program”.
3.5.2 The compartment divider is not installed.
Remove the cooking tray and place it on a flat surface. Remove the compartment divider from its place. Then, attach the cooking tray to the device and follow the steps in section “3.5.3 Selecting and starting a program”.
3.5.3 Selecting and starting a program

If you want to switch to another program after starting the device, press and hold the "Start/Stop" button or the "Select Tray" button for 3 seconds. Then select the desired program by selecting the tray again.

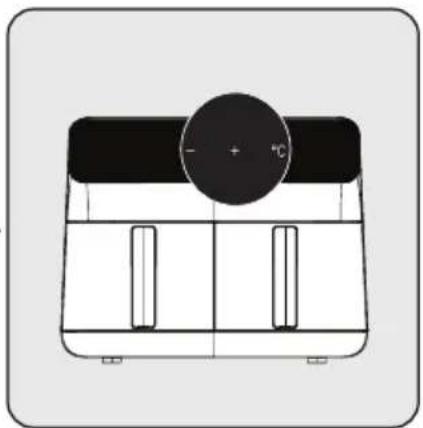
Turn on the device and press the on/off button. After the tray indicator light turns on, select the desired tray. If the divider in the chamber is not installed, the device will automatically mark the entire chamber as selected. After selecting the tray, choose the desired program from the Programs menu depending on the food you are cooking.
After selecting the desired program, the selected program will light up brightly. If you want to change the program, you can select one of the dimly lit programs.
After selecting the program, you can adjust the temperature and cooking time by pressing the temperature and time icons. Start the cooking process by pressing the start icon. When you want to cook in another chamber, repeat the process by selecting the tray.
3.5.4 Setting temperature and time
Press the '°C' or '☐' button to set the temperature or time. The symbol [-☐] is activated. Set the temperature and time to the desired value using the symbol [-☐].

When the selected cooking time has elapsed, an alert tone sounds and the device automatically stops cooking.
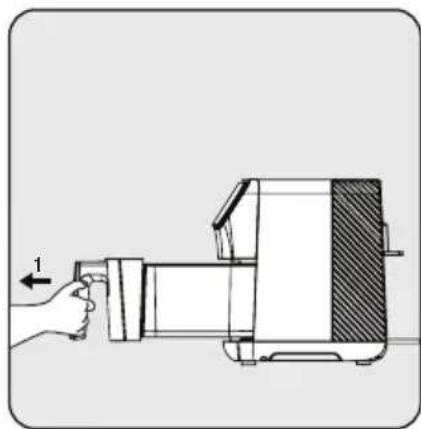
Avoid contact between the cooking basket and the external surface of the device, as the surface of the cooking tray (3) will be hot during and after cooking.

Cooking rack
Grill accessory
This is an accessory specially created for you to achieve the best grilling results. It helps you achieve better cooking results for red meat and fish. It is recommended to use the grill mode with the grill accessory.
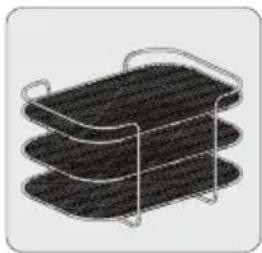
Dryer
It helps you dry all kinds of vegetables and fruits with its perforated and multi-layer structure for the best results. The drying mode is recommended to be used with the drying accessory.
4 Cooking time
All temperature and time settings in the device's programs are set automatically.
The following table provides an overview of cooking times for various foods. Cooking time depends on the thickness, brand, and consistency of the food. Recommended times and quantities should be considered approximate values.
| Program Hrana Temperatura Trajanje | | |
| Piletina | Batak (4 komada) 180°C 24 - 30 min | | |
| Pileća prsa (2 x 200 g) 180°C 24 - 30 min | | |
| Krilo (8 komada) 180 stepeni 180°C 22 - 26 min | | |
| Povrće | Sveži krompir 200 g 200°C 20 - 25 min | | |
| Sveži krompir 500 g 200°C 24 - 30 min | | |
| Smrznuti krompir 500 g 200°C 20 - 27 min | | |
| Smrznuti krompir 1000 gr 200°C 42 - 48 min | | |
| Prilog od kockica krompira - šargarepe (250-500 grama) | 190°C 15 - 20 min | |
| Kolutići luka 190°C 10 - 15 min | | |
| Tikvice i patlidžan (narezan na kolutiće - 1 komad) 180°C 20 - 25 min | | |
| Pećnica/torta | Mafini (4- 6 komada) 160°C 15 - 19 min | | |
| Odmrzavanje | Mleveno meso, piletina, ćufte itd. 35-50°C | 15 - 30 min | |
| Grilovanje | Rib-eye odrezak (2 kriške, 200-250 grama) | 200°C 12 - 18 min | |
| Odrezak pečenice (2 kriške, 200-250 grama) | 200°C 8 - 12 min | |
| Patlidžan, tikvice, paprika, pečurke | 190°C 8 - 15 min | |
| Ćufte (4- 8 komada) | 200°C 6 - 10 min | |
| Losos (2 fileta) | 200°C 7 - 12 min | |
| Velike škampe (12-16 komada) | 200°C 10 - 14 min | |
| Brancin (1 celi ili 2 fileta) | 200°C 11 - 18 min | |
| Kotleti (3-4 komada, 350-450 grama) | 200°C | 5 - 8 min |
| Aparat za ražnjiće | Pileći ražnjići | 200°C 10 - 14 min | |
| Mesni ražnjići | 200°C 11 - 15 min | |
| Sušač vazduha | Paradajz (debljine 2-3 mm) | 55°C | 7 - 9 sati |
| Jabuka (2-3 mm debljine) | 55°C | 7 - 8 sati |
| Banana (2-3 mm debljine) | 60°C | 7 - 9 sati |
| Patlidžan (2-3 mm debljine) | 55°C | 7 - 8 sati |
| Pečurke (3-4 mm debljine) | 60°C | 6 - 8 sati |
| Ananas (debljine 4-5 mm) | 60°C | 6 - 8 sati |
Allow the appliance to cool completely.

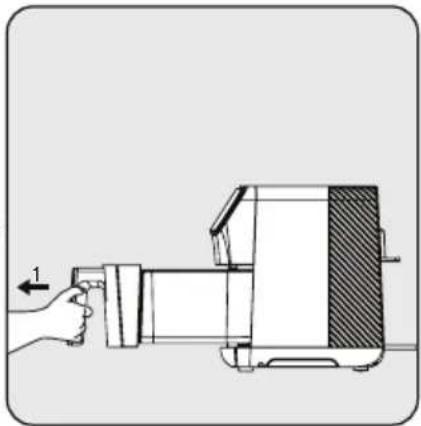
Remove the removable cooking basket (5) from the drawer.

Remove the cooking trays from the appliance to allow it to cool faster.

Before first use, remove the packaging and place the appliance on a flat, clean work surface.

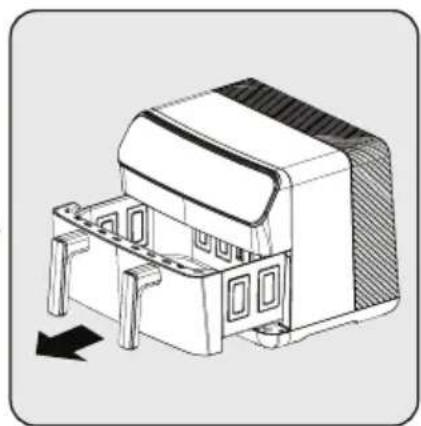
To access the removable cooking pot, firmly grip the handles and pull the chambers out of the slots.

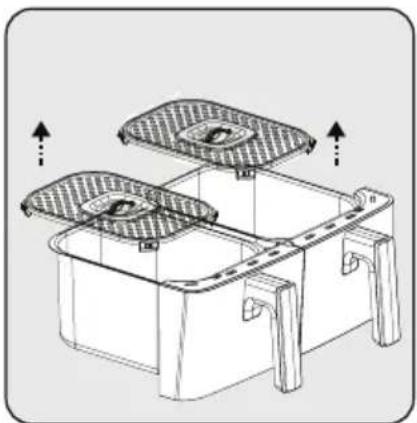
Remove the cooking utensils from the food preparation chamber.
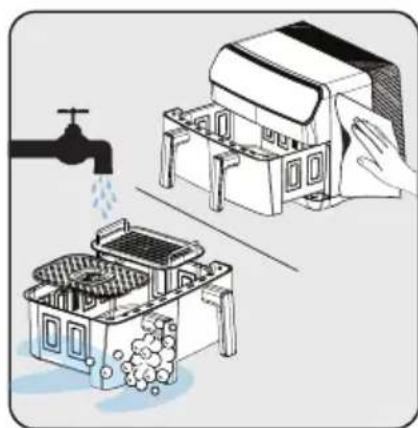
Wash the removable cooking pots and kitchen utensils with water and detergent. Then thoroughly dry the outside of the appliance and the parts you washed.

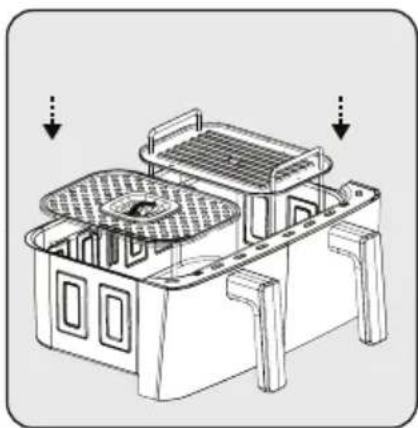
Place the utensils you wish to use in the cooking pot.

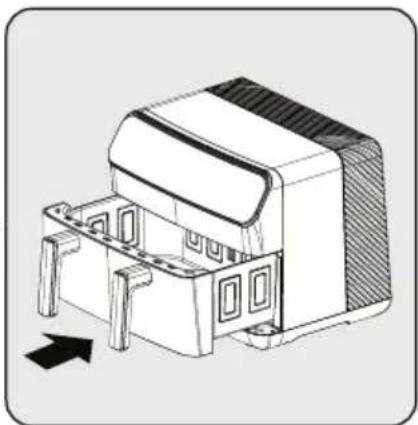
Once all parts are clean, attach the cooking pot and utensils to the appliance. The appliance is ready for use.

During first use, set the appliance to cooking mode "M" at the highest temperature and let it run for 10 minutes without adding any food.
3 Operation
Remove the cooking pot and place it on a flat surface. Insert the chamber divider attachment into the slots on the cooking pot. Then, attach the cooking pot to the appliance and follow the steps in section "3.5.3 Selecting and starting a program".
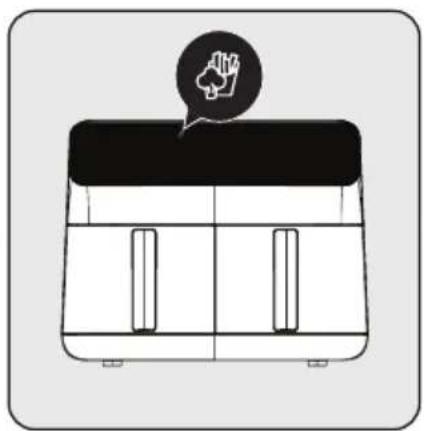
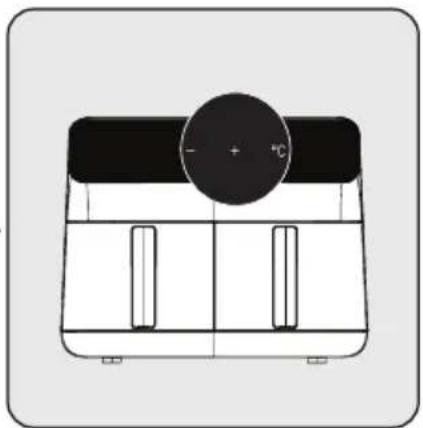
Remove the cooking pot and place it on a flat, clean surface. Place the appropriate utensils in the cooking pot. For detailed information on utensils, see section 3.7. For detailed information on single and double chamber use, see section 3.5.
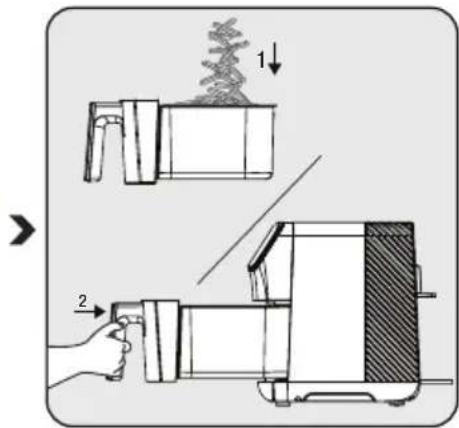
Plug the device into a power outlet and select the desired food preparation program. Then start the food preparation process.
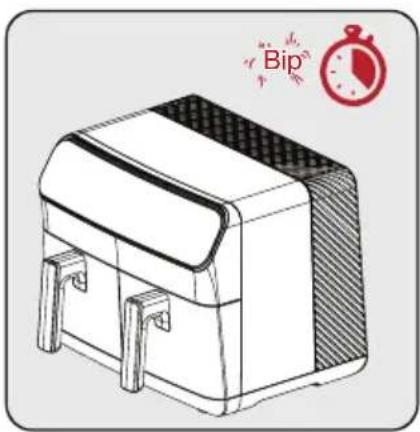
When the selected food preparation time expires, an audible warning will sound and the device will automatically stop cooking.
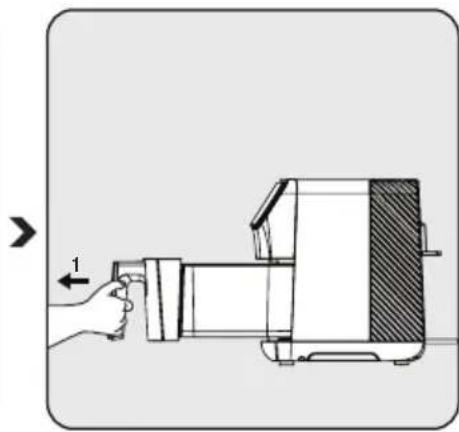
When the process is finished, transfer the cooked food to a bowl or tray.
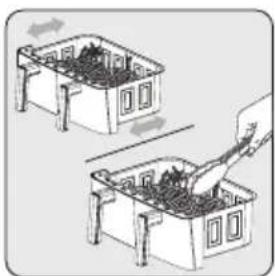
- To ensure even cooking, carefully remove and shake the cooking basket when half of the cooking time has passed, or use tongs to turn the food being cooked, being careful not to scratch the basket.
- Repeat this process often if you are using a longer food preparation cycle or if you want the food to be crispy.
3 Handling

Food preparation rack
Grill accessory
This is an accessory specially designed to achieve the best results when preparing food on the grill. It helps you achieve better results when preparing red meat and fish. With the grill accessory, it is recommended to use the grill cooking mode.
Dehydrator
It helps dry any type of fruit and vegetable thanks to its perforated and layered structure that allows achieving the best results. With the dehydrator accessory, it is recommended to use the food drying mode.
Remove the removable food preparation basket (5) from the drawer.

Before first use, remove the packaging and place the appliance on a flat, clean work surface.

Remove the cooking accessories from the cooking chamber.
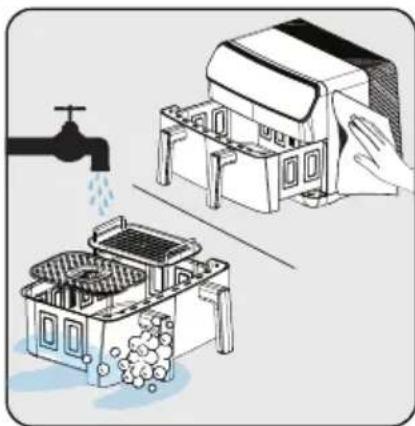
Clean the removable trays and cooking accessories with warm soapy water. Then thoroughly dry the outside of the appliance and the washed parts.

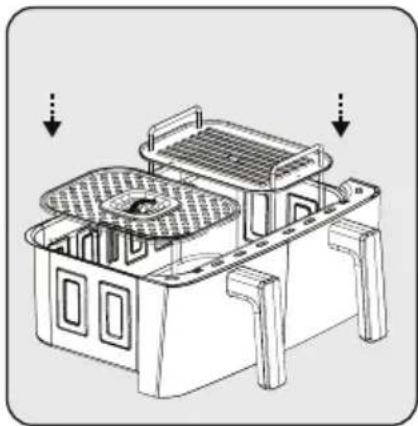
Remove the tray and place it on a flat surface. Insert the chamber divider into the slots on the cooking tray. Then attach the cooking plate to the appliance and follow the steps described in section "3.5.3 Selecting and starting a program".
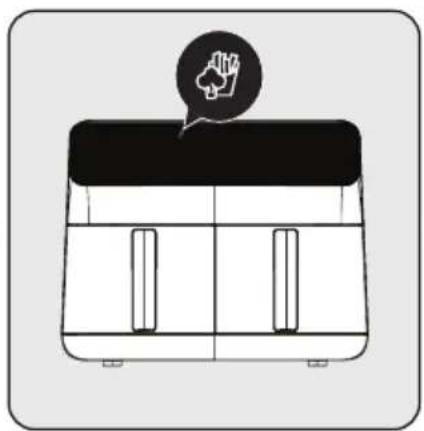
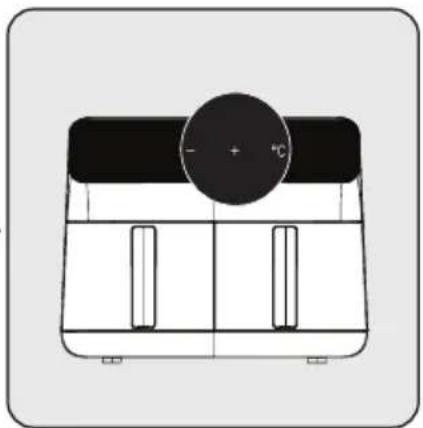
Remove the baking tray and place it on a flat, clean surface. Insert the appropriate accessory into the cooking container. For detailed information on accessories, see section 3.7. For detailed information on using the chamber as double or single, see section 3.5.
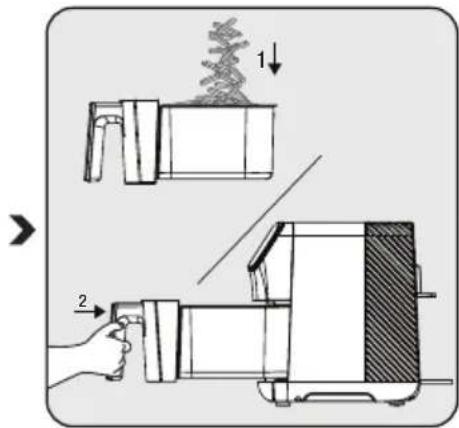
Connect the appliance and select the desired cooking program. Then start cooking.
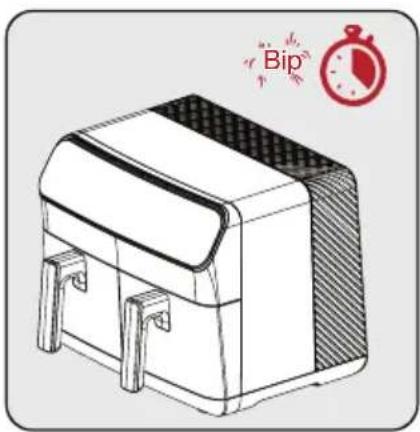
When the selected cooking time has elapsed, an audible alert sounds and the appliance automatically stops cooking.
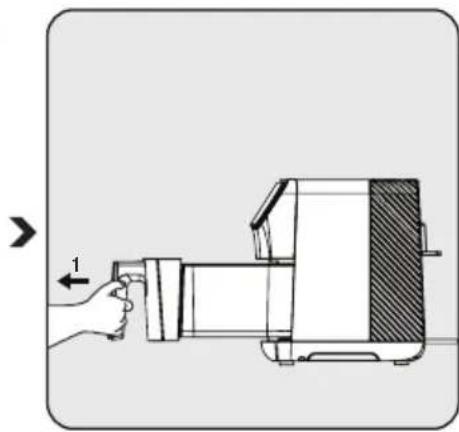
After the cooking process is complete, transfer the cooked food to a bowl or plate.
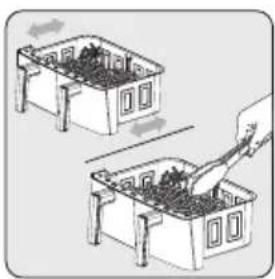
- To ensure even cooking, halfway through the cooking process carefully remove and shake the cooking tray, or use tongs to turn the food over, being careful not to scratch the tray. • Perform this procedure more frequently for longer cooking cycles or if you prefer crispier results.
3 Operation

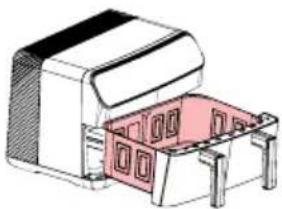
Avoid contact between the cooking basket and the outer surface of the appliance, as the surface of the cooking tray (3) will be hot during and after cooking.

Cooking rack
Grill accessories
Drying rack
Wait until the appliance has completely cooled down.

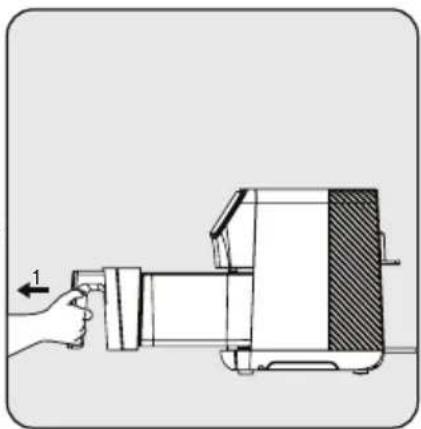
Remove the cooking accessories from the cooking compartment.

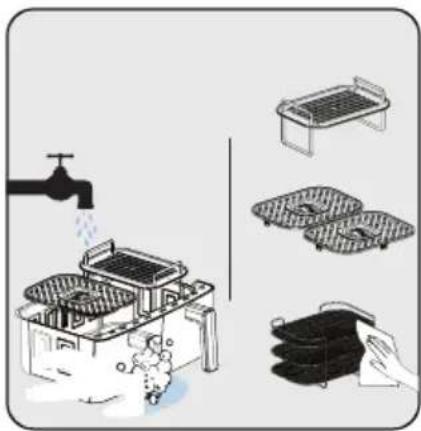
Clean the outside of the appliance with a damp cloth. Dry the outside of the appliance completely.

The bottom of the cooking compartment should always be kept clean to prevent the accumulation of foreign objects.
5 Cleaning and care
5.2 Storage

3
Operation
Cooking rack

Grill accessories


Operation 3.5
567
AR