SIN-ALD-2000 - Advertising LED screen Singercon - Free user manual and instructions
Find the device manual for free SIN-ALD-2000 Singercon in PDF.

Pick your language and provide your email: we'll send you a specifically translated version.
User questions about SIN-ALD-2000 Singercon
0 question about this device. Answer the ones you know or ask your own.
Ask a new question about this device
No questions yet. Be the first to ask one.
Download the instructions for your Advertising LED screen in PDF format for free! Find your manual SIN-ALD-2000 - Singercon and take your electronic device back in hand. On this page are published all the documents necessary for the use of your device. SIN-ALD-2000 by Singercon.
USER MANUAL SIN-ALD-2000 Singercon
ADVERTISING LED DISPLAY
USER MANUAL
BEDIENUNGSANLEITUNG
INSTRUKCJA OBSŁUGI
NÁVOD K POUŽITÍ
MANUEL D'UTILISATION
ISTRUZIONI PER L'USO
text_image
e!Expand by 0.1%natural_image
Close-up of a metallic metal bracket with four circular holes and a square cutout, mounted on a wooden surface (no text or symbols visible)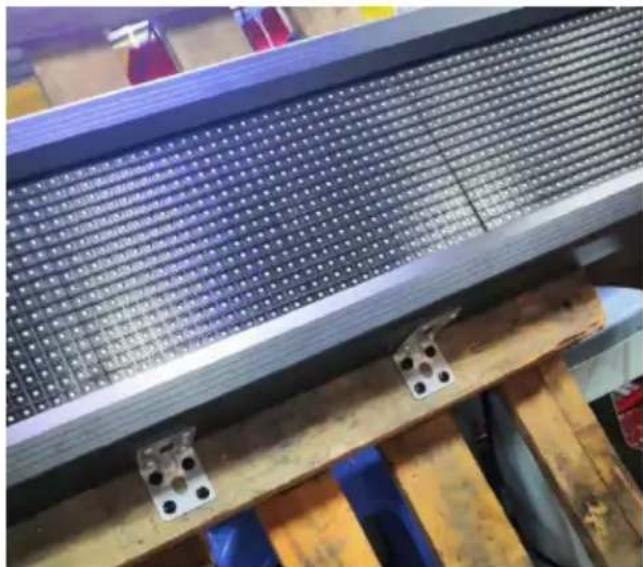
natural_image
Close-up of a metal heat exchanger or cooling unit with grid pattern and mounting brackets (no visible text or symbols)text_image
QR code with a central logo featuring red and blue swoosh design and a registered trademark symbol.text_image
Default 16 Stroke N T word space Def Stretch 0 Subtitle807 End to End Animation Animation n Continuously m... Speed 2 Select WiFi Read Back Se HONtext_image
节目0 Parameter Adjustment Brig Power On/Off Adjustment Tin WiFi View Password Add Font Update Firmwa Language About Switch Subtitle807 End to End Animation Animation Speed 2 Stay Time 0.00 Select WiFi Read Back Se HON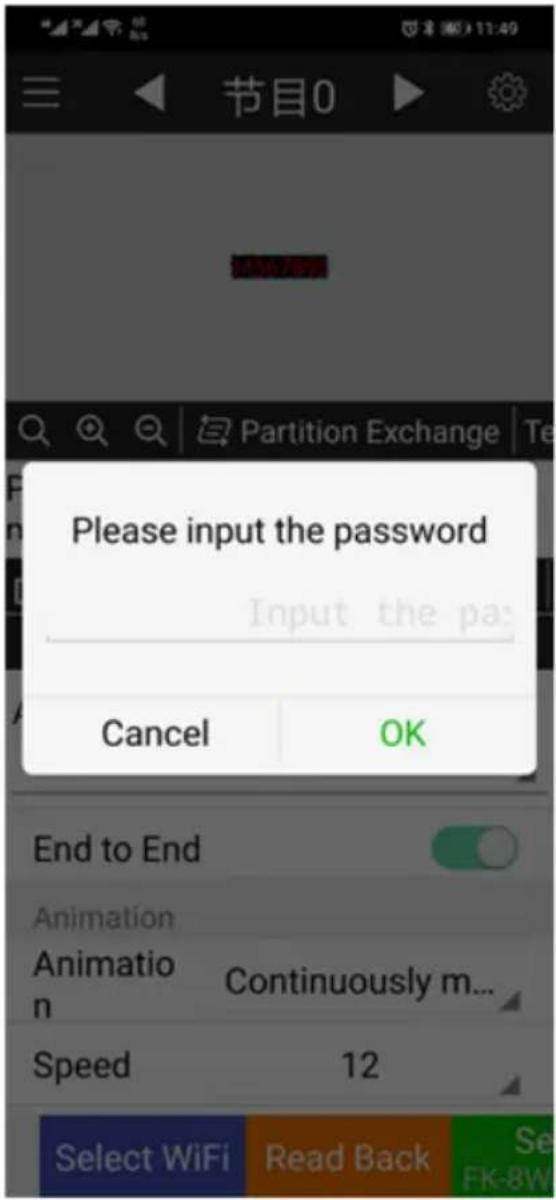
text_image
节目0 Partition Exchange Please input the password Input the pa: Cancel OK End to End Animation Animation n Continuously m... Speed 12 Select WiFi Read Back Se FK-8W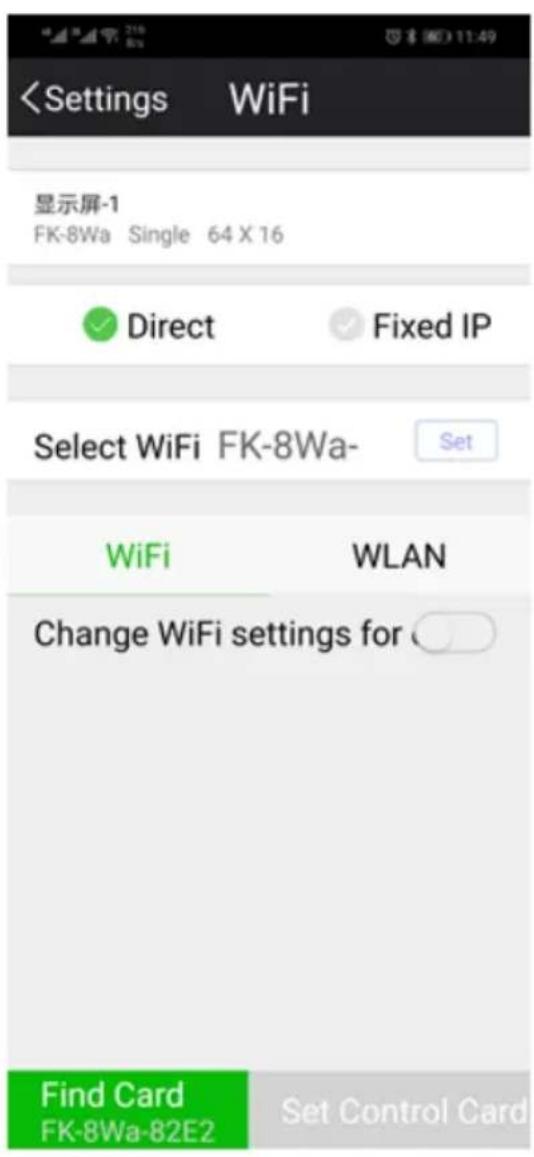
text_image
text_image
natural_image
Close-up of a red electronic circuit board with visible components and wiring, no readable text or symbols.text_image
FK-8F1 GND 5Vtext_image
节目0 Subtitle Partition Exchange Te Program Subtitle + 3 1 Default 16 Stroke N T word space Def Stretch 0 2 Subtitle807 End to End Animation Animation Continuously m... Speed 2 Select WiFi Read Back Se HON3.3. Reinigung und Wartung
a) Ziehen Sie den Netzstecker vor jeder Reinigung und wenn das Gerät nicht benutzt wird. b) Verwenden Sie zur Reinigung der Oberfläche nur nicht-korrosive Mittel. c) Lagern Sie das Gerät an einem trockenen und kühlen Ort, geschützt vor Feuchtigkeit und direkter Sonneneinstrahlung. d) Es ist verboten, das Gerät mit einem Wasserstrahl abzuspritzen oder es in Wasser zu tauchen. e) Verwenden Sie zur Reinigung ein weiches Tuch.Technical Data
| Description of the parameter | Value of the parameter | |||
| Product name | ADVERTISING LED DISPLAY | |||
| Model | SIN-ALD-1000 | SIN-ALD-3000 | SIN-ALD-1500 | SIN-ALD-2000 |
| Supply voltage [V~] / Frequency [Hz] | 230/50 (power supply 5VDC) | |||
| Rated power [W]. | 15 | 60 | 40 | 40 |
| LED display board | 64*16 red | 192*32 P5 RGB | 96*16 P10 RGB | 96*16 P10 RGB |
| Display speed [frames/s] | 60 | |||
| Viewing angle [°] | ±60 (vertically and horizontally) | |||
| Viewing range [m] | >3 | >2 | >3 | >3 |
| Ambient temperature[°C] | -40 / 55 | |||
| IP code | - | IP54 | IP21 | IP54 |
| Dimensions [Width x Depth x Height; mm] | 670x190x40 | 1050x250x95 | 1050x250x95 | 1050x250x95 |
| Weight [kg] | 1.8 | 5 | 5.1 | 5.1 |
1. General Description
The instruction manual is intended to assist in safe and reliable use. The product is designed and manufactured strictly according to technical specifications using the latest technology and components and maintaining the highest quality standards.PLEASE CAREFULLY READ AND UNDERSTAND THIS INSTRUCTION MANUAL BEFORE OPERATION,
To ensure long and reliable operation of the device, make sure to operate and maintain it properly in accordance with the guidelines in this instruction manual. The technical data and specifications contained in this instruction manual are up to date. The manufacturer reserves the right to make changes in order to improve the quality.Explanation of symbols
 | The product complies with applicable safety standards. |
 | Please read the instructions before use. |
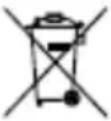
 | Recyclable product. |
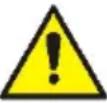
 | CAUTION! or WARNING! or REMINDER! describing a situation.(general warning sign). |
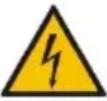
 | CAUTION! Warning of electric shock! |
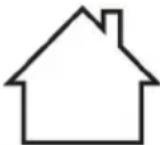
 | For indoor use only. |
CAUTION!
The illustrations in this instruction manual are for reference only and may differ from the actual product in some details. The original instruction manual is in the German language version. Other language versions are translations from German.2. Safety of use
 CAUTION! Read all safety warnings and all instructions. Failure to follow the warnings and instructions may result in electric shock, fire and/or severe personal injury or death. The term "appliance" or "product" in the warnings and in the description of the instructions refers to the ADVERTISING LED DISPLAY.2.1. Electrical safety
a) The plug of this device must fit into the outlet. Do not modify the plug in any way. Original plugs and matching outlets reduce the risk of electric shock. b) Avoid touching grounded parts, such as pipes, heaters, ovens, and refrigerators. There is an increased risk of electric shock if your body is grounded and touches the device exposed to direct rain, wet pavement, and operation in a humid environment. If water enters the device, there is an increased risk of damage to the device and electric shock. c) Do not touch the device with wet or damp hands. d) Do not use the cord in an unintended manner. Never use it to carry the device or to pull the plug out of the socket. Keep the cord away from heat sources, oil, sharp edges or moving parts. Damaged or tangled cords increase the risk of electric shock. e) If you cannot avoid using the unit in a wet environment, use a residual current device (RCD). Using an RCD reduces the risk of electric shock. f) Do not use the device if the power cord is damaged or shows signs of wear. A damaged power cord should be replaced by a qualified electrician or the manufacturer's service department. g) To avoid electric shock, do not immerse the cable, plug, or device itself in water or other liquid. Do not use the device on wet surfaces. h) CAUTION - THREAT TO LIFE! When cleaning or using the device, never immerse it in water or other liquids.2.2. Safety of use
a) Do not use the device in an explosive area, for example in the presence of flammable liquids, gases or dust. b) If you find any damage or irregularities in the operation of the device, immediately turn it off and report it to an authorized person. c) If you have any doubts as to whether the device is working properly or if it is damaged, contact the manufacturer's service department. d) Only the manufacturer's service department can repair the device. Do not carry out repairs yourself! e) In case of open flames or fire, use only dry powder or snow (CO2) fire extinguishers to extinguish the live equipment. f) Keep these instructions for use for future reference. If the device is to be passed on to a third party, the operating instructions must also be handed over together with the device. g) Keep the packaging and small assembly parts out of the reach of children. h) Do not operate this product if you are tired, ill or under the influence of alcohol, drugs or medication that could impair your ability to operate the product. i) The device is not intended to be used by persons (including children) with reduced mental, sensory or intellectual functions or persons who lack experience and/or knowledge unless they are supervised or have been instructed by a person responsible for their safety on how to operate the device. j) The device is not a toy. Children should be watched to ensure that they do not play with the device. k) Disconnect the unit from the power supply before adjusting, cleaning, or servicing. This precaution reduces the risk of accidental start-up. I) Keep the device in good working condition. Check before each use for general damage or damage to moving parts (cracks in parts and components or any other condition that may affect the safe operation of the device). If damaged, have the device repaired before use. m) Repairs and maintenance should be carried out by qualified personnel using only original spare parts. This will ensure the safety of use. n) To ensure the designed operational integrity of the device, do not remove factory-installed covers or loosen screws. o) Do not tamper with the device to alter its performance or design. p) Keep the device away from sources of fire and heat.  CAUTION! Although the product has been designed to be safe, with adequate safeguards, and despite the additional safety features provided to the user, there is still a slight risk of accident or injury when handling the appliance. You are advised to use caution and common sense when using this product.3. Rules of use
The device is designed to display items such as texts sent from a dedicated application. The user is responsible for any damage resulting from misuse.3.1. Preparation for operation
LOCATION OF THE DEVICE The ambient temperature must not exceed 55^ and ambient humidity should not exceed 85% . Keep the device away from any hot surfaces. Always operate the device on a level, stable, clean, fireproof and dry surface and out of the reach of children and persons of impaired mental, sensory and intellectual functions. Place the device in such a way that the mains plug can be reached at any time. Ensure that the power supply to the appliance corresponds to that specified on the identification plate!ASSEMBLY OF THE DEVICE
SIN-ALD-1000 Adjust the handles marked with an arrow to the preferred spacing by sliding them into the recess in the casing. text_image
Welcometext_image
e!Expand0.06natural_image
Close-up of a metallic metal bracket with multiple holes and a square cutout, mounted on a wooden surface (no text or symbols visible)natural_image
Close-up of a metal heat exchanger or heat sink with grid pattern and mounting holes, installed in a workshop (no visible text or symbols)3.2. Working with the device
1. Connect the power supply to the device, insert the power supply plug into an electrical outlet. 2. Program the display using the dedicated app (app installation instructions later). 3.2.1 Application installation 1. Scan the QR code below. 2. Once on the website, click "LED FkShow APP". Depending on the operating system of the mobile device on which the application will be installed, select the appropriate option: Android - "android download" iOS - "ios download". 3. After installing the application, an icon as below will appear on the desktop of the device. text_image
FkShowtext_image
Default 16 Stroke N T word space Def Stretch 0 Subtitle807 End to End Animation Animation n Continuously m... Speed 2 Select WiFi Read Back Se HONtext_image
← WLAN WLAN 可用 WLAN 列表 FK-8Wa-82E2 已连接 (不可上网) HONOR-05110G 已保存,加密text_image
节目0 Parameter Adjustment Brig Power On/Off Adjustment Tin WiFi View Password Add Font Update Firmwa Language About Switch Subtitle807 End to End Animation Animation Speed 2 Stay Time 0.00 Select WiFi Read Back Se HONtext_image
节目0 Partition Exchange Please input the password Input the pa: Cancel OK End to End Animation Animation n Continuously m... Speed 12 Select WiFi Read Back Se FK-8Wtext_image
natural_image
Close-up of a red electronic circuit board with visible components and wiring, no readable text or symbols.text_image
FK-8F1 GND 5Vtext_image
节目0 Subtitle Partition Exchange Te Program Subtitle + 3 1 Default 16 Stroke N T word space Def Stretch 0 2 Subtitle807 End to End Animation Animation Continuously m... Speed 2 Select WiFi Read Back Se HON3.3. Cleaning and maintenance
a) Pull out the mains plug before each cleaning and when the device is not in use. b) Use only non-corrosive cleaning agents for cleaning the surfaces. c) Store the device in a dry and cool place protected from moisture and direct sunlight. d) Do not spray the device with a stream of water or immerse it in water. e) Use a soft cloth for cleaning.Dane techniczne
| Opisparametru | Wartośćparametru | |||
| Nazwa produktu | Wyświetlacz reklamowy LED | |||
| Model | SIN-ALD-1000 | SIN-ALD-3000 | SIN-ALD-1500 | SIN-ALD-2000 |
| Napięcie zasilania [V~] /Częstotliwość [Hz] | 230/50 (zasilacz 5VDC) | |||
| Moc znamionowa [W] | 15 | 60 | 40 | 40 |
| Wyświetlacz LED | 64*16czerwony | 192*32 P5RGB | 96*16 P10RGB | 96*16 P10RGB |
| Prędkośćwyświetlania[ramki/s] | 60 | |||
| Kąt widzenia [°] | ±60 (pionowo i poziomo) | |||
| Zakres widzenia[m] | >3 >2 >3 >3 | |||
| Temperaturaotoczenia[°C] | -40 ÷ 55 | |||
| Klasa ochrony IP | - | IP54 IP21 IP54 | ||
| Wymiary[Szerokość xGłębokość xWysokość; mm] | 670x190x40 | 1050x250x95 | 1050x250x95 | 1050x250x95 |
| Ciężar [kg] | 1,8 | 5 | 5,1 | 5,1 |
1. Ogólny opis
Instrukcja przeznaczona jest do pomocy w bezpiecznym i niezawodnym użytkowaniu. Produkt jest zaprojektowany i wykonany ściśle według wskazań technicznych przy użyciu najnowszych technologii i komponentów oraz przy zachowaniu najwyższych standardów jakości.PRZED PRZYSTĄPIENIEM DO PRACY NALEŻY DOKŁADNIE PRZECZYTAĆ I ZROZUMIEĆ NINIEJSZĄ INSTRUKCJĘ.
Dla zapewnienia długiej i niezawodnej pracy urządzenia należy dbać o jego prawidłową obsługę oraz konserwację zgodnie ze wskazówkami zawartymi w tej instrukcji. Dane techniczne i specyfikacje zawarte w tej instrukcji obsługi są aktualne. Producent zastrzega sobie prawo dokonywania zmian związanych z podwyższeniem jakości. Objaśnienie symboli | Produkt spełnia wymagania odpowiednich norm bezpieczeństwa. |
 | Przed użyciem należy zapoznać się z instrukcją. |
 | Produkt podlegający recyklingowi. |
 | UWAGA! lub OSTRZEŻENIE! lub PAMIĘTAJ! opisująca daną sytuację (ogólny znak ostrzegawczy). |
 | UWAGA! Ostrzeżenie przed porażeniem prądem elektrycznym! |
 | Do użytku tylko wewnątrz pomieszczeń. |
UWAGA!
Ilustracje w niniejszej instrukcji obsługi mają charakter poglądowy i w niektórych szczegółach mogą różnić się od rzeczywistego wyglądu produktu. Instrukcją oryginalną jest niemiecka wersja instrukcji. Pozostałe wersje językowe są tłumaczeniami z języka niemieckiego.2. Bezpieczeństwo użytkowania
 UWAGA! Przeczytać wszystkie ostrzeżenia dotyczące bezpieczeństwa oraz wszystkie instrukcje. Niezastosowanie się do ostrzeżeń i instrukcji może spowodować porażenie prądem, pożar i/lub ciężkie obrażenia ciała lub śmierć. Termin „urządzenie” lub „produkt” w ostrzeżeniach i w opisie instrukcji odnosi się do2.1. Bezpieczeństwo elektryczne
a) Wtyczka urządzenia musi pasować do gniazda. Nie modyfikować wtyczki w jakikołwiek sposób. Oryginalne wtyczki i pasujące gniazda zmniejszają ryzyko porażenia prądem. b) Unikać dotykania uziemionych elementów, takich jak rury, grzejniki, piece i lodówki. Istnieje zwiększone ryzyko porażenia prądem, jeśli ciało jest uziemione i dotyka urządzenia narażonego na bezpośrednie działanie deszczu, mokrej nawierzchni i pracy w wilgotnym otoczeniu. Przedostanie się wody do urządzenia zwiększa ryzyko jego uszkodzenia oraz porażenia prądem. c) Nie wolno dotykać urządzenia mokrymi lub wilgotnymi rękoma. d) Nie należy używać przewodu w sposób niewłaściwy. Nigdy nie używać go do przenoszenia urządzenia lub do wyciągania wtyczki z gniazda. Trzymać przewód z dala od źródeł ciepła, oleju, ostrych krawędzi lub ruchomych części. Uszkodzone lub poplątane przewody zwiększają ryzyko porażenia prądem. e) Jeśli nie można uniknąć używania urządzenia w środowisku wilgotnym, należy stosować wyłącznik różnicowo-prądowy (RCD). Używanie RCD zmniejsza ryzyko porażenia prądem. f) Zabrania się używania urządzenia, jeśli przewód zasilający jest uszkodzony lub nosi wyraźne oznaki zużycia. Uszkodzony przewód zasilający powinien być wymieniony przez wykwalifikowanego elektryka lub serwis producenta g) Aby uniknąć porażenia prądem elektrycznym, nie należy zanurzać kabla, wtyczki ani samego urządzenia w wodzie lub innym płynie. Nie wolno używać urządzenia na mokrych powierzchniach. h) UWAGA – ZAGROŻENIE ŻYCIA! Podczas czyszczenia lub użytkowania urządzenia nigdy nie wolno zanurzać go w wodzie lub innych cieczach.2.2. Bezpieczeństwo użytkowania
a) Nie używać urządzenia w strefie zagrożenia wybuchem, na przykład w obecności łatwopalnych cieczy, gazów lub pytów. b) W razie stwierdzenia uszkodzenia lub nieprawidłowości w pracy urządzenia należy je bezzwłocznie wyłączyć i zgłosić to do osoby uprawnionej. c) W razie wątpliwości czy urządzenie działa poprawnie, należy skontaktować się z serwisem producenta. d) Naprawy urządzenia może wykonać wyłącznie serwis producenta. Nie wolno dokonywać napraw samodzielnie! e) W przypadku zaprószenia ognia lub pożaru, do gaszenia urządzenia pod napięciem należy używać wyłącznie gaśnic proszkowych lub śniegowych (CO2). f) Zachować instrukcję użytkowania w celu jej późniejszego użycia. W razie, gdyby urządzenie miało zostać przekazane osobom trzecim, to wraz z nim należy przekazać również instrukcję użytkowania. g) Elementy opakowania oraz drobne elementy montażowe należy przechowywać w miejscu niedostępnym dla dzieci. h) Niedozwolone jest obsługiwanie urządzenia w stanie zmęczenia, choroby, pod wpływem alkoholu, narkotyków lub leków, które ograniczają w istotnym stopniu zdolności obsługi urządzenia. i) Urządzenie nie jest przeznaczone do tego, by było użytkowane przez osoby (w tym dzieci) o ograniczonych funkcjach psychicznych, sensorycznych i umysłowych lub nieposiadające odpowiedniego doświadczenia i/lub wiedzy, chyba że są one nadzorowane przez osobę odpowiedzialną za ich bezpieczeństwo lub otrzymały od niej wskazówki dotyczące tego, jak należy obsługiwać urządzenie. j) Urządzenie nie jest zabawką. Dzieci powinny być pilnowane, aby nie bawiły się urządzeniem. k) Przed przystąpieniem do regulacji, czyszczenia i konserwacji urządzenie należy odłączyć od zasilania. Taki środek zapobiegawczy zmniejsza ryzyko przypadkowego uruchomienia. I) Utrzymywać urządzenie w dobrym stanie technicznym. Sprawdzać przed każdą pracą czy nie posiada uszkodzeń ogólnych lub związanych z elementami ruchomymi (pęknięcia części i elementów lub wszelkie inne warunki, które mogą mieć wpływ na bezpieczne działanie urządzenia). W przypadku uszkodzenia, oddać urządzenie do naprawy przed użyciem. m) Naprawa oraz konserwacja urządzeń powinna być wykonywana przez wykwalifikowane osoby przy użyciu wyłącznie oryginalnych części zamiennych. Zapewni to bezpieczeństwo użytkowania. n) Aby zapewnić zaprojektowaną integralność operacyjną urządzenia, nie należy usuwać zainstalowanych fabrycznie ośton lub odkręcać śrub. o) Zabrania się ingerowania w konstrukcję urządzenia celem zmiany jego parametrów lub budowy. p) Trzymać urządzenia z dala od źródeł ognia i ciepła.  UWAGA! Pomimo iż urządzenie zostało zaprojektowane tak aby było bezpieczne, posiadało odpowiednie środki ochrony oraz pomimo użycia dodatkowych elementów zabezpieczających użytkownika, nadal istnieje niewielkie ryzyko wypadku lub odniesienia obrażeń w trakcie pracy z urządzeniem. Zaleca się zachowanie ostrożności i rozsądku podczas jego użytkowania.3. Zasady użytkowania
Urządzenie przeznaczone jest do wyświetlania elementów np. tekstów wysłanych z dedykowanej aplikacji. Odpowiedzialność za wszelkie szkody powstałe w wyniku użytkowania niezgodnego z przeznaczeniem ponosi użytkownik.3.1. Przygotowanie do pracy
UMIEJSCOWIENIE URZĄDZENIA
Temperatura otoczenia nie może przekraczać 55°C a wilgotność względna nie powinna przekraczać 85%. Urządzenie należy trzymać z dala od wszelkich gorących powierzchni. Urządzenie należy zawsze użytkować na równej, stabilnej, czystej, ognioodpornej i suchej powierzchni i poza zasięgiem dzieci oraz osób ograniczonych funkcjach psychicznych, sensorycznych i umysłowych. Urządzenie należy umiejscowić w taki sposób, by w dowolnej chwili można się było dostać do wtyczki sieciowej. Należy pamiętać o tym, by zasilanie urządzenia energią odpowiadało danym podanym na tabliczce znamionowej!MONTAŻ URZĄDZENIA
SIN-ALD-1000 Zaznaczone strzałką uchwyty ustawić w preferowanym rozstawie przesuwając je we Percentieniu w obudowie. text_image
Welcometext_image
e!Expand gonatural_image
Close-up of a metallic metal bracket with multiple holes and a square cutout, mounted on a wooden surface (no text or symbols visible)natural_image
Close-up of a metal heat exchanger or heat sink with grid pattern and mounting holes, installed in a workshop (no visible text or symbols)3.2. Praca z urządzeniem
1. Podłączyć zasilacz do urządzenia, wtyczkę zasilacza umieścić w gniazdku elektrycznym. 2. Zaprogramować wyświetlacz za pomocą dedykowanej aplikacji (instrukcja instalacji aplikacji w dalszej części).3.2.1 Instalacja aplikacji
1. Zeskanować poniższy kod QR. text_image
QR code with a central logo featuring red and blue swoosh design and a registered trademark symbol.text_image
FkShowtext_image
Default 16 Stroke N T word space Def Stretch 0 Subtitle807 End to End Animation Animation n Continuously m... Speed 2 Select WiFi Read Back Se HONtext_image
← WLAN WLAN 可用 WLAN 列表 FK-8Wa-82E2 已连接 (不可上网) HONOR-05110G 已保存,加密text_image
节目0 Parameter Adjustment Brig Power On/Off Adjustment Tin WiFi View Password Add Font Update Firmwa Language About Switch Subtitle807 End to End Animation Animation Speed 2 Stay Time 0.00 Select WiFi Read Back Se HONtext_image
节目0 Please input the password Input the pa: Cancel OK End to End Animation Animation n Continuously m... Speed 12 Select WiFi Read Back Se FK-8Wtext_image
text_image
natural_image
Close-up of a red electronic circuit board with visible components and wiring, no readable text or symbols present.text_image
FK-8F1 GND 5Vtext_image
节目0 Subtitle Partition Exchange Te Program Subtitle Default 16 Stroke N T word space Def Stretch 0 Subtitle807 End to End Animation Animation Continuously m... Speed 2 Select WiFi Read Back Se HON3.3. Czyszczenie i konserwacja
a) Przed każdym czyszczeniem, a także jeżeli urządzenie nie jest używane, należy wyciągnąć wtyczkę sieciową. b) Do czyszczenia powierzchni należy stosować wyłącznie środki niezawierające substancji żrácych. c) Urządzenie należy przechowywać w suchym i chłodnym miejscu chronionym przed wilgocią i bezpośrednim promieniowaniem słonecznym. d) Zabrania się spryskiwania urządzenia strumieniem wody lub zanurzania urządzenia w wodzie. e) Do czyszczenia należy używać miękkiej ściereczki.Technické údaje
| Popis parametru | Hodnota parametru | |||
| Název výrobku | LED DISPLEJ S POHYBLIVÝM TEXTEM | |||
| Model | SIN-ALD-1000 | SIN-ALD-3000 | SIN-ALD-1500 | SIN-ALD-2000 |
| Napájecí napětí [V~] / Frekvence [Hz] | 230/50 (napájecí zdroj 5 VDC) | |||
| Jmenovitý výkon [W] | 15 | 60 | 40 | 40 |
| LED displej | 64*16 červený | 192*32 P5 RGB | 96*16 P10 RGB | 96*16 P10 RGB |
| Rychlost zobrazování [snímků/s] | 60 | |||
| Pozorovací úhel [°] | ±60 (svisle a vodorovně) | |||
| Rozsah zorného pole [m] | >3 | >2 | >3 | >3 |
| Okolní teplota [°C] | -40 ÷ 55 | |||
| Stupeň krytí IP | - | IP54 | IP21 | IP54 |
| Rozměry [šířka x hloubka x výška; mm] | 670x190x40 | 1050x250x95 | 1050x250x95 | 1050x250x95 |
| Hmotnost [kg] | 1,8 | 5 | 5,1 | 5,1 |
1. Všeobecný popis
Účelem pokynů je pomoc při bezpečném a spolehlivém používání. Výrobek je navržený a vyrobený přísně podle technických pokynů pomocí nejnovějších technologií a komponentů a při zachování nejvyšších standardů kvality. PŘED ZAHÁJENÍM PRÁCE SI DŮKLADNĚ PROSTUDUJTE TYTO POKYNY. Pro zajištění dlouhodobého a spolehlivého provozu zařízení dbejte o jeho řádnou obsluhu a údržbu podle doporučení uvedených v těchto pokynech. Technické údaje a specifikace uvedené v těchto pokynech k obsluze jsou aktuální. Výrobce si vyhrazuje právo provádět změny související se zvýšením kvality. Vysvětlení symbolů | Výrobek splňuje požadavky příslušných bezpečnostních norem. |
 | Před použitím se seznamte s pokyny. |
 | Recyklovatelný výrobek. |
 | UPOZORNĚNÍ! nebo VAROVÁNÍ! nebo NEZAPOMEŇTE! popisující danou situaci(všeobecná výstražná značka). |
 | UPOZORNĚNÍ! Varování před zásahem elektrickým proudem! |
 | Pro použití ve vnitřních prostorech. |
2. Bezpečné používání
 UPOZORNĚNÍ! Prostudujte si všechna varování týkající se bezpečnosti a všechny pokyny. Jejich nedodržování může způsobit zasažení elektrickým proudem, požár a/nebo závažné zranění nebo smrt. Výrazy „zařízení“ nebo „produkt“ použité u varování a v pokynech se týkají < LED DISPLEJ S POHYBLIVÝM TEXTEM >.2.1. Elektrická bezpečnost
a) Zástrčka zařízení musí odpovídat zásuvce. Zástrčku v žádném případě nijak neupravujte. Originální zástrčky a zásuvky snižují riziko zasažení elektrickým proudem. b) Nedotýkejte se uzemněných částí, jako jsou trubky, ohřívače, pece a chladničky. Hrozí zvýšené riziko zasažení elektrickým proudem, je-li tělo uzemněno a dotýká se zařízení vystaveného přímému dešti, mokrému povrchu a práci ve vlhkém prostředí. Vniknutí vody do zařízení zvyšuje riziko jeho poškození a zasažení elektrickým proudem. c) Nedotýkejte se zařízení mokrýma nebo vlhkýma rukama. d) Kabel používejte podle pokynů. Nikdy ho nepoužívejte k přenášení zařízení nebo k vytahování zástrčky ze zásuvky. Chraňte kabel před zdroji tepla, olejem, ostrými hranami nebo pohyblivými částmi. Poškozené nebo spletené kabely zvyšují riziko zasažení elektrickým proudem. e) Jestliže se nelze vyhnout použití zařízení ve vlhkém prostředí, používejte proudový chránič (RCD). Použitím RCD snížíte riziko zasažení elektrickým proudem. f) Zařízení je zakázáno používat, je-li napájecí kabel poškozený nebo opotřebený. Poškozený napájecí kabel nechejte vyměnit elektromontérem nebo v servisu výrobce. g) Pro zabránění zasažení elektrickým proudem nevkládejte kabel, zástrčku ani samotné zařízení do vody ani jiné kapaliny. Je zakázáno používat zařízení na mokrých površích. h) POZOR – OHROŽENÍ ŽIVOTA! Při čistění nebo používání zařízení nikdy nevkládejte do vody nebo jiných kapalin.2.2. Bezpečnost používání
a) Nepoužívejte zařízení v potenciálně výbušné atmosféře, například v přítomnosti hořlavých kapalin, plynů nebo prachu. b) Zjistíte-li poškození nebo závady týkající se fungování výrobku, zařízení okamžitě vypněte a oznamte to oprávněné osobě. c) V případě pochybností, zda zařízení funguje správně, kontaktujte servis výrobce. d) Opravy zařízení může provádět výhradně servis výrobce. Výrobek nikdy neopravujte sami! e) Při vznícení nebo požáru na hašení zařízení pod napětím používejte výhradně práškové nebo sněhové hasicí přístroje (CO2). f) Pokyny k používání si uložte pro pozdější použití. Mělo-li by být zařízení předáno třetím osobám, předejte současně s ním rovněž pokyny k používání. g) Části balení a drobné montážní prvky ukládejte mimo dosah dětí. h) Obsluha zařízení v případě únavy, nemoci, konzumace alkoholu, omamných látek nebo léků, které do značné míry omezují schopnosti pracovníka obsluhujícího zařízení, je zakázána. i) Zařízení není určeno k tomu, aby bylo používáno osobami (včetně dětí) se sníženými psychickými, smyslovými a mentálními funkcemi nebo osobami bez příslušných zkušeností a/nebo znalostí, nejsou-li pod dohledem osoby odpovědné za jejich bezpečnost nebo nebyly-li touto osobou poučeny o obsluze zařízení. j) Zařízení není hračka. Zabraňte dětem, aby si se zařízením hrály. k) Zařízení před nastavením, čištěním a údržbou odpojte od napájení. Takové preventivní opatření snižuje riziko náhodného uvedení do provozu. I) Zařízení udržujte v dobrém technickém stavu. Před každou prací zkontrolujte, zda zařízení není poškozeno nebo nejsou poškozeny jeho pohyblivé části (praskliny částí nebo veškeré jiné podmínky, které mohou mít vliv na bezpečnou činnost zařízení). V případě poškození předejte zařízení do opravy ještě před jeho použitím. m) Opravu a údržbu zařízení musí provádět kvalifikovaní pracovníci pomocí výhradně originálních náhradních dílů. Bude tak zajištěno bezpečné používání. n) Aby byla zajištěna provozní integrita jednotky tak, jak byla navržena, neodstraňujte kryty instalované výrobcem ani šrouby. o) Je zakázáno zasahovat do konstrukce zařízení a provádět změny jeho parametrů nebo konstrukce. p) Zařízení nepoužívejte ani neukládejte v blízkosti zdrojů ohně a tepla.  UPOZORNĚNÍ! Přestože zařízení bylo navrženo tak, aby bylo bezpečné a mělo dostatečné ochranné prostředky a navzdory použití dalších bezpečnostních prvků chránících uživatele, existuje i nadále malé riziko úrazu při práci se zařízením. Doporučujeme, abyste při používání s výrobkem nakládali opatrně a rozumně.3. Zásady používání
Zařízení je určeno k zobrazování prvků, např. textů zasílaných z určené aplikace. Odpovědnost za veškeré škody způsobené v důsledku používání, které je v rozporu s určením zařízení, nese uživatel.3.1. Příprava k provozu
UMÍSTĚNÍ ZAŘÍZENÍ
Teplota prostředí nesmí překračovat 55 °C a relativní vlhkost by neměla překračovat 85 %. Zařízení používejte v dostatečné vzdálenosti od horkých povrchů. Zařízení vždy používejte na rovném, stabilním, čistém a suchém ohnivzdorném povrchu mimo dosah děti a osob se sníženými psychickými, smyslovými a duševními funkcemi. Zařízení umístěte tak, aby byl vždy zajištěn přístup k síťové zástrčce. Nezapomeňte, aby napájení zařízení odpovídalo údajům uvedeným na typovém štítku!MONTÁŽ ZAŘÍZENÍ
SIN-ALD-1000 Očka označená šipkou nastavte v preferované rozteči jejich posunem v drážce na krytu. text_image
Welcometext_image
e!Expondo, gnatural_image
Metal bracket with multiple holes and a square cutout, mounted on a wooden surface (no text or symbols visible)3.2. Práce se zařízením
1. Připojte k zařízení napájecí zdroj, zástrčku zdroje zapojte do elektrické zásuvky. 2. Pomocí určené aplikace displej naprogramujte (návod na instalaci aplikace naleznete v další části). 3.2.1 Instalace aplikace 1. Naskenujte QR kód níže. 2. Po otevření webové stránky klikněte na „LED FkShow APP“. V závislosti na operačním systému mobilního zařízení, v němž bude aplikace nainstalována, zvolte příslušnou možnost: Android – „android download“ iOS – „ios download“ 3. P o nainstalování aplikace se na ploše zařízení objeví níže uvedená ikona. text_image
FkShowtext_image
Default 16 Stroke N T word space Def Stretch 0 Subtitle807 End to End Animation Animation n Continuously m... Speed 2 Select WiFi Read Back Se HONtext_image
← WLAN WLAN 可用 WLAN 列表 FK-8Wa-82E2 已连接 (不可上网) HONOR-05110G 已保存,加密text_image
节目0 Parameter Adjustment Brig Power On/Off Adjustment Tin WiFi View Password Add Font Update Firmwa Language About Switch Subtitle807 End to End Animation Animation Speed 2 Stay Time 0.00 Select WiFi Read Back Se HONtext_image
节目0 Partition Exchange Please input the password Input the pa: Cancel OK End to End Animation Animation n Continuously m... Speed 12 Select WiFi Read Back Se FK-8Wtext_image
text_image
text_image
FK-8W GND 5V GND 5V FK-8F1 GND 5Vtext_image
节目0 Subtitle Partition Exchange Te Program Subtitle Default 16 Stroke N T word space Def Stretch 0 Subtitle807 End to End Animation Animation Continuously m... Speed 2 Select WiFi Read Back Se HON3.3. Čištění a údržba
a) Před každým čištěním, a rovněž není-li zařízení používáno, vytáhněte síťovou zástrčku. b) K čistění ploch používejte výhradně prostředky neobsahující leptavé látky. c) Zařízení uložte na suchém a chladném místě chráněném před vlhkostí a přímým slunečním zářením. d) Na zařízení nestříkejte vodu ani ho nevkládejte do vody. e) K čistění používejte měkký hadřík.Características técnicas
| Nombre del parámetro | Valor del parámetro | |||
| Denominación del producto | LETRERO LED | |||
| Modelo | SIN-ALD-1000 | SIN-ALD-3000 | SIN-ALD-1500 | SIN-ALD-2000 |
| Voltaje de alimentación [V~] / Frecuencia [Hz] | 230/50 (fuente de alimentación 5 V CC) | |||
| Potencia nominal [W] | 15 | 60 | 40 | 40 |
| Pantalla LED | 64*16 roja | 192*32 P5 RGB | 96*16 P10 RGB | 96*16 P10 RGB |
| Tasa de refresco [imágenes / s] | 60 | |||
| Ángulo de visión [°] | ±60 (vertical y horizontal) | |||
| Alcance de visión [m] | >3 | >2 | >3 | >3 |
| Temperatura ambiente [°C] | -40 a 55 | |||
| Grado de protección IP | - | IP54 | IP21 | IP54 |
| Dimensiones [anchura × profundidad × altura; mm] | 670x190x40 | 1050x250x95 | 1050x250x95 | 1050x250x95 |
| Peso [kg] | 1,8 | 5 | 5,1 | 5,1 |
1. Descripción general
Este manual tiene como objeto el uso seguro y fiable de la herramienta. El producto ha sido desarrollado y fabricado siguiendo rigurosamente las prescripciones técnicas, utilizando la tecnología y los componentes más avanzados y manteniendo el máximo nivel de calidad.LEA ATENTAMENTE ESTE MANUAL ANTES DE TRABAJAR CON ESTA HERRAMIENTA.
Para extender la vida útil del equipo y garantizar su fiabilidad, el usuario tiene que asegurarse de que el funcionamiento y el mantenimiento sean correctos y se ajusten a las instrucciones de este manual. Las características técnicas y los datos incluidos en este manual son actuales. La información de este documento está sujeta a cambios en relación con mejoras de calidad, sin previo aviso.Aclaración de los símbolos
| CE | El producto cumple con los requisitos de las correspondientes normas de seguridad. |
 | Antes de utilizar, leer atentamente el manual. |
 | Producto reciclable. |
 | ¡PRECAUCIÓN! o ¡ADVERTENCIA! o ¡AVISO!, describiendo una situación (señal de advertencia general). |
 | ¡ADVERTENCIA! ¡Peligro de choque eléctrico! |
 | Sólo para uso en interiores. |
2. Seguridad de uso
 ¡AVISO! Leer todas las advertencias de seguridad y todos los manuales e instrucciones. El incumplimiento de avisos e instrucciones puede causar el choque eléctrico, el incendio, lesiones graves o la muerte. Por el término “equipo” o “producto” en estas advertencias y en las descripciones del manual de uso se entiende la < LETRERO LED >.2.1. Seguridad eléctrica
a) La clavija de la herramienta eléctrica debe coincidir con el enchufe. Nunca modificar el enchufe de ninguna manera. Usar la clavija no modificada y el enchufe de alimentación correspondiente reducirá el riesgo de choque eléctrico. b) No tocar las partes conectadas a tierra como tubos, radiadores, calderas y frigoríficos. Existe un mayor riesgo de descarga eléctrica al estar conectado a tierra y a la vez tocando un equipo expuesto a la lluvia directa, al pavimento mojado o al funcionamiento en un entorno húmedo. El ingreso del agua a la herramienta aumenta el riesgo de avería y descargas eléctricas. c) No tocar el dispositivo con las manos mojadas o húmedas. d) N o utilizar el cable de forma incorrecta. Nunca manipular el equipo ni sacar la clavija tirando del cable. Mantener el cable alejado de las fuentes de calor, aceites, cantos cortantes o piezas móviles. Los cables dañados o enredados aumentan el riesgo de descarga eléctrica. e) Si no es posible evitar utilizar el equipo en un entorno húmedo, debe emplearse un interruptor diferencial (RCD). La utilización de un RCD reduce el riesgo de choque eléctrico. f) Está prohibido utilizar la herramienta si el cable de alimentación está dañado o muestra signos visibles de desgaste. Si el cable de alimentación está dañado, debe ser reemplazado por el servicio técnico del fabricante o por un electricista calificado. g) Para evitar el choque eléctrico, no sumergir el cable, el enchufe o el aparato en agua o en cualquier otro líquido. No trabajar con la herramienta en superficies mojadas. h) ¡ADVERTENCIA! ¡PELIGRO DE MUERTE! No se puede nunca sumergir la herramienta en agua u otros líquidos durante su limpieza o uso.2.2. Seguridad de uso
a) No utilizar el dispositivo en atmósferas potencialmente explosivas, por ejemplo, en presencia de líquidos, gases o vapores inflamables. b) Si se observa cualquier daño o anomalía en el funcionamiento del equipo, hay que apagarlo inmediatamente y comunicar el hecho ocurrido a una persona autorizada. c) Si tiene alguna duda sobre el funcionamiento del equipo, póngase en contacto con el servicio técnico del fabricante. d) Cualquier reparación de la herramienta deberá ser realizada por el servicio técnico del fabricante. ¡No reparar el producto por cuenta propia! e) En caso de producirse un fuego o un incendio, solo deben utilizarse extintores de polvo o de nieve carbónica (CO2) para extinguir el equipo con tensión eléctrica. f) Guardar el manual de uso para permitir su consulta en futuro. En caso de transmitir el equipo a otra persona, deberá entregarse también el manual de uso. g) Guardar los elementos de embalaje y las partes pequeñas fuera del alcance de los niños. h) Está prohibido utilizar la herramienta por personas cansadas, enfermas o bajo influencia de alcohol, drogas o medicamentos que limitan significativamente la capacidad de utilizarla. i) El equipo no está destinado a ser utilizado por personas (incluidos los niños) con funciones mentales, sensoriales o intelectuales reducidas o con falta de experiencia y/o conocimientos, a menos que estén supervisadas por una persona responsable de su seguridad o que ésta les haya dado instrucciones cómo operar el equipo. j) El dispositivo no es un juguete. Los niños deben ser supervisados para asegurarse que no jueguen con el producto. k) El equipo debe desconectarse de la red eléctrica antes de proceder a su ajuste, limpieza y mantenimiento. Esta medida preventiva reduce el riesgo de su puesta en marcha accidental. I) Mantener el dispositivo en buenas condiciones técnicas. Antes de cada trabajo, revisar si la herramienta no presenta daños generales o relacionados con las partes en movimiento (roturas en las partes y componentes o cualquier otra condición que pueda afectar el funcionamiento seguro del dispositivo). En caso de encontrar un daño, no usar el dispositivo sin repararlo. m) Cualquier operación de reparación y mantenimiento debe ser realizada por el personal cualificado y utilizando repuestos originales. Así la seguridad de uso será garantizada. n) Para garantizar la seguridad de funcionamiento de la herramienta, no retirar las tapas originales de fabricación ni aflojar los tornillos. o) Queda prohibido modificar los parámetros o el diseño de la máquina. p) Mantener las herramientas lejos de fuentes de fuego y calor. ¡ADVERTENCIA! Aunque el equipo ha sido diseñado para ser seguro, con las protecciones adecuadas, y a pesar del uso de elementos de seguridad adicionales para el usuario, sigue existiendo un pequeño riesgo de accidente o lesión al manipular el equipo. Se recomienda mantener precaución y aplicar el sentido común al utilizarlo.3. Condiciones de uso.
El equipo está diseñado para visualizar elementos, como por ejemplo textos enviados a partir de una aplicación dedicada. En caso de cualquier daño producido por el uso distinto al uso previsto de la herramienta, será responsable el usuario.3.1. Preparación para el trabajo
LUGAR DE USO
La temperatura de ambiente no debe exceder los 55°C y la humedad relativa no debe exceder el 85%. Mantenga el equipo alejado de cualquier superficie caliente. El equipo siempre debe utilizarse sobre una superficie plana, estable, limpia, resistente al fuego y seca, fuera del alcance de los niños y las personas con reducida capacidad psíquica, sensorial y mental. El dispositivo debe estar situado en un lugar con acceso libre al enchufe de alimentación. ¡Asegúrese de que la fuente de alimentación del dispositivo coincida con los datos indicados en la placa de características!ENSAMBLAJE DEL DISPOSITIVO
SIN-ALD-1000 Ajuste la distancia entre los soportes marcados con la flecha, deslizándolos en la ranura de la carcasa. Suspenda la pantalla de los soportes. SIN-ALD-3000, SIN-ALD-1500, SIN-ALD-2000 1. Conecte la alimentación para determinar la orientación de la pantalla (de lo contrario, existe el riesgo de instalar la pantalla al revés). Desconecte la alimentación. 2. En la carcasa del equipo, marque los puntos de montaje de los soportes metálicos. Para facilitar el montaje del soporte, es recomendable taladrar agujeros auxiliares con un diámetro máximo de 1 mm. Atornille el soporte metálico a la parte superior del equipo con tornillos autoroscantes. No utilice excesiva fuerza para no dañar el equipo y el agujero. 3. Instale la pantalla en la posición deseada sobre una pared empleando tacos y pernos. Controle el correcto montaje para prevenir que el equipo se caiga y se dañe. Además, es recomendable fijar la pantalla a la pared con un adhesivo orgánico neutro a base de silicona. natural_image
Close-up of a metallic metal bracket with multiple holes and a square cutout, mounted on a wooden surface (no text or symbols visible)natural_image
Close-up of a metal heat exchanger or heat sink component with grid pattern and mounting holes, placed on wooden supports (no visible text or symbols)3.2. Trabajo con la herramienta
1. Conecte la fuente de alimentación al equipo y el enchufe a una toma de corriente. 2. Programe la pantalla con la aplicación dedicada (véase a continuación).3.2.1 Instalación de la aplicación
1. Escanee el siguiente código QR. text_image
QR code with a central logo featuring red and blue wings, marked with a registered trademark symbol.text_image
← WLAN WLAN 可用 WLAN 列表 FK-8Wa-82E2 已连接 (不可上网) HONOR-05110G 已保存,加密text_image
节目0 Parameter Adjustment Brig Power On/Off Adjustment Tin WiFi View Password Add Font Update Firmwa Language About Switch Subtitle807 End to End Animation Animation Speed 2 Stay Time 0.00 Select WiFi Read Back Se HONtext_image
节目0 Partition Exchange Please input the password Input the pa: Cancel OK End to End Animation Animation n Continuously m... Speed 12 Select WiFi Read Back Se FK-8Wtext_image
text_image
natural_image
Close-up of a red electronic circuit board with visible components and wiring, no readable text or symbols present.text_image
FK-8F1 GND 5Vtext_image
节目0 Subtitle Partition Exchange Te Program Subtitle + 3 Default 16 Stroke N T word space Def Stretch 0 2 Subtitle807 End to End Animation Animation Continuously m... Speed 2 Select WiFi Read Back Se HON3.3. Limpieza y mantenimiento
a) Desconectar la clavija del enchufe antes de cada limpieza, y después de usar el dispositivo. b) Para la limpieza de superficies no deben utilizarse productos con propiedades corrosivas. c) Guardar el dispositivo en un lugar fresco y seco, protegido de la humedad y de la luz solar directa. d) Está prohibido dirigir un chorro de agua a la herramienta o sumergirla en el agua. e) Limpiar con un paño suave.Dati tecnici
| Descrizione del parametro | Valore del parametro | |||
| Nome del prodotto | DISPLAY A LED PER SCRITTE | |||
| Modello | SIN-ALD-1000 | SIN-ALD-3000 | SIN-ALD-1500 | SIN-ALD-2000 |
| Tensione di alimentazione [V~] / Frequenza [Hz] | 230/50(alimentatore 5VDC) | |||
| Potenza nominale [W] | 15 | 60 | 40 | 40 |
| Display a LED | 64*16 rosso | 192*32 P5 RGB | 96*16 P10 RGB | 96*16 P10 RGB |
| Velocità di visualizzazione [frames/s] | 60 | |||
| Angolo visivo [°] | ±60 (verticale e orizzontale) | |||
| Campo visivo [m] | >3 | >2 | >3 | >3 |
| Temperatura ambiente [°C] | -40 ÷ 55 | |||
| Classe di protezione IP | - | IP54 | IP21 | IP54 |
| Dimensioni [Larghezza x Profondità x Altezza; mm] | 670x190x40 | 1050x250x95 | 1050x250x95 | 1050x250x95 |
| Peso [kg] | 1,8 | 5 | 5,1 | 5,1 |
1. Descrizione generale
Il manuale ha lo scopo di aiutare nell'uso sicuro e affidabile. Il prodotto è progettato e fabbricato rigorosamente secondo le specifiche tecniche utilizzando la tecnologia e i componenti più recenti e mantenendo i più alti standard di qualità. PRIMA DI PROCEDERE AL LAVORO BISOGNA ACCURATAMENTE LEGGERE E COMPRENDERE QUESTO MANUALE. Per garantire un funzionamento duraturo e affidabile dell'apparecchio, occorre prestare attenzione al suo funzionamento e alla sua manutenzione secondo le istruzioni del presente manuale. I dati tecnici e le specifiche di questo manuale sono aggiornati. Il produttore si riserva il diritto di apportare modifiche per migliorare la qualità.Spiegazione dei simboli
 | Il prodotto soddisfa i requisiti degli standard di sicurezza pertinenti. |
 | Prima dell’uso bisogna prendere visione del manuale. |
 | Prodotto riciclabile. |
 | ATTENZIONE! o AVVERTENZA! o RICORDA! che descrivono una data situazione(segnale generico di pericolo) |
 | ATTENZIONE! Avvertenza contro la folgorazione! |
 | Solo per uso all’interno dei locali. |
ATTENZIONE!
Le illustrazioni in questo manuale sono solo a scopo illustrativo e possono differire in alcuni dettagli dall'aspetto reale del prodotto. Il manuale originale è la versione tedesca. Le altre versioni linguistiche sono delle traduzioni dal tedesco.2. Sicurezza di utilizzo
Attenzione! Leggere tutte le avvertenze relative alla sicurezza e tutte le istruzioni. La mancata osservazione delle avvertenze e delle istruzioni può causare folgorazione, incendio e/o danni fisici o morte. Il termine "apparecchio" o "prodotto" nelle avvertenze e nella descrizione delle istruzioni si riferisce al < DISPLAY A LED PER SCRITTE>.2.1. Sicurezza elettrica
a) La spina dell'apparecchio deve essere adattata alla presa. Non modificate la spina in alcun modo. Le spine originali e le prese corrispondenti riducono il rischio di scosse elettriche. b) Evitare di toccare i componenti con messa a terra come tubi, radiatori, fornelli e frigoriferi. C'è un rischio maggiore di scossa elettrica se il corpo è messo a terra e tocca l'unità esposta a pioggia diretta, pavimentazione bagnata e funzionamento in un ambiente umido. Il passaggio dell'acqua nell'apparecchio aumenta il rischio di danneggiamento o di folgorazione. c) Non toccare l'apparecchio con mani bagnate o umide. d) Non usare il cavo in modo improprio. Non utilizzare mai il cavo per trasportare l'apparecchio o per tirare o estrarre la spina dal contatto. Tenere il cavo lontano da fonti di calore, olio, bordi taglienti o parti in movimento. I cavi danneggiati o aggrovigliati aumentano il rischio di scosse elettriche. e) Se l'uso dell'apparecchio in un ambiente umido non può essere evitato, è necessario utilizzare un interruttore differenziale (RCD). L'uso di un RCD riduce il rischio di scossa elettrica. f) Non utilizzare l'apparecchio se il cavo di alimentazione è danneggiato o mostra chiari segni di usura. Il cavo di alimentazione danneggiato deve essere sostituito da un elettricista qualificato o dal centro di assistenza del produttore g) Per evitare scosse elettriche, non immergere il cavo, la spina o l'apparecchio stesso in acqua o altri liquidi. Non utilizzare l'apparecchio su superfici bagnate. h) ATTENZIONE - PERICOLO DI MORTE! Quando si pulisce o si usa l'apparecchio, non immergerlo mai in acqua o altri liquidi.2.2. Sicurezza d'uso
a) Non utilizzare l'apparecchio in un'area esplosiva, per esempio in presenza di liquidi, gas o polveri infiammabili. b) In caso di constatazione di danno o non conformità nel funzionamento del dispositivo bisogna spegnerlo immediatamente e informare la persona delegata. c) In caso di dubbi sul corretto funzionamento dell'apparecchio, bisogna contattare il servizio di assistenza del produttore. d) L'apparecchio può essere riparato esclusivamente dal servizio di assistenza del produttore. Non eseguire le riparazioni da soli! e) In caso di incendio o di accensione del fuoco, si devono usare solo estintori a polvere o a neve (CO2) per spegnere l'apparecchio sotto tensione. f) Conservare il manuale d'uso per utilizzo futuro. Se l'apparecchio deve essere trasferito a terzi, anche il manuale d'uso deve essere consegnato insieme all'apparecchio. g) Tenere le parti dell'imballaggio e le piccole parti di assemblaggio fuori dalla portata dei bambini. h) Non utilizzare l'apparecchio quando si è stanchi, malati o sotto l'influenza di alcol, droghe o farmaci che limitano sostanzialmente la capacità di utilizzare l'apparecchio. i) L'apparecchio non è destinato ad essere utilizzato da persone (compresi i bambini) con funzioni mentali, sensoriali o intellettuali ridotte o con mancanza di esperienza e/o conoscenza, a meno che non siano sorvegliati da una persona responsabile della loro sicurezza o abbiano ricevuto istruzioni su come utilizzare la macchina. j) I bambini non devono giocare con il dispositivo. I bambini non devono giocare con l'apparecchio. k) Bisogna scollegare l'apparecchio dall'alimentazione prima della regolazione, della pulizia e della manutenzione. Questa misura preventiva riduce il rischio di messa in moto accidentale. I) Mantenere l'apparecchio in uno stato tecnico buono. Controllare prima di ogni operazione che non ci siano danni generali o relativi alle parti in movimento (crepe nelle parti e nei componenti o qualsiasi altra condizione che possa influenzare il funzionamento sicuro dell'apparecchio). In caso di danno, far riparare l'apparecchio prima dell'uso. m) La riparazione e la manutenzione delle apparecchiature dovrebbe essere effettuate da personale qualificato utilizzando esclusivamente parti di ricambio originali. Questo garantirà un utilizzo sicuro. n) Per assicurare l'integrità operativa progettata dell'apparecchio, non rimuovere le coperture installate in fabbrica o allentare le viti. o) È vietato manomettere il design dell'apparecchio per modificarne i parametri o la costruzione. p) Tenere l'apparecchio lontano dalle fonti di fuoco o dal calore.  ATTENZIONE! Anche se l'apparecchio è stato progettato per essere sicuro, sia dotato di adeguate protezioni, e nonostante l'uso di ulteriori elementi di sicurezza per l'utente, c'è ancora un piccolo rischio di incidente o lesione durante l'utilizzo dell'apparecchiatura. Si consiglia di mantenere la cautela e il buon senso durante l'utilizzo.3. Principi di utilizzo
L'apparecchio è progettato per visualizzare elementi come i testi inviati da un'app dedicata. L'utente è responsabile di qualsiasi danno derivante da un uso improprio.3.1. Predisposizione al lavoro
POSIZIONAMENTO DELL'APPARECCHIO
La temperatura ambiente non deve superare i 55°C e l'umidità relativa non deve superare l'85%. Tenere l'apparecchio lontano da qualsiasi superficie calda. Utilizzare sempre l'apparecchio su una superficie piana, stabile, pulita, resistente al fuoco e tenere fuori dalla portata dei bambini e delle persone con funzioni mentali, sensoriali o intellettuali ridotte. L'apparecchio deve essere collocato in modo tale che la spina di alimentazione possa essere raggiunta in qualsiasi momento. Assicurarsi che l'alimentazione elettrica dell'apparecchio corrisponda ai dati riportati sulla targhetta!MONTAGGIO DEL'APPARECCHIO
SIN-ALD-1000 Posizionare le maniglie contrassegnate da una freccia alla distanza preferita facendole scorrere nell'incavo dell'alloggiamento. text_image
Welcometext_image
e!Expondonatural_image
Close-up of a metallic metal bracket with multiple holes and a square cutout, mounted on a wooden surface (no text or symbols visible)natural_image
Close-up of a metal heat exchanger or heat sink with grid pattern and mounting holes, installed in a workshop (no visible text or symbols)3.2. Lavoro con l'apparecchio
1. Collegare l'alimentatore all'aparecchio, inserire la spina dell'alimentatore nella presa elettrica. 2. Programmare il display utilizzando l'app dedicata (istruzioni per l'installazione dell'app in seguitoi). 3.2.1 Installazione dell'app 1. Scannerizzare il codice QR. text_image
QR code with a central logo featuring red and blue bird-like graphics and a registered trademark symbol.text_image
FkShowtext_image
Default 16 Stroke N T word space Def Stretch 0 Subtitle807 End to End Animation Animation n Continuously m... Speed 2 Select WiFi Read Back Se HONtext_image
← WLAN WLAN 可用 WLAN 列表 FK-8Wa-82E2 已连接 (不可上网) HONOR-05110G 已保存,加密text_image
节目0 Parameter Adjustment Brig Power On/Off Adjustment Tin WiFi View Password Add Font Update Firmwa Language About Switch Subtitle807 End to End Animation Animation Speed 2 Stay Time 0.00 Select WiFi Read Back Se HONtext_image
节目0 Partition Exchange Please input the password Input the pa: Cancel OK End to End Animation Animation n Continuously m... Speed 12 Select WiFi Read Back Se FK-8Wtext_image
text_image
natural_image
Close-up of a red electronic circuit board with visible components and wiring, no readable text or symbols.text_image
FK-8F1 GND 5V3.3. Pulizia e manutenzione
a) Estrarre la spina di alimentazione prima di ogni pulizia e quando l'apparecchio non è in uso. b) Usare solo agenti non corrosivi per la pulizia della superficie. c) Conservare l'apparecchio in un luogo asciutto e fresco, al riparo dall'umidità e dalla luce solare diretta. d) È vietato spruzzare l'apparecchio con un getto d'acqua o immergerlo in acqua. e) Pulire con un panno non abrasivo.Caractéristiques techniques
| Désignation du paramètre | Valeur du paramètre | |||
| Nom du produit | PANNEAU PUBLICITAIRE LED | |||
| Modèle | SIN-ALD-1000 | SIN-ALD-3000 | SIN-ALD-1500 | SIN-ALD-2000 |
| Tension d'alimentation [V~] / Fréquence [Hz] | 230/50 (chargeur 5VDC) | |||
| Puissance nominale [W] | 15 | 60 | 40 | 40 |
| Panneau d'affichage LED | 64*16 rouge | 192*32 P5 RGB | 96*16 P10 RGB | 96*16 P10 RGB |
| Fréquenced'affichage [images/s] | 60 | |||
| Angle de vue [°] | ±60 (vertical et horizontal) | |||
| Distance de lecture [m] | >3 | >2 | >3 | >3 |
| Température ambiante [°C] | -40 ÷ 55 | |||
| Classe de protection IP | - | IP54 | IP21 | IP54 |
| Dimensions [Largeur x Profondeur x Hauteur ; mm] | 670x190x40 | 1050x250x95 | 1050x250x95 | 1050x250x95 |
| Poids [kg] | 1,8 | 5 | 5,1 | 5,1 |
1. Description générale
Ce mode d'emploi a pour but de vous aider à utiliser l'appareil en sécurité et de manière fiable. Le produit est conçu et fabriqué dans un respect stricte des spécifications techniques, avec les technologies et les composants les plus récents et conformément aux normes de qualité les plus élevées.AVANT TOUTE UTILISATION, CE MODE D'EMPLOI DOIT ÊTRE LU ET COMPRIS.
Pour assurer un fonctionnement durable et fiable de l'appareil, veillez à l'utiliser et à l'entretenir correctement, conformément aux instructions de ce mode d'emploi. Les caractéristiques techniques et les spécifications contenues dans ce mode d'emploi sont à jour. Le fabricant se réserve le droit d'apporter des modifications pour améliorer la qualité.Signification des symboles
| CE | Le produit répond aux exigences des normes de sécurité correspondantes. |
| Avant toute utilisation, lisez attentivement le mode d'emploi. |
| Le produit est recyclable. |
| ATTENTION! ou AVERTISSEMENT ! ou RAPPEL ! décrivant la situation (icône d'avertissement générale). |
| ATTENTION ! Risque d'électrisation ! |
| N'utilisez qu'à l'intérieur des locaux. |
ATTENTION!
Les illustrations de ce mode d'emploi ne sont données qu'à titre indicatif et peuvent différer dans certains détails de l'aspect réel du produit. C'est la version allemande de ce mode d'emploi qui est sa version originale. Lesautres versions linguistiques sont des traductions de l'allemand.2. Sécurité d'utilisation
 ATTENTION ! Lisez tous les avertissements de sécurité et toutes les instructions. Le non-respect des avertissements et des instructions peut entraîner une électrisation, une incendie et/ou des blessures graves ou la mort. Le terme « appareil » ou « produit » dans les avertissements et dans la description des instructions désigne le PANNEAU D PUBLICITAIRE LED.2.1. Sécurité électrique
a) La fiche de l'appareil doit être compatible avec la prise de courant. Ne modifiez pas la fiche de quelque manière que ce soit. Les fiches d'origine et les prises correspondantes réduisent le risque d'électrisation. b) Évitez de toucher les éléments mis à la terre tels que les tuyaux, les radiateurs, les cuisinières et les réfrigérateurs. Il existe un risque accru d'électrisation si le corps est mis à la terre en touchant l'appareil qui est exposé à l'action directe de la pluie, d'un sol humide ou qui est mis en marche dans un environnement humide. La pénétration d'eau dans l'appareil augmente le risque de son endommagement et d'électrisation. c) Ne touchez pas l'appareil avec des mains mouillées ou humides. d) N'utilisez pas le câble à mauvais escient. Ne l'utilisez jamais pour déplacer l'appareil ou pour retirer la fiche de la prise. Gardez le câble à l'écart des sources de chaleur, de l'huile, des arêtes tranchantes et des pièces mobiles. Les fils endommagés ou emmêlés augmentent le risque d'électrisation. e) Si vous ne pouvez pas éviter d'utiliser l'appareil dans un environnement humide, employez un dispositif à courant différentiel-résiduel (RCD). L'emploi d'un RCD réduit le risque d'électrisation. f) Il est interdit d'utiliser l'appareil si le câble d'alimentation est endommagé ou présente des signes évidents d'usure. Un câble d'alimentation endommagé doit être remplacé par un électricien qualifié ou par le service après-vente du fabricant g) Pour éviter l'électrisation, n'immergez pas le câble, la fiche ou l'appareil lui-même dans l'eau ou tout autre liquide. N'utilisez pas l'appareil sur des surfaces mouillées. h) ATTENTION - DANGER DE MORT ! Lorsque vous nettoyez ou utilisez l'appareil, ne l'immergez jamais dans l'eau ou dans d'autres liquides.2.2. Sécurité d'utilisation
a) N'utilisez pas l'appareil dans une zone à risque d'explosion, par exemple en présence de liquides, de gaz ou de poussières inflammables. b) En cas de dommages ou d'anomalies dans le fonctionnement de l'appareil, il faut l'arrêter immédiatement et en informer une personne autorisée. c) En cas de doute quant au bon fonctionnement de l'appareil, contactez le service après-vente du fabricant. d) Le produit ne peut être réparé que par le service après-vente du fabricant. N'effectuez pas les réparations vous-même ! e) En cas d'incendie ou de départ de feu, n'utilisez que les extincteurs à poudre ou à neige (CO2) pour éteindre l'appareil sous tension. f) Conservez ce mode d'emploi pour tout usage ultérieur. Si l'appareil doit être transmis à un tiers, ce mode d'emploi sera livré avec l'appareil. g) Gardez les pièces d'emballage et les petites pièces d'assemblage hors de portée des enfants. h) N'utilisez pas l'appareil si vous êtes fatigué, malade ou sous l'influence de l'alcool, de drogues ou de médicaments qui limitent considérablement votre capacité à l'utiliser. i) L'appareil n'est pas destiné à être utilisé par des personnes (y compris les enfants) aux capacités mentales, sensorielles ou intellectuelles réduites ou qui manquent d'expérience et/ou de connaissances appropriées, à moins qu'elles ne soient surveillées par une personne responsable de leur sécurité ou qu'elles aient reçu des instructions de celle-ci sur la manière d'utiliser l'appareil. j) Cet appareil n'est pas un jouet. Surveillez les enfants pour vous assurer qu'ils ne jouent pas avec l'appareil. k) L'appareil doit être débranché de l'alimentation électrique avant tout réglage, nettoyage ou entretien. Cela réduit le risque de démarrage accidentel. I) Maintenez l'appareil en bon état de marche. Avant chaque utilisation, assurez-vous de l'absence d'endommagements généraux et de ceux de pièces mobiles (fissures de pièces ou de composants ou toute autre condition susceptible de peser sur la sécurité de fonctionnement de l'appareil). En cas d'endommagement, faites réparer l'appareil avant de l'utiliser. m) La réparation et l'entretien des appareils doivent être effectués par un personnel qualifié, n'utilisant que des pièces de rechange d'origine. Cela garantira la sécurité d'utilisation. n) Pour assurer l'intégrité opérationnelle de l'appareil, ne retirez pas les protections installées en usine ni ne desserrez les vis. o) Il est interdit d'intervenir sur la structure de l'appareil afin de la modifier ou modifier les caractéristiques de l'appareil. p) Gardez les appareils éloignés des sources de chaleur.  ATTENTION ! Bien que l'appareil ait été conçu pour fonctionner en sécurité et muni de protections adéquates et d'éléments supplémentaires protégeant l'utilisateur, il existe toujours un petit risque d'accident ou de blessure lors de la manipulation de l'appareil. Soyez donc prudent et raisonnable lors de son utilisation.3. Règles d'utilisation
L'appareil est conçu pour afficher des contenus tels que les messages envoyés depuis une application dédiée. L'utilisateur est responsable de tout dommage résultant de toute utilisation contraire à la destination de l'appareil.3.1. Préparation au fonctionnement
EMPLACEMENT DE L'APPAREIL
La température ambiante ne doit pas dépasser 55°C et l'humidité relative 85%. Gardez l'appareil à l'écart de toute surface chaude. Utilisez toujours l'appareil sur une surface plane, stable, propre, ignifuge et sèche et gardez toujours l'appareil hors de portée des enfants et des personnes aux capacités mentales, sensorielles ou intellectuelles réduites. Placez l'appareil de manière à ce que la prise de courant soit accessible à tout moment. Assurez-vous que l'alimentation électrique de l'appareil correspond aux informations indiquées sur la plaque signalétique !ASSEMBLAGE DE L'APPAREIL
SIN-ALD-1000 Réglez les poignées marquées d'une flèche sur l'espacement souhaité en les faisant glisser dans l'encoche du boîtier. text_image
Welcometext_image
e!Expand, gnatural_image
Close-up of a metallic metal bracket with multiple holes and a square cutout, mounted on a wooden surface (no text or symbols visible)natural_image
Close-up of a metal heat exchanger or heat sink with grid pattern and mounting holes, installed in a workshop (no visible text or symbols)3.2. Utilisation de l'appareil
1. Raccordez le chargeur à l'appareil en insérant la fiche de celui-là dans la prise. 2. Programmez le panneau d'affichage en utilisant l'application dédiée (vous trouverez plus loin les instructions d'installation de l'application).3.2.1 Installation de l'application
1. Scannez le code QR ci-dessous. text_image
QR code with a central logo featuring red and blue swoosh design and a registered trademark symbol.text_image
FkShowtext_image
Default 16 Stroke N T word space Def Stretch 0 Subtitle807 End to End Animation Animation n Continuously m... Speed 2 Select WiFi Read Back Se HONtext_image
← WLAN WLAN 可用 WLAN 列表 FK-8Wa-82E2 已连接 (不可上网) HONOR-05110G 已保存,加密text_image
节目0 Parameter Adjustment Brig Power On/Off Adjustment Tin WiFi View Password Add Font Update Firmwa Language About Switch Subtitle807 End to End Animation Animation Speed 2 Stay Time 0.00 Select WiFi Read Back Se HONtext_image
节目0 Partition Exchange Please input the password Input the pa: Cancel OK End to End Animation Animation n Continuously m... Speed 12 Select WiFi Read Back Se FK-8Wtext_image
text_image
natural_image
Close-up of a red electronic circuit board with visible components and wiring, no readable text or symbols present.text_image
FK-8F1 GND 5Vtext_image
节目0 Subtitle Partition Exchange Te Program Subtitle + 3 1 Default 16 Stroke N T word space Def Stretch 0 2 Subtitle807 End to End Animation Animation Continuously m... Speed 2 Select WiFi Read Back Se HON3.3. Nettoyage et entretien
a) Retirez la fiche avant chaque nettoyage ou lorsque l'appareil n'est pas utilisé. b) Pour nettoyer la surface, n'utilisez que des produits libres de substances caustiques. c) Conservez l'appareil dans un endroit sec et frais, à l'abri de l'humidité et des rayons directs du soleil. d) Il est interdit de tremper l'appareil avec un jet d'eau ou de l'immerger dans l'eau. e) Nettoyez avec un chiffon doux ou une éponge.Műszaki adatok
| MagyarázatParaméterek: | ÉrtékParaméterek: | |||
| Termék neve | LED REKLÁMTÁBLA | |||
| Modell | SIN-ALD-1000 | SIN-ALD-3000 | SIN-ALD-1500 | SIN-ALD-2000 |
| Tápfeszültség [V ~] / Frekvencia [Hz] | 230/50 (5VDC tápegység) | |||
| Névleges teljesítmény [W] | 15 | 60 | 40 | 40 |
| LED kijelző | 64*16 piros | 192*32 P5 RGB | 96*16 P10 RGB | 96*16 P10 RGB |
| Kijelzési sebesség [képkocka/s] | 60 | |||
| Látószög [°] | ±60 (függőlegesen és vízszintesen) | |||
| Látómező [m] | >3 | >2 | >3 | >3 |
| Környezeti hőmérséklet[°C] | -40 ÷ 55 | |||
| Védelmi osztály IP | - | IP54 | IP21 | IP54 |
| Méretek [Szélesség x Mélység x Magasság; mm] | 670x190x40 | 1050x250x95 | 1050x250x95 | 1050x250x95 |
| Súly [kg] | 1,8 | 5 | 5,1 | 5,1 |
1. Általános leírás
A használati utasítás célja a biztonságos és megbízható használat elősegítése. A termék szigorúan a műszaki előírásoknak megfelelően, a legújabb műszaki megoldások és alkatrészek felhasználásával, a legmagasabb minőségi előírások betartásával lett tervezve és legyártva. A MUNKA MEGKEZDÉSE ELŐTT ALAPOSAN, ÉRTŐ OLVASÁSSAL TANULMÁNYOZZA A JELEN HASZNÁLATI UTASÍTÁST. A készülék hosszú és megbízható működésének érdekében ügyelni kell a készülék megfelelő használatára és karbantartására az ebben a használati utasításban leírtaknak megfelelően. A használati utasításban szereplő műszaki adatok és specifikációk aktuálisak. A gyártó fenntartja magának a jogot a termék minőségének javítására, módosítására. Szimbólummagyarázat | A termék megfelel a vonatkozó biztonsági szabványok követelményeinek. |
 | Használat előtt olvassa el a használati utasítást. |
 | Újrahasznosítható termék. |
 | VIGYÁZAT! vagy FIGYELEM! vagy EMLÉKEZZ! adott szituációnak megfelelően (általános figyelmeztető szimbólum). |
 | VIGYÁZAT! Vigyázat, áramütés veszélye áll fent! |
 | Csak beltéri használatra. |
VIGYÁZAT!
A használati utasítás illusztrációi szemléltető jellegűek és bizonyos részletekben eltérhetnek a tényleges terméktől. A használati utasítás eredeti változata a német verzió. A többi nyelvi verzió az eredeti német fordítása.2. Biztonságos üzemeltetés
 VIGYÁZAT! Olvassa el az összes biztonsági figyelmeztetést és a teljes használati utasítást. A figyelmeztetések és utasítások figyelmen kívül hagyása áramütést, tüzet, súlyos sérülést vagy halálos balesetet okozhat. A figyelmeztetésekben és a használati utasításban szereplő "készülék" vagy "termék" kifejezés a2.1. Elektromosságra vonatkozó biztonsági szabályok
a) A készülék villásdugójának illenie kell a konnektorba. A villásdugót semmilyen módon sem szabad módosítani. Az eredeti villásdugók és a megfelelő aljzatok csökkentik az áramütés kockázatát. b) Kerülje a földelt elemekkel, például csövekkel, radiátorokkal, tűzhelyekkel és hűtőszekrényekkel való érintkezést. Fokozott fennáll az áramütés veszélye, ha t este földelve van, és közvetlen esőnek, nedves felületnek kitett berendezésekkel érintkezik vagy nedves környezetben dolgozik. A készülékbe jutó víz növeli a sérülés és az áramütés kockázatát. c) Ne érintse meg a készüléket vizes vagy nedves kézzel. d) N e használja a kábelt rendeltetésétől eltérően. Soha ne használja a készülék felemelésére vagy a konnektorból való kihúzásra. A kábelt tartsa távol hőtől, olajtól, éles szegélyektől vagy mozgó alkatrészektől. A sérült vagy összegabalyodott vezetékek növelik az áramütés kockázatát. e) Ha elkerülhetetlen a készülék nedves környezetben történő használata, akkor maradékáram kapcsolót (RCD-t) kell használni. Az RCD használata csökkenti az áramütés veszélyét. f) Tilos a készülék használata, ha a tápkábel megsérült, vagy kopási jelek észlelhetők. A sérült tápkábelt szakképzett villanyszerelővel vagy a gyártó szervizével kell kicserélni g) Az áramütés elkerülése érdekében ne merítse a kábelt, villásdugót vagy a készüléket vízbe vagy más folyadékba. Tilos a készüléket nedves felületen használni. h) VIGYÁZAT - ÉLETVESZÉLY! A készülék tisztítása vagy használata közben soha ne merítse vízbe vagy más folyadékba.2.2. A felhasználóbiztonsága
a) N e használja a készüléket robbanásveszélyes környezetben, például gyúlékony folyadékok, gázok vagy por jelenlétében. b) Sérülés megállapításakor vagy rendellenesség esetén azonnal ki kell kapcsolni a készüléket, és jelenteni azt egy illetékes személynek. c) Ha bizonytalan abban, hogy a készülék megfelelően működik-e, lépjen kapcsolatba a gyártó szervizével. d) A készüléket csak a gyártó szervize javíthatja. Tilos önálló javításokat végezni a terméken! e) Tüz esetén csak száraz por vagy szén-dioxid (CO2) tüzoltót szabad használni a készülék oltására mindaddig, amíg az feszültség alatt van. f) A használati utasítást meg kell őrizni, később is szükség lehet rá. Ha a készüléket átadja egy következő tulajdonosnak, a használati utasítást is mindenképpen a termékkel együtt át kell adni. g) A csomagolás részeit és az apró alkatrészeket gyermekektől elzárva kell tartani. h) Tilos a készüléket fáradtan, betegen vagy alkohol, kábítószer vagy olyan gyógyszer hatása alatt használni, amely jelentősen korlátozza a koncentrációs képességet. i) A készüléket nem használhatják csökkent szellemi, érzékszervi és mentális funkciókkal rendelkező személyek (beleértve a gyerekeket), valamint nem használhatják megfelelő tapasztalattal és/vagy ismeretekkel nem rendelkező személyek, kivéve ha egy a biztonságukért felelős személy felügyeli munkájukat, vagy elmagyarázta, hogy hogyan kell kezelni a készüléket. j) A készülék nem játék. Nem szabad megengedni, hogy gyermekek játszanak a készülékkel. k) A beállítások módosítása, a tisztítás vagy a karbantartás előtt ki kell húzni a készüléket az áramforrásból. Ez a óvintézkedés csökkenti a véletlen bekapcsolás kockázatát. I) Tartsa a készüléket jó műszaki állapotban. Minden munka előtt ellenőrizze, hogy nincsenek-e sérülések a burkolaton vagy a mozgó alkatrészeken (repedések az alkatrészeken és alegységeken, vagy bármilyen más körülmény, amely befolyásolhatja a készülék biztonságos működését). Sérülés esetén a készüléket használat előtt javítsa meg. m) A készülékek javítását és karbantartását csak szakképzett személyek végezhetik, kizárólag eredeti cserealkatrészek használatával. Ez biztosítja a biztonságos használatot. n) A készülék működési integritásának biztosítása érdekében tilos eltávolítani a gyári burkolatot vagy a csavarokat. o) Tilos módosítani a készülék felépítését paramétereinek vagy kialakításának megváltoztatása érdekében. p) Tartsa távol a készülékeket tűztől és más hőforrásoktól.  VIGYÁZAT! Annak ellenére, hogy a készülék minél biztonságosabbra lett tervezve, fel lett szerelve megfelelő biztonsági eszközökkel, valamint a felhasználó biztonságát óvó plusz elemek használatának ellenére is fennáll a baleset vagy sérülés veszélye a készülékkel való munka során. A termék használata során járjon el óvatosan és a józan ész szabályai szerint.3. Üzemeltetés szabályai
A készüléket elemek, például egy dedikált alkalmazásból küldött szövegek megjelenítésére tervezték. A felhasználó felelős a nem rendeltetésszerű használatból eredő bármilyen károkért.3.1. Beüzemelés előtt
A KÉSZÜLÉK ELHELYEZÉSE
A készülék környezetének hőmérséklete nem haladhatja meg a 55°C-ot, és páratartalma nem haladhatja meg a 85%-ot. Tartsa távol a készüléket bármilyen forró felülettől. A készüléket mindig sima, stabil, tiszta, túzálló és száraz felületen kell használni, gyermekek és csökkent szellemi, érzéki vagy mentális funkciókkal rendelkező személyek számára elérhetetlen helyen. A készüléket úgy kell elhelyezni, hogy a tápkábel villásdugója bármikor elérhető legyen. Ellenőrizni kell, hogy a készülék tápellátása megfelel-e az adattáblán megadott adatoknak!A KÉSZÜLÉK ÖSSZESZERELÉSE
SIN-ALD-1000 A nyíllal jelölt tartófüleket a kívánt távolságra állitsa egymástól a burkolatban lévő horonyban történő elmozgatásukkal. text_image
Welcometext_image
e!Expondo, gnatural_image
Metal bracket with multiple holes and a square cutout, mounted on a wooden surface (no text or symbols visible)natural_image
Close-up of a metal heat exchanger or cooling unit with grid pattern and mounting brackets (no visible text or symbols)3.2. A készülék használata
1. Csatlakoztassa a hálózati adaptert a készülékhez, és hálózati adapter villásugóját dugja be a konnektorba. 2. Programozza be a kijelzőt egy dedikált alkalmazással (az alkalmazás telepítése a későbbiekben kerül leírásra). 3.2.1 Az alkalmazás telepítése 1. Szkennelje be az alábbi QR -kódot. text_image
QR code with a central logo featuring red and blue swoosh design and a registered trademark symbol.text_image
FkShowtext_image
Default 16 Stroke N T word space Def Stretch 0 Subtitle807 End to End Animation Animation n Continuously m... Speed 2 Select WiFi Read Back Se HONtext_image
← WLAN WLAN 可用 WLAN 列表 FK-8Wa-82E2 已连接 (不可上网) HONOR-05110G 已保存,加密text_image
节目0 Parameter Adjustment Brig Power On/Off Adjustment Tin WiFi View Password Add Font Update Firmwa Language About Switch Subtitle807 End to End Animation Animation Speed 2 Stay Time 0.00 Select WiFi Read Back Se HONtext_image
节目0 Partition Exchange Please input the password Input the pa: Cancel OK End to End Animation Animation n Continuously m... Speed 12 Select WiFi Read Back Se FK-8Wtext_image
text_image
natural_image
Close-up of a red electronic circuit board with visible components and wiring, no readable text or symbols present.text_image
FK-8F1 GND 5Vtext_image
节目0 Subtitle Partition Exchange Te Program Subtitle Default 16 Stroke N T word space Def Stretch 0 2 Subtitle807 End to End Animation Animation Continuously m... Speed 2 Select WiFi Read Back Se HON3.3. Tisztítás és karbantartás
a) M inden tisztítás előtt, és akkor is, ha a készülék nincs használatban húzza ki a hálózati csatlakozót. b) A felület tisztítására csak maró anyagoktól mentes tisztítószereket szabad használni. c) A készüléket hűvös és száraz helyen, nedvességtől és közvetlen napfénytől védve kell tárolni. d) Tilos a készüléket vízsugárral fröcskölni, vagy vízbe meríteni. e) A tisztításhoz puha rongyot vagy szivacsot kell használni.Tekniske data
| Parameter beskrivelse | Parameter værdi | |||
| Produktnavn | LYSAVIS | |||
| Model | SIN-ALD-1000 | SIN-ALD-3000 | SIN-ALD-1500 | SIN-ALD-2000 |
| Forsyningsspænding [V ~] / Frekvens [Hz] | 230/50 (strømforsyning 5VDC) | |||
| Nominel effekt [W] | 15 | 60 | 40 | 40 |
| LED display | 64*16 rød | 192*32 P5 RGB | 96*16 P10 RGB | 96*16 P10 RGB |
| Displayhastighed [ramki/s] | 60 | |||
| Synsvinkel [°] | ±60 (lodret og vandret) | |||
| Synsfelt [m] | >3 | >2 | >3 | >3 |
| Omgivelsestemperatur[°C] | -40 ÷ 55 | |||
| IP -beskyttelsesklasse | - | IP54 IP21 | IP54 | |
| Dimensioner [bredde / dybde / højde; mm] | 670x190x40 | 1050x250x95 | 1050x250x95 | 1050x250x95 |
| Vægt [kg] | 1,8 | 5 | 5,1 | 5,1 |
1. Generel beskrivelse
Denne betjeningsvejledning er beregnet til at hjælpe med sikker og pålidelig brug. Dette produkt er designet og produceret strengt i henhold til tekniske indikationer, ved hjælp af de nyeste teknologier og komponenter samt opretholdelse af de højeste kvalitetsstandarder.LÆS BETJENINGSVEJLEDNINGEN OMHYGGELIGT INDEN DU STARTER MED AT ARBEJDE MED APPARATET
For at sikre en lang og pålidelig drift af apparatet er det nødvendigt at sørge for den korrekte betjening og vedligeholdelse i overensstemmelse med retningslinjerne angivet i denne betjeningsvejledning. De tekniske data og specifikationer angivet i denne betjeningsvejledning er aktuelle. Producenten forbeholder sig retten til at foretage ændringer i forbindelse med forøgelse af kvaliteten.Symbolbeskrivelse
 | Produktet opfylder kravene, angivet i de relevante sikkerhedsstandarder. |
 | Læs betjeningsvejledningen inden brug. |
 | Produktet er genanvendeligt. |
 | OBS! eller ADVARSEL! eller HUSK! beskriver en given situation (generelt advarselsskilt.) |
 | OBS! Advarsel mod elektrisk stød! |
 | Kun til indendørs brug. |